QuickBooks Data Integration Tools That Cut Out the Manual Work

QuickBooks Online is Intuit’s cloud-based accounting software used by over 7 million small businesses worldwide. It handles bookkeeping, invoicing, payroll, expense management, and financial reporting well. What it does not do is connect your financial data to the other tools your team depends on, or make that data easily accessible for analysis, automation, and real-time decision-making.

When business owners, finance teams, and accountants search for QuickBooks data integration tools, they are usually looking for one of three very different things. First, they want to automate workflows between QuickBooks Online and other apps like Shopify, Salesforce, or HubSpot, so data flows automatically without manual data entry. Second, they want to pull QuickBooks financial data into spreadsheets for reporting, forecasting, and cash flow analysis. Third, they want to load QuickBooks data into a data warehouse for broader analytics across multiple systems.

Most articles mix these use cases without separating them, so you end up reading about ETL tools for data engineers alongside simple add-ons for Shopify merchants. This guide separates them clearly. We review seven QuickBooks integration tools across three use case layers, cover the key difference between QuickBooks Online and QuickBooks Desktop for integration purposes, and include real user feedback from G2 and other review platforms with current pricing for every tool.

Quick Answers

How do finance and accounting teams get QuickBooks data into spreadsheets automatically?
Coefficient connects QuickBooks Online directly to Google Sheets or Excel. Finance teams import P&L, balance sheet, cash flow, AR/AP aging, and transaction data with no-code setup, automated refresh schedules, and two-way write-back to QuickBooks. Free plan available.

Which tool is best for automating workflows between QuickBooks and Shopify, Salesforce, or other apps?
Zapier for simple trigger-based automation at lower cost. Workato for more complex, multi-step enterprise workflows where reliability and conditional logic matter more than price. Both support QuickBooks Online integrations with popular e-commerce and CRM platforms.

What is the best tool for loading QuickBooks data into a data warehouse?
Fivetran for a fully managed ELT pipeline with minimal setup. Integrate.io if you need built-in data transformations and accounting-specific data handling before the data lands in your warehouse.

QuickBooks Online or Desktop — does it matter for integration tool choice?
Yes. QuickBooks Online uses a modern REST API that most connectors support. QuickBooks Desktop uses a legacy API with limited cloud access — only some tools (Method CRM, SaasAnt, Coefficient via the QBO connector) support both editions. If you are still on QuickBooks Desktop, check edition compatibility before committing to any tool.

QuickBooks Online vs QuickBooks Desktop: What It Means for Integrations

QuickBooks Online (QBO) is Intuit’s cloud-based accounting software. It uses a modern REST API that most integration tools support out of the box. Real-time data sync, webhook triggers, and OAuth-based authentication are all available through the QBO API, which is why the majority of third-party connectors focus on QBO.

QuickBooks Desktop (including QuickBooks Pro, Premier, and Enterprise) uses a legacy COM-based API via the Intuit Merchant Services Developer Program. Cloud-based connectors cannot access QuickBooks Desktop data directly — they require either a locally installed sync agent or a workaround via file export. Intuit stopped selling QuickBooks Desktop to new customers in most markets from 2024, but many businesses still run existing Desktop installations.

The practical implication: if your business runs QuickBooks Desktop, your integration options are narrower. Most of the tools in this guide support QBO only. Method CRM and SaasAnt are notable exceptions that maintain genuine QuickBooks Desktop support alongside QBO. If you are evaluating integrations and still on Desktop, confirm edition compatibility before investing time in any tool.

QuickBooks-Specific Integration Challenges

API rate limits. QuickBooks Online enforces rate limits on API calls. Tools that run frequent, large data syncs can exhaust these limits and experience throttled or failed syncs. Well-designed connectors use batching, incremental sync, and backoff strategies to work within these constraints.

Multi-company and multi-entity complexity. QuickBooks accounts are tied to a single company file. Businesses with multiple entities, subsidiaries, or client portfolios managed in separate QuickBooks accounts need integration tools that can handle multiple QBO connections within a single workflow. Not all tools support this cleanly.

Limited native reporting depth. QuickBooks Online’s built-in financial reporting is functional but inflexible. Finance teams frequently need to export data to spreadsheets for custom analysis, cash flow modelling, and board reporting. The native export is a static CSV — not a live connection. This is the gap that spreadsheet connectors like Coefficient are built to close.

QuickBooks Desktop legacy constraints. As noted above, QuickBooks Desktop’s API requires local tooling. Any integration relying on cloud-to-cloud connectivity will not work with Desktop without additional configuration or a dedicated sync agent.

What to Look for in a QuickBooks Data Integration Tool

Edition support. Confirm whether the tool supports QuickBooks Online, QuickBooks Desktop, or both. If you use QBO, most tools will work. If you use Desktop, your options are significantly narrower.

Two-way sync. Many tools only pull data from QuickBooks (read-only). If you need to push data back — updating customer records, creating invoices, logging payments — confirm the connector supports write operations with field mapping and preview functionality.

Multi-company support. Accounting firms and fractional CFOs managing multiple QuickBooks accounts need a tool that can connect to and sync data from several QBO company files. Single-company-only tools create manual overhead at scale.

Automated refresh and scheduling. For finance teams building live dashboards and reports, a connector that requires manual refresh defeats the purpose. Look for scheduled automation: hourly, daily, or weekly auto-refresh that keeps your data current without manual data entry.

No-code accessibility. Finance teams and accountants are not developers. The best QuickBooks integration tools for reporting and analysis workflows are genuinely no-code: sidebar-driven, point-and-click, with no SQL or API knowledge required for day-to-day use.

The 7 Best QuickBooks Data Integration Tools

For Finance Teams and Accountants — Spreadsheet-Native QuickBooks Connectors

Finance teams, accountants, bookkeepers, and fractional CFOs who need QuickBooks data in Google Sheets or Excel for reporting, forecasting, and cash flow analysis belong in this category. The goal is replacing the manual CSV export cycle with a live QuickBooks Online connection that updates automatically.

1. Coefficient

quickbooks data integration - coefficient google sheets excel

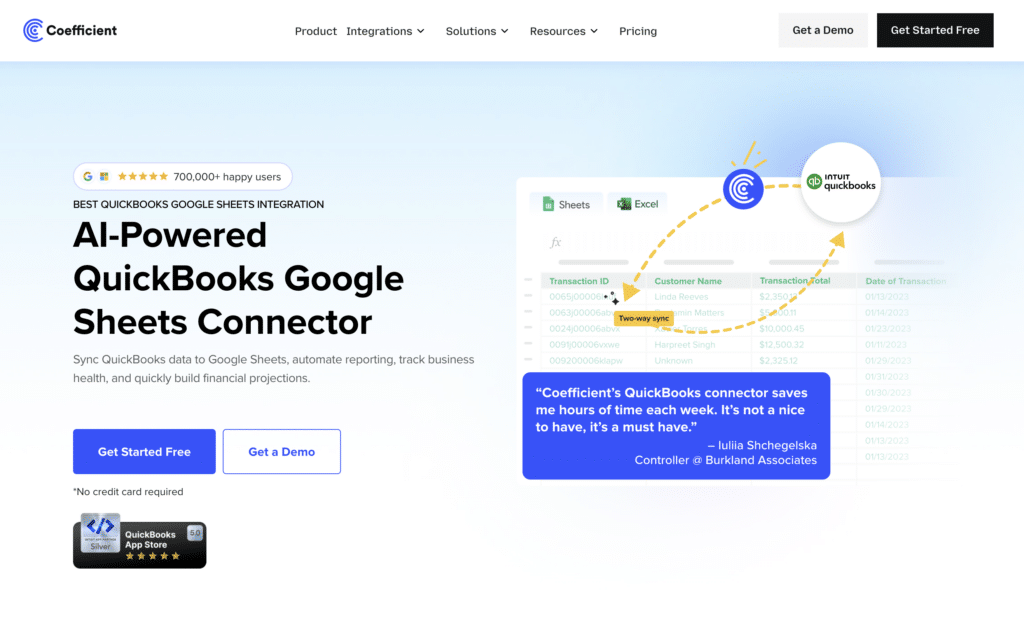
Best for: Finance teams, accountants, and fractional CFOs who need live QuickBooks Online data in Google Sheets or Excel, with automated refresh and two-way write-back.

Coefficient connects QuickBooks Online directly to Google Sheets and Excel. Finance teams import P&L statements, balance sheets, cash flow data, AR aging, AP aging, transaction lists, customer records, and vendor data with a no-code sidebar UI. No SQL required. No IT ticket. The connection is OAuth-authenticated and live — when QuickBooks data updates, the spreadsheet reflects it on the next scheduled refresh.

The core workflow Coefficient replaces is the manual QuickBooks export cycle. Instead of running a report in QBO, downloading a CSV, formatting it, and pasting it into a spreadsheet that goes stale within hours, finance teams connect once and set a refresh schedule. Cash flow dashboards, budget vs actuals reports, AR aging trackers, and revenue models stay current automatically. When an invoice is paid in QuickBooks Online, the spreadsheet reflects it.

For fractional CFOs and accounting firms managing multiple clients, Coefficient supports connections to multiple QuickBooks Online accounts, making it practical for multi-client reporting without rebuilding models from scratch for each engagement. The two-way sync lets teams push data back to QuickBooks: updating customer records, creating or modifying transactions, and writing financial data back to QBO directly from the spreadsheet without manual data entry back into the accounting software. Coefficient also works in Microsoft Excel alongside Google Sheets, which matters for finance teams that prefer Excel for modelling.

Coefficient also connects to 100-plus other data sources including Salesforce, HubSpot, Snowflake, and Shopify, so finance teams can blend QuickBooks financial data with CRM pipeline data or e-commerce revenue in a single spreadsheet — without exporting from each system separately.

Pros

  • No-code setup. Point-and-click import from QuickBooks Online with no SQL or API knowledge required. Finance teams get live data without involving IT.
  • Genuine two-way sync with write-back to QuickBooks Online. Supports update, insert, and upsert actions with field mapping and preview before execution.
  • Works in both Google Sheets and Excel. Finance teams can use whichever spreadsheet environment they already operate in.
  • Automated refresh scheduling (hourly, daily, weekly). Dashboards and reports stay current without manual exports or data entry.
  • Free plan available. No per-user or per-row fees on paid plans.

Source: Coefficient user reviews on G2

Cons

  • Supports QuickBooks Online only. QuickBooks Desktop users need to migrate to QBO or use a different connector.
  • Initial setup requires OAuth authorization with QuickBooks Online. Straightforward, but not zero-touch.

Source: Coefficient pros and cons — G2 verified reviews

Pricing

Free tier available. Paid plans start from $49/month. See Coefficient pricing for full plan details.

For Workflow Automation — Connecting QuickBooks to Other Business Apps

If your goal is automating data flows and business processes between QuickBooks Online and other apps — e-commerce platforms like Shopify, Amazon, and eBay, CRM systems like Salesforce and HubSpot, payment platforms like PayPal and Stripe, or project management tools — you need a workflow automation platform. These tools automate the operational side of QuickBooks integration: syncing orders, creating invoices, updating customer records, and eliminating manual data entry between systems.

2. Zapier

zapier - data integration tool for quickbooks

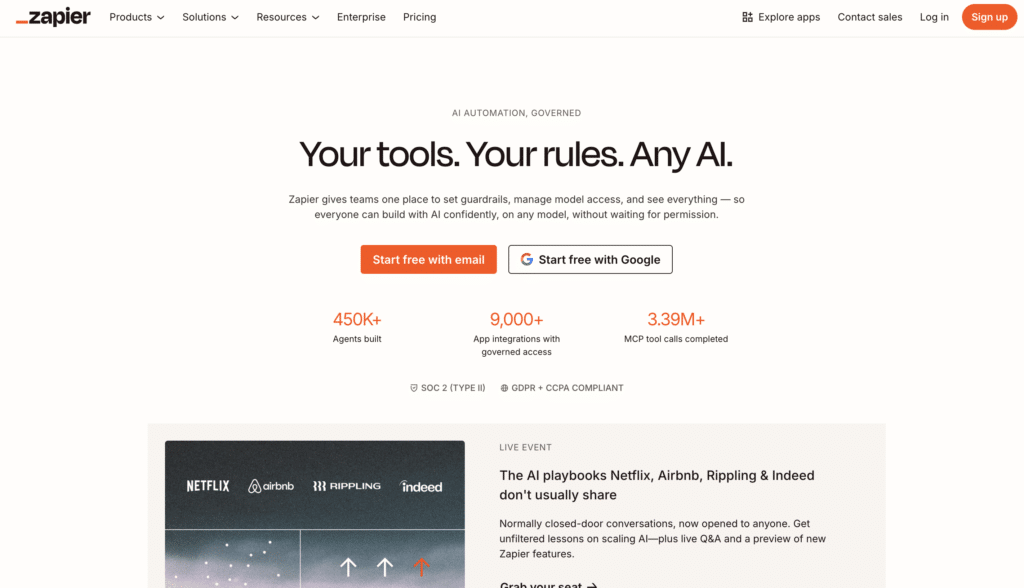
Best for: Small businesses and individual users who need simple, trigger-based automation between QuickBooks Online and everyday apps, without a large budget or technical resources.

Zapier is the most accessible workflow automation tool on this list. Its trigger-action model (when X happens in QuickBooks, do Y in another app) makes it easy for non-technical small businesses and business owners to automate common QuickBooks integration workflows: creating invoices from Shopify orders, syncing new customers to a CRM, sending Slack notifications when invoices are paid, or logging expenses from receipt apps.

Zapier’s QuickBooks Online integration covers a broad range of triggers and actions including new invoices, new payments, new customers, new expenses, and new bills. For e-commerce businesses syncing Shopify or Amazon payouts, or service businesses connecting QuickBooks Online to project management tools, Zapier is the fastest path to automation with the lowest setup cost. Note that Zapier does not support QuickBooks Desktop, only QBO.

Pros

  • Extremely easy to set up. Business owners and bookkeepers can configure workflows without technical skills.
  • Free plan for basic use. Large library of pre-built QuickBooks Online integration templates for common use cases including Shopify, Stripe, PayPal, HubSpot, and Salesforce.
  • Fast time-to-value. Most QuickBooks Online integration workflows are live within minutes using pre-built Zap templates.

Source: Zapier user reviews on G2

Cons

  • QuickBooks Desktop not supported. QBO only.
  • Limited for complex, multi-step workflows with conditional logic. Workato or a dedicated iPaaS handles those better.
  • Transaction caps on paid plans. Businesses with high automation volume can hit limits and face unexpected cost increases.

Pricing

Free plan available. Paid plans from $19.99/month. Costs increase with higher automation volumes.

3. Workato

workato data automation tool for quickbooks

Best for: Mid-market and enterprise teams that need reliable, complex workflow automation between QuickBooks Online and mission-critical systems like Salesforce, NetSuite, HubSpot, or internal ERP platforms.

Workato is an enterprise iPaaS that handles more sophisticated QuickBooks integration scenarios than Zapier. Its recipe-based low-code builder allows conditional logic, multi-step workflows, error handling, and data transformation — capabilities that matter when connecting QuickBooks Online to other critical business systems in workflows where failures are costly.

A common use case for Workato with QuickBooks Online is syncing closed-won Salesforce opportunities to QBO as invoices, or creating QuickBooks customers automatically when deals are signed in a CRM. Users in Capterra reviews note that Workato ‘simply outperformed all of the other integration solutions we tested in terms of reliability and real hands-free automation’ for Salesforce-QuickBooks workflows. Workato holds Gartner Leader status for iPaaS for eight consecutive years through 2026.

Pros

  • Handles complex, multi-step workflows with conditional logic, error handling, and data transformation. More reliable than Zapier for mission-critical QuickBooks integrations.
  • 14,000-plus pre-built connectors covering virtually every enterprise SaaS and database system. Strong QuickBooks Online integration with Salesforce, NetSuite, and HubSpot.
  • Enterprise governance: role-based access control, audit logs, and environment separation make it suitable for regulated businesses and finance compliance requirements.

Source: Workato G2 reviews — pros and cons

Cons

  • Expensive. Custom enterprise pricing, typically starting around $10,000/year, puts it out of reach for most small businesses.
  • Steep learning curve for advanced workflows. Building complex recipes with custom connectors requires meaningful investment in learning the platform.
  • Not suited for data warehouse pipelines or spreadsheet-based reporting. Workato is a workflow automation tool, not an ETL or analytics connector.

Source: Workato Capterra verified reviews

Pricing

Custom enterprise pricing. Contact Workato for current rates. Typically starts around $10,000/year for entry-level plans.

4. Method CRM

method quickbooks crm

Best for: Small businesses and service companies that use QuickBooks as their accounting backbone and want a CRM built natively around it, with real-time two-way sync that works with both QuickBooks Online and QuickBooks Desktop.

Method CRM is the #1-rated QuickBooks CRM with over 1,400 five-star reviews on Intuit’s apps.com. Unlike generic CRM platforms that connect to QuickBooks via a third-party iPaaS, Method CRM was built from the ground up around QuickBooks integration. Its patented real-time, two-way sync keeps customer records, invoices, estimates, and payments in sync between Method and QuickBooks instantly — changes in either system appear in the other without delay or manual data entry.

The key use case: small businesses that use QuickBooks Online or QuickBooks Desktop for bookkeeping but need CRM capabilities — lead management, sales pipeline, estimate creation, and customer portals — that QBO does not provide. Method fills that gap without requiring the business to switch accounting software, while keeping financial data accurate across both systems. Method also supports QuickBooks Desktop, which is rare among modern integration tools and matters for businesses not yet ready to migrate to QBO.

Pros

  • Patented real-time, two-way sync with QuickBooks Online and QuickBooks Desktop. One of the only CRM tools that genuinely supports both editions.
  • Built natively for QuickBooks users. No complex field mapping or middleware required. The integration is the product’s core functionality, not an add-on.
  • No-code workflow automation and customizable dashboards without developer involvement. Finance and operations teams can configure it without IT.

Source: Method CRM G2 reviews — QuickBooks integration

Cons

  • Not as full-featured as standalone CRMs like Salesforce or HubSpot for complex sales processes. Better suited to small service businesses than large enterprise sales teams.
  • Learning curve during initial setup and customisation. G2 and Capterra reviewers note that configuring the platform to match specific workflows takes time and occasionally requires support.
  • Some users report occasional data sync issues with more complex transaction types. The Method team is responsive to support requests when these occur.

Source: Method CRM Capterra verified reviews

Pricing

From $25/user/month for the contact management plan. Sales pipeline and invoicing features start at $44/user/month. Enterprise at $74/user/month. 30-day free trial available.

For Data Warehouse Pipelines — QuickBooks ETL Tools

If your goal is loading QuickBooks Online data into Snowflake, BigQuery, Redshift, or another cloud data warehouse for cross-system analytics, these ETL tools are the right category. Unlike spreadsheet connectors, these tools extract QuickBooks financial data, handle schema management, and deliver it to your warehouse for downstream transformation and analysis via SQL or BI tools.

5. Fivetran

fivetran - data pipeline solution for quickbooks

Best for: Data engineering teams that need a fully managed, low-maintenance ELT pipeline from QuickBooks Online into a cloud data warehouse.

Fivetran’s QuickBooks Online connector is a managed ELT integration that extracts a comprehensive set of QBO objects — invoices, bills, payments, customers, vendors, items, accounts, and journal entries — and loads them into your data warehouse in a clean, queryable schema. Schema management is handled automatically: if new fields appear in QBO, Fivetran updates the destination schema without manual intervention.

Fivetran changed its pricing model in March 2025, moving from an account-wide Monthly Active Rows model to a per-connector pricing structure. This has driven cost increases for some users with many connectors. For teams focused specifically on a QuickBooks integration alongside a handful of other connectors, the impact is more predictable.

Pros

  • Fully managed ELT pipeline. No ongoing engineering overhead for schema changes, API updates, or data quality checks.
  • Comprehensive QuickBooks Online object coverage including all core financial records: invoices, bills, payments, journal entries, chart of accounts, and customer/vendor master data.
  • Wide destination support: Snowflake, BigQuery, Redshift, Databricks, and more.

Source: Fivetran G2 reviews — pros and cons

Cons

  • Per-connector MAR pricing introduced March 2025 can be difficult to forecast. Costs escalate with data volume and connector count.
  • QuickBooks Online only. No QuickBooks Desktop support.
  • Extraction only. No transformation and no write-back to QuickBooks. Requires dbt or custom SQL downstream for any transformation logic.

Source: Fivetran Capterra verified reviews

Pricing

Usage-based pricing per connector based on Monthly Active Rows. Annual contracts start at $12,000/year minimum.

6. Integrate.io

integrate io data pipeline solution for quickbooks

Best for: Finance and data teams that need ETL pipelines from QuickBooks Online into a data warehouse, with built-in data transformations and accounting-specific data handling.

Integrate.io is a low-code ETL platform with a QuickBooks connector designed with finance data quality in mind. Unlike generic ELT tools that load raw QuickBooks data as-is, Integrate.io supports incremental sync tracking by last-modified timestamps, deduplication logic for transactions, and 220-plus built-in data transformations before data lands in your warehouse. For finance teams building revenue dashboards that blend QuickBooks data with CRM pipeline data from Salesforce, this preprocessing matters.

Pros

  • 220-plus built-in data transformations reduce the need for a separate dbt layer for teams without analytics engineering resources.
  • Finance-aware QuickBooks integration: deduplication logic, incremental sync, and accounting entity validation built in.
  • Fixed-fee pricing with white-glove support. More predictable cost structure than consumption-based alternatives.

Source: Integrate.io QuickBooks ETL overview

Cons

  • Starts at $1,999/month, which is high relative to extraction-only alternatives like Fivetran for simpler use cases.
  • QuickBooks Online only. No support for QuickBooks Desktop integration.
  • Overkill for teams that only need basic extraction and are comfortable handling transformations downstream in dbt or SQL.

Pricing

From $1,999/month. Contact Integrate.io for current plan details.

For Accounting Firms and Multi-Client Management

Accounting professionals, bookkeepers, and fractional CFOs managing multiple QuickBooks accounts need tools designed for their specific workflow: bulk data operations across many QBO company files, clean import/export without disrupting existing data, and predictable flat-rate pricing that scales with client count rather than by data volume.

7. SaasAnt Transactions

SaasAnt Transactions for accounting

Best for: Accountants, bookkeepers, and accounting firms that need to bulk import, export, and manage transactions in QuickBooks Online or QuickBooks Desktop without manual data entry.

SaasAnt Transactions is a purpose-built data utility for QuickBooks users. It solves one problem extremely well: moving large volumes of financial data in and out of QuickBooks accounting software quickly and accurately. Accountants use it to import thousands of transactions from Excel or CSV files into QBO in minutes, export QBO data for review or audit purposes, and bulk delete test transactions before going live. A verified G2 reviewer notes it as a workaround for QBO’s lack of native batch import for credit card transfers.

SaasAnt supports both QuickBooks Online and QuickBooks Desktop, handles a wide range of transaction types including invoices, bills, journal entries, customers, vendors, and chart of accounts updates, and offers a straightforward per-company pricing model that is affordable for firms managing many client QuickBooks accounts.

Pros

  • Supports both QuickBooks Online and QuickBooks Desktop. One of the few modern integration tools that maintains genuine Desktop compatibility.
  • Handles all major QBO transaction types: invoices, bills, journal entries, payments, estimates, purchase orders, and master data updates.
  • Flat, affordable per-company pricing makes it practical for accounting firms managing many client QuickBooks accounts.

Source: SaasAnt mentioned in QuickBooks Online Advanced G2 reviews

Cons

  • A data utility tool, not a full integration platform. It handles bulk import/export well but does not automate ongoing workflows or provide live dashboards.
  • Less suitable for real-time data integration use cases. Best for periodic batch operations rather than continuous sync.

Pricing

From approximately $10/month per company. Plans scale by transaction volume and features. See SaasAnt’s website for current pricing.

QuickBooks Data Integration Tools: Quick Comparison

Use this table to compare all seven tools across the criteria that matter most for your QuickBooks integration decision.

ToolBest ForTypeNo-CodeTwo-Way SyncQBO / DesktopPricing
CoefficientFinance teams, accountants in spreadsheetsSpreadsheetYesYesQBO onlyFree; from $49/month
ZapierSimple automation, SMBsAutomationYesLimitedQBO onlyFree; from $19.99/month
WorkatoEnterprise cross-system workflowsiPaaSPartialYesQBO onlyCustom enterprise pricing
Method CRMQuickBooks-native CRM for small businessCRMYesYesQBO + DesktopFrom $25/user/month
FivetranData warehouse pipelinesELTYesNoQBO onlyPer-connector MAR model
Integrate.ioFinance-aware ETL pipelinesETL/ELTPartialNoQBO onlyFrom $1,999/month
SaasAntBulk import/export for accountantsData utilityYesYesQBO + DesktopFrom $10/month

How to Connect QuickBooks Online to Google Sheets with Coefficient

For finance teams and accountants, connecting QuickBooks Online to Google Sheets with Coefficient takes under ten minutes and requires no technical setup. Here is the short version:

  1. Install Coefficient. Add the Coefficient add-on from the Google Workspace Marketplace. In Google Sheets, go to Extensions, click Add-ons, and search for Coefficient. Launch it from the Extensions menu once installed.
  2. Connect QuickBooks Online. In the Coefficient sidebar, click ‘Import From’ and select QuickBooks. Authorize via OAuth using your QBO credentials. No API key or developer setup required.
  3. Select your data. Choose the QuickBooks report or data object you want to import: P&L, balance sheet, cash flow, AR aging, AP aging, transaction list, customers, vendors, or items. Apply filters and field selections as needed.
  4. Set your refresh schedule. Choose hourly, daily, or weekly auto-refresh. Your spreadsheet stays current on the schedule you set without further manual data entry or exports.
  5. Enable write-back (optional). Use Export to QuickBooks to push changes from your spreadsheet back to QBO. Supports update, insert, and upsert actions with preview before execution.

For the full step-by-step guide with screenshots, see How to Connect QuickBooks to Google Sheets. For Excel, see coefficient.io/integrations-excel/quickbooks.

How to Choose the Right QuickBooks Data Integration Tool

Finance team or accountant needing live QuickBooks data in spreadsheets without manual exports: Coefficient. No-code setup, automated refresh, two-way write-back to QuickBooks Online, and support for all core financial reporting objects. Works in Google Sheets and Excel.

Small business owner automating simple workflows between QuickBooks and Shopify, PayPal, HubSpot, or eBay: Zapier. Pre-built QuickBooks Online integration templates for common e-commerce and CRM automation workflows. Fast setup at low cost.

Mid-market or enterprise team running complex, multi-step workflows between QuickBooks Online and Salesforce, NetSuite, or other critical systems: Workato. More reliable than Zapier for mission-critical QuickBooks integrations with conditional logic and error handling.

Small business or service company needing a CRM that works natively with QuickBooks (Online or Desktop): Method CRM. The only CRM with a patented real-time, two-way QuickBooks sync that covers both QBO and Desktop.

Data engineering team loading QuickBooks Online data into a data warehouse: Fivetran for a fully managed extraction pipeline. Integrate.io if you need built-in data transformations and finance-specific data handling before data lands in the warehouse.

Accountant or accounting firm needing bulk import/export for QuickBooks Online or Desktop: SaasAnt Transactions. Flat, affordable per-company pricing, covers both QBO and Desktop, and handles all major transaction types without complex setup.

Get Started with Coefficient for QuickBooks

If you are on a finance team, accounting firm, or working as a fractional CFO and want live QuickBooks Online data in your spreadsheet without manual CSV exports, try Coefficient for free. Connect your QBO account in minutes, import your first report or dataset, and set a refresh schedule that keeps your financial data current automatically.

For pricing details, see coefficient.io/pricing. For pre-built QuickBooks dashboard templates covering P&L, cash flow, and AR aging, see coefficient.io/dashboard-examples.

Frequently Asked Questions

Can I automate financial reporting from QuickBooks Online without a developer?

Yes. Coefficient connects QBO to Google Sheets or Excel with no-code setup. Finance teams can import P&L, balance sheet, cash flow, AR aging, and transaction data with automated refresh schedules — no SQL, no API knowledge required.

What is the difference between QuickBooks add-ons and QuickBooks data integration tools?

QuickBooks add-ons extend accounting software functionality within QBO (payroll, inventory, time tracking). Data integration tools connect QuickBooks data to external systems — spreadsheets, CRMs, data warehouses, and other business apps — to automate workflows and enable reporting across multiple data sources.

Can multiple QuickBooks accounts connect to one spreadsheet?

Yes with Coefficient. Fractional CFOs and accounting firms can connect multiple QuickBooks Online accounts and import data from different company files into a single Google Sheet or Excel workbook for consolidated reporting.

Is QuickBooks data integration secure?

The tools reviewed here use OAuth 2.0 authentication with the QuickBooks API. No credentials are stored in your spreadsheet. Coefficient, Fivetran, and Workato all maintain SOC 2 Type II certification. Always review the security documentation of any tool before connecting it to your QuickBooks account.

How Thornton Capital Automated QuickBooks Reports and Saved 7+ on Month-End Close

For many finance professionals, QuickBooks reports and month-end close can be a daunting process, especially when dealing with multiple data sources or QuickBooks files. At Thornton Capital, a single-family office managing a diverse investment portfolio, consolidating QuickBooks data from 16 different files was a major pain point.

Their manual process was not only time-consuming but also prone to errors, which impacted the credibility of their financial reports.

By implementing Coefficient, Thornton Capital was able to transform their financial reporting workflow, reducing their month-end close from 10 days to just 3.

thornton capital automates quickbooks reports

Here’s a step-by-step guide on how Mike did it:

Step-by-step guide: Automating QuickBooks Reports & Month-end Close

Step 1: Build Standardized Templates

The first step was to create a series of standardized templates for their P&L and balance sheet reports. This allowed them to pull in data from their multiple QuickBooks files in a consistent and organized manner.

Step 2: Automate Data Pulls with Coefficient

Using Coefficient, they were able to automate the process of pulling data from their QuickBooks files into their QuickBooks reports template. This eliminated the need for manual data entry and reduced the risk of errors.

Step 3: Create Summarized Data Fields

Coefficient’s flexibility allowed them to build formulas and create summarized data fields that were tailored to their specific QuickBooks reports needs. This gave them a more comprehensive and insightful view of their financial performance.

Step 4: Refresh QuickBooks Reports Data in Real-Time

refresh quickbooks reports automatically with coefficient

One of the biggest benefits of using Coefficient is the ability to refresh data in real-time. This means that any corrections or updates made in QuickBooks are instantly reflected in their reports, ensuring that they are always working with the most up-to-date information.

By following this workflow, Thornton Capital has not only saved a significant amount of time but also improved the accuracy and credibility of their financial reports. This has allowed them to make faster, more informed decisions and focus on what matters most: growing their business.

Ready to transform your QuickBooks reports process?

Thornton Capital’s story shows what’s possible when you eliminate manual data entry and embrace automation. They cut their month-end close by 70% – from 10 days to just 3 – while improving accuracy across 16 QuickBooks files.

The payoff? More time for strategic analysis. Greater confidence in their numbers. And a finance team that’s no longer buried in spreadsheets during close.

QuickBooks reporting doesn’t have to be painful. Whether you’re managing multiple entities like Thornton Capital or simply tired of manual data pulls, Coefficient can help you build a smarter, faster workflow.

Get started with Coefficient today and see how much time you can save on the QuickBooks reports you need for next month-end close.

How to open QuickBooks file in Excel: Top 3 methods

QuickBooks stores your financial data in its own format. You can’t just double-click and open it in Excel. The file types (.QBW for Desktop, cloud storage for Online) aren’t compatible with spreadsheet programs. Most business owners need their QuickBooks data in Excel for custom reports, analysis, or sharing with team members who don’t have QuickBooks access.

This guide walks you through three proven methods—from fully automated live connections to one-time manual exports.

Top 3 methods to open QuickBooks file in Excel

Choose the method that fits your workflow. Here’s what each one does:

MethodBest ForWhat It Does
CoefficientLive data connectionAutomatically syncs QuickBooks data to Excel with scheduled refreshes—no manual exports needed.
QuickBooks native exportManual exportsBuilt-in export feature that creates static Excel files of your reports and lists.
ODBC driverQuickBooks Desktop technical usersTechnical connection method that requires database setup and works only with Desktop versions.

Method 1: Coefficient

This is the fastest path. Coefficient connects QuickBooks directly to Excel with a live link. Your data refreshes automatically on the schedule you choose—hourly, daily, or weekly. No more downloading files and copying data between programs.

Why Coefficient works best for QuickBooks data

  • Live data sync keeps Excel updated without manual exports
  • Automatic refresh on your schedule (even when Excel is closed)
  • Works with both QuickBooks Online and Desktop
  • Ready-made snapshots for common reports like P&L, Balance Sheet, and Customer Lists
  • Direct queries let you pull specific data without running full reports

Here’s how to set it up:

Step 1: Install Coefficient

Open Excel. Navigate to the Insert tab and click “Get Add-ins.” Search for “Coefficient” and install the add-in.

Step 2: Launch Coefficient and connect QuickBooks

Click the Coefficient icon in your Excel ribbon. Select “New Import” then choose QuickBooks from the data source list.

Sign in to your QuickBooks account when prompted. Grant Coefficient permission to access your data.

Step 3: Choose how to import your data

Coefficient allows you to pull Reports, Objects & Fields and Custom Queries 

Step 4: Select your report or data

For a Report, for example, choose from the pre-built report list. For this example, select “Profit & Loss.”

Set your date range and filters. Choose your preferred basis (accrual or cash) and column configuration.

Step 5: Import to Excel

Click “Import.” Coefficient pulls your data into Excel in seconds. The formatting matches standard financial reports—organized, readable, and ready for analysis.

Step 6: Set up automatic refresh

Click the refresh settings icon next to your import. Choose your schedule: hourly, daily, weekly, or on-demand only.

Enable “Refresh even when workbook is closed” so your data updates without opening the file.

The time savings add up fast. Most finance teams spend 3-4 hours per week exporting QuickBooks data manually. Coefficient eliminates that work entirely. Your Excel files stay current automatically.

Video Walkthrough

Method 2: QuickBooks native export

QuickBooks includes built-in export tools. They work, but create static files—one-time snapshots that never update.

For QuickBooks Online:

Open the report you need. Click the gear icon and select “Export to Excel.” QuickBooks downloads an .xlsx file to your computer.

Open the downloaded file in Excel. The data appears with basic formatting but no connection to QuickBooks.

For QuickBooks Desktop:

Open your report. Go to File → Export → Excel. Choose “Create new worksheet” or “Update existing worksheet.”

QuickBooks Desktop offers slightly more control—you can map data to existing Excel formats.

When native export makes sense

  • One-time data pulls for specific questions or requests
  • Historical snapshots you want to preserve unchanged
  • Sharing with external parties who need a static file, not live access
  • Quick ad-hoc exports when you don’t need regular updates

The main limitation is manual work. Every time you need updated numbers, repeat the export process. For weekly or monthly reports, this becomes tedious. The QuickBooks export to Excel process works fine for occasional needs but doesn’t scale for regular reporting.

Method 3: ODBC driver

This method works only with QuickBooks Desktop. QuickBooks Online doesn’t support ODBC connections.

An ODBC driver creates a database connection between QuickBooks and Excel. It requires technical setup and ongoing maintenance.

Step 1: Install the ODBC driver

Download the QuickBooks ODBC driver from Intuit’s website. Run the installer and follow the setup wizard.

Step 2: Configure the data source

Open Windows ODBC Data Source Administrator. Add a new System DSN for QuickBooks.

Point the connection to your company file. Set up authentication credentials.

Step 3: Connect from Excel

In Excel, go to Data → Get Data → From Other Sources → From ODBC.

Select your QuickBooks DSN. Choose the tables you want to query.

Step 4: Build your query

Use Power Query to select specific fields and apply filters. Transform the data as needed.

Load the query results into your worksheet.

Why ODBC has limitations

  • QuickBooks Desktop only—Online doesn’t support ODBC connections
  • Technical expertise required for setup and troubleshooting
  • Single-user mode often required during data access
  • Maintenance burden when QuickBooks updates or files move
  • Database knowledge helpful for complex queries

The ODBC approach makes sense for specific scenarios. If you’re already managing technical integrations, need very specific data extractions, or want to build custom queries beyond standard reports, it provides flexibility. Most users find it more complex than needed.

Stop wrestling with exports

Manual exports create busy work. Static files go stale. Technical solutions require expertise most teams don’t have.

Coefficient solves the core problem: keeping Excel and QuickBooks in sync without manual effort. Your reports stay current. Your team sees real-time numbers. You reclaim hours spent on repetitive exports.

The choice depends on your workflow. For occasional snapshots, native exports work fine. For regular reporting and analysis, automation saves significant time. Get started with Coefficient today to connect your QuickBooks data to Excel in minutes.

Top 6 QuickBooks Connectors to Use in 2025

Managing QuickBooks data across multiple platforms creates bottlenecks that slow down financial decision-making. Third-party connectors eliminate these friction points, enabling real-time data synchronization and automated workflows that boost operational efficiency.

Feature Comparison Table

ConnectorRow Limits/ExportData SourcesBuilder License CostViewer LicenseAI FunctionalityRefresh FrequencyAlertsSecurity
CoefficientUnlimited (Pro+)100+ platforms$59/monthShared at no cost✅ GPT integrationReal-timeSlack & EmailEnterprise-grade
SyncQN/ACRM-focused$59/month$24.50/user/monthReal-timeEmail alertsIndustry standard
Shopify IntegrationTransaction-basedE-commerce focusedFree (basic)N/ADaily payoutsLimitedStandard SSL
SOS Inventory40,000 itemsManufacturing/retail$65/monthIncludedReal-timeLow stock alertsMulti-factor auth
QuickBooks TimeUnlimited users (Free)Time tracking$20/month + $8/userMobile accessReal-timeGPS/geofencingTwo-factor auth
Bill.comTransaction-basedAP/AR focused$45/monthRole-basedReal-timePayment remindersBank-level

#1 Coefficient (Spreadsheet Connector)

Coefficient transforms Google Sheets and Excel into powerful QuickBooks reporting engines by establishing live data connections that eliminate manual exports and imports. This no-code solution enables finance teams to build dynamic dashboards, automate report generation, and monitor key metrics without leaving their familiar spreadsheet environment.

Highlights of Tool

  • Real-time data synchronization keeps financial reports current without manual intervention. 
  • AI-powered insights help identify trends and anomalies in financial data automatically. 
  • Pre-built templates for P&L, balance sheet, and cash flow reports accelerate implementation. 
  • Multi-source data blending combines QuickBooks data with CRM, marketing, and operational systems for comprehensive business intelligence.

Pros

  • Unlimited row imports on Pro plans eliminate data export restrictions that plague other connectors
  • One-click setup requires no technical skills, making it accessible to finance teams without IT support
  • Shared dashboards allow unlimited viewer access without additional licensing costs

Cons

  • Spreadsheet dependency may not appeal to users seeking purpose-built BI tools
  • Limited customization compared to enterprise-grade business intelligence platforms
  • Google Sheets focus though Excel integration is available

Pricing

Starting at $59/month for unlimited data imports and multi-user support. Enterprise pricing available for larger organizations requiring advanced security and governance features (updated September 2025).

What do users say about Coefficient?

Positive: “Setting up QuickBooks workflows to your spreadsheet and automating data refreshes is incredibly easy and reliable.” – David Schneider, Neo Insurance Solutions

Critical: Some users report occasional sync delays during peak usage periods, though support response is generally quick to resolve issues.

Support

24/7 chat support, email assistance, and comprehensive documentation. Free onboarding sessions help teams implement their first automated reports within days.

#2 SyncQ

SyncQ specializes in advanced CRM-to-QuickBooks automation, enabling bidirectional data synchronization that keeps customer records, estimates, and invoices perfectly aligned between systems. The platform’s sophisticated mapping capabilities handle complex workflows that basic integrations cannot support.

Highlights of Tool

  • Bi-directional sync ensures CRM and QuickBooks data remains consistent across platforms. 
  • Custom field mapping accommodates unique business requirements and data structures. 
  • Multi-line invoice generation from CRM deals streamlines the quote-to-cash process. 
  • Multiple QuickBooks company support serves businesses managing separate entities.

Pros

  • Intuit-approved security meets industry standards for financial system integrations
  • Advanced automation handles complex workflows like 2-way and 3-way matching
  • Free setup assistance reduces implementation time and complexity

Cons

  • CRM-focused scope limits usefulness for businesses needing broader data integration
  • Per-user pricing becomes expensive for larger teams
  • Learning curve for configuring advanced mapping and automation rules

Pricing

Professional plan starts at $49/month for 2 users, with effective pricing of $24.50 per user monthly. Business Max plan includes custom objects and advanced features (updated 2025).

What do users say about SyncQ?

Positive: “SyncQ automatically shows QuickBooks Estimates, Invoices and Payments details within HubSpot Companies/Contacts note sections.” – HubSpot Marketplace review

Critical: Setup complexity can be overwhelming for non-technical users, though support assistance is available.

Support

Phone support (8AM-6PM CT, Mon-Fri), email assistance, and virtual demos. Plus and Pro plans include priority phone support.

#3 Shopify Integration

Native Shopify-QuickBooks integration automates the transfer of e-commerce transaction data, eliminating manual entry of sales, fees, and tax information. This connector transforms complex multi-channel financial data into organized QuickBooks records that accountants can easily process.

Highlights of Tool

  • Payout-based recording matches actual cash flow timing rather than individual transaction dates. 
  • Automatic fee categorization properly allocates Shopify processing fees, subscription costs, and adjustments. 
  • Multi-store support consolidates financial data from multiple Shopify locations. 
  • Tax compliance features ensure proper sales tax reporting across jurisdictions.

Pros

  • Free core functionality makes it accessible for small e-commerce businesses
  • Native integration provides reliable data transfer without third-party dependencies
  • Simplified workflow reduces accounting complexity for multi-channel sellers

Cons

  • Shopify Payments only excludes transactions from other payment processors
  • Summary-level data lacks individual transaction detail for forensic accounting
  • Limited customization offers fewer mapping options than dedicated integration tools

Pricing

Free for basic integration. Shopify subscription fees range from $29-$299/month depending on plan level (updated 2025).

What do users say about Shopify Integration?

Positive: “The integration works great for basic e-commerce accounting needs and eliminates hours of manual data entry.” – Shopify merchant review

Critical: “Limited to Shopify Payments makes it useless for businesses using multiple payment processors.” – E-commerce business owner

Support

Email support, help documentation, and community forums. Higher-tier Shopify plans include priority support channels.

#4 SOS Inventory

SOS Inventory extends QuickBooks with comprehensive inventory management, order fulfillment, and manufacturing capabilities designed specifically for product-based businesses. The seamless integration maintains accurate cost of goods sold calculations while providing advanced inventory tracking features that QuickBooks alone cannot deliver.

Highlights of Tool

  • Lot and serial number tracking ensures compliance with FDA, USDA, and ISO standards for regulated industries. 
  • Multi-location inventory provides real-time visibility across warehouses and retail locations. 
  • Advanced item management includes barcode scanning, automated reordering, and custom fields. 
  • Manufacturing features support bill of materials, work orders, and production tracking.

Pros

  • Native QuickBooks integration maintains seamless data synchronization without double entry
  • Industry-specific features serve manufacturing, food processing, and distribution businesses
  • Mobile accessibility enables warehouse staff to manage inventory from smartphones and tablets

Cons

  • Setup complexity requires significant configuration time without professional assistance
  • Higher cost compared to basic inventory tracking solutions
  • Learning curve for teams transitioning from simple inventory methods

Pricing

Companion plan starts at $65/month for 2 users. Plus and Pro plans include additional features and user capacity (updated 2025).

What do users say about SOS Inventory?

Positive: “SOS Inventory has been a real time saver and has allowed us to implement a robust process for inventory close each month, as well as timely information for our management.” – Mitchell Nishi

Critical: “Setup can be time-consuming and a bit confusing without support” – Software Connect review

Support

Phone and email support during business hours (9 AM – 6 PM CT). Free setup assistance and virtual demos available for new customers.

#5 QuickBooks Time

QuickBooks Time delivers comprehensive workforce management by connecting employee time tracking, scheduling, and payroll data directly with QuickBooks accounting records. This integration ensures labor costs are accurately captured and properly allocated across projects, jobs, and departments.

Highlights of Tool

  • GPS tracking and geofencing provide location verification for mobile and field employees. 
  • Mobile time clock enables employees to clock in/out from smartphones with push notifications. 
  • Project time allocation tracks labor costs against specific jobs or clients. 
  • Compliance tools help maintain FLSA and DCAA requirements through automated audit trails.

Pros

  • Free tier available for single-user unlimited project tracking
  • Comprehensive mobile apps work offline and sync when connectivity returns
  • Payroll integration streamlines the time-to-pay process for accurate labor costing

Cons

  • Cannot track multiple jobs simultaneously limits usefulness for multi-project workers
  • No expense or mileage tracking requires additional tools for complete workforce management
  • Complex permission structure can be overwhelming during initial setup

Pricing

Free plan for 1 user with unlimited projects. Premium plans start at $20/month base fee plus $8 per user monthly (updated 2025).

What do users say about QuickBooks Time?

Positive: “Feature-rich and integrates well with QuickBooks for seamless payroll processing.” – TrustRadius review

Critical: “Pricey with unreliable overtime tracking that requires manual adjustment.” – Software review site

Support

Email support, help documentation, and phone support for Premium and Elite plans. Mobile app includes in-app support features.

#6 Bill.com

Bill.com revolutionizes accounts payable and receivable processes by automating invoice processing, payment approvals, and cash flow management while maintaining perfect synchronization with QuickBooks financial records. This platform eliminates paper-based workflows and reduces processing time from days to minutes.

Highlights of Tool

  • Automated invoice capture extracts data from emailed invoices and converts them into QuickBooks bills. 
  • Approval workflows route payments through customizable approval chains based on amount thresholds and department rules. 
  • Multiple payment methods include ACH, check printing, wire transfers, and international payments. 
  • Cash flow forecasting provides visibility into upcoming payables and receivables.

Pros

  • Bank-level security protects sensitive financial data with enterprise-grade encryption
  • Audit trail maintenance provides complete payment history for compliance and reporting
  • Vendor portal access allows suppliers to submit invoices and track payment status electronically

Cons

  • Per-transaction fees can become expensive for high-volume businesses
  • Learning curve for teams transitioning from manual payment processes
  • Limited customization of approval workflows compared to enterprise solutions

Pricing

Essentials plan starts at $45/month per user. Team ($55/month) and Corporate ($79/month) plans include additional features and user capacity (updated 2025).

What do users say about Bill.com?

Positive: “Cost-effective so it saves us money over time. The integration with QuickBooks is seamless.” – Verified User, TrustRadius

Critical: “Extra charge for ACH payments and sometimes we do not receive all email alerts.” – Tim Edwards, General Office Accounting Administrator

Support

Email support, phone assistance for paid plans, and comprehensive online help center. Implementation support available for Enterprise customers.

Make Better QuickBooks Reports Today

QuickBooks connectors transform financial data management from a manual chore into an automated advantage. Whether you need real-time spreadsheet reporting, advanced inventory tracking, or streamlined payment processing, the right connector eliminates bottlenecks that slow down business decisions.

Coefficient leads the pack for businesses prioritizing spreadsheet-based reporting and multi-source data integration. Its unlimited data imports, AI-powered insights, and seamless QuickBooks synchronization deliver immediate value for finance teams seeking operational efficiency.

Ready to automate your QuickBooks workflows? Get started with Coefficient today and experience the difference that real-time data connectivity makes for your business intelligence and financial reporting processes.

Start your free trial and transform your QuickBooks data into actionable insights within minutes, not hours.

How to Set Up QuickBooks API Integration: A Quick Starter Guide

Quick Answer

Setting up QuickBooks API integration requires creating an Intuit Developer account, registering an OAuth app, and implementing proper authentication flows. The process involves configuring scopes, managing monthly API limits (500,000 CorePlus calls for Builder Tier), and handling QuickBooks’ complex endpoint versioning system.

While technically feasible, custom integrations demand significant development resources and ongoing maintenance due to frequent platform changes and authentication complexities. Coefficient for Excel and Coefficient for Google Sheets offer a no-code alternative that connects QuickBooks to spreadsheets in minutes, eliminating OAuth headaches, API versioning issues, and monthly usage monitoring while providing real-time financial data sync.

Prerequisites and Requirements

Before you begin:

  • QuickBooks Developer Account: Sign up at the Intuit Developer Portal for API credentials and sandbox access
  • Sandbox Company: Set up test environment within developer account for safe integration testing
  • App Configuration: Create new app, select “QuickBooks Online and Payments,” configure redirect URIs and OAuth scopes
  • OAuth 2.0 Knowledge: Understanding of authorization flows and secure token management
  • Development Environment: Node.js, npm, HTTP libraries like axios for API requests
  • Production vs Sandbox Credentials: Separate client credentials for each environment
  • QuickBooks Online Account: Valid subscription required for production access
  • API Documentation Review: Familiarize yourself with Intuit’s endpoint structures and error handling

API Limits:

  • Builder Tier: 500,000 CorePlus API calls per month (exceeding causes service interruptions)
  • Higher Tiers: Silver, Gold, Platinum available with increased limits and overage options
  • Subscription Limits: Restrictions on billable users, chart of accounts, classes, locations, custom fields
  • Endpoint Categories: Core (basic accounting) vs CorePlus (projects, payroll, inventory) with stricter tier restrictions
  • Rate Limiting: Subject to HTTP 429 errors requiring exponential backoff retry logic
  • Custom Fields: Up to 12 custom fields per transaction in higher-tier accounts

Step-by-Step QuickBooks API Integration Setup

Step 1: Create Your Developer Environment

Start with the basics. Register for an Intuit Developer account at https://developer.intuit.com.

This gives you immediate access to sandbox data. Perfect for testing without risking real financial information.

Step 2: Set Up Your Workspace and OAuth App

Navigate to Workspaces and create a new development workspace. Think of this as your project container.

Click “Create app” and configure these critical settings:

  • App Name: Clear, descriptive identifier
  • Scopes: Choose com.intuit.quickbooks.accounting for most use cases, com.intuit.quickbooks.payment for payment processing
  • Redirect URI: Use https://localhost:8080/callback for local development

Pro tip: Create separate apps for development and production to prevent scope changes from breaking live integrations.

Step 3: Implement OAuth 2.0 Authentication

QuickBooks requires OAuth 2.0 for all new integrations. The authentication flow works like this:

  1. Redirect users to QuickBooks authorization URL
  2. User grants permissions via QuickBooks consent screen
  3. QuickBooks redirects back with authorization code
  4. Exchange authorization code for access token
  5. Use access token for subsequent API requests

Critical: Access tokens expire after 6 months. Implement automatic refresh logic to prevent integration failures.

Step 4: Handle API Versioning and Minor Versions

QuickBooks uses a complex versioning system. Always specify minor versions in your requests to access latest features.

Without minor versions, you’ll use the base 2014 API, missing years of functionality.

Example request with minor version 70:

GET /v3/company/{companyId}/invoice/147?minorversion=70

Research each minor version in the documentation to ensure you’re using appropriate versions for your integration needs.

Step 5: Implement Data Retrieval and Error Handling

Build robust data fetching with proper error handling:

For large datasets: Some report endpoints cap responses at 400,000 cells. Implement date range chunking and result merging.

For deleted records: Use the ChangeDataCapture endpoint to detect entity changes and deletions.

For rate limiting: Implement exponential backoff retry logic for 429 errors.

Step 6: Test Across Different Environments

Test your integration thoroughly:

  • Different QuickBooks subscription tiers (Simple Start, Essentials, Plus, Advanced)
  • Various data volumes and complexity levels
  • Custom fields and properties
  • Different user permission levels
  • Edge cases like deleted or modified records

Reference: Merge QuickBooks API Integration Guide

Common Integration Issues

Authentication and Connection Interruptions

Persistent OAuth failures plague QuickBooks integrations. Token expiration and authentication infrastructure changes cause widespread downtime across major platforms. In 2025, OAuth modifications led to simultaneous failures across Power BI and numerous third-party integrations.

Reddit users report that even minor OAuth updates from Intuit trigger platform-wide integration failures until patches are deployed. This creates critical business disruptions, especially during month-end reporting periods when financial data access is essential.

Impact: Developers face emergency fixes during peak business periods, often forcing users to seek alternative data sync solutions or rebuild connectors entirely.

The Builder Tier’s 500,000 CorePlus API calls per month limit catches integrations off-guard. Once exceeded, services experience failed syncs and complete interruptions until the next billing cycle.

SaaS platforms and multi-tenant applications burn through quotas rapidly, forcing urgent migrations to higher-cost tiers or alternative accounting APIs. Several CTOs report being blindsided by sudden service cutoffs that impact customer-facing features.

Prevention: Monitor usage proactively and implement usage alerts well before limits. Consider higher tiers for production applications with multiple users.

Data Sync Reliability and Error-Prone Updates

QuickBooks data retrieval suffers from inconsistent reliability, especially for large batches or real-time updates. Well-established integrations experience daily or weekly sync failures with cryptic error codes.

Users report silent partial updates where some data syncs successfully while other records fail without clear notification. This forces developers to implement comprehensive validation and error detection systems.

Common workarounds: Nightly database overwrites, manual reconnection prompts, and extensive error logging to catch partial sync failures.

Constant UI, API, and Capability Changes Impacting Reliability

Frequent, undocumented updates to QuickBooks break established integrations without warning. API endpoints, business logic, and data structures change unpredictably, causing workflow interruptions.

Users consistently report that integrations working perfectly for years suddenly fail due to back-end modifications. The lack of advance notice or comprehensive change documentation creates ongoing maintenance headaches.

User frustration: “Every month there’s a new issue… I am sick and tired of these errors, updates, and continuous ‘enhancements’ that do nothing but make the lives of everyone much more difficult.” – QuickBooks Community Forum

Building a QuickBooks API Integration for Google Sheets or Excel?

Skip the development nightmare entirely. Coefficient for Google Sheets and Coefficient for Excel eliminate QuickBooks API complexity completely.

Connect in under 5 minutes:

  1. Install Coefficient from Google Workspace Marketplace or Microsoft AppSource
  2. Authenticate with QuickBooks using one-click OAuth (no developer setup required)
  3. Import financial data using simple formulas or visual data selector
  4. Configure automatic refresh schedules for real-time updates

No more headaches: Rate limiting, authentication failures, API versioning, or usage monitoring become Coefficient’s problem, not yours. Import customers, invoices, expenses, and financial reports instantly.

Real-time sync keeps spreadsheets current while you focus on analysis and decision-making. Build dashboards, create pivot tables, and generate reports using familiar Excel or Google Sheets tools.

Custom QuickBooks API Integration vs. Coefficient.io Comparison

AspectCustom DevelopmentCoefficient.io
Setup Time2-4 weeks5 minutes
Development Cost$5,000-$15,000$29-$299/month
MaintenanceOngoing dev resourcesFully managed
SecurityMust implement yourselfEnterprise-grade built-in
MonitoringBuild your own24/7 automated monitoring
ScalingHandle infrastructure yourselfAuto-scaling included
UpdatesMaintain API changesAutomatic updates

Get Started Today

QuickBooks API integration can work—if you have the development resources and patience for ongoing maintenance. But why battle OAuth complexity, usage limits, and constant platform changes when Coefficient handles everything for you?

Most businesses need QuickBooks data in spreadsheets for analysis, not another custom application. Coefficient bridges that gap instantly, letting your team focus on insights instead of integration maintenance.

Ready to connect QuickBooks to your spreadsheets? Start your free trial and see your financial data flowing in minutes, not months.

FAQs

Does QuickBooks have API integration?

Yes, QuickBooks Online provides comprehensive REST API integration through the Intuit Developer Platform. The API offers access to customers, invoices, expenses, reports, and other financial data. However, integration requires OAuth 2.0 setup, developer account creation, and ongoing maintenance. For spreadsheet users, Coefficient provides instant QuickBooks connectivity without technical complexity.

Is the QuickBooks API free?

QuickBooks API access is free within usage limits. The Builder Tier allows 500,000 CorePlus API calls per month, with higher tiers available for increased limits. However, building and maintaining integrations requires significant development time and resources, often costing $5,000-$15,000. Managed solutions like Coefficient offer more predictable monthly pricing with enterprise features included.

Can I integrate QuickBooks with my website?

Yes, you can integrate QuickBooks with websites using the QuickBooks Online API and OAuth 2.0 authentication. This enables features like automated invoicing, customer data sync, and financial reporting. However, web integrations require secure token management, error handling, and ongoing maintenance as QuickBooks updates its platform frequently.

Does QuickBooks have AI integration?

QuickBooks Online includes AI-powered features like automated expense categorization, receipt scanning, and smart invoicing suggestions. For external AI integrations, you can use the API to feed QuickBooks data into machine learning models for predictive analytics, automated bookkeeping, or financial forecasting applications.

How to Set Up QuickBooks Webhooks: Quick Integration Guide

Quick Answer

QuickBooks Online provides robust webhook functionality that automatically sends real-time notifications when specific accounting events occur—like invoice creation, payment processing, or customer updates. 

Setting up QuickBooks webhooks requires OAuth 2.0 authentication, configuring webhook endpoints in the Intuit Developer portal, and implementing HMAC-SHA256 signature verification for security. 

Unlike traditional polling methods, webhooks eliminate constant API calls and provide instant data synchronization, making them essential for modern accounting integrations. This guide covers both technical implementation and no-code alternatives like Coefficient for seamless spreadsheet integration.

Prerequisites and Requirements

Before setting up QuickBooks webhook integrations, ensure you have the following components in place:

QuickBooks Setup Requirements:

  • Active QuickBooks Online Account: Valid subscription with company data accessible via API
  • Intuit Developer Account: Register at developer.intuit.com and create your application
  • OAuth 2.0 Implementation: All webhook integrations require OAuth 2.0 for secure authentication between your app and QuickBooks

Technical Infrastructure:

  • HTTPS Webhook Endpoint: Secure, publicly accessible URL that can receive POST notifications from QuickBooks
  • HMAC-SHA256 Verification: Implement signature validation using the verifier token provided by QuickBooks
  • Data Processing Logic: Backend capability to parse JSON payloads and handle business logic triggered by webhook events

Development Environment:

  • Sandbox Testing: Use QuickBooks sandbox companies for initial integration testing
  • API Documentation Access: Familiarize yourself with supported entities and operations
  • Error Handling Strategy: Plan for webhook delivery failures, retries, and timeout scenarios

API Limitations and Considerations:

Limit TypeSpecificationImpact
Request Throttling40 requests per minute per realm IDMay affect high-volume integrations
Batch RequestsMaximum 30 payloads per batchOptimize for bulk operations
TLS RequirementsTLS 1.2 and higher onlyEnsure endpoint security compliance
API Call BillingMay apply after 500,000+ monthly callsMonitor usage for cost planning
Webhook DeliveryBest-effort delivery with retriesImplement idempotency handling

Supported Entities for Webhook Events: QuickBooks webhooks support Create, Update, Delete, Merge, and Void operations for most entities including Account, Bill, Customer, Invoice, Item, Payment, Vendor, and more. Verify specific entity support in the official documentation before implementation.

Step-by-Step QuickBooks Webhook Setup

Step 1: Configure OAuth 2.0 Authentication

Begin by implementing OAuth 2.0 authentication for your application. Navigate to the Intuit Developer portal and access your app’s dashboard.

Configure OAuth settings by setting your redirect URI to match your application’s callback URL exactly. This URI must handle the authorization code exchange for access tokens.

Implement the OAuth flow in your application:

  • Redirect users to QuickBooks authorization URL
  • Handle the callback with authorization code
  • Exchange authorization code for access and refresh tokens
  • Store tokens securely for ongoing API access

Test the OAuth flow thoroughly in the sandbox environment before proceeding to webhook configuration.

Step 2: Set Up Webhook Endpoints in Developer Portal

Access your app in the Intuit Developer dashboard and navigate to the “Webhooks” section. The enhanced webhooks interface simplifies configuration and testing.

For Production Applications:

  • Select “Webhooks” in the Production section
  • Enter your secure HTTPS endpoint URL where QuickBooks will send notifications
  • Configure event frequency for aggregating multiple events (optional)
  • Review available entities and operations
  • Select specific events you want to receive notifications for
  • Save your webhook configuration

For Sandbox/Development Applications:

  • Navigate to Development section and select “Webhooks”
  • Input your test endpoint URL
  • Choose events for testing purposes
  • Save configuration for sandbox testing

Use the “Send Test Notification” feature to verify your endpoint receives and processes webhook payloads correctly.

Step 3: Implement Webhook Signature Verification

Security is critical for webhook implementations. QuickBooks includes an intuit-signature header with each webhook payload for verification.

Locate your Verifier Token in the Developer portal:

  • Sign in to your developer account
  • Open your application dashboard
  • Navigate to Webhooks section (Production or Development)
  • Copy the Verifier Token value

Implement HMAC-SHA256 signature verification:

javascript

// Node.js example

const crypto = require(‘crypto’);


function verifyWebhookSignature(payload, signature, verifierToken) {

  const hash = crypto

    .createHmac(‘sha256’, verifierToken)

    .update(payload)

    .digest(‘base64’);


  return hash === signature;

}


// Express.js webhook handler

app.post(‘/quickbooks-webhook’, (req, res) => {

  const signature = req.headers[‘intuit-signature’];

  const payload = JSON.stringify(req.body);


  if (!verifyWebhookSignature(payload, signature, process.env.QB_VERIFIER_TOKEN)) {

    return res.status(401).send(‘Unauthorized’);

  }


  // Process verified webhook data

  processWebhookData(req.body);

  res.status(200).send(‘OK’);

});

Step 4: Process Webhook Notifications

QuickBooks webhook notifications arrive as POST requests with JSON payloads. The response body contains essential event information:

Standard Webhook Fields:

  • name: Entity type that changed (Customer, Invoice, Payment, etc.)
  • id: Unique identifier of the changed entity
  • operation: Type of change (Create, Update, Delete, Void, Merge)
  • lastUpdated: UTC timestamp of the latest change
  • deletedID: ID of deleted/merged entity (for merge events only)

Example webhook payload structure:

json

{

  “eventNotifications”: [{

    “realmId”: “1185883450”,

    “dataChangeEvent”: {

      “entities”: [{

        “name”: “Customer”,

        “id”: “1”,

        “operation”: “Create”,

        “lastUpdated”: “2025-01-15T15:00:00-0700”

      }, {

        “name”: “Invoice”,

        “id”: “142”,

        “operation”: “Update”, 

        “lastUpdated”: “2025-01-15T15:05:00-0700”

      }]

    }

  }]

}

Implement robust processing logic that handles multiple entities in a single webhook, manages duplicate events through idempotency checks, and triggers appropriate business logic based on entity types and operations.

Step 5: Test and Monitor Webhook Delivery

Use QuickBooks sandbox environment for comprehensive testing. Create test transactions, modify existing records, and verify webhook delivery timing and accuracy.

Monitor webhook performance through the Developer portal’s enhanced webhooks page, which provides insights into delivery status, failure rates, and retry attempts.

Implement proper error handling and logging in your webhook endpoint to troubleshoot delivery issues and ensure reliable data synchronization.

Common Integration Issues

Authentication and OAuth Flow Failures

Issue Explanation: Many developers encounter challenges during OAuth 2.0 setup, particularly with redirect_uri parameter configuration. Invalid or mismatched callback URLs frequently cause “The redirect_uri query parameter is invalid” errors, blocking the authentication handshake between applications and QuickBooks.

Solution: Ensure your redirect_uri in the authorization request exactly matches the URI configured in your Intuit Developer app settings. Avoid clearing critical URL parameters during the OAuth flow, and always use HTTPS for production callback URLs.

Webhook Delivery Delays or Missed Events

Issue Explanation: Some integrations experience webhook notification delays or complete event loss, even after successful OAuth setup and endpoint verification. This creates data synchronization gaps and missed business logic triggers, particularly affecting time-sensitive financial workflows.

Solution: Implement webhook retry logic and consider hybrid approaches that combine webhooks with periodic API polling for critical data. Monitor webhook delivery through the Developer portal and establish alerting for missed notifications.

Webhook URL and Event Routing Issues

Issue Explanation: Platform-specific implementations like Make.com use shared webhook URLs rather than unique endpoints per integration, causing confusion for developers expecting individual webhook addresses. This architectural difference complicates troubleshooting and event routing understanding.

Solution: Understand your integration platform’s webhook architecture. For shared URL platforms, ensure proper event filtering and routing logic to handle multiple users or applications correctly.

Partial Coverage and Entity Limitations

Issue Explanation: QuickBooks webhooks don’t support all entity types or granular event details that developers might expect. Certain reports, specific transaction statuses, or detailed audit trails require direct API polling rather than webhook notifications.

Solution: Review the comprehensive entity support matrix in QuickBooks documentation before designing your integration. Plan hybrid polling approaches for unsupported entities while leveraging webhooks for supported real-time events.

No-code Webhook Workflows for Google Sheets or Excel

Managing QuickBooks data in spreadsheets traditionally requires complex custom development or constant manual updates. Coefficient eliminates this friction entirely, providing instant connectivity between your QuickBooks accounting data and Excel or Google Sheets.

Instead of building custom webhook handlers and managing authentication flows, Coefficient handles all the technical complexity while delivering enterprise-grade reliability. Your accounting team gets real-time data synchronization without IT dependency.

Transform Manual Processes into Automated Workflows:

Webhooks let you trigger live data pulls into Coefficient from QuickBooks, which means your accounting system can now tell Coefficient exactly when to refresh a data import. Whether invoice data changes, customer information updates, or payment status shifts in QuickBooks, your spreadsheet can react in real-time.

Instead of waiting for scheduled syncs or refreshing manually, you can keep financial dashboards and reports up to date the moment your source data changes.

Step-by-Step Coefficient Webhook Setup:

  1. Import QuickBooks Data: Start by importing your accounting data from QuickBooks into your spreadsheet using the Coefficient sidebar
  2. Access Import Settings: Locate your QuickBooks import in the “Imports” section of the Coefficient interface
  3. Open Configuration Menu: Click the three-dot menu icon next to your import’s name
  4. Select Edit Option: Choose “Edit” from the dropdown to access import settings
  5. Generate Webhook URL: Click the three-dot menu again and select “Webhook URL” to open the configuration panel
  6. Choose Refresh Scope: Select either single-import refresh or comprehensive sheet refresh based on your needs
  7. Implement in QuickBooks: Configure your QuickBooks webhook to call the Coefficient URL when accounting events occur

When QuickBooks processes transactions, creates invoices, or updates customer records, your spreadsheet automatically refreshes with the latest data—no manual intervention required.

Custom QuickBooks Webhooks vs. Coefficient Comparison

AspectCustom DevelopmentCoefficient
Setup Time2-4 weeks5 minutes
Development Cost$5,000-$15,000$29-$299/month
MaintenanceOngoing dev resourcesFully managed
SecurityMust implement yourselfEnterprise-grade built-in
MonitoringBuild your own24/7 automated monitoring
ScalingHandle infrastructure yourselfAuto-scaling included
UpdatesMaintain API changesAutomatic updates

Transform Your Accounting Workflow Today

QuickBooks webhooks unlock powerful real-time integration possibilities, but implementing them shouldn’t consume weeks of development time or require ongoing technical maintenance. Whether you choose custom development or modern no-code solutions, the key is selecting an approach that scales with your business needs.

Ready to experience effortless QuickBooks-to-spreadsheet integration without the complexity? Get started with Coefficient today and transform hours of manual data management into automated, real-time synchronization.

Your accounting team will focus on analysis and decision-making instead of wrestling with data imports and version control issues.

FAQs

Does QuickBooks have webhooks?

Yes, QuickBooks Online provides comprehensive webhook functionality that automatically sends real-time notifications when accounting events occur. You can configure webhooks for entity operations like invoice creation, payment processing, customer updates, and more through the Intuit Developer portal. However, setting up webhooks requires OAuth 2.0 authentication and custom endpoint development.

Does QuickBooks have API access?

QuickBooks Online offers extensive API access including REST API, OAuth 2.0 authentication, and webhook capabilities. The API allows programmatic access to accounting data, transaction management, and business entity operations. API access varies by QuickBooks plan, with developer accounts receiving sandbox environments and production access requiring published applications through Intuit’s review process.

What are webhooks used for?

Webhooks enable real-time data synchronization by automatically sending notifications when specific events occur in QuickBooks. Common use cases include updating external databases when invoices are created, triggering email campaigns when payments are received, synchronizing customer data across multiple systems, and maintaining real-time financial dashboards without constant API polling.

Is QuickBooks Online API free?

QuickBooks Online API access is free for development and testing in sandbox environments. Production usage may incur charges after exceeding 500,000 API calls per month, though exact pricing varies by application and usage patterns. Webhook notifications are included in standard API access and don’t count toward call limits, making them a cost-effective integration approach.

QuickBooks API Rate Limits & How to Prevent Hitting Them

Quick answer

QuickBooks Online enforces 500 requests per minute per company with a strict 10 concurrent request limit. Batch operations get 40 requests per minute, while resource-intensive endpoints drop to 200 requests per minute.

Exceeding these limits triggers HTTP 429 “Too Many Requests” errors that can disrupt financial workflows. Beyond rate limits, QuickBooks also caps report responses at 400,000 cells and restricts features based on subscription tiers.

Smart workaround? Use Coefficient’s managed QuickBooks connection instead of direct API calls. You get real-time financial data in spreadsheets without rate limit headaches or complex error handling.

QuickBooks rate limits

API rate limits

QuickBooks takes a multi-layered approach to rate limiting. Here’s what you’re up against:

  • Standard endpoints: 500 requests per minute per realm ID (company)
  • Concurrent requests: Maximum 10 simultaneous requests per company per app
  • Batch operations: 40 batch requests per minute per realm ID
  • Resource-intensive endpoints: Reduced to 200 requests per minute for select APIs
  • Environment parity: Production and sandbox use identical limits (with occasional email restrictions in sandbox)
  • Error response: HTTP 429 “Too Many Requests” when limits exceeded

API usage limits

QuickBooks enforces subscription-based restrictions beyond simple rate limiting:

  • Report cell limits: BalanceSheet, TransactionList, and JournalReport responses capped at 400,000 cells
  • Billable users: Maximum active users determined by subscription tier
  • Chart of accounts: Account creation limits vary by plan (Essentials vs Plus vs Advanced)
  • Classes and locations: Only available in Plus and Advanced plans with tier-specific limits
  • Custom fields: Number of custom fields restricted by subscription level

Methods to prevent QuickBooks rate limits

  • Implement intelligent batching and spacing. Group related operations into batch requests (40 per minute limit) rather than individual calls. Add delays between requests to stay under the 500-per-minute threshold while respecting the 10 concurrent request ceiling.
  • Monitor your request patterns actively. Track API usage across all integrations to avoid sudden spikes. Implement exponential backoff when you hit 429 errors, and consider request queuing during peak usage periods.
  • Use Coefficient for seamless QuickBooks integration. Instead of managing complex rate limit logic, Coefficient’s QuickBooks connector handles all the API complexity automatically. You get real-time financial data without coding or quota management.

Step-by-step walkthrough to avoid rate limits using Coefficient

Coefficient eliminates QuickBooks API rate limit frustrations by managing connections intelligently behind the scenes. You get live financial data in familiar spreadsheets without worrying about 429 errors or concurrent request limits.

Connect in under 5 minutes:

  1. Install Coefficient from Google Workspace Marketplace or Microsoft AppSource
  2. Authenticate with QuickBooks using one-click OAuth (no developer setup required)
  3. Import your Reports, Objects & Fields, ect. With a click of a button  
  1. Configure automatic refresh schedules for real-time updates

No rate limit monitoring needed. No complex retry logic. No API expertise required. Coefficient handles request optimization, error handling, and data synchronization automatically while you focus on financial analysis and reporting.

Common use cases that trigger API rate limits

  • Month-end financial reporting workflows. Accounting teams pulling profit & loss statements, balance sheets, and transaction details simultaneously often exceed the 10 concurrent request limit, causing 429 errors.
  • Real-time dashboard integrations. Business intelligence tools making frequent polling requests can quickly exhaust the 500-requests-per-minute quota, especially when monitoring multiple QuickBooks companies.
  • Bulk data synchronization projects. Migrating historical transactions or updating large customer lists often hits both rate limits and the 400,000-cell report restriction simultaneously.

Skip the API headaches

QuickBooks rate limiting doesn’t have to complicate your financial workflows. While building custom integrations requires careful quota management and error handling, Coefficient provides instant access to live QuickBooks data without technical complexity.

Ready to eliminate API rate limit frustrations? Get started with Coefficient and connect QuickBooks in minutes, not hours.

FAQs

What is the rate limit for QuickBooks API?

QuickBooks Online enforces 500 requests per minute per company (realm ID) with a maximum of 10 concurrent requests per app. Batch operations are limited to 40 requests per minute, while resource-intensive endpoints drop to 200 requests per minute. Exceeding these limits results in HTTP 429 “Too Many Requests” errors.

How do I fix the API rate limit exceeded error?

When you hit QuickBooks’ 429 error, implement exponential backoff and retry logic. Reduce concurrent connections, space out requests to stay under 500 per minute, and consider batching operations. For ongoing financial data needs, Coefficient’s managed QuickBooks integration eliminates rate limit management entirely.

Is QuickBooks Online API free?

QuickBooks Online API access is included with your QuickBooks subscription for first-party integrations. Third-party apps may require separate developer accounts or fees. However, API usage is still governed by rate limits and subscription-based feature restrictions regardless of cost.

What is the API rate limit for MYOB?

MYOB’s rate limits vary by product and subscription tier, typically ranging from 1,000-5,000 requests per hour with burst allowances. This differs significantly from QuickBooks’ 500-per-minute model. Check MYOB’s developer documentation for your specific product’s current limits, as they frequently update their policies.

How to Import Google Sheets into QuickBooks

While QuickBooks is a powerful accounting platform, many finance teams find themselves regularly working with Google Sheets for their financial analysis and reporting.

Spreadsheets offer more flexibility than QuickBooks’ built-in reporting, letting finance teams create the exact reports and analysis they need.

But importing Google Sheets into QuickBooks presents challenges.

If users want to import their Google Sheets into QuickBooks, they typically have two options:

Manual data entry in QuickBooks or using limited native import features.

But spoiler alert: there’s a better solution for importing Google Sheets into QuickBooks! This guide will show you how to automatically import Google Sheets into QuickBooks.

Let’s get started!

Step-by-Step Walkthrough: How to Import Google Sheets into QuickBooks

Coefficient is a free Google Sheets add-on that lets users seamlessly import and export data between Google Sheets and QuickBooks.

Finance professionals can use Coefficient to manage any QuickBooks analysis and reporting needs. Check out Coefficient’s Templates Gallery for pre-built QuickBooks dashboards.

And that’s not all!

With Coefficient, you can import Google Sheets into QuickBooks in a few clicks!

Here’s a step-by-step tutorial to show you how.

Step 1: Install Coefficient

Coefficient’s QuickBooks connector allows you to import Google Sheets into QuickBooks.

But first, you’ll need to install it from the Google Workspace Marketplace.

Start by opening a new spreadsheet.

Navigate to the top navigation and click Extensions > Add-ons > Get add-ons.

Google Sheets extension menu showing add-ons option.

This will direct you to the Google Workspace Marketplace.

Type in “Coefficient” in the search bar and select the Coefficient app.

Google Workplace, marketplace, strong and coefficient map.

Accept the prompts to install.

Coefficient installation permission prompt screen

Once installation is finished, return to Extensions on the Google Sheets menu.

Coefficient will appear as an add-on.

Extension menu showing installed Coefficient

Launch the app. Now Coefficient will run on the sidebar of your Google Sheet.

Google Sheets with Co-Officials have

Step 2: Set Up QuickBooks Import

Next, we need to configure how to import your Google Sheet into QuickBooks.

Select Export To… on the Coefficient sidebar.

Coefficient Sidebar, export to button highlighted.

Choose QuickBooks as your destination.

QuickBooks destination selection and coefficient.

Select your data range and header row.

Data Range and Header Selection Interface.

Click Next.

Step 3: Configure Import Settings

Select the QuickBooks Object you are exporting the data to and the Action you would like to take, then hit Next.

Cookbook's object and action selection screen.

Step 4: Map Your Fields

Under the Field Mappings section, match your Google Sheets columns to QuickBooks fields.

Field mapping interface for Sheets to QuickBooks.

Click Save Mappings when finished.

Step 5: Import Google Sheets to QuickBooks

Review your import settings.

Click Export to begin.

Export settings review screen.

Choose which rows to import:

  • All rows
  • Selected rows
  • Filtered rows
Root import and selection option interface.

Preview the changes before confirming.

Did a preview for cookbooks in port.

Click Update ‘n’ rows in QuickBooks to send your Google Sheets data to QuickBooks.

Update confirmation with row count display.

Coefficient will notify you when the import is complete.

Step 6 (Optional): Set Up Auto-Refresh

After importing your data into your spreadsheet, you can set up Coefficient’s auto-refresh scheduler for automatic updates.

Just select your frequency (hourly, daily, or weekly) and the specific time, and Coefficient will handle the rest.

Auto refresh scheduler configuration screen.

Import Google Sheets into QuickBooks with Coefficient

Why manually import Google Sheets into QuickBooks if you don’t have to?

With Coefficient, you can import Google Sheets into QuickBooks without ever leaving your spreadsheet.

Get started for free and automatically import Google Sheets into QuickBooks in just a few clicks.

How to Import Excel Files into QuickBooks

While QuickBooks is a powerful accounting platform, many finance teams find themselves regularly working with Excel spreadsheets for their financial analysis and reporting.

Spreadsheets offer more flexibility than QuickBooks’ built-in reporting, letting finance teams create the exact reports and analysis they need.

But importing Excel files into QuickBooks presents challenges.

If users want to import their Excel files into QuickBooks, they typically have two options:

Manual data entry in QuickBooks or using limited native import features.

But spoiler alert: there’s a better solution for importing Excel files into QuickBooks! This guide will show you how to automatically import Excel files into QuickBooks.

Let’s get started!

Step-by-Step Walkthrough: How to Import Excel Files into QuickBooks

Coefficient is a free Excel add-in that lets users seamlessly import and export data between Excel and QuickBooks.

Finance professionals can use Coefficient to manage any QuickBooks analysis and reporting needs. Check out Coefficient’s Templates Gallery for pre-built QuickBooks dashboards.

And that’s not all!

With Coefficient, you can import Excel files into QuickBooks in a few clicks!

Here’s a step-by-step tutorial to show you how.

Step 1: Install Coefficient

Open Excel from your desktop or in Office Online. Click ‘File’ > ‘Get Add-ins’ > ‘More Add-Ins.’

Excel menu showing good add-ins selection path.

Type “Coefficient” in the search bar and click ‘Add.’

Coefficient search results in Office add-in store.

Follow the prompts in the pop-up to complete the installation.

Once finished, you will see a “Coefficient” tab in the top navigation bar. Click ‘Open Sidebar’ to launch Coefficient.

So we've been displaying new Coefficient

Step 2: Set Up QuickBooks Import

Next, we need to configure how to import your Excel file into QuickBooks.

Select Export To… on the Coefficient sidebar.

Coefficient sidebar with export to button highlighted.

Choose QuickBooks as your destination.

QuickBooks Destination Selection screen.

Select your data range and header row.

Data range selection interface with header

Click Next.

Step 3: Configure Import Settings

Select the QuickBooks Object you are exporting the data to and the Action you would like to take, then hit Next.

QuickBooks object and action configuration menu

Step 4: Map Your Fields

Under the Field Mappings section, match your Excel columns to QuickBooks fields.

Excel to QuickBooks Field Mapping Interface

Step 5: Import Excel File to QuickBooks

Review your import settings.

Click Export to begin.

Explore confirmation screen with settings review.

Choose which rows to import:

  • All rows
  • Selected rows
  • Filtered rows
Rows, selection options for getting

Preview the changes before confirming.

Did a preview screen before a QuickBooks import.

Click Update ‘n’ rows in QuickBooks to send your Excel data to QuickBooks.

Update confirmation button with RoCan.

Step 6 (Optional): Set Up Auto-Refresh

After importing your data into your spreadsheet, you can set up Coefficient’s auto-refresh scheduler for automatic updates.

Just select your frequency (hourly, daily, or weekly) and the specific time, and Coefficient will handle the rest.

auto refreshed schedule configuration interface.

Import Excel Files into QuickBooks with Coefficient

Why manually import Excel files into QuickBooks if you don’t have to?

With Coefficient, you can import Excel files into QuickBooks without ever leaving Excel.

Get started for free and automatically import Excel files into QuickBooks in just a few clicks.

How to Reconcile Stripe Payments In Quickbooks Online

QuickBooks Online (QBO) from Intuit is cloud accounting software used by many business owners. It offers a user-friendly and cost effective solution to solve numerous back-office and accounting functions. Quickbooks Online links to most of the major payment processing platforms including Stripe.

Stripe is a payment processing platform that allows you to transfer money from a customer’s account to yours and accept payments via credit card or other alternative payment methods.

This guide will walk through how to reconcile Stripe payments in Quickbooks Online if your business is using Stripe as their payment processing platform.

Let’s get started!

Step-by-Step Guide: How to Reconcile Stripe Payments in Quickbooks Online

Step 1: Create Folders to Save Out Quickbooks Online and Stripe Reports

Before going through the reconciliation process for Stripe payments in Quickbooks Online you will first want to create a folder repository on your shared drive, desktop, cloud platform, etc to save out reports at. In these folders you will want to save out Stripe transaction details, payouts, month-end reports, and QBO reconciliations so you don’t have to duplicate work as you continue to reconcile transactions.

Step 2: Download Stripe Reports

Once you’ve created your folder structure you will need to log into your Stripe account and pull down the relevant reports.

To do this you will need to navigate to the reports section in the menu section on the left side of your homepage. Once in the reports section you will need to download the balance summary, balance change from activity, and payouts reports for the relevant time frame and save them out in the folders you created in step 1. Depending on the volume of transactions you may want to reconcile payments weekly instead of monthly or quarterly.

Having the reports saved out and readily available from Stripe will be helpful when going through any transactions and reconciling items.

Step 3: Connect Stripe to Quickbooks

In order to seamlessly pull in Stripe transactions to Quickbooks Online in order to reconcile them you will need to connect your Stripe account. Once your account is connected it will help eliminate any manual entries and errors that can occur if you are manually uploading your Stripe transactions.

To link your Stripe account you will have to navigate to the apps section of your Quickbooks Online menu.

Navigation menu showing banking page and QuickBooks Online

Once in the apps section you will need to search for Stripe and link it to your Quickbooks Online instance. Once you’ve select Stripe you may be prompted for your login credentials so make sure you have those handy.

Stripe app search results in QuickBooks Online

Step 4: Import Stripe Transactions into Quickbooks

Now that you’ve connected your Stripe account in Quickbooks and have been regularly downloading Stripe transactions, you will need to upload those Stripe transactions in Quickbooks Online and begin the reconciliation process. The upload process can be done automatically by correctly linking your Stripe account in step 3. Otherwise you will have to do a manual upload process to Quickbooks Online from Stripe, which can take more time and cause more issues and reconciling items from the manual intervention.

Once you’ve successfully connected the Stripe platform to Quickbooks Online through the apps section you will see transactions poplate for that particular company.

If you are unable to link the application and have to manually import transactions you will need to pick a start date for the transactions and then upload your csv file out of Stripe  to Quickbooks Online.

Step 4: Run Quickbooks Online Reconciliation  

Now that your transactions from Stripe have pulled into the Quickbooks Online you are able to run your Stripe account reconciliation. In order to do this you first need to navigate to the reports section in Quickbooks Online.

Reports section navigation equipment interface.

Once here you can search for the reconciliation discrepancy report in the account field to find report options.

Reconciliation discrepancies report search screen.

After you’ve searched for and located the reconciliation discrepancy report you will be prompted to select what account you want to reconcile from your chart of accounts. In this particular example we are reconciling our Stripe account so you will want to select the bank account you have created to pull in your Stripe transactions.

Bank Account Selection Screen for Reconciliation

Once you’ve selected the Stripe account to reconcile you will be able to select the date range that you want to reconcile and will be able to run your reconciliation report for that particular date range. At this point in time you will also want to have your Stripe reports you previously pulled down ready to go in the event you have a reconciling difference that you need to investigate. Typically, with Stripe and other payment processing platforms you will have reconciling differences due to timing, missing or duplicated transactions, or any manual adjustments you have made throughout the accounting period you are reconciling.

Now you are ready to select run on your Stripe account reconciliation.

A conciliation report showing account differences

In this particular example we are showing that there is a $30,848.20 difference between our Stripe balance and our Quickbooks Online balance.

Balanced difference of $30,848.20 displayed in report.

With this reconciling difference you will then need to go through the transaction level detail in your reconciliation and match it up with the Stripe transaction detail that was saved out in your folder. You shouldn’t have issues with reconciling items if you have linked your Stripe account to your Quickbooks Online instance, other than potential minor timing issues.

If you’ve manually uploaded or entered your Stripe transactions you will need to correct, add, or remove transactions to your Stripe account in Quickbooks Online as you go through each transaction. You have the functionality in Quickbooks Online to check the radial box on the right side of your reconciliation screen. This allows you to monitor and track which Stripe transactions you’ve already tied and reconciled to your Stripe statement.

For transactions that don’t appear or you are not able to tie back you will want to leave that radial box unchecked. This will remove the transaction from your Quickbooks Online reconciliation when you finish and process it.

After you’ve fully reconciled your Stripe account you should have a reconciling difference of zero and will be able to select finish now to complete your Stripe account reconciliation for that particular time frame.

Final reconciliation screen with finish button.

Reconcile Your Stripe Payments in Quickbooks Online

Linking your Stripe Payment processing platform to your Quickbooks Online instance can provide easy and seamless accounting of transactions for business owners and accountants. The pre-built connector between Quickbooks Online and Stripe makes it possible to pull in Stripe transactions and reconcile them without the need of an information technology professional. This can save both time and money for businesses as they start-up their back-office processes.

Once you have accurate, reconciled Stripe data in your Quickbooks Online instance, it allows you to report more meaningful information for your business to help it succeed. Quickbooks Online also is able to connect to reporting tools such as Coefficient to seamlessly pull information out of Quickbooks Online. Coefficient also enhances your reporting capabilities out of Quickbooks Online so you can use transactional data to help tell the story of your business.

Ready to take your data analysis to the next level?

Try Coefficient to seamlessly integrate your Excel with live data from various business systems, enabling real-time analysis and more advanced financial modeling.