If you want to connect QuickBooks to Excel, this blog is for you.
QuickBooks is an indispensable tool for businesses managing their accounting and financial processes.
Yet, when it comes to data analysis, reporting, and sharing insights, Excel remains unmatched for many professionals. Linking QuickBooks data with Excel not only enhances your reporting capabilities but also provides greater flexibility in managing financial data.
Here’s a step-by-step guide on how to connect QuickBooks to Excel, highlighting some of the most popular methods.
TL;DR: Coefficient is the fastest and safest way to Export data from QuickBooks to Excel
Coefficient integrates QuickBooks to Excel in a single click, with no coding required.
In fact, Coefficient can connect Excel to any business system, enabling you to blend and analyze your QuickBooks data with a variety of other data sources, including:
Coefficient’s automatic data updates allow you to build live accounting reports and dashboards in Excel with your QuickBooks Data.
And with Slack/email alerts, you can update stakeholders in real-time when key accounting reports and KPIs change. It’s the easiest way to connect Excel to QuickBooks, pull in accounting data, develop real-time dashboards, and share them with your team.
How to Export Data from QuickBooks to Excel: Top 3 Methods
While there are many ways and tools to connect QuickBooks to Google Sheets, we’ll focus on the best methods in this guide.
Method 1. Coefficient (no code)
Coefficient’s no-code solution is the fastest and easiest option to export QuickBooks data to Excel. Especially for Excel for Web users who can’t access Power Query.
Step 1: Install Coefficient for Excel
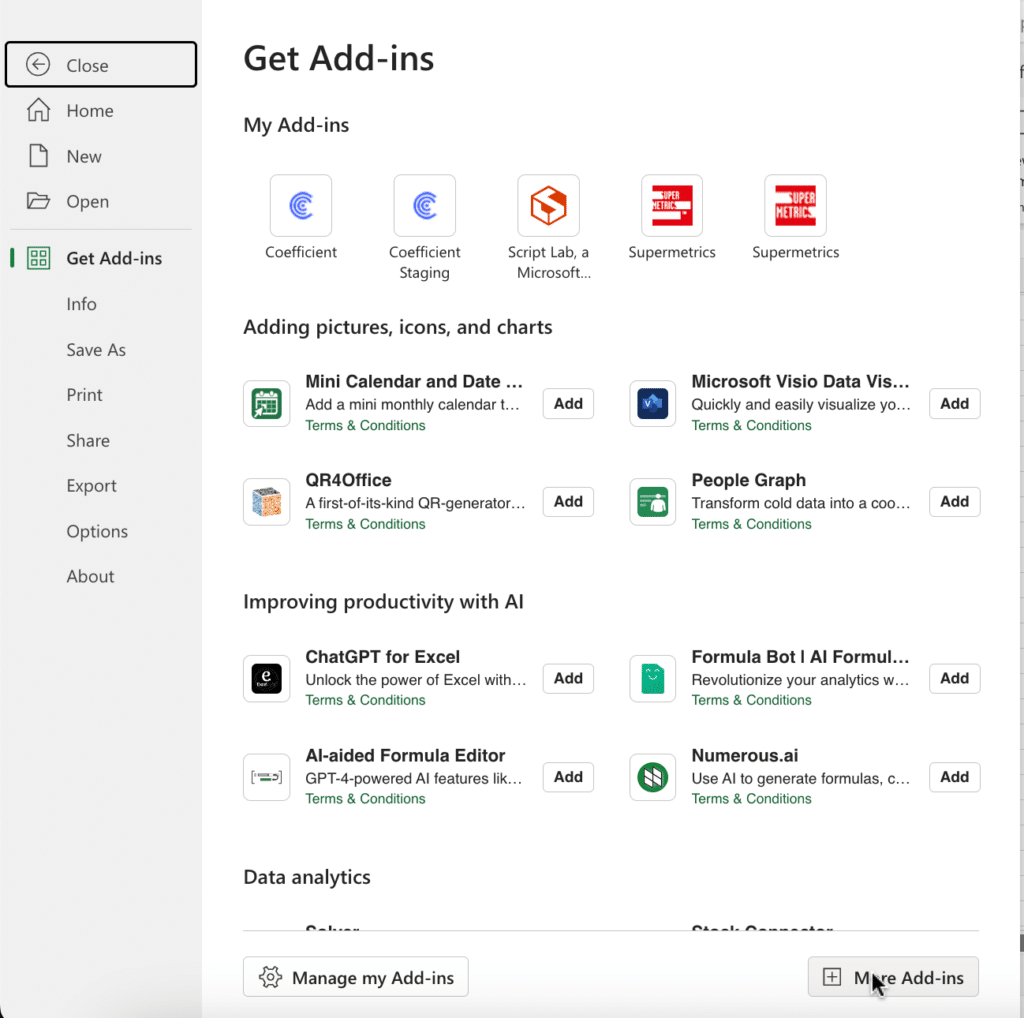
To kick start the process, open a new workbook. Click ‘File’ > ‘Get Add-ins’ > ‘More Add-Ins.’
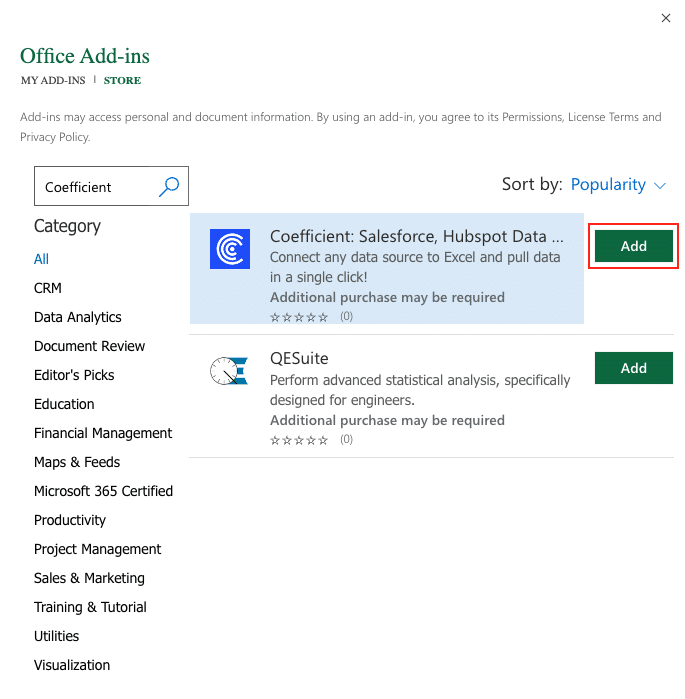
Search for Coefficient and click “Add” to install it.
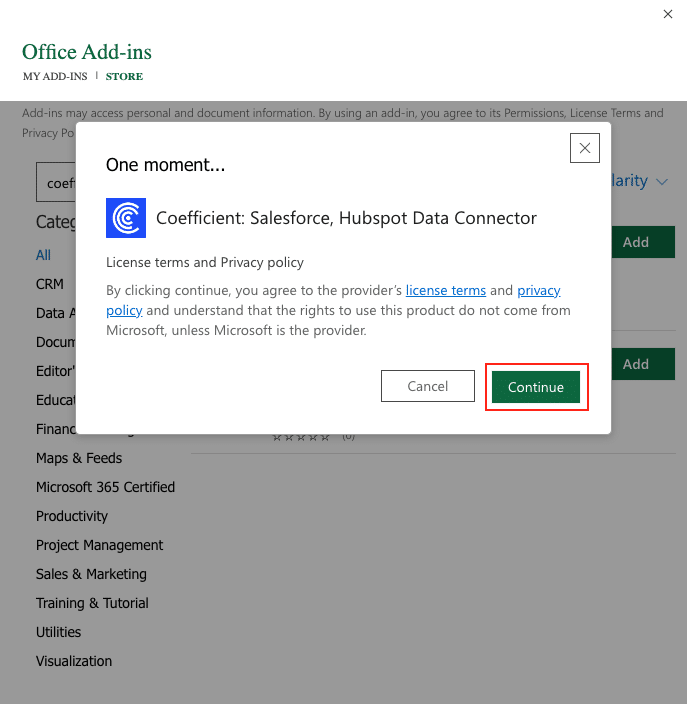
A pop-up will open up. Follow the prompts to complete the installation.
Step 2: Connect Your QuickBooks Account
After installation, you will see a “Coefficient” tab at the top navigation bar.
Select ‘Open Sidebar’ to launch Coefficient.
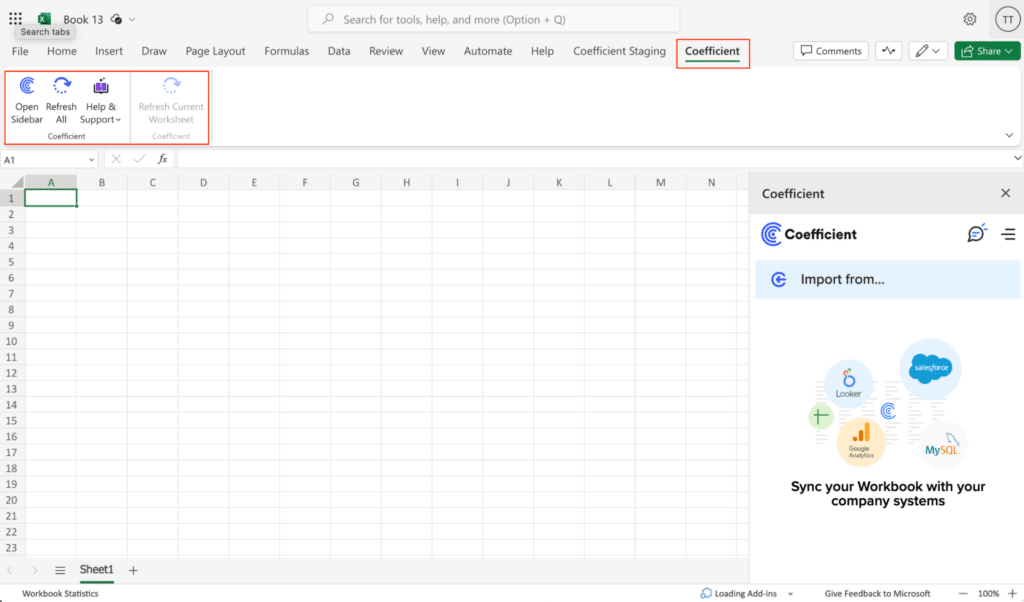
Click ‘Import from…’ and scroll down until you find QuickBooks.
Click ‘Connect’ to continue.
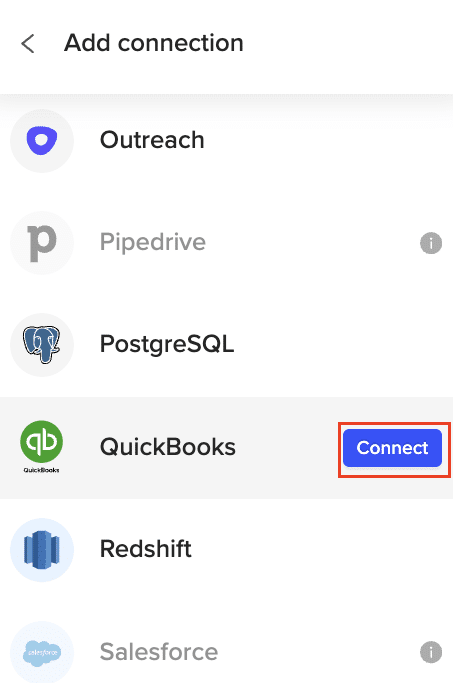
A couple notes:
- You need Admin access in QuickBooks to establish a connection with Coefficient.
- QuickBooks API permits only one admin to connect through Coefficient simultaneously.
- You can connect multiple QuickBooks accounts to Excel with Coefficient.
Follow the prompts to connect Coefficient to your QuickBooks account.

Step 3: Define QuickBooks Data to Export to Excel
Next, specify the QuickBooks data you’re looking to bring into Excel.
Coefficient’s flexibility allows you to choose from over 17 standard QuickBooks reports, build one from scratch, or write a custom query.
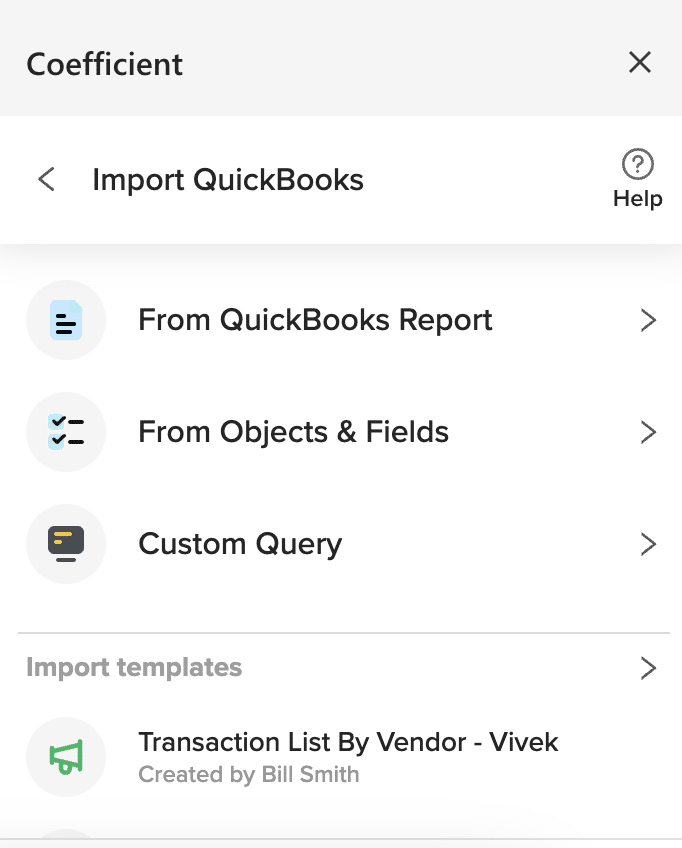
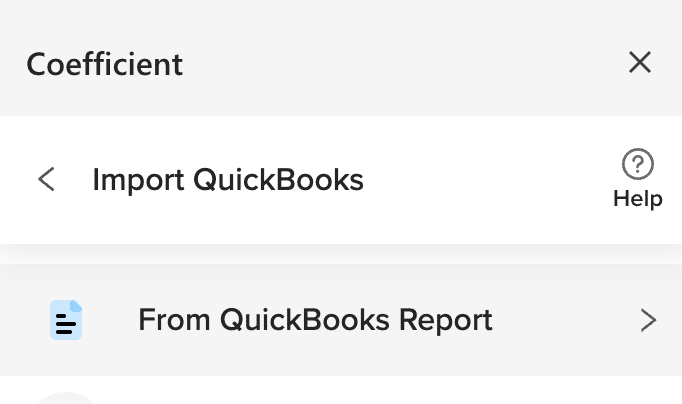
Click ‘From QuickBooks Report’ to continue.
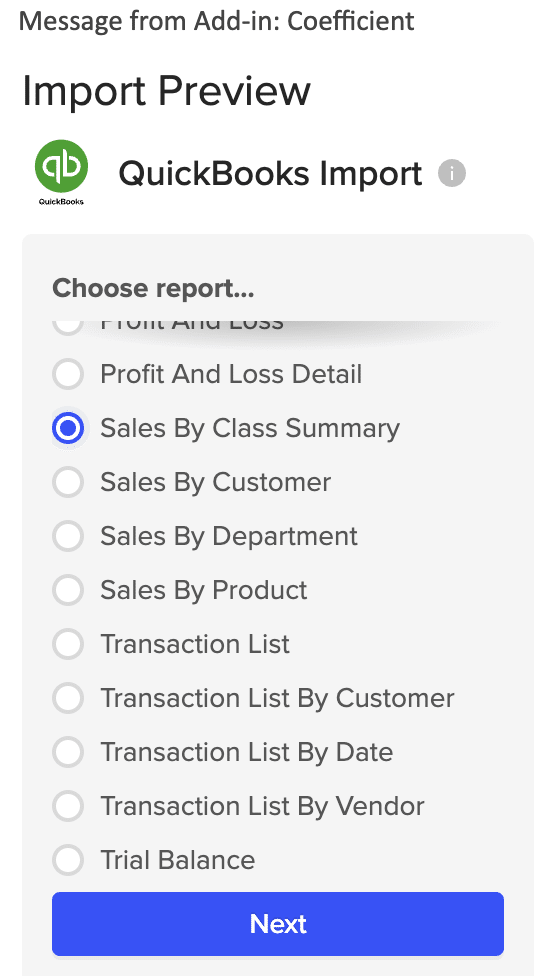
Choose a Report from the list then hit ‘Next.’
Customize your Report import by selecting “Display Columns By” and applying filters such as “Report Period” and “Accounting Method”.
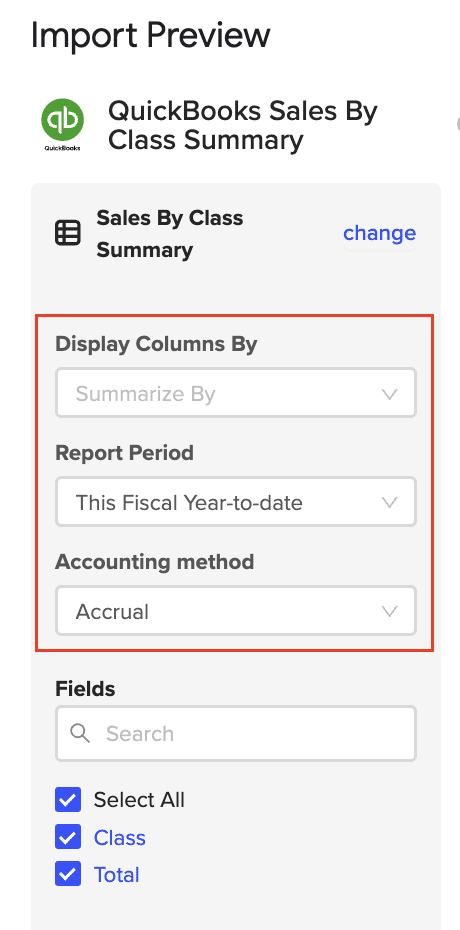
Select your desired fields and click ‘Import.’
In just a few seconds, your QuickBooks export to Excel will automatically populate your spreadsheet.
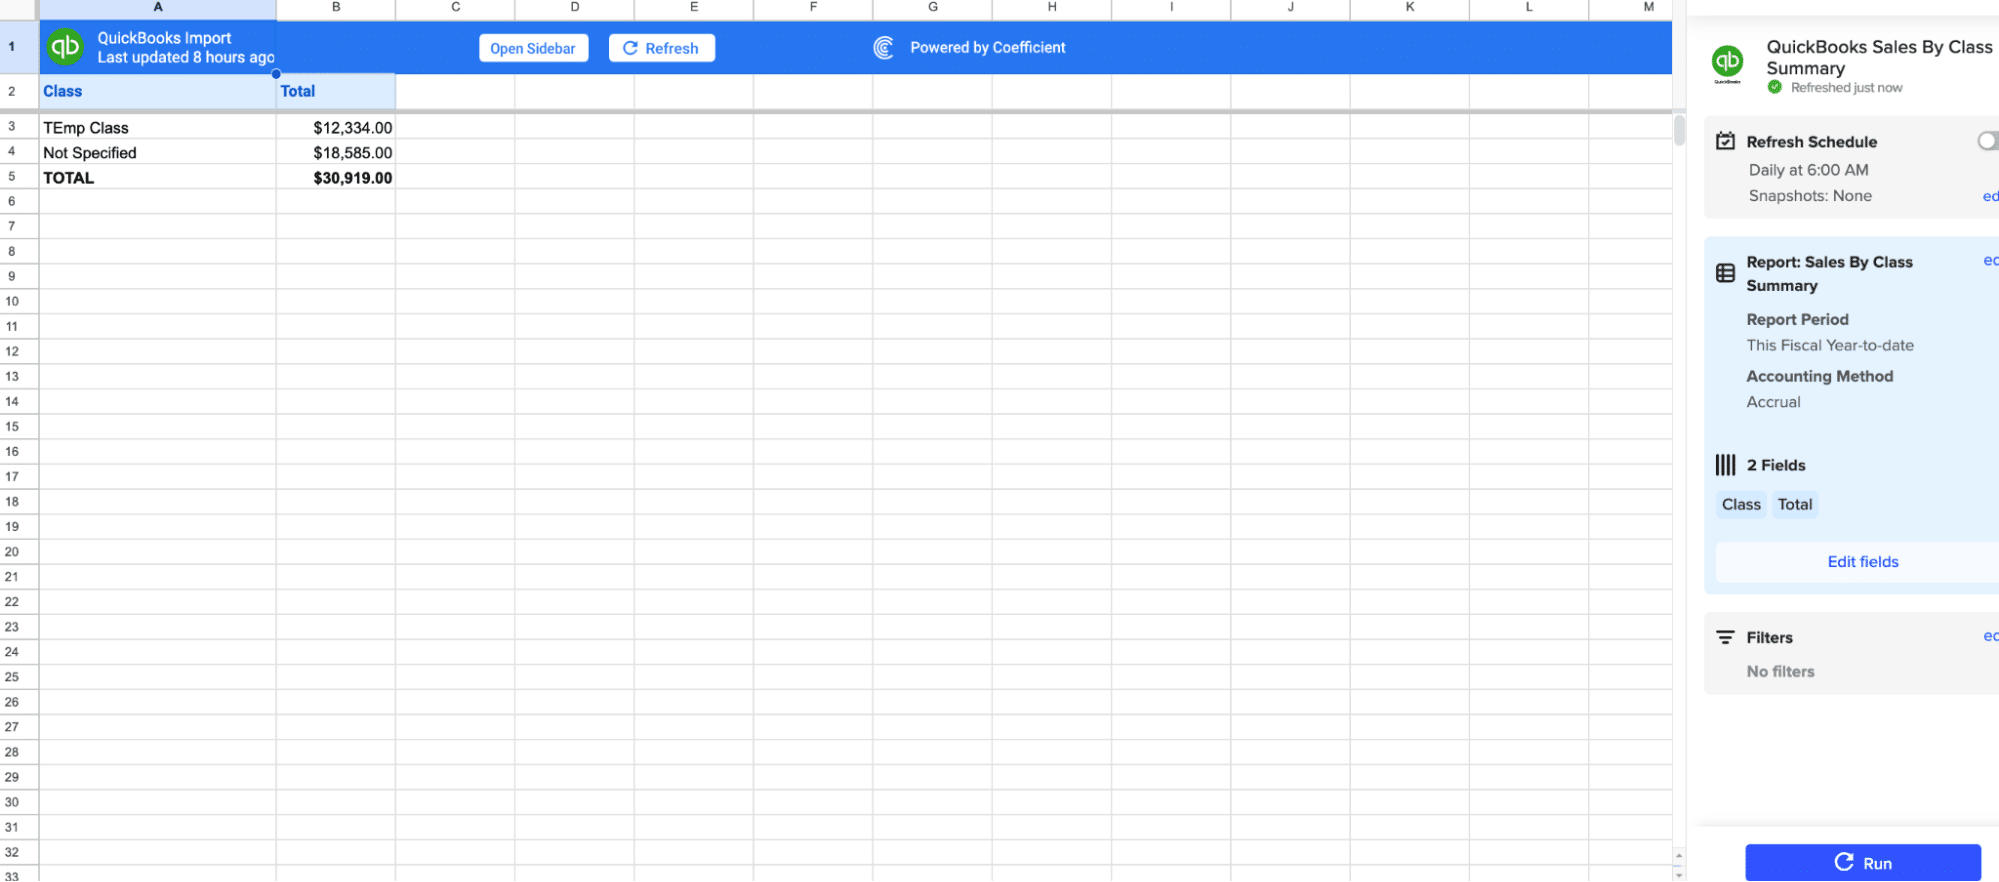
Step 4: Set Data Refresh Schedule
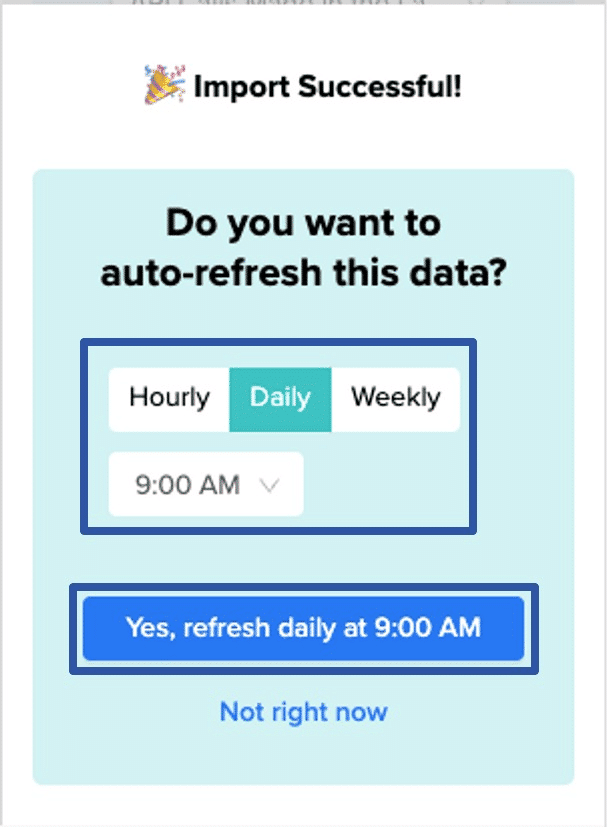
To maintain up-to-date records in Excel, Coefficient enables setting an automatic data refresh rate. Opt for hourly, daily, or weekly updates to keep your Excel reports consistently current with real-time QuickBooks data.
Pros:
- Ease of use with an intuitive, straightforward interface.
- Fast, one-click installation and setup.
- Real-time data synchronization with automatic updates.
- Ensures data security and privacy.
- Pre-built financial dashboards in spreadsheets that you can power with your live data, including a Profit and Loss template, SaaS P&L template, Cash Runway template, Accounts Payable Dashboard, Account Receivable Dashboard, Revenue Dashboard, and Cashflow template.
Cons:
- Enterprise features require a paid subscription.
Method 2. QuickBooks Manual Export to Excel
QuickBooks itself offers built-in capabilities to export reports directly to Excel but with a few caveats:
- You must have QuickBooks Online Advanced
- Payroll reports cannot be exported to Google Sheets
- QuickBooks data exports are static and cannot be automatically refreshed
Step 1: Choose Report in QuickBooks
First, navigate through your QuickBooks account to select the report or data you wish to export.
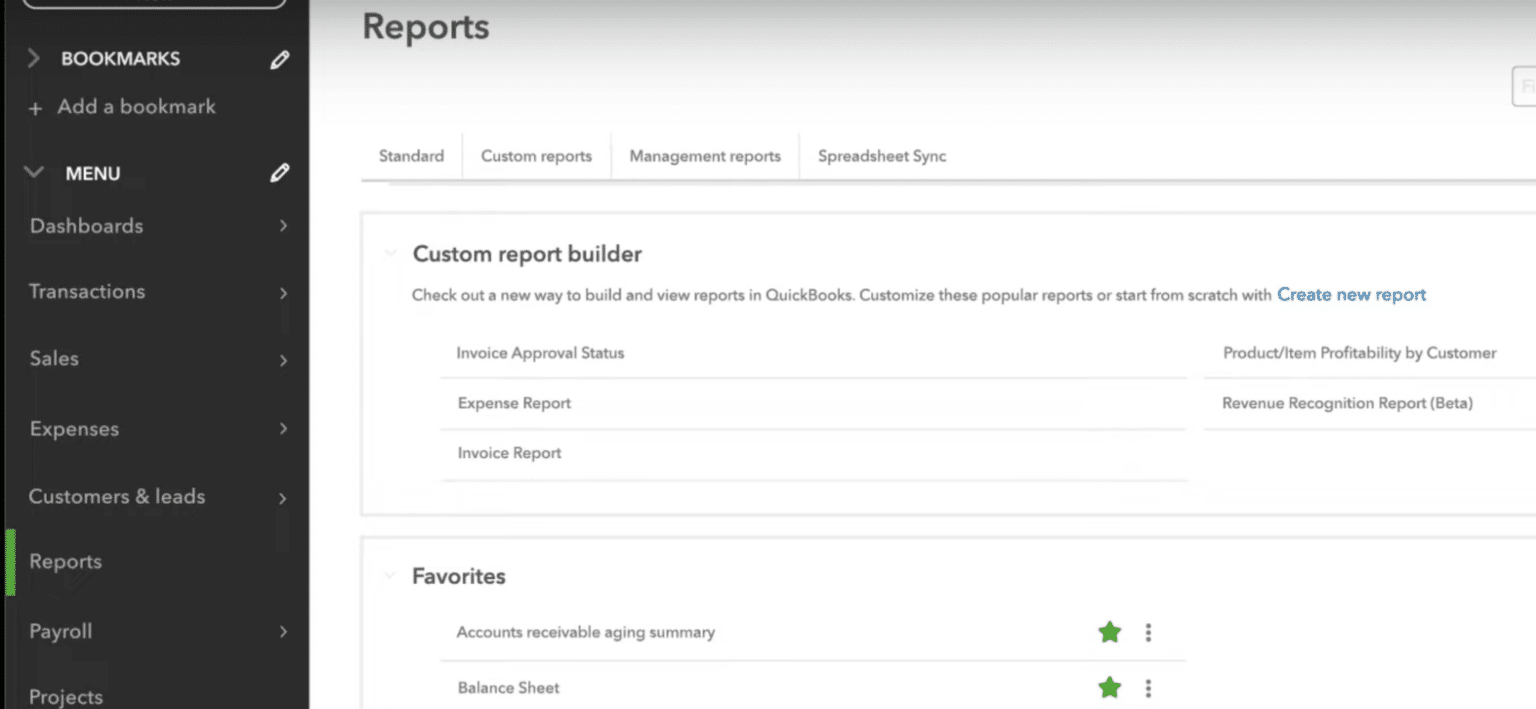
Step 2: Export to Excel
Utilize QuickBooks’ export function to save the report as an Excel file (.xlsx). This option can typically be found in the report viewing window.
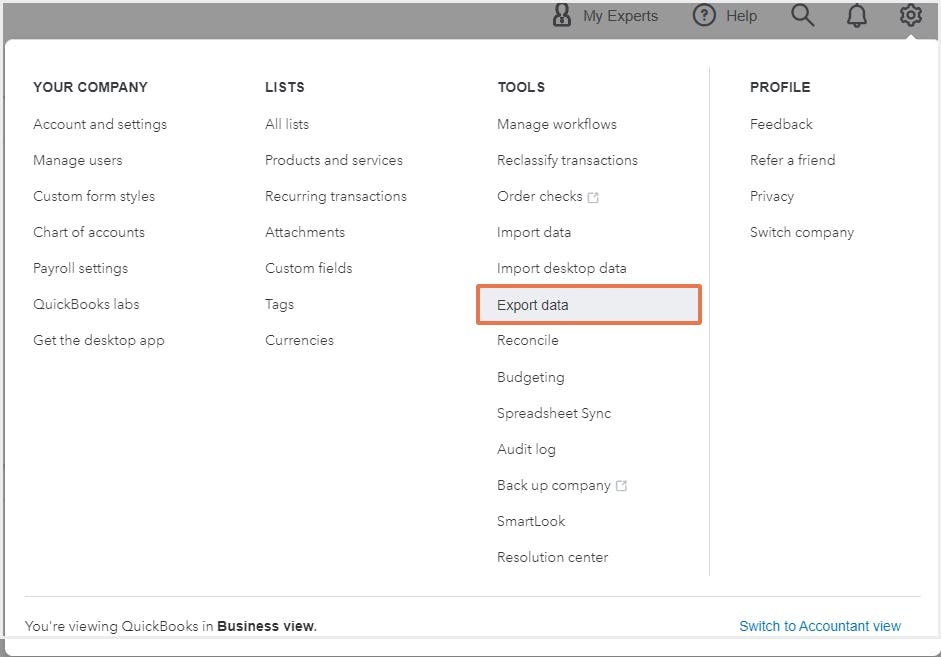
Click ‘Export data’ underneath the column labeled ‘TOOLS.’
Select the date range you want to export: ‘All dates,’ ‘Custom date range,’ ‘Last calendar quarter’, ‘This year-to-date,’ and ‘Last year.’
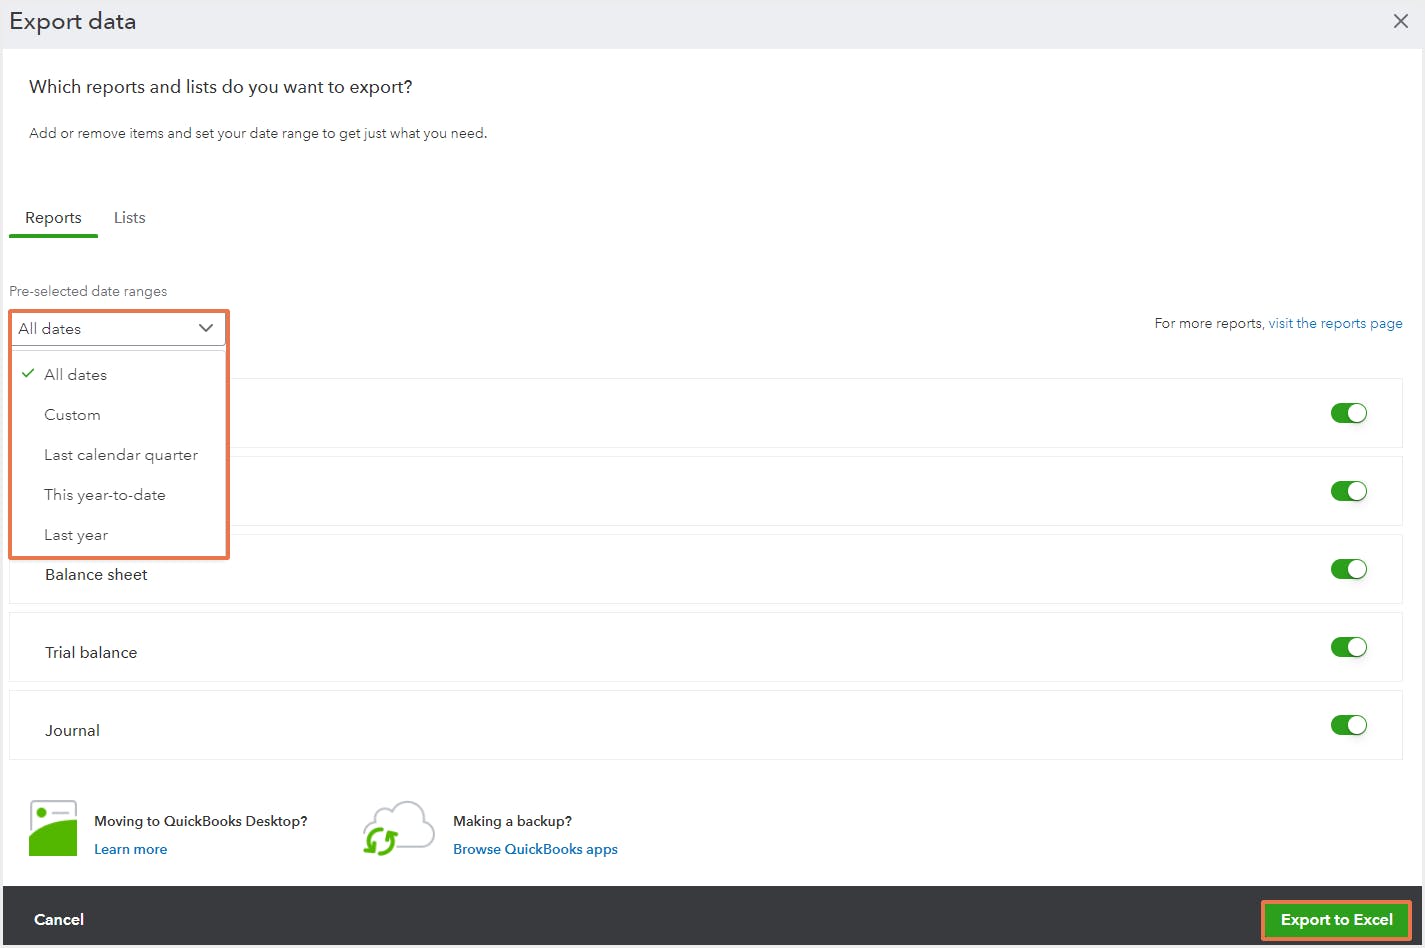
Finally, toggle off unwanted fields to remove them from your export.
Click the ‘Export to Excel’ button in the bottom right corner.
Your data will download as a ZIP file. Open it to access your CSV.
Step 3: Open and Analyze in Excel
With the file saved, simply open it in Excel to leverage Excel’s powerful analytical tools on your QuickBooks data.
Cons of QuickBooks Export to Excel:
- Exporting data to Excel needs to be done by hand every time, which is time-consuming.
- Exported data won’t automatically update, so you might use old information unless you keep exporting new data.
- After exporting, you often have to spend more time in Excel arranging the data how you need it.
Method 3. Power Query (Only for Desktop)
If you’re using Excel for Desktop and want to integrate QuickBooks data, Power Query is a good alternative for more technical users. It simplifies importing, refreshing, and managing QuickBooks data within Excel, enhancing your analysis and reports.
Here’s how to connect QuickBooks to Excel using Power Query in a few steps.
Step 1: Open Power Query in Excel
From Excel, access Data > Get Data > From Other Sources > From Web. Power Query will prompt you for a web API URL.
Step 2: Connect to QuickBooks Online
Enter your QuickBooks Online API endpoint. You’ll need to go through authentication steps to establish a secure connection.
Step 3: Load and Transform Your Data
Select the specific sets of data you want to import into Excel. Power Query allows for data transformation and conditioning before loading it into your worksheet for analysis.
Power Query Cons:
- Getting the hang of Power Query’s many features can take some time, especially if you’re new to handling data.
- Power Query works just on the Excel Desktop app, not on web or mobile versions.
- Linking to QuickBooks Online with its API is complex and needs regular checks and maintenance to keep it working correctly.
Streamlining Financial Data Analysis and Reporting
Exporting data from QuickBooks to Excel expands your data manipulation and reporting capabilities significantly. Coefficient streamlines this integration, making it efficient for anyone on your team to develop comprehensive dashboards and reports in Excel using QuickBooks data.
Ready to transform your financial reporting and data analysis workflows?
Get started with Coefficient today for seamless QuickBooks to Excel integration, and harness the full potential of your financial data.


