This guide shows you how to connect Excel to SQL Server. You’ll learn easy ways to get your SQL Server data right into Excel. This means you can see your data update on its own, save time bringing data into Excel, and use Excel to better understand your data.
Whether you’re a pro at tech or new to it, you’ll find helpful steps here, including using Coefficient for no-code approach.
Why Connect SQL Server to Excel?
Connecting SQL Server to Excel is not just about simplifying data transfers; it’s about transforming how you visualize and interact with your data. Here’s why you should consider it:
- Real-time Access to Data: Stay ahead with live data updates directly in Excel.
- Streamline Business Processes: Save hours with automated data imports.
- Enhanced Data Analysis: Leverage Excel’s robust analytical tools with your comprehensive SQL Server data.
How to Connect Excel to SQL Server: 3 Methods
Method 1: Coefficient, a No-Code, Fully Automated Solution
Coefficient is the fastest way to import data from SQL Server to Excel (especially for Excel for Web users who can’t access Power Query).
Its no-code interface makes it easy for anyone to get the MS SQL data they need. Simply pick the tables and columns you want to import, or craft your own queries. Need help? GPT CoPilot is on standby to guide you in creating custom queries for precise Coefficient imports.
To install Coefficient, open Excel from your desktop or in Office Online.
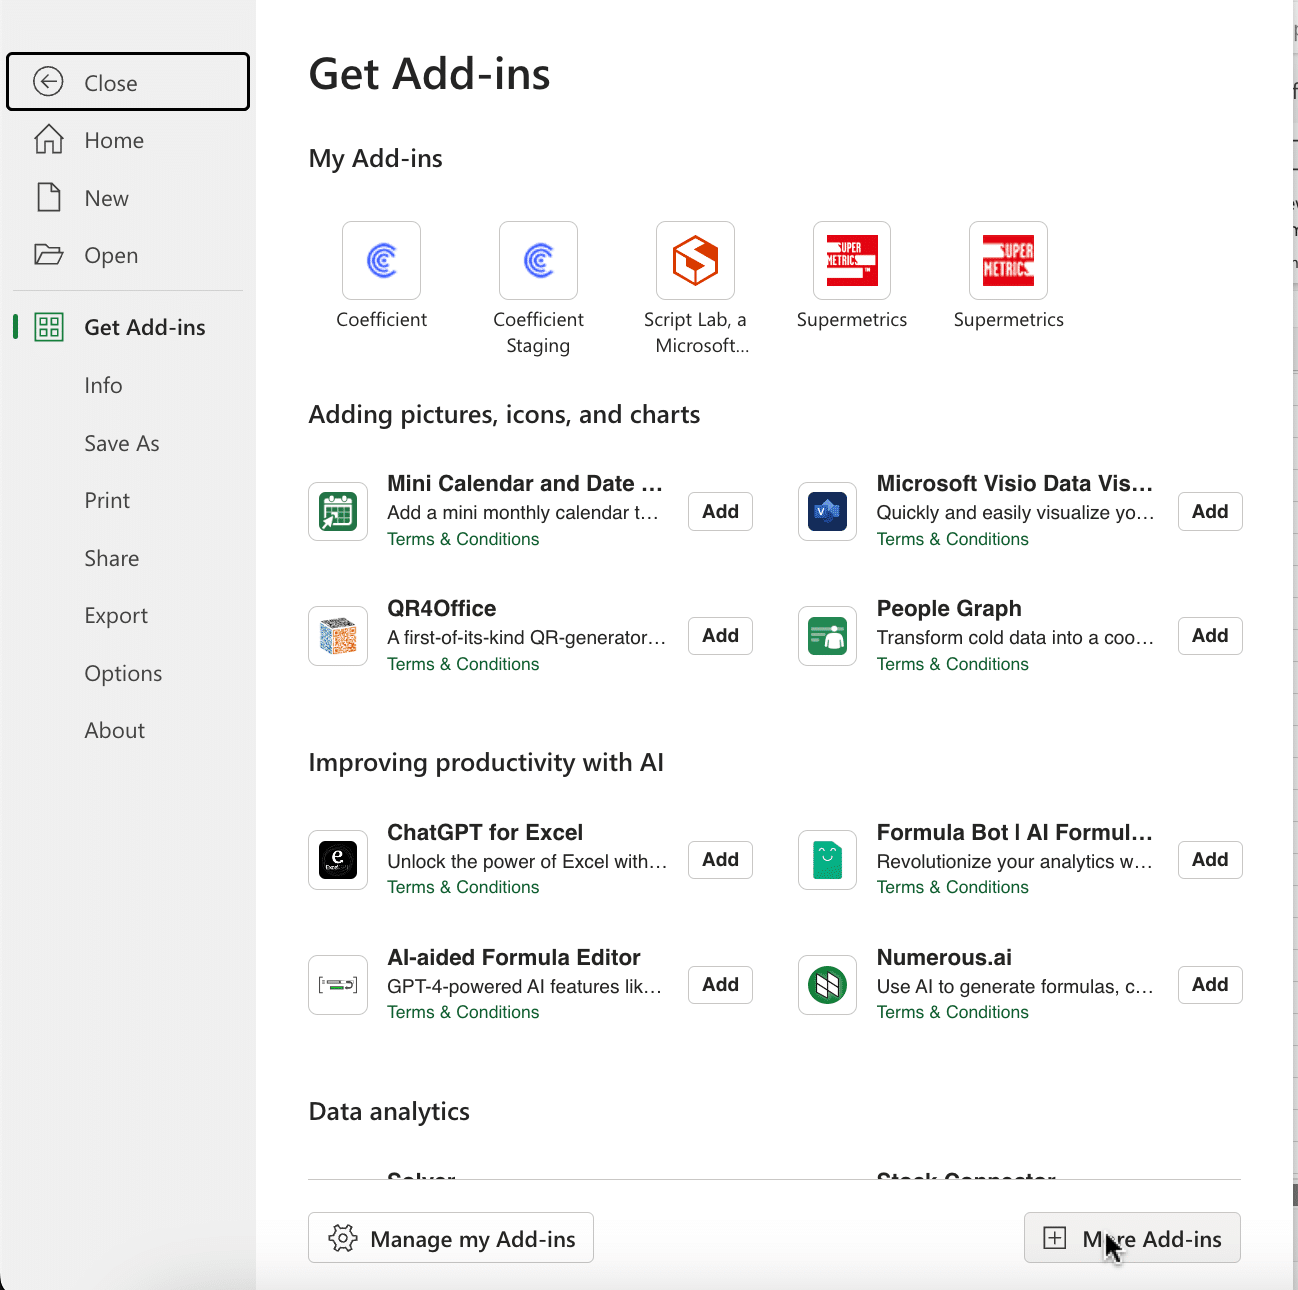
Click ‘File’ > ‘Get Add-ins’ > ‘More Add-Ins.’
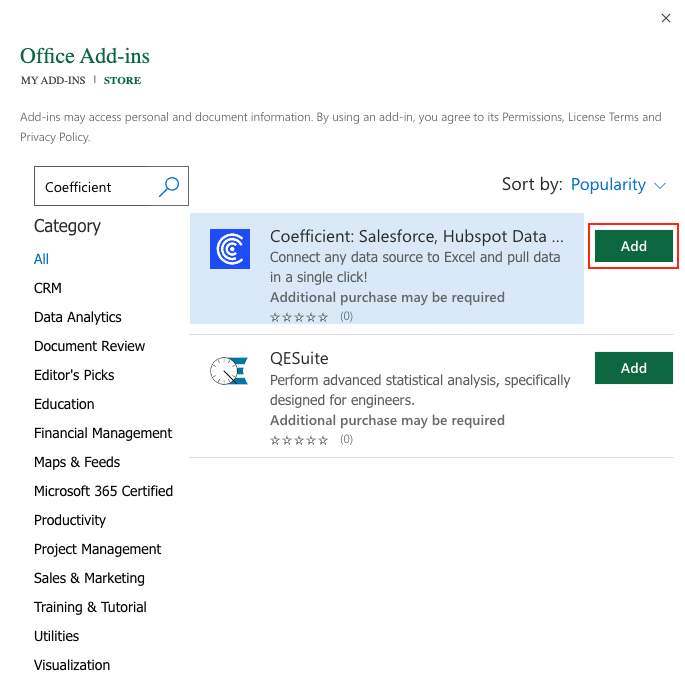
Type “Coefficient” in the search bar and click ‘Add.’
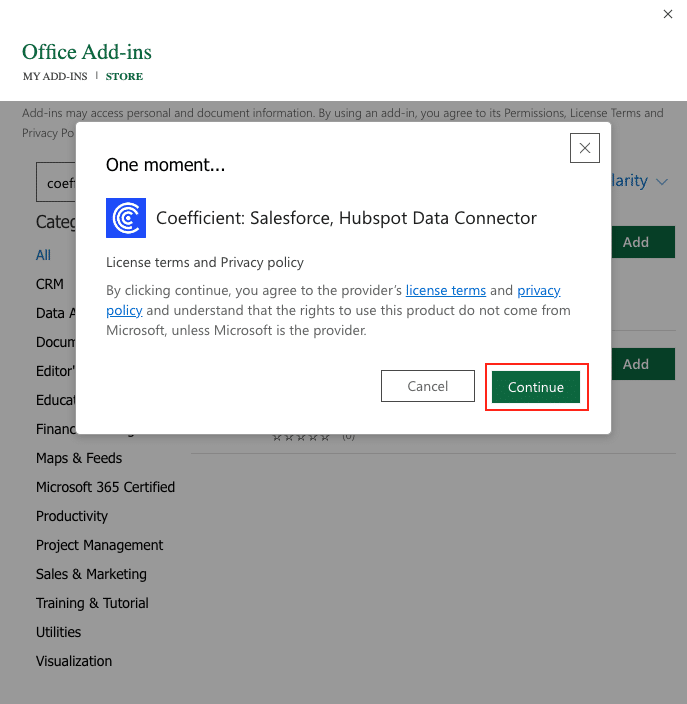
A pop-up will open up. Follow the prompts to complete the installation.
Once finished, you will see a “Coefficient” tab at the top navigation bar.
Click ‘Open Sidebar’ to launch Coefficient.
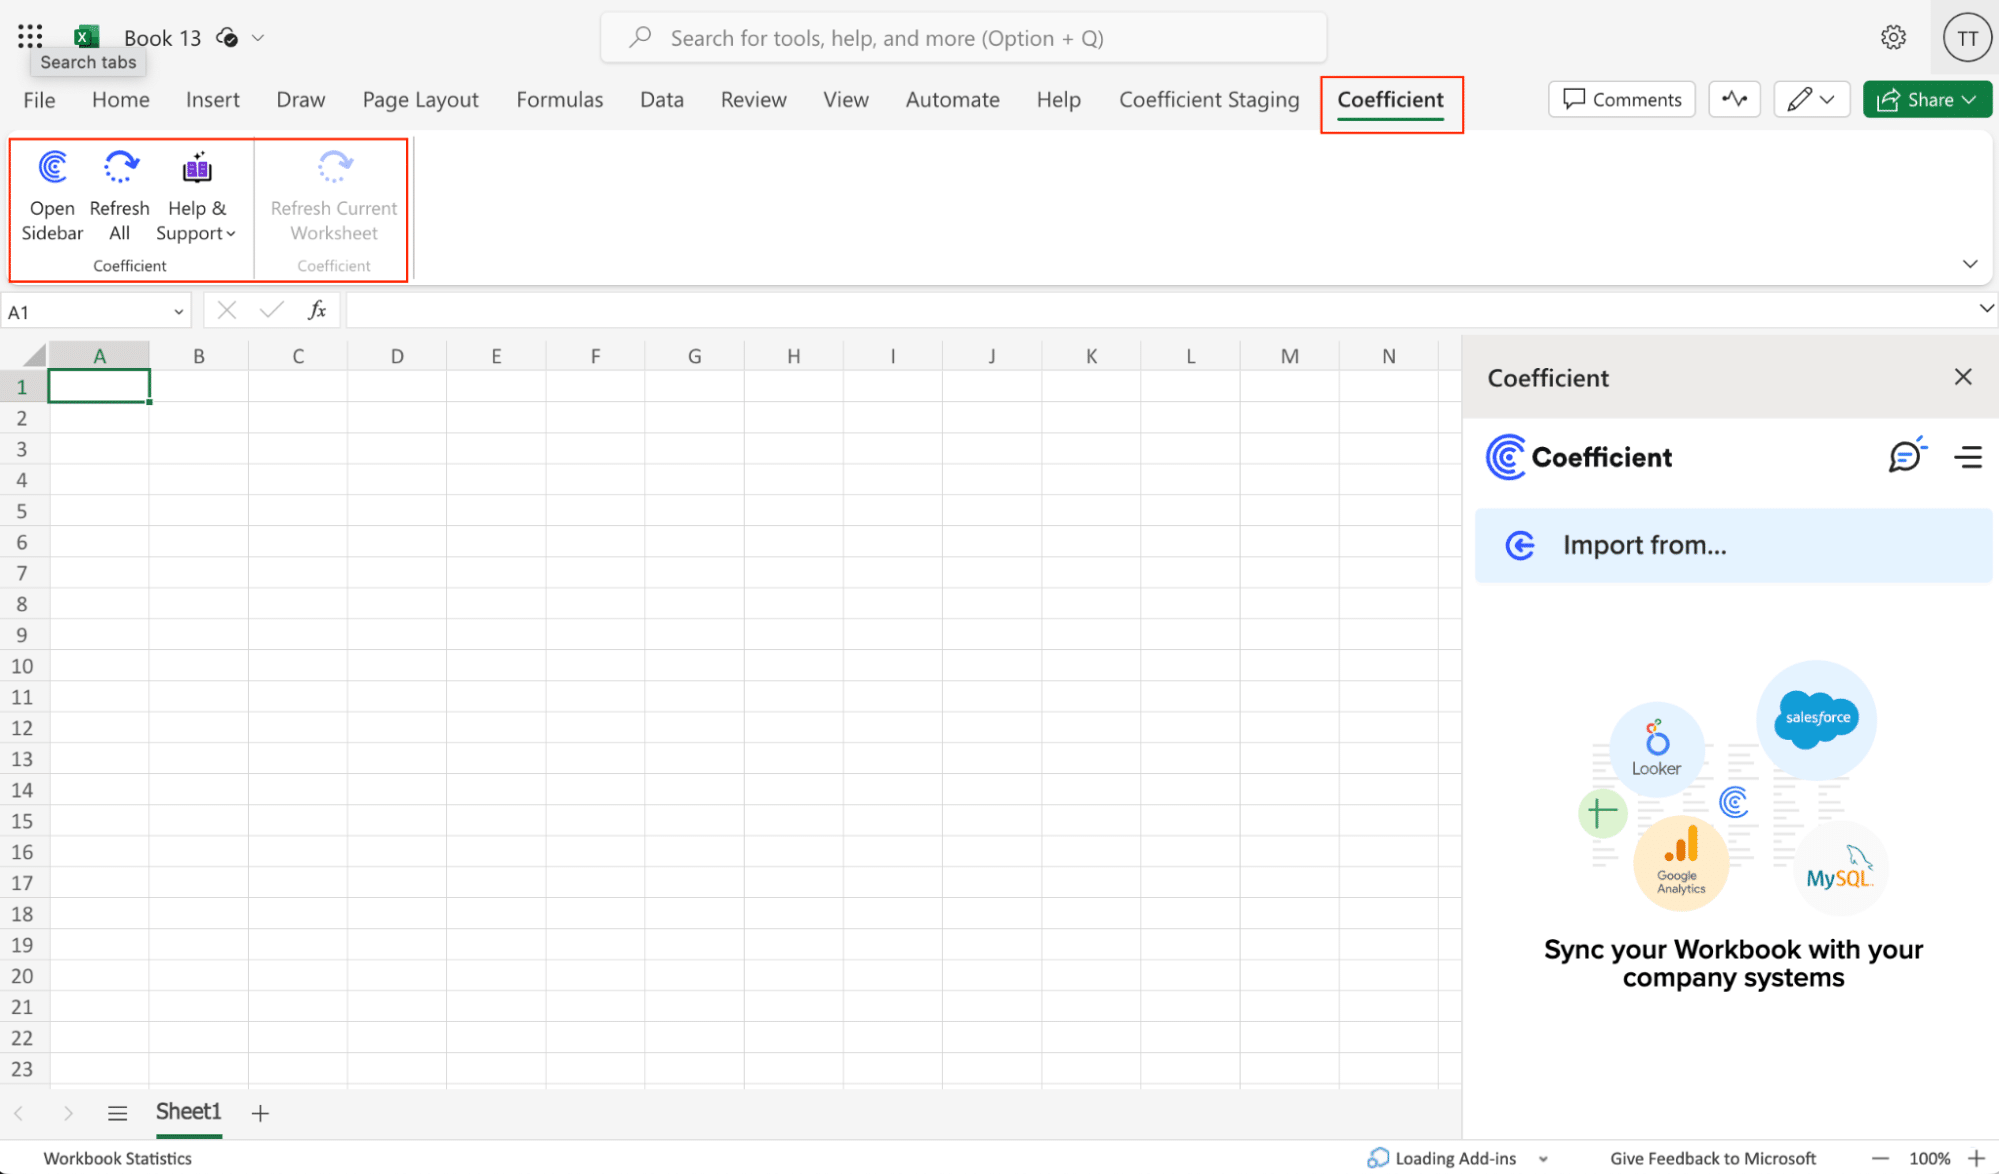
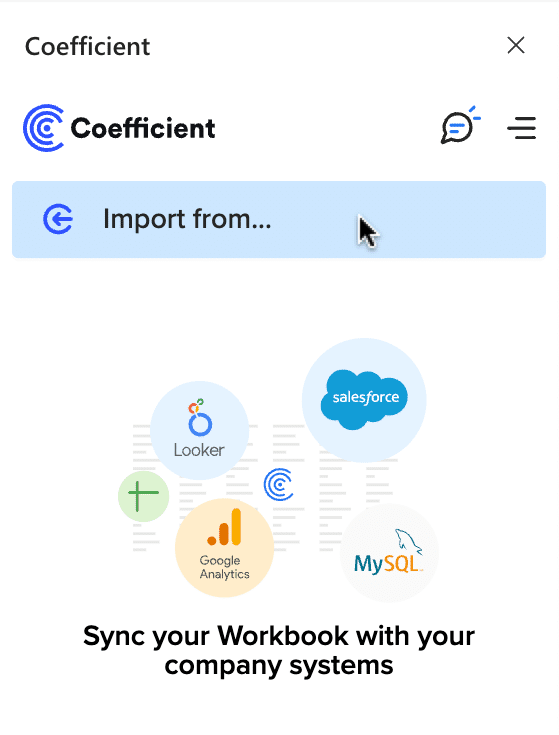
Select ‘Import from…’
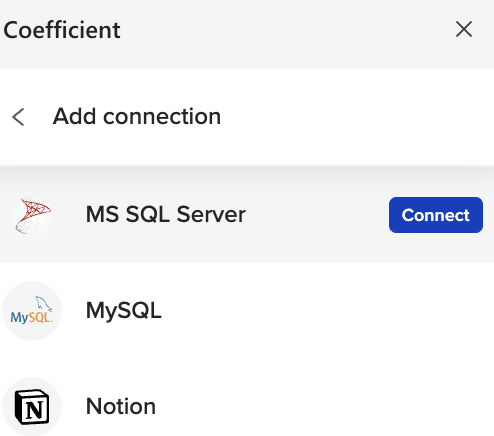
Scroll down until you find MS SQL Server and click ‘Connect.’
Enter the required fields (Host, Database name, Username, Password, and Port).
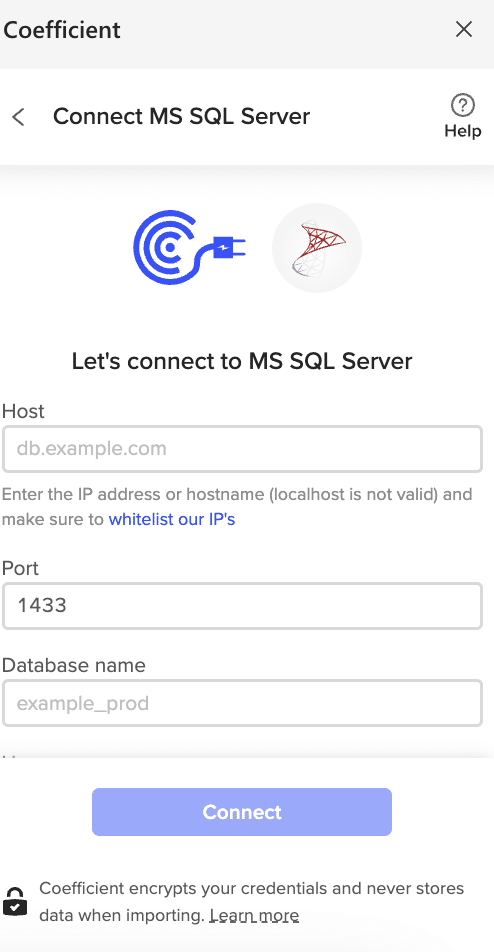
Note: If your database is behind a firewall, you will need to whitelist ALL 3 of Coefficient’s IP Addresses.

Click ‘Connect’ when you’re done.
You will then be presented with the option to share this connection with other members of your team who also use Coefficient. Your credentials will NOT be shared with your team.

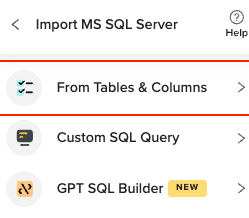
Return to MS SQL Server from the Coefficient menu ‘Import from…’ > ‘MS SQL Server’ > ‘From Tables & Columns’
The Import Preview window opens showing all the table schemas from your MS SQL database. Select the table for your import. (eg. ”Person_Person”)
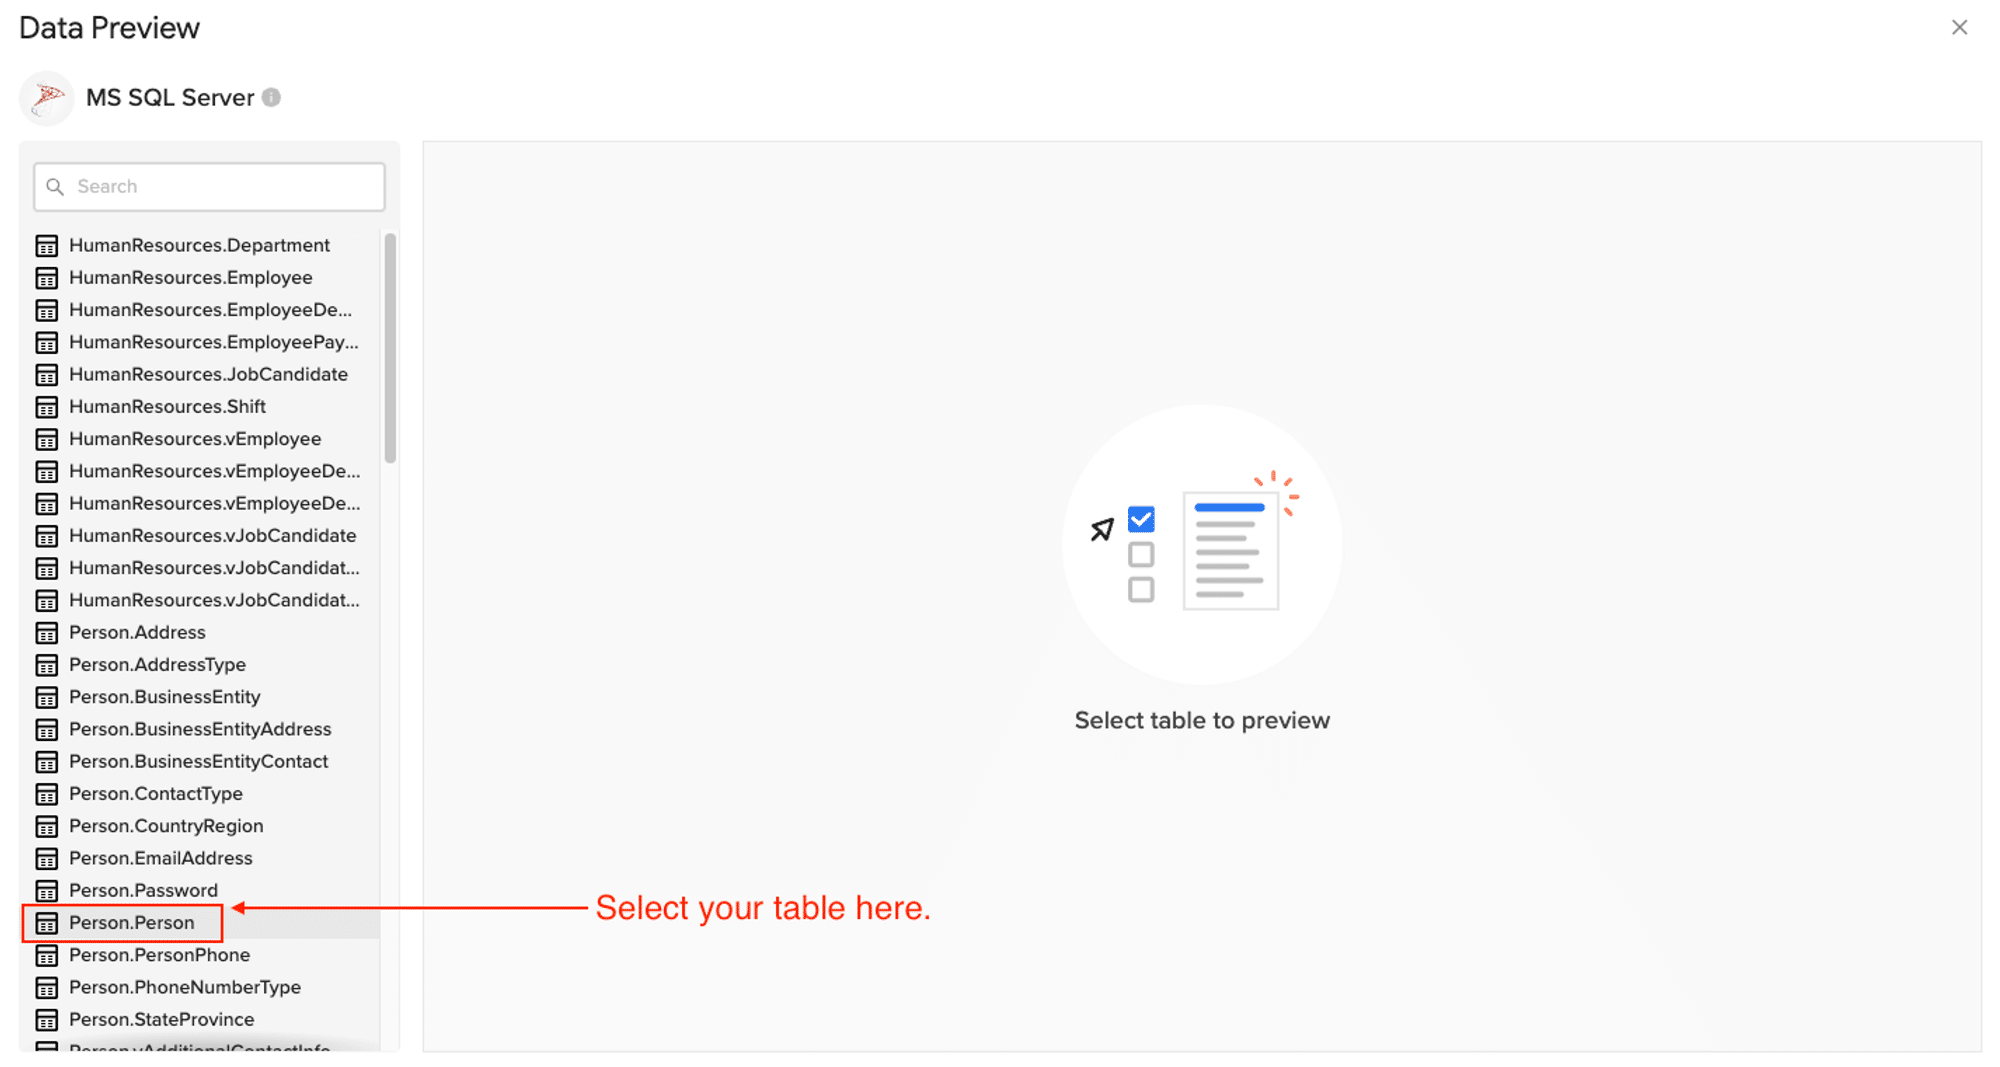
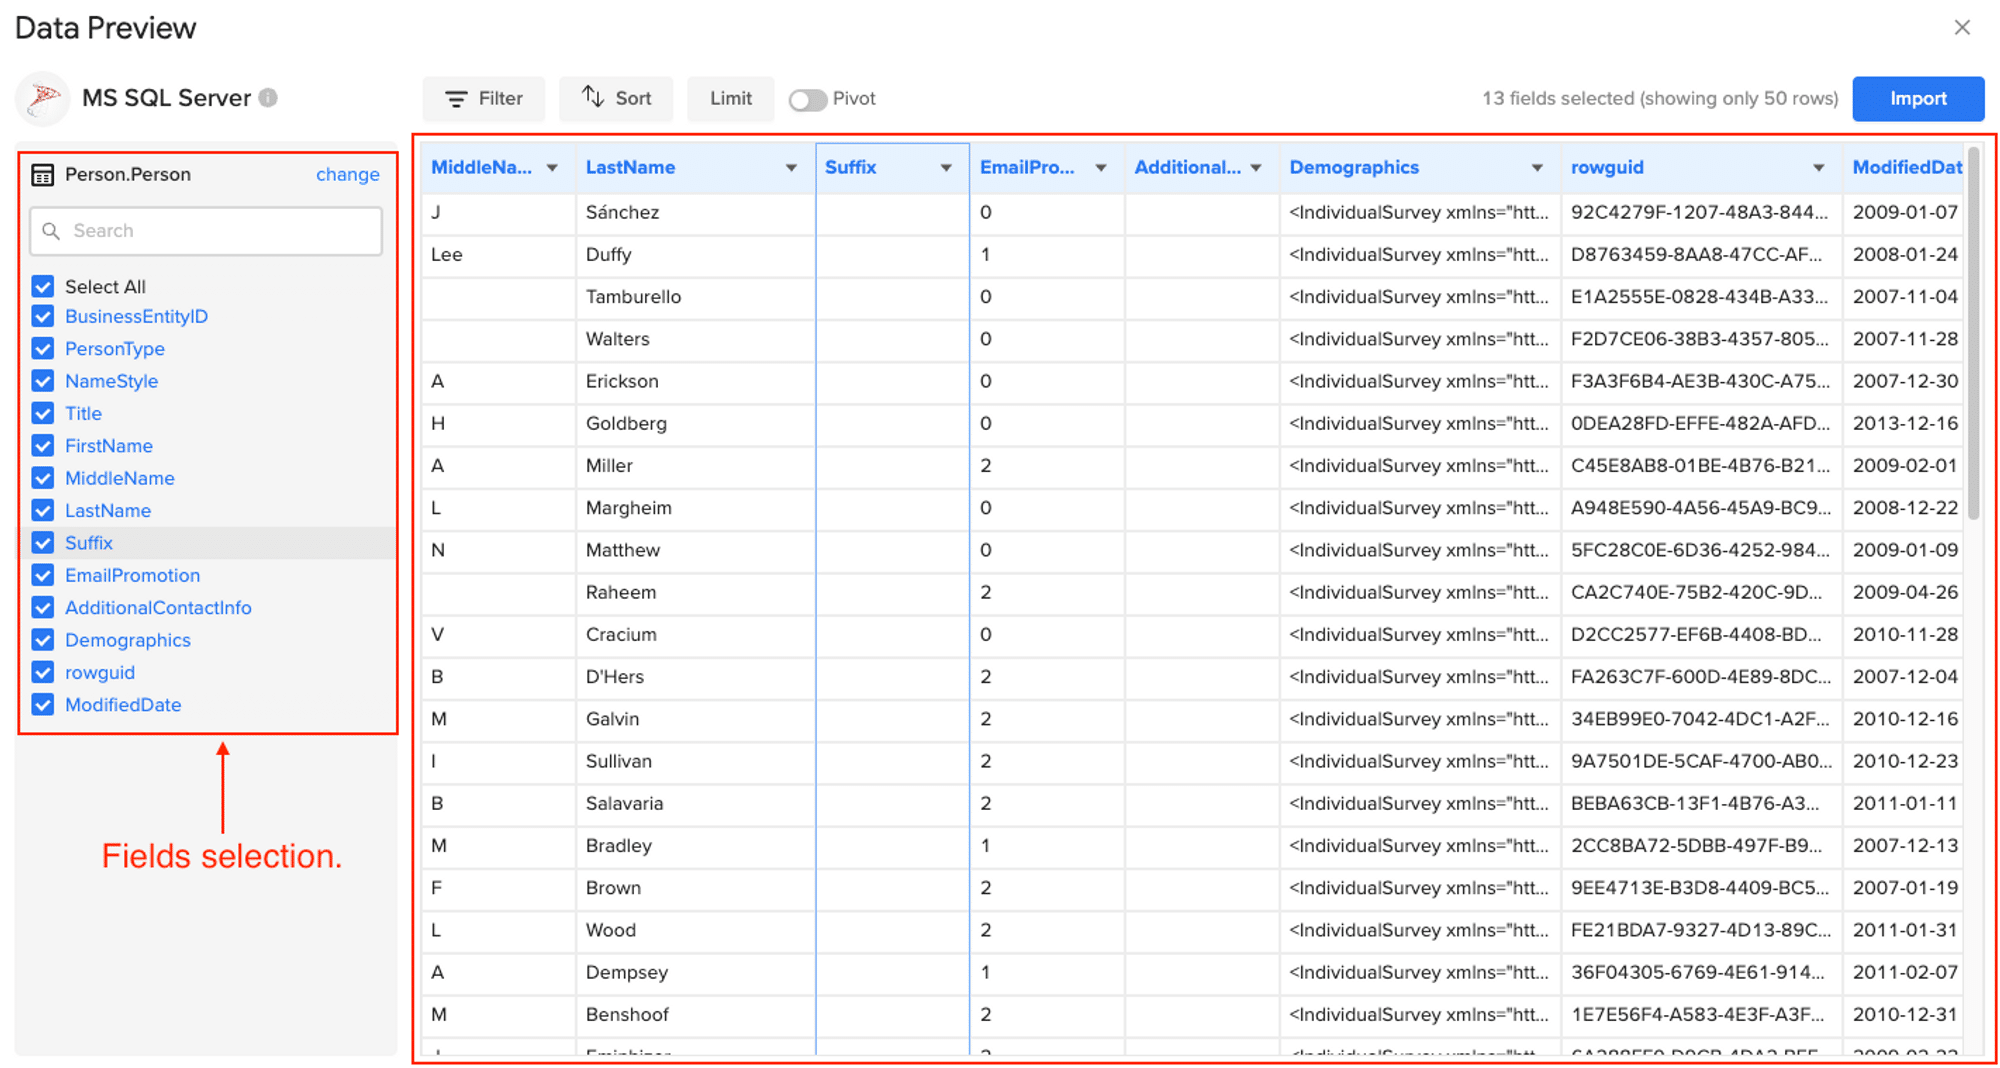
Once the table is selected, the fields within that table will appear in a list on the left side of the Import Preview window. Select the fields you want to include in your import by checking/unchecking the corresponding boxes.
Note: The Import Preview shows only a sample of your data (50 rows). This sample data will be updated if there are any changes to the import’s criteria.
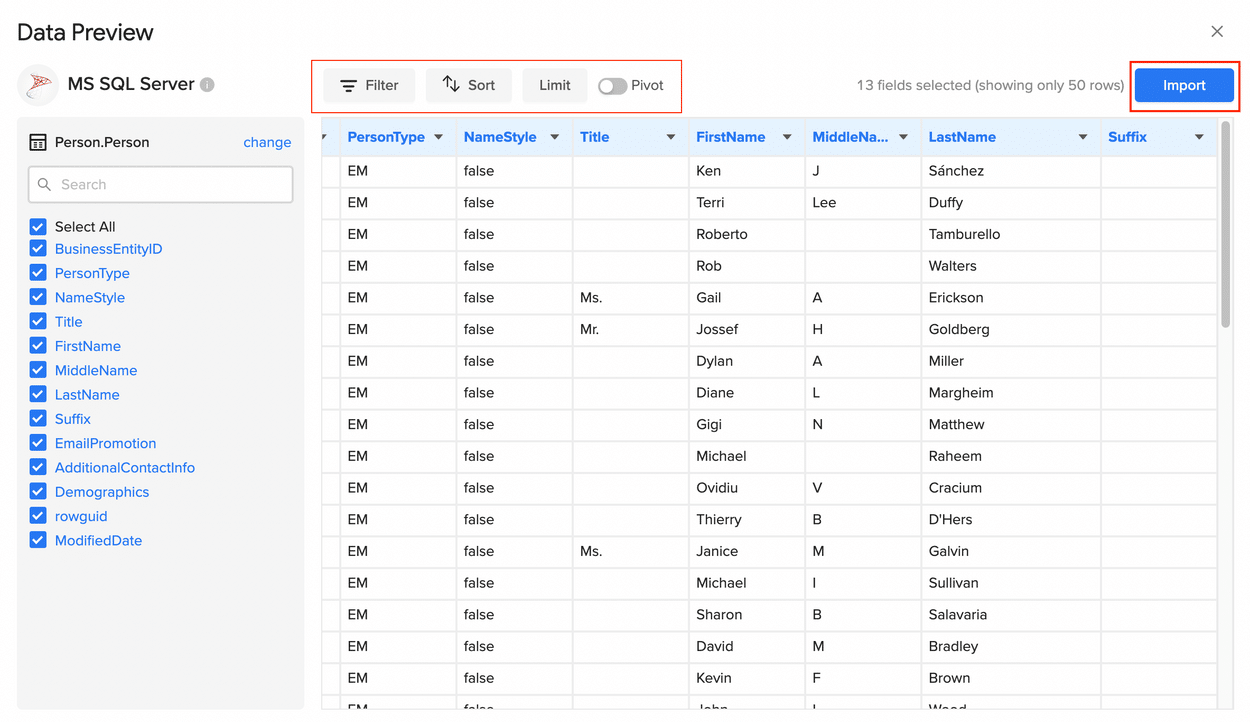
Customize your import by adding filters, sorts, limits, or even grouping the data into a cloud pivot table.
Then ‘Import’ when done.
Your MS SQL data will automatically populate your Excel spreadsheet.

You can also set up automatic data updates to schedule data syncs between MS SQL and Excel. Choose whether to run daily, hourly, or weekly automatic data updates.
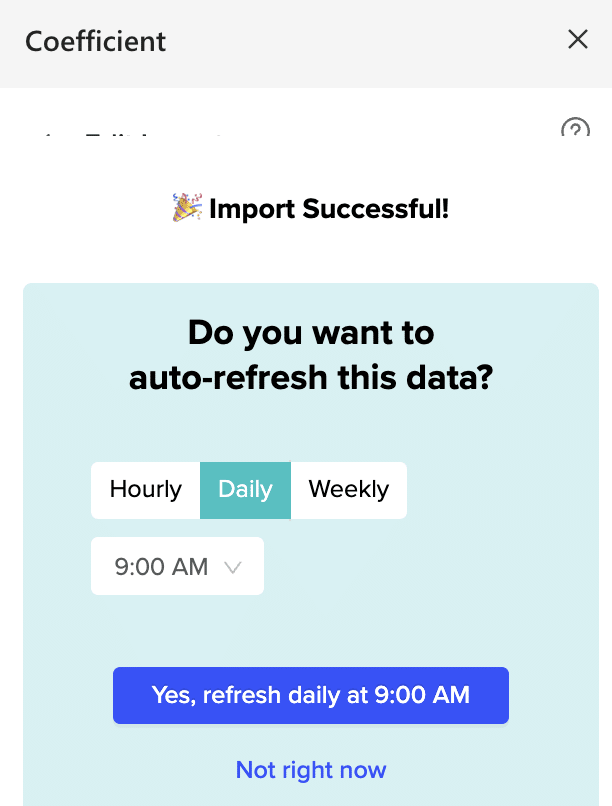
With automatic data updates, your MS SQL data is always up-to-date in your spreadsheet. That means you can build live dashboards and reports on top of the data without performing cumbersome manual updates.
Pros and Cons:
Pros
- Easy to Use: You don’t have to be a tech wizard to use Coefficient. It lets you connect SQL Server to Excel easily, with just a few clicks.
- Always Up-to-Date: Your Excel sheets update automatically with the latest data from SQL Server — no need to do it by hand.
- Work Together Better: Coefficient isn’t just for solo work. You can share your data setups with teammates in Excel, making teamwork smooth and straightforward.
Cons
The only downside to Coefficient is that any scheduled automations are not free forever. However, its pricing plans are affordable, and its benefits far outweigh the app’s costs.
Method 2: Microsoft Query
Those comfortable with SQL and using Excel on the desktop have to connect Excel to SQL Server (Sorry web users).
Start by opening a new workbook in Excel. Click on the “Data” tab in the ribbon.
Click on “Get Data” > “From Other Sources” > “From Microsoft Query”. This opens a dialog box where you can choose the data source.

Stop exporting data manually. Sync data from your business systems into Google Sheets or Excel with Coefficient and set it on a refresh schedule.

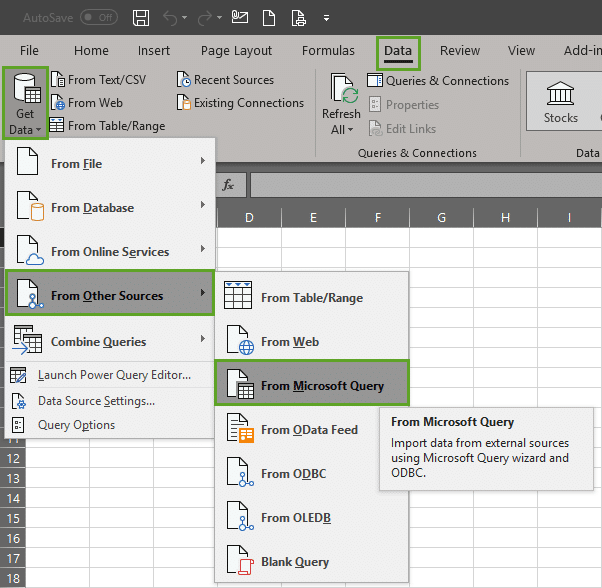
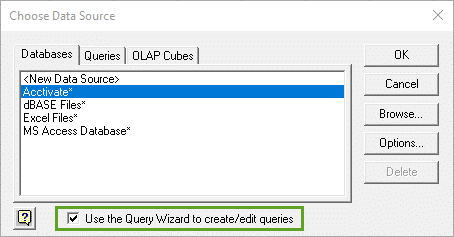
Select “<New Data Source>” and click OK. Name your data source and select “SQL Server” as the driver in the list displayed. Click “Connect”.
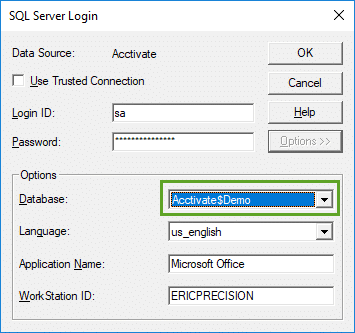
A new window pops up asking for the SQL Server information. Enter the name of the server and proceed to log in using either Windows or SQL Server authentication, based on your setup.
Once connected, you’ll be presented with a list of databases on the server. Select the database you wish to query from, and then select the tables. You can also use the “SQL” button to manually enter a SQL query if you prefer.
After completing your selection or entering your query, click “Return Data to Microsoft Excel” to import the data into your worksheet.
Pros and Cons:
Pros:
- Built into Excel: No need to download anything else.
- Lets you use SQL: Great if you already know how to write SQL queries.
Cons:
- Needs SQL skills: Not user-friendly if you’re not proficient in SQL.
- Only on Desktop: Doesn’t work with Excel online.
- Manual Updates: You have to refresh data yourself, which could be slow.
Method 3: OBDC Driver
Excel for desktop users can also link Excel with SQL Server using ODBC (Open Database Connectivity.
Note: Make sure you’ve got the ODBC driver for SQL Server installed first.
Open Excel and click ‘Data’ in the cop ribbon. Then, click ‘Get Data’ > ‘From Other Sources’ > ‘From ODBC’.
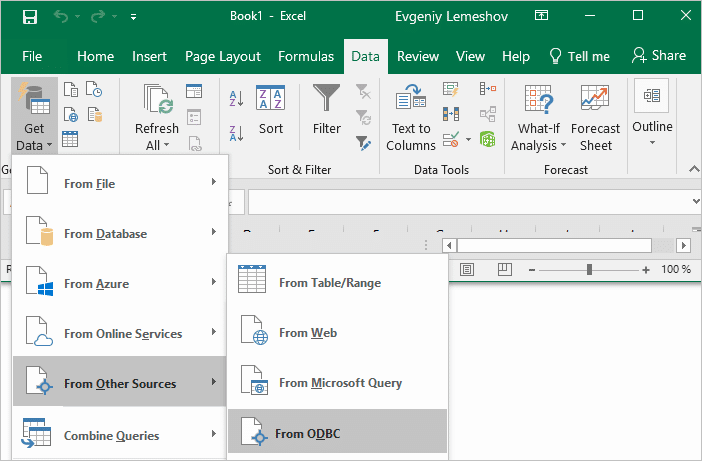
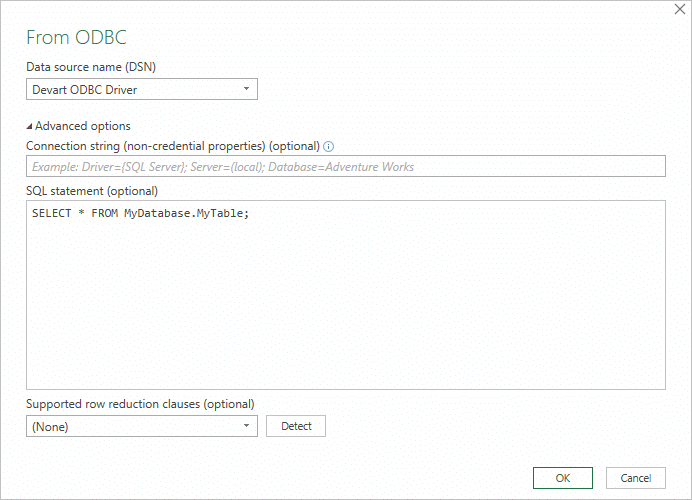
In the ‘From ODBC’ window, pick your Data Source Name (DSN). If your ODBC driver isn’t set up yet, click ‘Advanced Options’ to input your ODBC connection string (credentials are handled later).
You can also use this space to input an SQL command to run immediately after connection. Click ‘OK’.
If your database uses a username or password, now’s the time to enter these details. Choose ‘Database’, type in your credentials, and hit ‘Connect’.
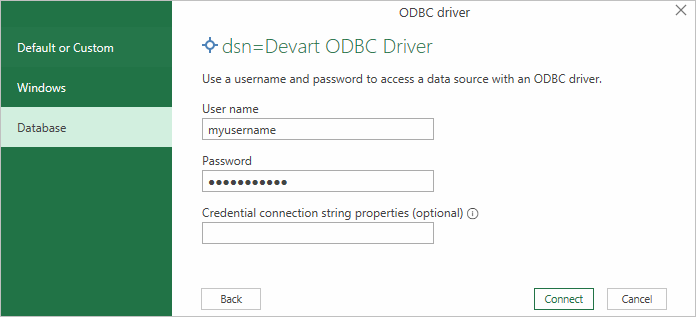
If no password is required or you’ve pre-entered your credentials in the ODBC settings, simply choose ‘Default’ or ‘Custom’ and connect.
You’ll see a list of tables; select the one you need and click ‘Load’. The data will then appear in an Excel sheet for further analysis.
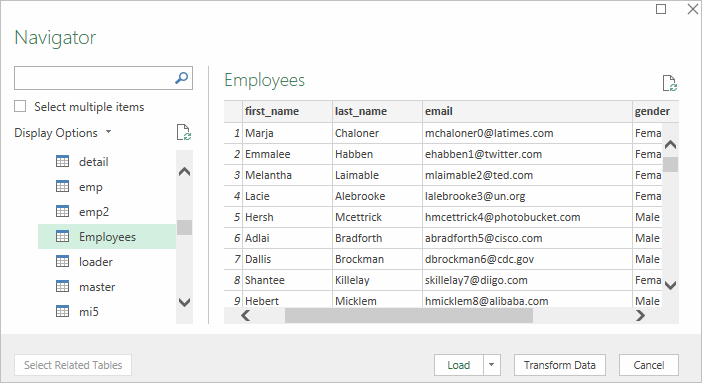
Now, you can directly work with your SQL Server data right inside Excel.
Pros:
- Wide Database Support: Connects Excel to various databases, not just SQL Server.
Cons:
- Technical Setup Required: Setting up ODBC drivers and DSN can be complicated.
- Potential Performance Lag: Large datasets or complex queries may slow down.
- Driver Setup Needed: Requires installation of the right ODBC driver.
Excel to SQL Server Made Easy with Coefficient
Make your data work better for you by easily linking SQL Server with Excel.
Each way to do this has its benefits, but if you want something simple, fast, and reliable, Coefficient is your best bet. With Coefficient, you can focus more on understanding your data rather than setting things up.
Start making your data analysis easier with Coefficient today. Get moving here.
