


Table of Contents
![]()
- 1. Snowsight Dashboards Sunset June 22, 2026: A Migration Guide for Teams Without Engineers
- 2. Snowflake Data Integration Tools That Won’t Blow Your Budget
- 3. 7 Best Snowflake Data Visualization Tools in 2026 (With Pricing)
- 4. Datameer Pricing 2026: What It Actually Costs (And What They Don’t Tell You)
- 5. Snowflake Intelligence Cost: What You Actually Pay in 2026
- 6. Bridging the Last Mile: How Coefficient Brings Live Snowflake Data to Your Spreadsheets
- 7. Top 5 Snowflake Reporting Tools for 2026
- 8. Snowflake Partners with Coefficient to Solve the Last Mile of the Modern Data Stack
- 9. 5 Best Snowflake ETL Tools for 2026 [w/ Feature Comparison Table]
- 10. How to Migrate Data from SQL Server to Snowflake
- 11. How to Connect Snowflake to Power BI
- 12. How to Connect BigQuery to Snowflake? Top 3 Methods
- 13. Connect Google Ads to Snowflake – Step-by-Step Guide
- 14. How to Connect Mailchimp to Snowflake? Top 3 Methods
- 15. How to Connect Freshdesk to Snowflake
- 16. How to Connect Klaviyo to Snowflake
- 17. How to Migrate from Redshift to Snowflake: A Comprehensive Guide
- 18. How to Connect Razorpay to Snowflake
- 19. How to Connect Chargebee to Snowflake?
- 20. How to Connect MongoDB to Snowflake? Top 3 Methods
- 21. How to Migrate from BigQuery to Snowflake
- 22. How to Connect Outreach to Snowflake
- 23. How to Connect Zoho CRM to Snowflake
- 24. How to integrate Shopify to Snowflake? 3 Simple ways explained

Connecting Chargebee to Snowflake can transform your data workflow, enabling seamless data synchronization between your billing platform and data warehouse. This blog will guide you through the process, detailing the benefits, methods, and step-by-step tutorials for integrating Chargebee with Snowflake using Coefficient, Airbyte, and Hevo Data.
Advantages of Connecting Chargebee to Snowflake
- Unify billing and revenue data: Combine Chargebee subscription and billing data with other financial data in Snowflake for a comprehensive view of your revenue streams.
- Enhance financial reporting: Leverage Snowflake’s powerful analytics features to create more accurate and detailed financial reports.
- Streamline data management: Automate the transfer of data from Chargebee to Snowflake, reducing manual effort and ensuring data consistency.
Connecting Chargebee to Snowflake: 3 Methods
Connecting Chargebee to Snowflake is crucial for businesses looking to analyze their subscription data alongside other business metrics. There are several solutions available, each catering to different needs and user preferences. The following table provides an overview of three popular options:
|
Solution |
Best For |
|
Coefficient | Best suited for finance and operations teams who want to analyze data from multiple sources in spreadsheets with no code. Example: Chargebee subscription data alongside other business data in Snowflake |
|
Fivetran |
Ideal for companies that need to continuously replicate large volumes of data from Chargebee to Snowflake, ensuring data consistency and enabling near real-time analytics through a fully managed automated data pipeline. |
|
Stitch |
Perfect for organizations seeking an easy-to-use, affordable solution for moving data from Charg |
How to Connect Chargebee to Snowflake
Method 1: Coefficient – No-Code, User-Friendly
Coefficient is a no-code solution that simplifies data integration. It supports bi-directional sync, allowing you to easily import and export data from Chargebee to Snowflake.
Pros:
- Simple, no-code setup
- Automatic data updates
- Affordable pricing plans
Cons:
- Scheduled automations are not free forever
Step-by-Step Guide
Step 1. Install Coefficient
For Google Sheets
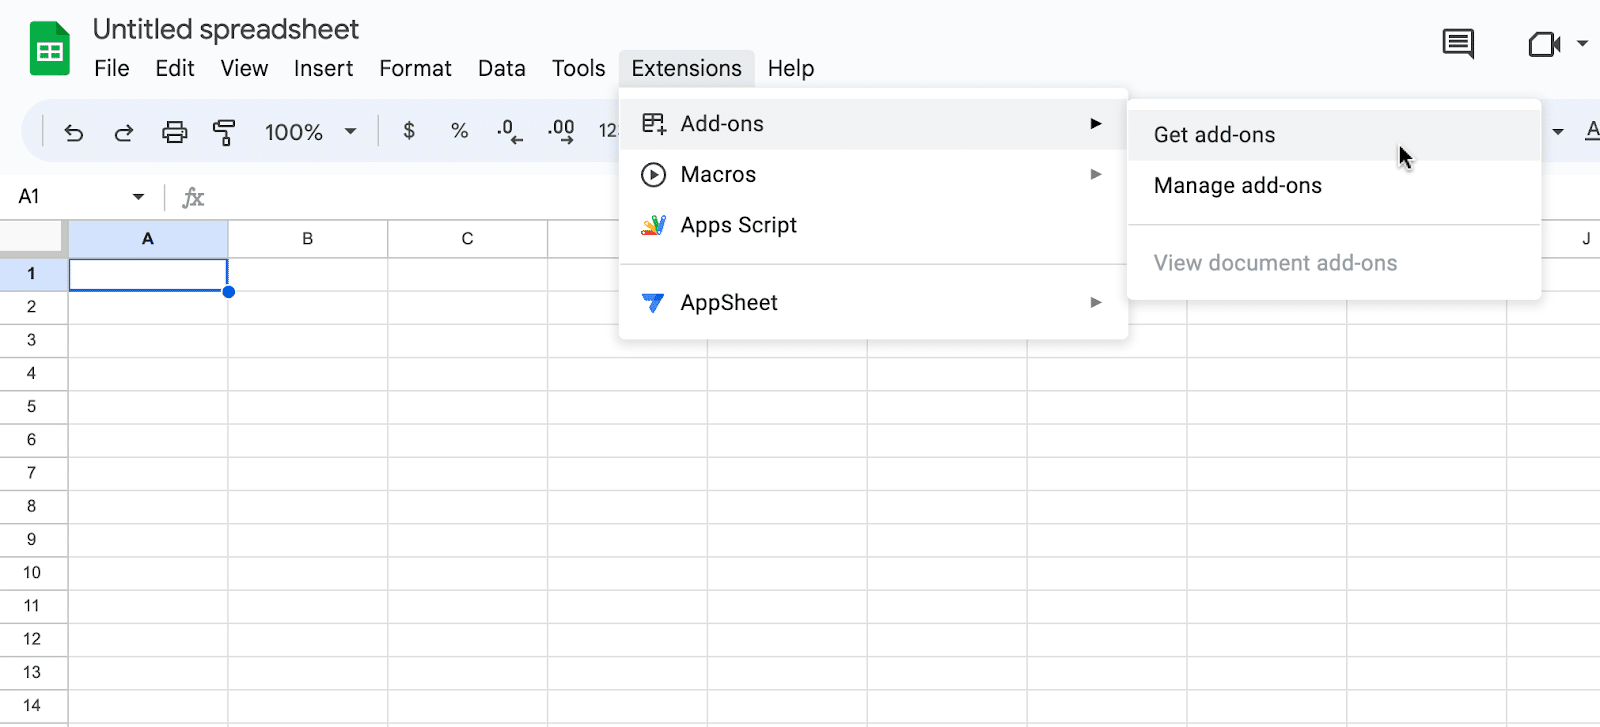
Open a new or existing Google Sheet, navigate to the Extensions tab, and select Add-ons > Get add-ons.
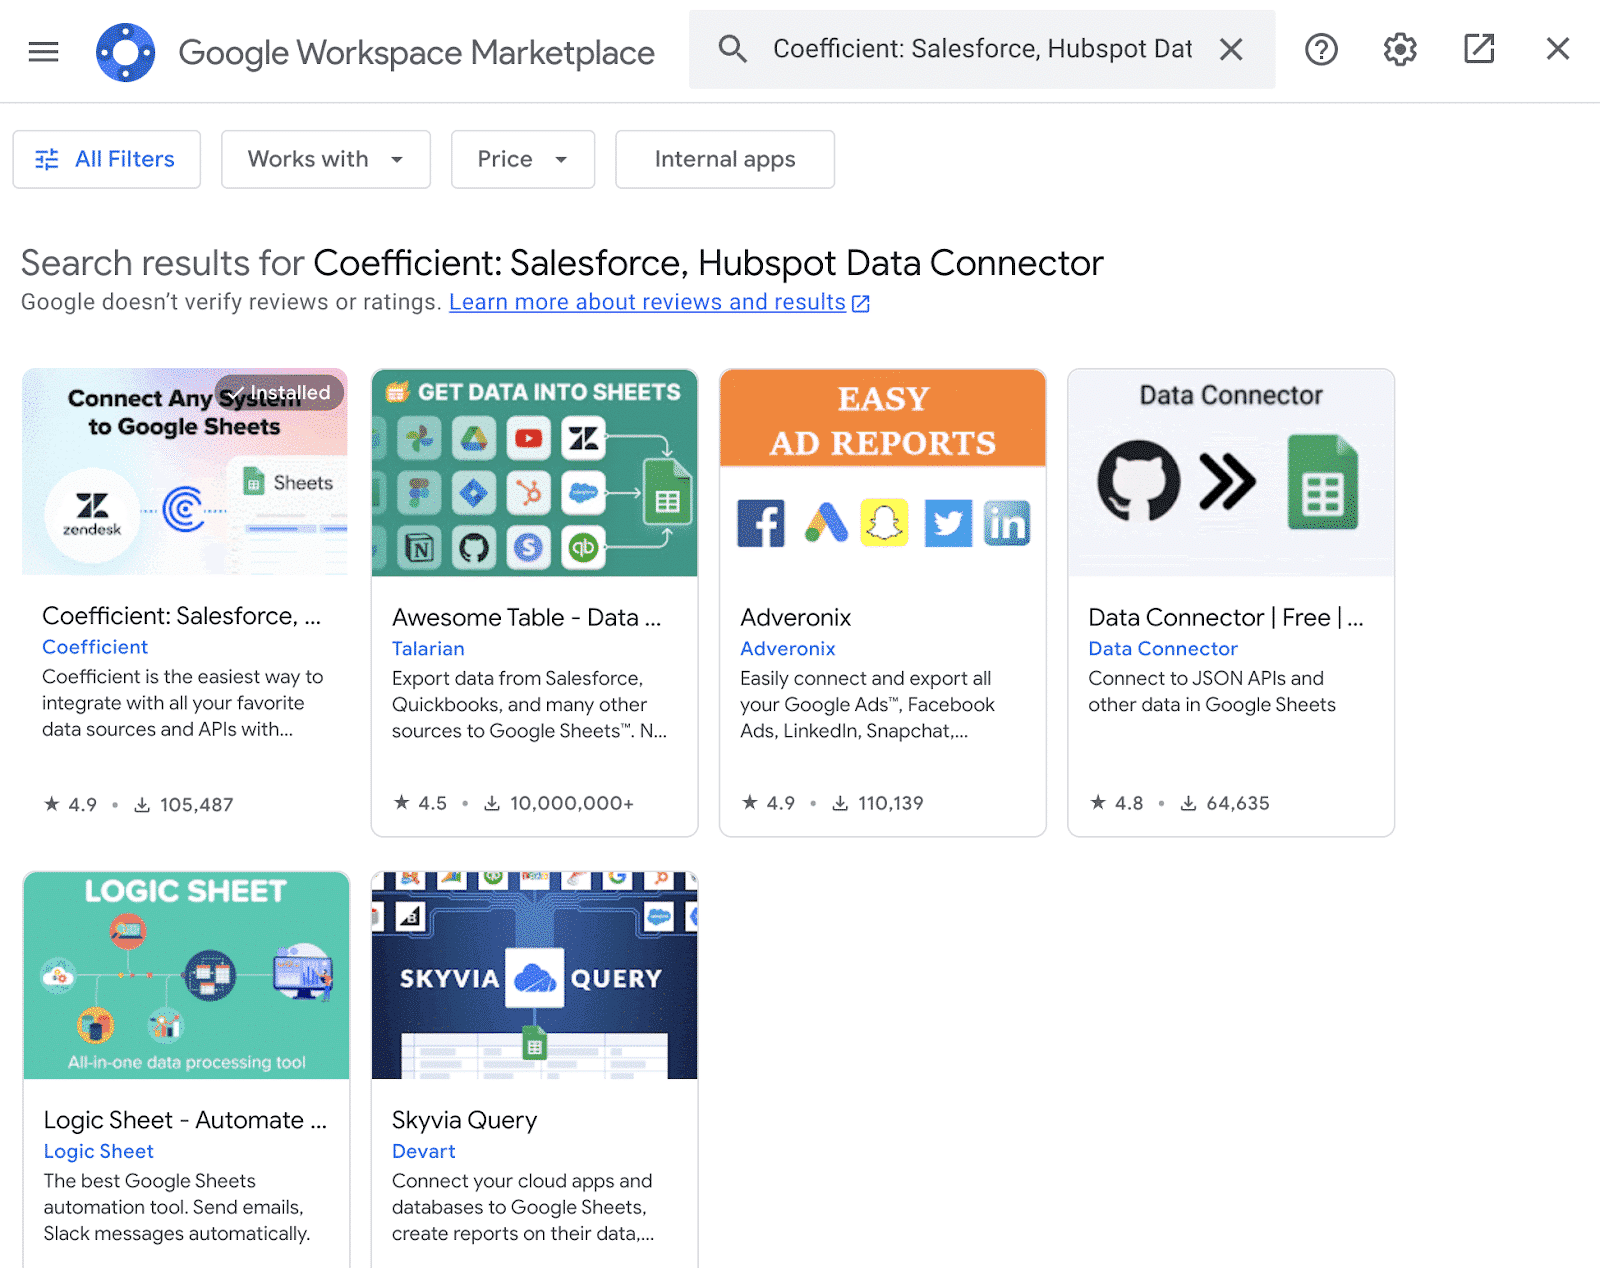
In the Google Workspace Marketplace, search for “Coefficient.”
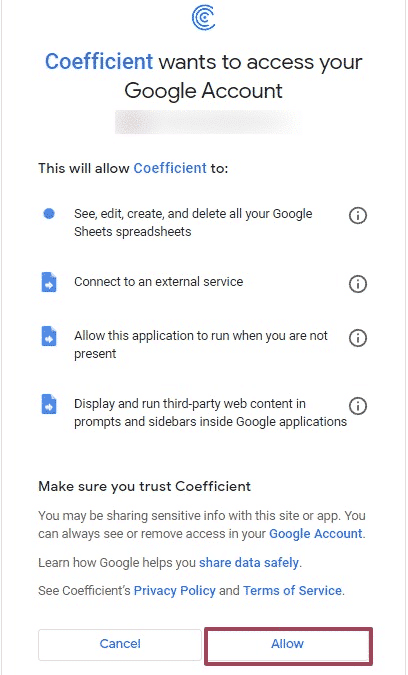
Follow the prompts to grant necessary permissions.
Launch Coefficient from Extensions > Coefficient > Launch.

Coefficient will open on the right-hand side of your spreadsheet.
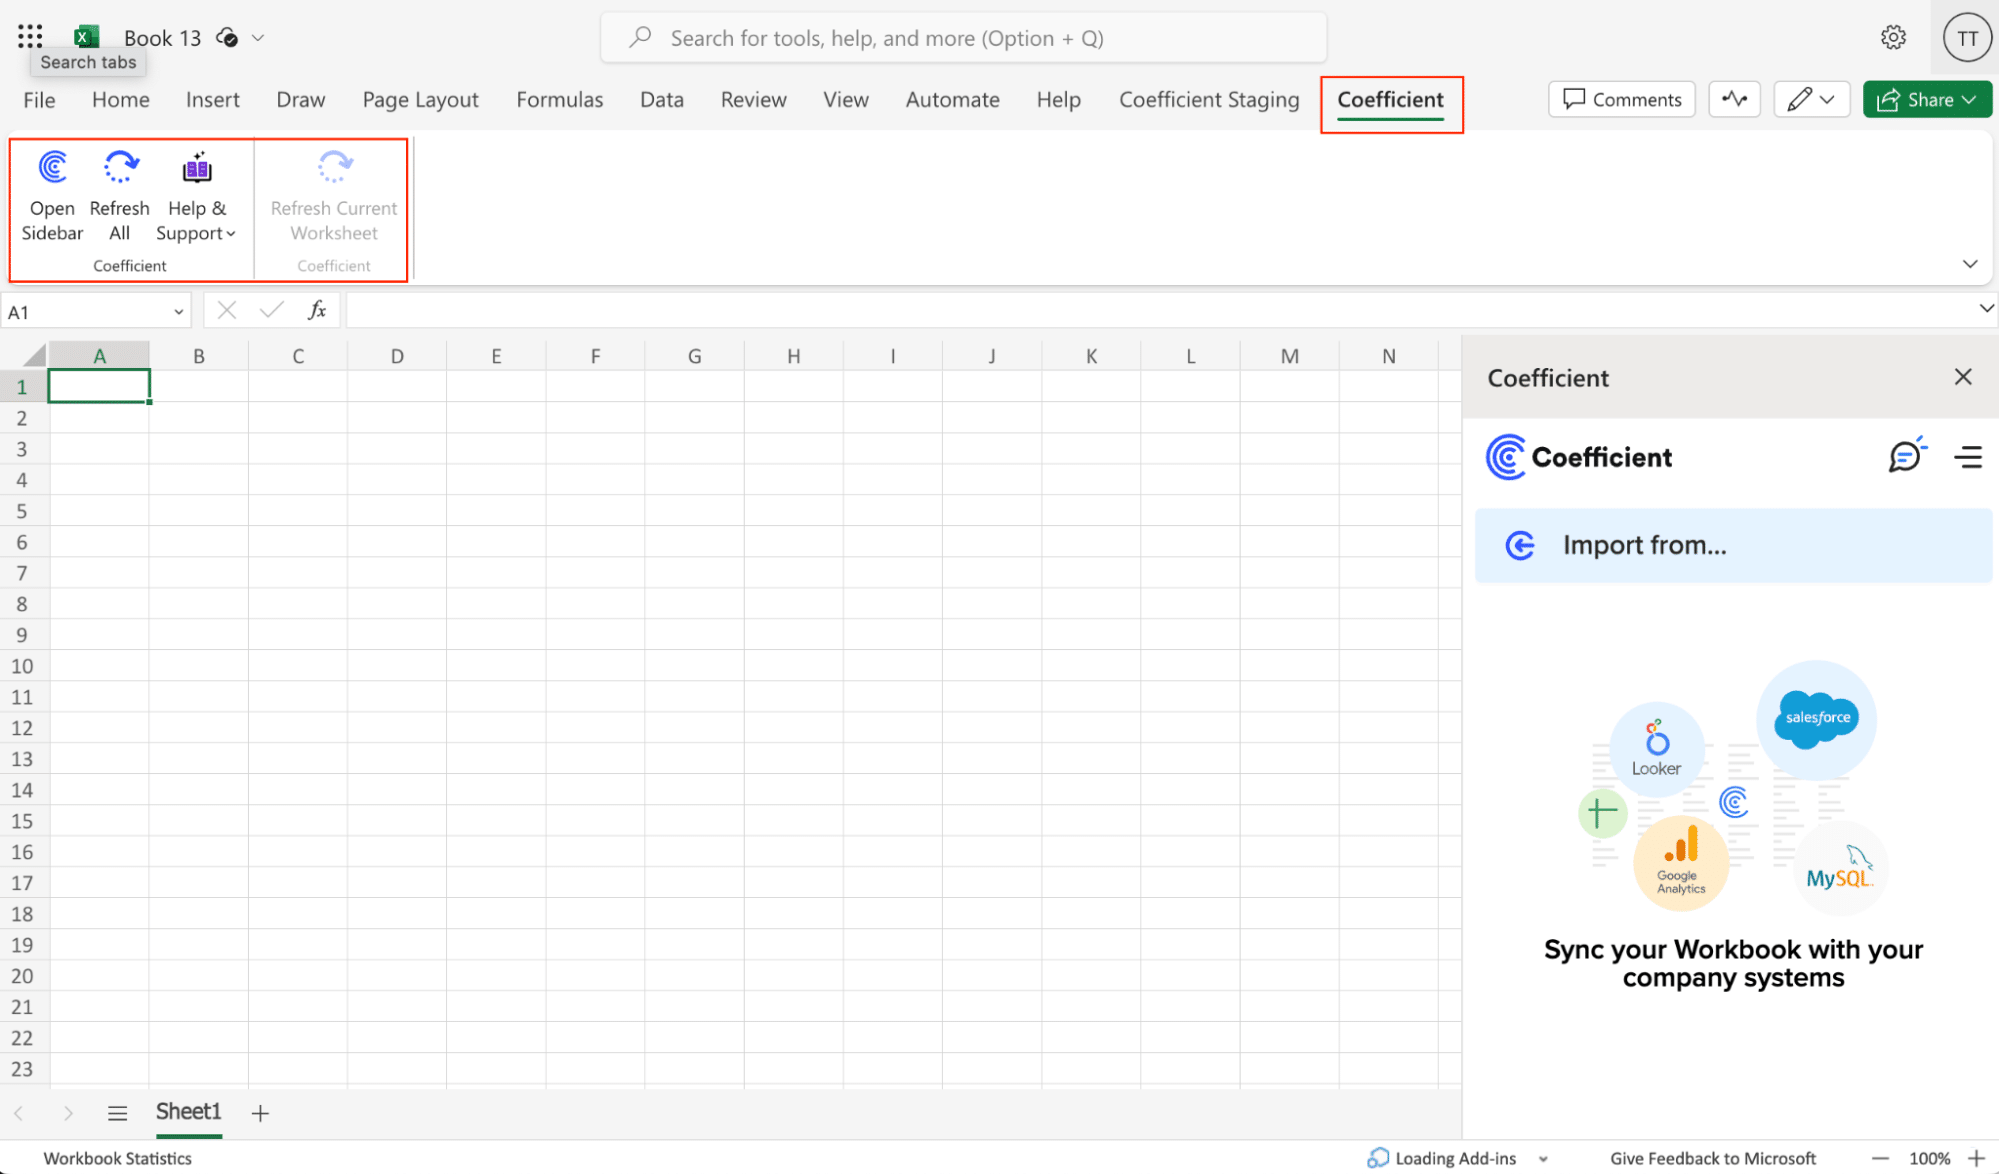
For Microsoft Excel
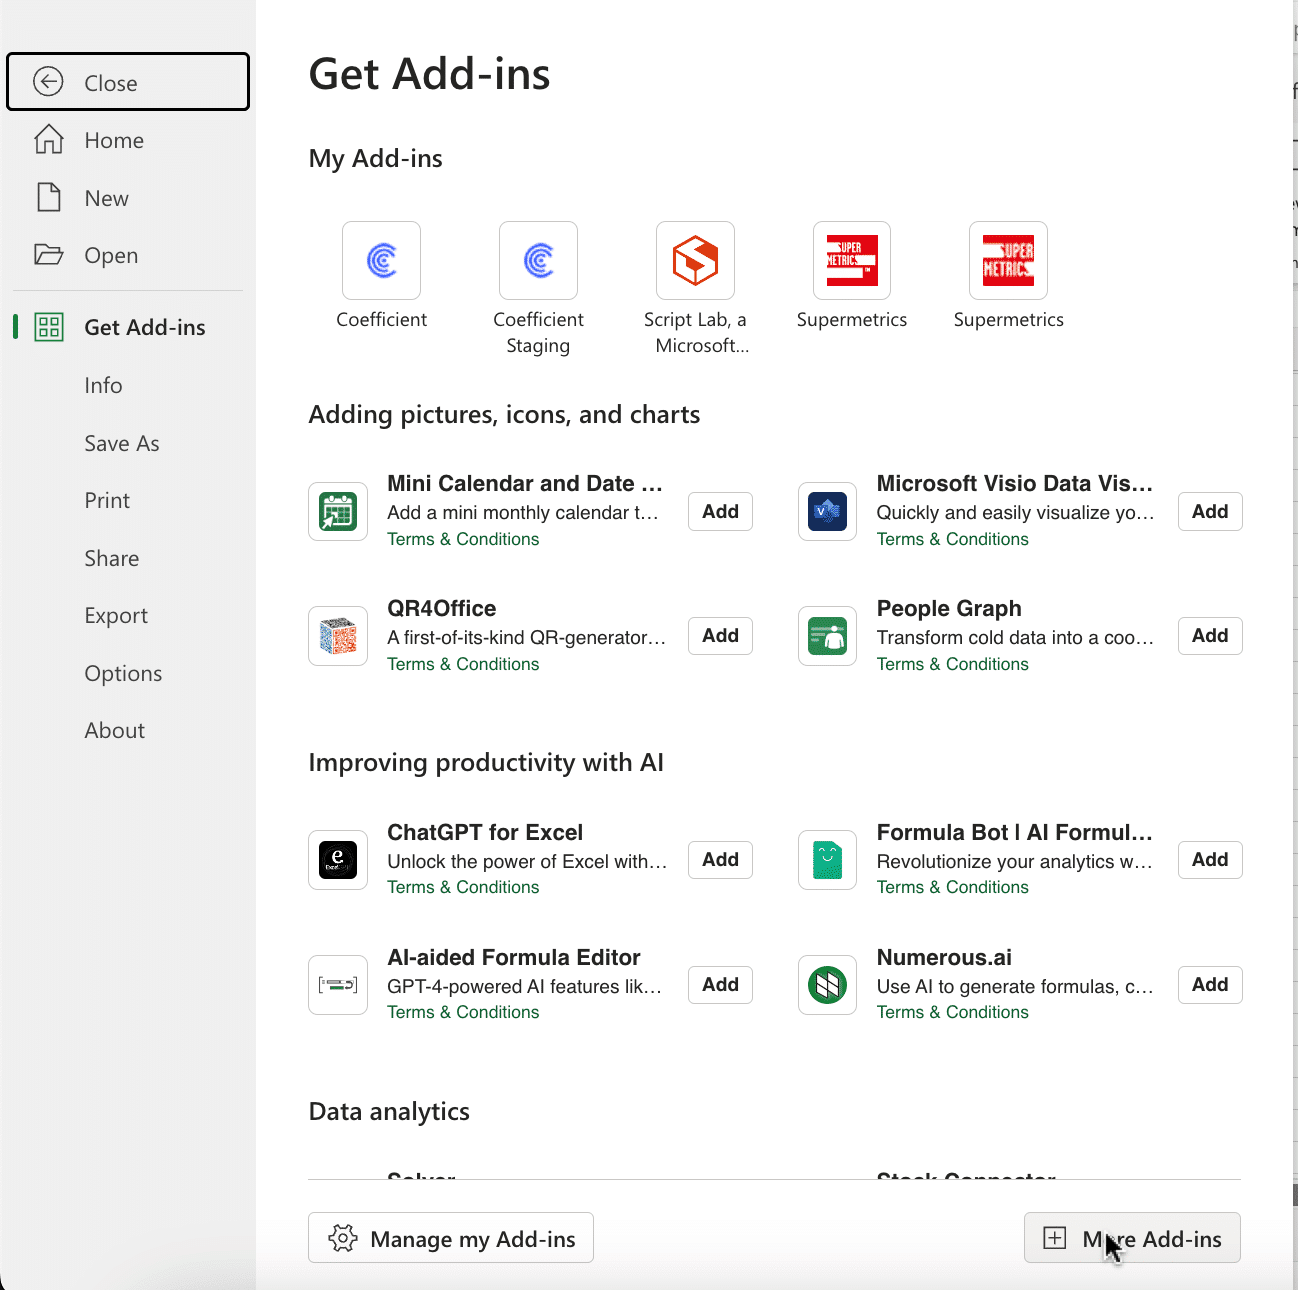
Open Excel from your desktop or in Office Online. Click ‘File’ > ‘Get Add-ins’ > ‘More Add-Ins.’
Type “Coefficient” in the search bar and click ‘Add.’

Follow the prompts in the pop-up to complete the installation.
Once finished, you will see a “Coefficient” tab in the top navigation bar. Click ‘Open Sidebar’ to launch Coefficient.
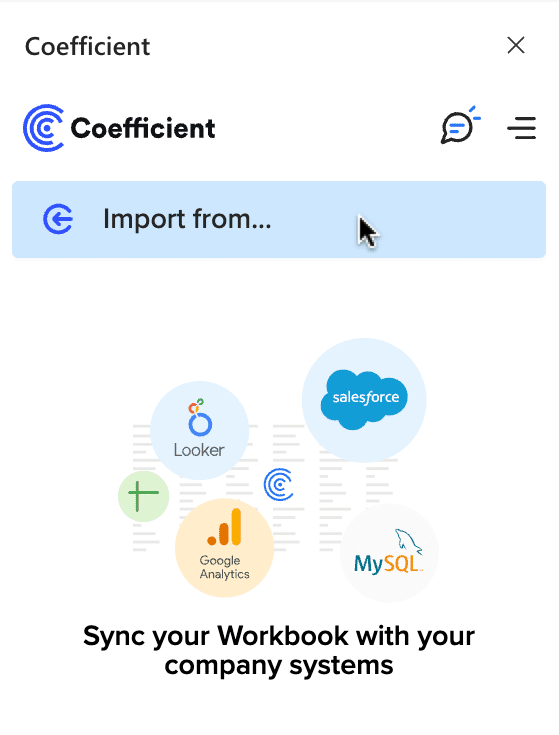
Step 2. Import Data from Chargebee
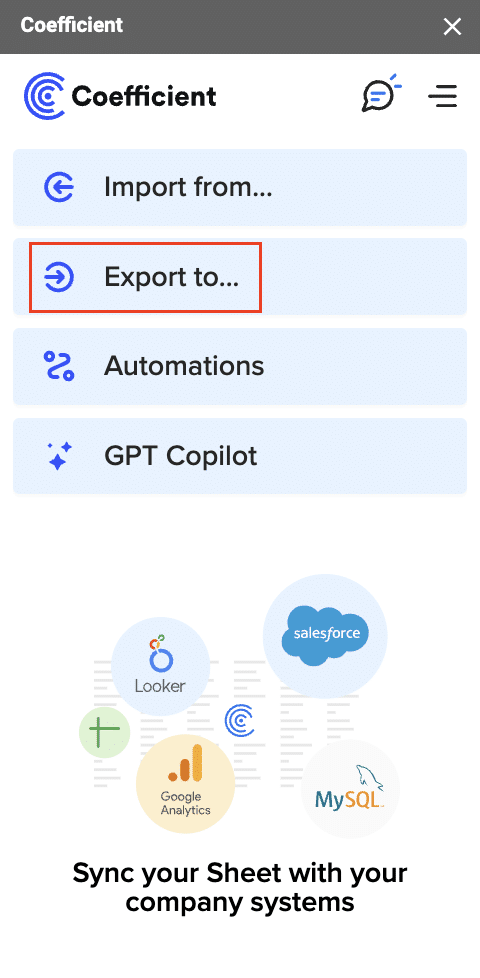
Select ‘Import from…’
Scroll down until you find Chargebee and click ‘Connect.’
Enter your Chargebeen site name.
Your Chargebee Site Name can be found in the URL when you are logged in and viewing the Dashboard. (e.g. https://sitename.chargebee.com) You can enter the Site Name or the complete Dashboard URL.
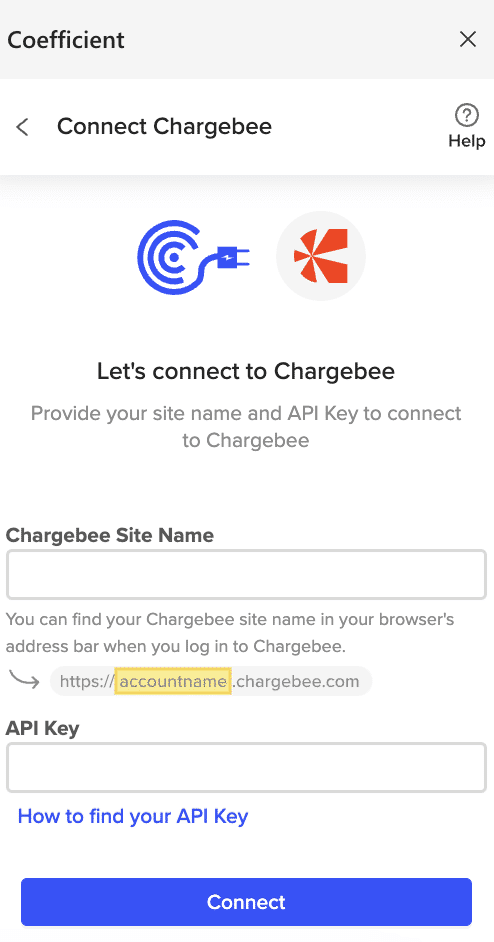
Next, you will need your Chargebee API Key.
From the Chargebee Menu, go to “Settings” → “Configure Chargebee”.

Scroll down to “API Keys and Webhooks” and select “API Keys”.

NOTE: We (HIGHLY) recommend generating a new API Key, since these keys can be tied to specific user(s)/permission(s) and should be treated as private.

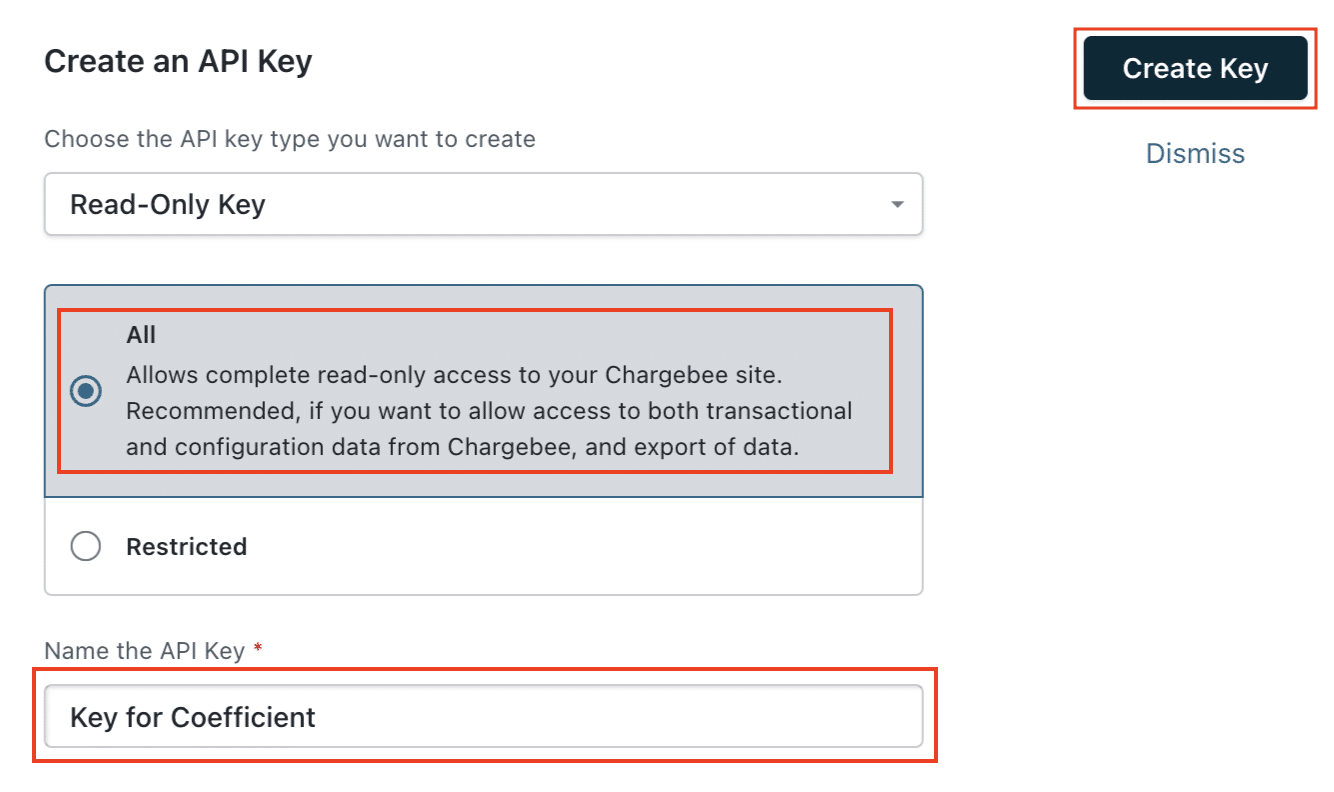
You will be shown different key types for this API Key – we recommend selecting the “Read-Only Key” since we are only pulling in existing data from Chargebee.
Once you select the Key type, you need to confirm what records the Key should allow you to access/pull data from using Coefficient. We recommend selecting “All”. This will ensure that you are not accidentally leaving out any records that may be important in your imports. Give your API Key a name and then click on the “Create Key” button on the right.
We highly recommend naming your API Key with something like “Key for Coefficient” (as shown) or ”Coefficient API Key”. This will tell you right away what the key is used for – that way no one deletes it by accident.
A new API key will be generated. Please copy the Key and paste it into the API Key field provided in the Coefficient sidebar. Then click the “Connect” button (blue) in the Coefficient sidebar to establish your connection.

After establishing your connection, return to Chargebee from the Coefficient menu. It will now appear at the bottom of the menu under “Connected sources.”
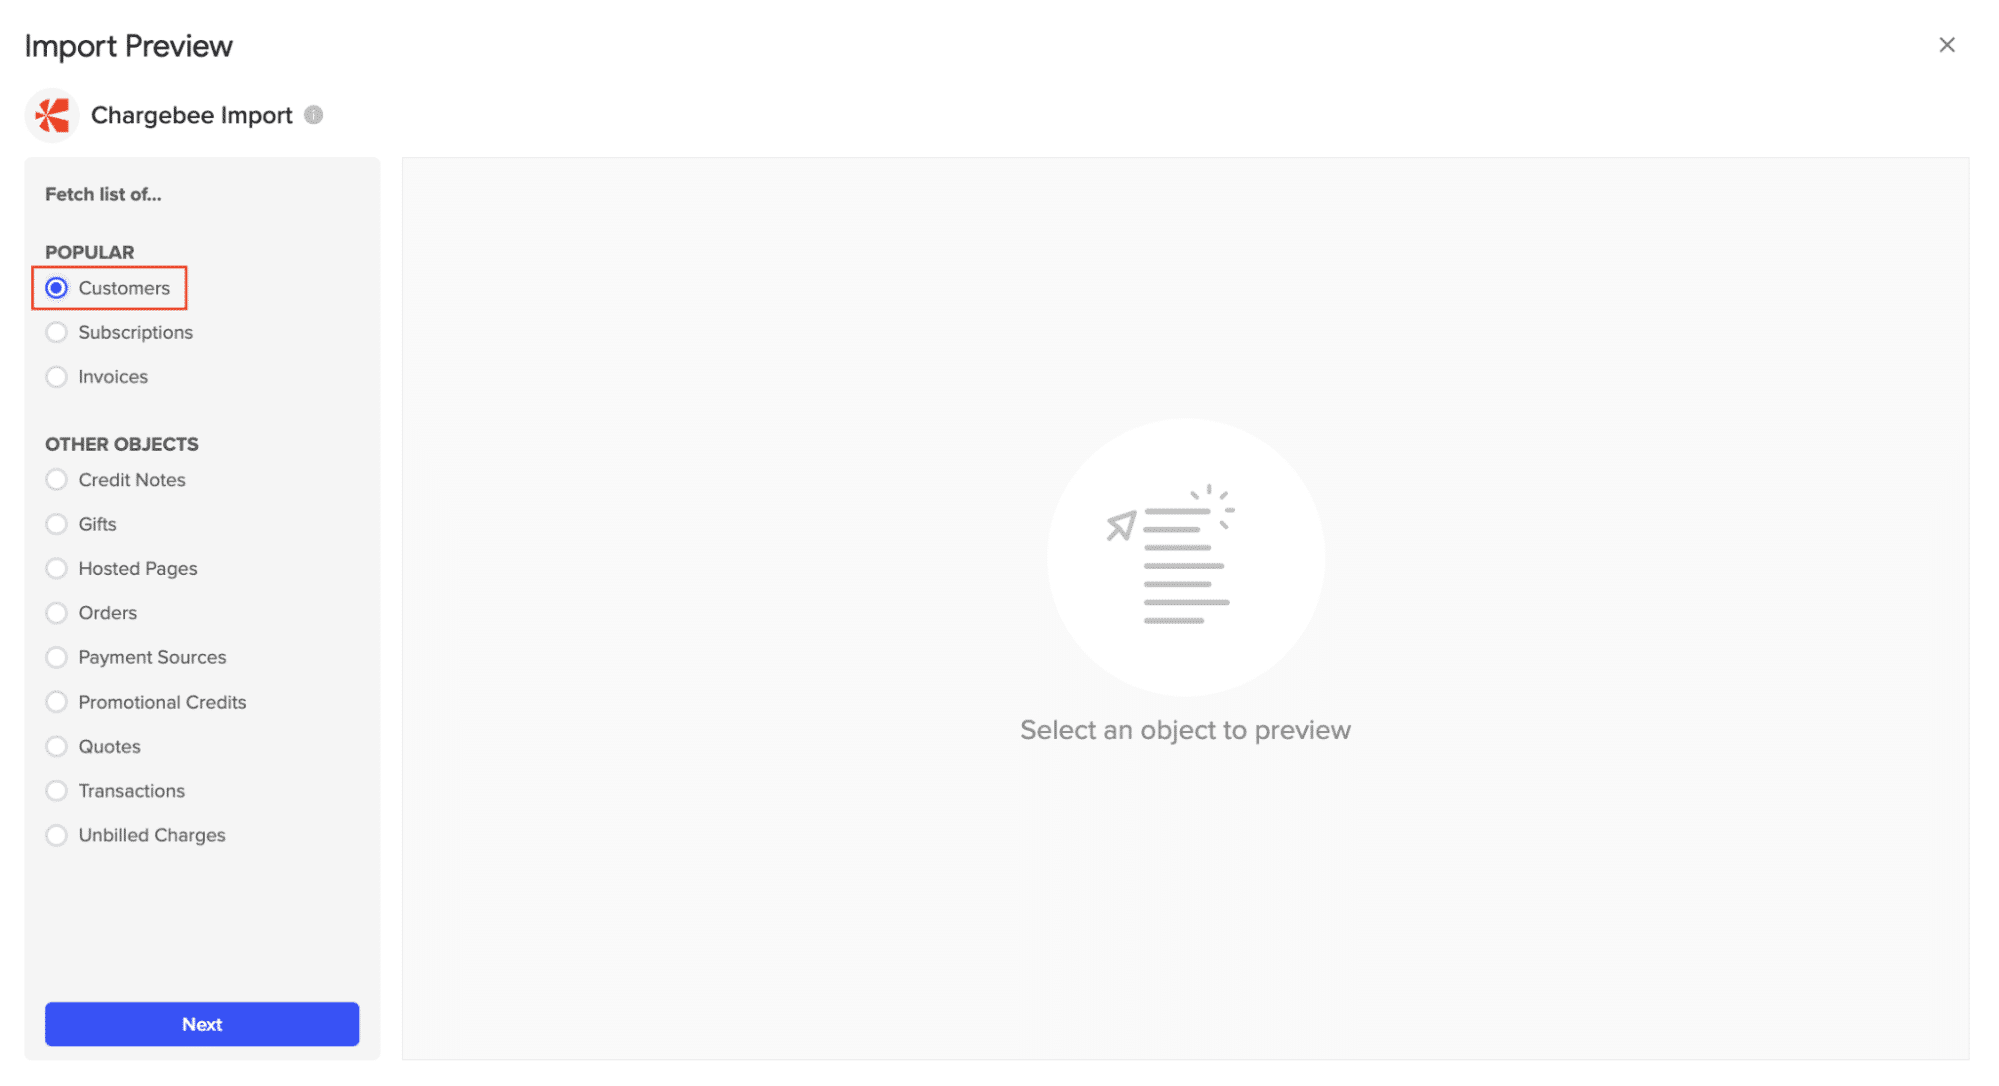
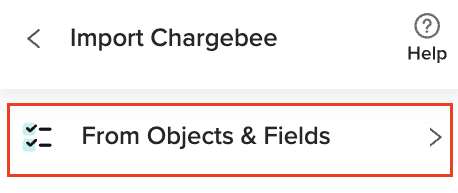
Select “Chargebee” from the list.
Choose “From Objects & Fields”.
Check (or uncheck) the box(es) corresponding to the fields you would like to include in this import. (Some of the more popular fields may already be selected)
Note: The preview only shows a sample of the results that will be included in your import.
Customize your import by adding filters, sorts, or limits as needed.

Click “Import” on the top right of your screen and your data will automatically populate your spreadsheet.

Step 3. Export Data from Your Spreadsheet to Snowflake
Before starting, make sure you’ve connected to Snowflake.
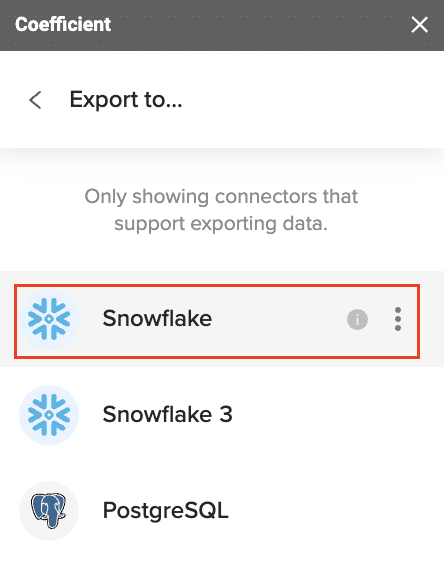
Then, navigate to Coefficient’s menu. Click “Export to…”
Choose Snowflake from the list of available data sources.
Select the tab and header rows in your spreadsheet that contains the data you want to export.

Click “Next” to continue.
Select the table in your Snowflake database that you want to update. Then, select the type of action you want to perform—Update, Insert, Upsert, or Delete.
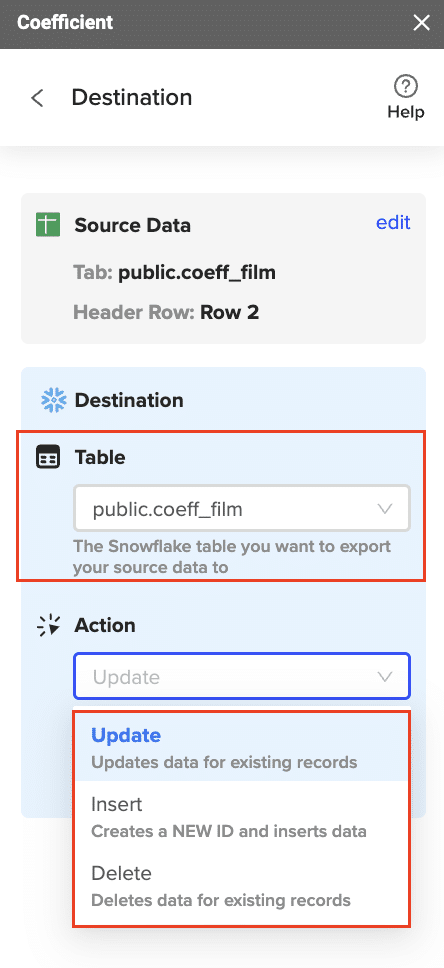
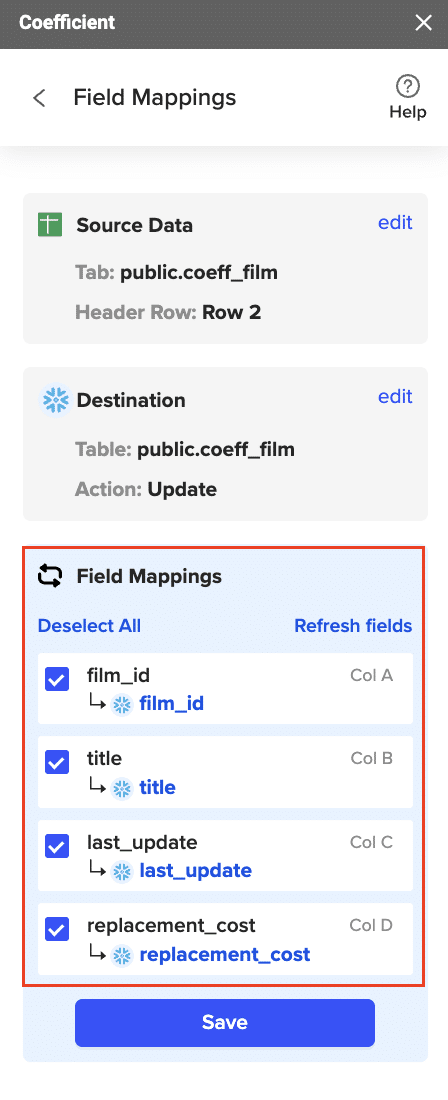
Map the fields from your spreadsheet to the corresponding Snowflake fields.
Note: Primary Keys (ID fields) are required for Update and Delete actions. For Insert actions, the Primary Key field can be set to auto populate if it’s configured in Snowflake.
(Optional) Specify additional settings such as batch size, whether to export empty cells on an update, and the column for results.
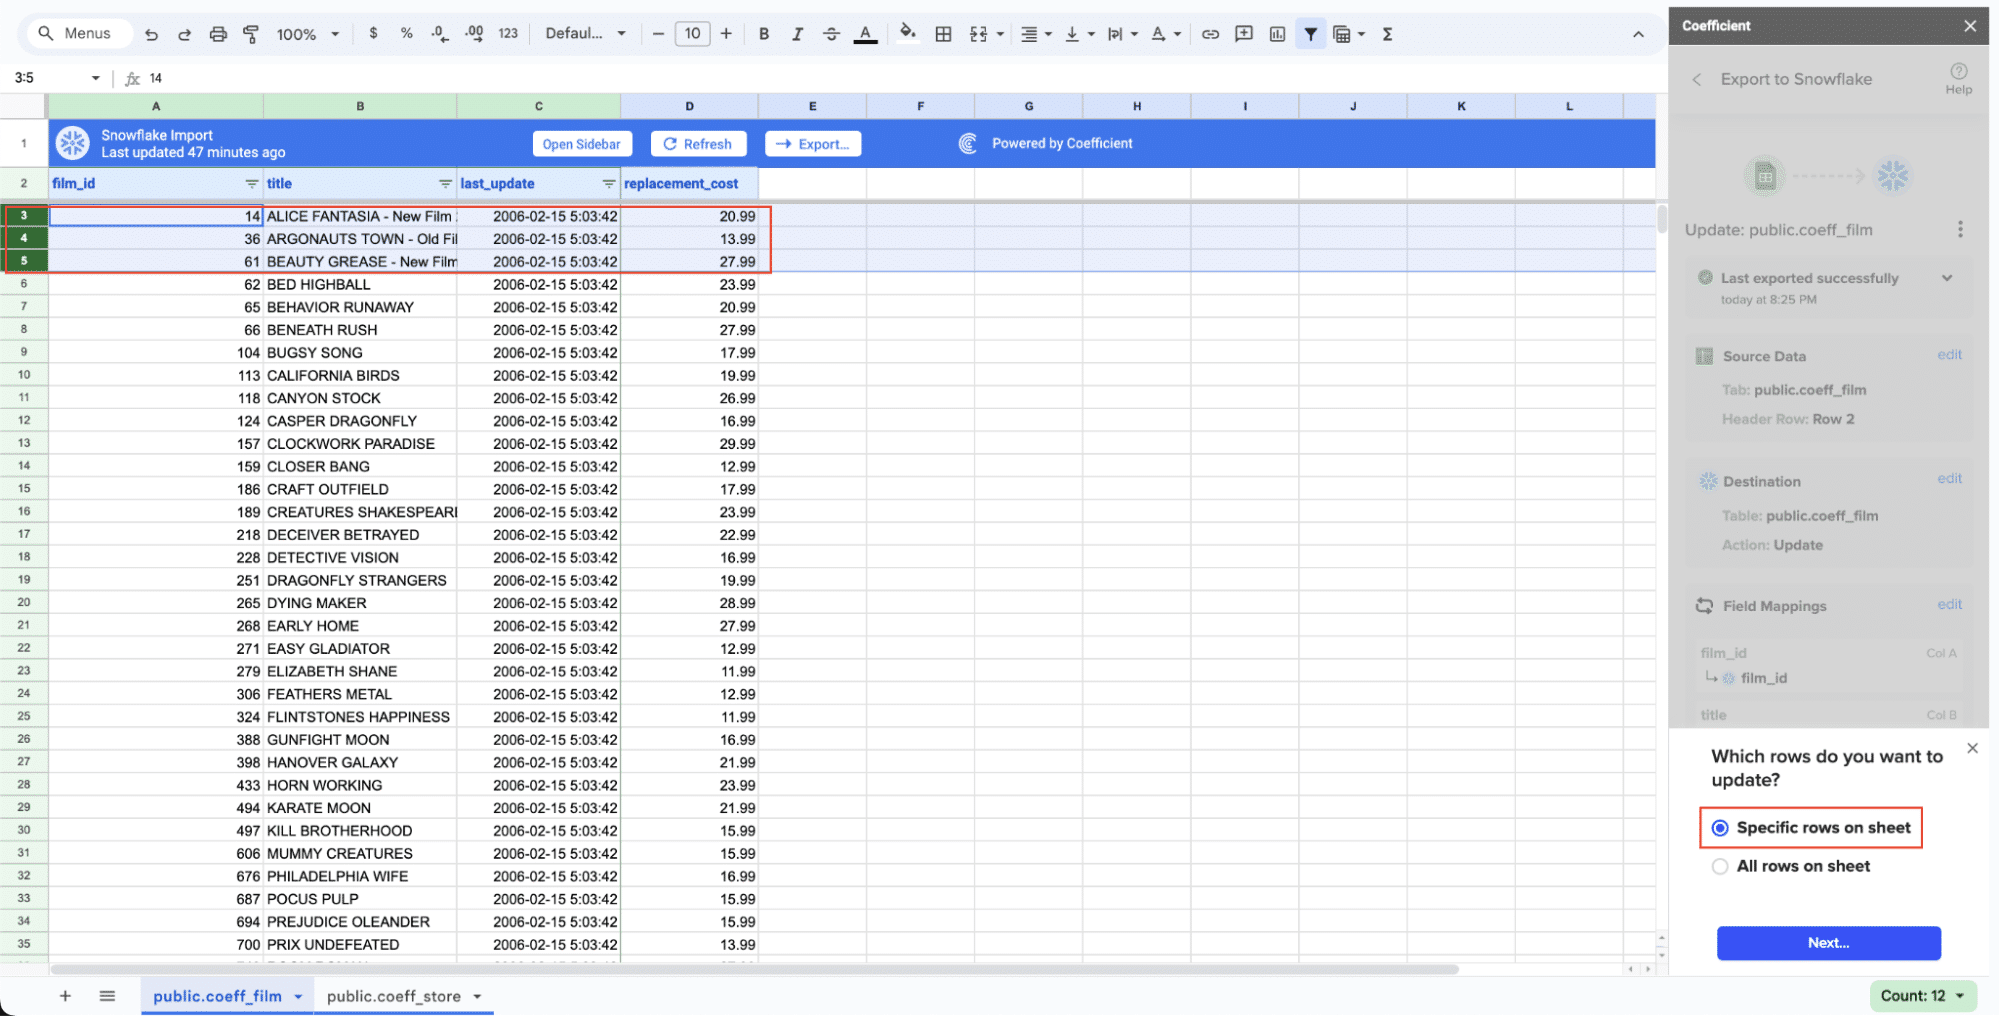
Confirm your settings.
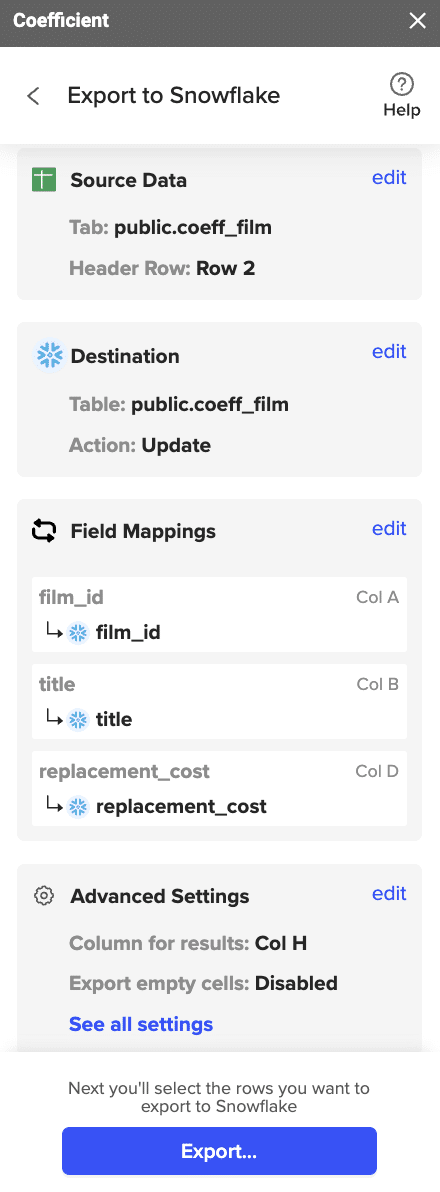
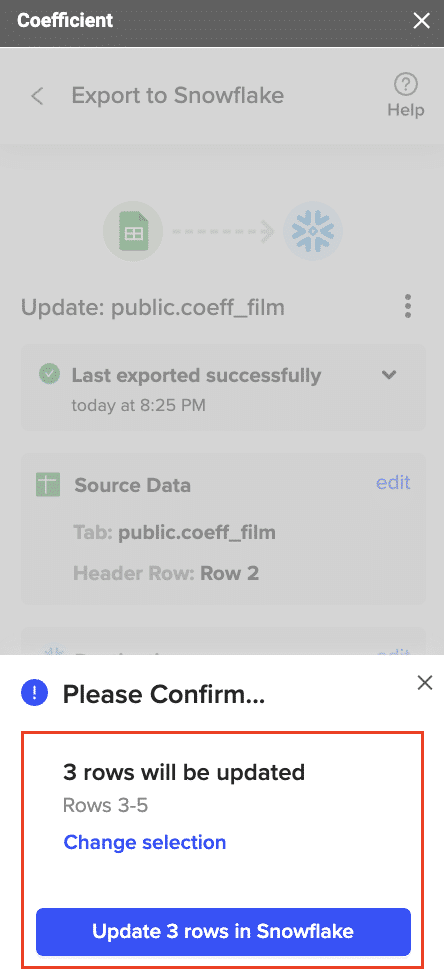
Then, highlight the rows you want to update or export. You can choose to export all rows or specific rows.
After you’re finished, review your settings and click “Export.”
Follow the prompts to confirm your changes.
In a few seconds, data from your spreadsheet will be pushed to Salesforce.
Coefficient will then update the records in Snowflake, displaying the status, record ID, and timestamp of the updates in your spreadsheet.
Method 2: Airbyte – Flexible and Open-Source

Airbyte is an open-source data integration tool, known for its flexibility and extensive customization options.
Pros:
- Highly customizable
- Large number of connectors
- Open-source, free of cost
Cons:
- Requires technical expertise
Step-by-Step Guide:
1. Set Up Airbyte:
- Install Airbyte:
- Using Docker:
- Make sure Docker is installed on your machine.
- Run the following command to start Airbyte:
- docker run -d –name airbyte -p 8000:8000 airbyte/airbyte:latest
- Using Kubernetes:
- Follow the Airbyte Kubernetes installation guide for detailed steps.
- Using Kubernetes:
- docker run -d –name airbyte -p 8000:8000 airbyte/airbyte:latest
- Using Docker:
- Access the Airbyte Web Application:
- Open your web browser and go to http://localhost:8000 to access the Airbyte dashboard.
- Create an account and log in to begin configuration.
2. Connect Chargebee to Airbyte:
- Add Chargebee as a Source:
- In the Airbyte dashboard, click on “New Connection” and select “Chargebee” as the source.
- Provide the necessary credentials such as API key, site name, and other required details.
- Test the connection to ensure Airbyte can access your Chargebee data.
- Select Data to Sync:
- Choose the specific data entities (e.g., subscriptions, invoices, customers) you want to sync from Chargebee.
- Configure any data extraction settings if needed.
3. Sync Data to Snowflake:
- Add Snowflake as a Destination:
- In the Airbyte dashboard, select “Add Destination” and choose “Snowflake”.
- Provide the necessary Snowflake account details, including the warehouse, database, schema, username, and password.
- Test the connection to ensure it is properly configured.
- Set Sync Schedules:
- Define how often you want the data to be synchronized (e.g., hourly, daily).
- Map the fields between Chargebee and Snowflake to ensure accurate data transfer.
- Save the configuration and initiate the data transfer.
Method 3: Hevo – Automated and No-Code

Hevo provides a simple automated pipeline solution that requires no coding for setting up data transfers.
Pros:
- Fully automated
- Easy to set up
- Supports real-time data sync
Cons:
- Subscription-based pricing
- Limited customization compared to open-source tools
Step-by-Step Guide:
1. Register with Hevo Data:
- Sign Up on Hevo Data’s Website:
- Go to the Hevo Data website and sign up for an account.
- Fill in the required information and verify your email address to complete the registration process.
- Access the Hevo Dashboard:
- Log in to your Hevo account to access the dashboard where you can manage your data pipelines.
2. Connect Chargebee to Hevo Data:
- Add Chargebee as a Source:
- In the Hevo dashboard, click on “Create Pipeline” and select “Chargebee” as the source.
- Enter the necessary details such as API key, site name, and other required configurations.
- Test the connection to ensure Hevo can access your Chargebee data.
- Choose Data Entities to Sync:
- Select the specific data entities (e.g., subscriptions, invoices, customers) you want to sync from Chargebee.
- Configure any data extraction settings if needed.
3. Set Up Snowflake as the Destination:
- Define Snowflake as the Destination:
- In the Hevo dashboard, select “Add Destination” and choose “Snowflake”.
- Provide the necessary Snowflake account details, including the warehouse, database, schema, username, and password.
- Test the connection to ensure it is properly configured.
- Map Data Fields and Activate Transfer:
- Define how the data from Chargebee should map to the corresponding tables and columns in Snowflake.
- Ensure all necessary transformations are configured.
- Activate the pipeline to start the data transfer.
- Monitor the real-time data transfer via Hevo’s dashboard to ensure everything is functioning correctly.
Conclusion
Integrating Chargebee with Snowflake can greatly enhance data management, reporting, and workflow automation. Coefficient, Airbyte, and Hevo Data each offer unique advantages catering to different needs. Get started today by leveraging Coefficient’s no-code solution for an efficient setup. Click here to begin.