Razorpay and Snowflake are two powerful platforms that, when connected, can take your data management and analytics to the next level. Razorpay is a leading payment gateway that enables businesses to accept, process, and disburse payments. Snowflake, on the other hand, is a cloud-based data warehousing platform that allows organizations to store, manage, and analyze their data efficiently.
In this blog post, we’ll explore the advantages of connecting Razorpay to Snowflake and guide you through three methods for integrating these platforms: Coefficient, Hevo, and Airbyte. We’ll also provide step-by-step instructions on setting up each of these connections.
Advantages of Connecting Razorpay to Snowflake
Integrating Razorpay with Snowflake offers several significant benefits:
- Multi-Entity Financial Consolidation: For businesses managing multiple entities in Xero, Snowflake enables automated consolidation of financial data across all entities. This allows for real-time group-level reporting and analysis, crucial for complex organizations or those preparing for M&A activities.
- AI-Powered Cash Flow Forecasting: By combining historical financial data from Xero with external economic indicators and customer behavior data in Snowflake, you can leverage machine learning algorithms to create highly accurate cash flow predictions. This enables proactive financial management and more strategic decision-making around investments or cost-cutting measures.
- Granular Profitability Analysis: Merge detailed transaction data from Xero with operational metrics from other systems in Snowflake to perform in-depth profitability analysis at the customer, product, or project level. This level of insight can drive strategic decisions on pricing, resource allocation, and customer retention efforts.
Connecting Razorpay and Snowflake: 3 Methods
Here’s a comparison of the three methods we’ll cover for connecting Razorpay and Snowflake:
| Solution | Best For |
| Coefficient | Finance teams in small to medium-sized businesses who need to quickly combine Xero data with other business metrics for ad-hoc analysis. |
| Hevo Data | Growing businesses that require real-time data syncing from Xero to Snowflake, along with data from multiple other sources. Best for companies that want to build a comprehensive data lake with minimal coding. |
| Fivetran | Large enterprises or organizations with complex data ecosystems beyond just Xero and Snowflake. Ideal for businesses that need enterprise-grade features like advanced data transformations, data governance, and compliance capabilities. |
Method 1: Coefficient – No-Code, User-Friendly

Coefficient is a no-code solution that allows you to connect your spreadsheets to various data sources, including Razorpay and Snowflake. With its user-friendly interface and automated data updates, Coefficient is an excellent choice for users who want to set up data integration quickly without any coding knowledge.
Pros:
- Easy setup: Coefficient offers a straightforward installation process that requires no coding, making it accessible for users of all technical levels.
- Automatic updates: Once set up, Coefficient automatically syncs data in real-time, ensuring that your Snowflake database is always up-to-date with the latest Razorpay transactions.
- Affordable: Coefficient’s pricing plans are budget-friendly, making it an attractive option for small to medium-sized businesses looking to integrate their data without a significant investment.
Cons:
- Limited customization for complex workflows: While Coefficient is excellent for simple integrations, it may lack the advanced customization options needed for more complex data workflows.
How to Connect Razorpay to Snowflake with Coefficient
Step 1: Install the Coefficient
For Google Sheets
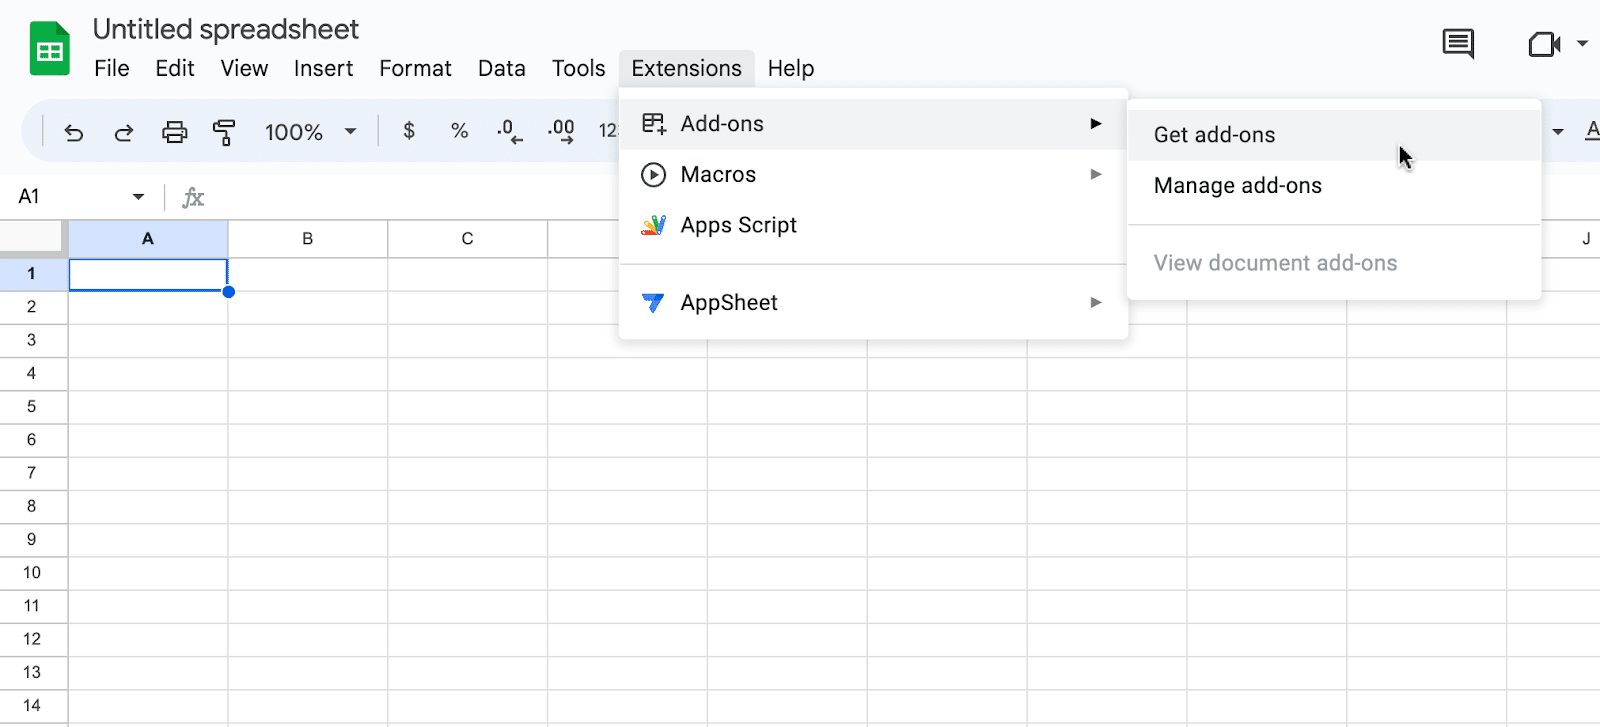
Open a new or existing Google Sheet, navigate to the Extensions tab, and select Add-ons > Get add-ons.
In the Google Workspace Marketplace, search for “Coefficient.”

Follow the prompts to grant necessary permissions.

Launch Coefficient from Extensions > Coefficient > Launch.
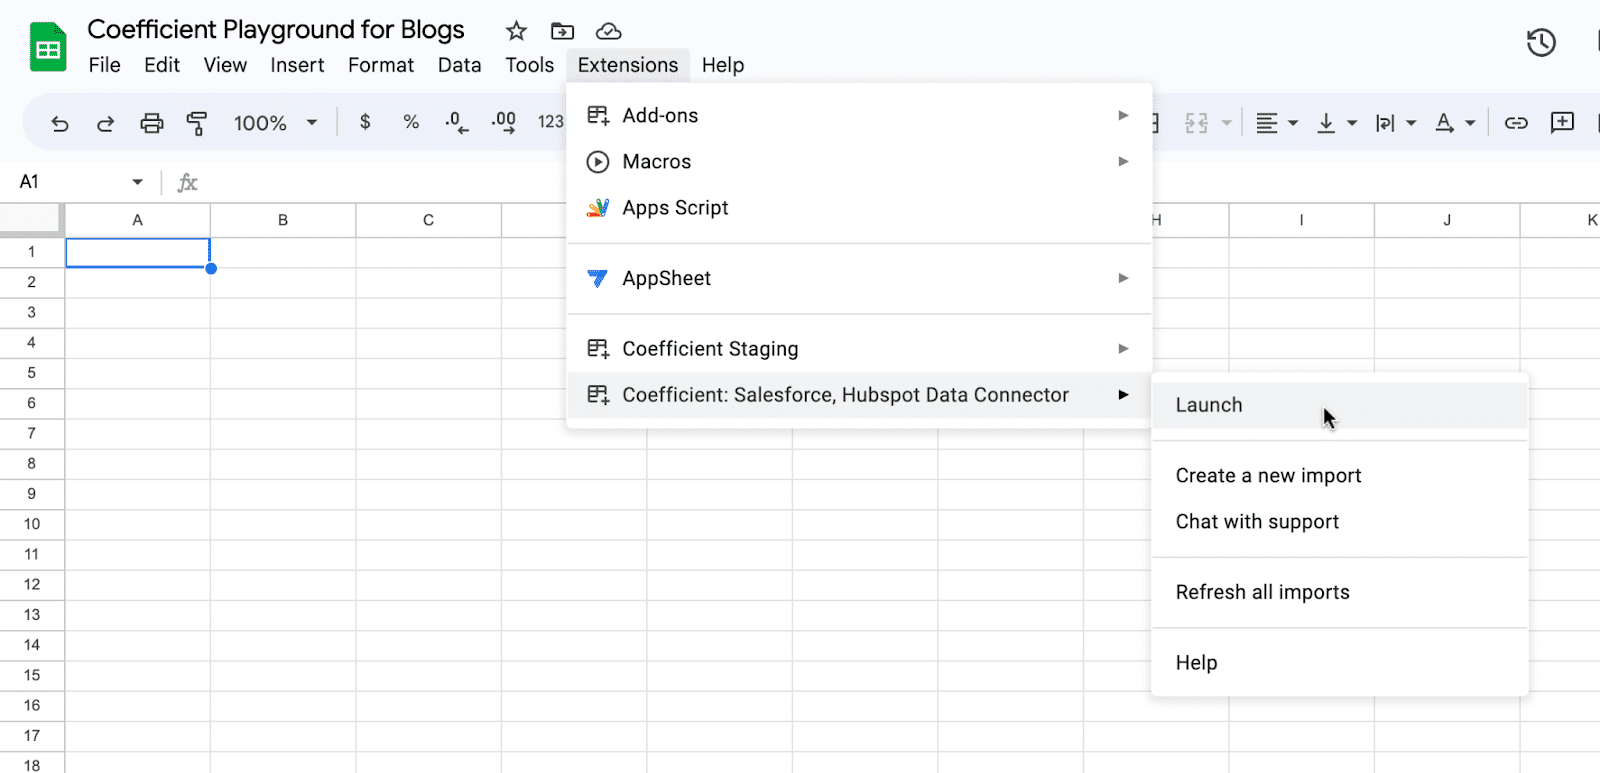
Coefficient will open on the right-hand side of your spreadsheet.

For Microsoft Excel
Open Excel from your desktop or in Office Online. Click ‘File’ > ‘Get Add-ins’ > ‘More Add-Ins.’
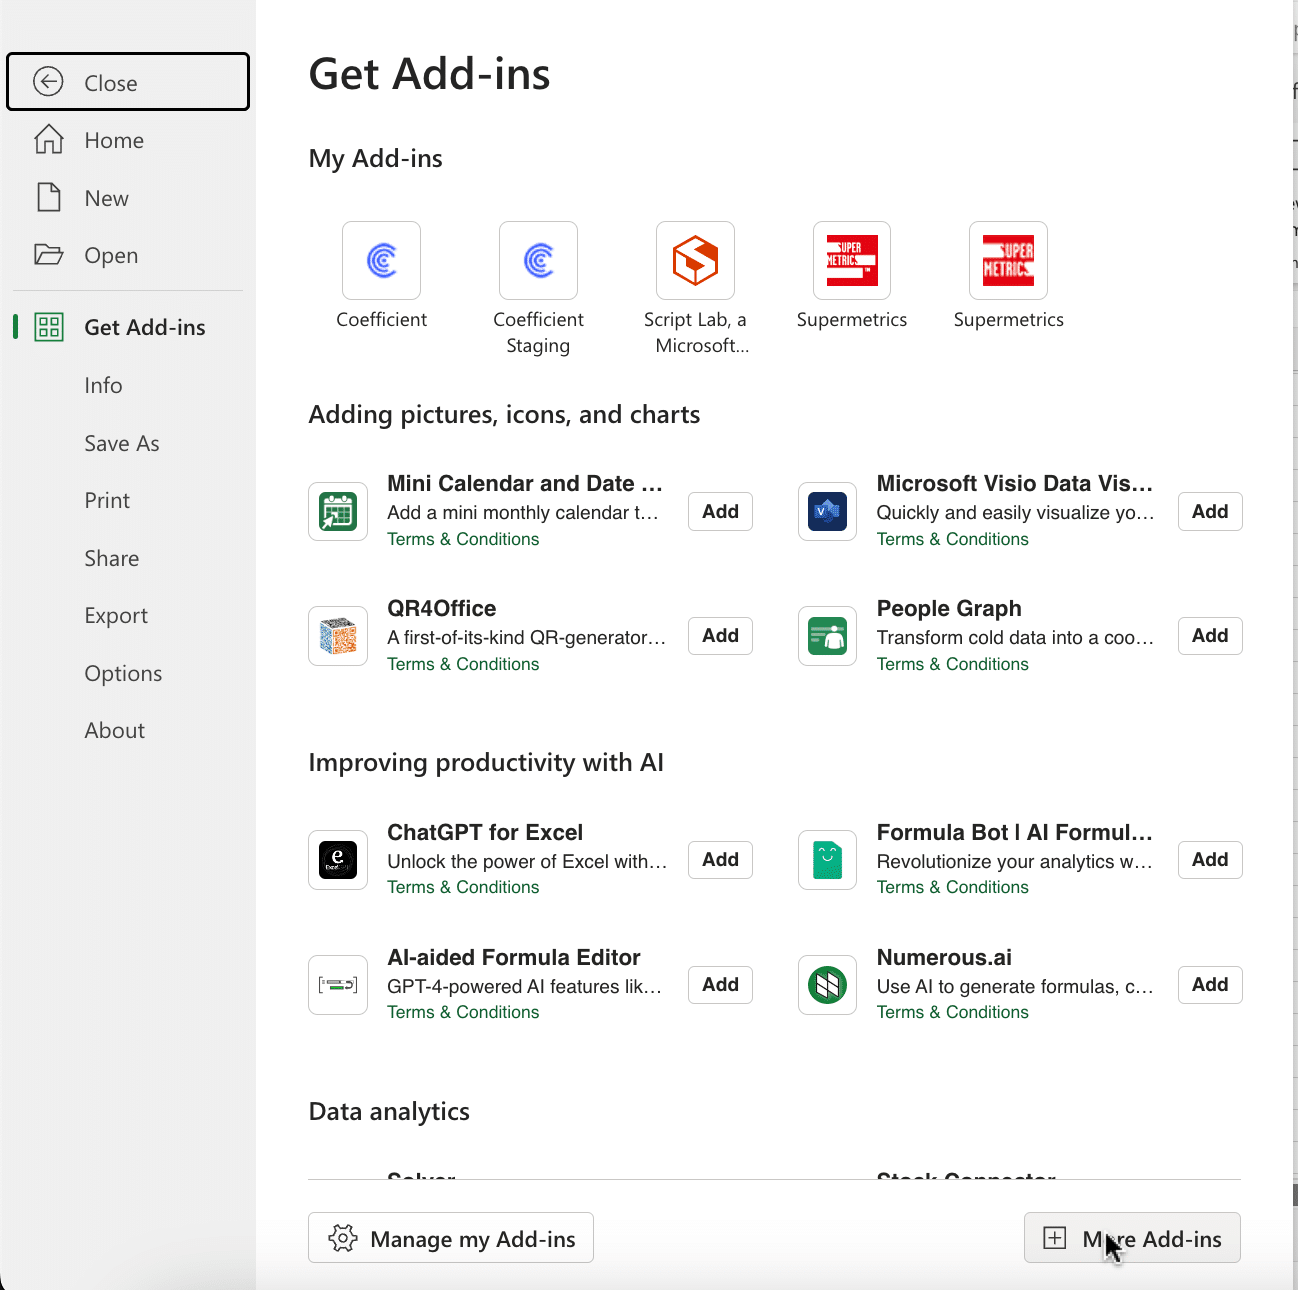
Type “Coefficient” in the search bar and click ‘Add.’

Follow the prompts in the pop-up to complete the installation.
Once finished, you will see a “Coefficient” tab in the top navigation bar. Click ‘Open Sidebar’ to launch Coefficient.

Step 2: Import Data from Razorpay
Navigate to the Coefficient sidebar.

Click on “Import from” and proceed to select “Razorpay” from the dropdown.
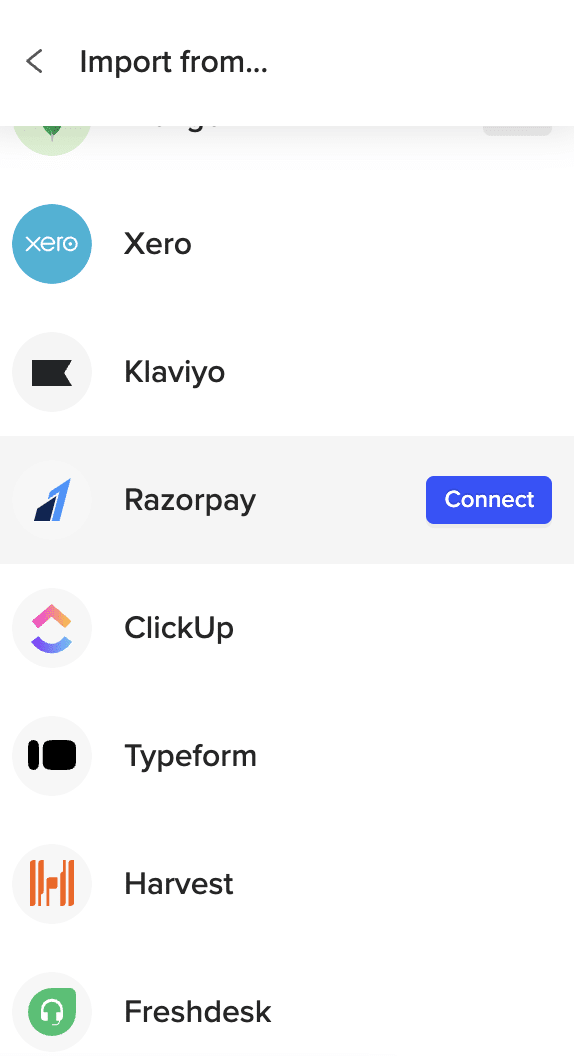
To continue with authentication, you’ll need to acquire an API key from Razorpay.

Open a separate tab and log into your Razorpay account.
Navigate to the left-hand menu and select “Accounts and Settings.”
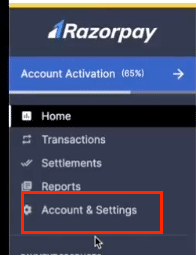
Click “API Keys” in the Website and app settings box.

Copy your API Key ID and Key Secret and head back to your spreadsheet.
Paste your Key ID and Key Secret into the Coefficeint and click “Connect.”

Click “Start from Scratch” to open the Import Preview window.

Scroll through the available objects and reports in Coefficient’s no-code Import Preview menu. Options include Customers, Payments, Orders, Settlements, and more!

In this example, select “Customers” and click the “Preview” button to continue.
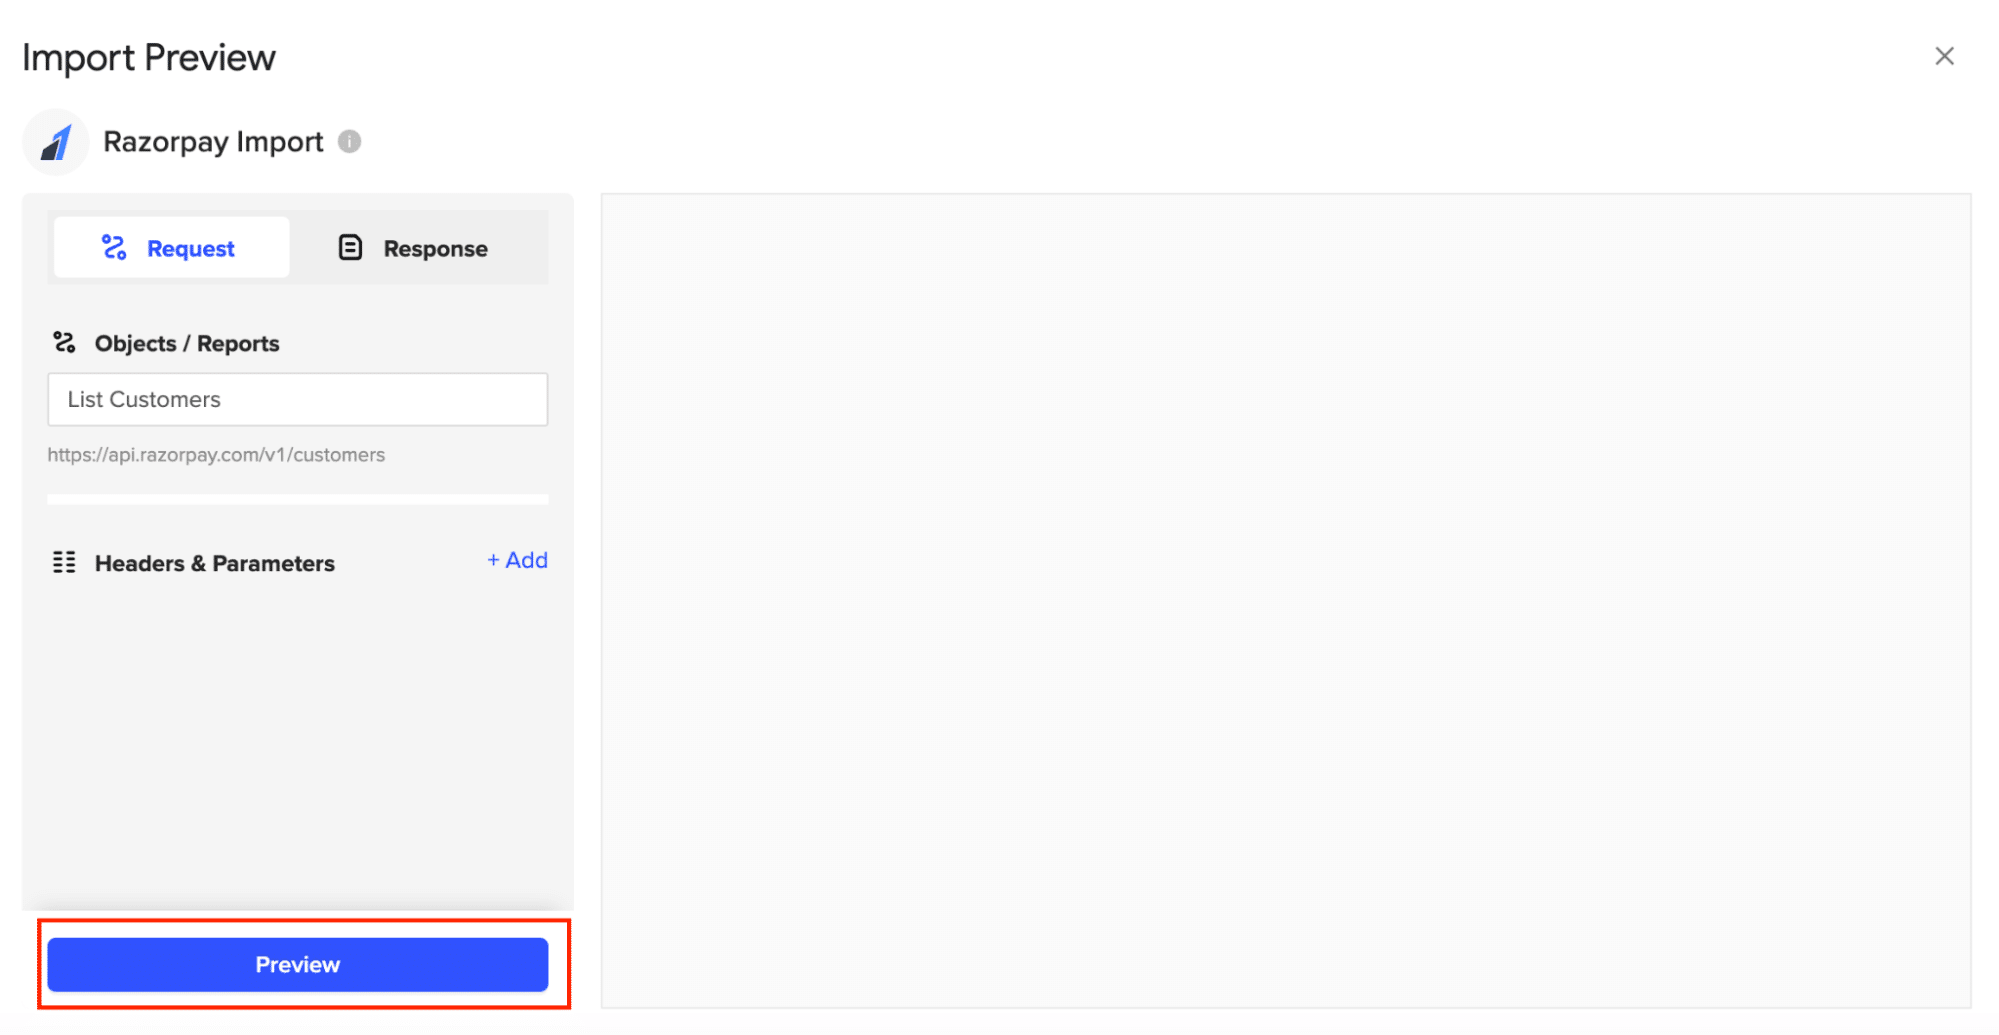
Customize your import by toggling on the fields on the left-hand side of your menu.
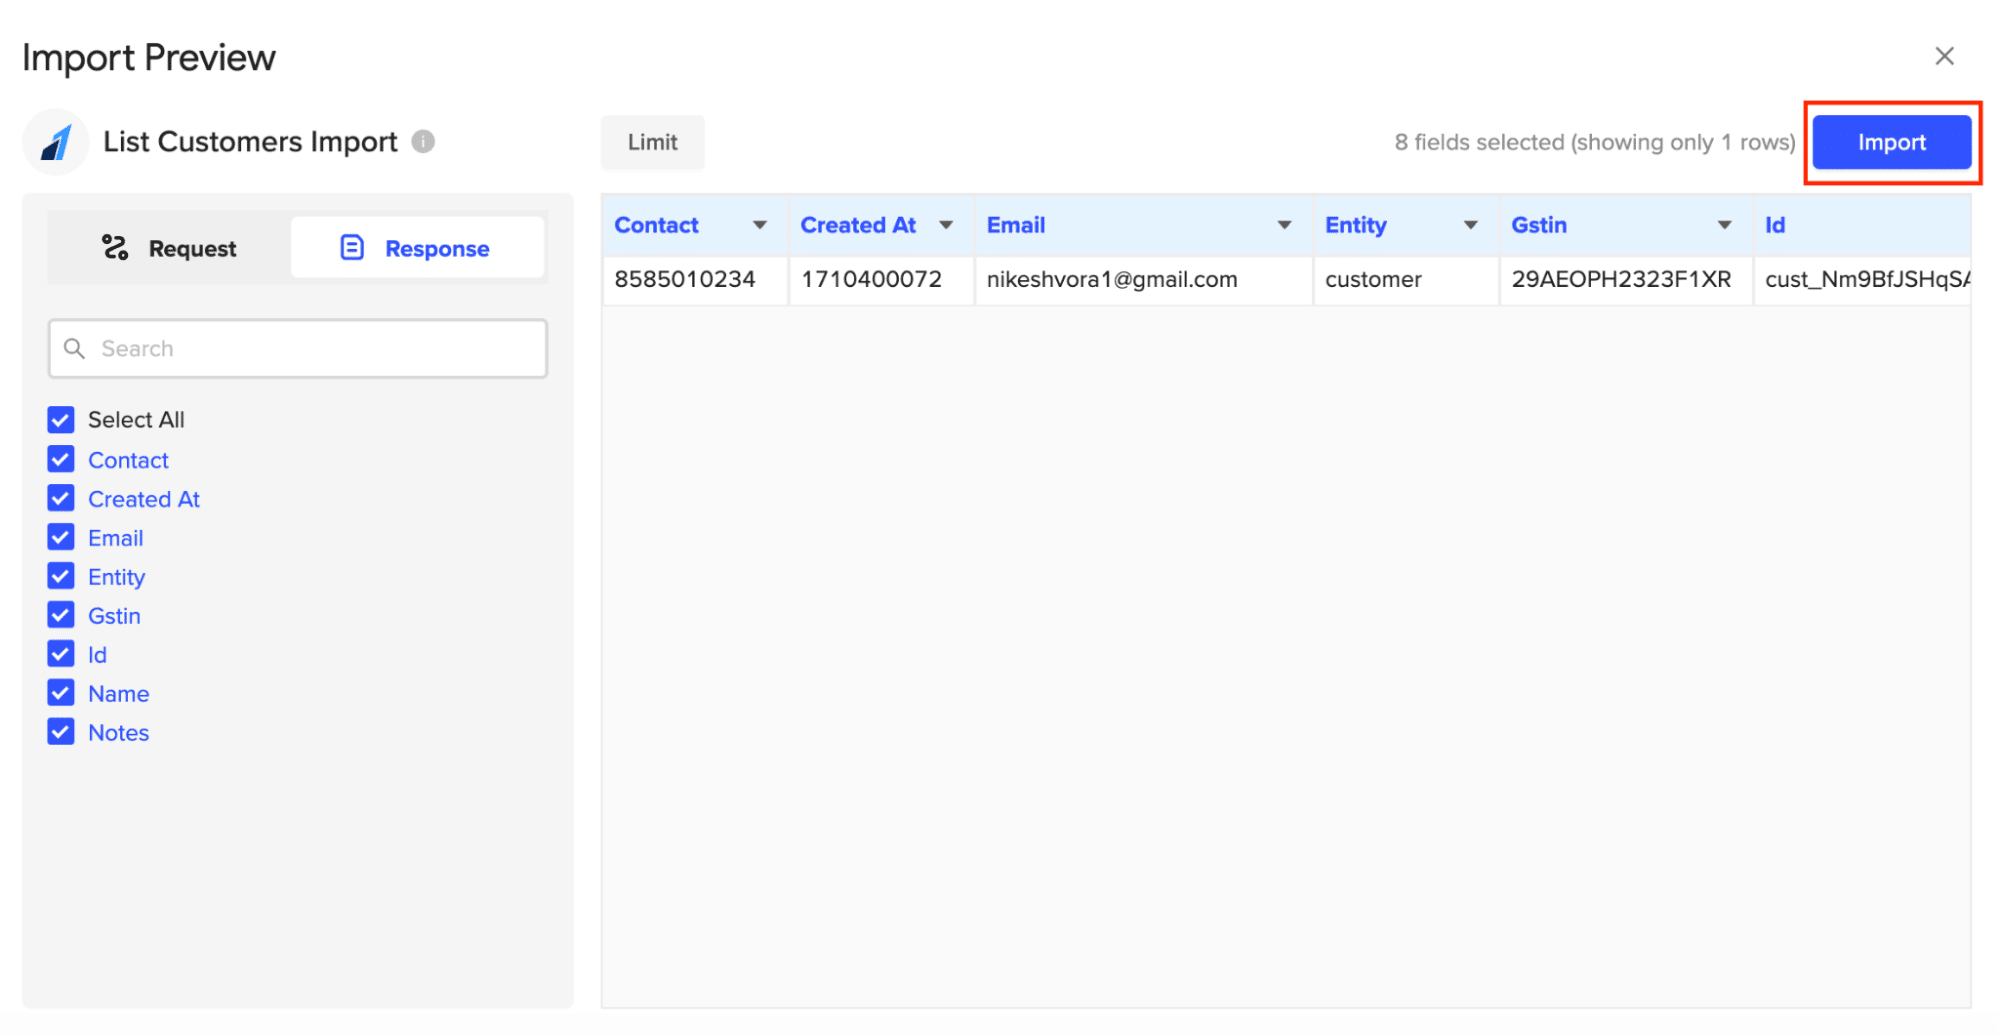
When finished, click “Import.” In a few seconds, your Razorpay data will populate your spreadsheet!

Step 3. Export Data Snowflake
Before starting, make sure you’ve connected to Snowflake.
https://www.youtube.com/watch?v=Zjym92WHgLM
Then, navigate to Coefficient’s menu. Click “Export to…”
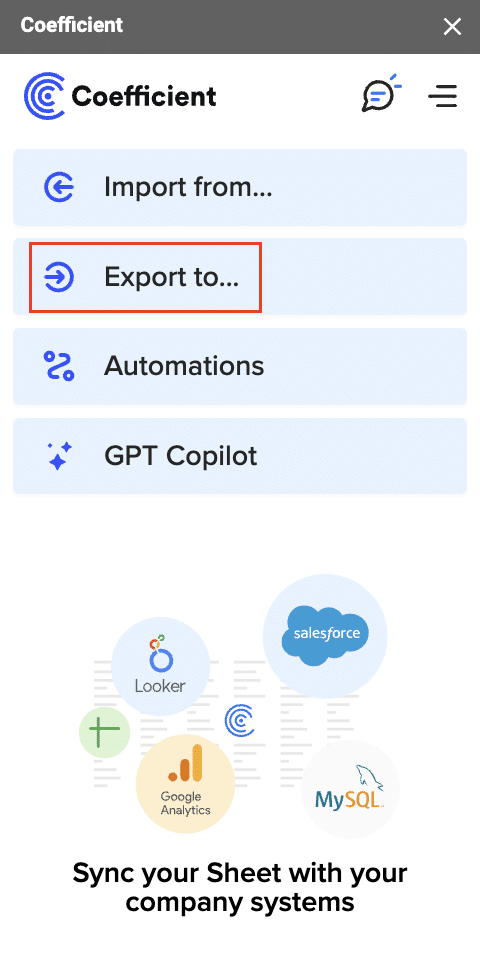
Step 2: Select Snowflake as the Data Source
Choose Snowflake from the list of available data sources.

Select the tab and header rows in your spreadsheet that contains the data you want to export.

Click “Next” to continue.
Select the table in your Snowflake database that you want to update. Then, select the type of action you want to perform—Update, Insert, Upsert, or Delete.

Map the fields from your spreadsheet to the corresponding Snowflake fields.
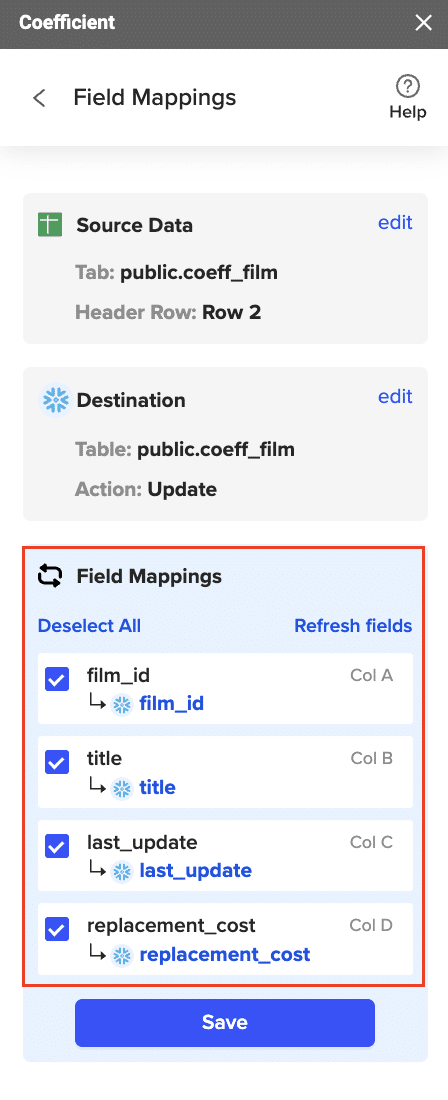
Note: Primary Keys (ID fields) are required for Update and Delete actions. For Insert actions, the Primary Key field can be set to auto populate if it’s configured in Snowflake.
Specify additional settings such as batch size, whether to export empty cells on an update, and the column for results.
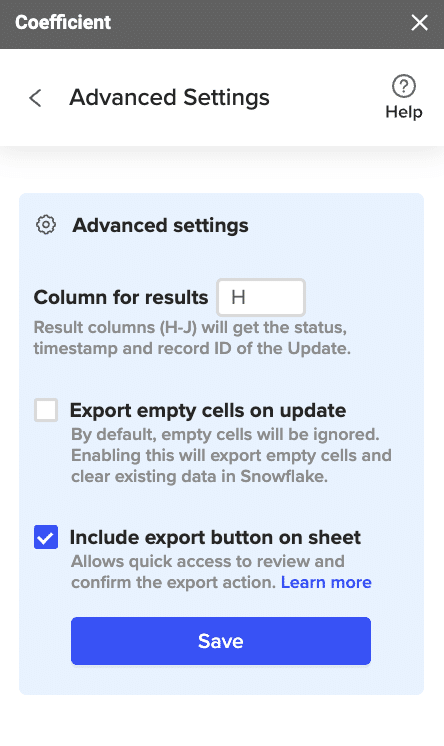
Confirm your settings.
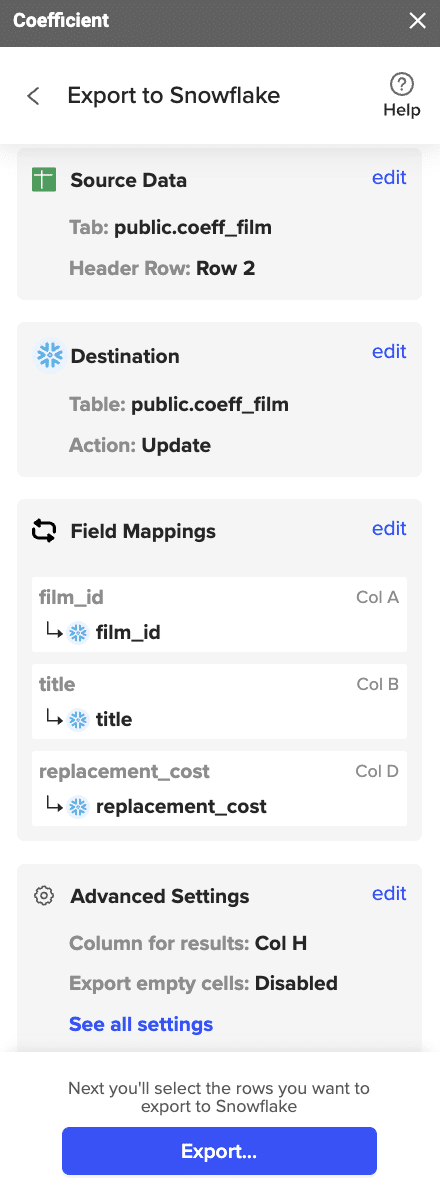
Then, highlight the rows you want to update or export. You can choose to export all rows or specific rows.

After you’re finished, review your settings and click “Export.”
Follow the prompts to confirm your changes.
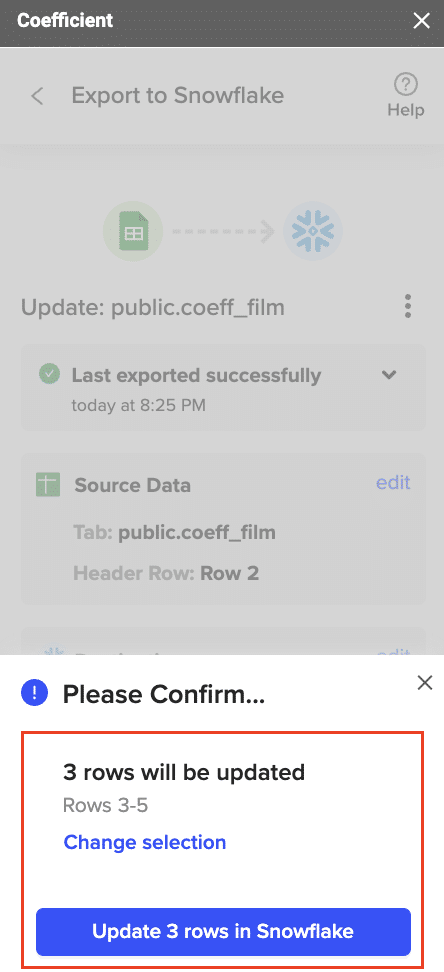
In a few seconds, data from your spreadsheet will push to Salesforce.

Review your settings and click “Export” to push your data from the spreadsheet to Snowflake.
Coefficient will then update the records in Snowflake, displaying the status, record ID, and timestamp of the updates in your spreadsheet.
Method 2: Hevo – Real-Time, No-Code Data Pipeline
Hevo is a no-code data pipeline platform that enables real-time data replication from various sources, including Razorpay, to destinations like Snowflake. It’s ideal for users who need automated data pipelines without the complexity of coding.
Pros:
- No-code setup: Hevo provides a user-friendly, no-code interface that simplifies the process of setting up data pipelines from Razorpay to Snowflake.
- Real-time sync: Hevo supports real-time data replication, ensuring that your Snowflake data warehouse is continuously updated with the latest transaction data.
- Robust monitoring: Hevo offers comprehensive monitoring tools that allow you to track the status and performance of your data pipelines in real-time.
Cons:
- Higher cost for advanced features: While Hevo’s basic features are accessible, more advanced functionalities and higher usage limits come at a premium price, which may be a consideration for cost-conscious businesses.
How to Connect Razorpay to Snowflake with Hevo
Step 1: Create a Hevo Account and Pipeline
- Sign up for a Hevo account at https://hevodata.com/.
- Click on “Create Pipeline” and select “Razorpay” as the source and “Snowflake” as the destination.
Step 2: Configure Razorpay as the Source
- Provide your Razorpay API credentials to authenticate the connection.
- Select the data you want to replicate (e.g., payments, refunds, etc.).
- Choose the replication frequency (real-time or scheduled).
Step 3: Set Up Snowflake as the Destination
- Provide your Snowflake account details, including the host, port, database, schema, and warehouse.
- Map the Razorpay data fields to the corresponding Snowflake table columns.
Step 4: Activate and Monitor the Pipeline
- Click “Activate Pipeline” to start the real-time data replication from Razorpay to Snowflake.
- Monitor the pipeline status and data flow from the Hevo dashboard.
Method 3: Airbyte – Open-Source, Customizable

Airbyte is an open-source data integration platform that offers extensive customization options and supports various connectors, including Razorpay and Snowflake. It’s best suited for users who require flexibility and have the technical expertise to set up and manage their data pipelines.
Pros:
- Open-source: Airbyte is an open-source platform, providing flexibility and the ability to customize the solution to meet specific needs without licensing fees.
- Highly customizable: Airbyte allows extensive customization of data workflows, making it suitable for businesses with complex data integration requirements.
- Extensive connector support: Airbyte supports a wide range of connectors, enabling seamless integration with multiple data sources and destinations.
Cons:
- Requires technical expertise for setup: Setting up and managing Airbyte may require significant technical knowledge, making it less suitable for non-technical users or businesses without dedicated IT resources.
How to Connect Razorpay to Snowflake with Airbyte
Step 1: Set Up Airbyte
- Install Airbyte on your local machine or server by following the instructions in the Airbyte documentation.
- Access the Airbyte web interface and create a new workspace.
Step 2: Configure Razorpay as the Source
- In the Airbyte web interface, click on “Sources” and select “Razorpay” from the list of available connectors.
- Provide your Razorpay API credentials and configure the data you want to replicate.
Step 3: Configure Snowflake as the Destination
- Click on “Destinations” in the Airbyte web interface and choose “Snowflake.”
- Enter your Snowflake account details and connection settings.
Step 4: Map Data Fields and Initiate Sync
- Create a new connection in Airbyte by selecting the configured Razorpay source and Snowflake destination.
- Map the Razorpay data fields to the corresponding Snowflake table columns.
- Set the sync schedule and initiate the data replication process.
Connect Razorpay to Snowflake Without a Line of Code
Connecting Razorpay and Snowflake can revolutionize your data management and analytics processes. Whether you choose Coefficient for its simplicity, Hevo for real-time data replication, or Airbyte for its customization options, integrating these platforms will help you streamline your data management, enhance reporting, improve accuracy, and increase efficiency.
Ready to take your data integration to the next level? Get started with Coefficient today and experience the power of seamless data syncing between Razorpay and Snowflake. Try Coefficient now!


