How to Connect Google Ads to Snowflake
Transferring data from Google Ads to Snowflake is essential for businesses looking to leverage their advertising data for advanced analytics.
In this blog, you’ll learn about different methods to connect Google Ads with Snowflake seamlessly. By the end, you’ll have a clear understanding of how to set up these connections and optimize your data workflows.
Advantages of Connecting Google Ads to Snowflake
- Measure advertising ROI: Combine Google Ads data with sales and customer data in Snowflake to accurately measure the return on your advertising spend.
- Optimize ad targeting: Use Snowflake’s advanced analytics capabilities to better target your Google Ads campaigns based on customer behavior and preferences.
- Streamline data management: Automate the transfer of data from Google Ads to Snowflake, reducing manual effort and ensuring data consistency.
Connecting Google Ads and Snowflake: 3 Methods
Connecting Google Ads to Snowflake is crucial for businesses looking to analyze their advertising performance data alongside other marketing and sales data. There are several solutions available, each catering to different needs and user preferences.
| Solution | Best For |
| Coefficient | Marketing teams who want to analyze Google Ads performance data alongside other marketing and sales data in Snowflake using a no-code spreadsheet connector. |
| Fivetran | Companies that need to continuously replicate large volumes of data from Google Ads to Snowflake using a fully managed, automated data integration platform. |
| Stitch | Organizations that want an easy-to-use, affordable solution for moving data from Google Ads t |
How to Connect Google Ads to Snowflake
In this section, we’ll discuss three methods to achieve this connection: Coefficient, Hevo Data, and Airbyte.
Method 1: Coefficient – No-Code, User-Friendly
Coefficient connects your spreadsheet to all your business data without a single line of code. It provides a user-friendly interface and automatic data updates, making it a reliable option for both technical and non-technical users.
Relevant Coefficient Features
- No-code setup
- Two-way sync functionality
- Automatic data updates
Pros and Cons
Pros:
- Simple, no-code setup
- Automatic data updates
- Affordable pricing plans
Cons:
- Scheduled automations are not free forever, but pricing plans are affordable
Step-by-Step Guide
Step 1. Install Coefficient
For Google Sheets
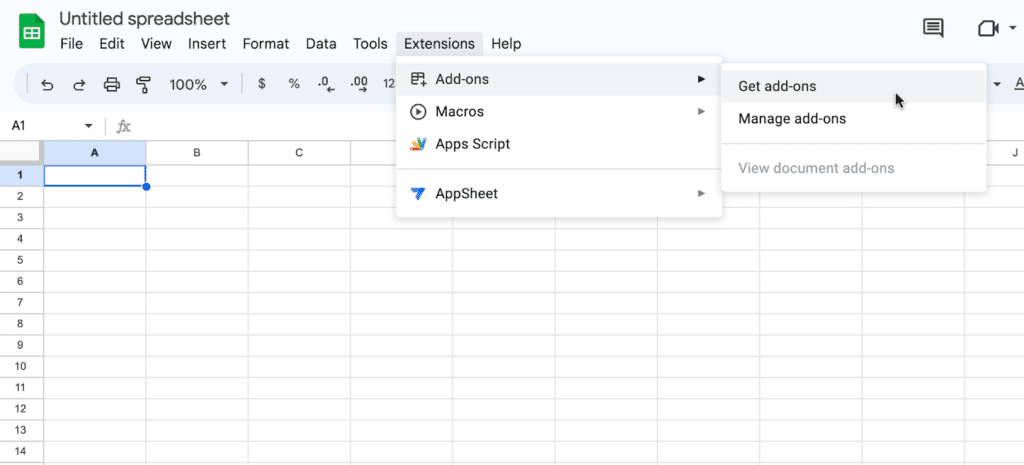
Open a new or existing Google Sheet, navigate to the Extensions tab, and select Add-ons > Get add-ons.
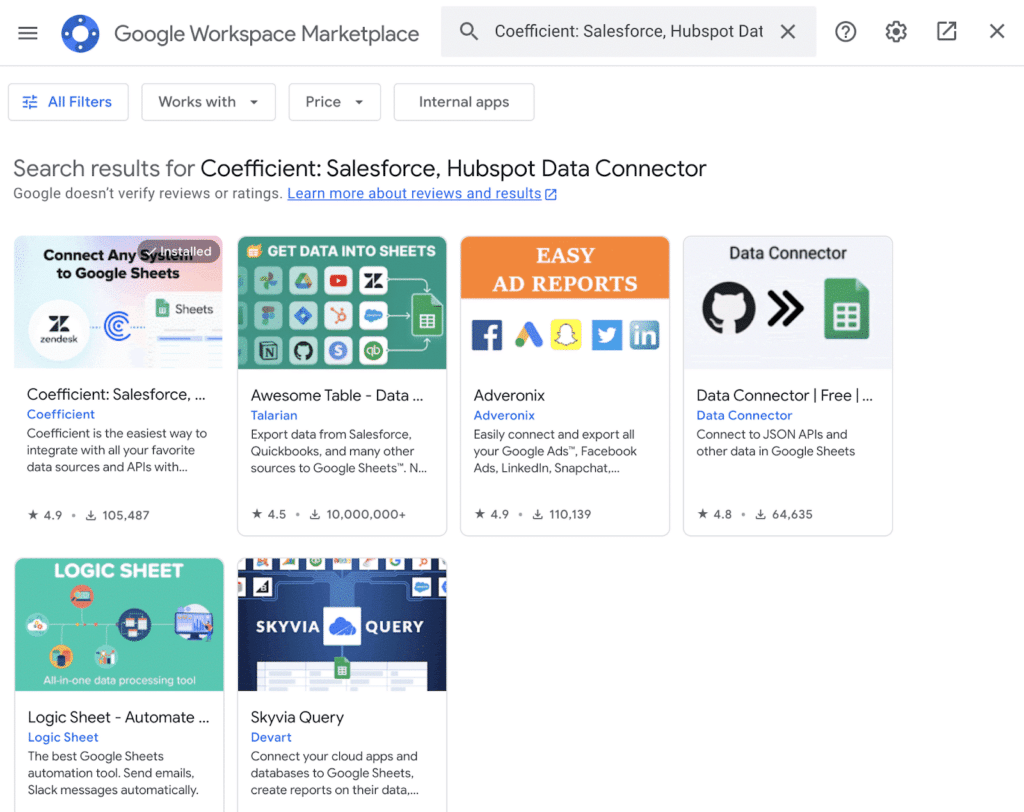
In the Google Workspace Marketplace, search for “Coefficient.”
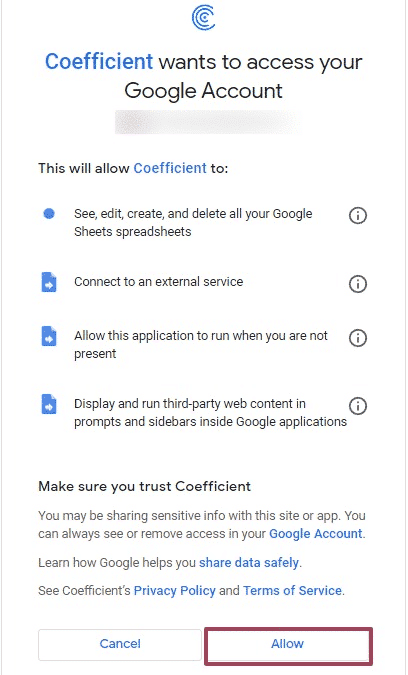
Follow the prompts to grant necessary permissions.
Launch Coefficient from Extensions > Coefficient > Launch.
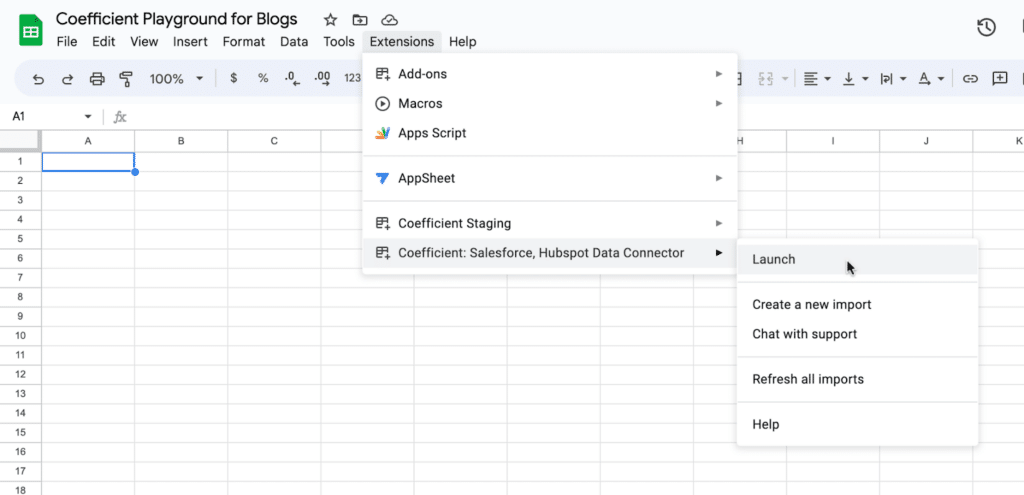
Coefficient will open on the right-hand side of your spreadsheet.

For Microsoft Excel
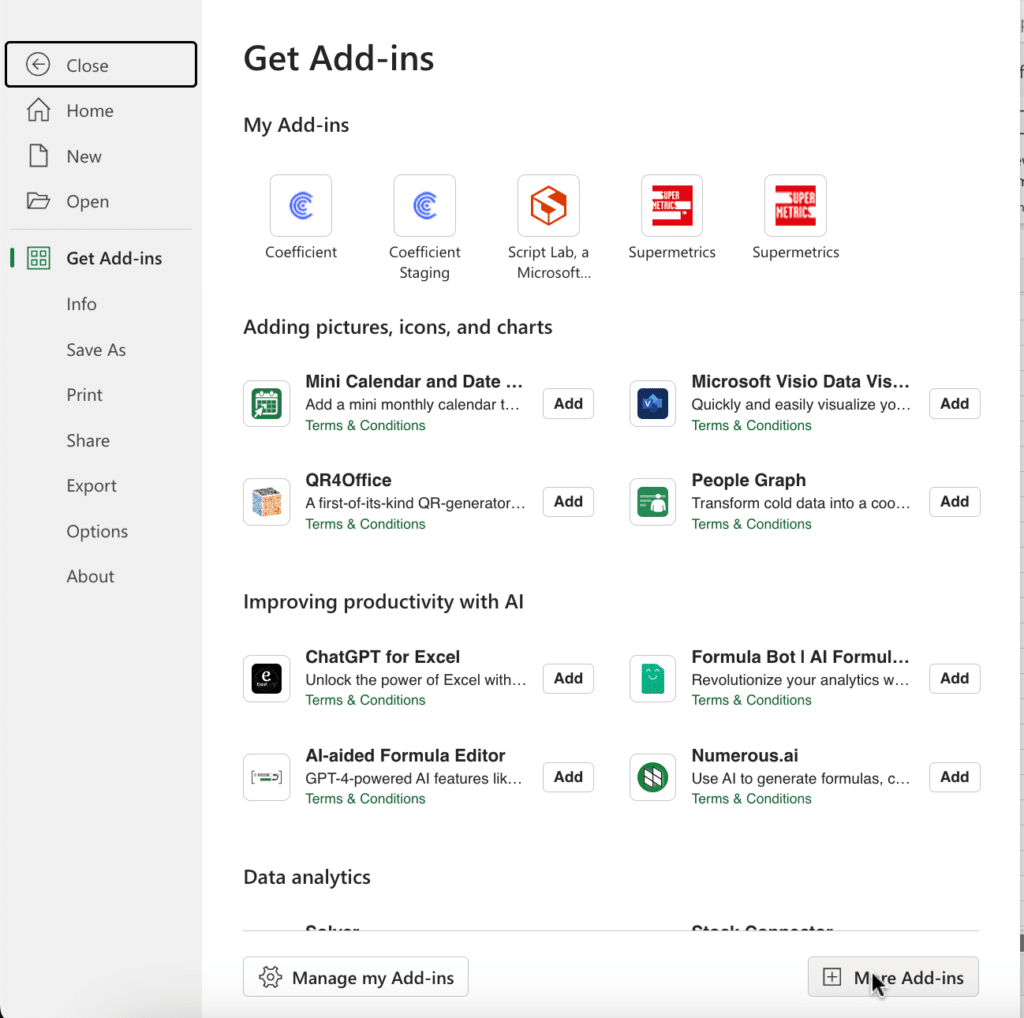
Open Excel from your desktop or in Office Online. Click ‘File’ > ‘Get Add-ins’ > ‘More Add-Ins.’
Type “Coefficient” in the search bar and click ‘Add.’
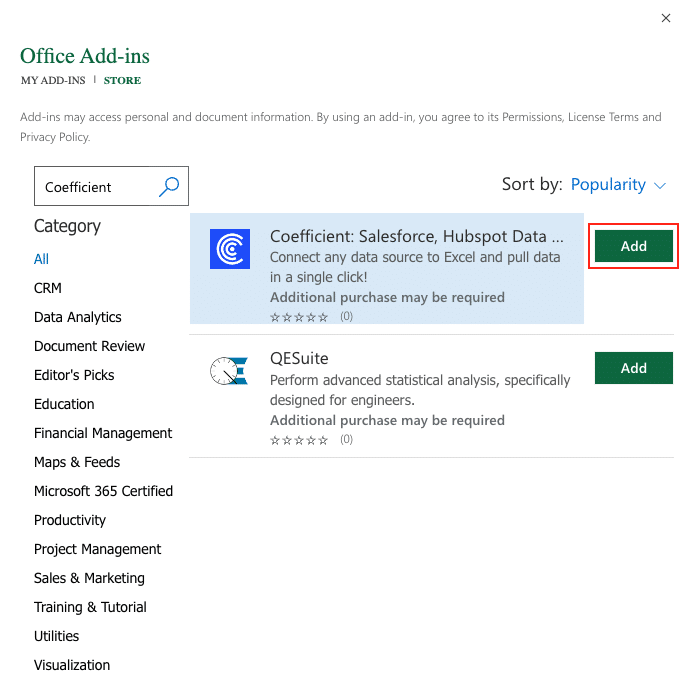
Follow the prompts in the pop-up to complete the installation.
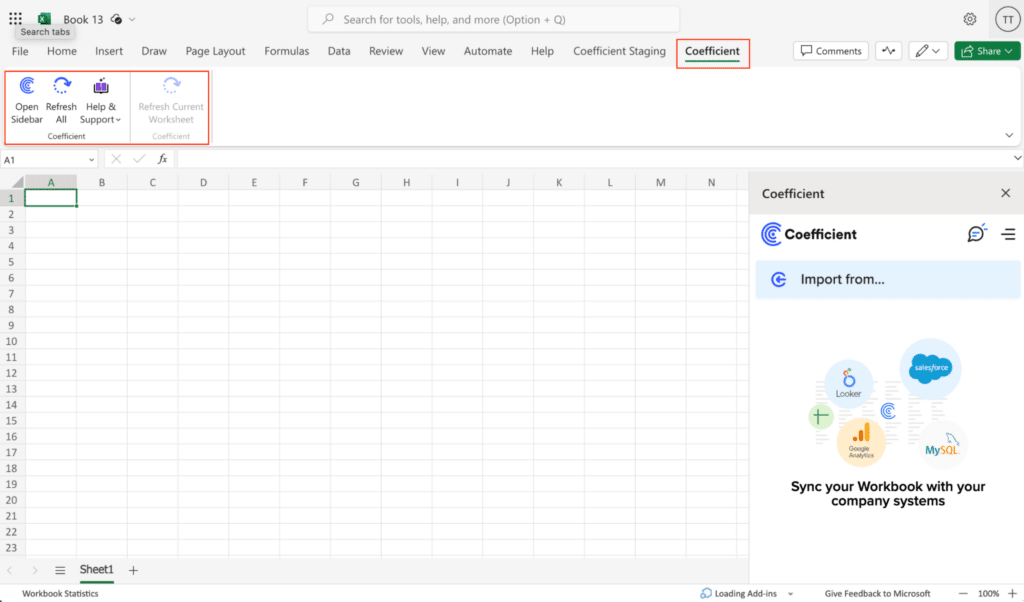
Once finished, you will see a “Coefficient” tab in the top navigation bar. Click ‘Open Sidebar’ to launch Coefficient.
Step 2. Import Google Ads Data from Your Spreadsheet
Select ‘Import from…’
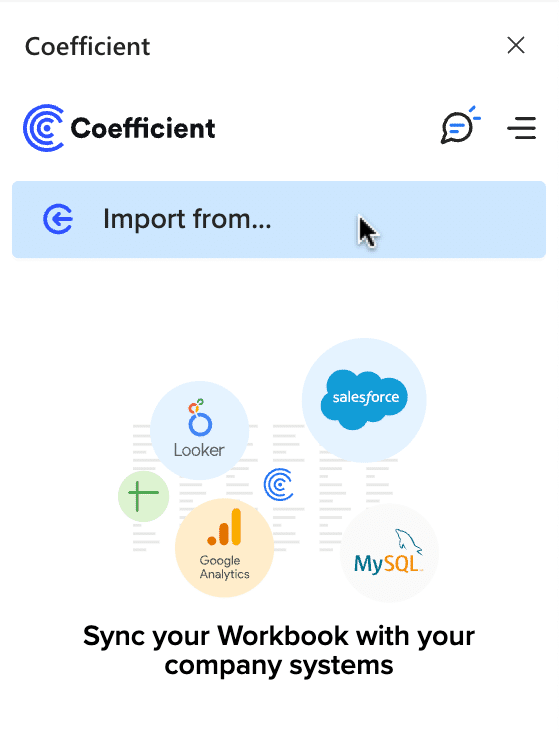
Scroll down until you find Google Ads and click ‘Connect.’

Follow the prompts to authorize Coefficient to your Google Ads account.

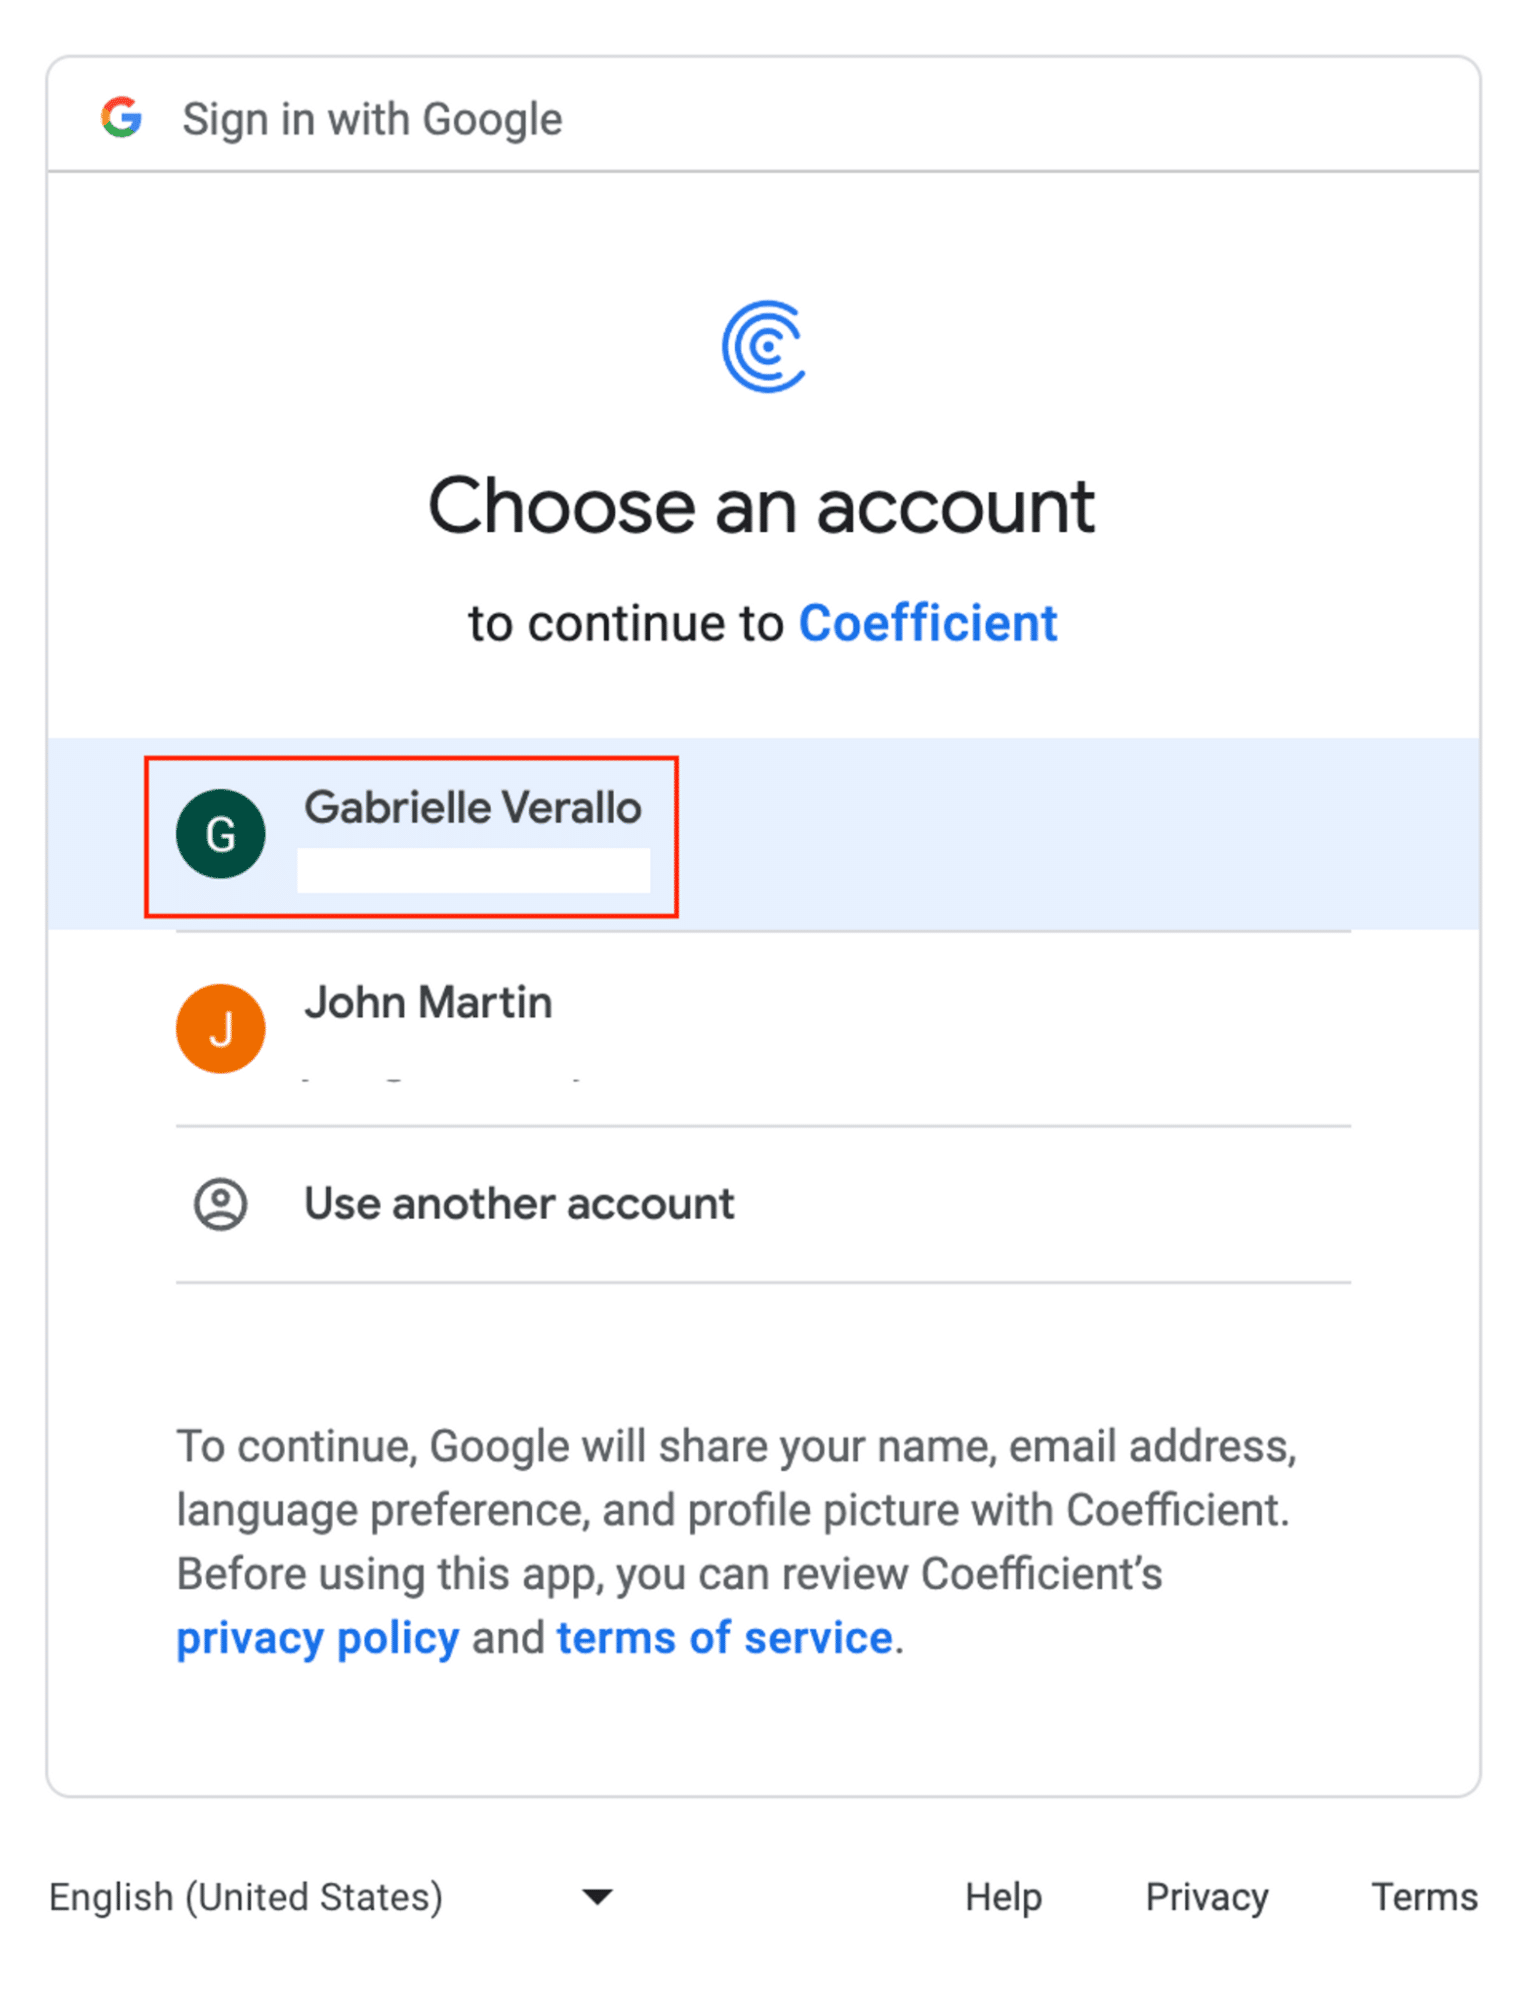
Select the email address associated with your Google Ads account.
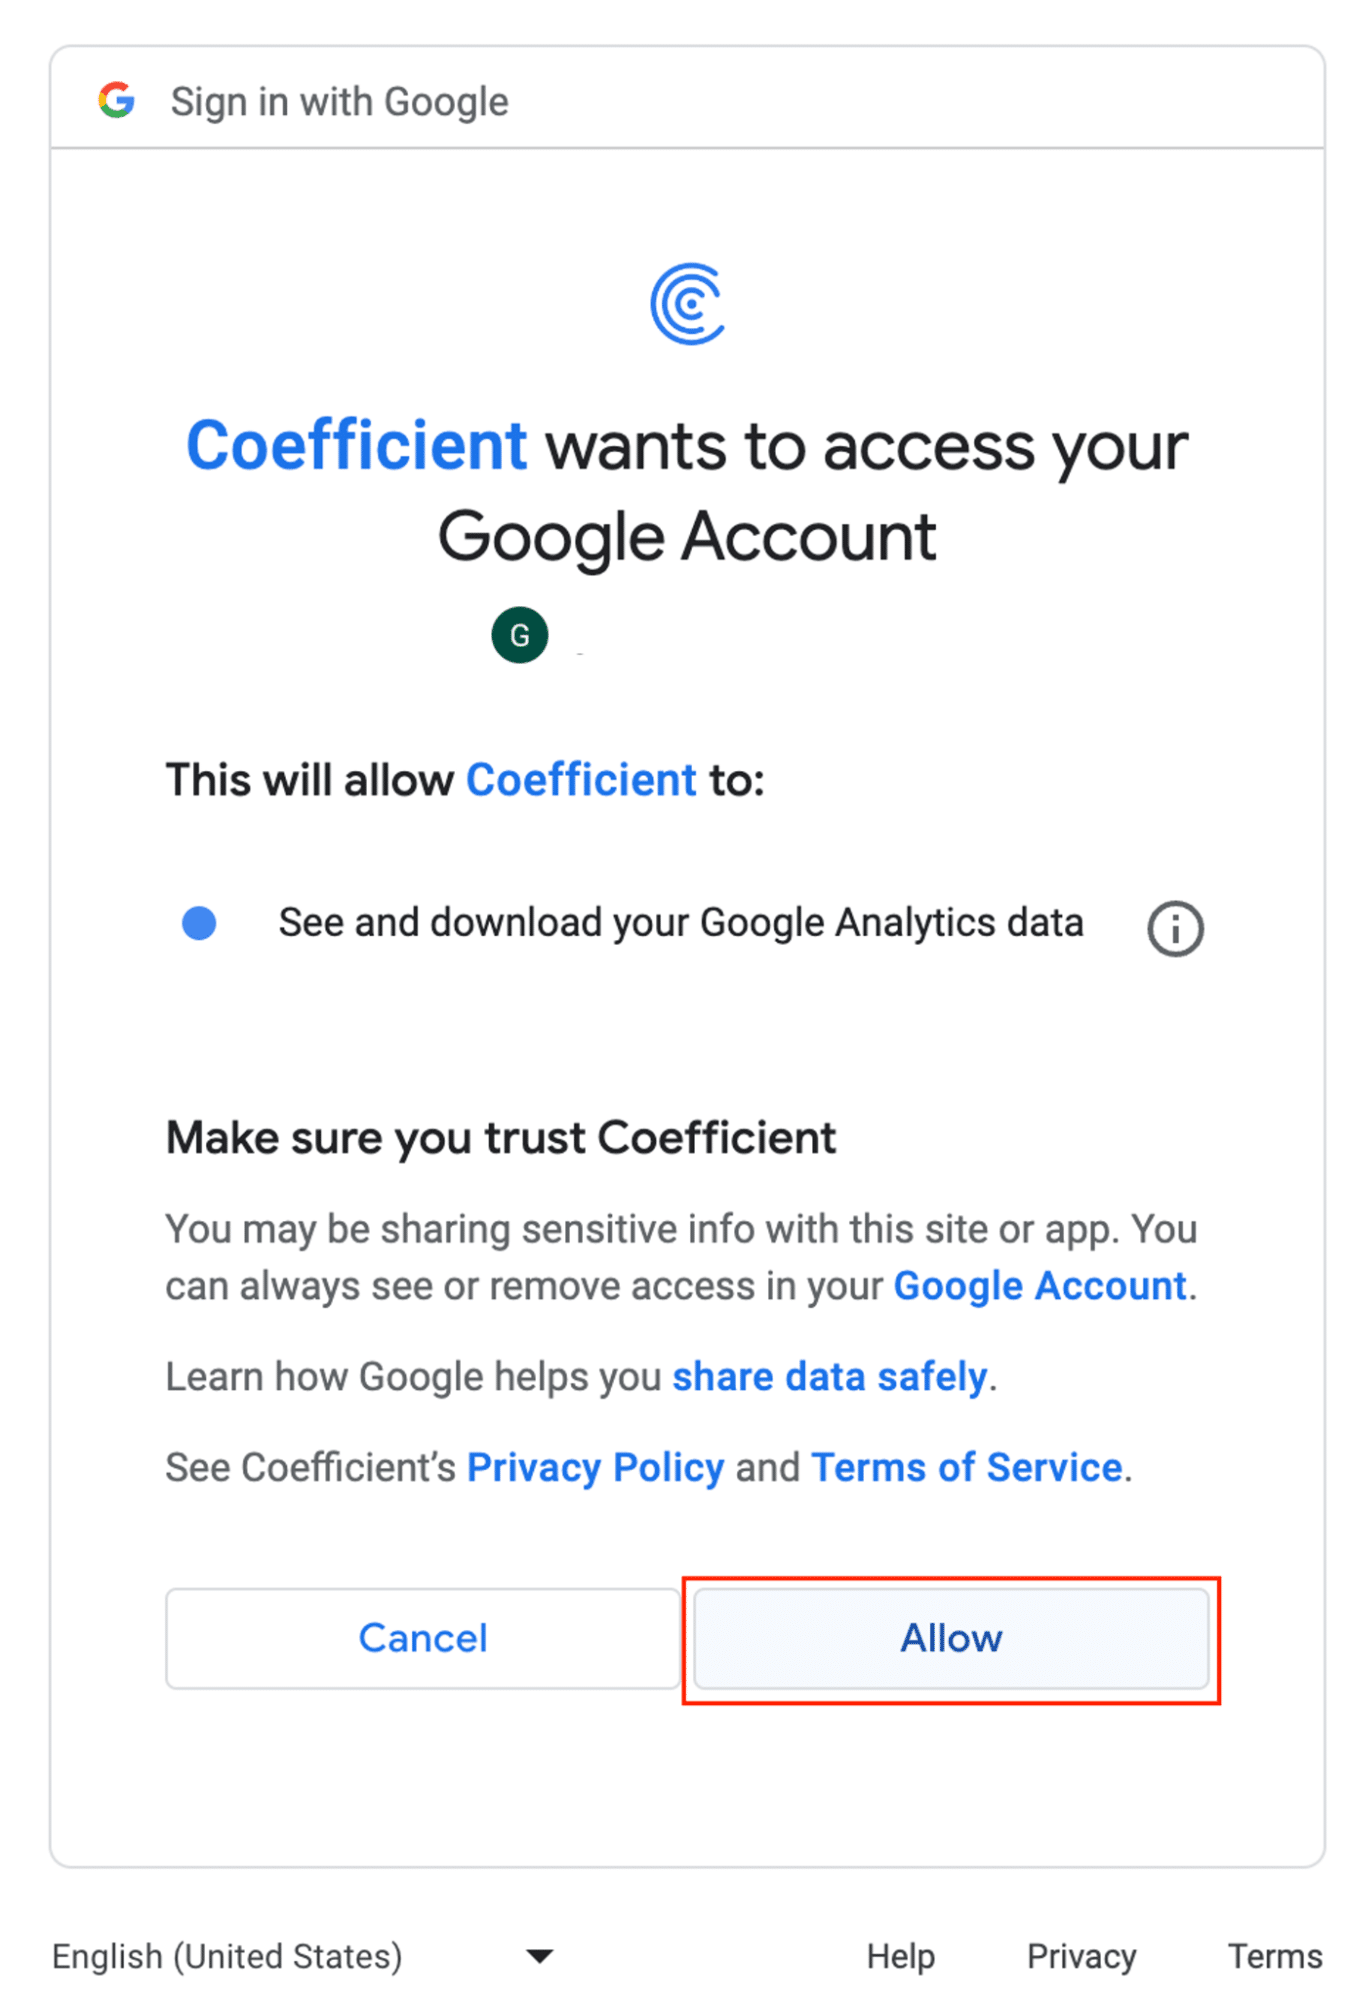
Click ‘Allow’ to finish the authorization process.
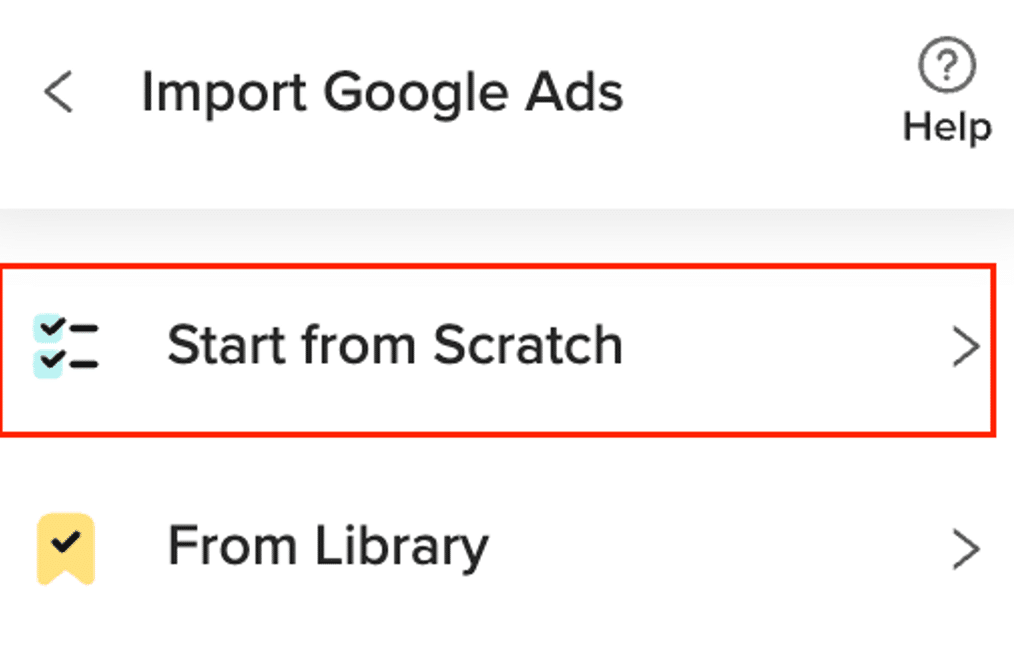
Return to Google Ads from Coefficient’s menu > ’Import From…’ > ‘Start from Scratch.’
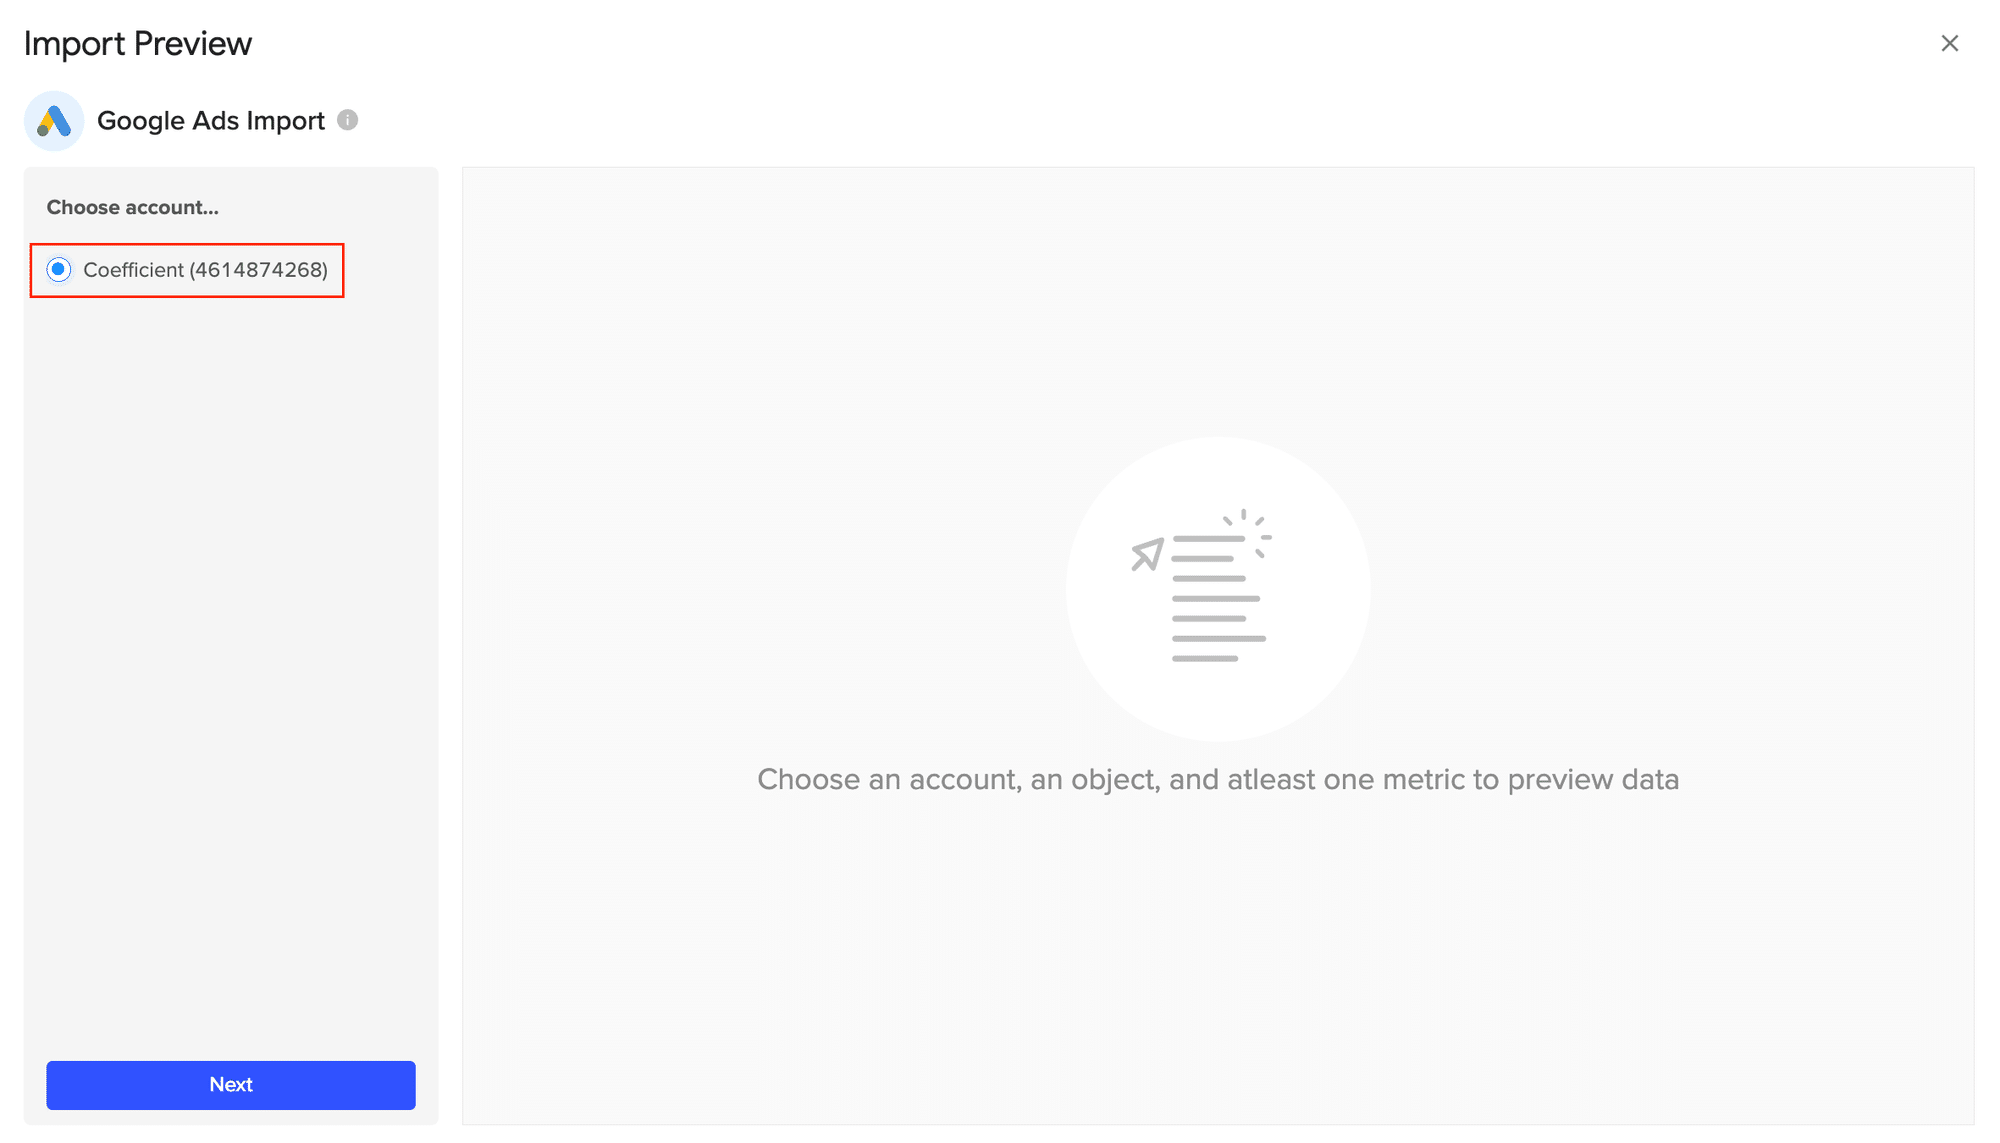
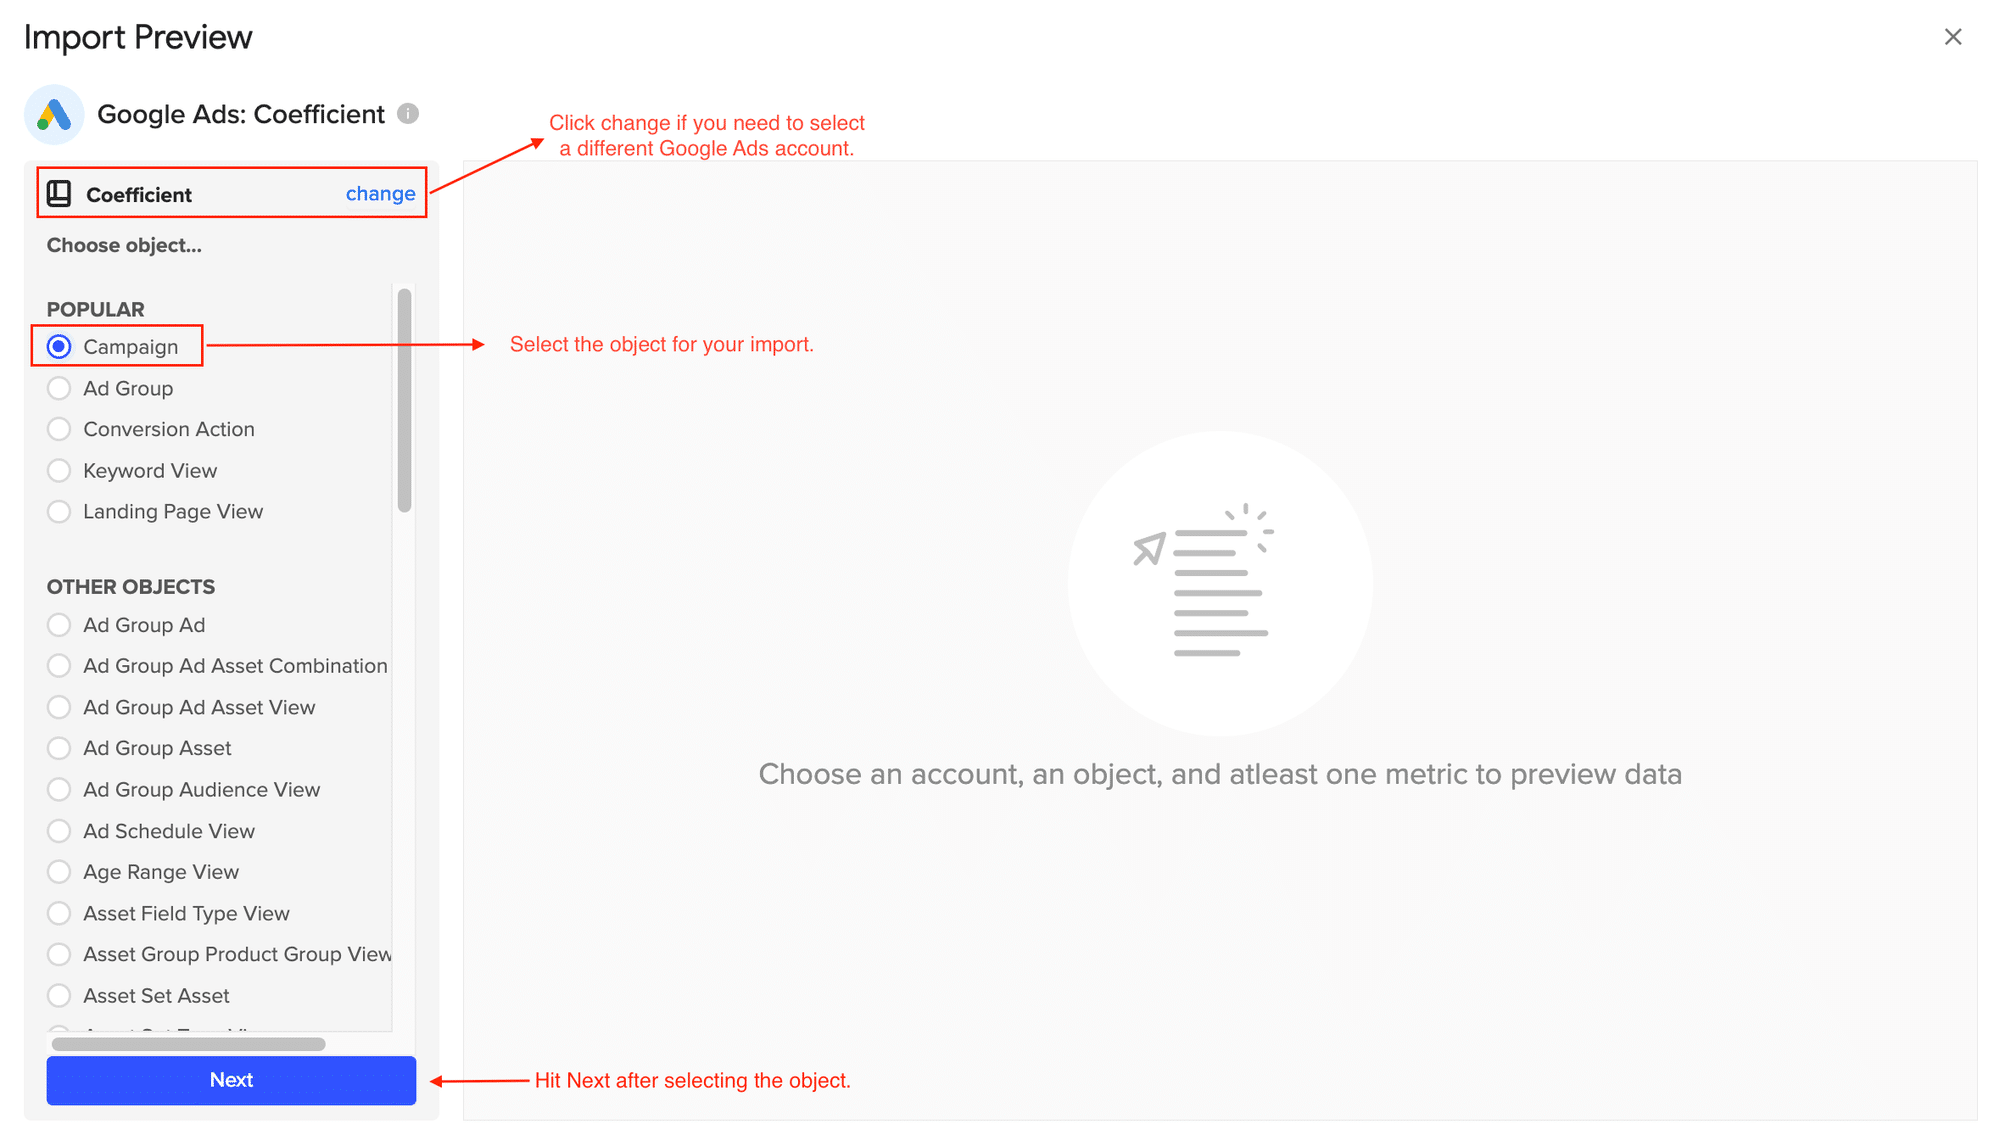
Select your Google Ads account from the “Import Preview” window.
Click ‘Next’ to continue.
Select an object from those listed (e.g., ”Campaign”).
Popular objects are displayed at the top, but you can scroll down to find other objects to pull from.
Customize your import by adding filters, and row limits as needed.
Select the ‘Refresh Preview’ option to update the sample data based on what customizations are added. When you’re finished, click ‘Import’ to continue.
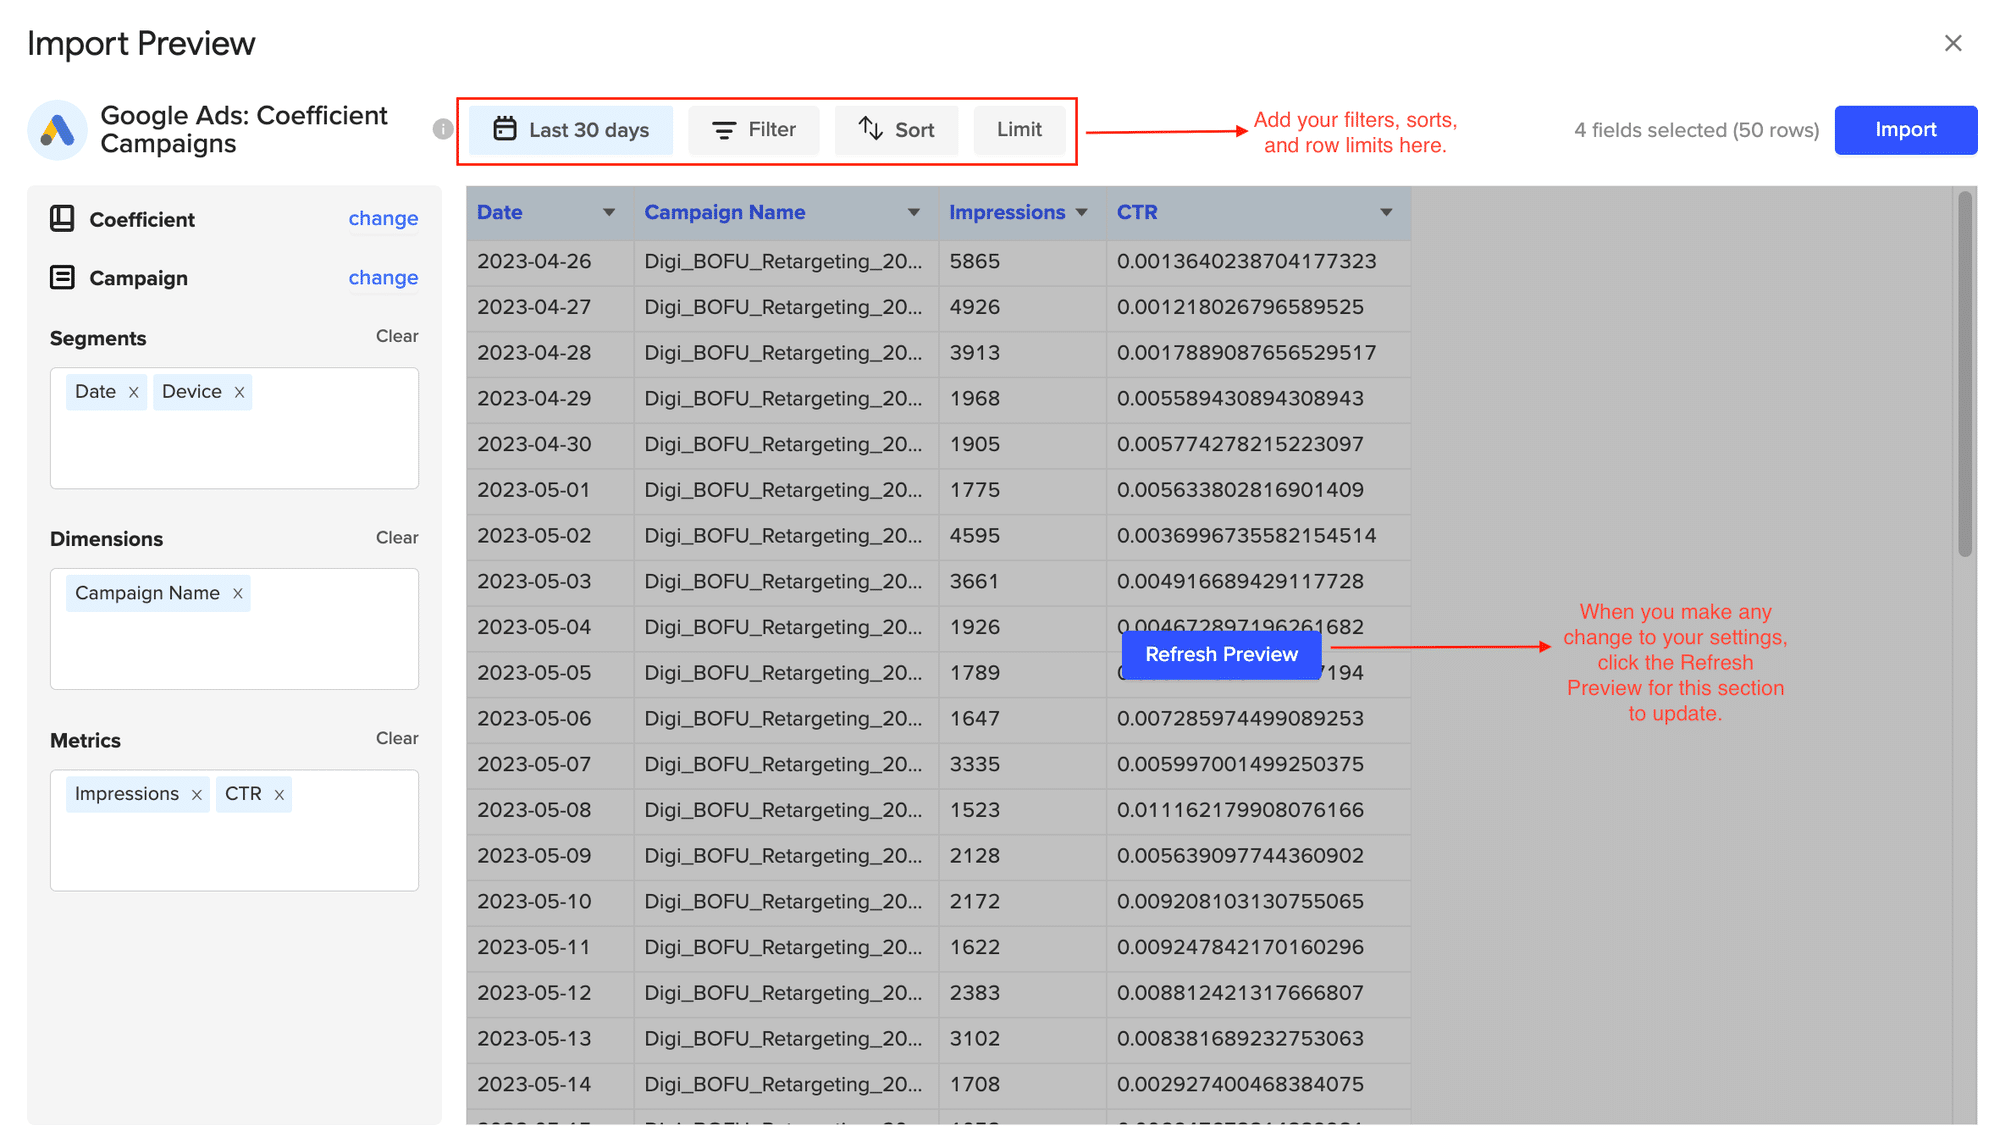
Your data will populate your spreadsheet in a few seconds.

Step 3. Export Data from Your Spreadsheet to Snowflake
Before starting, make sure you’ve connected to Snowflake.
https://www.youtube.com/watch?v=Zjym92WHgLM
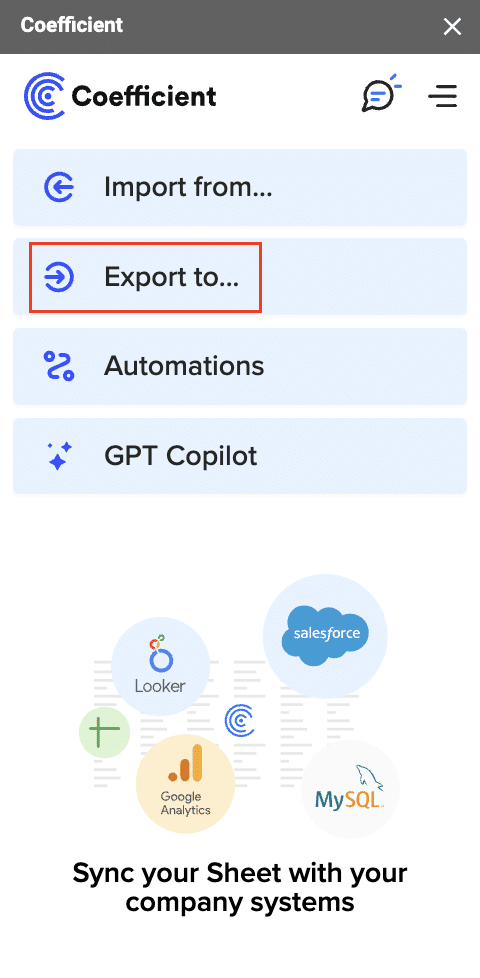
Then, navigate to Coefficient’s menu. Click “Export to…”
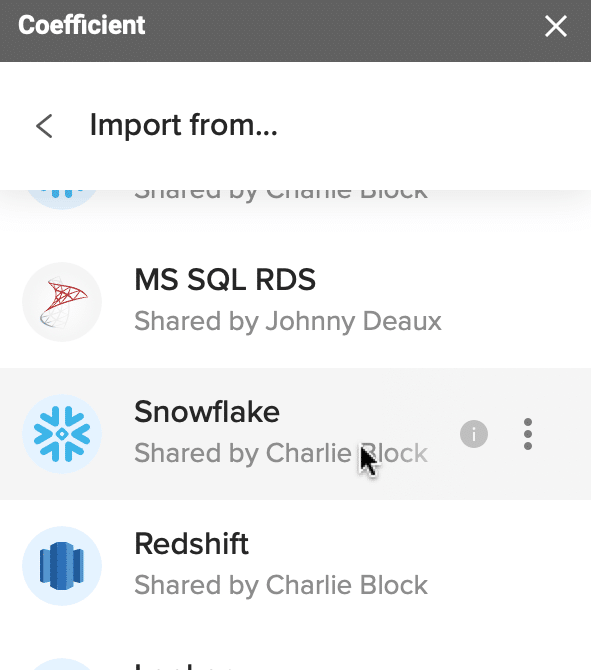
Choose Snowflake from the list of available data sources.
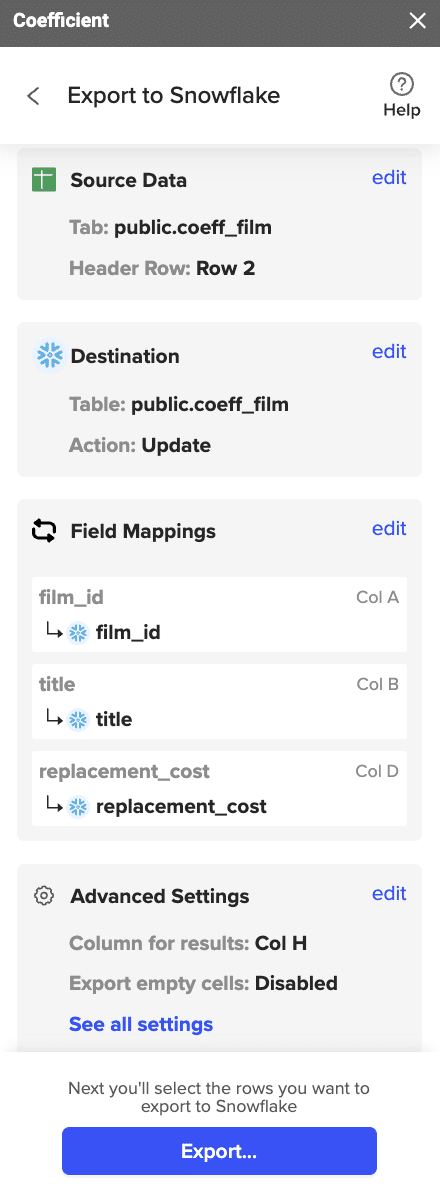
Select the tab and header rows in your spreadsheet that contains the data you want to export.
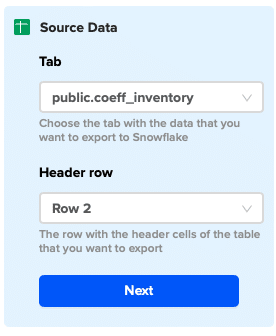
Click “Next” to continue.
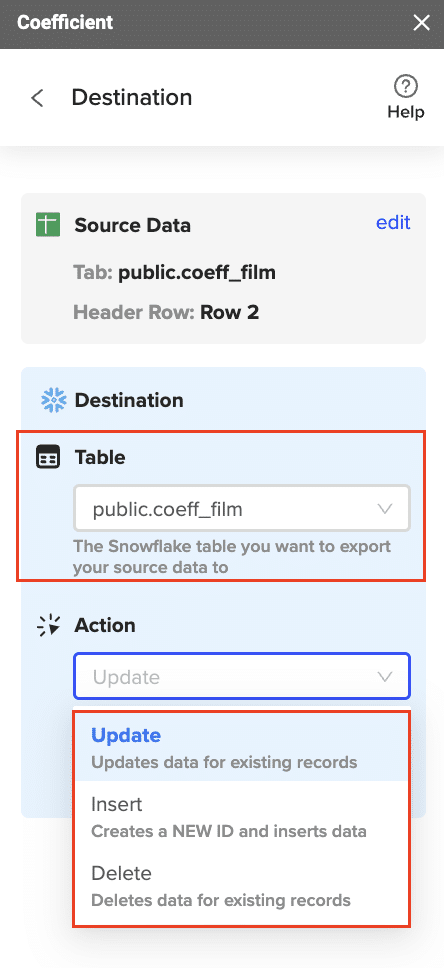
Select the table in your Snowflake database that you want to update. Then, select the type of action you want to perform—Update, Insert, Upsert, or Delete.
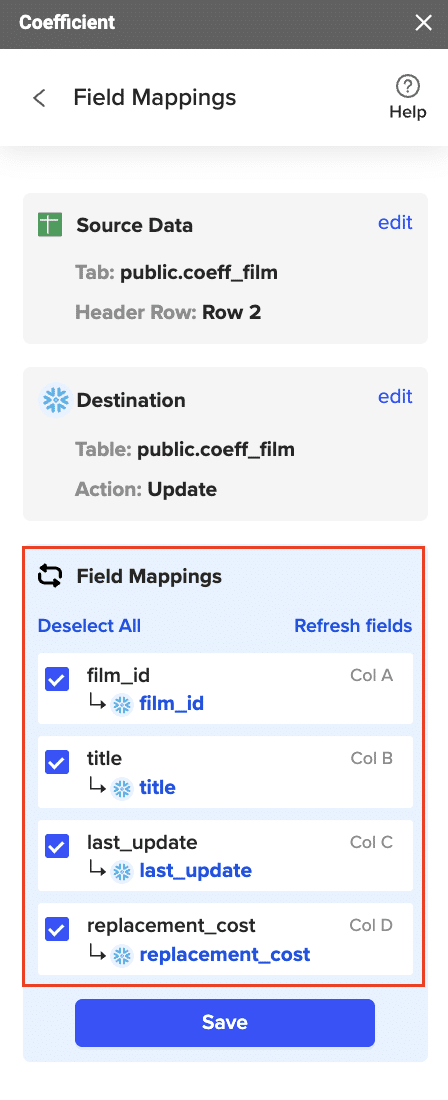
Map the fields from your spreadsheet to the corresponding Snowflake fields.
(Optional) Specify additional settings such as batch size, whether to export empty cells on an update, and the column for results.
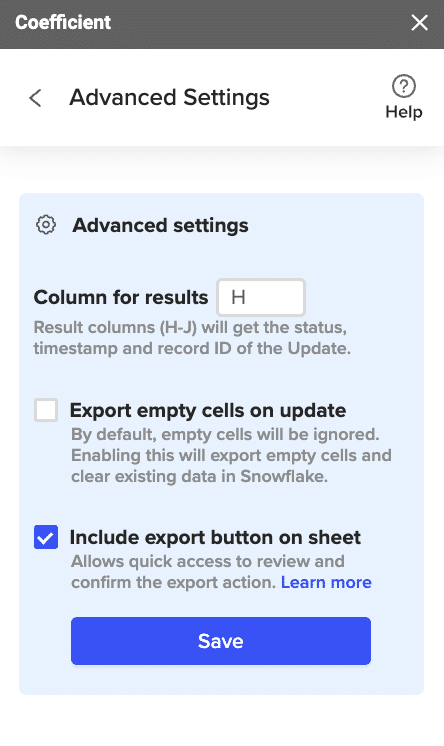
Confirm your settings.
Then, highlight the rows you want to update or export. You can choose to export all rows or specific rows.
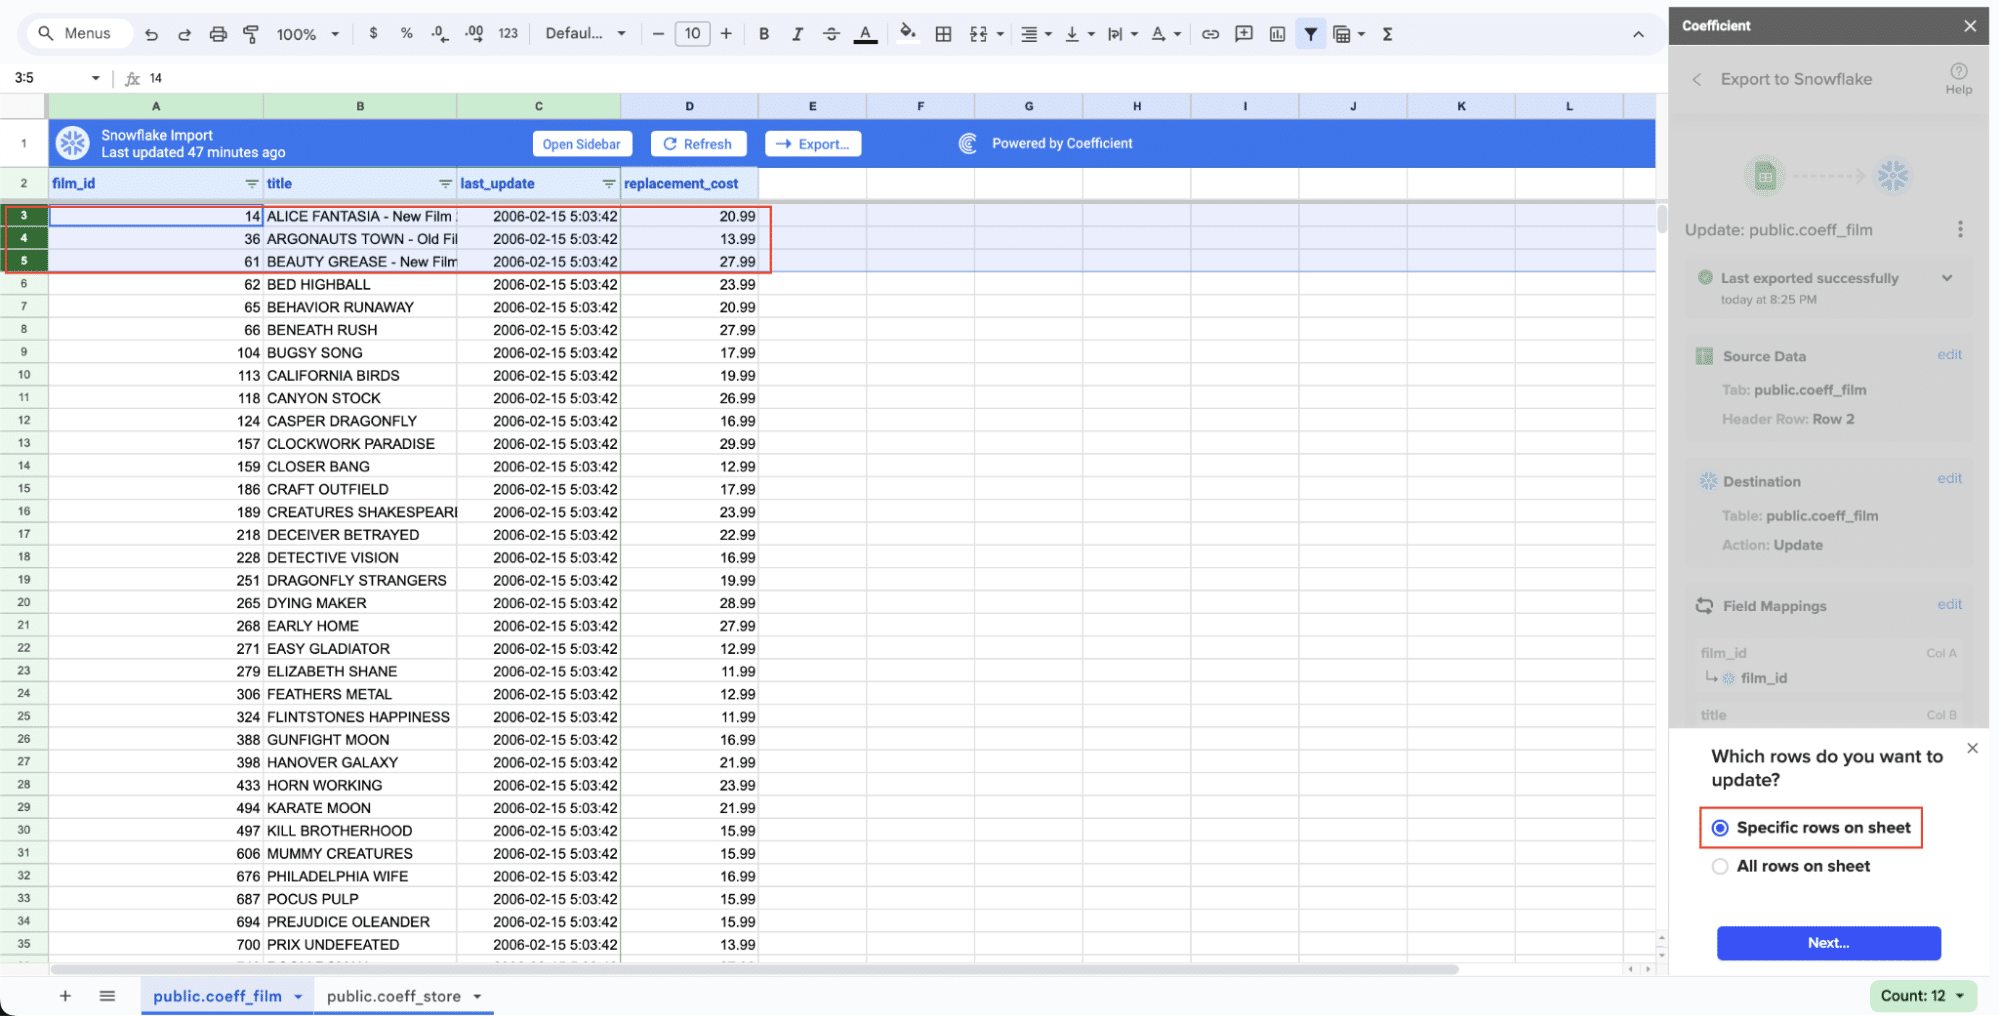
After you’re finished, review your settings and click “Export.”
Follow the prompts to confirm your changes.

In a few seconds, data from your spreadsheet will be pushed to Snowflake.

Coefficient will then update the records in Snowflake, displaying the status, record ID, and timestamp of the updates in your spreadsheet.
Method 2: Fivetran – Fully Managed, Automated
Fivetran is a fully managed data integration platform that automates the process of replicating data from Google Ads to Snowflake. It supports continuous data updates and is ideal for handling large volumes of data.
Pros and Cons
Pros:
- Fully automated
- Handles large volumes of data
- Reliable and robust
Cons:
- Higher cost compared to other solutions
- Requires a subscription
Step-by-Step Guide
- Set Up Fivetran Account
- Go to the Fivetran website and sign up for an account.
- Follow the onboarding process to configure your Fivetran account.
- Configure Google Ads Connector
- In the Fivetran dashboard, select “Add Connector.”
- Choose Google Ads as your data source and follow the prompts to authenticate your account.
- Set Up Snowflake Destination
- Select Snowflake as your destination.
- Enter your Snowflake credentials and configure the connection settings.
- Sync Data
- Define the data you want to sync from Google Ads to Snowflake.
- Set up the sync schedule and frequency.
- Start the data replication process and monitor it through the Fivetran dashboard.
Method 3: Stitch – Easy-to-Use, Affordable ETL
Stitch offers a straightforward and affordable solution for moving data from Google Ads to Snowflake. It provides a simple setup process and supports a variety of data sources.
Pros and Cons
Pros:
- Easy to use
- Affordable pricing
- Supports a wide range of data sources
Cons:
- May require some initial configuration
- Limited features compared to enterprise solutions
Step-by-Step Guide
- Create Stitch Account
- Sign up for a Stitch account on the Stitch website.
- Complete the onboarding steps to set up your account.
- Set Up Google Ads Integration
- In the Stitch dashboard, select “Add Integration.”
- Choose Google Ads as your data source and authenticate your account.
- Configure Snowflake Destination
- Add Snowflake as your destination.
- Enter the required connection details for your Snowflake account.
- Define Sync Settings
- Choose the data you want to replicate from Google Ads.
- Configure the sync schedule and any additional settings.
- Start the sync process and monitor it using the Stitch dashboard.
Conclusion
Connecting your Google Ads data to Snowflake empowers your business to take full advantage of the wealth of data generated from advertising campaigns.
Each method outlined offers unique features and benefits, making it possible to choose one that best aligns with your technical skills and specific business needs.
If you’re looking for a user-friendly no-code solution, try Coefficient today and start transforming your data workflows.


