Outreach is a leading sales engagement platform that helps sales teams efficiently manage their communication with prospects and customers. Snowflake is a cloud-based data warehousing solution known for its scalability, performance, and ease of use. Integrating Outreach with Snowflake can streamline data workflows, enhance analytics capabilities, and provide real-time data updates. In this blog post, we’ll explore three effective methods to achieve this integration.
Advantages of Connecting Outreach to Snowflake
Integrating Outreach with Snowflake offers several key benefits:
- Predictive Opportunity Scoring: By combining Outreach engagement data with historical deal outcomes in Snowflake, you can build sophisticated machine learning models to predict the likelihood of deal closure. This allows sales teams to prioritize high-potential opportunities and allocate resources more effectively, potentially increasing win rates and overall revenue.
- Comprehensive Sales Activity Analysis: Integrate Outreach activity data (emails sent, calls made, meetings booked) with performance metrics in Snowflake to conduct in-depth analysis of sales rep productivity. This enables you to identify best practices from top performers and optimize sales processes across the organization, potentially leading to improved efficiency and higher conversion rates.
- Dynamic Territory Optimization: Leverage the integration to analyze historical performance data from Outreach alongside geographic and industry data in Snowflake. This allows for data-driven territory assignments, ensuring that accounts are distributed optimally among sales reps based on factors like past success rates, industry expertise, and geographic proximity.
Connecting Outreach to Snowflake: 3 Methods
| Solution | Best For |
| Coefficient | Sales operations teams in small to medium-sized businesses who frequently work with spreadsheets for analysis and reporting. Ideal for organizations that need to combine Outreach data with other sales metrics before pushing to Snowflake. |
| Hevo | Fast-growing sales organizations that require near real-time replication of Outreach data to Snowflake, along with data from multiple other sources. Optimal for companies building a comprehensive data lake with minimal engineering resources. |
| Airbyte | Tech-savvy sales operations teams or organizations with complex data integration requirements. Best for businesses that need advanced data transformations, custom scheduling, and the flexibility to modify or extend the integration as needed. |
How to Connect Outreach to Snowflake: Step-by-Step Guide
Method 1: Coefficient – No-Code, User-Friendly
Coefficient is a no-code solution that allows you to connect your spreadsheets directly to Outreach, Snowflake, and many other platforms. It’s an excellent choice if you want a quick, easy way to integrate these systems without writing any code.
- No-code setup: Coefficient can be set up entirely through a visual interface, no coding required.
- Automatic data updates: Once configured, Coefficient will automatically keep your data in sync between systems.
- Affordable pricing plans: Coefficient offers pricing plans to fit a variety of budgets, starting at just $29/month.
Pros and Cons
- Pros:
- Simple, no-code setup
- Automatic data updates
- Affordable pricing plans
- Cons:
- Some advanced features only available on higher pricing tiers
Step-by-Step Walkthrough
Here’s how to set up an Outreach to Snowflake integration with Coefficient:
- Installing Coefficient
First, you’ll need to install the Coefficient add-on in your Google Sheets or Excel Online account.
Step 1: Install the Coefficient
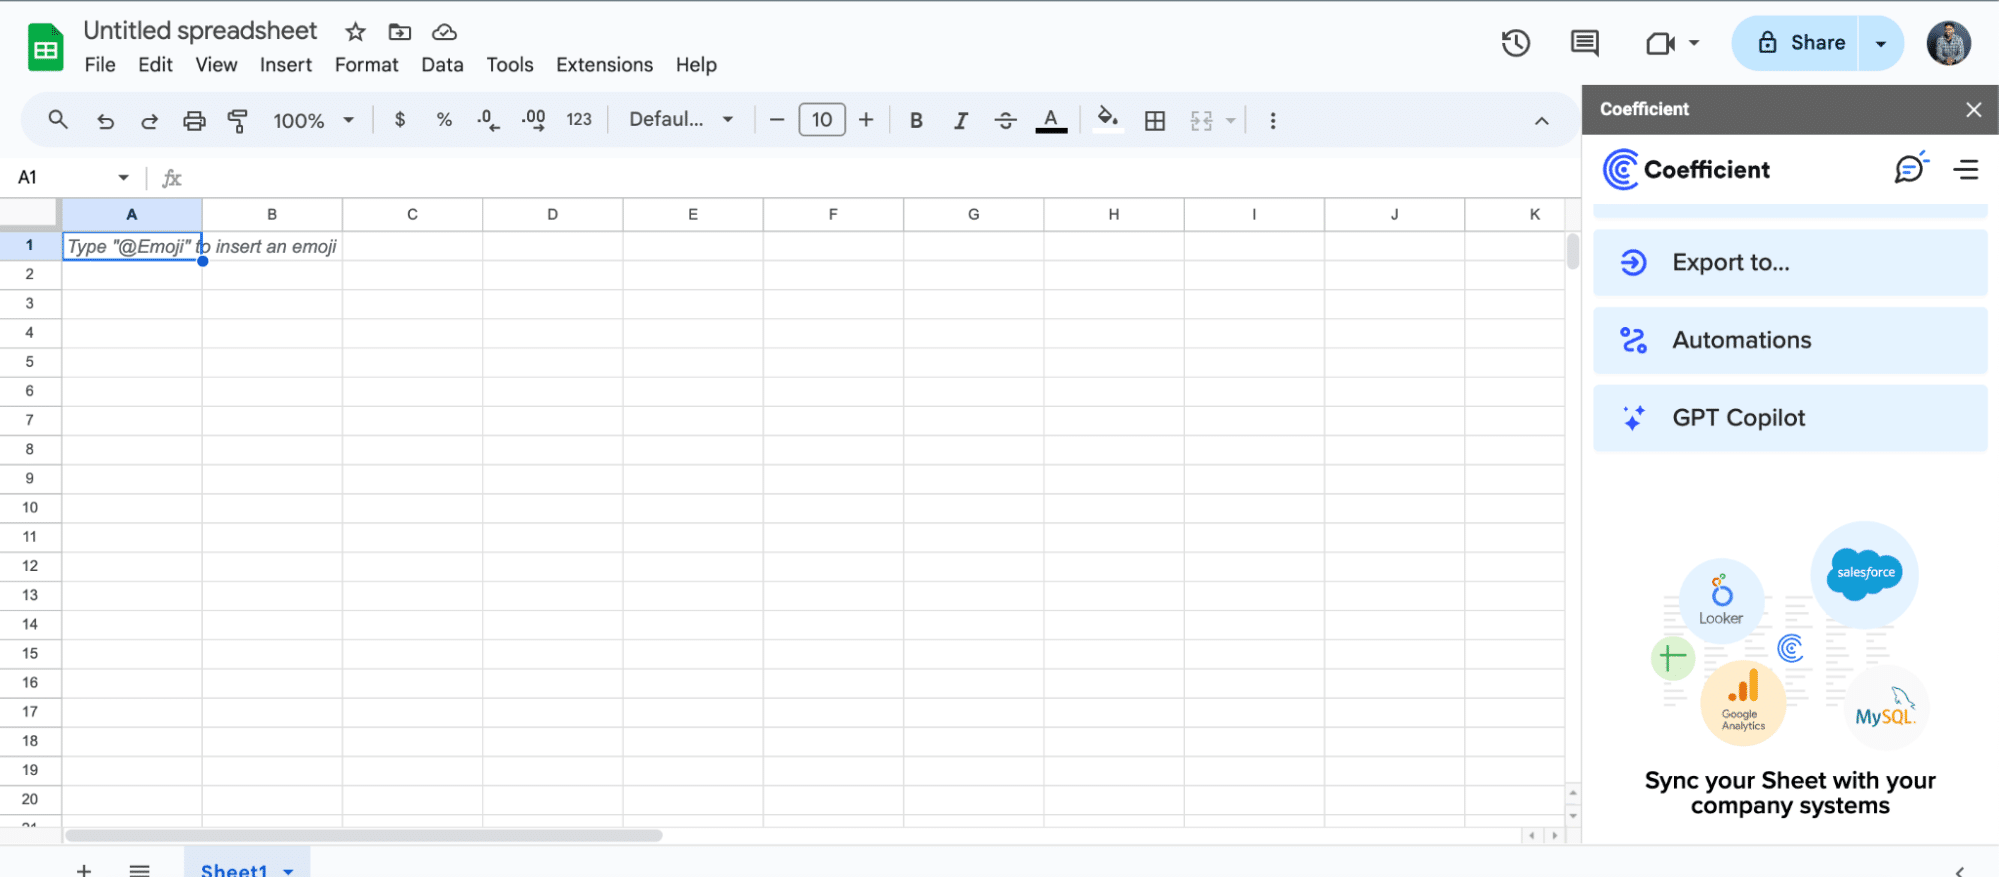
For Google Sheets
Open a new or existing Google Sheet, navigate to the Extensions tab, and select Add-ons > Get add-ons.
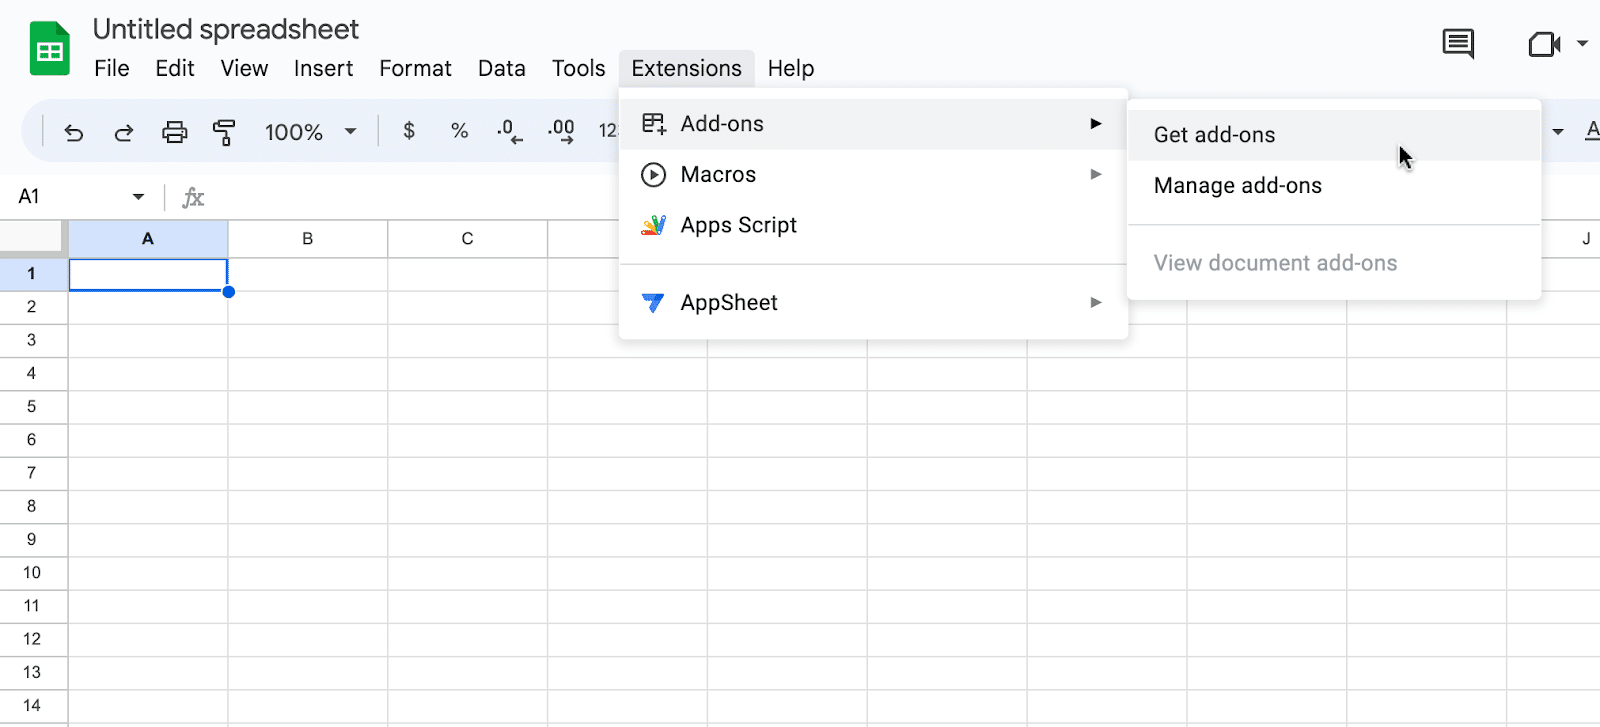
In the Google Workspace Marketplace, search for “Coefficient.”

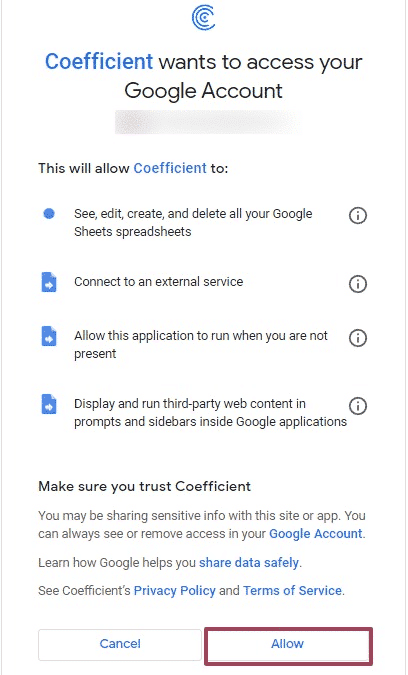
Follow the prompts to grant necessary permissions.
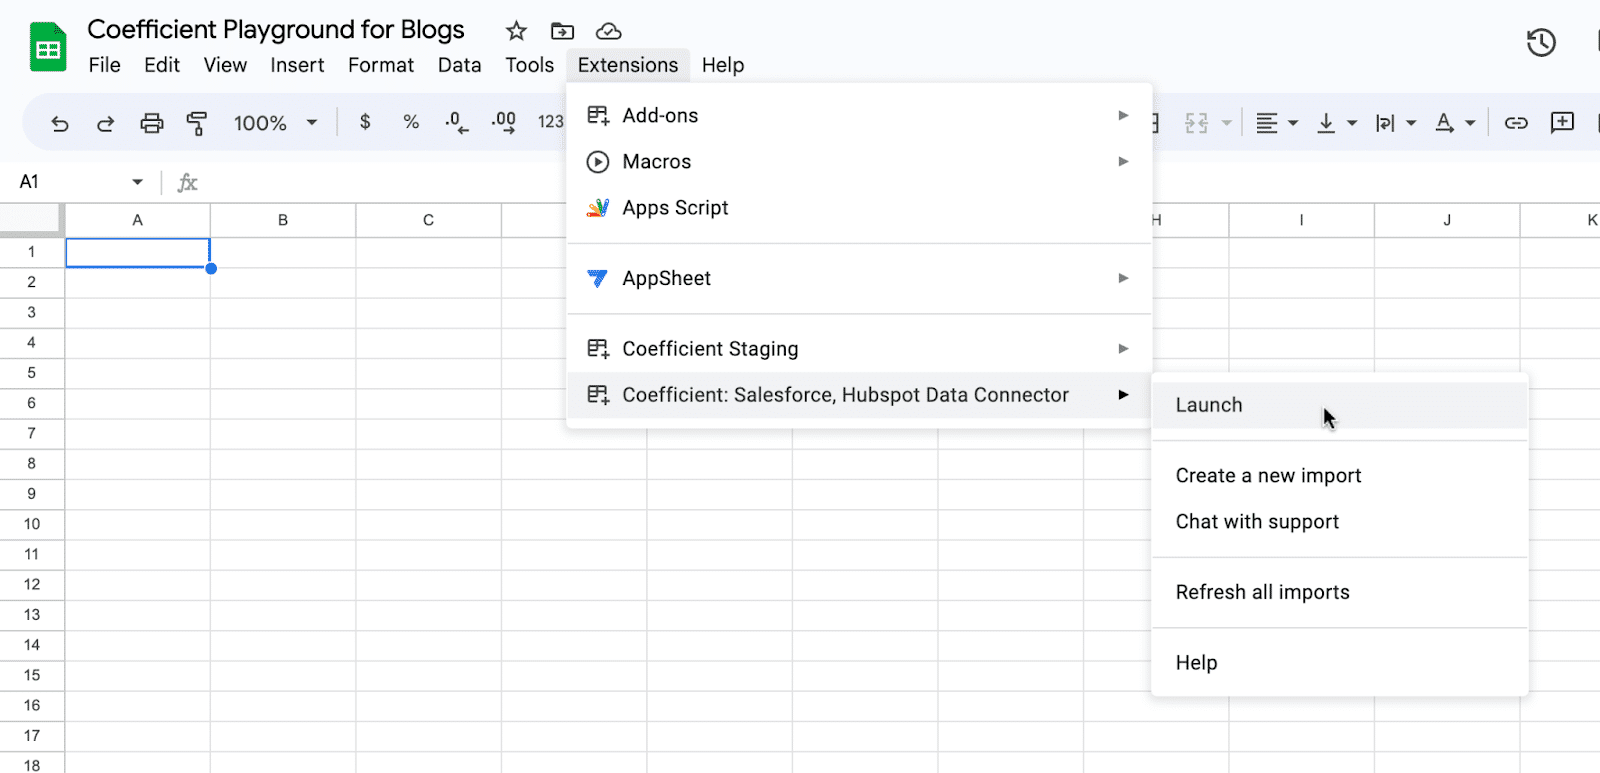
Launch Coefficient from Extensions > Coefficient > Launch.
Coefficient will open on the right-hand side of your spreadsheet.
For Microsoft Excel
Open Excel from your desktop or in Office Online. Click ‘File’ > ‘Get Add-ins’ > ‘More Add-Ins.’

Type “Coefficient” in the search bar and click ‘Add.’

Follow the prompts in the pop-up to complete the installation.
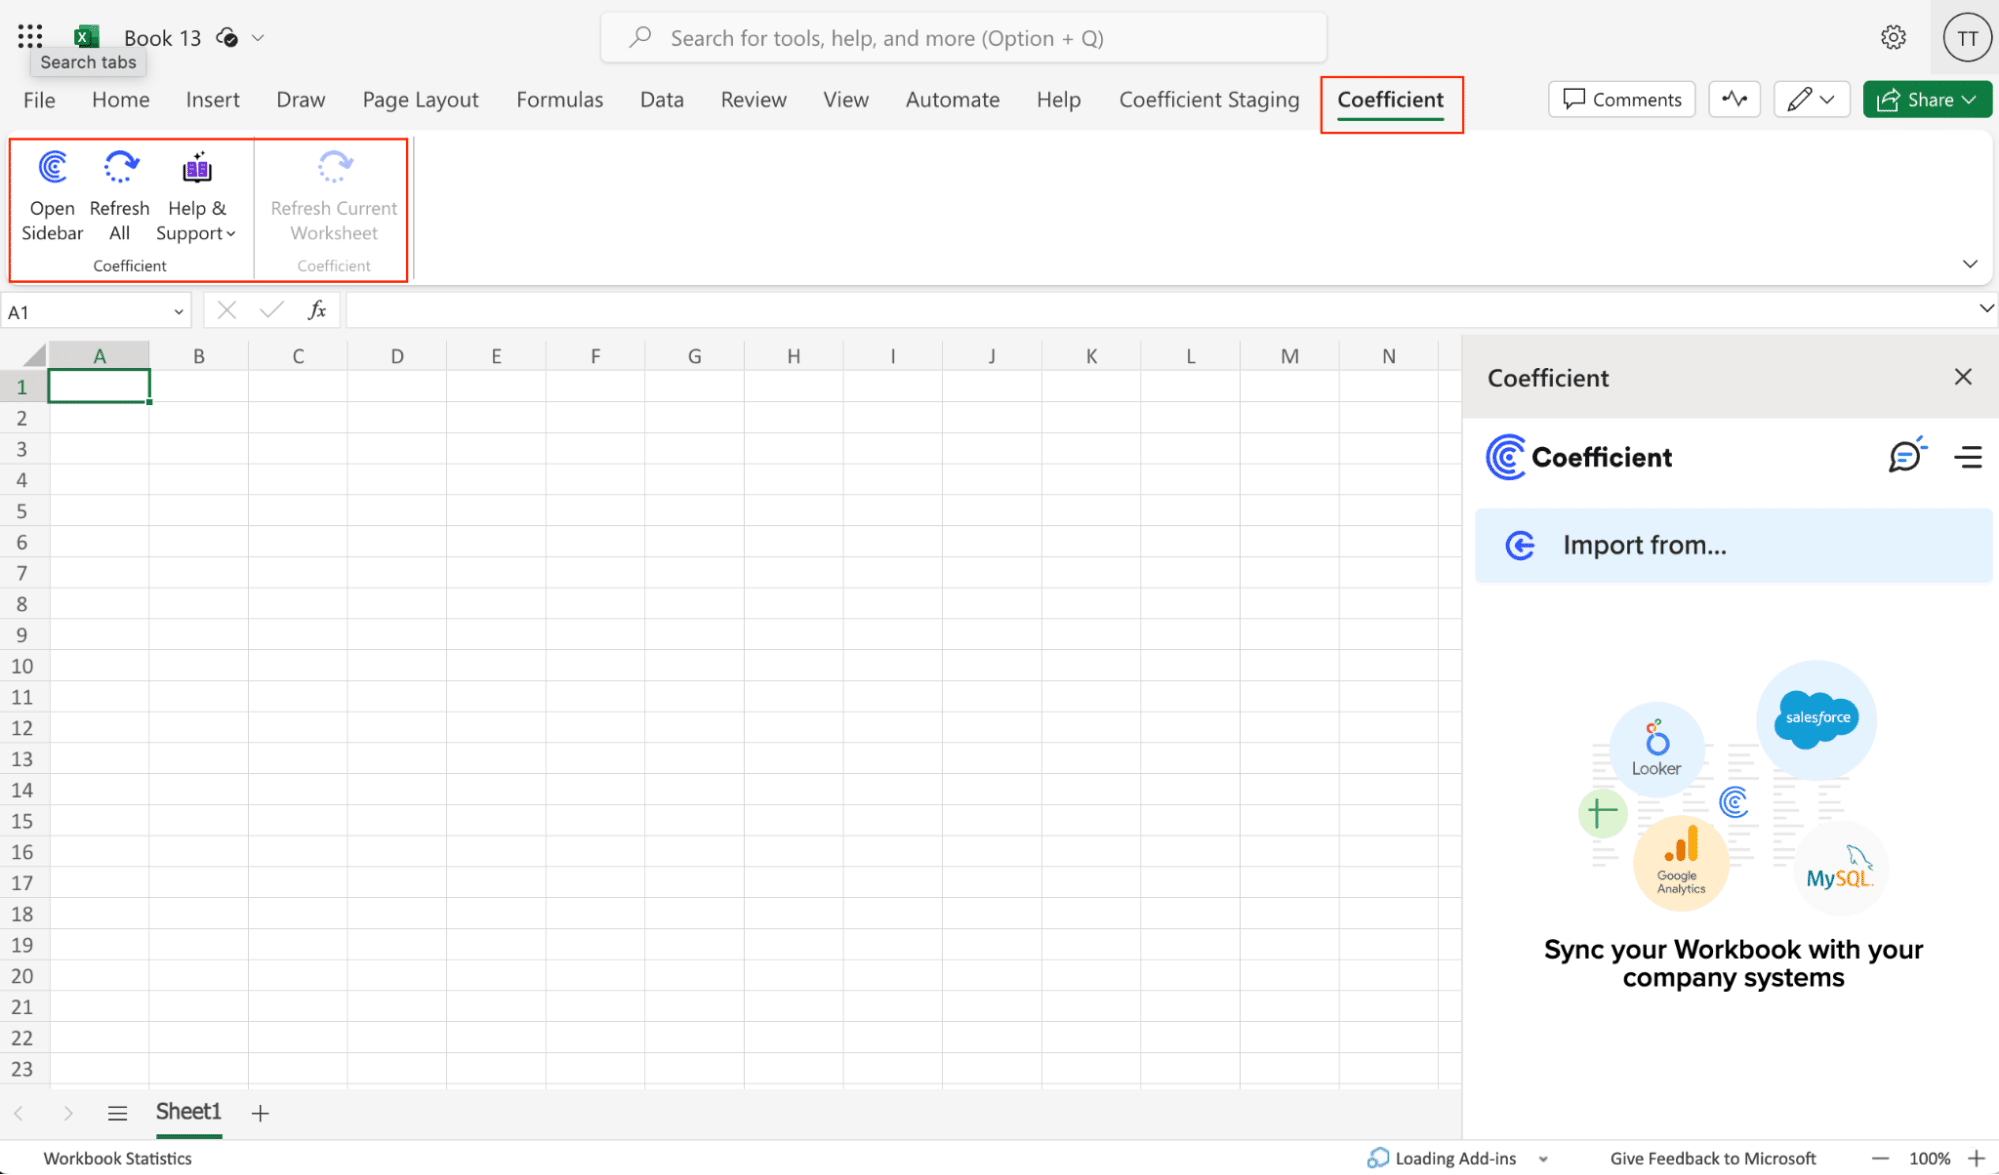
Once finished, you will see a “Coefficient” tab in the top navigation bar. Click ‘Open Sidebar’ to launch Coefficient.
Step 2. Import Outreach Data to Your Spreadsheet
With Coefficient installed, you can now import your Outreach data:
Select ‘Import from…’

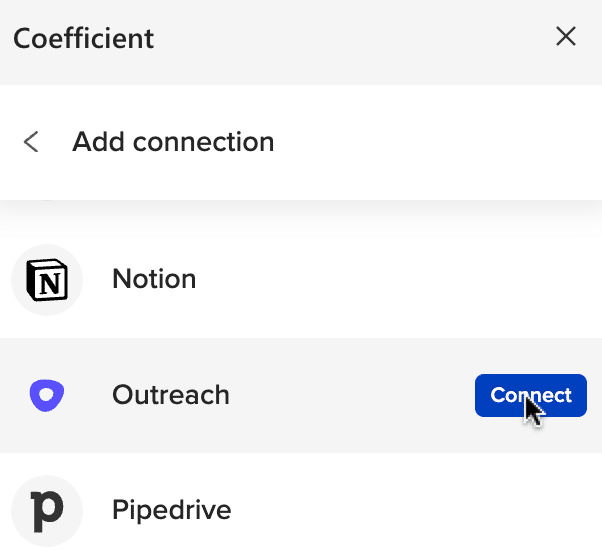
Scroll down until you see Outreach and click ‘Connect.’
Follow the prompts to authorize Coefficient to access your Outreach account.

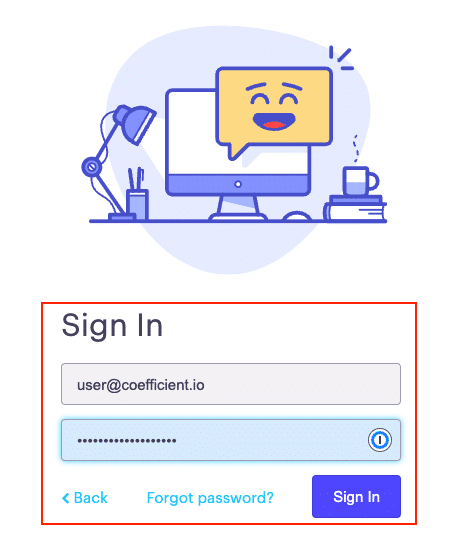
Enter your username and password and click “Sign In”. You will then be redirected back to your spreadsheet.
Return to Outreach from the menu ‘Import From…’ > ‘From Objects and Fields.’

Select an object from those listed (e.g.example: ”Opportunity”)
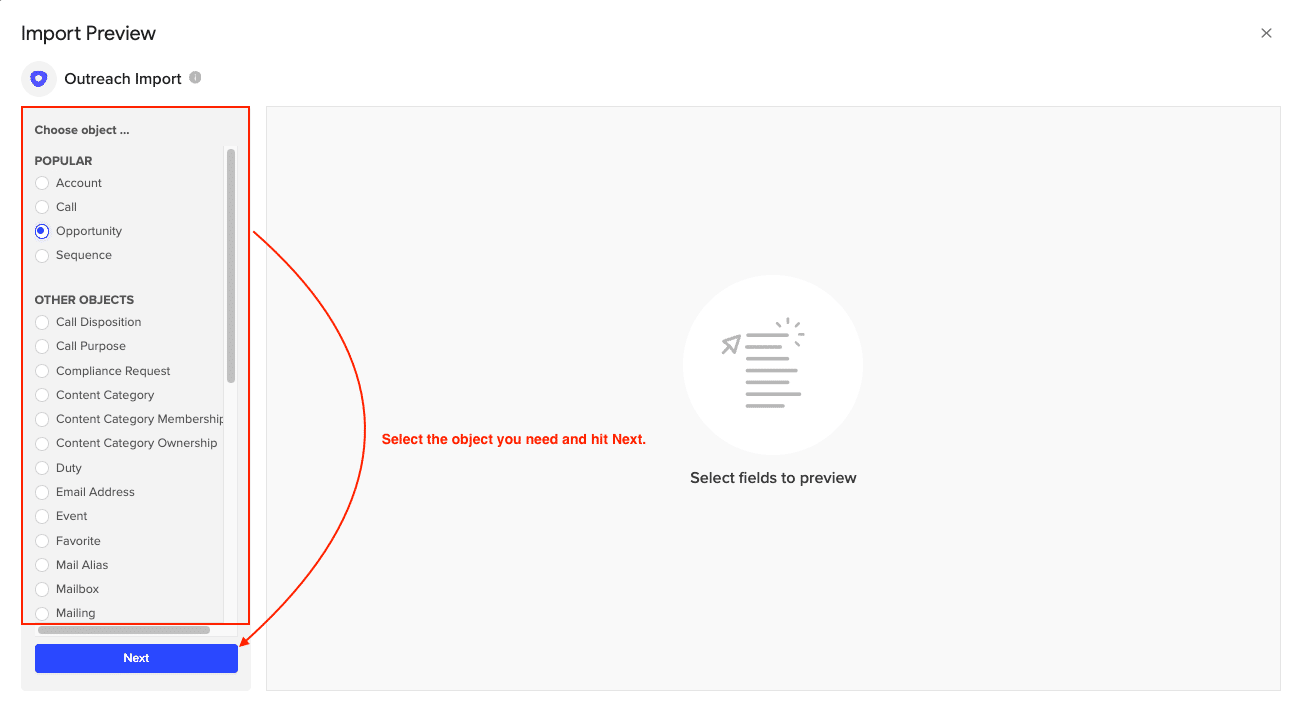
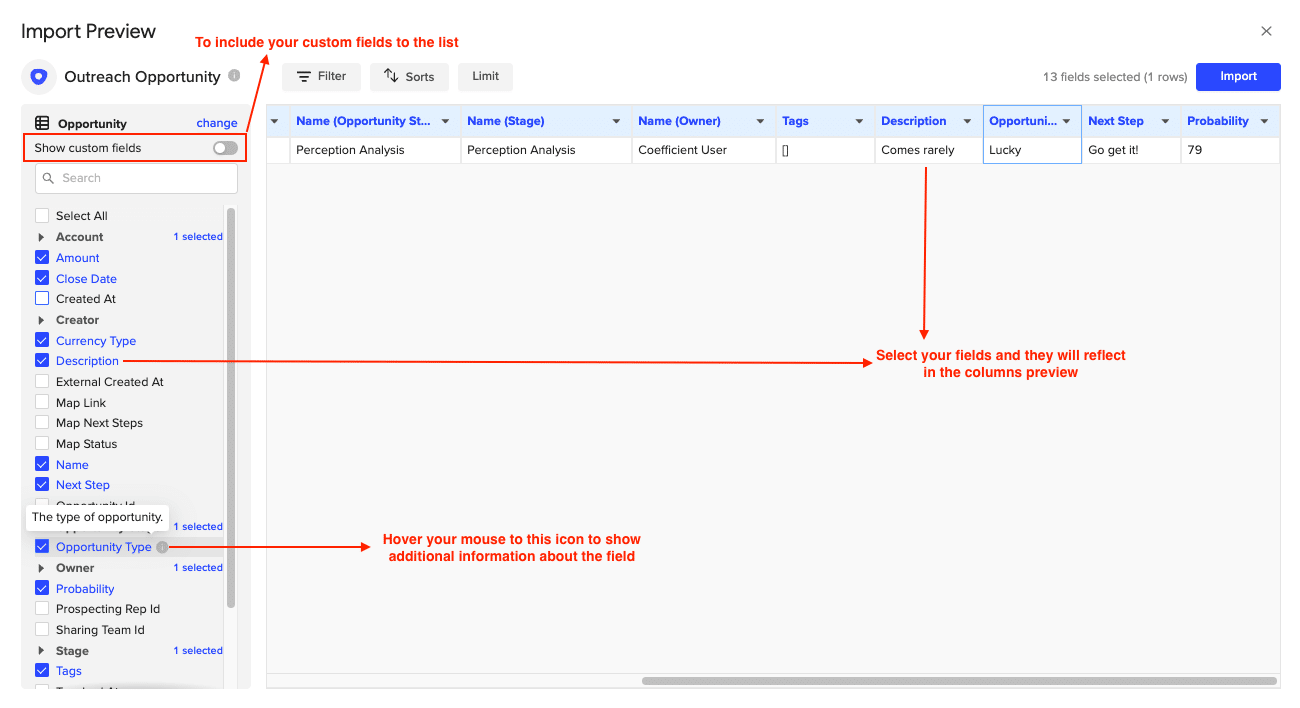
Check the box(es) corresponding to the fields you would like to include in this import. The fields selected will appear in the data previewer on the right of the screen.
Note: The preview only shows a sample of the results that will be included in your import.
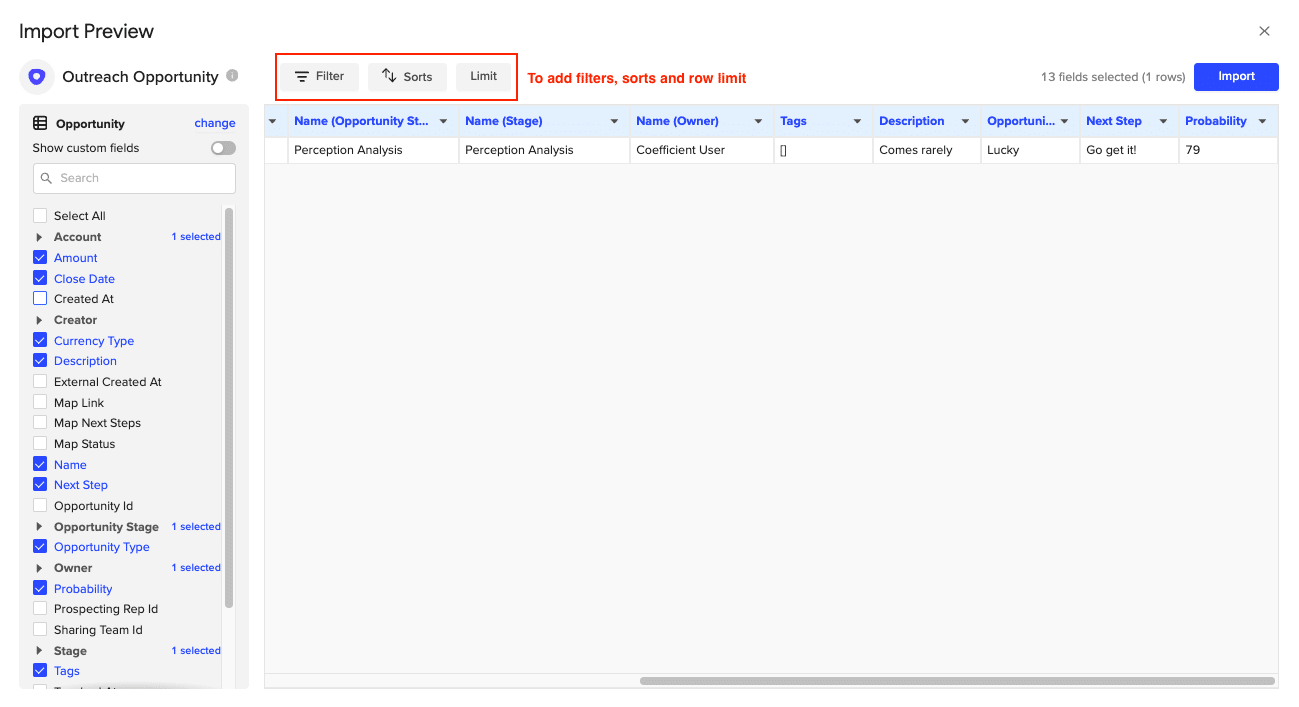
Customize your import by adding filters, sorts, or limits as needed. Then click, “Import” on the top right of your screen.
Your import will automatically populate your spreadsheet.

Step 3. Export Data to Snowflake
Before starting, make sure you’ve connected to Snowflake.
https://www.youtube.com/watch?v=Zjym92WHgLM
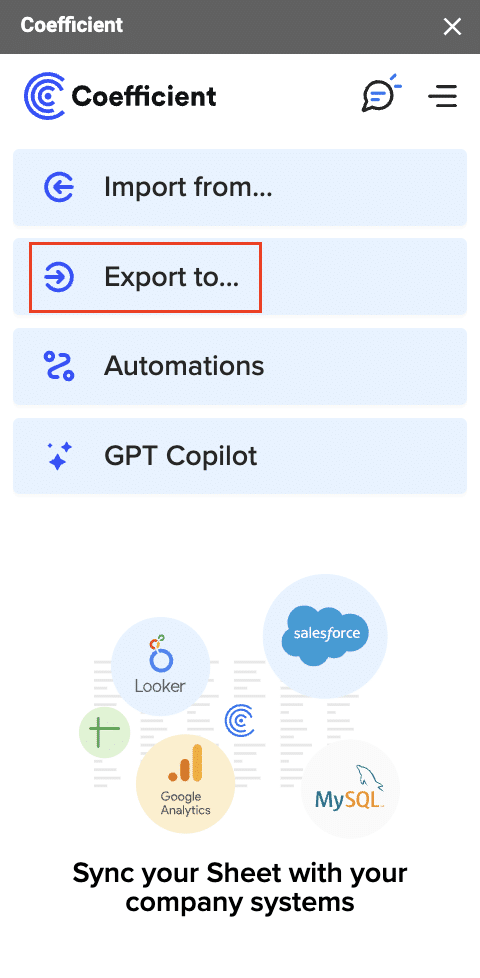
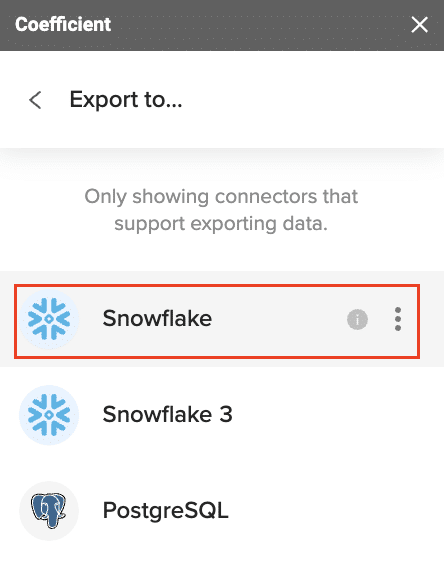
Then, navigate to Coefficient’s menu. Click “Export to…”
Step 2: Select Snowflake as the Data Source
Choose Snowflake from the list of available data sources.
Select the tab and header rows in your spreadsheet that contains the data you want to export.
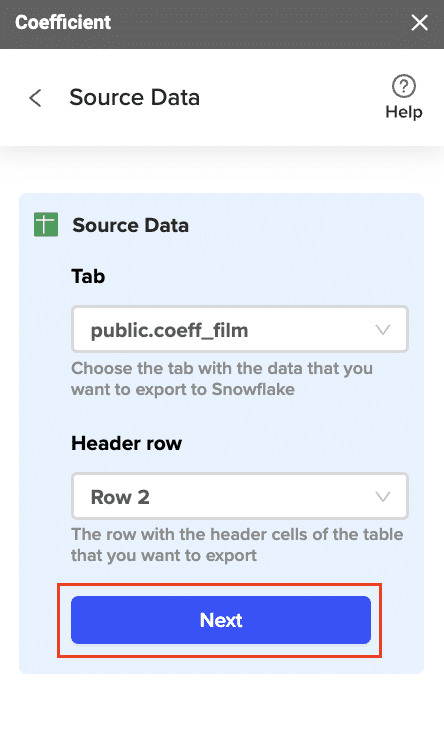
Click “Next” to continue.
Select the table in your Snowflake database that you want to update. Then, select the type of action you want to perform—Update, Insert, Upsert, or Delete.

Map the fields from your spreadsheet to the corresponding Snowflake fields.
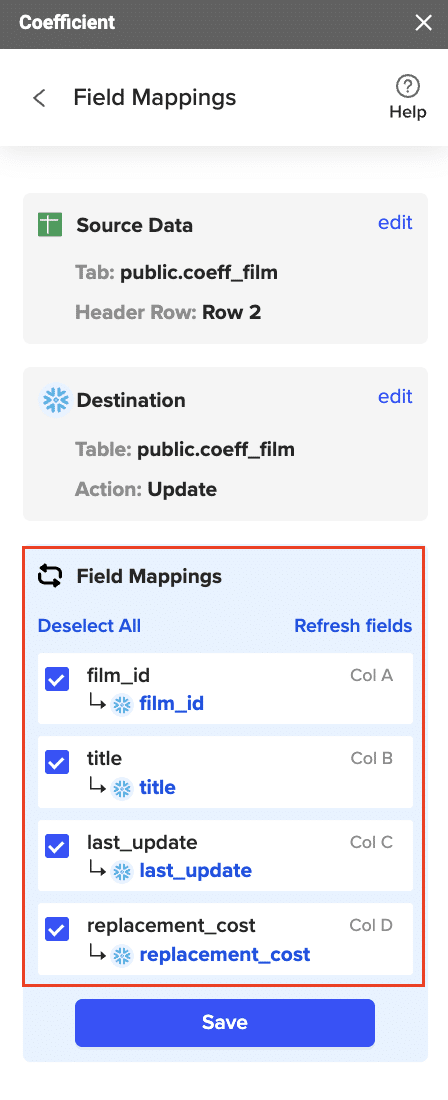
Note: Primary Keys (ID fields) are required for Update and Delete actions. For Insert actions, the Primary Key field can be set to auto populate if it’s configured in Snowflake.
Specify additional settings such as batch size, whether to export empty cells on an update, and the column for results.

Confirm your settings.
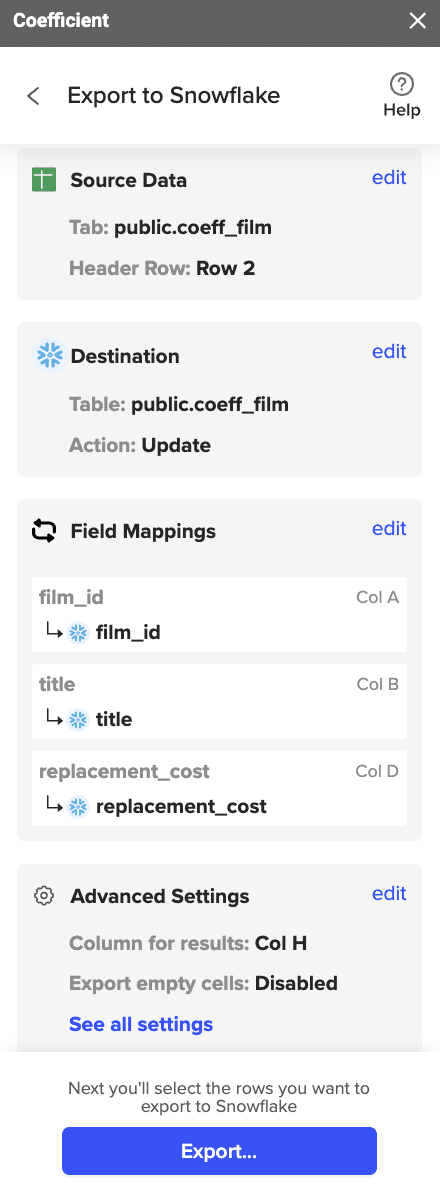
Then, highlight the rows you want to update or export. You can choose to export all rows or specific rows.
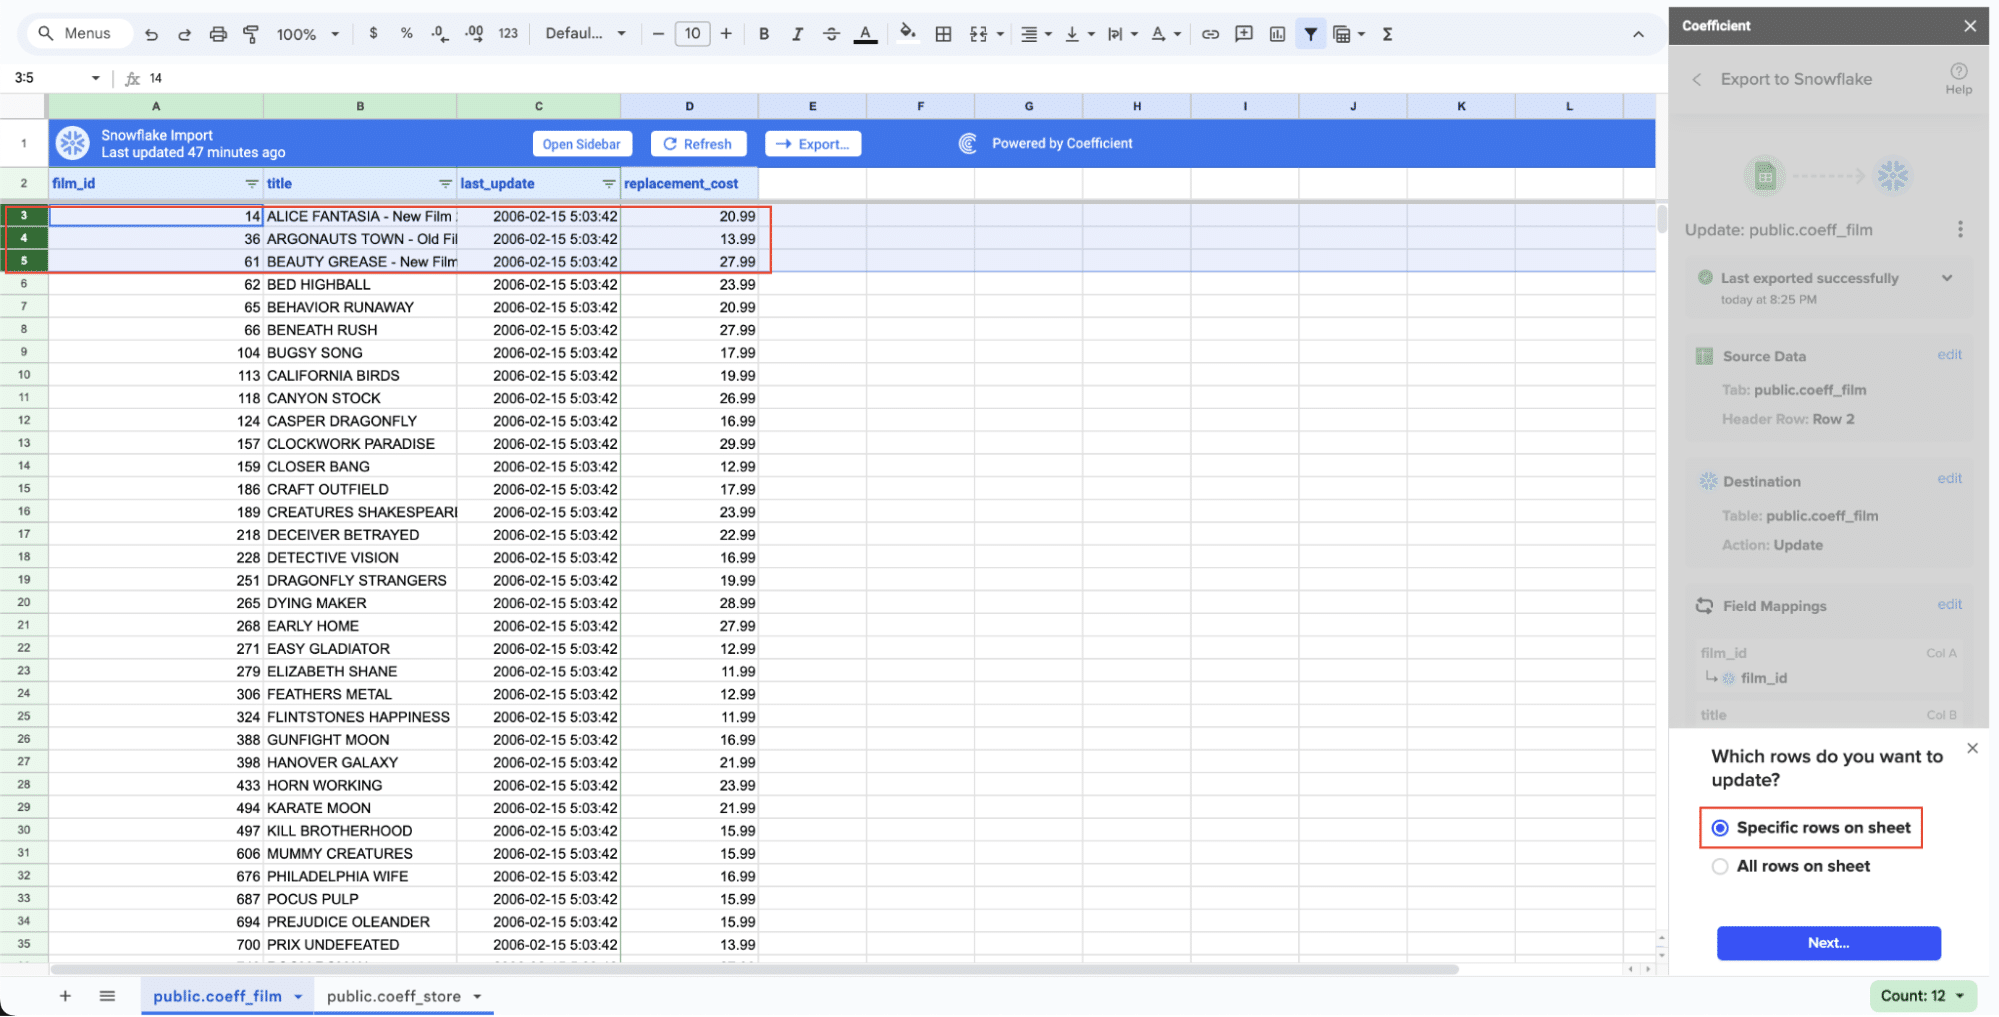
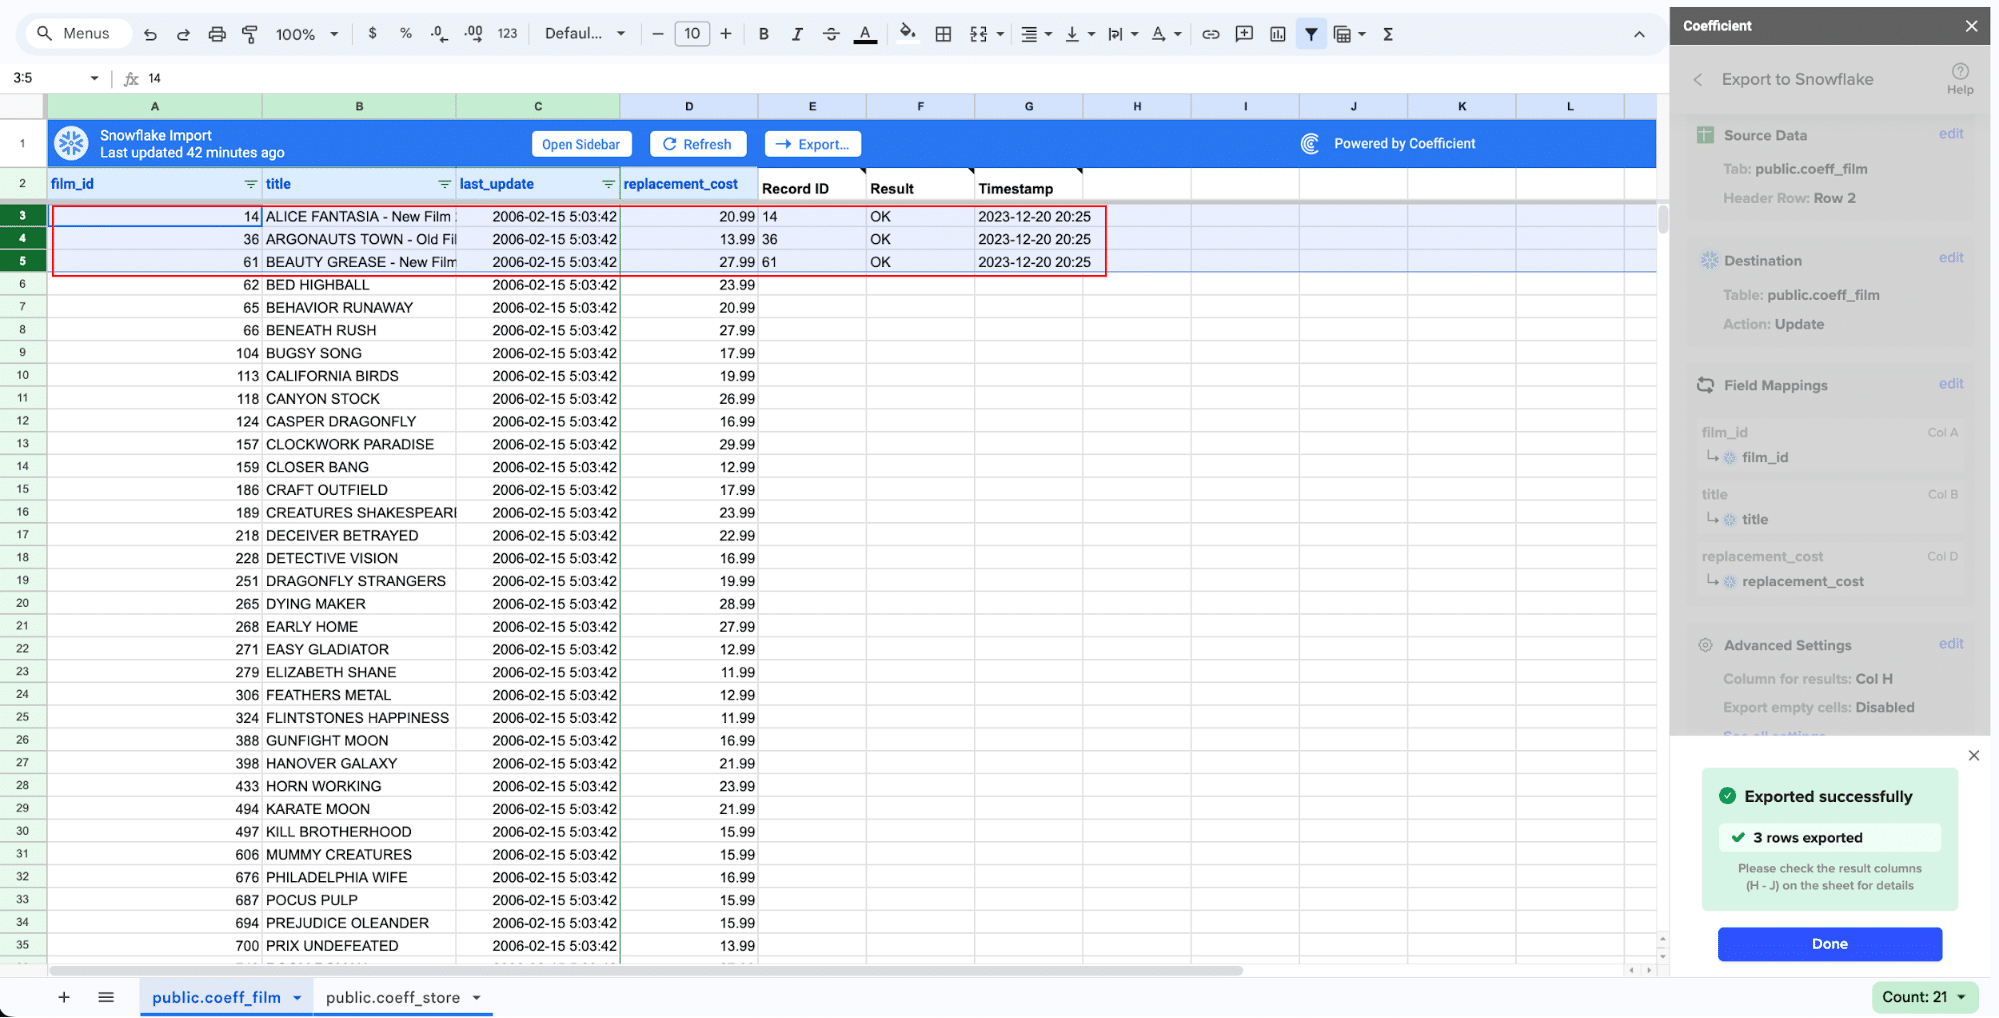
After you’re finished, review your settings and click “Export.”
Follow the prompts to confirm your changes.

In a few seconds, data from your spreadsheet will push to Salesforce.
Method 2: Hevo

Hevo is a powerful no-code platform for automated data pipelines. It’s a good choice if you need to replicate data from Outreach to Snowflake in real-time and want a solution that requires minimal setup and maintenance.
Some key things to know about Hevo:
- It’s a fully managed platform, meaning Hevo handles all the infrastructure and scaling
- Hevo supports 150+ data sources, including Outreach and Snowflake
- Pricing is based on the number of records synced
Relevant Features
- Automated, real-time data replication: Hevo can sync your data in real-time as it changes in Outreach
- No-code setup: Hevo pipelines can be configured through a visual interface
- Robust monitoring: Hevo provides monitoring and alerts to ensure your data pipelines run smoothly
Pros and Cons
- Pros:
- Automated real-time replication
- No-code setup
- Robust monitoring
- Cons:
- Can become expensive for high-volume data
- Some advanced transformations may require using Hevo’s Python interface
Step-by-Step Guide
Here’s how to set up an Outreach to Snowflake pipeline with Hevo:
- Setting Up Hevo
First, sign up for a Hevo account and log into the dashboard.
- Configuring Outreach and Snowflake
In the Hevo dashboard:
- Click “Add Pipeline”
- Select Outreach as the source
- Authenticate with your Outreach account
- Select the Outreach objects to replicate
- Choose Snowflake as the destination
- Enter your Snowflake account details
- Map Outreach fields to Snowflake columns
- Set the replication frequency
- Start the pipeline
Show Image
Hevo will now replicate data from Outreach to Snowflake on the set schedule, keeping the data in sync.
Method 3: Airbyte
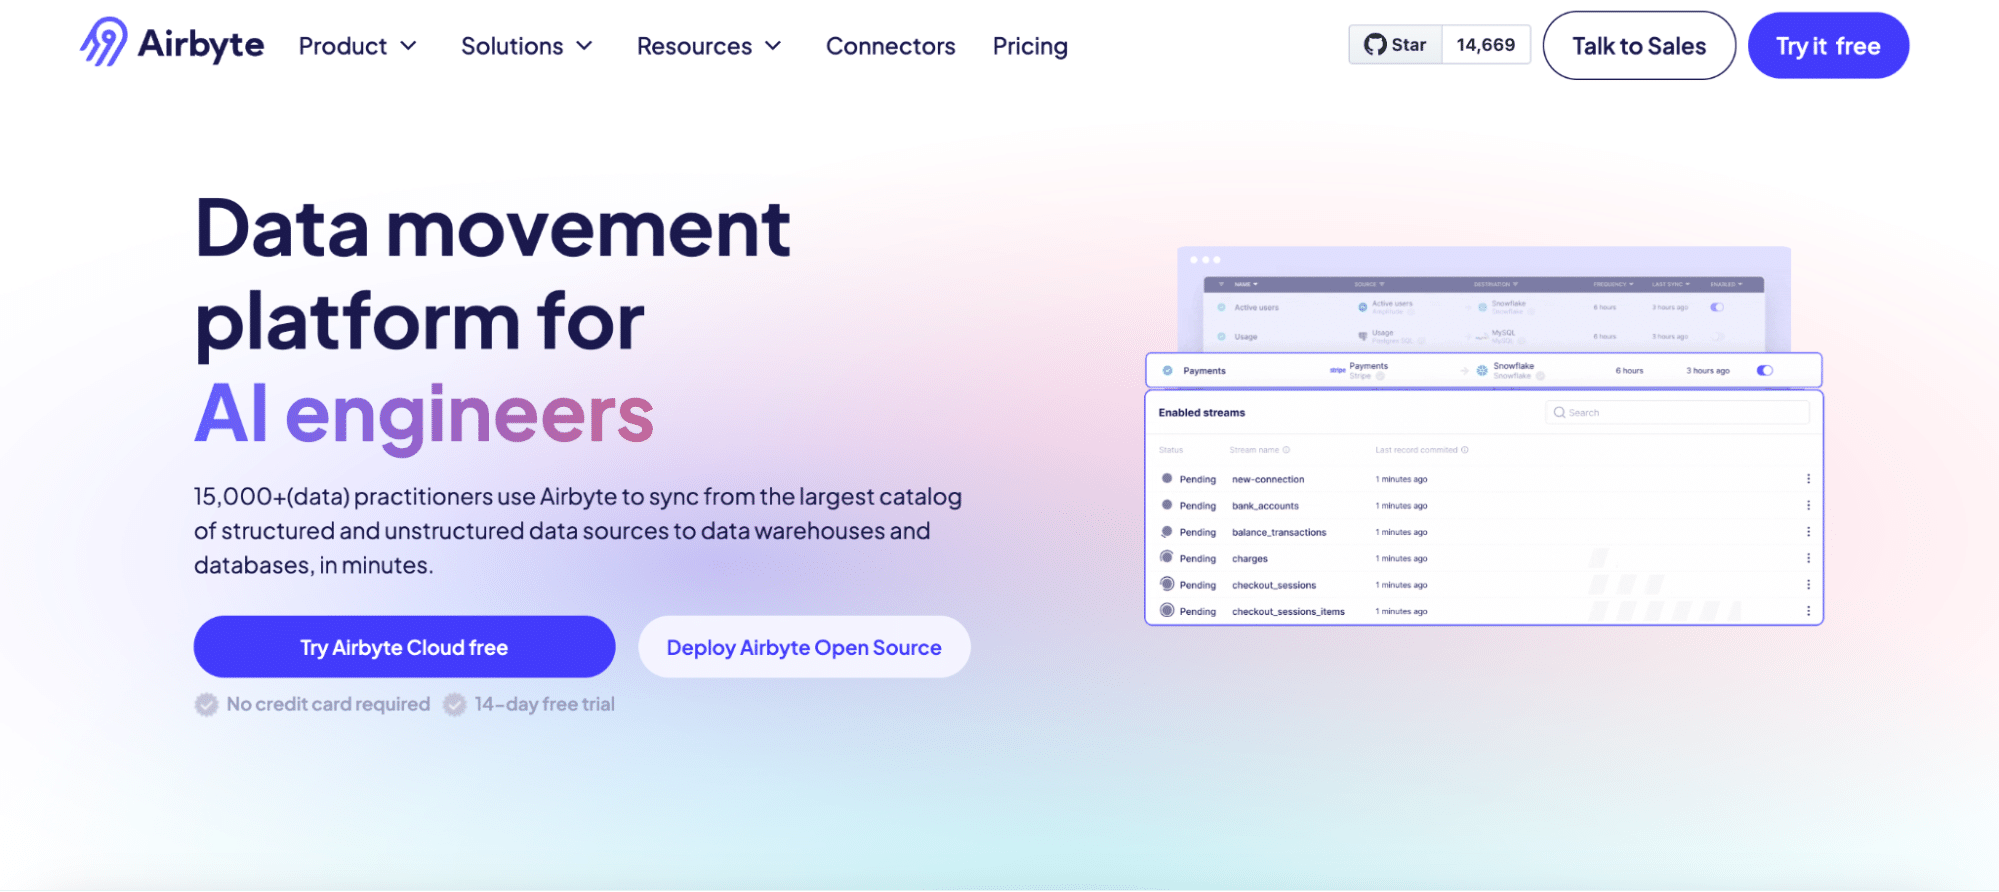
Airbyte is an open-source data integration platform. It’s a good option if you have more complex data integration needs, want the flexibility of an open-source solution, or need to support a wide variety of data sources.
Key things to know about Airbyte:
- It’s open-source and can be self-hosted or cloud-hosted
- Supports 150+ data sources
- Offers both no-code and code-based interfaces
Relevant Features
- Open-source: You can customize or extend Airbyte’s functionality
- Extensive connector support: Airbyte supports a wide variety of data sources and destinations
- Customizable pipelines: Airbyte allows for complex pipeline configurations
Pros and Cons
- Pros:
- Open-source
- Extensive connector support
- Customizable pipelines
- Cons:
- Setup can be complex, may require engineering resources
- Community-based support
Step-by-Step Guide
Here’s how to set up an Outreach to Snowflake sync with Airbyte:
- Setting Up Airbyte
First, deploy Airbyte. You can either use Airbyte’s managed cloud service or self-host Airbyte. For self-hosting, you’ll need to provision compute resources and install Airbyte according to the documentation.
- Configuring Outreach and Snowflake
In the Airbyte UI:
- Click “Sources” and select Outreach
- Enter your Outreach API credentials
- Select the Outreach objects to sync
- Click “Destinations” and select Snowflake
- Enter your Snowflake account details
- Create a new “Connection”
- Configure the source (Outreach) and destination (Snowflake)
- Set sync schedules and transformation rules
- Start the connection
Show Image
Airbyte will now sync data from Outreach to Snowflake according to your specified configuration.
Connect Outreach to Snowflake: No Code Required
In this post, we explored how to connect Outreach to Snowflake using three different methods: Coefficient, Hevo, and Airbyte. Each of these solutions offers a different set of features and capabilities:
- Coefficient is ideal if you want a no-code solution that lets you work with data directly in spreadsheets
- Hevo is a good choice for automated, real-time data replication with minimal setup
- Airbyte is best for complex integration needs and offers the most flexibility and customization
Whichever method you choose, integrating Outreach with Snowflake can greatly enhance your data workflow. By centralizing your data, enabling real-time updates, and facilitating advanced analytics, this integration can help you gain deeper insights into your sales process and make more informed decisions.
Ready to streamline your data workflows?
Get started with Coefficient here to begin syncing your Outreach and Snowflake data today. With Coefficient’s no-code platform, you can set up this integration in minutes and start gaining valuable insights from your combined data.


