Connecting Snowflake to Power BI allows organizations to take advantage of their data initiatives by visualizing
By integrating these two platforms, organizations can easily harness the full potential of their data, uncover valuable insights, and make data-driven decisions.
In this guide, we’ll walk you through the process of connecting Snowflake to Power BI, from setting up prerequisites to advanced optimization techniques.
Connect Snowflake and Power BI: Getting Started
Before you can connect Snowflake to Power BI, you’ll need to:
- Install Power BI Desktop on your local machine
- Access your Snowflake credentials (account URL, username, and password)
- Download and configure the Snowflake ODBC driver
Tutorial: How to Connect Snowflake to Power BI
Method 1. Power Query in Power BI Desktop/Online
This method allows you to import data from Snowflake into Power BI or use DirectQuery to create reports and dashboards based on the data stored in Snowflake.
In Power BI Desktop, go to Home > Get Data > Database > Snowflake > Connect.

Enter your Snowflake server and computing warehouse names.
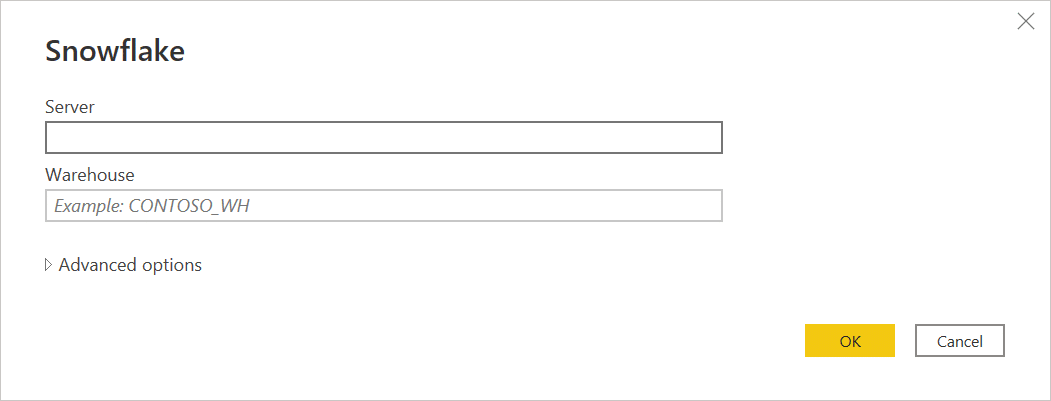
(Optional) Modify the connection query using advanced options.
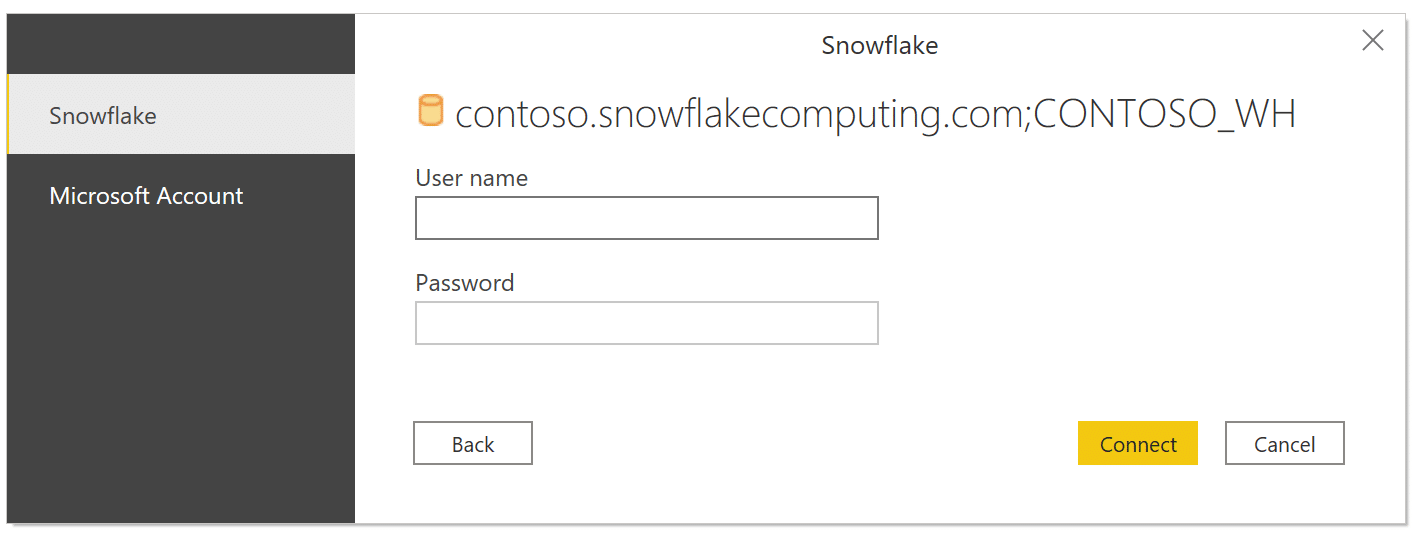
Click OK, then enter your username and password to sign in.
In Navigator, select the elements to import and choose either Load or Transform Data.
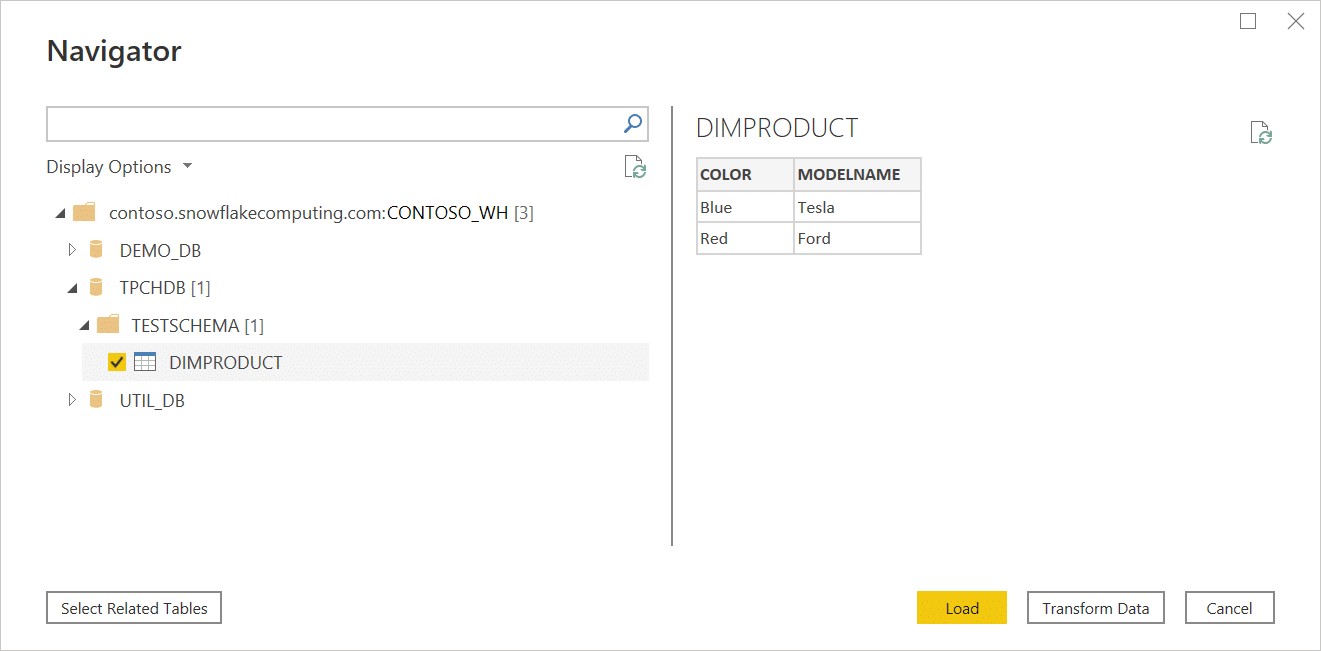
If using Transform Data, refine the data in the Power Query Editor, then load it.

Choose between Import or DirectQuery, then click OK.
Method 2. Power BI Service with SSO
Connecting to Snowflake through the Power BI Service offers the advantage of using Microsoft Entra ID with Single Sign-On (SSO).
With SSO, users can access Snowflake data using their own Microsoft Entra credentials, eliminating the need to manage separate Snowflake credentials and reducing the risk of unauthorized access.
Step 1. Configure Power BI SSO to Snowflake
Sign in to Power BI as a global admin. Go to Settings > Admin portal > Tenant settings > Integration settings.
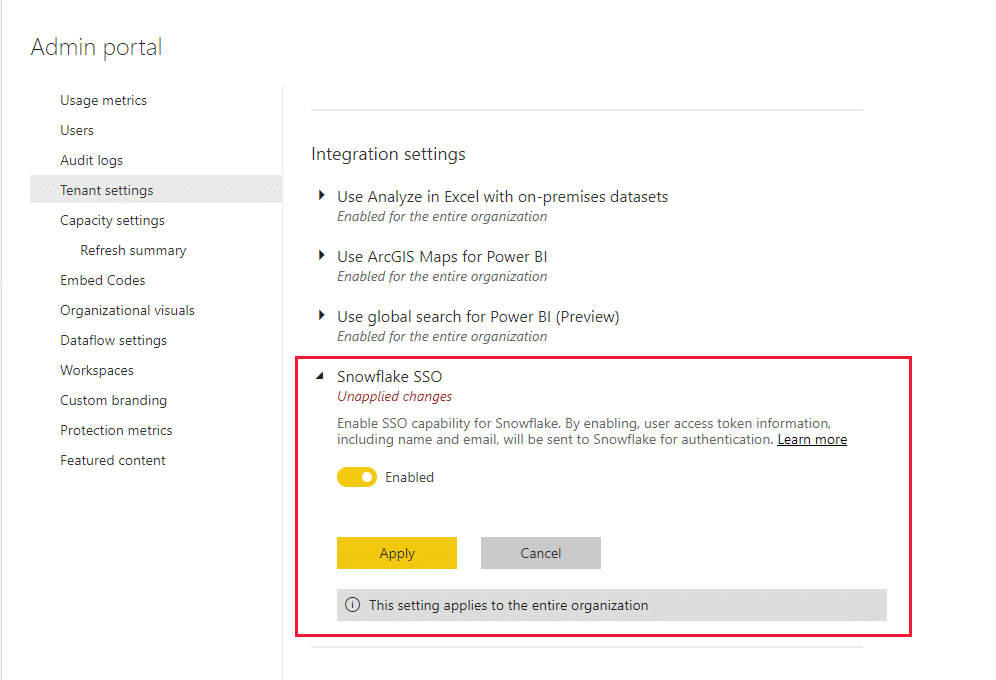
Expand Snowflake SSO, toggle to Enabled, and click Apply.
Step 2. Configure a semantic model with Microsoft Entra ID
Sign in to Power BI as a semantic model creator.
Select the workspace and choose Settings for the semantic model.
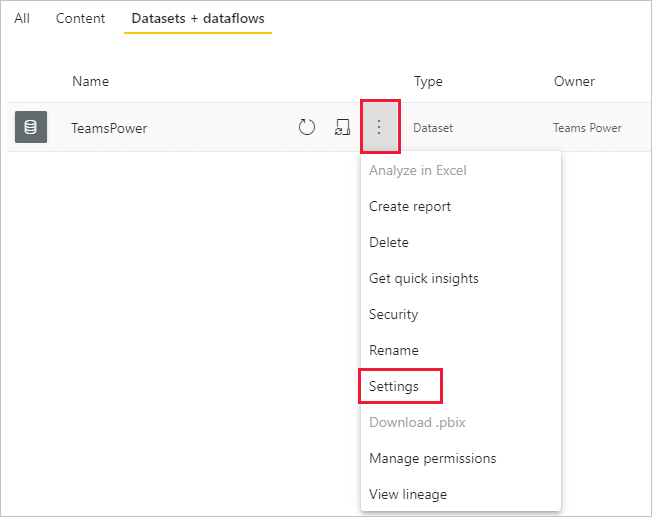
Select Data source credentials and sign in with Basic or OAuth2 (Microsoft Entra ID) credentials.
Select End users use their own OAuth2 credentials when accessing this data source via DirectQuery to enable SSO.
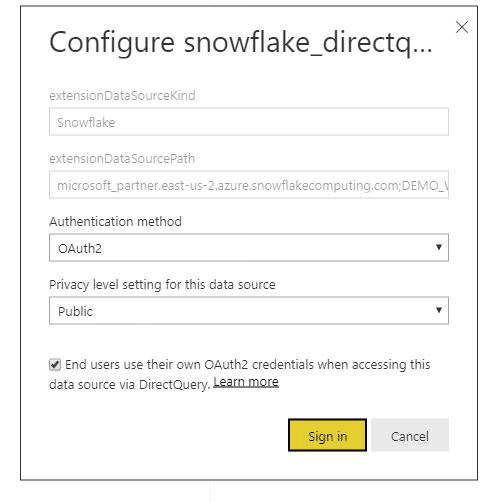
After completing these steps, users can access Snowflake data using their own Microsoft Entra credentials.
Method 3. No-Code Solution Using Your Spreadsheet
Coefficient is a spreadsheet connector that enables secure, self-service access to Snowflake data for quick ad hoc analyses in spreadsheets. You can use Coefficient to import Snowflake data into Excel and then upload that workbook into Power BI.
This method makes it easier for business users to access the data they need while ensuring data integrity and governance.
Step 1. Set Up Snowflake Connection in Coefficient
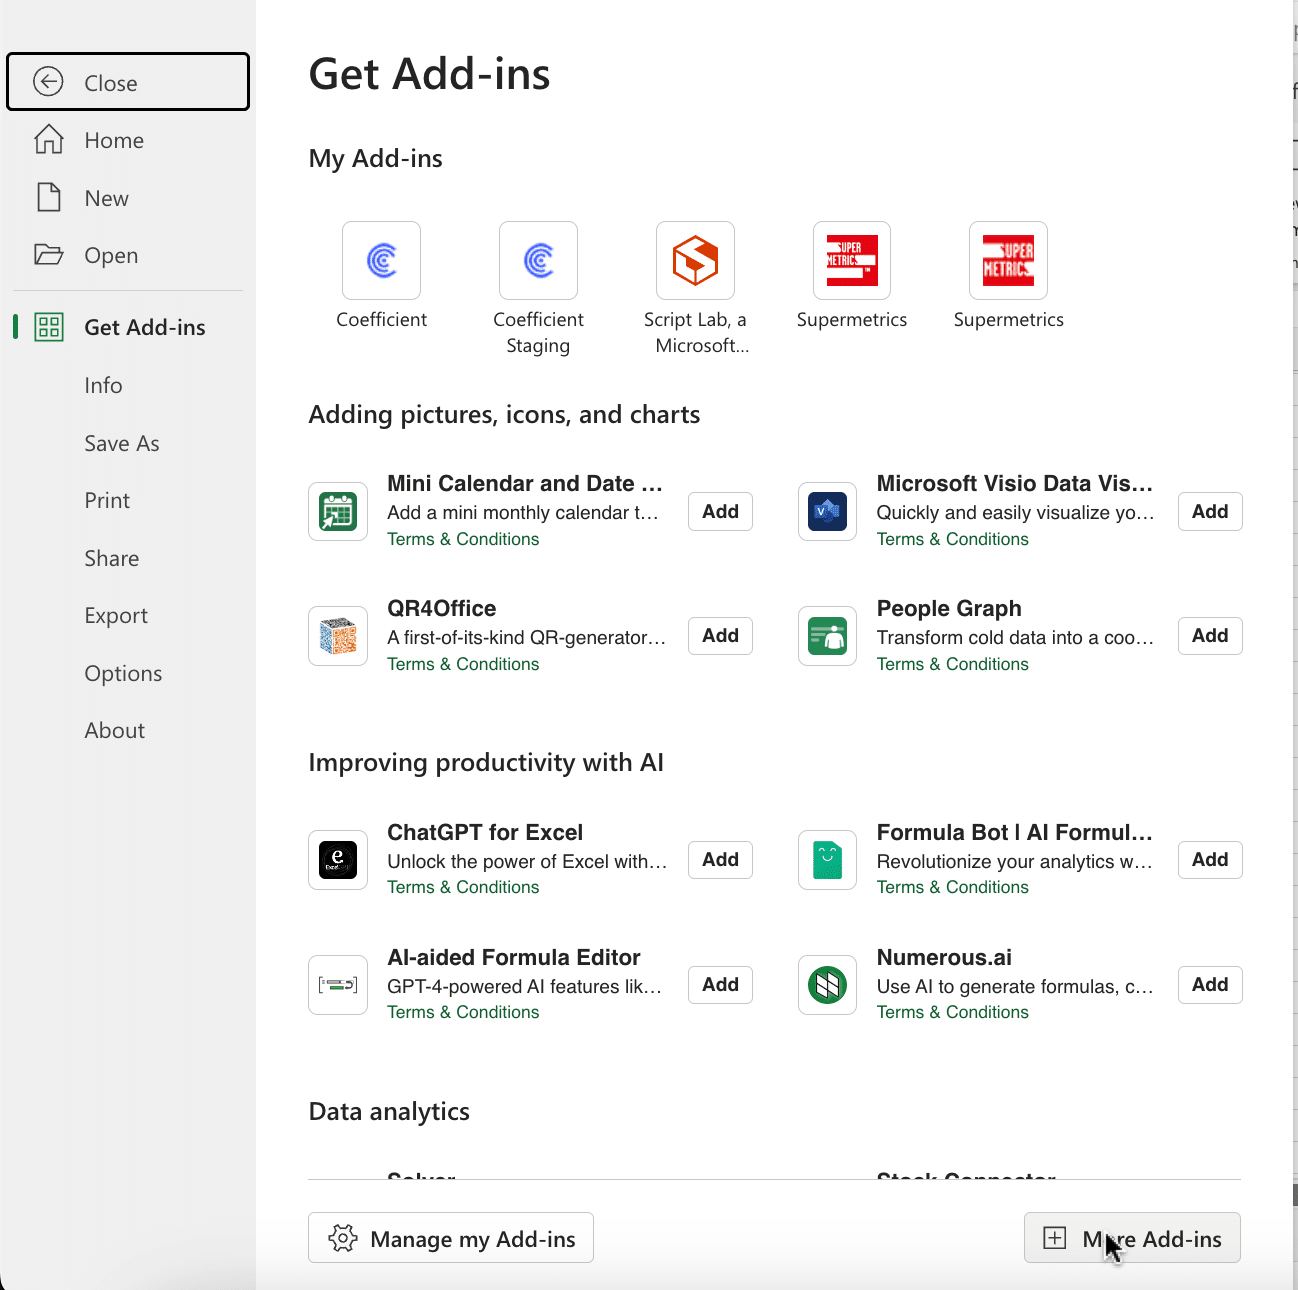
Open Excel from your desktop or in Office Online. Click ‘File’ > ‘Get Add-ins’ > ‘More Add-Ins.’
Type “Coefficient” in the search bar and click ‘Add.’
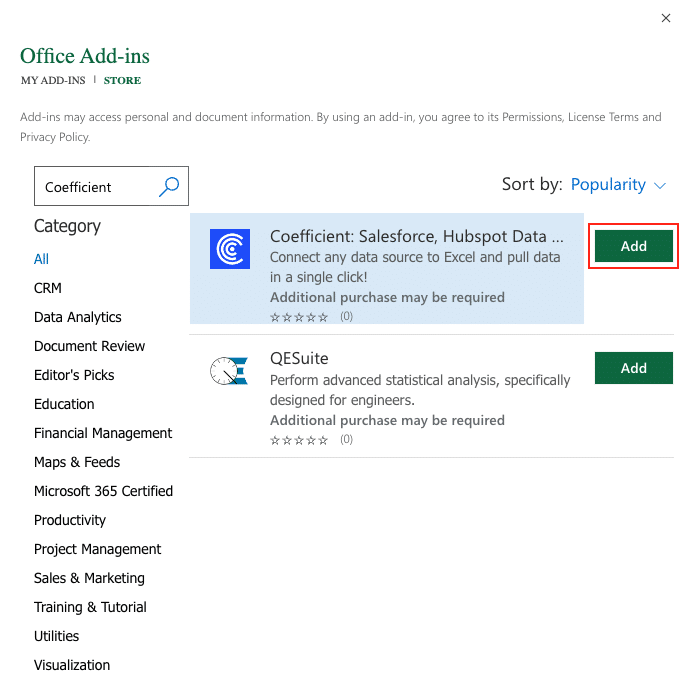
Follow the prompts in the pop-up to complete the installation.
Once finished, you will see a “Coefficient” tab in the top navigation bar. Click ‘Open Sidebar’ to launch Coefficient.
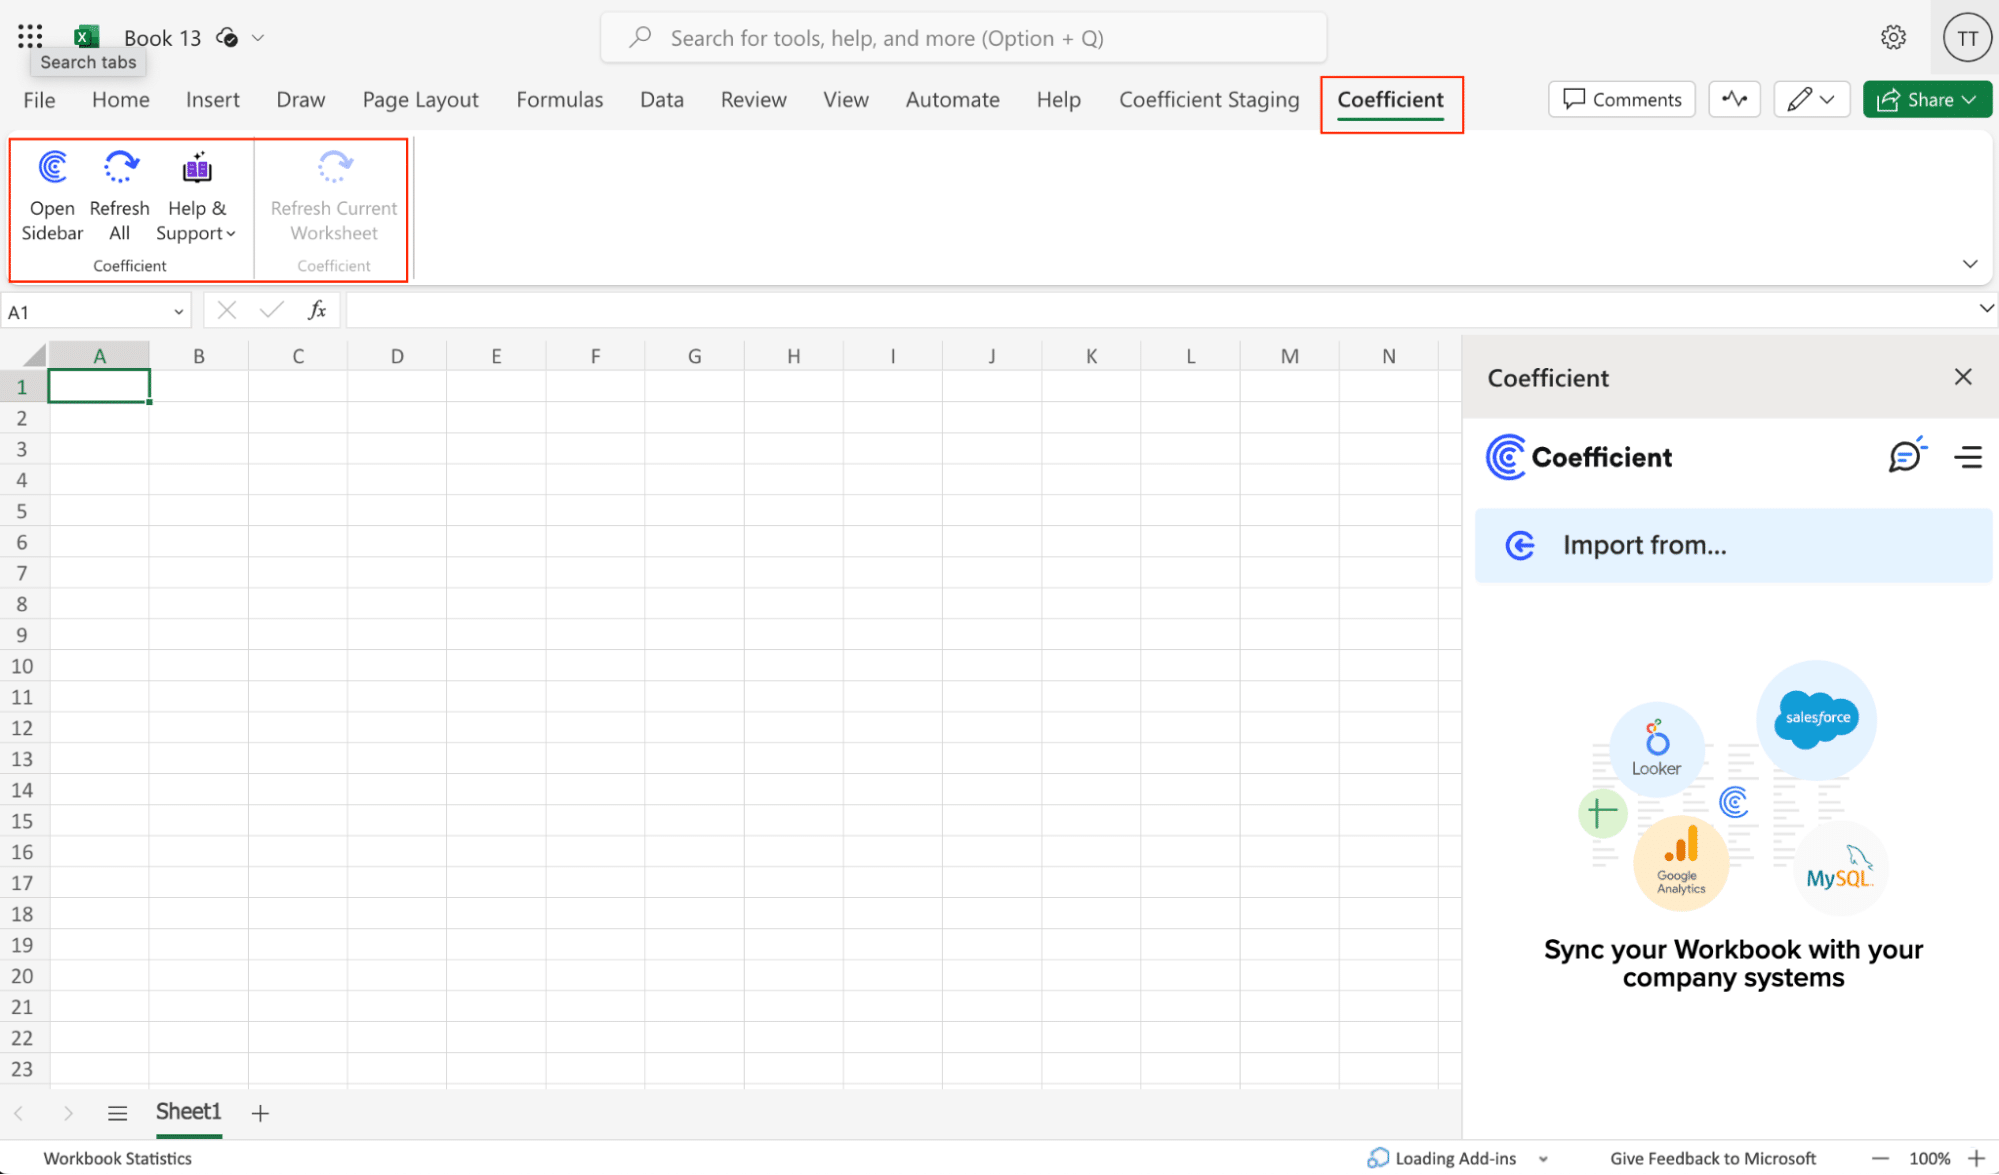
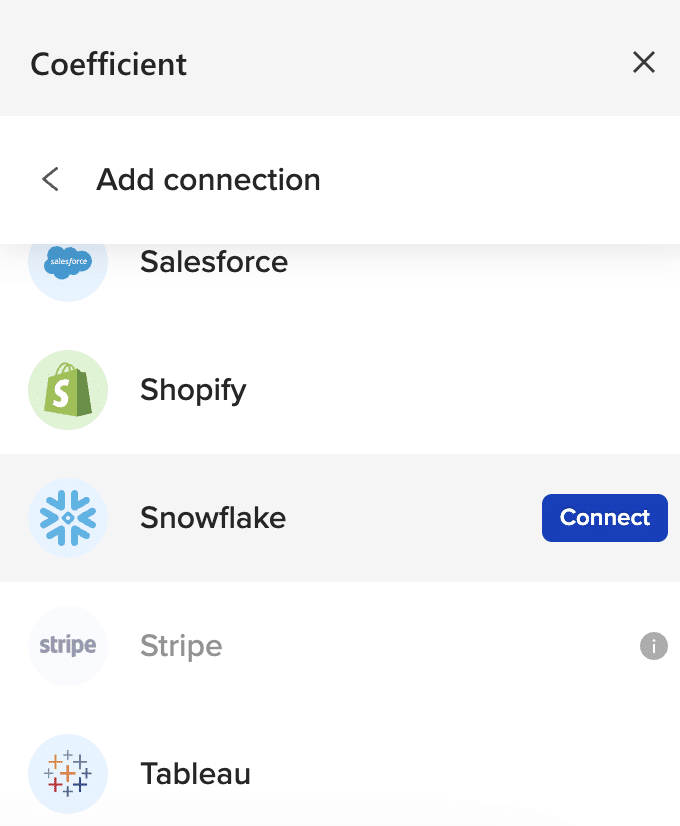
Select ‘Import from…’ and scroll down to Snowflake. Click ‘Connect.’
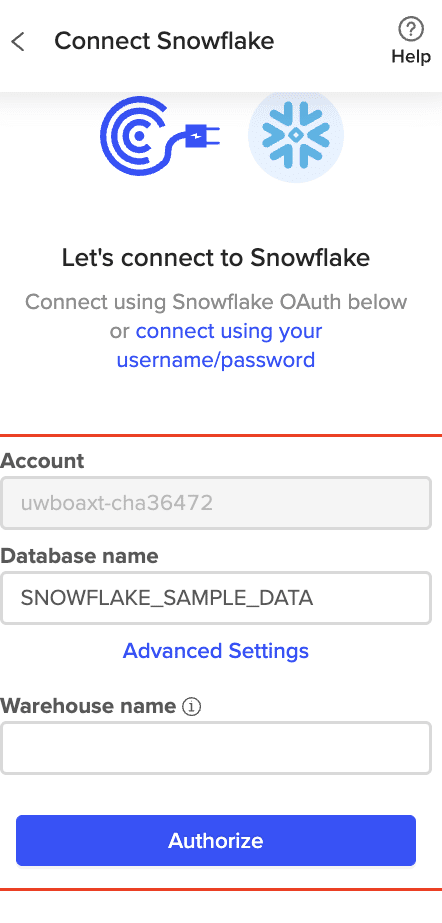
If your domain’s Snowflake OAuth is properly configured, enter the Database name and/or Warehouse name (Optional).
Click ‘Authorize’ to proceed and sign in to your Snowflake account.
Step 2. Import Data from Snowflake
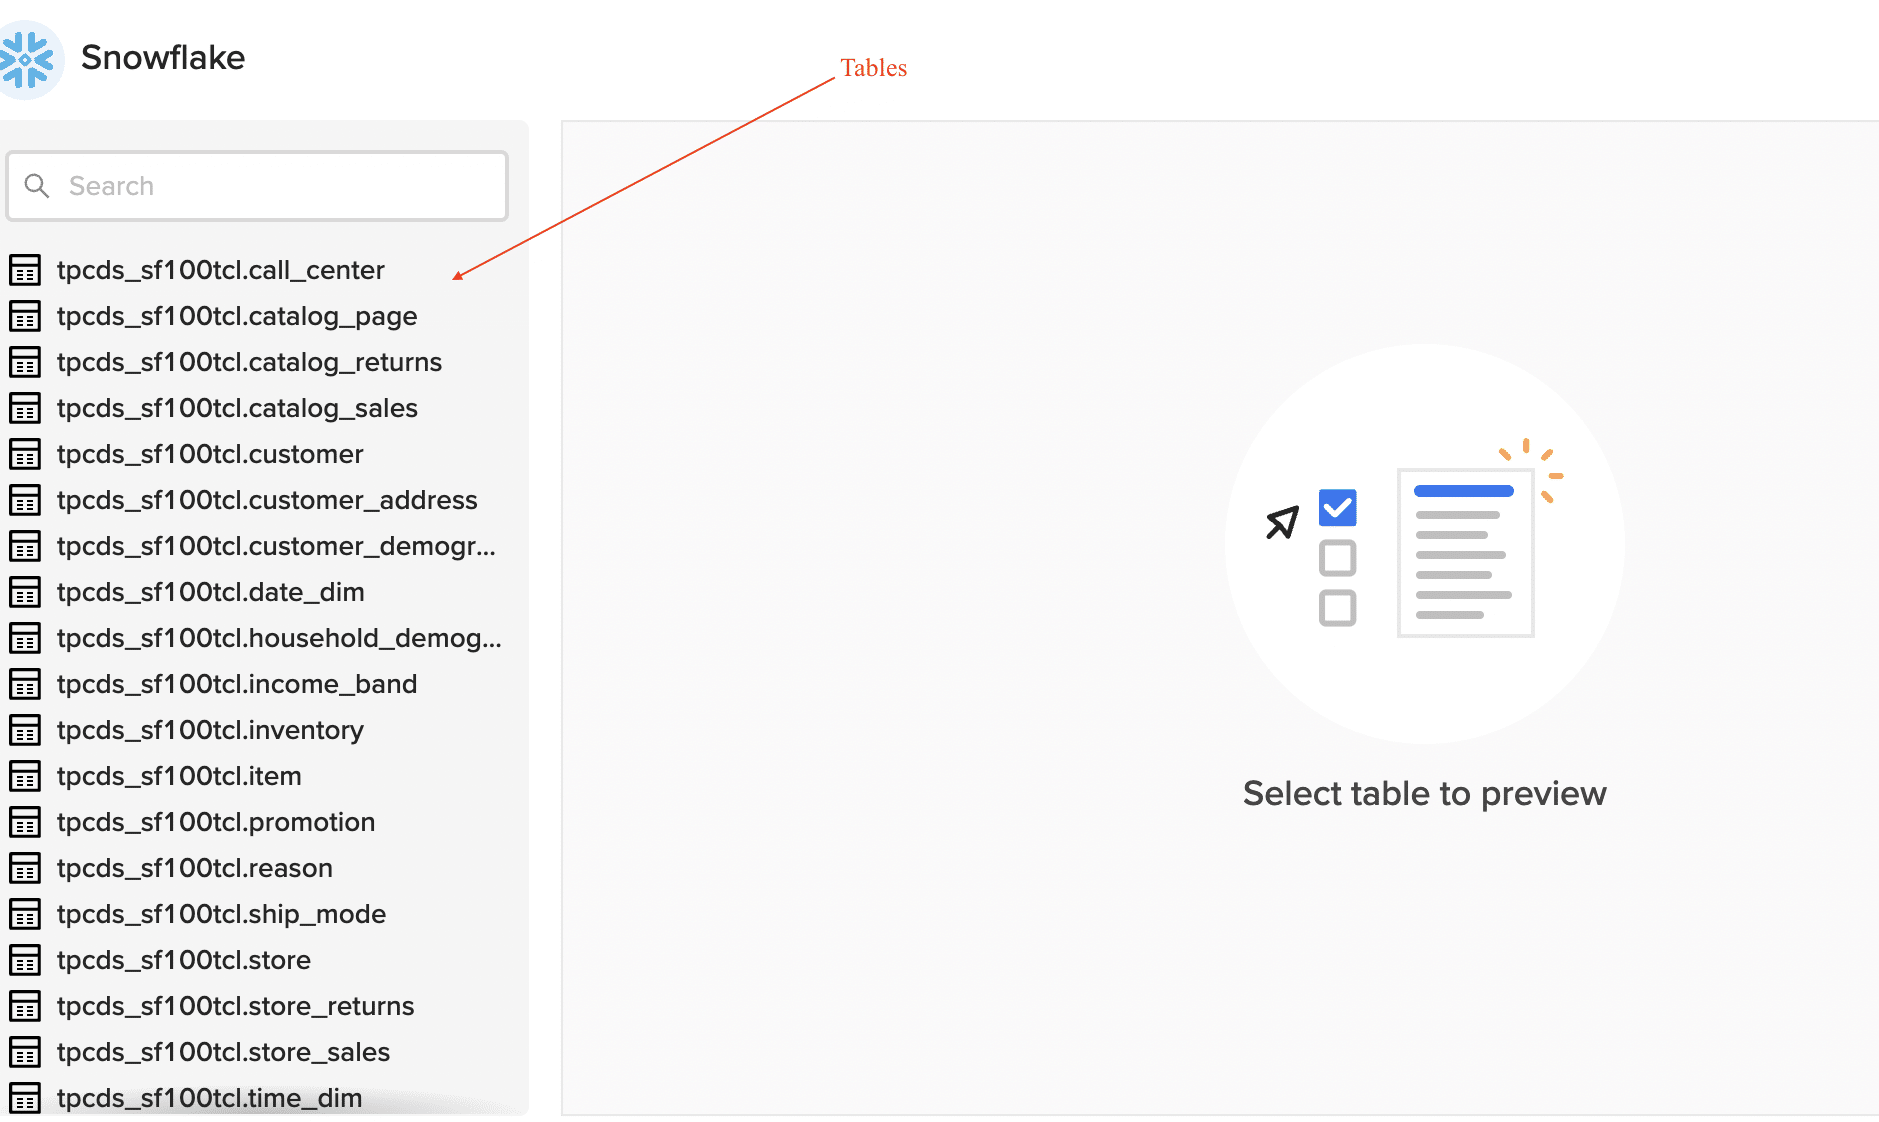
After connecting to Snowflake, select ‘Import from Tables’ to configure your Snowflake import using Coefficient’s visual Import Preview Window.
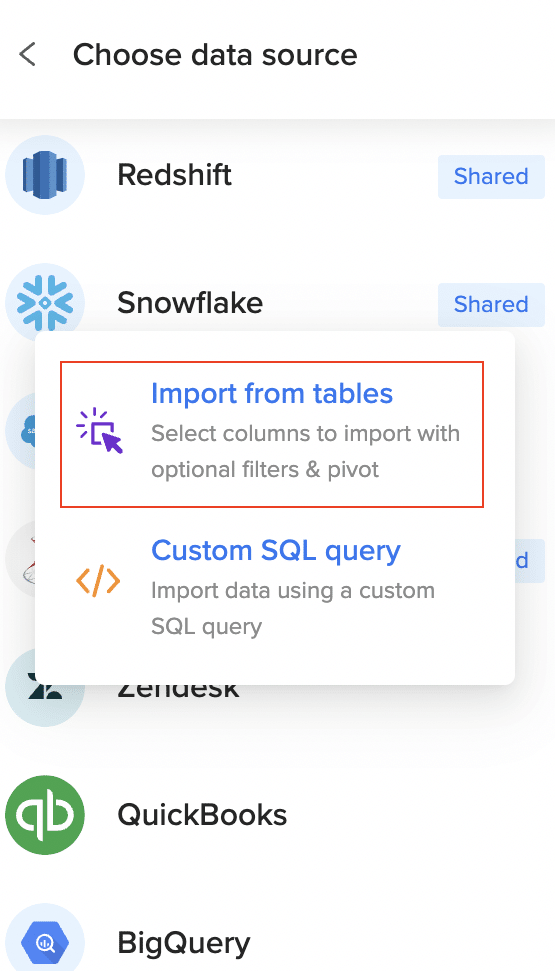
Select the table you would like to pull data from.
Customize your import.
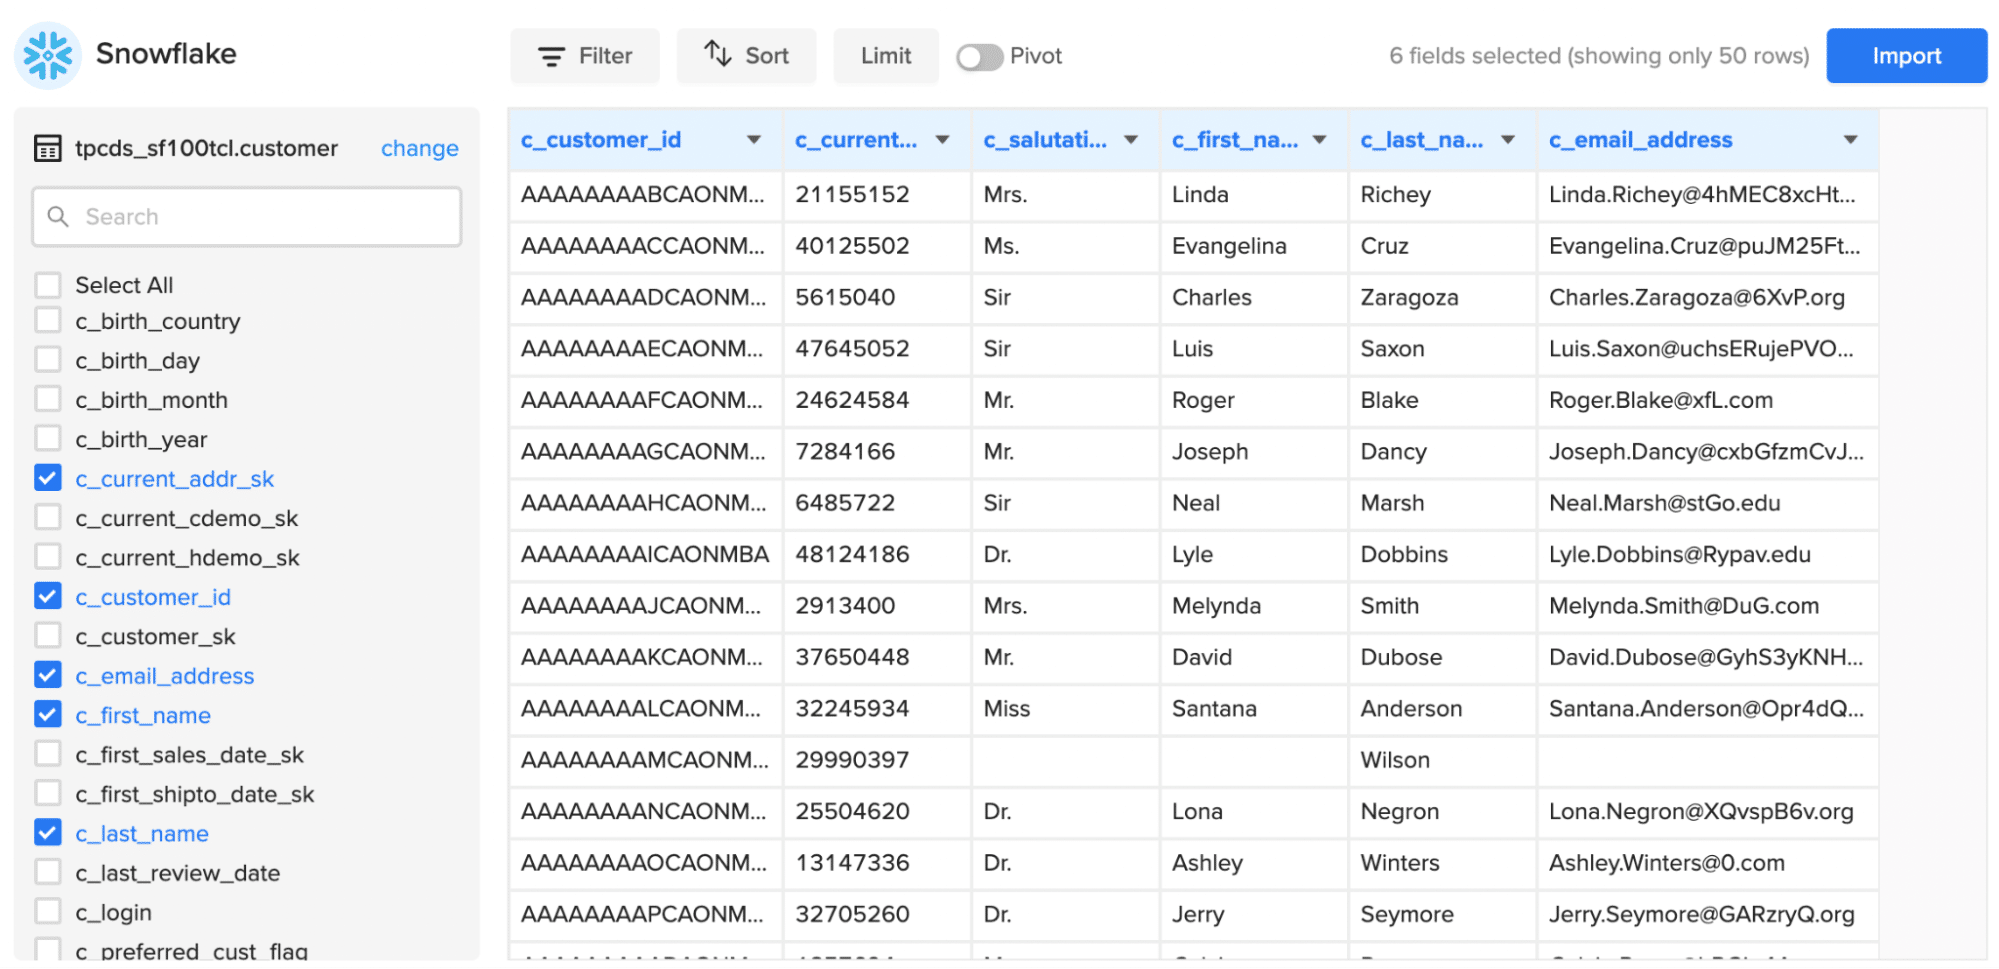
Once ready, click ‘Import.’
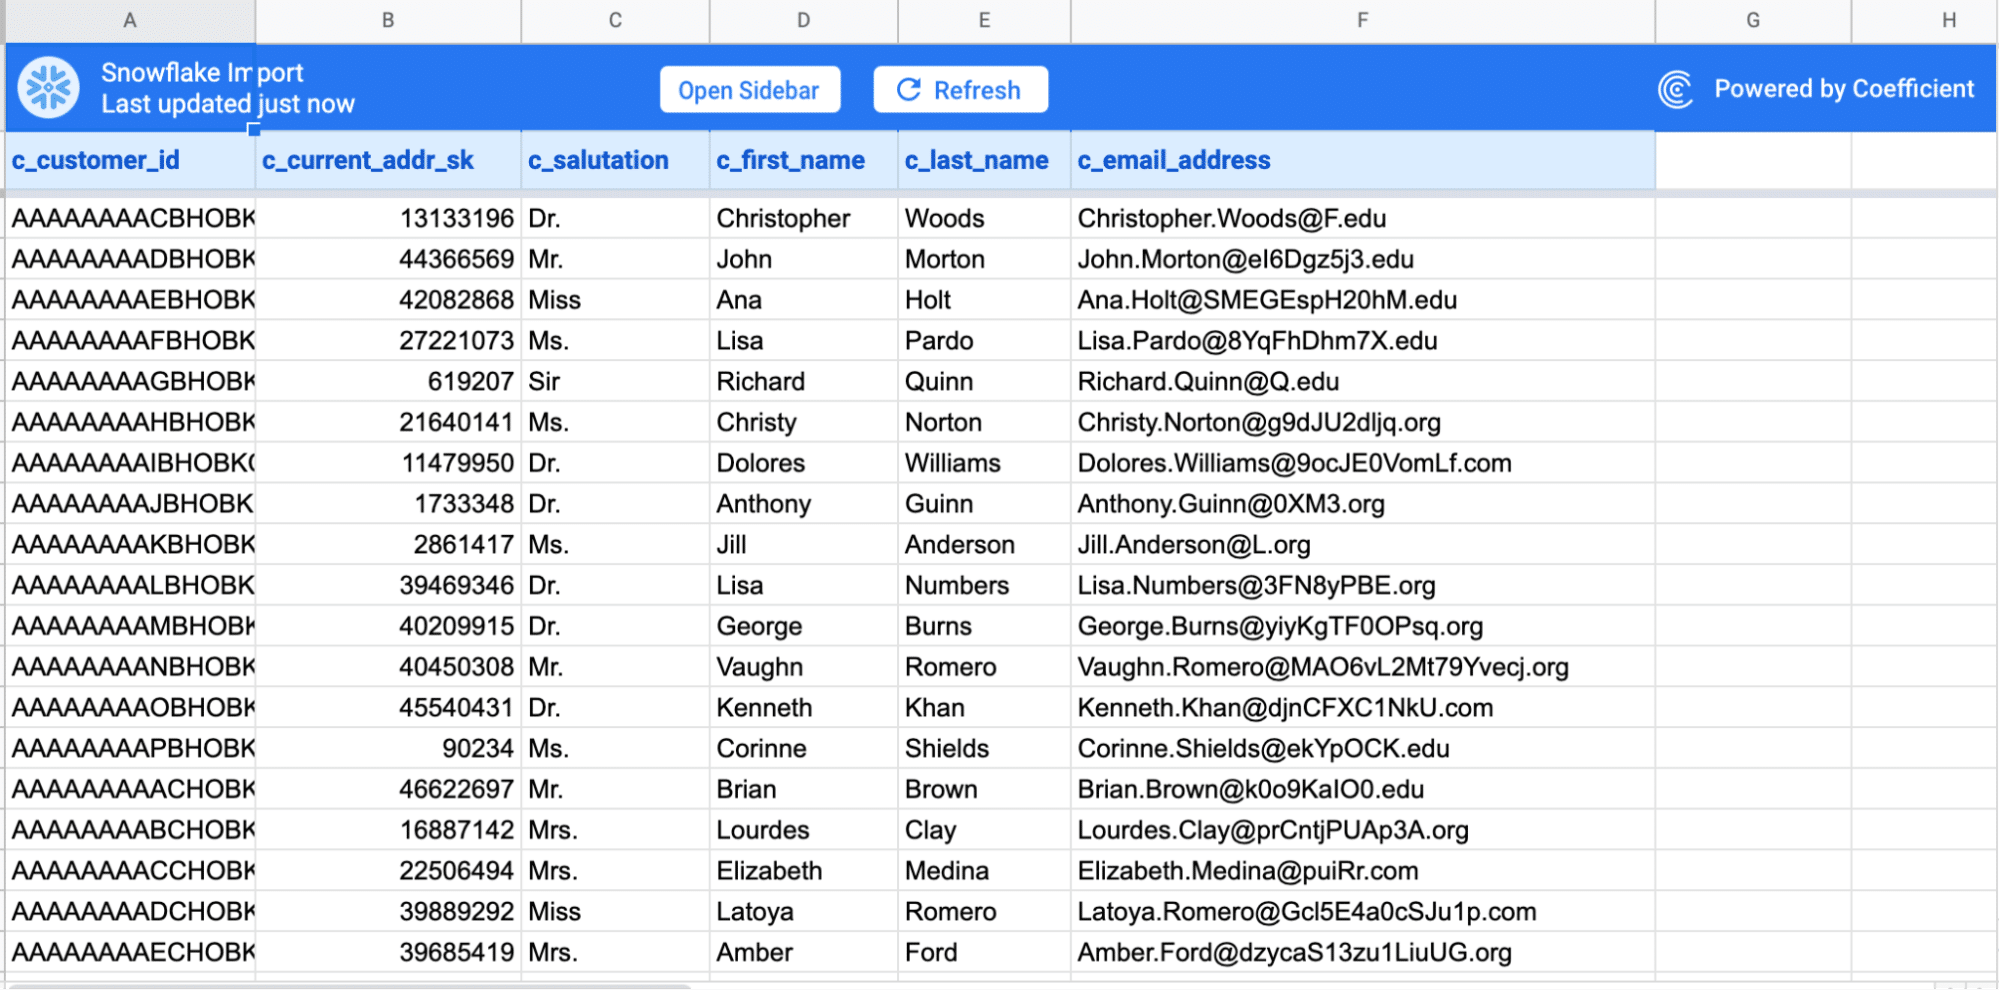
Step 3. Export Excel Workbook into Power BI
To import the Excel workbook into Power BI Desktop, select File > Import > Power Query, Power Pivot, Power View.
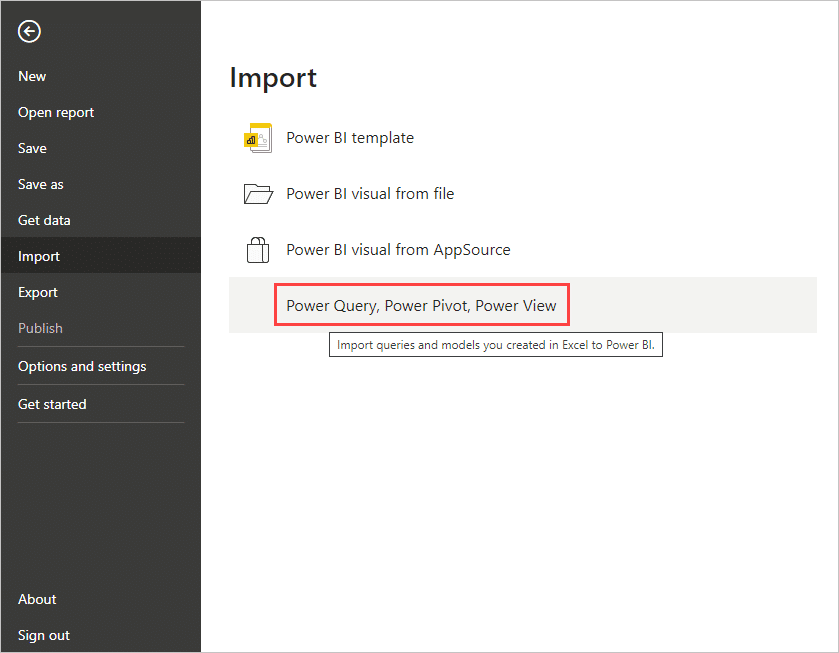
In the Open window, choose the Excel workbook exported from Coefficient.
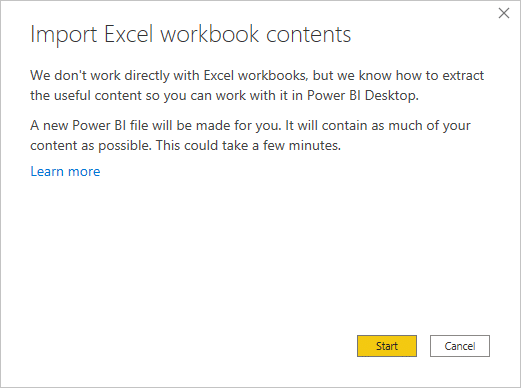
Click Start in the import dialog box.
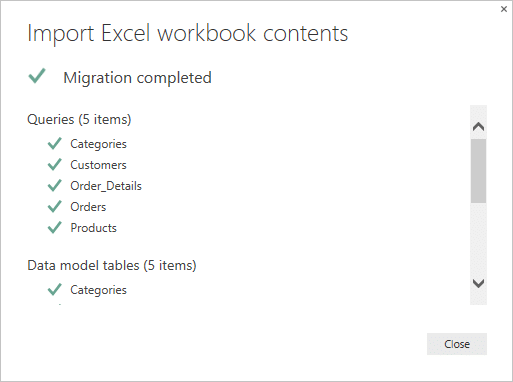
Once the import is complete, review the summary page that lists the converted items and any items that couldn’t be imported. Click Close.
Power BI Desktop now displays a report based on the imported Excel workbook.
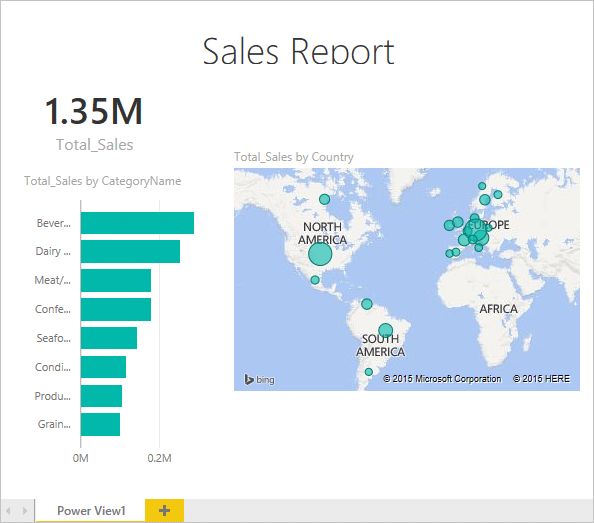
Continue working on the report by creating new visualizations, adding data, or generating new report pages using the features and capabilities available in Power BI Desktop.
Optimizing Snowflake-Power BI Performance: Best Practices
To maximize the performance of your Snowflake-Power BI integration, follow these best practices and leverage advanced settings:
Optimize Your Data Model
- Denormalize data when necessary to minimize joins and improve query performance.
- Choose appropriate data types for columns to reduce storage and enhance query speed.
- Partition large tables based on commonly used query filters, such as date ranges.
- Create indexes on columns frequently used in JOIN, WHERE, and GROUP BY clauses.
- Flatten hierarchical data structures to simplify queries and reduce nesting.
- Avoid using too many calculated columns and measures, as they can impact performance.
- Aggregate data at the appropriate level to minimize data transfer between Snowflake and Power BI.
Implement Query Optimization Strategies
- Utilize Snowflake’s query profiling and history features to identify and optimize slow-running queries.
- Analyze query execution plans to identify and resolve performance bottlenecks.
- Rewrite inefficient queries using best practices, such as avoiding SELECT * and using appropriate JOIN types.
- Leverage Snowflake’s query caching to store and reuse results of frequently executed queries.
- Use Snowflake’s built-in SQL functions (e.g., TRIM, SUBSTRING, REGEXP) for data transformation instead of Power Query.
Leverage Snowflake’s Advanced Features
- Create materialized views to precompute and store results of complex queries, improving performance by avoiding redundant calculations.
- Configure Snowflake’s automatic clustering to optimize table structure for faster data retrieval.
- Enable Snowflake’s data caching feature to store frequently accessed data in memory for quicker access.
- Utilize Snowflake’s native support for semi-structured data (e.g., JSON, Avro) to simplify data parsing in Power BI.
- Use Snowflake’s VARIANT data type to efficiently store and query semi-structured data.
Scale Snowflake for Large Datasets
- Leverage Snowflake’s virtual warehouses to dynamically allocate compute resources based on workload demands.
- Scale up virtual warehouses to handle increased concurrency and query complexity.
- Implement Snowflake’s multi-cluster architecture to distribute query processing across multiple nodes.
Tune Power BI Performance for Complex Visualizations
- Minimize the use of custom visuals that require heavy client-side rendering.
- Optimize DAX queries using efficient functions (e.g., CALCULATE, FILTER) and avoiding unnecessary calculations.
- Implement incremental refresh for large datasets to reduce data transfer and refresh times.
- Use Power BI’s aggregations feature to create pre-aggregated tables for faster query performance.
Connect Snowflake to Power BI with Coefficient
Connecting Snowflake to Power BI enables your business to combine the power of Snowflake’s data warehousing capabilities with Power BI’s robust reporting and dashboarding features.
Ready to take your data visualization to the next level? Get started with Coefficient today and experience the benefits of seamless Snowflake and Power BI integration firsthand.


