Table of Contents
![]()
- 1. Snowflake Data Integration Tools That Won’t Blow Your Budget
- 2. 7 Best Snowflake Data Visualization Tools in 2026 (With Pricing)
- 3. Datameer Pricing 2026: What It Actually Costs (And What They Don’t Tell You)
- 4. Snowflake Intelligence Cost: What You Actually Pay in 2026
- 5. Bridging the Last Mile: How Coefficient Brings Live Snowflake Data to Your Spreadsheets
- 6. Top 5 Snowflake Reporting Tools for 2026
- 7. Snowflake Partners with Coefficient to Solve the Last Mile of the Modern Data Stack
- 8. 5 Best Snowflake ETL Tools for 2026 [w/ Feature Comparison Table]
- 9. How to Migrate Data from SQL Server to Snowflake
- 10. How to Connect Snowflake to Power BI
- 11. How to Connect BigQuery to Snowflake? Top 3 Methods
- 12. Connect Google Ads to Snowflake – Step-by-Step Guide
- 13. How to Connect Mailchimp to Snowflake? Top 3 Methods
- 14. How to Connect Freshdesk to Snowflake
- 15. How to Connect Klaviyo to Snowflake
- 16. How to Migrate from Redshift to Snowflake: A Comprehensive Guide
- 17. How to Connect Razorpay to Snowflake
- 18. How to Connect Chargebee to Snowflake?
- 19. How to Connect MongoDB to Snowflake? Top 3 Methods
- 20. How to Migrate from BigQuery to Snowflake
- 21. How to Connect Outreach to Snowflake
- 22. How to Connect Zoho CRM to Snowflake
- 23. How to integrate Shopify to Snowflake? 3 Simple ways explained

Connecting MongoDB to Snowflake can seem like a daunting task, but it doesn’t have to be. This blog will walk you through the process, highlighting key advantages and providing detailed step-by-step guides for three methods to help your organization streamline data management and analytics.
Advantages of Connecting MongoDB to Snowflake
- Real-Time Data Analysis: By connecting MongoDB to Snowflake, businesses can leverage real-time analytics. This integration facilitates the instantaneous uploading and querying of live data without any delays, making it easier to glean timely insights.
- Centralized Data Management: Snowflake’s platform centralizes data from multiple sources, including MongoDB. This provides a unified view of your data, enabling more efficient data management and reporting.
- Enhanced Data Security: Snowflake offers robust security features, including end-to-end encryption and comprehensive access control, to ensure data remains secure during transfer and storage.
Connecting MongoDB and Snowflake: 3 Methods
Integrating MongoDB and Snowflake is crucial for businesses looking to leverage their data for advanced analytics and reporting. With a range of solutions catering to different needs and user profiles, organizations can choose the best approach to connect these two powerful platforms.
|
Solution |
Best For |
|
Coefficient |
Business users who want to analyze MongoDB data in Snowflake without relying on technical resources, using a no-code spreadsheet connector to export, transform, and sync data. |
|
Fivetran |
Companies that need to continuously replicate large volumes of data from MongoDB to Snowflake, leveraging a fully managed service for automating data pipelines and ensuring data consistency and near real-time analytics. |
|
Stitch |
Organizations seeking an easy-to-use, affordable solution for moving data from MongoDB to Snowf |
How to Connect MongoDB to Snowflake
Method 1: Coefficient – No-Code, User-Friendly
Coefficient offers a no-code solution to connect MongoDB to Snowflake seamlessly. Here’s how you can do it:
Pros and Cons
Pros:
- Simple, no-code setup
- Automatic data updates
- Affordable pricing plans
Cons:
- Scheduled automations are not free forever, but pricing plans are affordable
Step-by-Step Walkthrough
Step 1. Install Coefficient
For Google Sheets
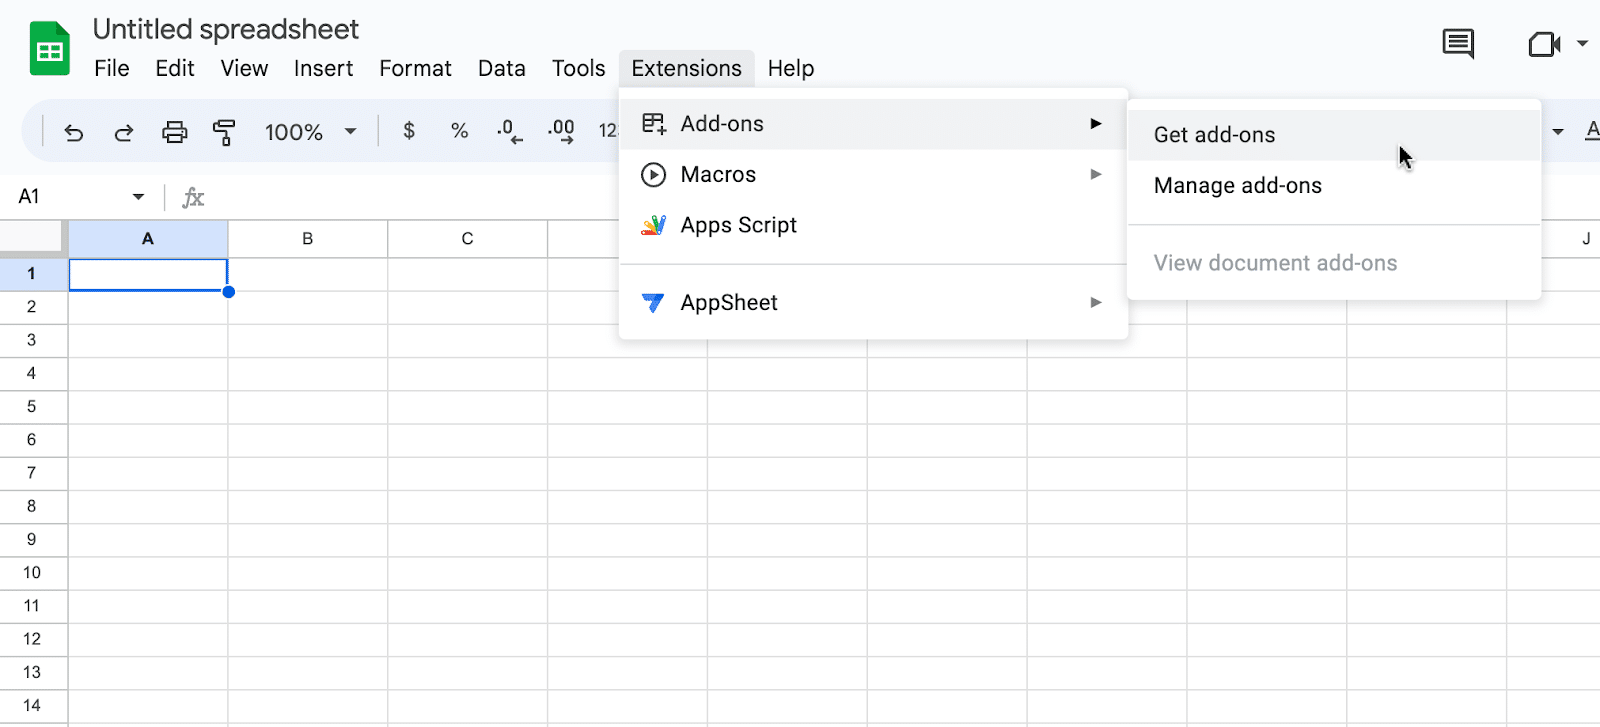
Open a new or existing Google Sheet, navigate to the Extensions tab, and select Add-ons > Get add-ons.
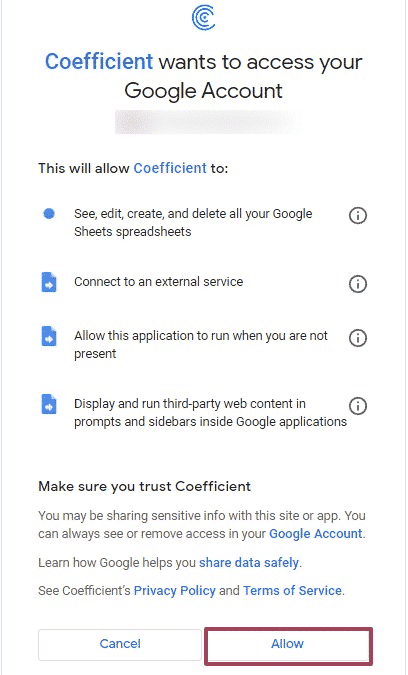
In the Google Workspace Marketplace, search for “Coefficient.”

Follow the prompts to grant necessary permissions.
Launch Coefficient from Extensions > Coefficient > Launch.
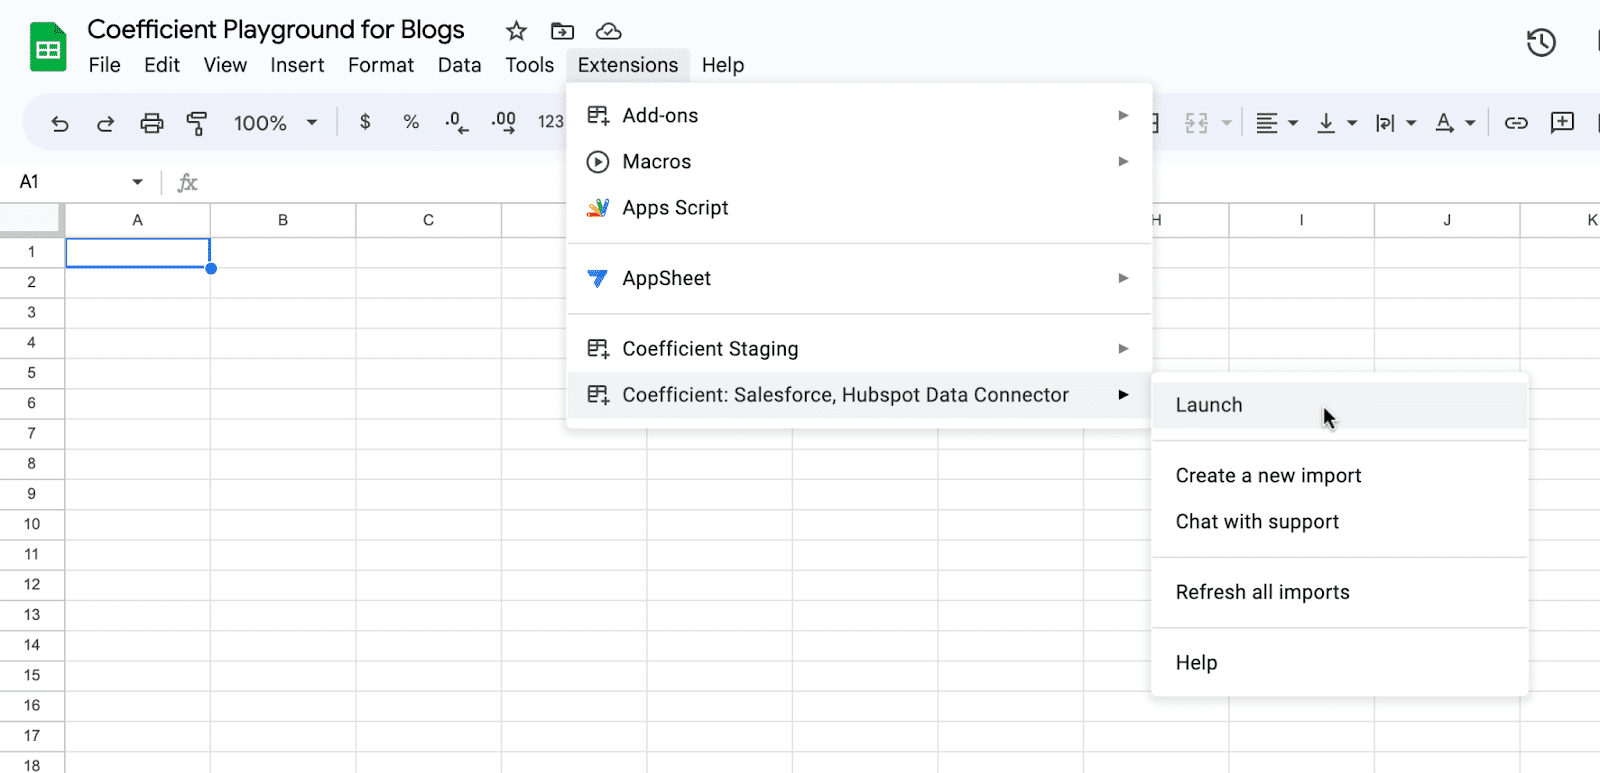
Coefficient will open on the right-hand side of your spreadsheet.
For Microsoft Excel
Open Excel from your desktop or in Office Online. Click ‘File’ > ‘Get Add-ins’ > ‘More Add-Ins.’
Type “Coefficient” in the search bar and click ‘Add.’
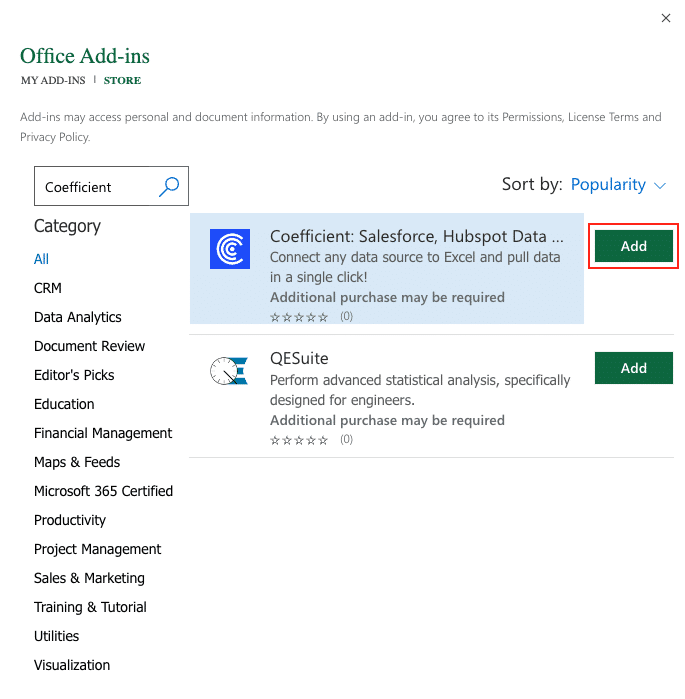
Follow the prompts in the pop-up to complete the installation.
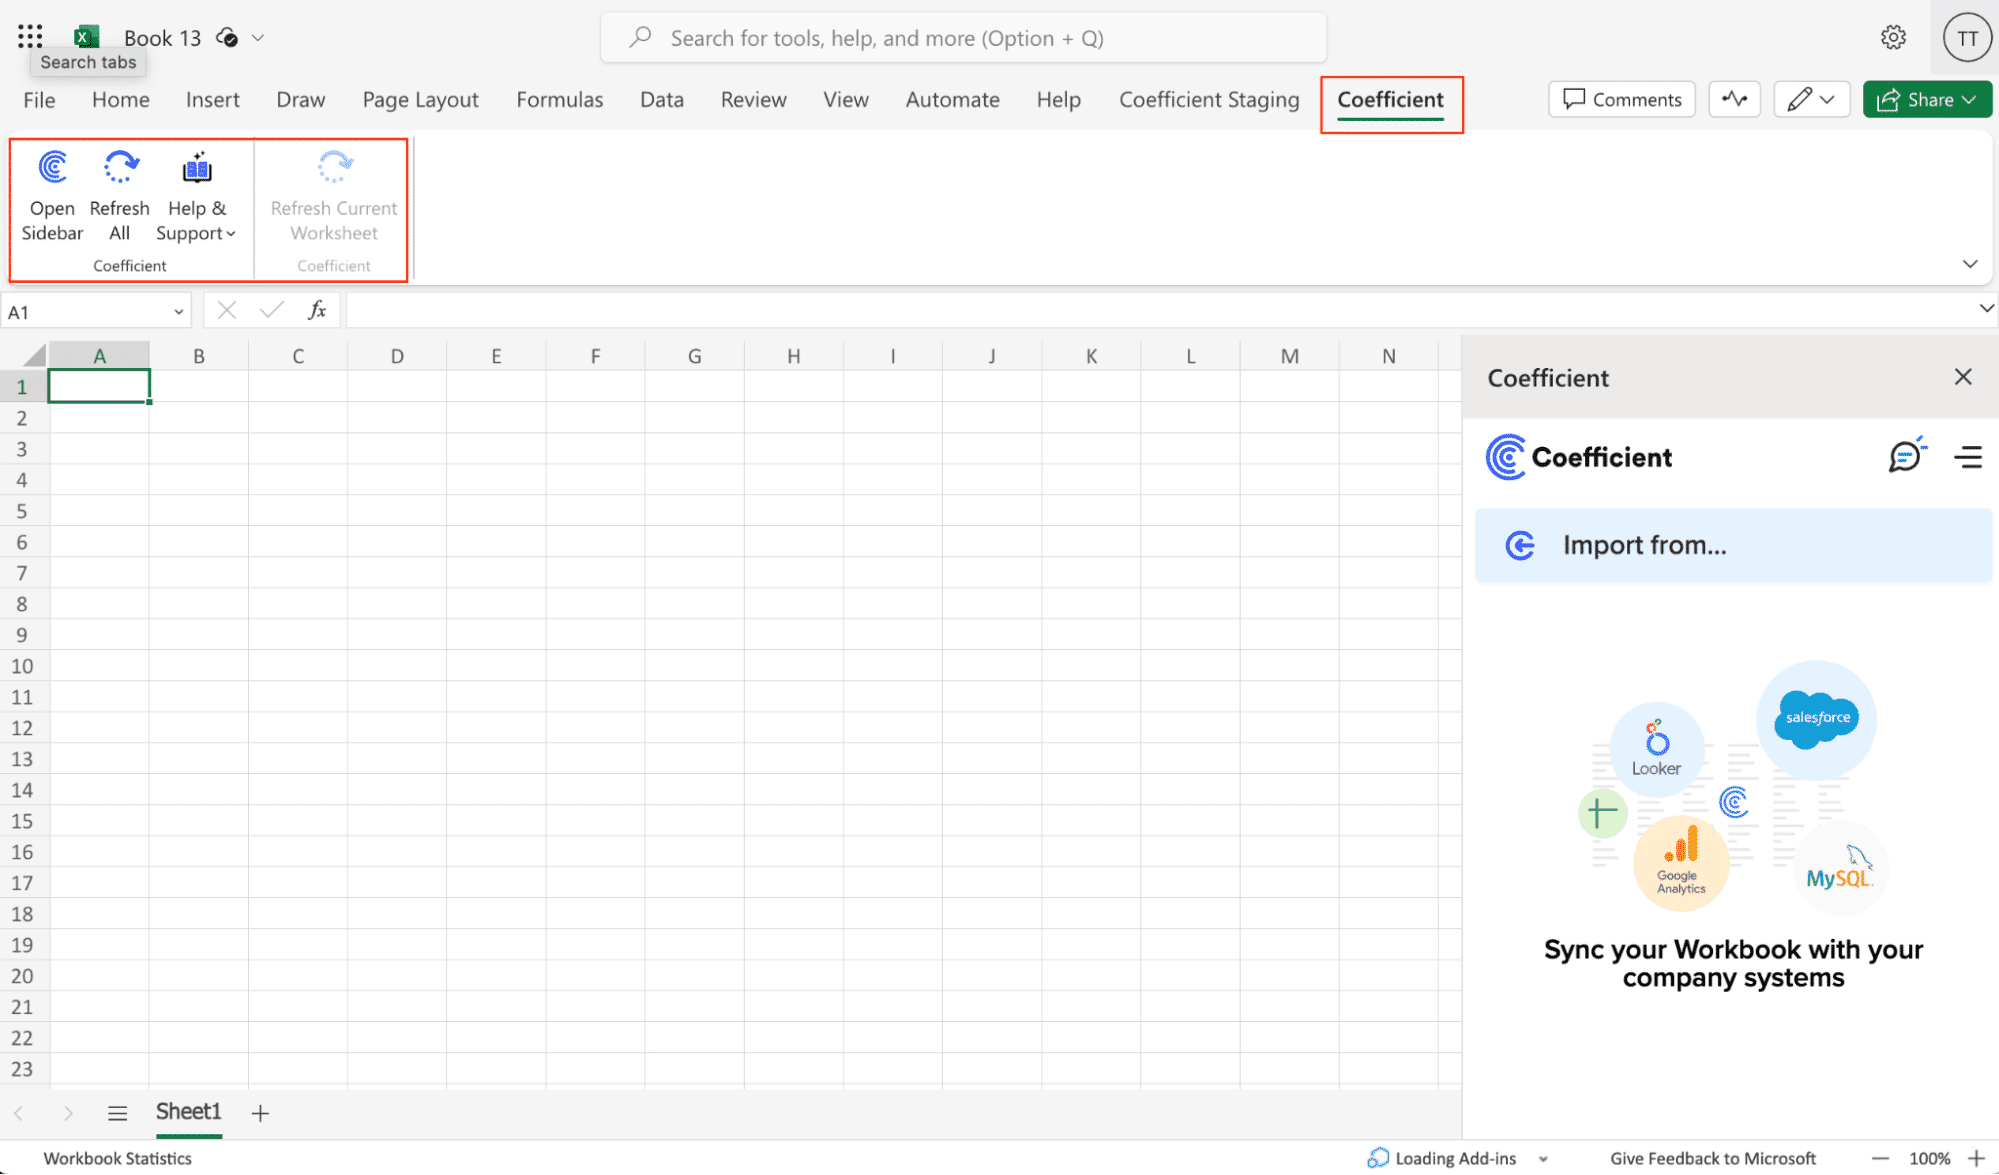
Once finished, you will see a “Coefficient” tab in the top navigation bar. Click ‘Open Sidebar’ to launch Coefficient.
With Coefficient installed, you’re now ready to import your MongoDB data into Excel.
Step 2. Import MongoDB Data to Your Spreadsheet
In the Coefficient sidebar, click on “Import From” and select “MongoDB” from the list.
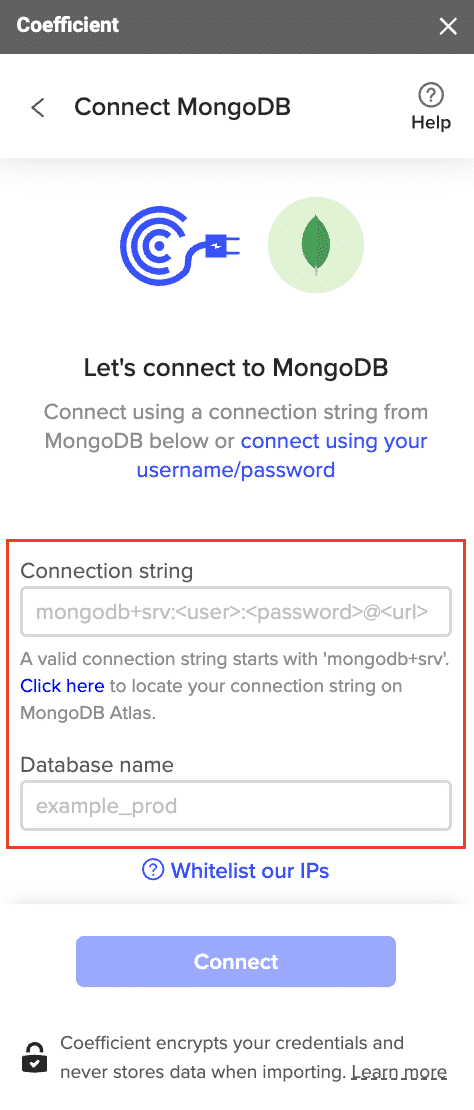
Paste your MongoDB connection string and fill in your database name.
Note: Before starting, make sure to whitelist the provided IP addresses in your MongoDB security settings.
Click “Connect” to establish the connection.
Select “Share” or “Not Now” depending on your preference.

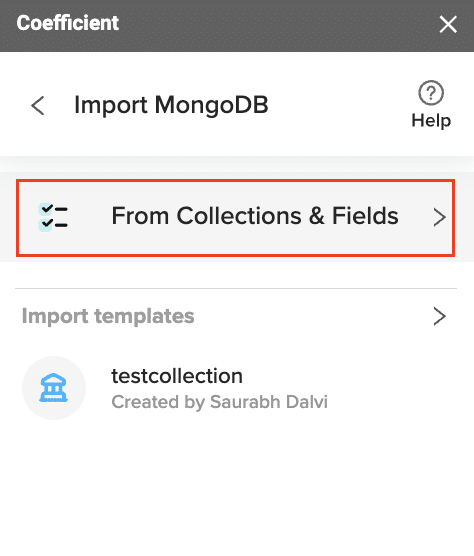
Under “Connected Sources,” click on your MongoDB connection and select “Import Data.”

Choose “From Collections and Fields” to select specific data to import.
In the import preview, select the table you want to import data from.
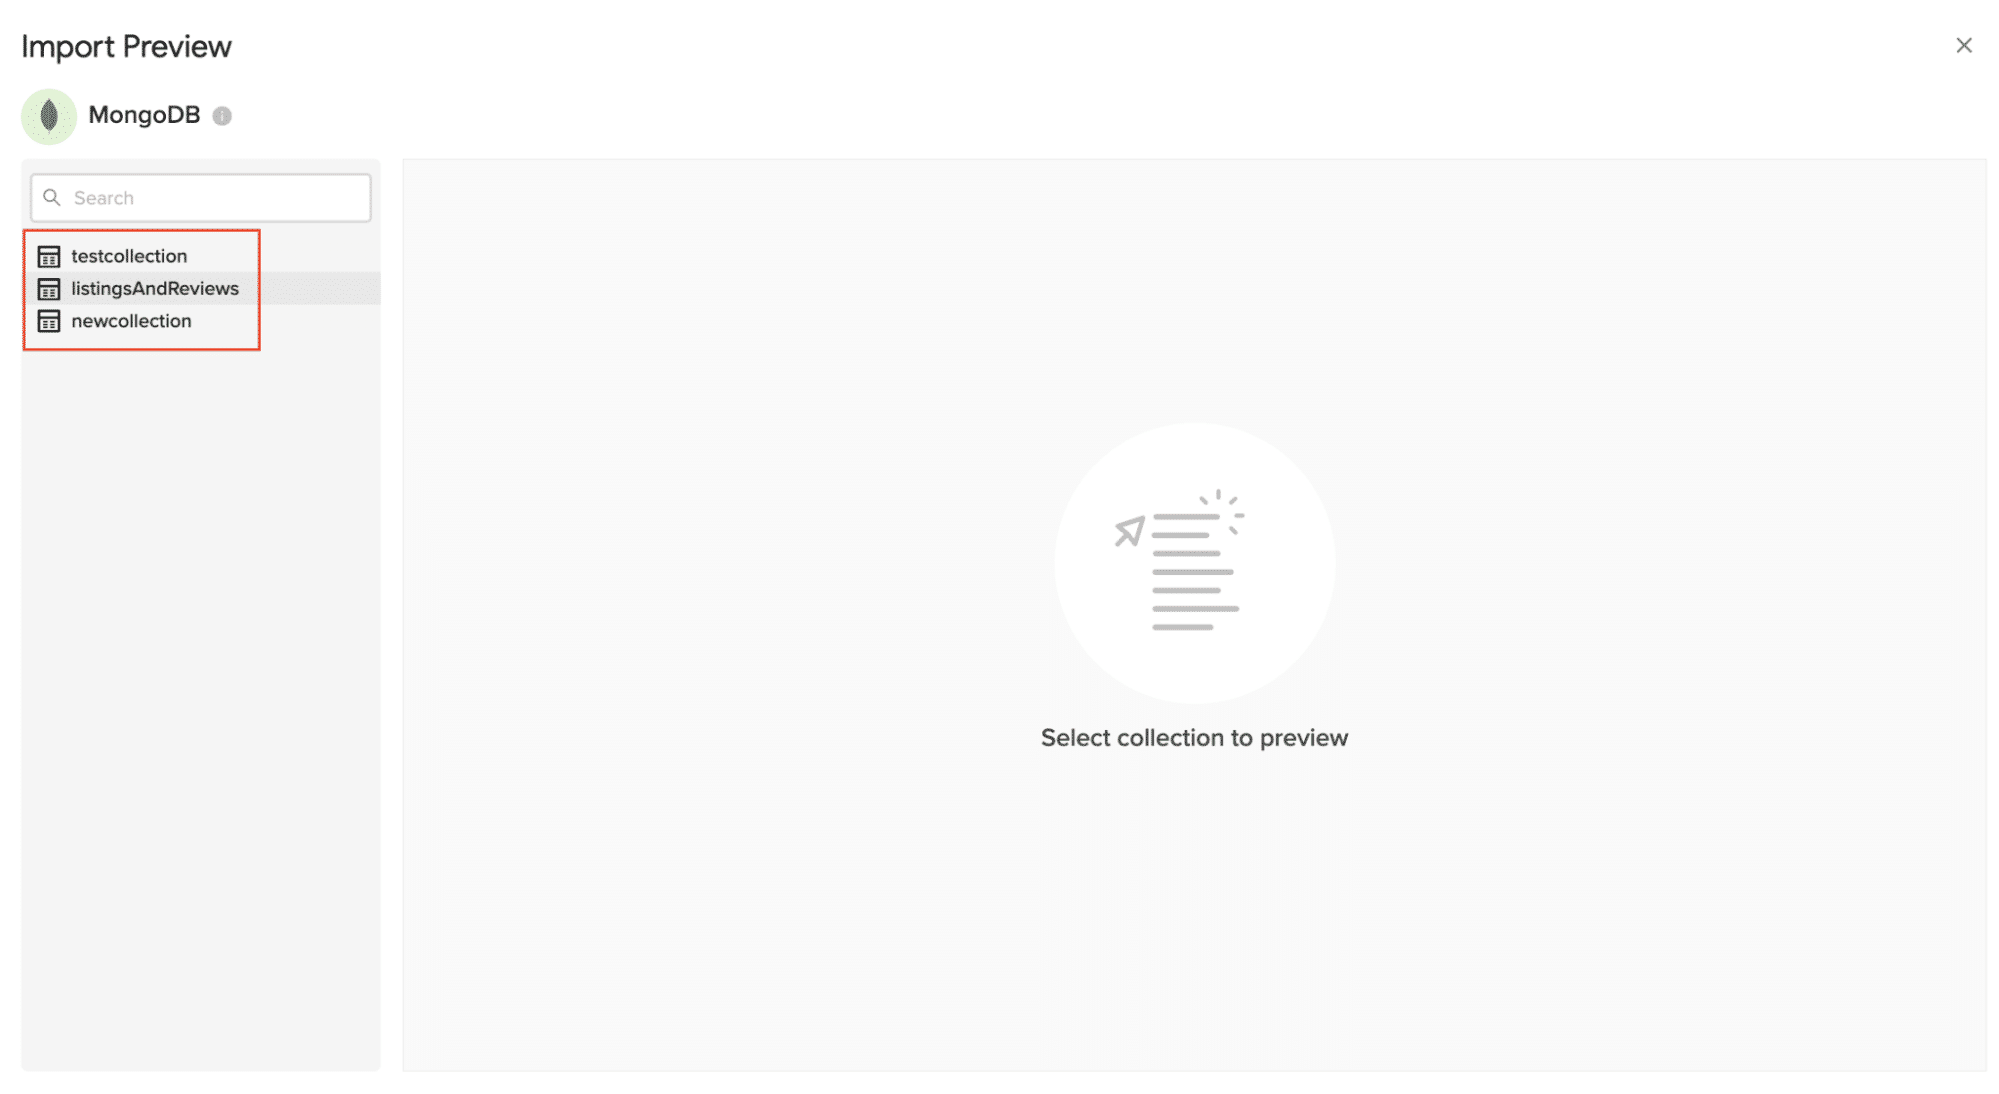
Choose the columns you want to include by checking or unchecking them.

Optionally, add filters, change the sort order, or limit the number of records imported.
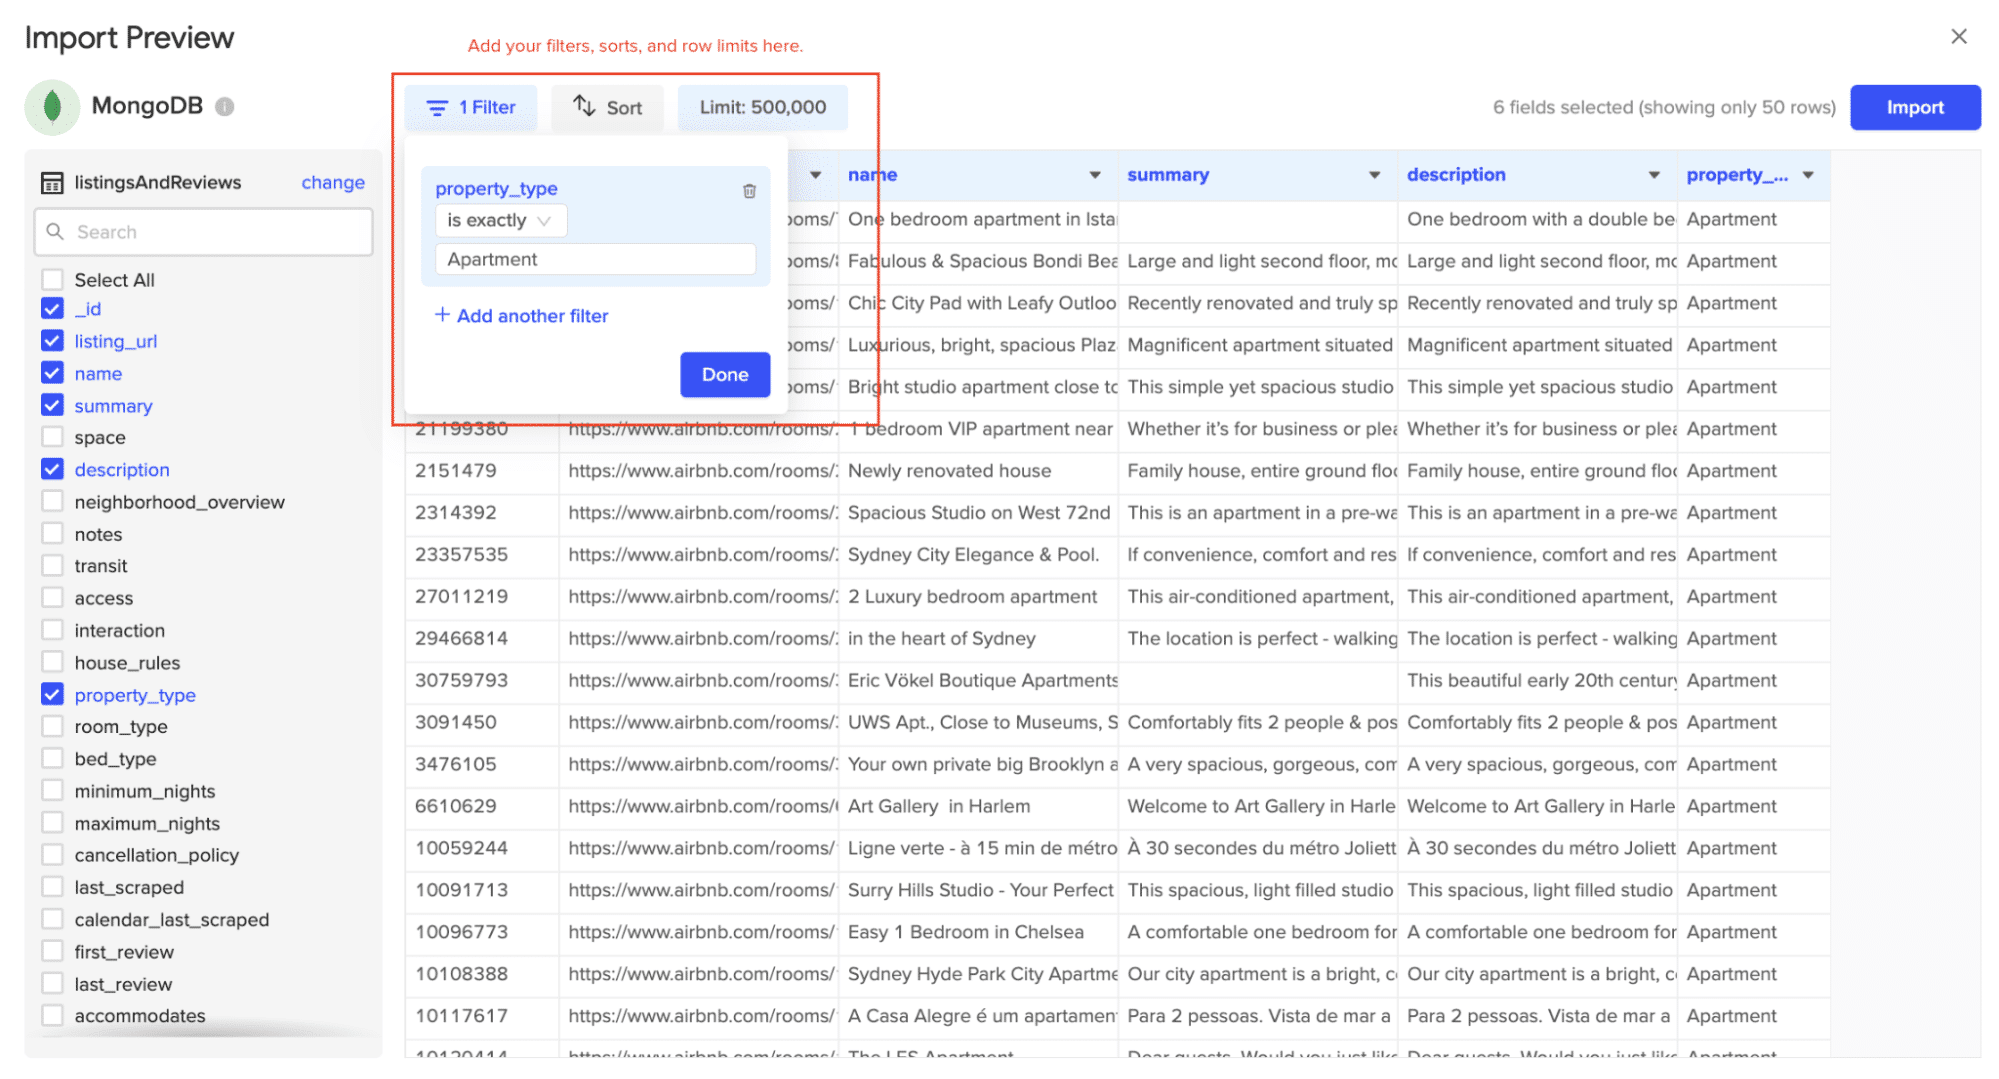
Click “Import” to fetch the data into your Excel spreadsheet.

Step 3. Export Data Snowflake Export Tutorial
This tutorial will guide you through exporting data from a spreadsheet to Snowflake using Coefficient.
Before starting, make sure you’ve connected to Snowflake.
Then, navigate to Coefficient’s menu. Click “Export to…”
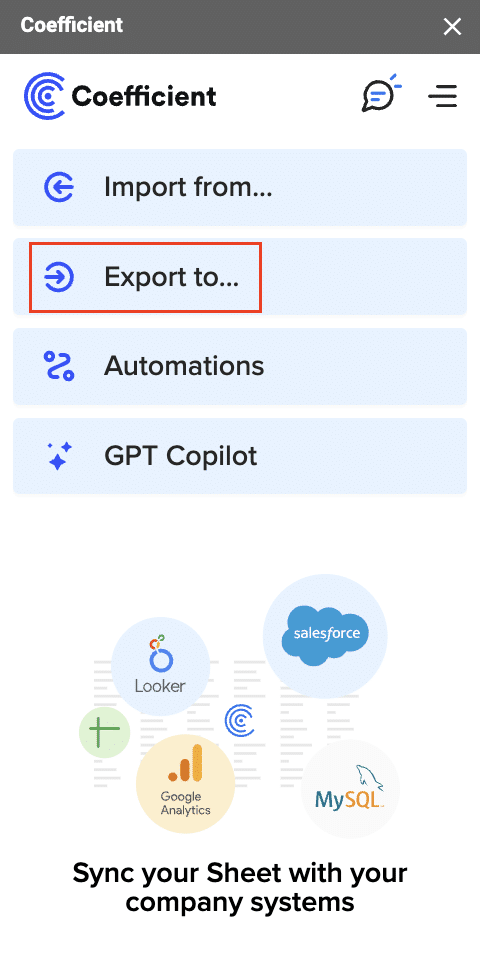
Choose Snowflake from the list of available data sources.

Step 3: Define Tab and Header Row
Select the tab and header rows in your spreadsheet that contains the data you want to export.
Click “Next” to continue.
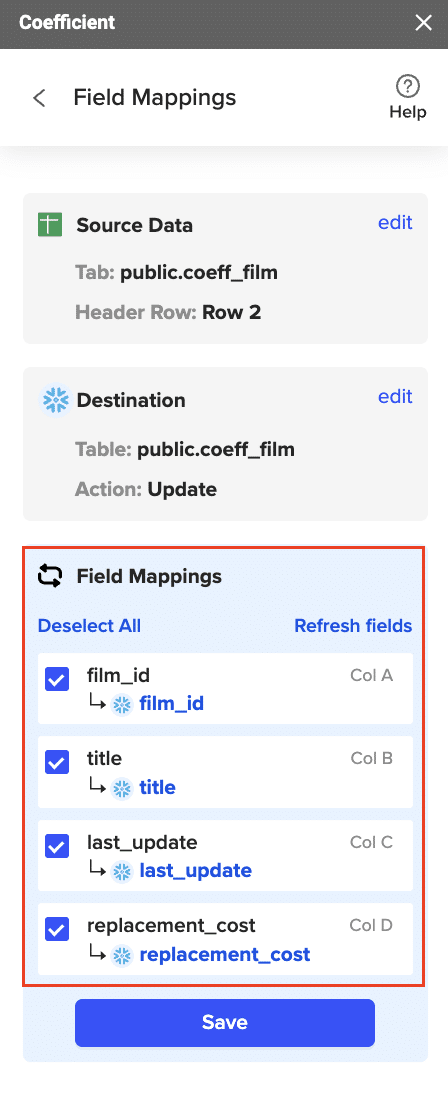
Select the table in your Snowflake database that you want to update. Then, select the type of action you want to perform—Update, Insert, Upsert, or Delete.

Map the fields from your spreadsheet to the corresponding Snowflake fields.
Note: Primary Keys (ID fields) are required for Update and Delete actions. For Insert actions, the Primary Key field can be set to auto populate if it’s configured in Snowflake.
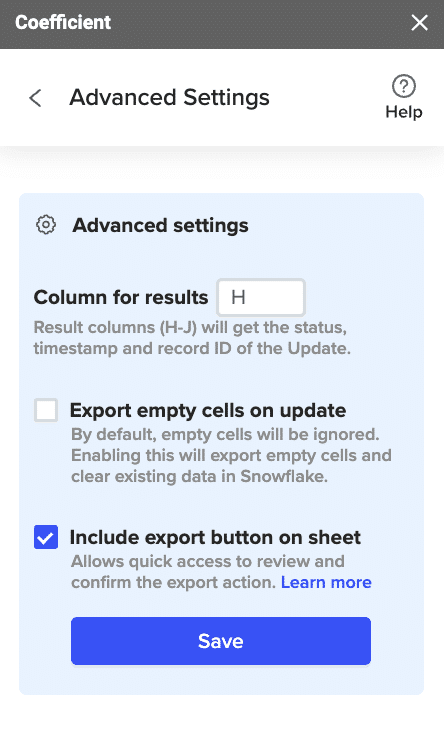
(Optional) Specify additional settings such as batch size, whether to export empty cells on an update, and the column for results.
Confirm your settings.

Then, highlight the rows you want to update or export. You can choose to export all rows or specific rows.

After you’re finished, review your settings and click “Export.”
Follow the prompts to confirm your changes.
In a few seconds, data from your spreadsheet will push to Salesforce.

Review your settings and click “Export” to push your data from the spreadsheet to Snowflake.
Coefficient will then update the records in Snowflake, displaying the status, record ID, and timestamp of the updates in your spreadsheet.
Method 2: Fivetran – Fully Managed Data Pipelines
Fivetran is a powerful, fully managed data pipeline solution that allows companies to continuously replicate large volumes of data from MongoDB to Snowflake. It is ideal for businesses requiring automated data pipelines with near real-time analytics capabilities.
Pros and Cons
Pros:
- Fully automated data replication
- Near real-time data updates
- Comprehensive data consistency and integrity checks
Cons:
- Higher cost compared to some other solutions
- Limited customization options
Step-by-Step Guide
- Sign Up for Fivetran:
- Visit the Fivetran website and sign up for an account.
- Set Up MongoDB as the Source:
- In your Fivetran dashboard, click on “Add Connector.”
- Choose MongoDB from the list of available connectors.
- Enter your MongoDB connection details, such as host, port, username, and password.
- Configure the MongoDB Connection:
- Select the collections you want to sync.
- Configure any necessary replication settings, such as sync frequency and incremental updates.
- Set Up Snowflake as the Destination:
- Add Snowflake as your destination by selecting it from the available destinations list.
- Provide your Snowflake connection details, including warehouse, database, schema, and authentication details.
- Map and Transform Data:
- Use Fivetran’s data mapping tools to ensure your MongoDB data fields align correctly with your Snowflake schema.
- Set up any transformations needed to prepare your data for analysis in Snowflake.
- Start the Data Pipeline:
- Review your configuration and start the pipeline.
- Fivetran will begin replicating your MongoDB data to Snowflake automatically.
- Monitor and Manage:
- Use Fivetran’s monitoring dashboard to keep track of data pipeline performance and health.
- Adjust settings and troubleshoot as needed.
Method 3: Stitch – Easy-to-Use Data Integration
Stitch is an affordable and easy-to-use ETL service that simplifies the process of moving data from MongoDB to Snowflake. It is well-suited for organizations seeking a straightforward, cost-effective solution for data integration.
Pros and Cons
Pros:
- Simple setup and user-friendly interface
- Cost-effective pricing plans
- Supports a wide range of data sources
Cons:
- Limited advanced features compared to more robust solutions
- May require additional tools for complex transformations
Step-by-Step Guide
- Sign Up for Stitch:
- Visit the Stitch website and sign up for an account.
- Add MongoDB as a Source:
- In your Stitch dashboard, click on “Add Integration” and select MongoDB.
- Provide the necessary connection details, including host, port, database, and authentication information.
- Configure MongoDB Connection:
- Select the collections you want to sync.
- Set up your sync frequency and any other desired settings.
- Add Snowflake as a Destination:
- Click on “Add Destination” and select Snowflake.
- Enter your Snowflake connection details, including account name, warehouse, database, schema, and user credentials.
- Define Replication Settings:
- Configure how often you want Stitch to replicate data from MongoDB to Snowflake.
- Ensure that the necessary tables and schemas are set up in Snowflake.
- Map and Transform Data:
- Use Stitch’s schema mapping tools to ensure your MongoDB data fields align correctly with your Snowflake schema.
- Set up any necessary transformations to prepare your data for analysis.
- Start the Data Pipeline:
- Review your settings and start the pipeline.
- Stitch will begin moving your MongoDB data to Snowflake based on the configured schedule.
- Monitor the Pipeline:
- Use Stitch’s monitoring tools to keep track of your data pipeline.
- Address any issues that arise to ensure smooth data flow.
Ready to Enhance Your Data Integration?
Integrating MongoDB with Snowflake can significantly improve your data management and analytics capabilities. Whether you choose Coefficient, Fivetran, or Stitch, each method offers unique benefits tailored to different business needs and technical expertise levels.
Ready to get started? Ready to get started? Try Coefficient today for a seamless, no-code data integration experience.