Want to export data from PostgreSQL? You’re in the right place.
This guide will walk you through three effective methods to extract your PostgreSQL data, enabling you to analyze and share it efficiently.
Learn how to leverage tools like Coefficient, use PostgreSQL’s native COPY command, and utilize pgAdmin for smooth data exports.
Top 3 Methods to Export Data from PostgreSQL
When it comes to exporting data from PostgreSQL, you have several options at your disposal. Each method has its own strengths and use cases. Let’s explore the top three approaches:
- Coefficient: Seamlessly export PostgreSQL data to Google Sheets or Excel with automated updates
- CSV Export: Manually export data using PostgreSQL’s built-in COPY command
- pgAdmin: Use the graphical interface to export data directly from the PostgreSQL management tool
Let’s dive into each method in detail, starting with the most user-friendly option.
#1 Coefficient: The Easiest Way to Export PostgreSQL Data to Spreadsheets

Coefficient is a powerful tool that simplifies the process of exporting PostgreSQL data to spreadsheets like Google Sheets and Excel. This method is particularly useful for teams that need to regularly update and analyze their database information in a familiar spreadsheet environment.
- Automated data sync: Coefficient keeps your spreadsheet data up-to-date with your PostgreSQL database, eliminating the need for manual exports.
- User-friendly interface: No SQL knowledge required, making it accessible for non-technical team members.
- Data transformation capabilities: Clean and format your data directly within the spreadsheet.
- Scheduled exports: Set up recurring exports to ensure you always have the latest data at your fingertips.
Step-by-Step Guide to Exporting PostgreSQL Data with Coefficient
Follow these steps to export your PostgreSQL data using Coefficient:
Step 1. Install Coefficient
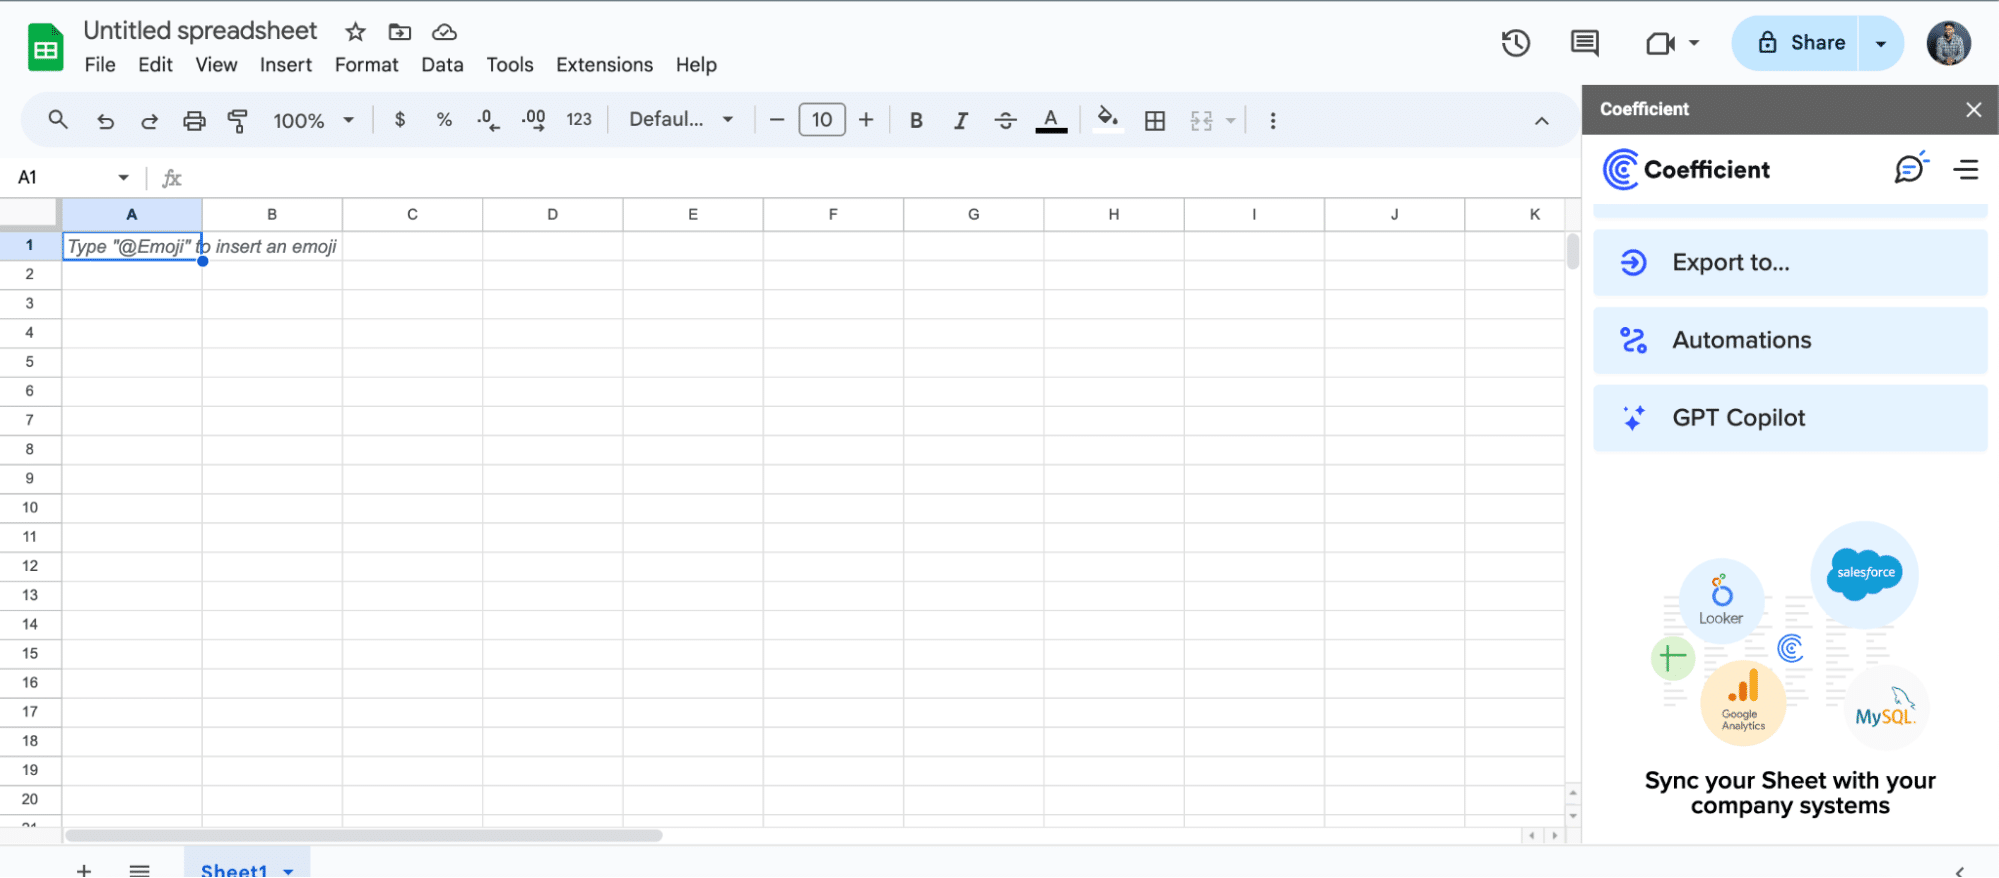
For Google Sheets
- Open a new or existing Google Sheet, navigate to the Extensions tab, and select Add-ons > Get add-ons.
- In the Google Workspace Marketplace, search for “Coefficient.”
- Follow the prompts to grant necessary permissions.
- Launch Coefficient from Extensions > Coefficient > Launch.
- Coefficient will open on the right-hand side of your spreadsheet.
For Microsoft Excel
- Open Excel from your desktop or in Office Online. Click ‘File’ > ‘Get Add-ins’ > ‘More Add-Ins.’
- Type “Coefficient” in the search bar and click ‘Add.’
- Follow the prompts in the pop-up to complete the installation.
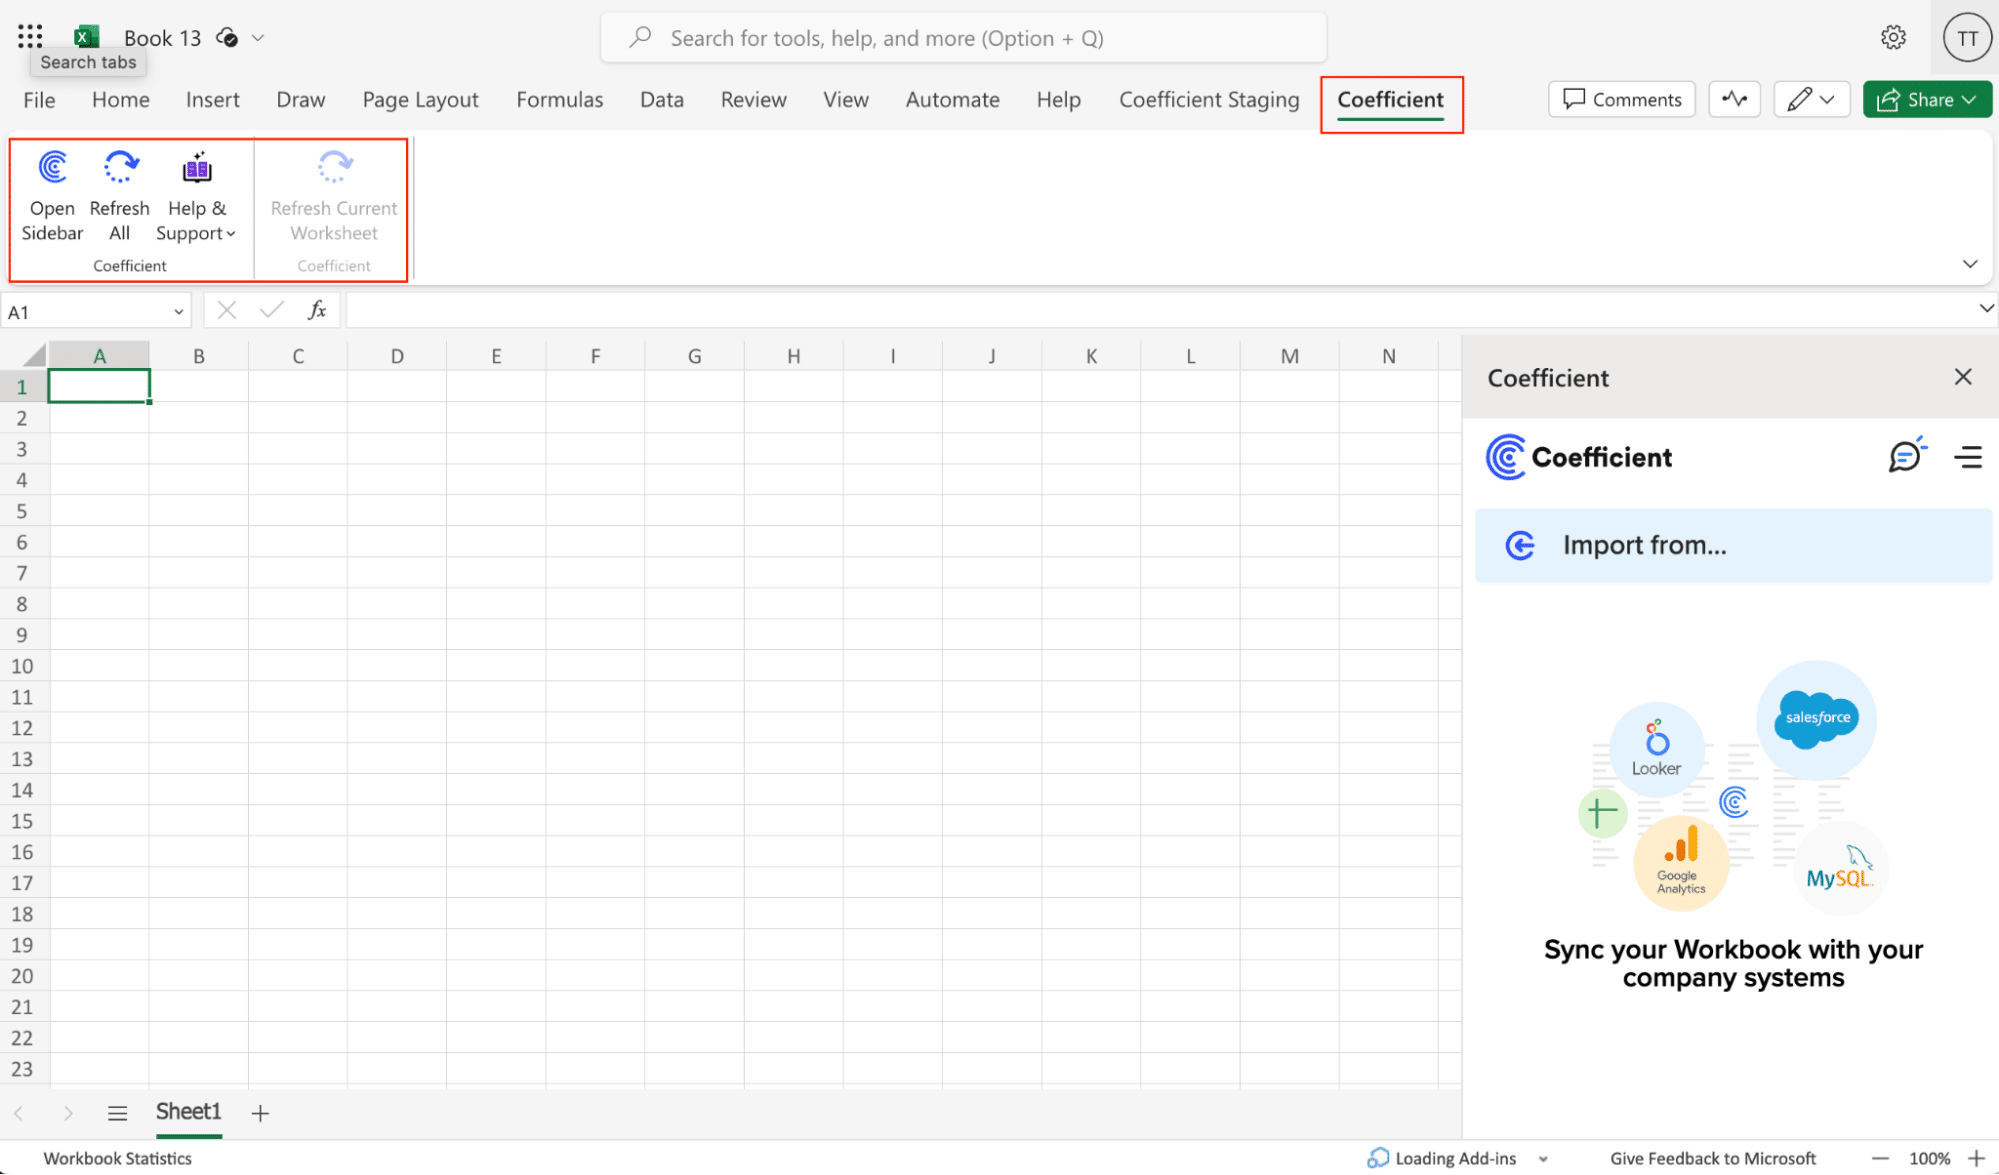
- Once finished, you will see a “Coefficient” tab in the top navigation bar. Click ‘Open Sidebar’ to launch Coefficient.
Step 2. Connect to your PostgreSQL database
- Open the Coefficient sidebar in your spreadsheet
- Click “Connect a data source”
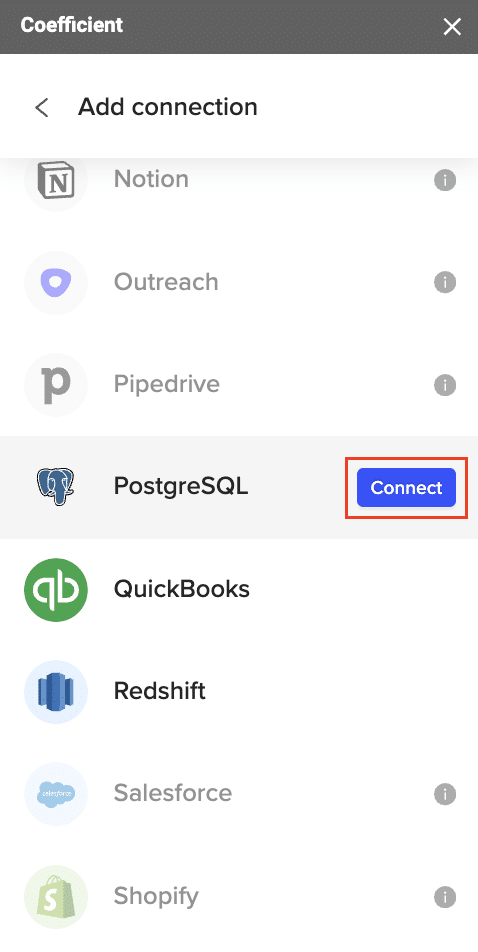
- Select “PostgreSQL” from the list of available connectors
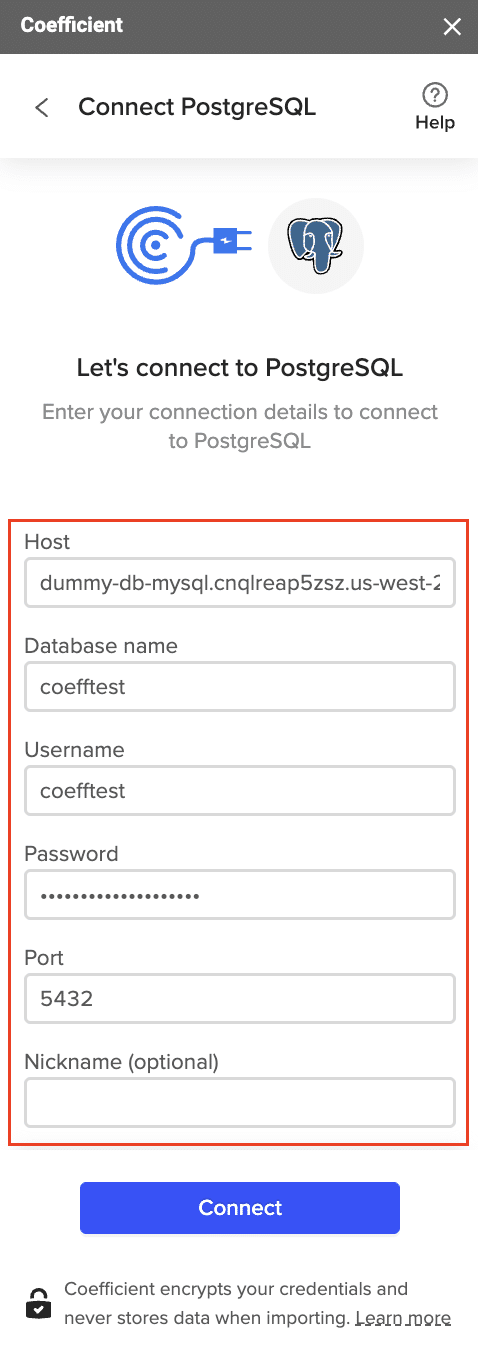
- Enter your PostgreSQL connection details:
- Host
- Port
- Database name
- Username
- Password
- Click “Connect” to establish the connection
Step 3. Choose the data to export
- In the Coefficient sidebar, click “Import from..”
- Select PostgreSQL from the list and click “From Tables & Columns”

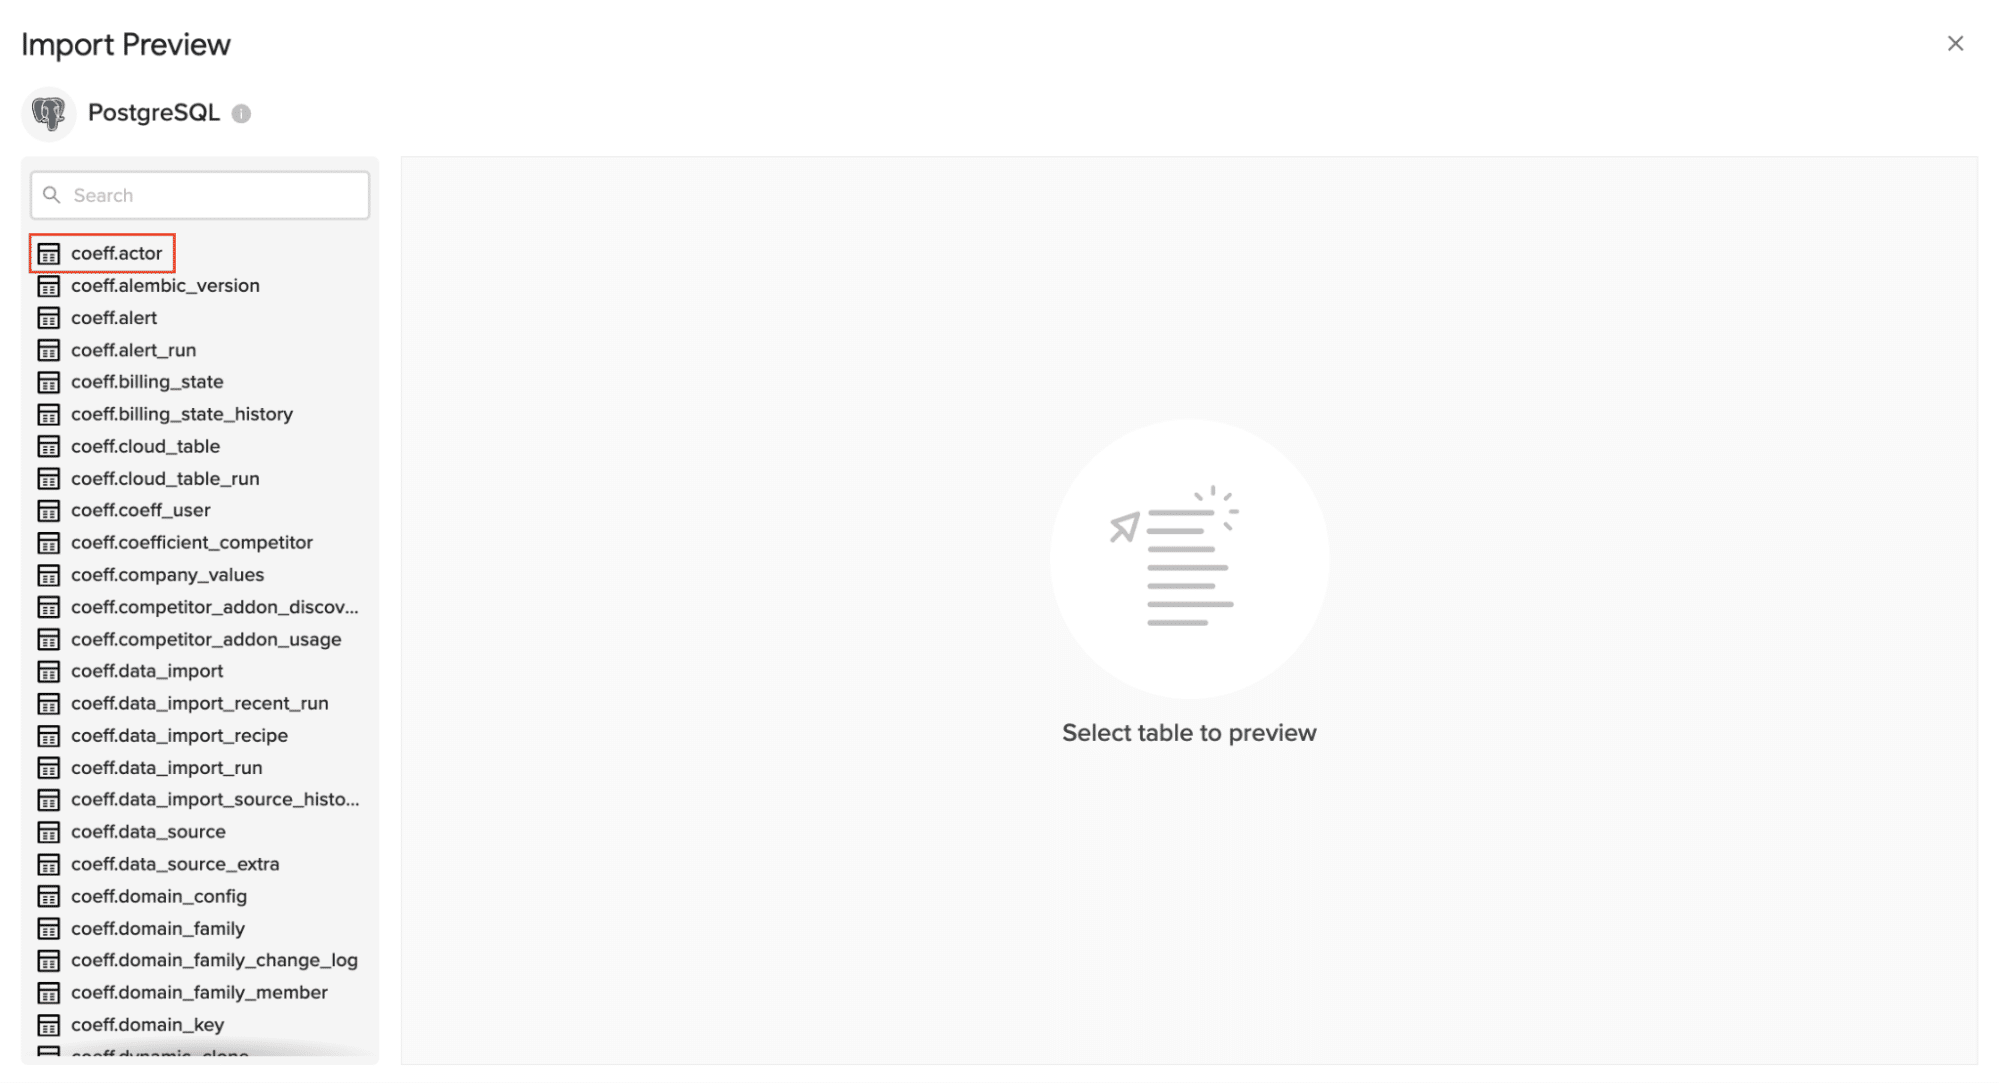
- Select the table you want to import.
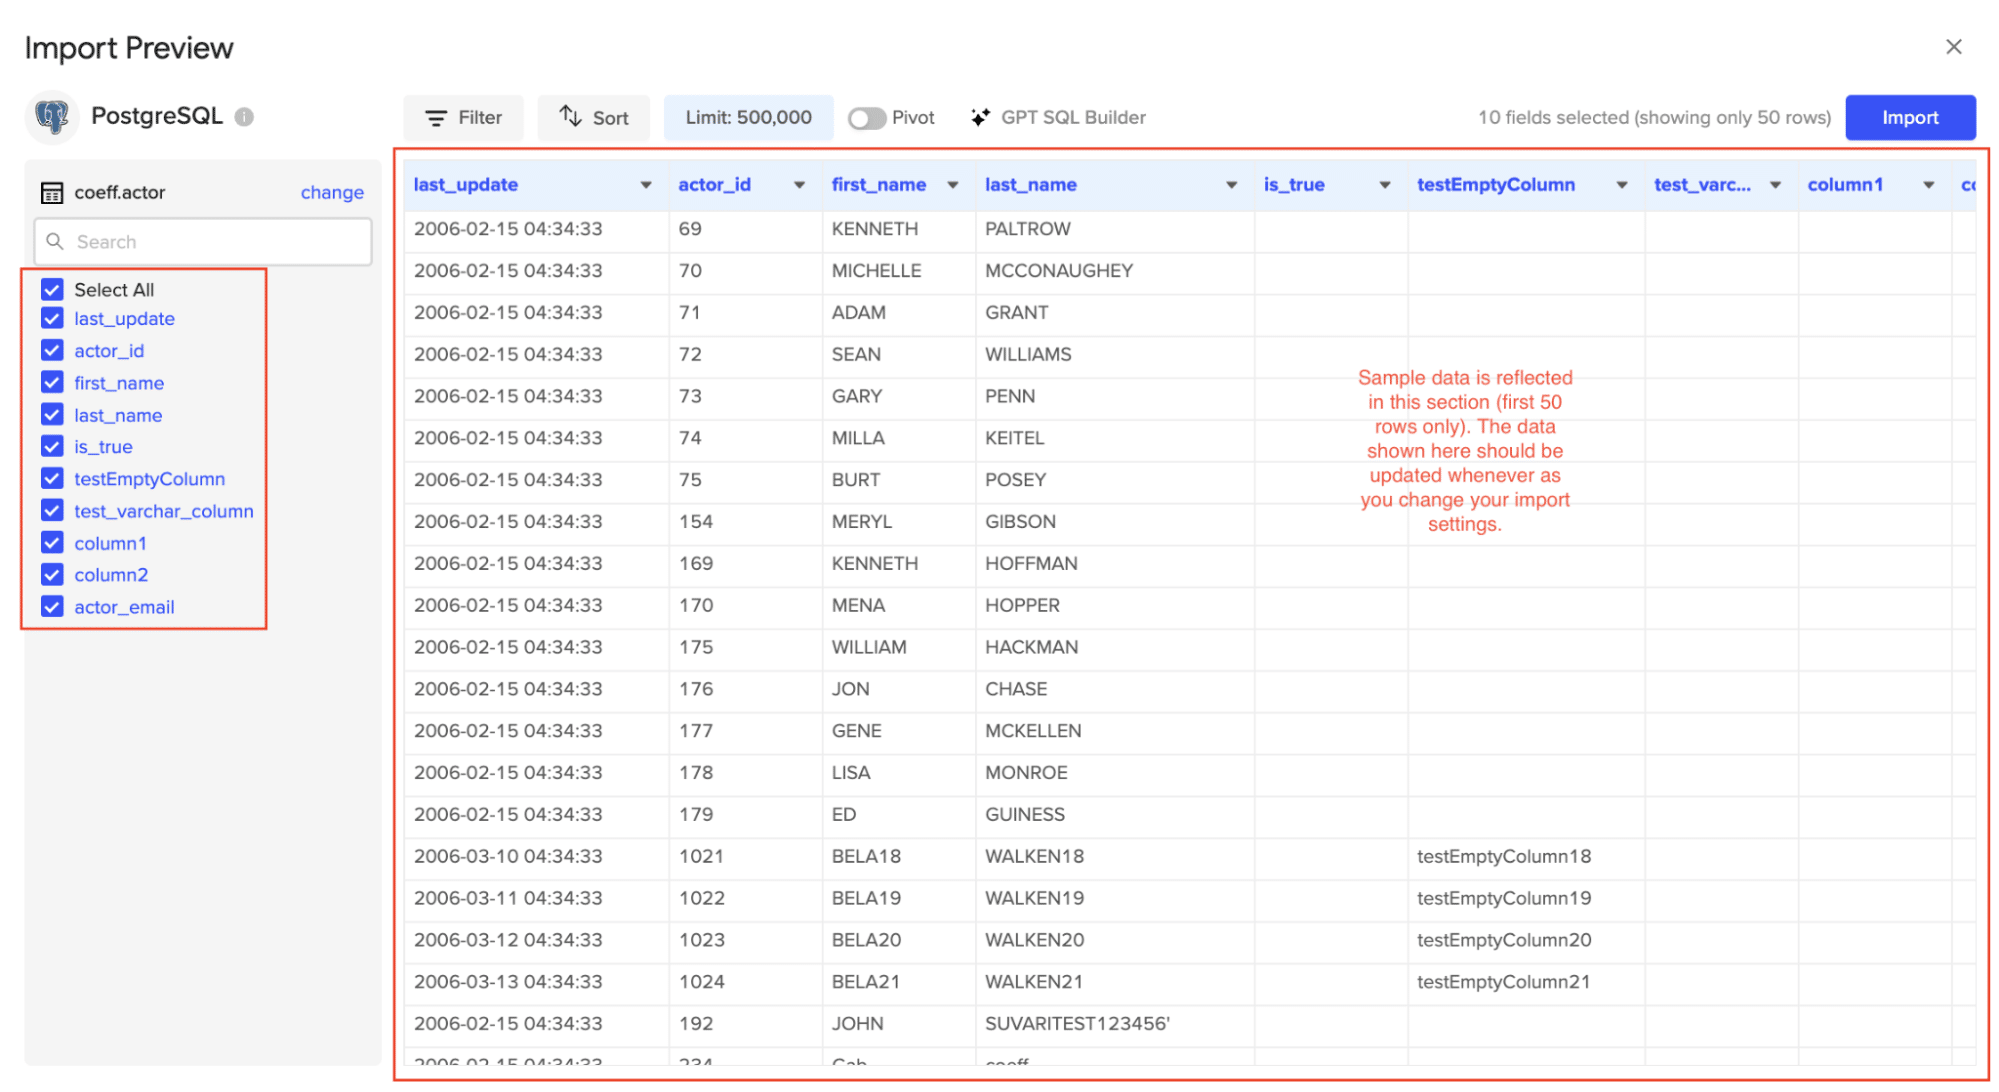
- Choose the specific columns you need and apply any filters or transformations if necessary
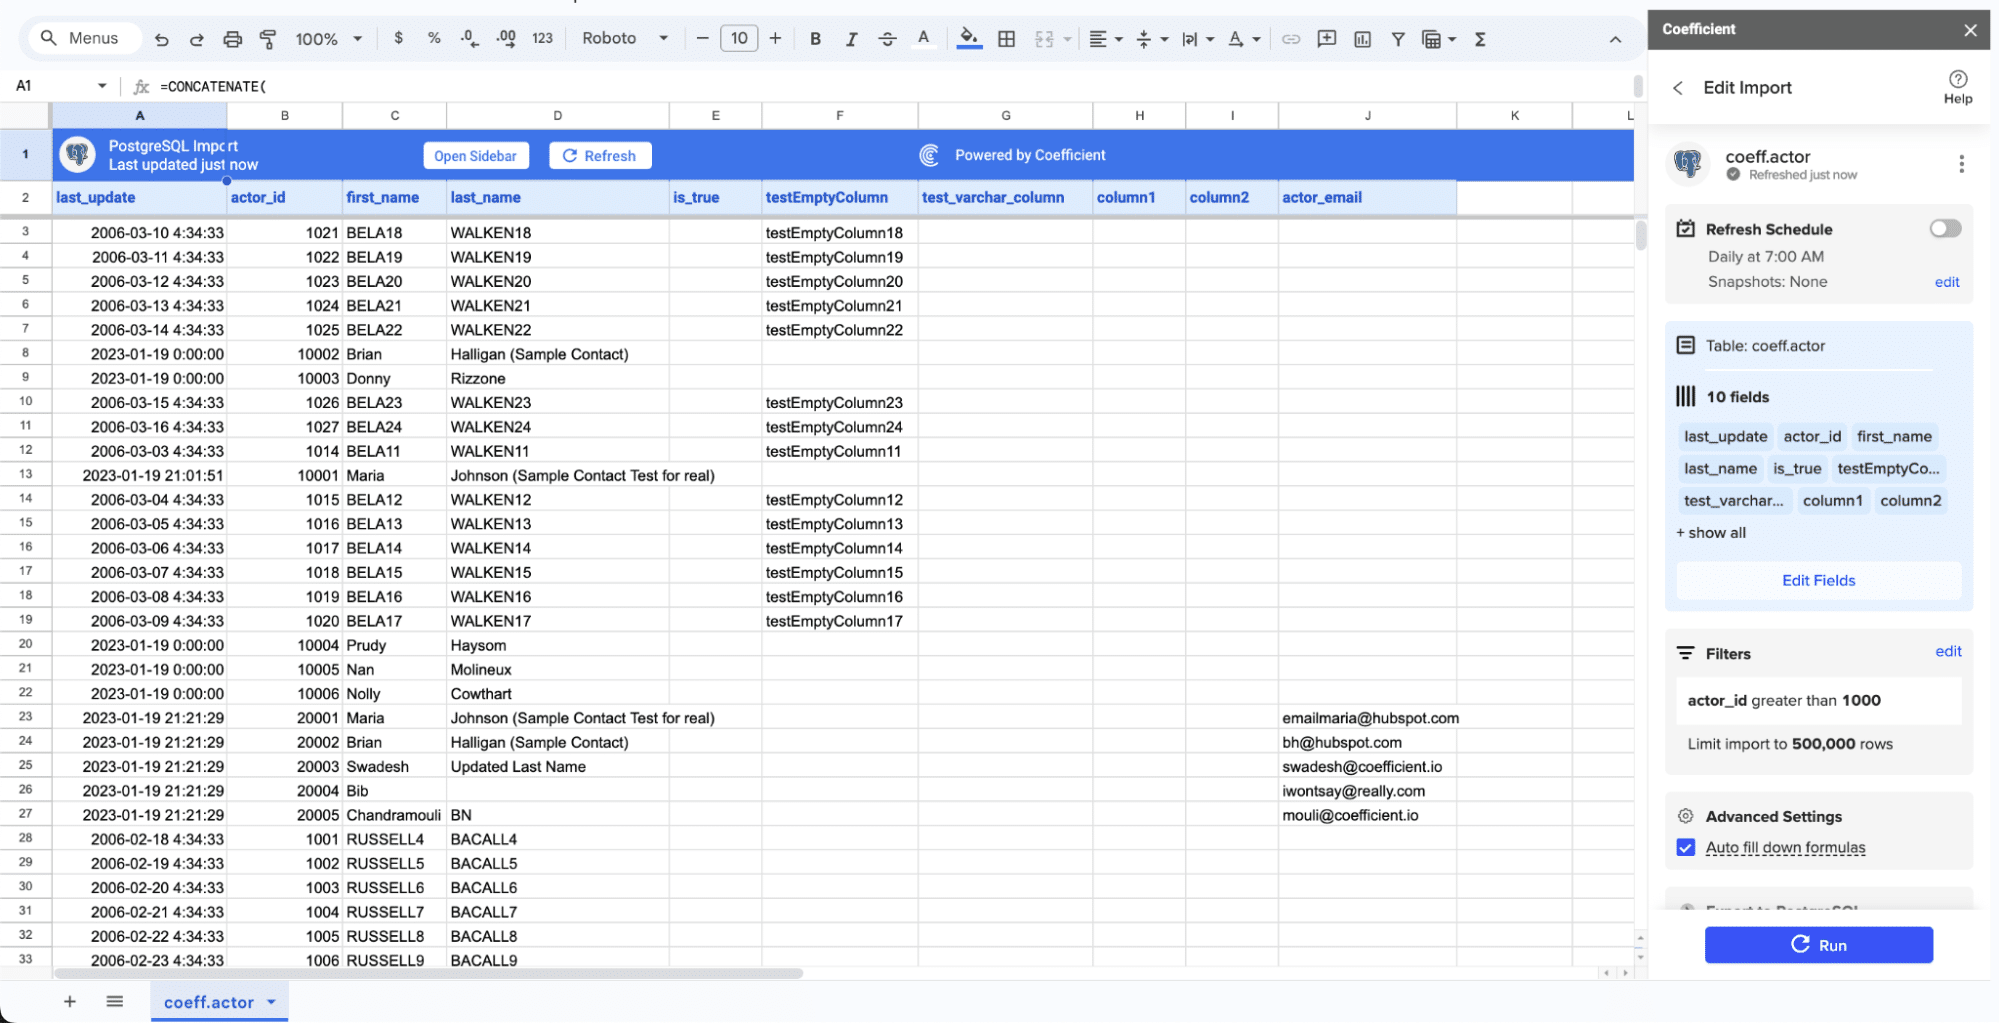
- Click “Import” to bring the data into your spreadsheet
Step 4. Schedule auto-updates
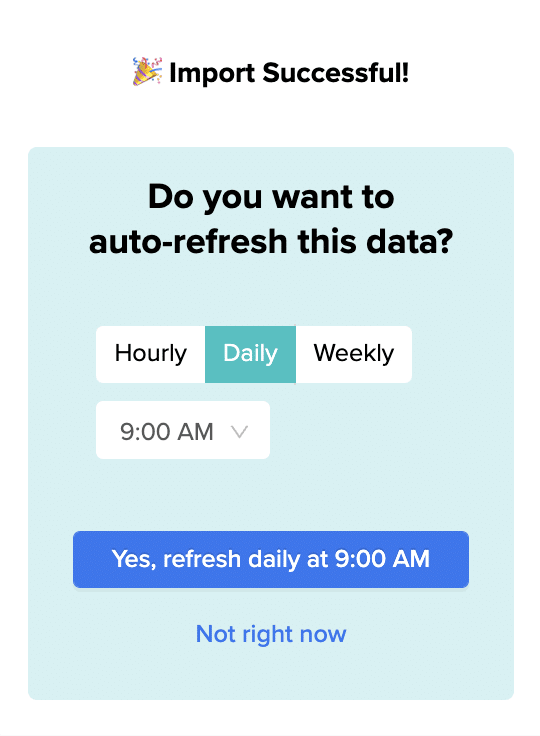
- To set up automatic updates, click on the imported data
- Select “Schedule refresh” and choose your preferred frequency
- Click “Save” to confirm the schedule
Pros and Cons of Using Coefficient
Pros:
- Eliminates manual data entry and reduces errors
- Creates live, auto-updating reports and dashboards
- Provides version history and collaboration features
- Offers data governance and access controls
- Includes alerting and notification capabilities for data changes
Cons: The only downside to Coefficient is that any scheduled automations are not free forever. However, its pricing plans are affordable, and its benefits far outweigh the app’s costs.
For more information on using Coefficient with PostgreSQL, check out the guides for PostgreSQL for Google Sheets and PostgreSQL for Excel.
#2 CSV Export: Manual Method Using COPY Command
For users who prefer a more hands-on approach or need a one-time export, PostgreSQL’s built-in COPY command provides a straightforward method to export data to CSV files.
Step-by-Step Guide to Exporting PostgreSQL Data to CSV
Follow these steps to manually export your PostgreSQL data to a CSV file:
Step 1. Connect to your PostgreSQL database
- Open your terminal or command prompt
- Use the psql command to connect to your database:
psql -U your_username -d your_database_name - Enter your password when prompted
Step 2. Prepare your SQL query
- Decide which data you want to export
- Write an SQL query to select this data. For example:
SELECT * FROM your_table_name;
Step 3. Use the COPY command to export data
- Run the following command to export your data to a CSV file:
COPY (SELECT * FROM your_table_name) TO ‘/path/to/your/file.csv’ WITH CSV HEADER; - Replace your_table_name with the actual table name and /path/to/your/file.csv with your desired file path and name
Step 4. Verify the export
- Exit the psql prompt by typing q and pressing Enter
- Navigate to the location where you saved the CSV file
- Open the file to ensure all data has been exported correctly
Here’s an example of a more complex export that includes multiple tables and conditions:
COPY (
SELECT
customers.id,
customers.name,
orders.order_date,
products.product_name,
order_items.quantity
FROM
customers
JOIN
orders ON customers.id = orders.customer_id
JOIN
order_items ON orders.id = order_items.order_id
JOIN
products ON order_items.product_id = products.id
WHERE
orders.order_date >= ‘2024-01-01’
) TO ‘/path/to/your/complex_export.csv’ WITH CSV HEADER;
This query exports customer information along with their orders, including product names and quantities, for all orders placed since January 1, 2024.
Pros and Cons of CSV Export
Pros:
- Direct control over the export process
- No additional software required
- Flexibility to export specific data using custom SQL queries
- Suitable for one-time or infrequent exports
Cons:
- Requires SQL knowledge
- Manual process, not suitable for frequent or automated exports
- Limited to CSV format, which may not be ideal for all use cases
- Can result in large file sizes for big datasets
#3 pgAdmin: Using the PostgreSQL Management Tool
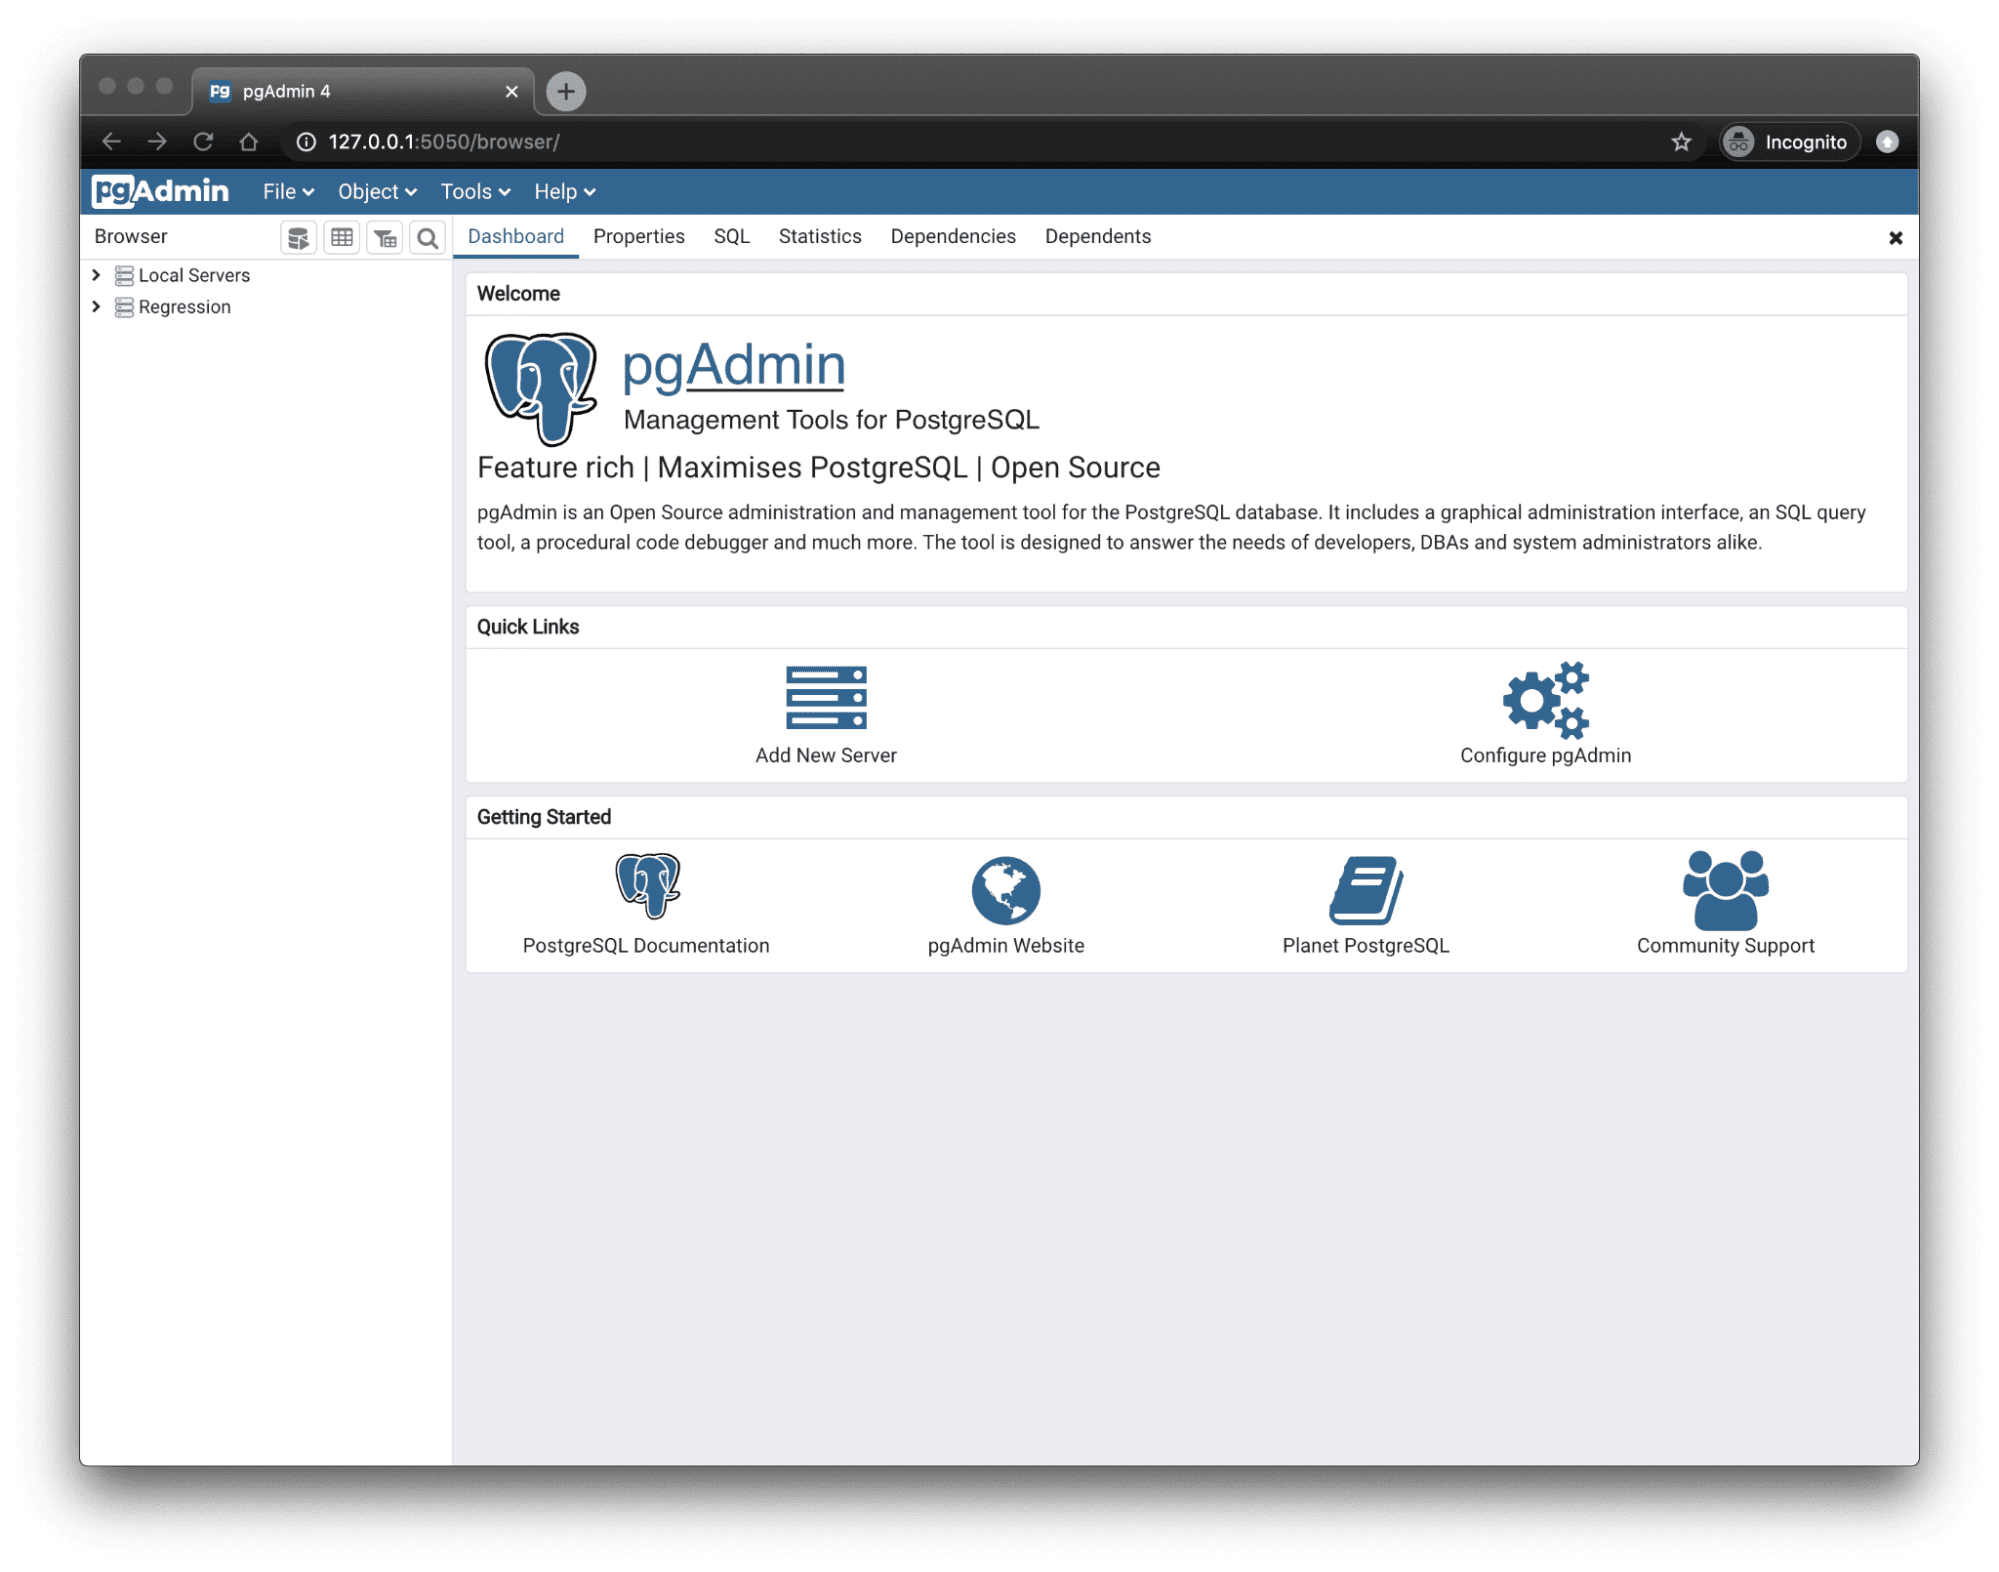
pgAdmin is a popular graphical user interface for managing PostgreSQL databases. It provides a user-friendly way to export data without writing SQL commands directly.
Step-by-Step Guide to Exporting PostgreSQL Data with pgAdmin
Follow these steps to export your PostgreSQL data using pgAdmin:
Step 1. Connect to your database in pgAdmin
- Open pgAdmin on your computer
- In the browser tree on the left, right-click on “Servers”
- Select “Create” > “Server”
- Enter your server details:
- Name: Give your connection a memorable name
- Host: Your PostgreSQL server address
- Port: Usually 5432 for PostgreSQL
- Maintenance database: Usually “postgres”
- Username: Your database username
- Click “Save” to connect to your server
Step 2. Navigate to the data you want to export
- Expand your server in the browser tree
- Expand “Databases” and select your target database
- Expand “Schemas” > “public” > “Tables”
- Right-click on the table you want to export
Step 3. Use the pgAdmin export wizard
- Select “Import/Export” from the right-click menu
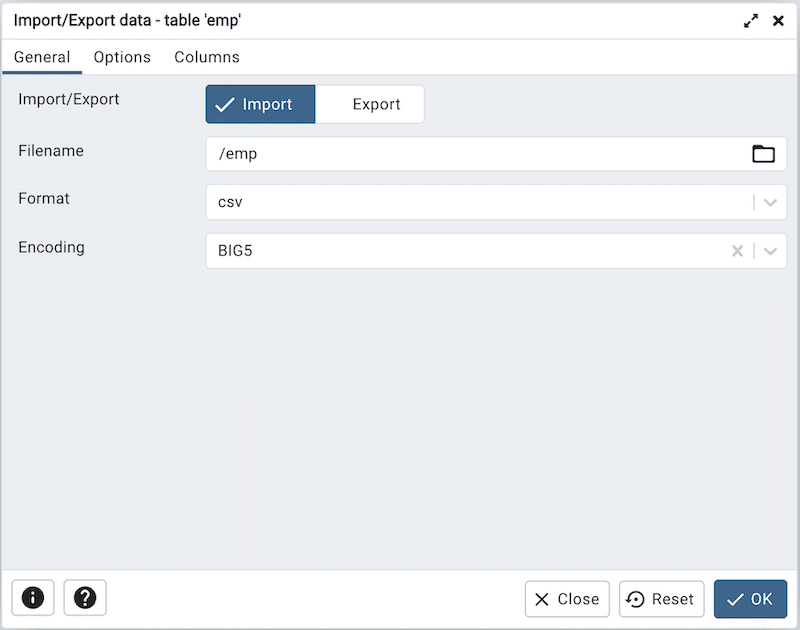
- In the dialog box that appears:
- Set “Export” as the transfer mode
- Choose your desired file format (CSV, TXT, etc.)
- Specify the file path where you want to save the exported data
- Select columns to export (or leave all selected for a full export)
- Configure any additional options like delimiter, quote character, etc.
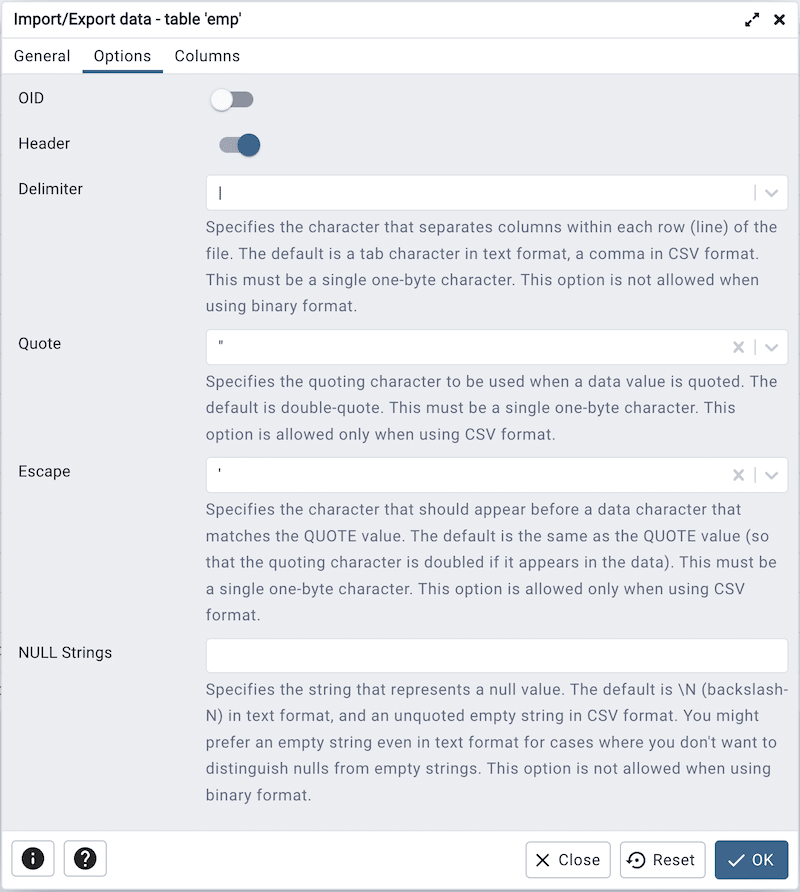
Step 4. Execute the export
- Review your export settings
- Click “OK” to start the export process
- Wait for the export to complete
- Check the “Messages” tab for any errors or confirmation of success

For more complex exports involving multiple tables or specific conditions, you can use pgAdmin’s Query Tool:
- Click on “Tools” > “Query Tool” in the top menu
Write your SQL query, for example:
SELECT
customers.id,
customers.name,
orders.order_date,
products.product_name,
order_items.quantity
FROM
customers
JOIN
orders ON customers.id = orders.customer_id
JOIN
order_items ON orders.id = order_items.order_id
JOIN
products ON order_items.product_id = products.id
WHERE
orders.order_date >= ‘2024-01-01’;
- Run the query to see the results
- Click on the “Download as CSV” button in the results pane to export the data
Pros and Cons of Using pgAdmin
Pros:
- User-friendly graphical interface
- No direct SQL writing required for basic exports
- Supports multiple export formats
- Combines ease of use with the power of SQL for complex exports
Cons:
- Requires installation and setup of additional software
- May be overkill for simple, one-time exports
- Less suitable for automated or scheduled exports
- Performance may be slower than direct command-line methods for very large datasets
Streamline Your PostgreSQL Data Exports Today
Exporting data from PostgreSQL doesn’t have to be a complex task. Whether you prefer the automation and ease of use provided by Coefficient, the direct control of the COPY command, or the graphical interface of pgAdmin, there’s a method that suits your needs.
Each approach has its strengths, from scheduled updates and data transformation capabilities to one-time exports and complex query support. By mastering these export techniques, you’ll be well-equipped to leverage your PostgreSQL data for analysis, reporting, and decision-making. Ready to simplify your data workflow? Get started with Coefficient and experience seamless PostgreSQL exports today.
Further Reading
To deepen your understanding of PostgreSQL and its integrations, check out these related articles:
- How to Connect Postgres to Excel in 2024
- How to Connect Freshdesk to PostgreSQL
- Importing data into PostgreSQL
By mastering these export methods and exploring additional integrations, you’ll be well-equipped to handle any data extraction task that comes your way. Happy exporting!


