Are you looking to import CSV data to Postgres?
Whether you’re a database administrator, developer, or data analyst, this comprehensive guide will walk you through the top three methods for efficiently importing CSV files into your PostgreSQL database.
By the end of this tutorial, you’ll have the knowledge and skills to choose the best approach for your specific needs and execute smooth data transfers.
Why Import CSV Data to Postgres?
Before we dive into the methods, let’s briefly consider why you might need to import CSV data to Postgres.
CSV (Comma-Separated Values) files are widely used for storing and exchanging tabular data. They’re simple, portable, and compatible with most spreadsheet and database applications. PostgreSQL, on the other hand, is a powerful, open-source relational database system known for its robustness, scalability, and advanced features.
- Data consolidation: Centralize data from various sources into a single, powerful database.
- Analysis and reporting: Leverage PostgreSQL’s robust querying capabilities for in-depth data analysis.
- Application integration: Use imported data to power web applications, dashboards, or other software systems.
- Data archiving: Store historical data in a structured, easily accessible format.
Now, let’s explore the top three methods for importing CSV data to Postgres.
Top 3 Methods to Import CSV Data into Postgres
- Coefficient: Streamlined spreadsheet-based imports
- COPY Command: Command-line tool for direct imports
- pgAdmin: Graphical user interface for visual imports
Each method has its strengths and ideal use cases. Let’s examine them in detail.
Method 1: Coefficient – Streamlined Spreadsheet-to-Postgres Imports

Coefficient is an excellent tool for users who prefer a user-friendly interface and want to import CSV data to Postgres directly from spreadsheet applications like Google Sheets or Microsoft Excel.
Why use Coefficient?
- Intuitive interface suitable for non-technical users
- Real-time data syncing capabilities
- Automated data type mapping to ensure accuracy
- Built-in data validation and error handling
Step-by-Step Tutorial: Importing CSV Data to Postgres with Coefficient
Step 1. Install Coefficient
For Google Sheets
- Open a new or existing Google Sheet, navigate to the Extensions tab, and select Add-ons > Get add-ons.
- In the Google Workspace Marketplace, search for “Coefficient.”
- Follow the prompts to grant necessary permissions.
- Launch Coefficient from Extensions > Coefficient > Launch.
- Coefficient will open on the right-hand side of your spreadsheet.

For Microsoft Excel
- Open Excel from your desktop or in Office Online. Click ‘File’ > ‘Get Add-ins’ > ‘More Add-Ins.’
- Type “Coefficient” in the search bar and click ‘Add.’
- Follow the prompts in the pop-up to complete the installation.
- Once finished, you will see a “Coefficient” tab in the top navigation bar. Click ‘Open Sidebar’ to launch Coefficient.
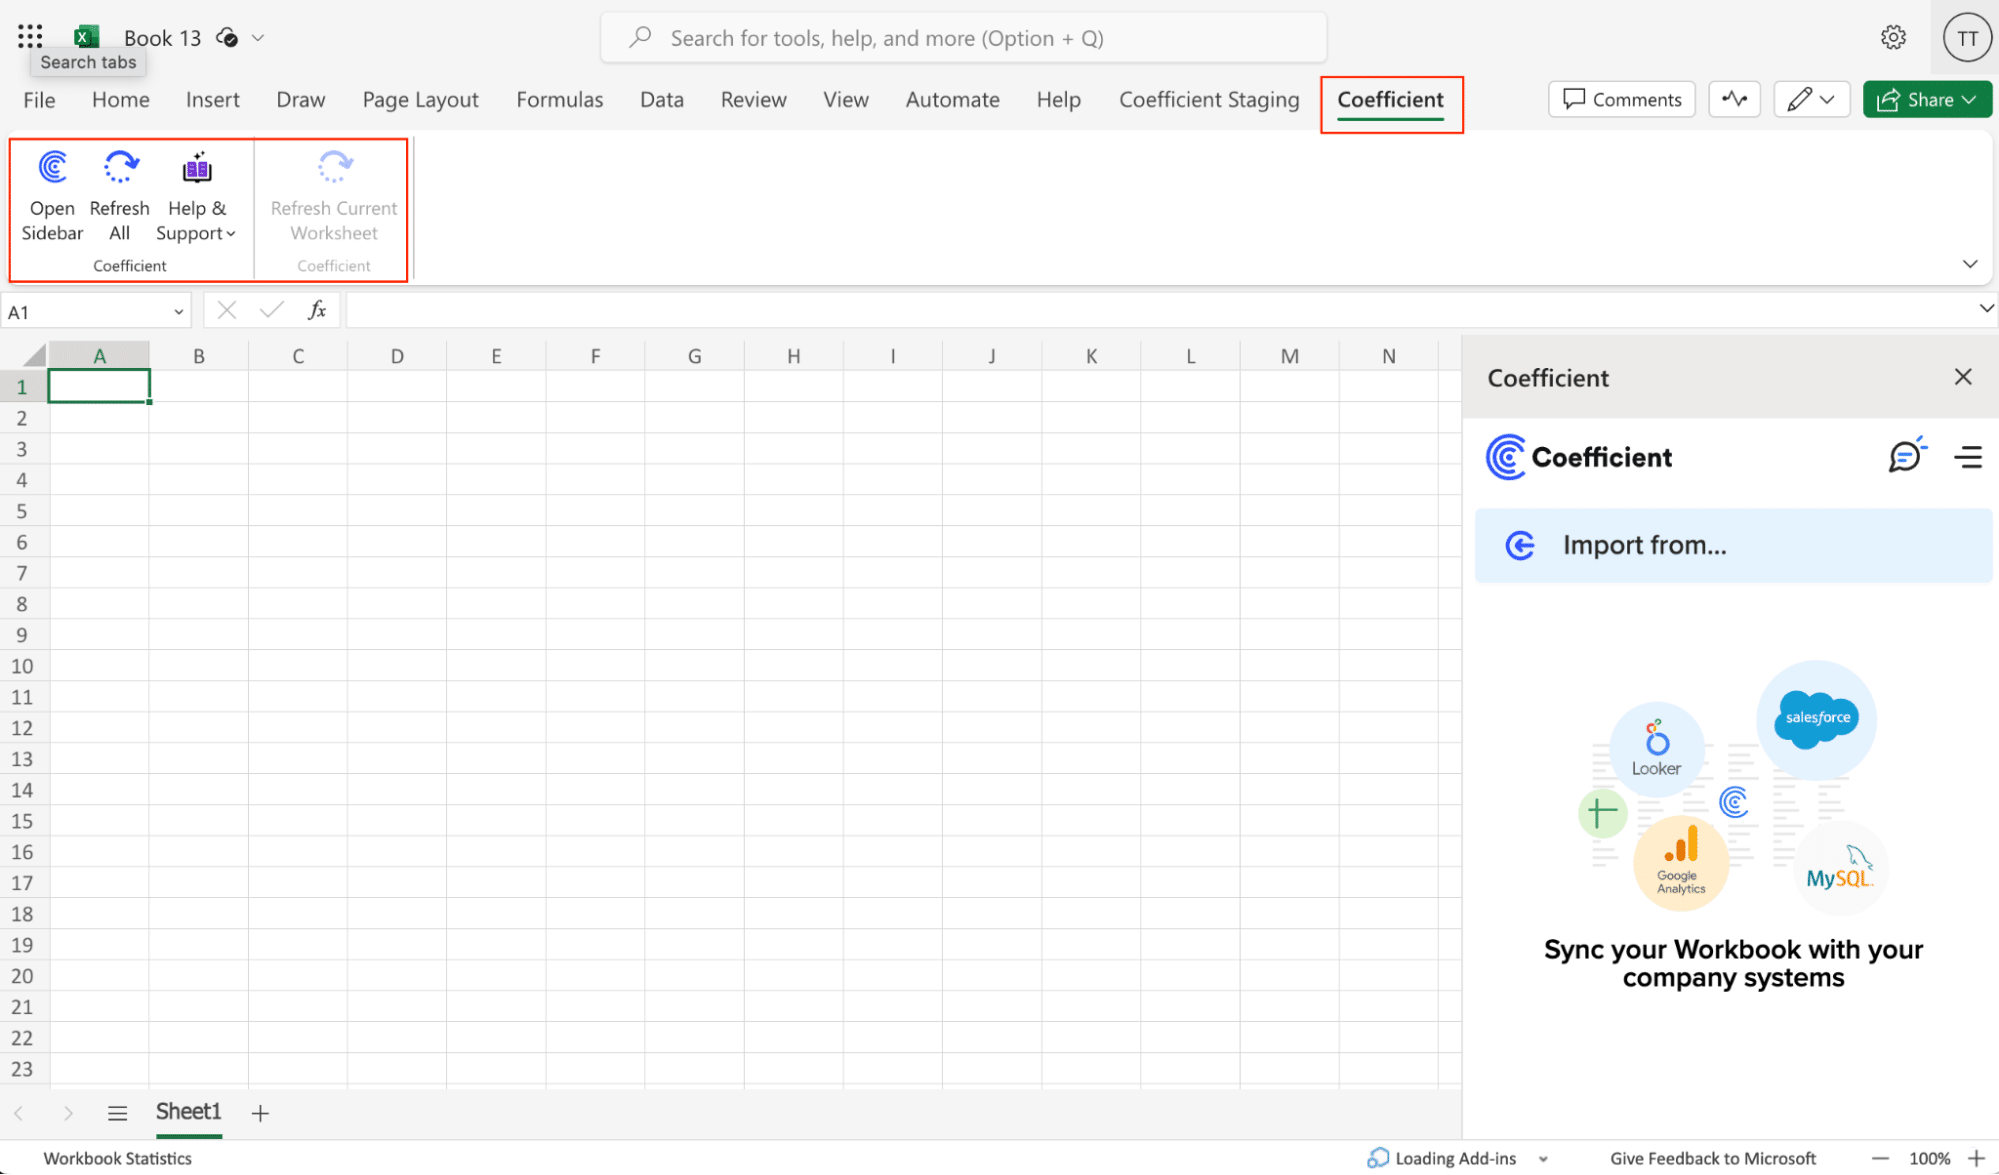
Step 2: Import CSV Data to Your Spreadsheet
With Coefficient open in your spreadsheet, you can import data from various sources:
- In the Coefficient sidebar, click “Import from…”
- Choose from a wide range of data sources, including:
- Databases (e.g., MySQL, PostgreSQL, SQL Server)
- CRM systems (e.g., Salesforce, HubSpot)
- Marketing platforms (e.g., Google Analytics, Facebook Ads)
- Finance tools (e.g., QuickBooks, Stripe)
- Project management tools (e.g., Jira, Asana)
- Enter the necessary connection details for your chosen data source.
- Select the specific data you want to import (tables, objects, or custom queries).
- Choose the destination sheet and starting cell for your imported data.
- Click “Import” to bring the data into your spreadsheet.
Step 3: Export Data to PostgreSQL
Now, use Coefficient to export your data to PostgreSQL:
- In the Coefficient sidebar, click ‘Export to…’.
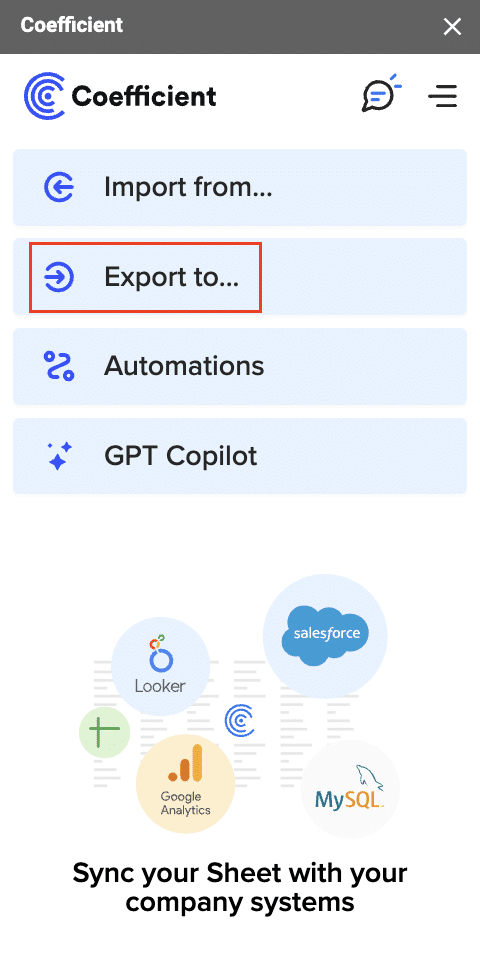
- Select PostgreSQL from the list of destinations.
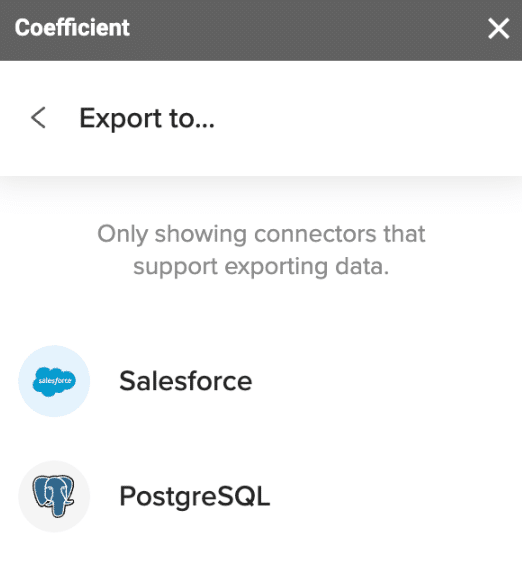
- Choose the sheet containing your CSV data and specify the header row.
- Select the target table in PostgreSQL and the action type (Insert, Update, Delete).
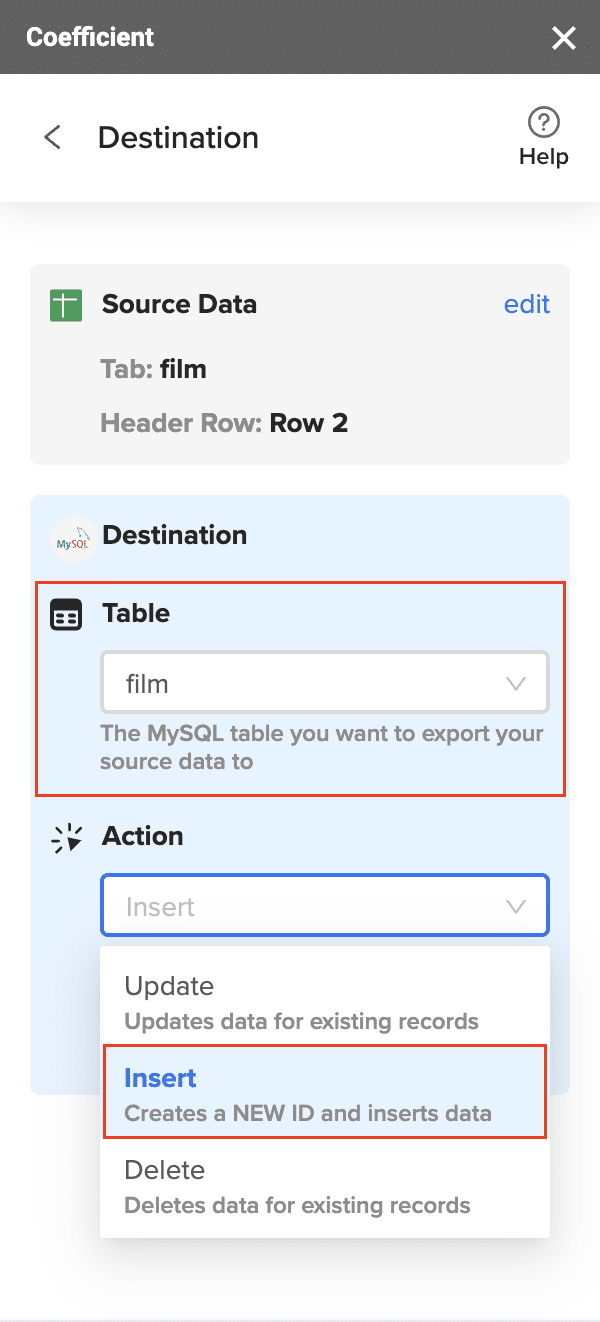
- Map your spreadsheet columns to the corresponding PostgreSQL table fields.
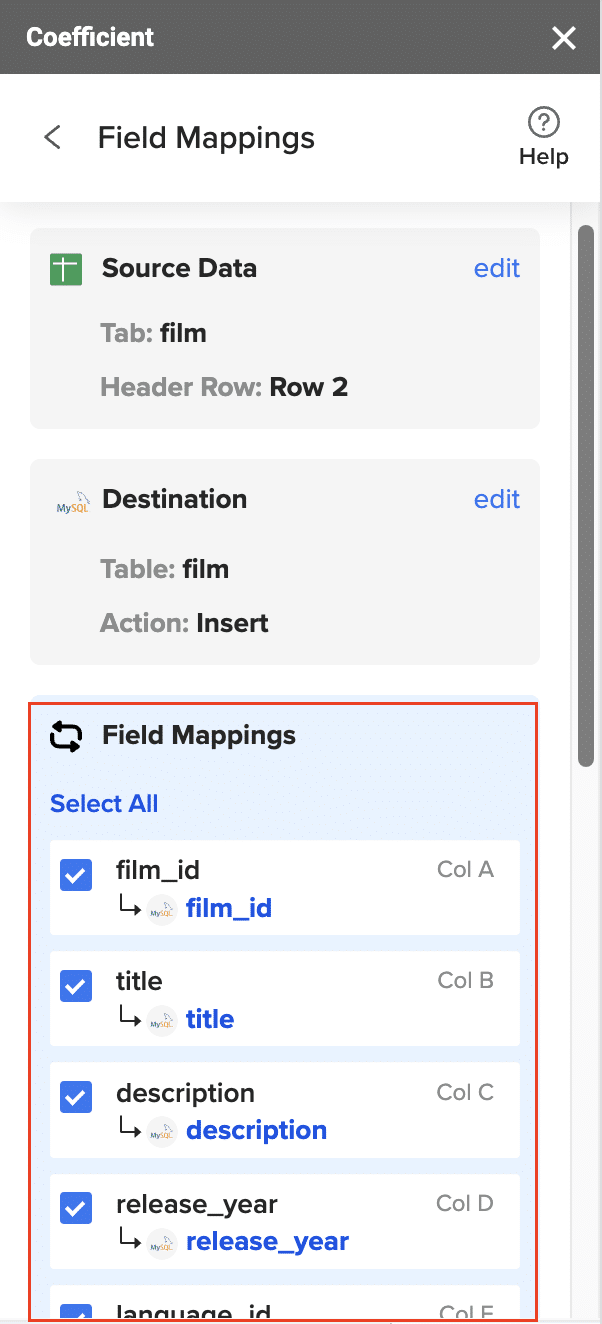
- Confirm your settings and click ‘Export’, then choose to export all rows or select specific ones.
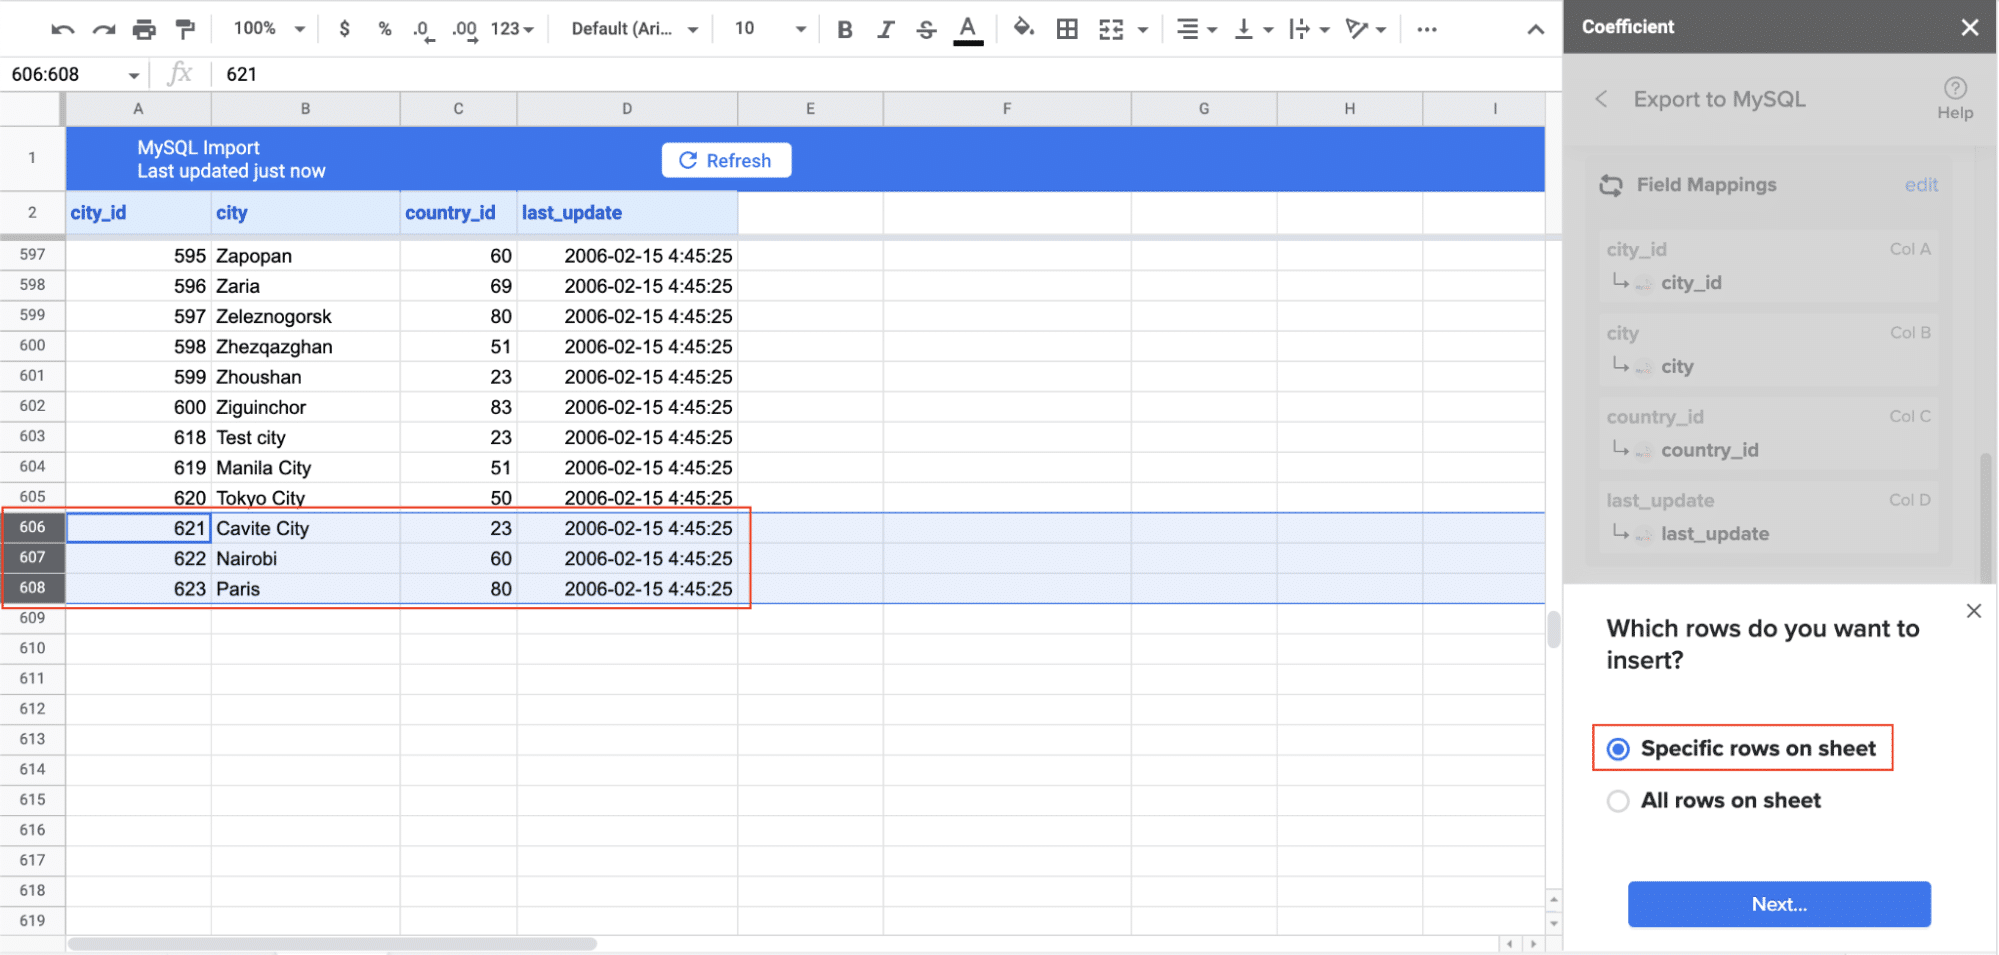
- Review your settings and follow the prompts to transfer your data to PostgreSQL.
Review your settings and follow the prompts to push your data back to PostgreSQL.
Pros and Cons of Using Coefficient
Pros:
- Eliminates manual data entry and reduces errors
- Creates live, auto-updating reports and dashboards
- Provides version history and collaboration features
- Offers data governance and access controls
- Includes alerting and notification capabilities for data changes
Cons:
- Scheduled automations are not free forever, but pricing plans are affordable
Method 2: COPY Command from the Command-Line
The COPY command is a built-in PostgreSQL feature that provides efficient, high-performance data imports directly from the command line
Step-by-Step Tutorial: Importing CSV Data to Postgres with COPY Command
Step 1. Prepare your CSV file
Ensure your CSV file is properly formatted with consistent delimiters and encoding. Place the file in a location accessible to the PostgreSQL server.
Step 2. Connect to your PostgreSQL database
Open a terminal or command prompt and connect to your PostgreSQL database using the psql command-line tool:
psql -U your_username -d your_database_name
Replace your_username and your_database_name with your actual PostgreSQL credentials.
Step 3. Create the target table (if it doesn’t exist)
If you haven’t already created a table to receive the imported data, do so now using SQL commands. For example:
CREATE TABLE your_table_name (
column1 data_type,
column2 data_type,
column3 data_type
— Add more columns as needed
);
Replace your_table_name with your desired table name, and define the columns to match your CSV structure.
Step 4. Use the COPY command to import data
Execute the COPY command to import your CSV data into the PostgreSQL table:
COPY your_table_name FROM ‘/path/to/your/file.csv’ DELIMITER ‘,’ CSV HEADER;
Replace your_table_name with your actual table name and /path/to/your/file.csv with the full path to your CSV file. Adjust the delimiter if your CSV uses a different separator.
Step 5. Verify the imported data
After the import is complete, run a SELECT query to check if the data was imported correctly:
SELECT * FROM your_table_name LIMIT 10;
This will display the first 10 rows of your imported data.
Pros and Cons of Using COPY Command
Pros:
- High-performance for large datasets
- Suitable for automated processes
- No additional software required
Cons:
- Requires command-line knowledge
- Less user-friendly for non-technical users
- Limited data transformation capabilities
Method 3: pgAdmin – Visual CSV Import Tool
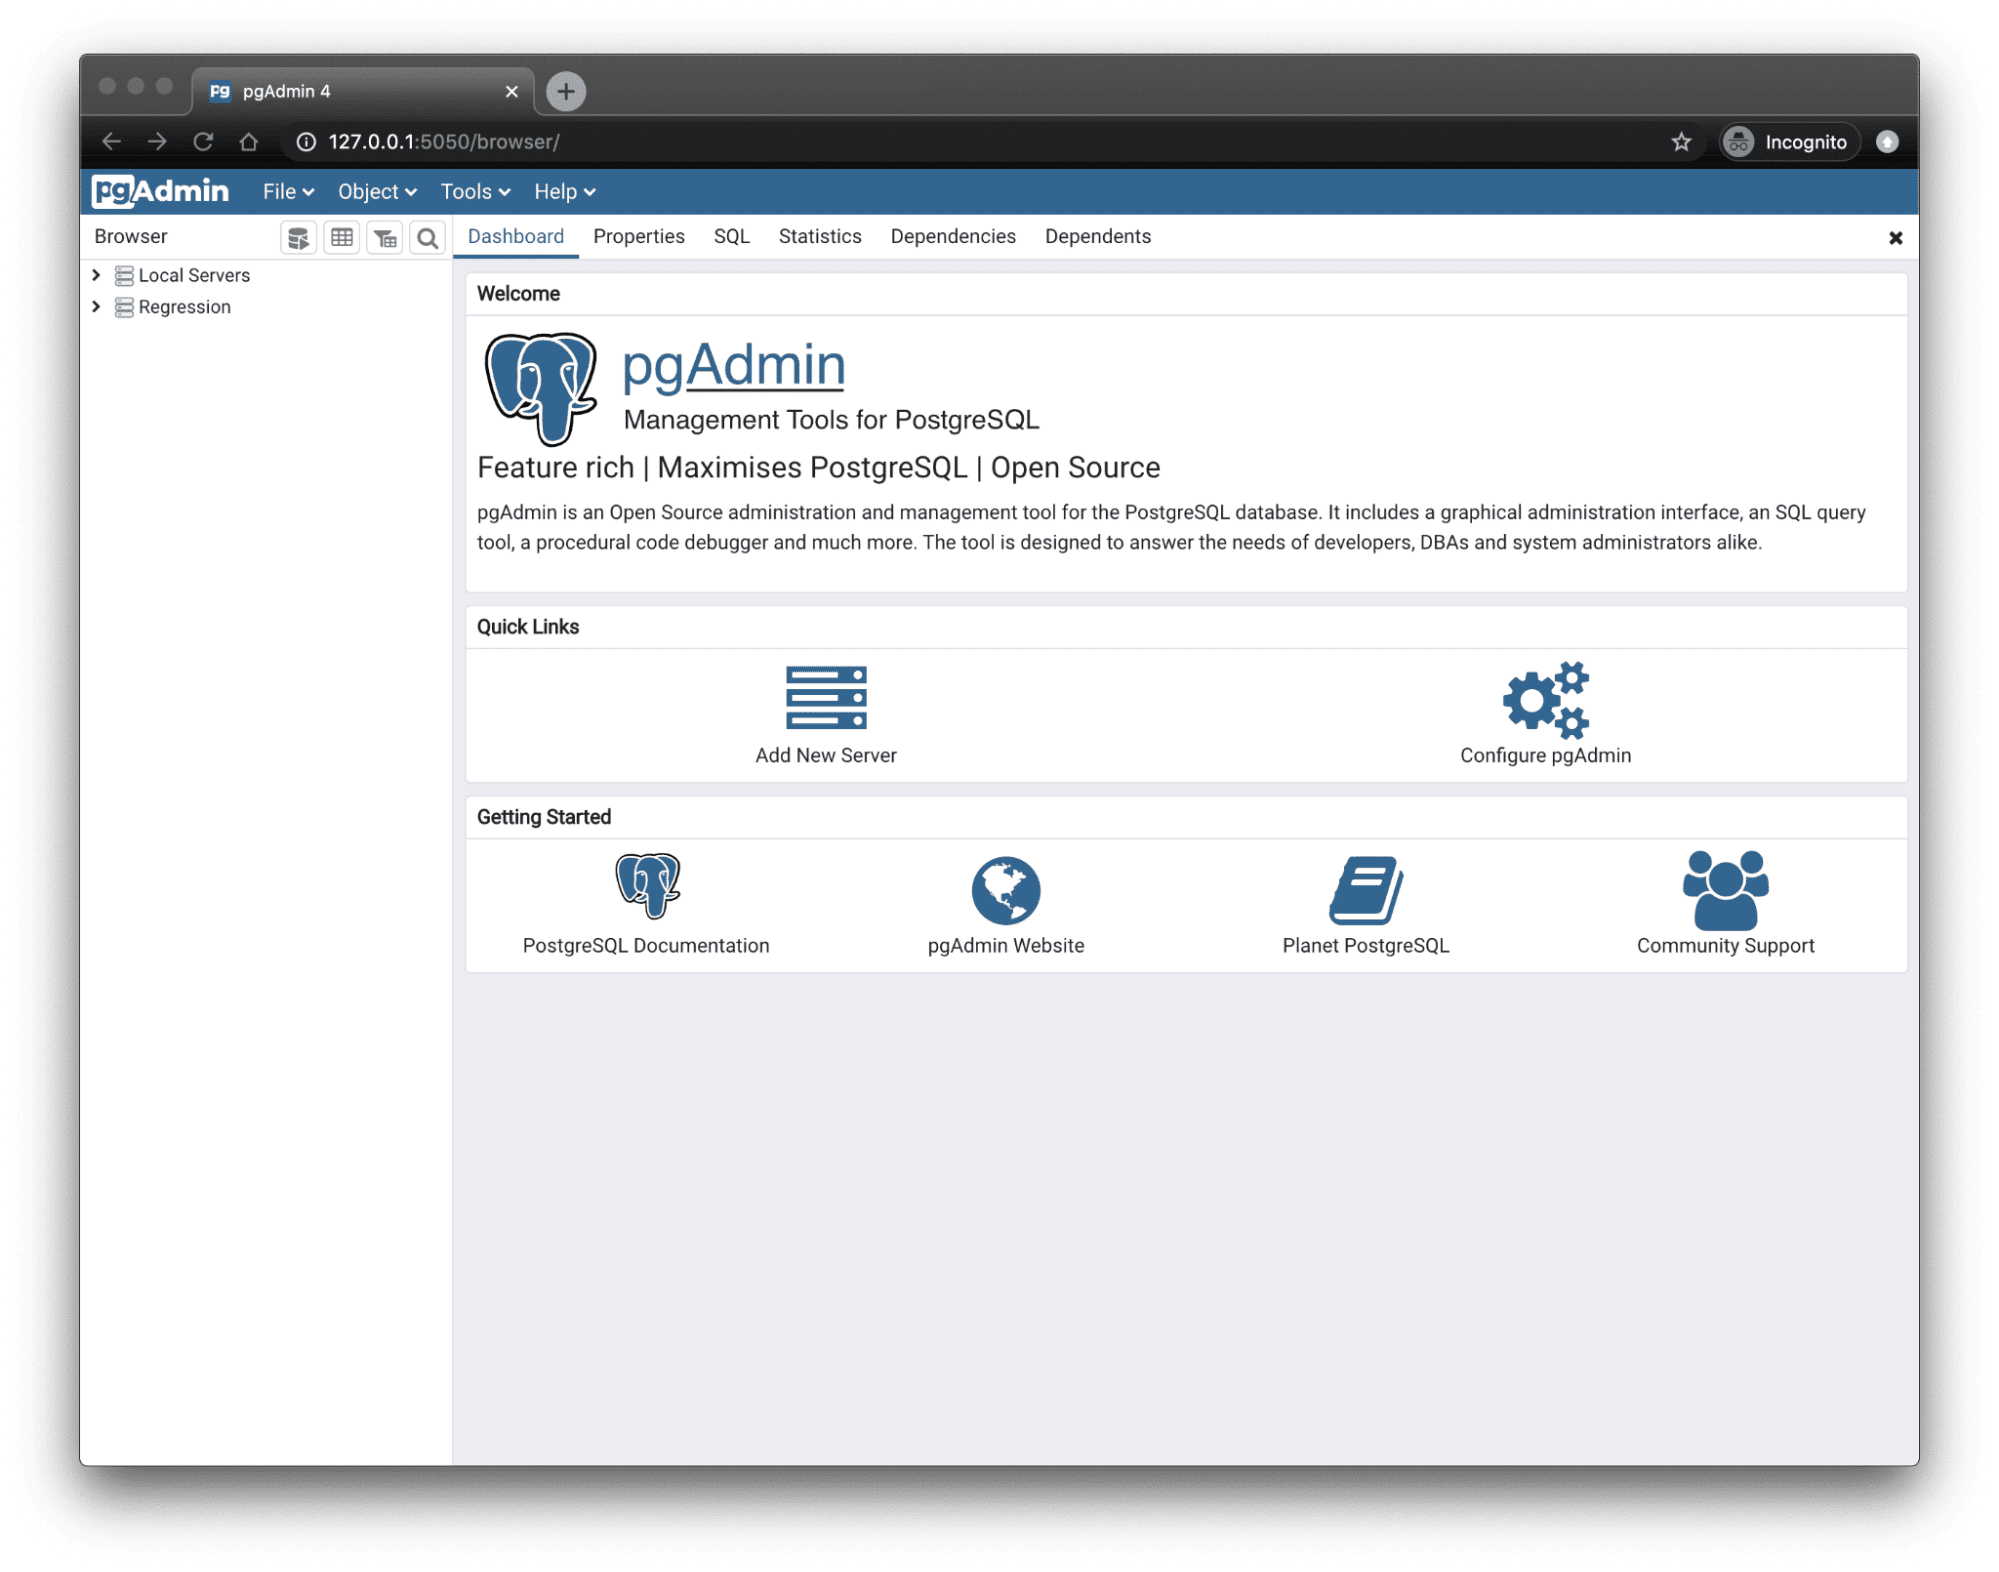
pgAdmin is a popular graphical user interface for PostgreSQL management that includes a user-friendly import wizard for CSV files.
Step-by-Step Tutorial: Importing CSV Data to Postgres with pgAdmin
Step 1. Install and open pgAdmin
If you haven’t already, download and install pgAdmin from the official website. Launch the application and connect to your PostgreSQL server.
Step 2. Navigate to your target database and table
In the pgAdmin object browser, expand your server and database connections. Locate the table where you want to import the CSV data.
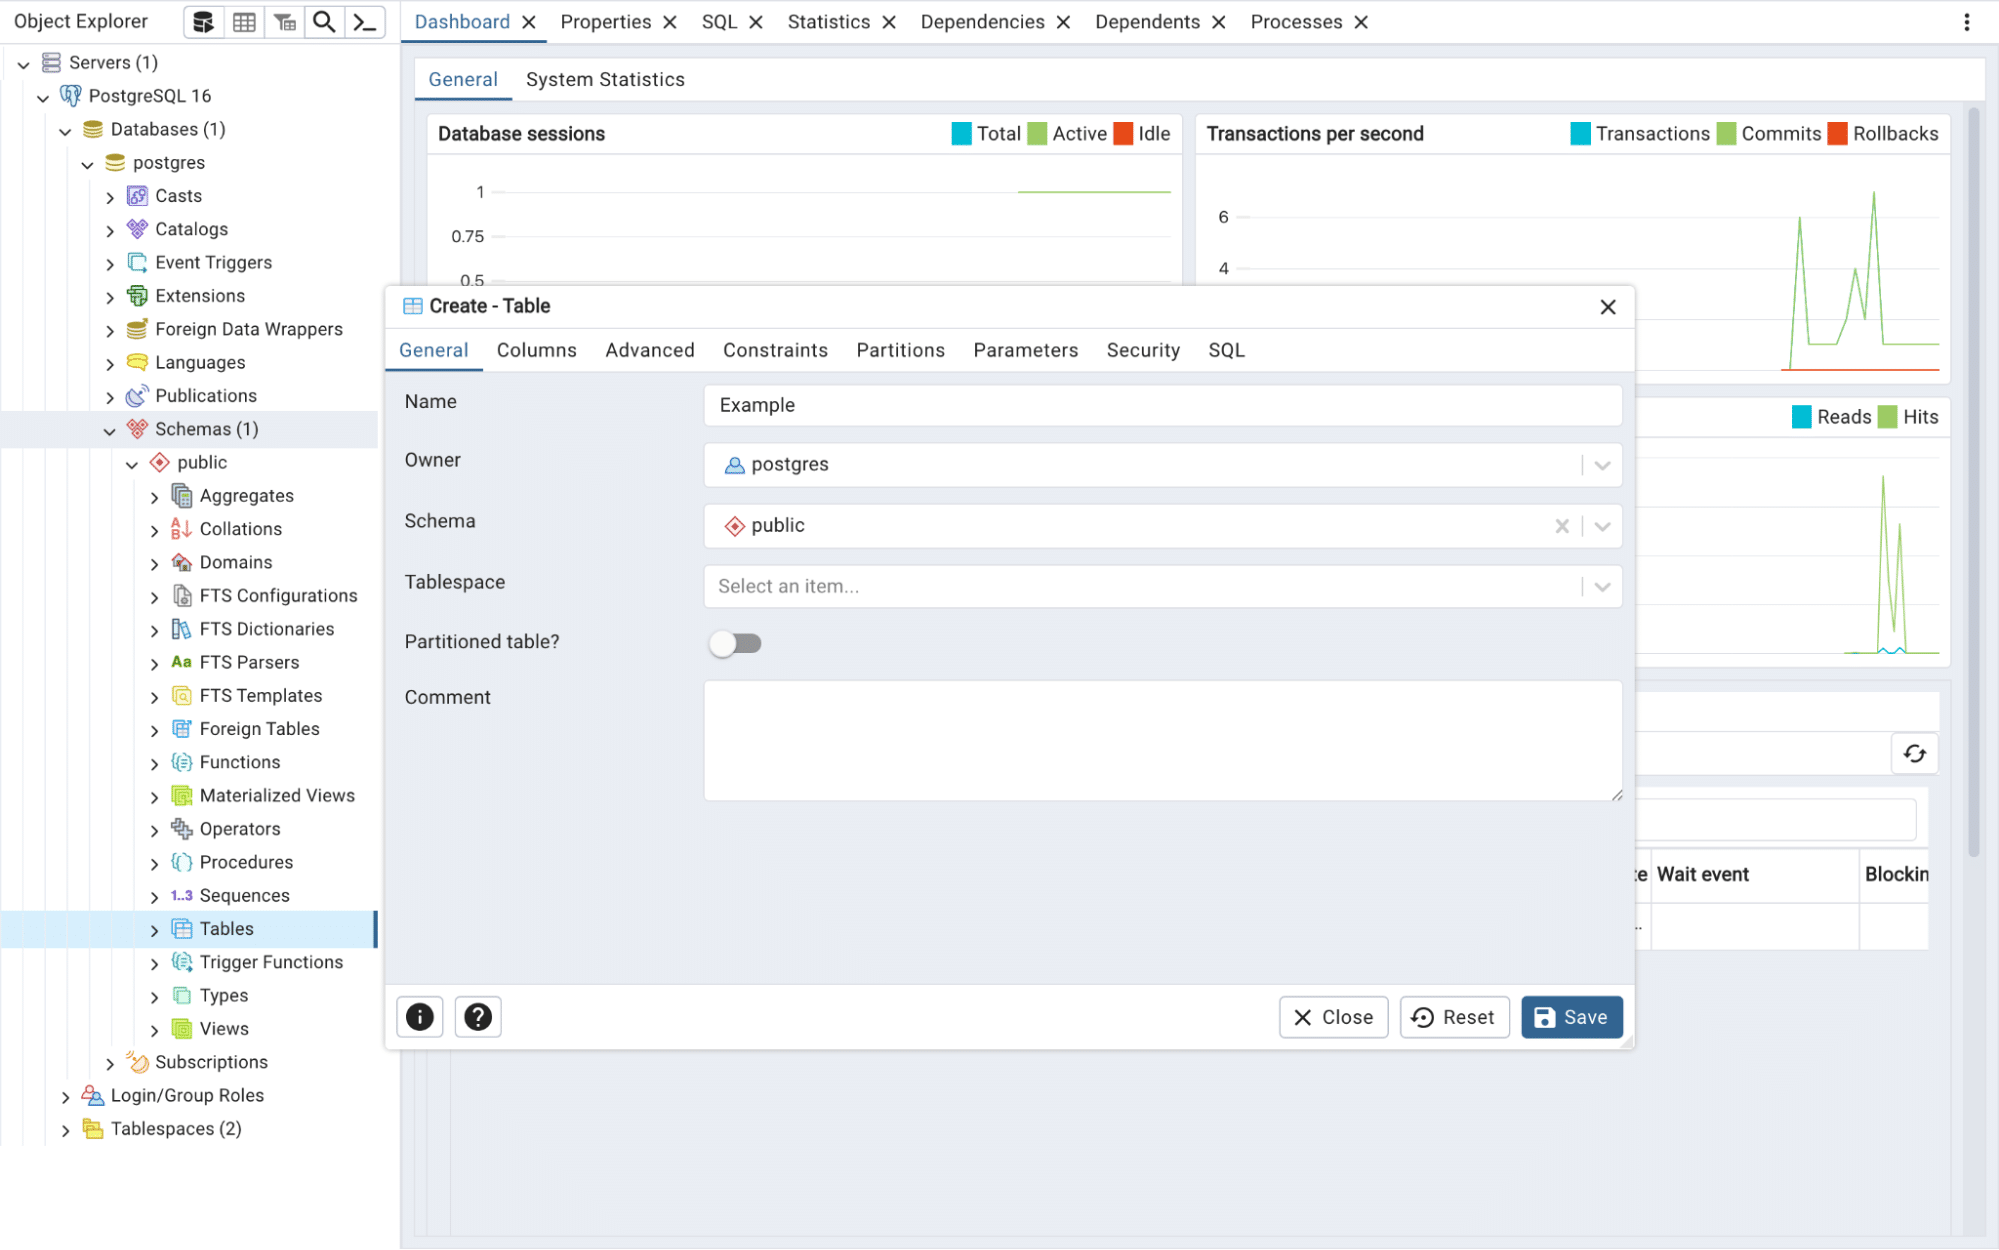
Step 3. Access the import wizard
Right-click on the target table and select “Import/Export” from the context menu. This will open the import/export wizard.
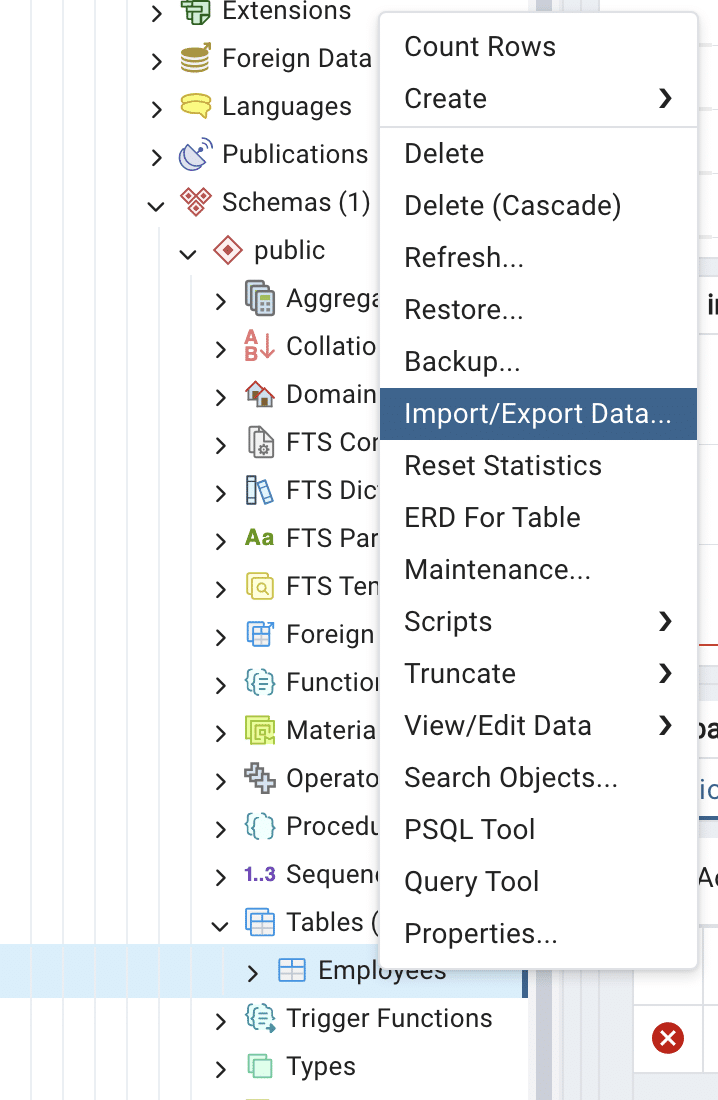
Step 4. Configure import settings
In the import wizard, set the following options:
- Select “Import” as the operation
- Choose your CSV file by clicking the “Filename” button and navigating to its location
- Set the format to “csv”
- Specify the delimiter used in your CSV file (usually a comma)
- Set the correct encoding for your file (e.g., UTF-8)
- Check the “Header” box if your CSV file includes a header row
Step 5. Map CSV columns to table columns
In the “Columns” tab of the import wizard, match the columns from your CSV file to the corresponding columns in your PostgreSQL table. Ensure that data types are compatible.
Step 6. Execute the import
Review your settings, then click “OK” to start the import process. pgAdmin will display a progress bar as it imports the data.
Step 7. Verify the imported data
Once the import is complete, right-click on your table and select “View/Edit Data” > “All Rows” to check if the data was imported correctly.
Pros and Cons of Using pgAdmin
Pros:
- User-friendly visual interface
- Comprehensive PostgreSQL management tools
- Suitable for occasional imports
Cons:
- May be slower for large datasets
- Limited automation capabilities
- Requires separate software installation
Choosing the Right Method to Import CSV Data to Postgres
When deciding how to import CSV data to Postgres, consider the following factors:
- Data volume: For large datasets, the COPY command typically offers the best performance, followed by Coefficient for medium-sized data, and pgAdmin for smaller imports.
- Technical expertise: Coefficient is user-friendly for non-technical users, pgAdmin offers a visual interface for those comfortable with GUIs, while the COPY command requires command-line and SQL knowledge.
- Frequency of imports: For regular, automated imports, Coefficient’s real-time syncing or scripted COPY commands work well. For occasional imports, pgAdmin might be more convenient.
- Data source: If your data originates from or is frequently updated in spreadsheets, Coefficient provides seamless integration. For server-side files, the COPY command or pgAdmin may be more appropriate.
- Additional features: Consider Coefficient for its data validation and transformation capabilities, the COPY command for its raw speed and scriptability, or pgAdmin for its comprehensive PostgreSQL management tools.
Mastering CSV to Postgres Imports
Importing CSV data to Postgres is a fundamental skill for anyone working with databases and data analysis. By understanding and mastering these three methods – Coefficient, the COPY command, and pgAdmin – you’ll be well-equipped to handle various data import scenarios efficiently.
Remember to always validate your data after import, regardless of the method you choose. Each approach has its strengths, so select the one that best fits your specific use case, technical skills, and workflow requirements.
To streamline your data workflows and enhance your analytics capabilities, consider exploring Coefficient’s powerful data integration tools. Get started with Coefficient today and take your CSV to Postgres imports to the next level!


