Are you looking to take your customer support operations to the next level? Connecting your Freshdesk account to a PostgreSQL database can unlock powerful insights and streamline your data management processes. In this comprehensive guide, we’ll explore the advantages of integrating these two platforms and walk you through three methods to make it happen.
Advantages of Connecting Freshdesk to PostgreSQL
Integrating Freshdesk with PostgreSQL offers several key benefits that can transform your customer support:
- Predictive Support Resource Allocation: By analyzing historical ticket volume data from Freshdesk in PostgreSQL, you can forecast peak support times with greater accuracy. This enables optimal staff scheduling and resource allocation, reducing wait times during high-demand periods.
- Customer Lifetime Value (CLV) Optimization: Combine support interaction data from Freshdesk with financial data in PostgreSQL to correlate support quality with CLV. This insight allows you to justify investments in support improvements that demonstrably increase customer retention and revenue.
- Proactive Product Enhancement: Analyze frequently occurring support issues from Freshdesk alongside product usage data in PostgreSQL to identify and prioritize product improvements. This data-driven approach can significantly reduce support ticket volume over time.
Connect Freshdesk to PostgreSQL: 3 Methods
Connecting Freshdesk to PostgreSQL streamlines customer data management and enhances support capabilities. Here’s a quick overview of three solutions and their ideal use cases
| Solution | Best For |
| Coefficient | Small to medium-sized businesses with limited IT resources but a strong need for data-driven decision making. Ideal for customer support managers or operations analysts who need to quickly create custom reports combining Freshdesk data with other business metrics. |
| Skyvia | Mid-sized companies with diverse data sources beyond just Freshdesk and PostgreSQL. Perfect for organizations that need to integrate multiple cloud and on-premise systems into a centralized data warehouse. |
| DBSync | Large enterprises or companies with complex, custom support processes. Ideal for organizations that require real-time, bi-directional data flow between Freshdesk and multiple databases or applications. |
How to Connect Freshdesk to PostgreSQL
Method 1: Coefficient – No-Code, User-Friendly
Coefficient offers a seamless way to connect Freshdesk and PostgreSQL without any coding required. Its intuitive interface and real-time data updates make it a top choice for businesses of all sizes.
Features
- Simple, drag-and-drop interface: The user-friendly design allows users to set up integrations with minimal effort, making it accessible for users of all technical levels.
- Automatic data sync in real-time: Data between Freshdesk and PostgreSQL is updated instantly, ensuring that you always have the most current information available.
- Affordable pricing plans: Coefficient provides cost-effective solutions that cater to small businesses and larger enterprises alike, ensuring you get value for your investment.
Pros:
- Quick and easy setup: Get your integration up and running in no time with Coefficient’s straightforward installation process.
- No coding skills needed: Ideal for non-technical users who need a powerful integration tool without the complexity of coding.
- Real-time data updates: Always have the latest data at your fingertips, enabling timely and informed decision-making.
- Affordable for small businesses: Budget-friendly plans make it accessible for smaller companies looking to enhance their data capabilities.
Cons:
- Some advanced features limited to higher-tier plans: Access to the most advanced functionalities may require upgrading to a premium plan, which might be cost-prohibitive for some users.
How to Connect Freshdesk to PostgreSQL with Coefficient
Step 1: Install the Coefficient
For Google Sheets
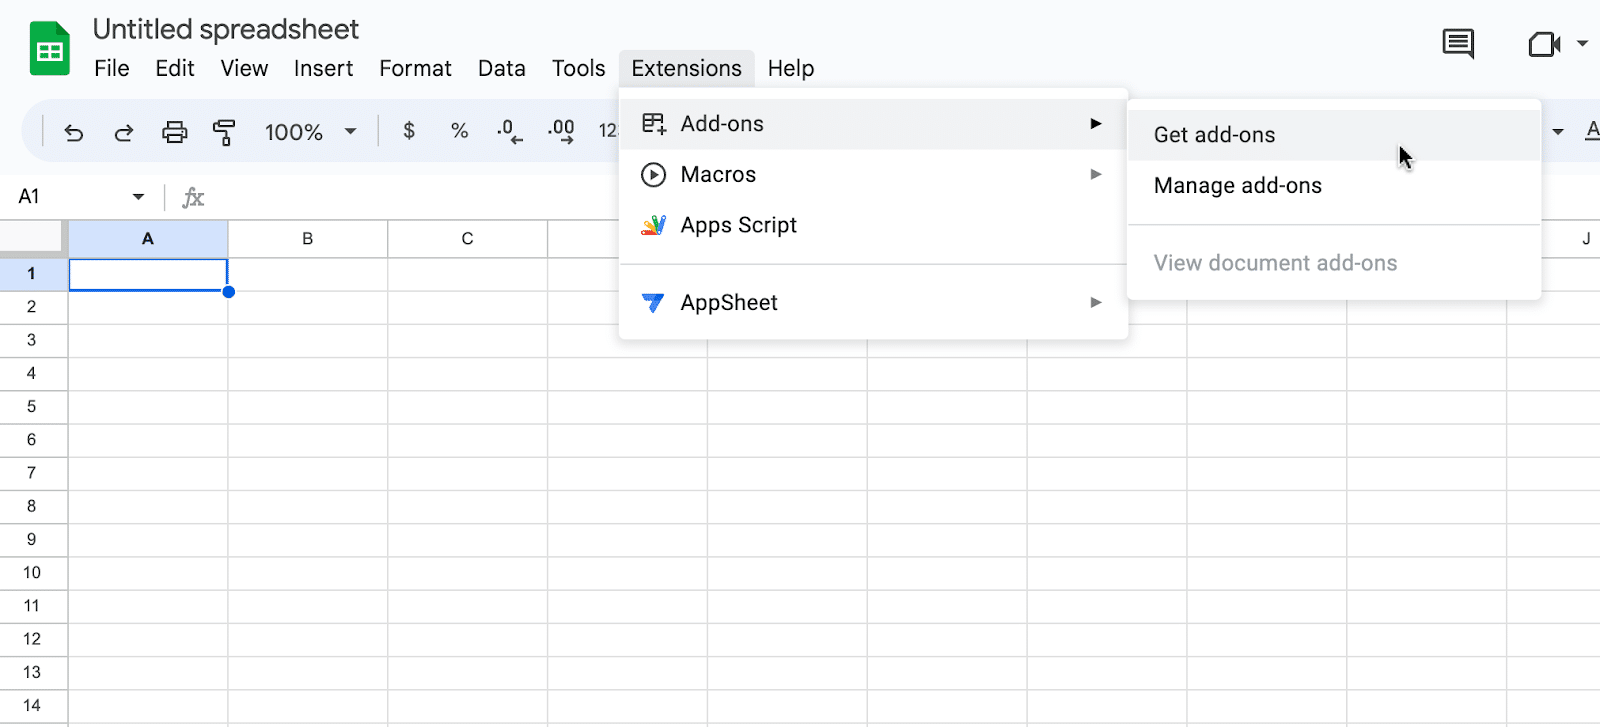
Open a new or existing Google Sheet, navigate to the Extensions tab, and select Add-ons > Get add-ons.
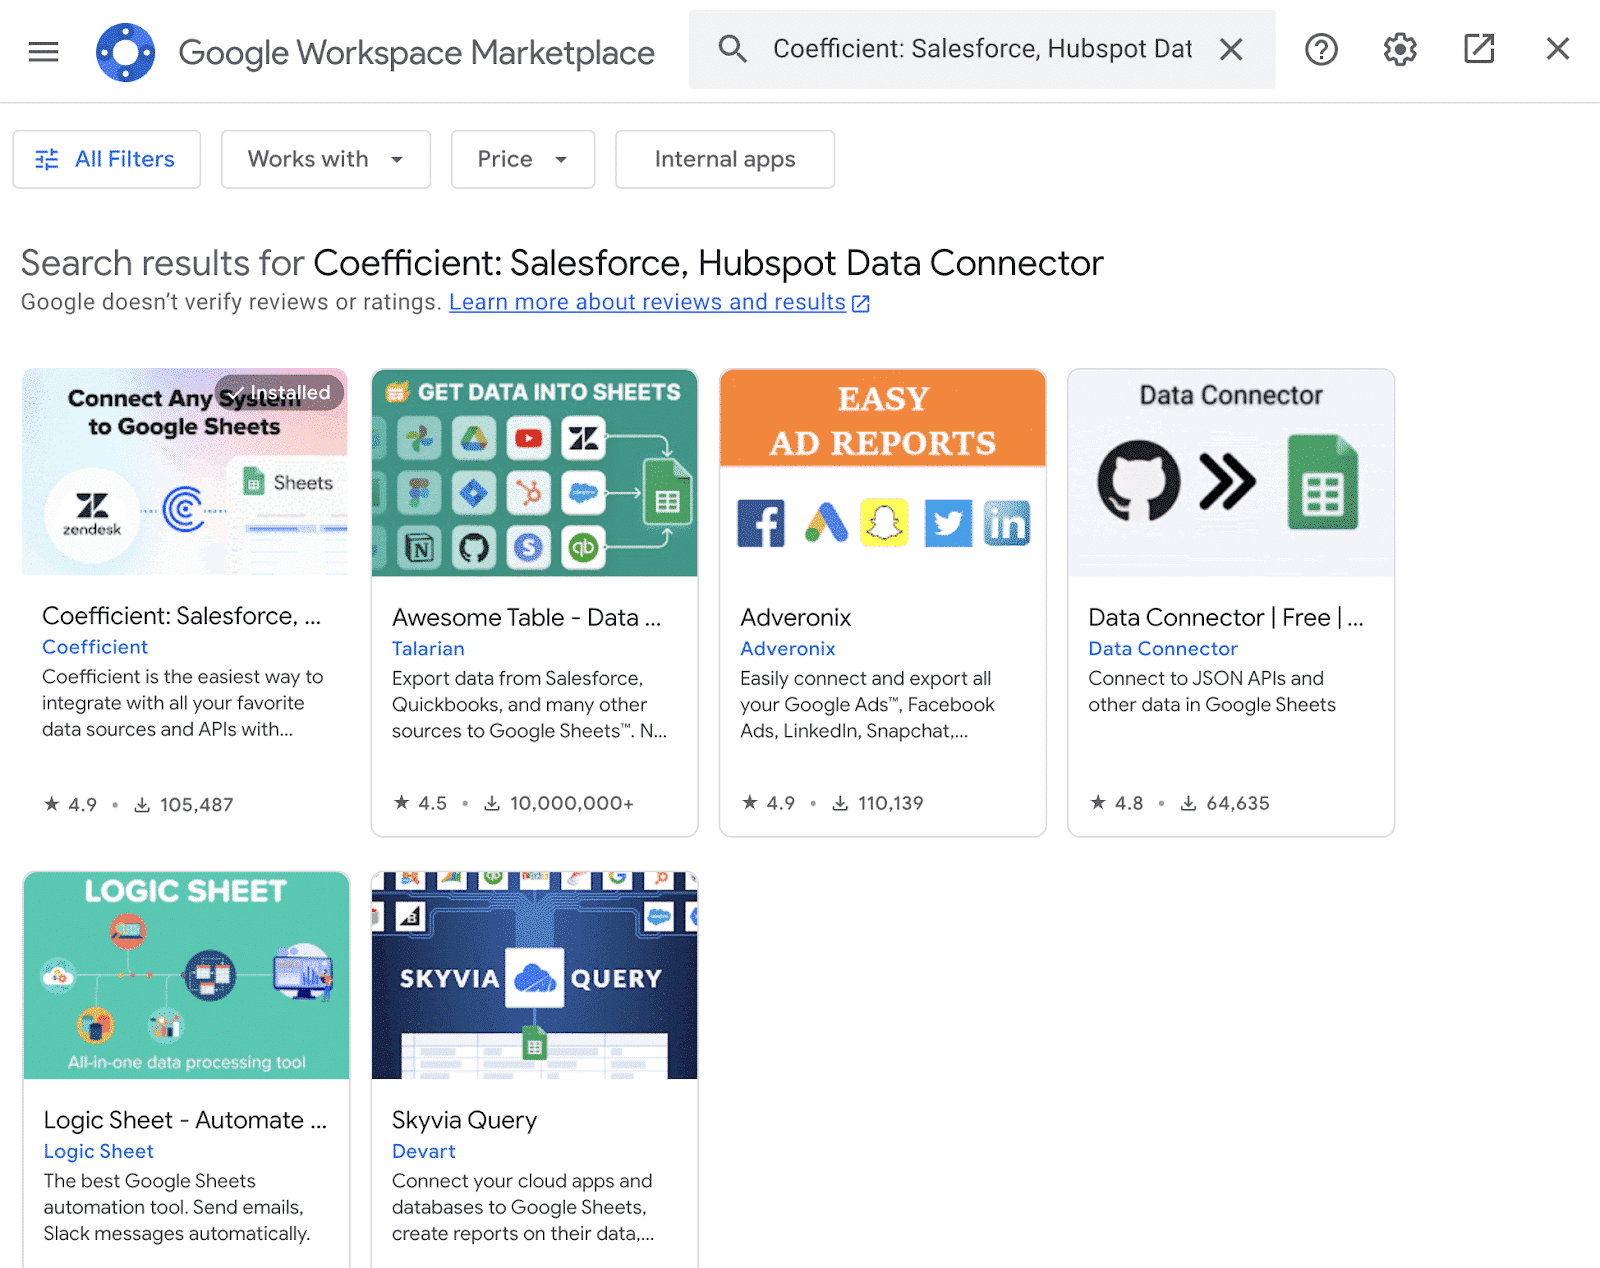
In the Google Workspace Marketplace, search for “Coefficient.”
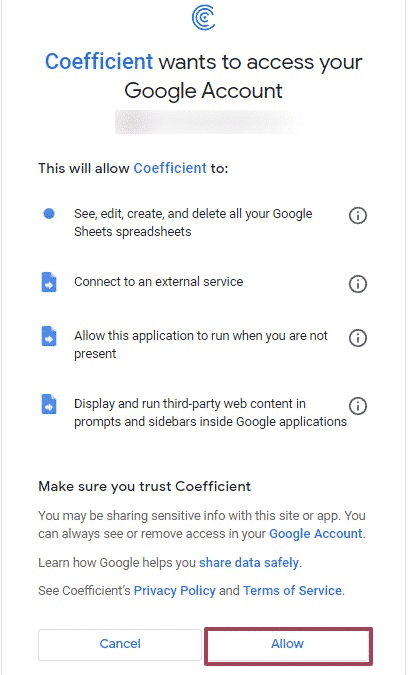
Follow the prompts to grant necessary permissions.
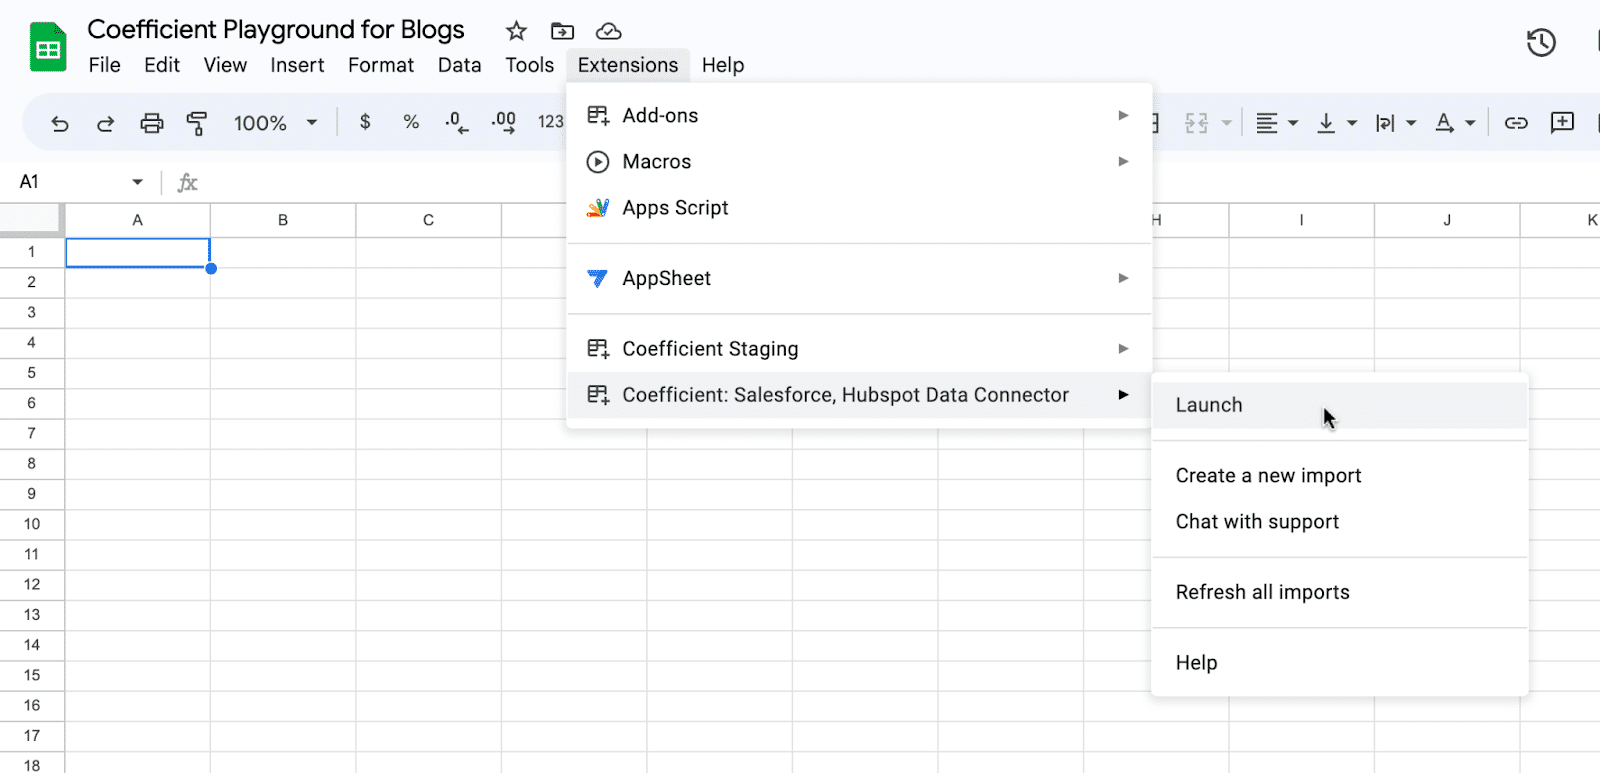
Launch Coefficient from Extensions > Coefficient > Launch.
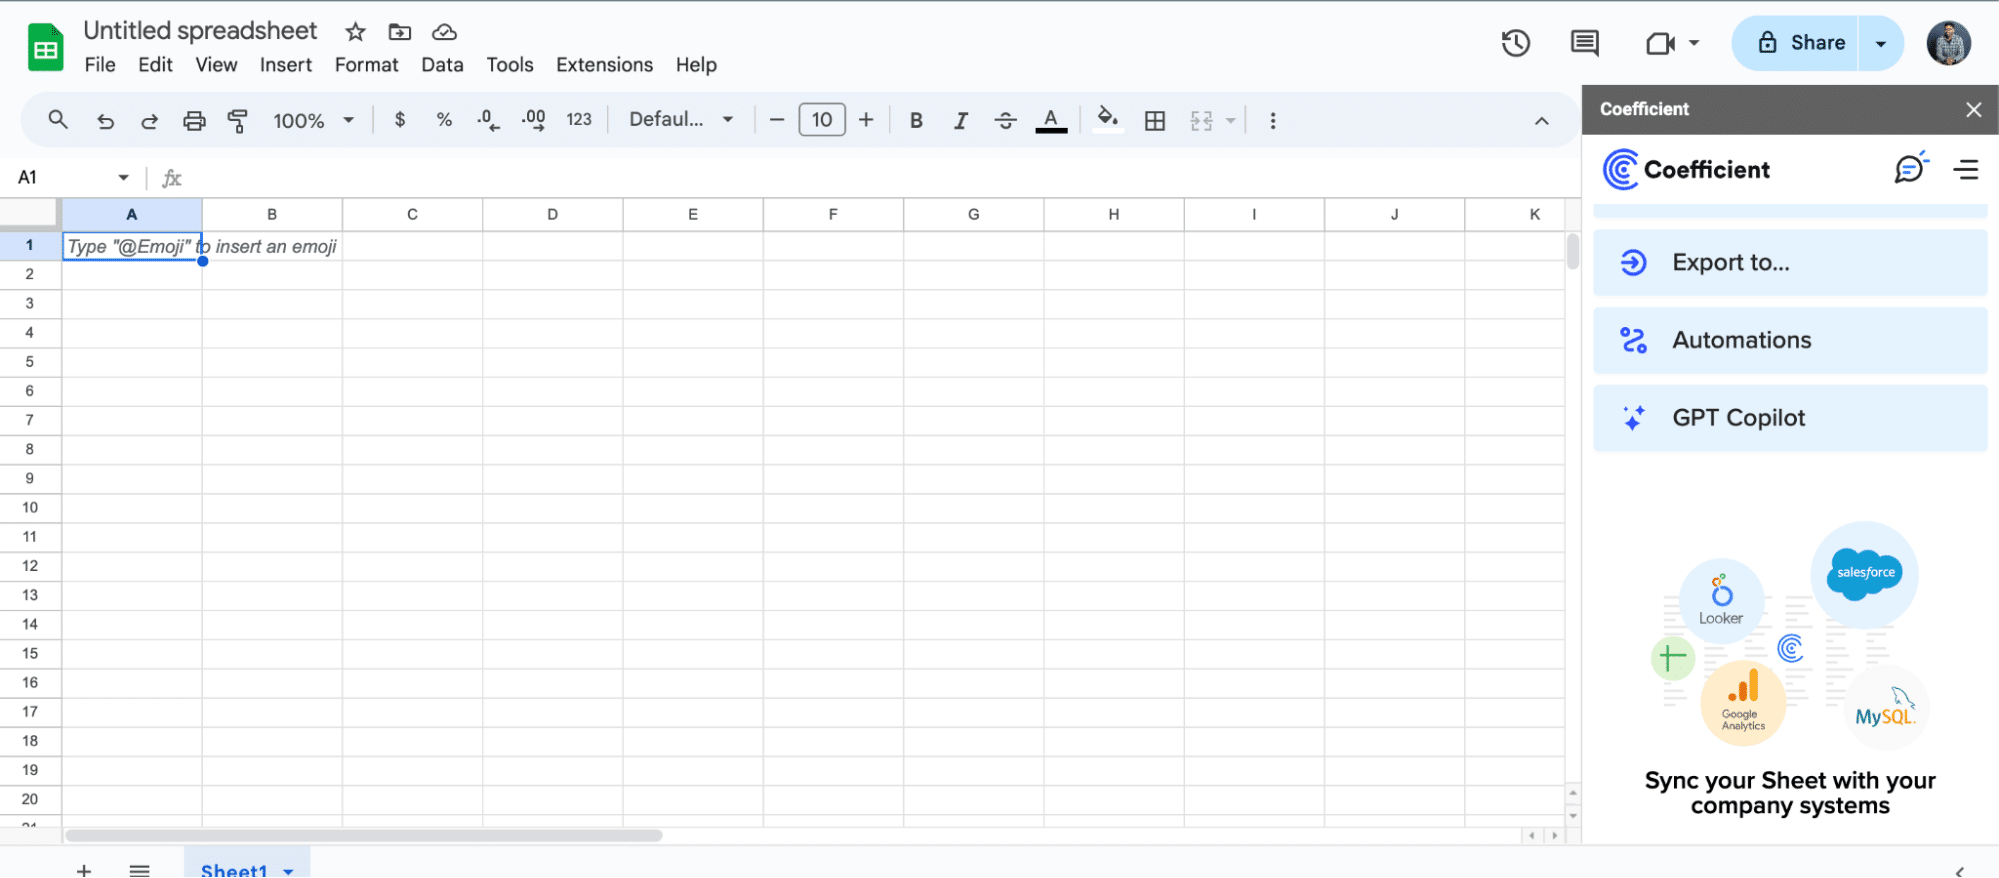
Coefficient will open on the right-hand side of your spreadsheet.
For Microsoft Excel
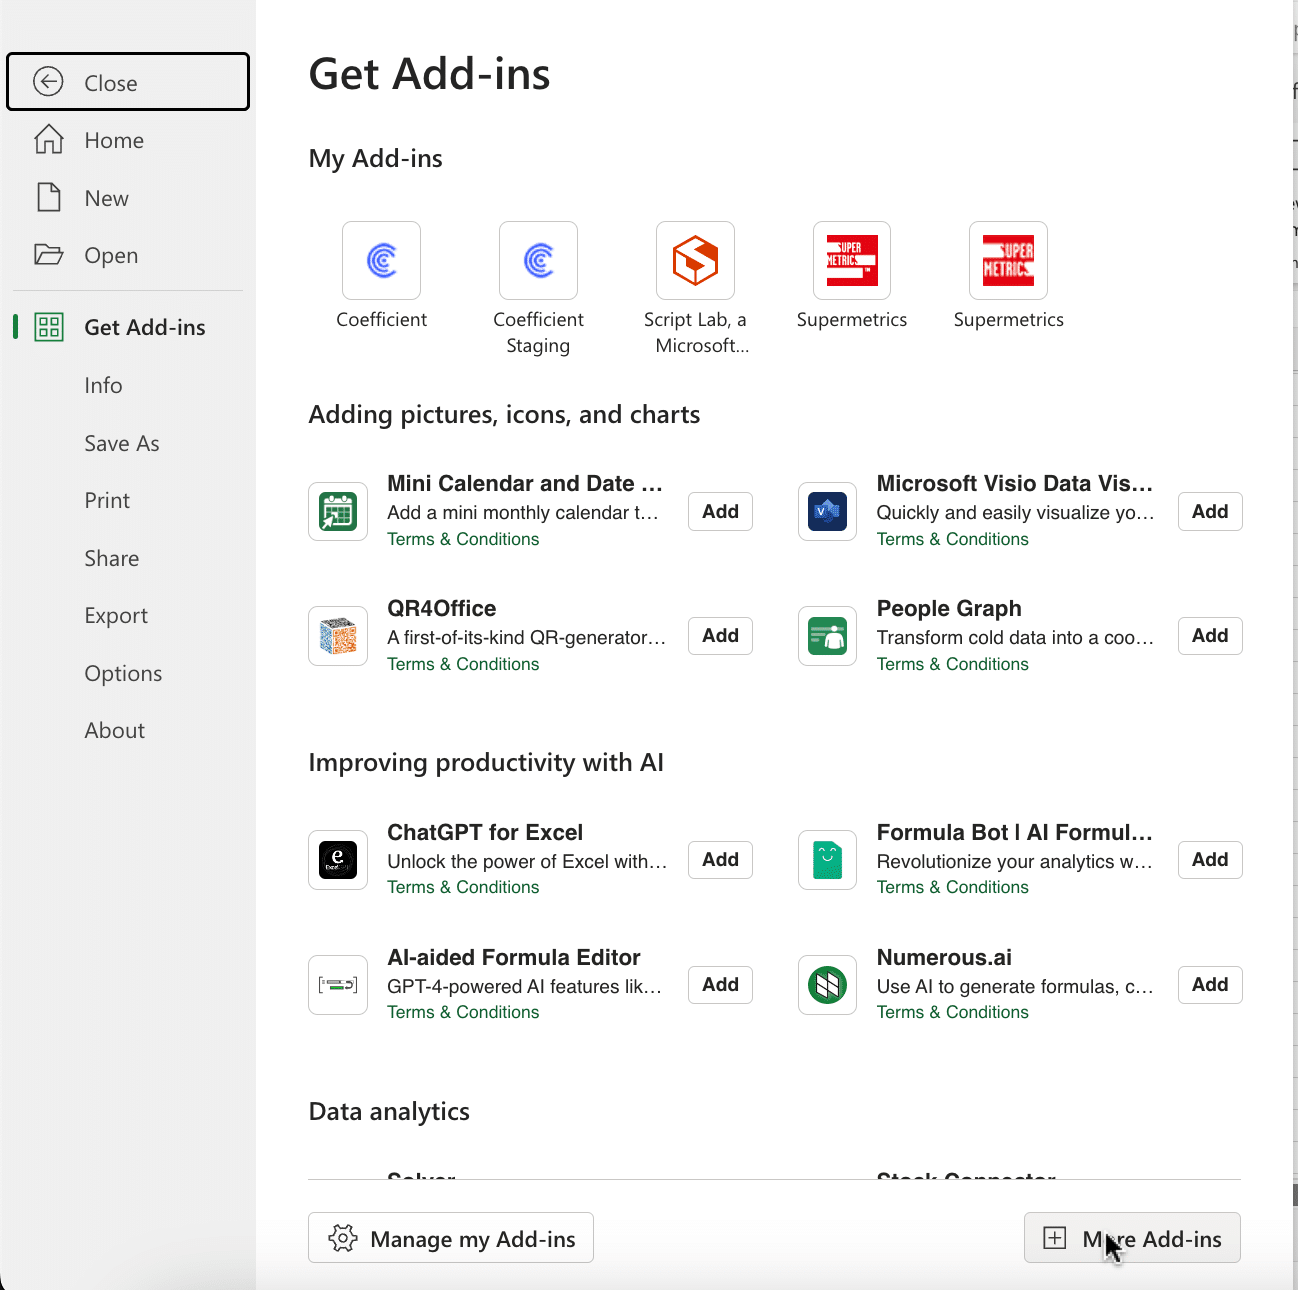
Open Excel from your desktop or in Office Online. Click ‘File’ > ‘Get Add-ins’ > ‘More Add-Ins.’
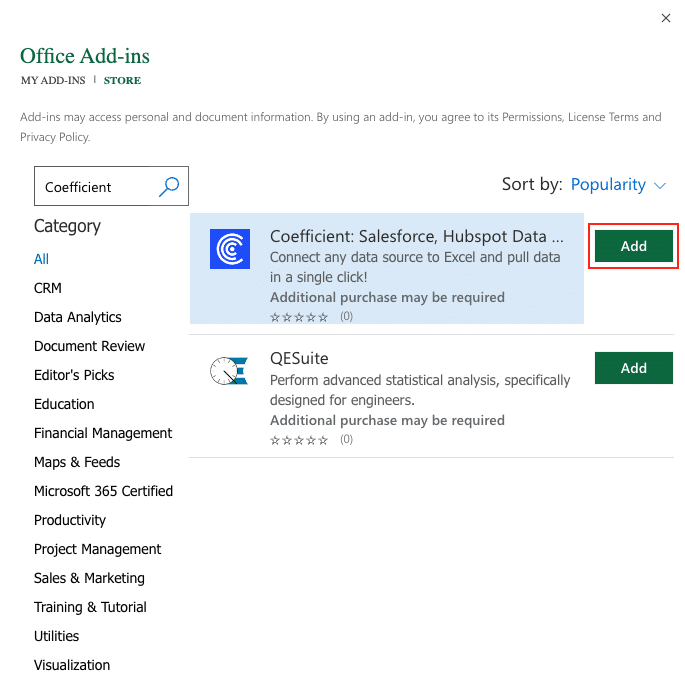
Type “Coefficient” in the search bar and click ‘Add.’
Follow the prompts in the pop-up to complete the installation.
Once finished, you will see a “Coefficient” tab in the top navigation bar. Click ‘Open Sidebar’ to launch Coefficient.
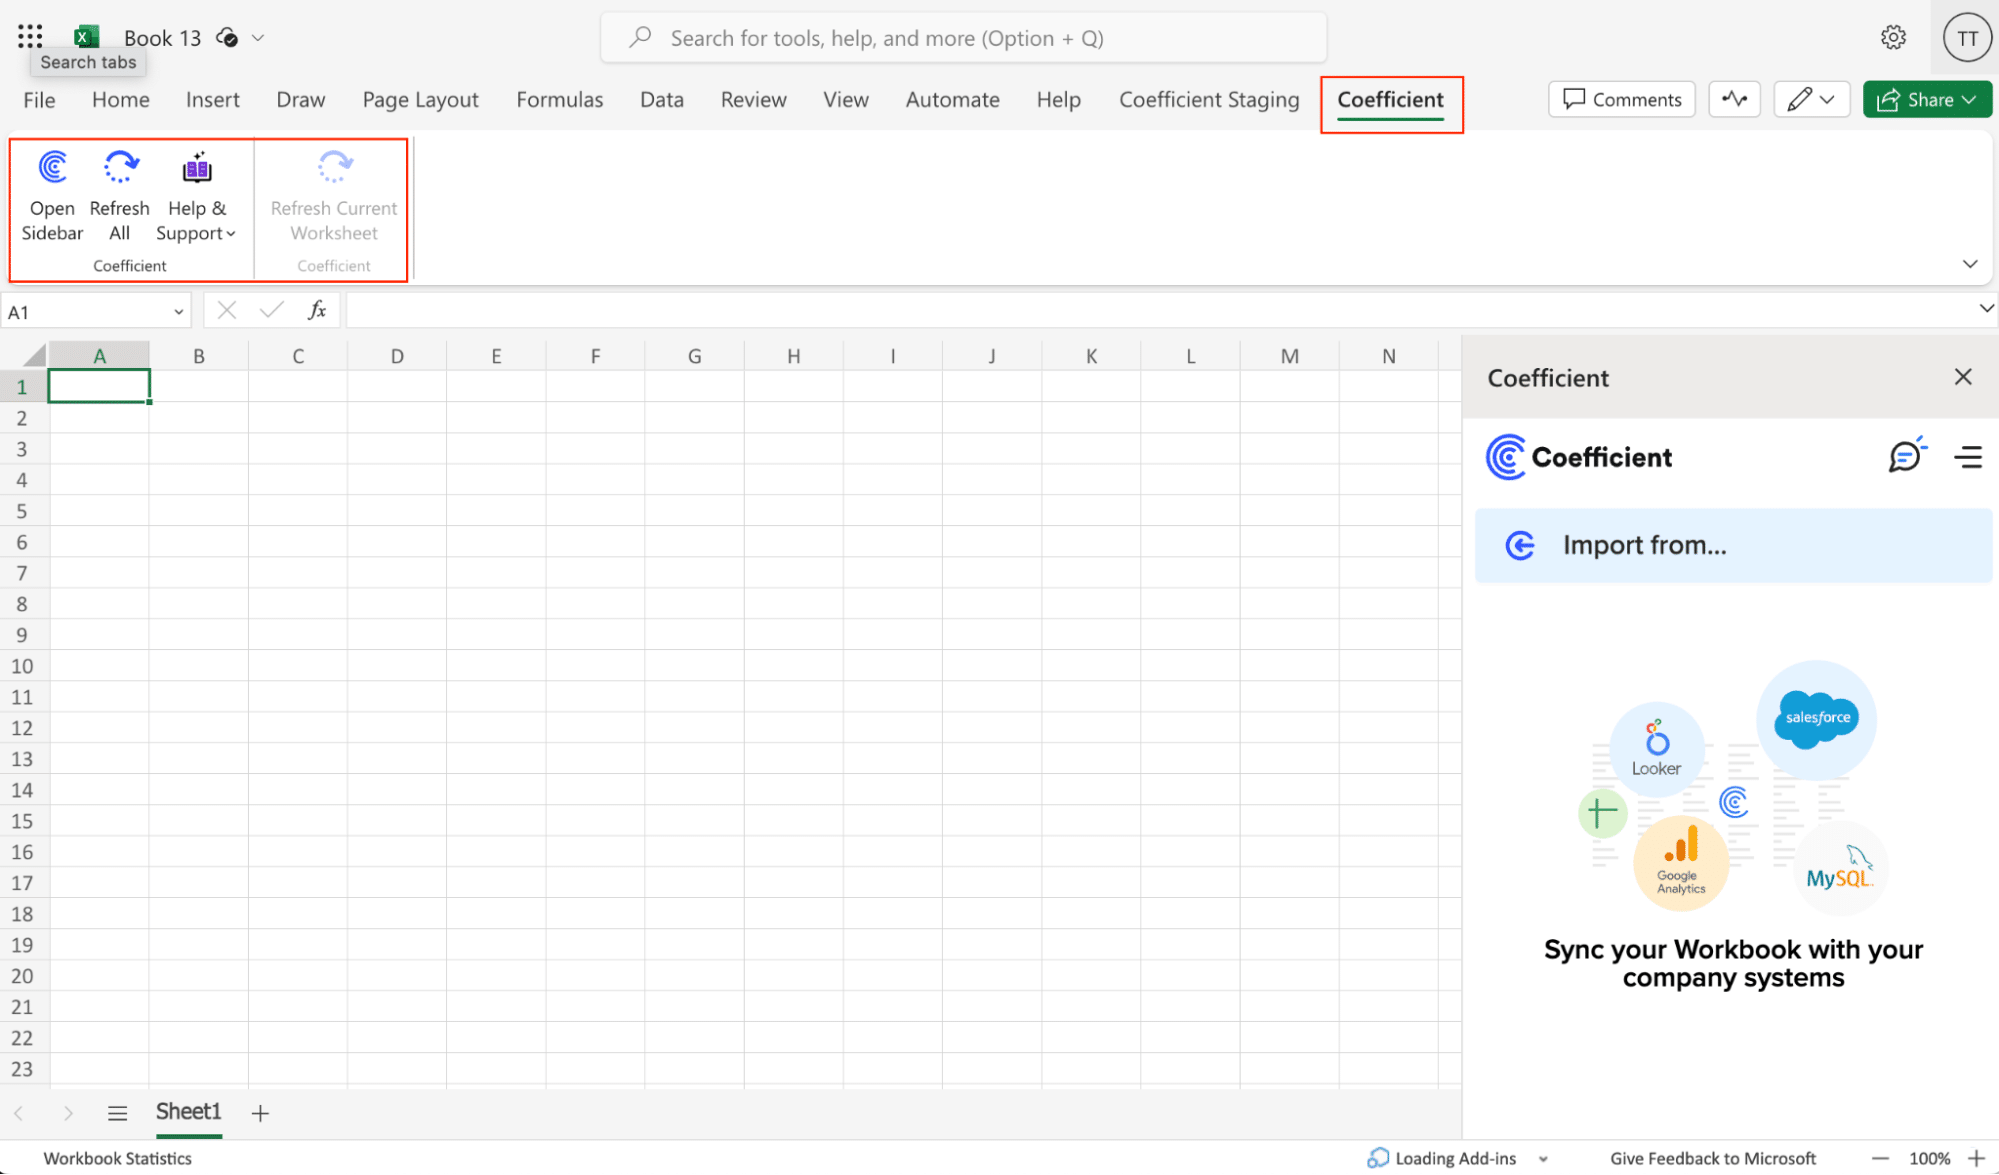
Step 2: Import Data from Freshdesk into Your Spreadsheet
With Coefficient installed, you’re now ready to import your Freshdesk data into Excel. Let’s walk through the process step by step:
In the Coefficient sidebar, click on “Import From” > “Add a Connection.” Select “Freshdesk” from the list of available data sources.

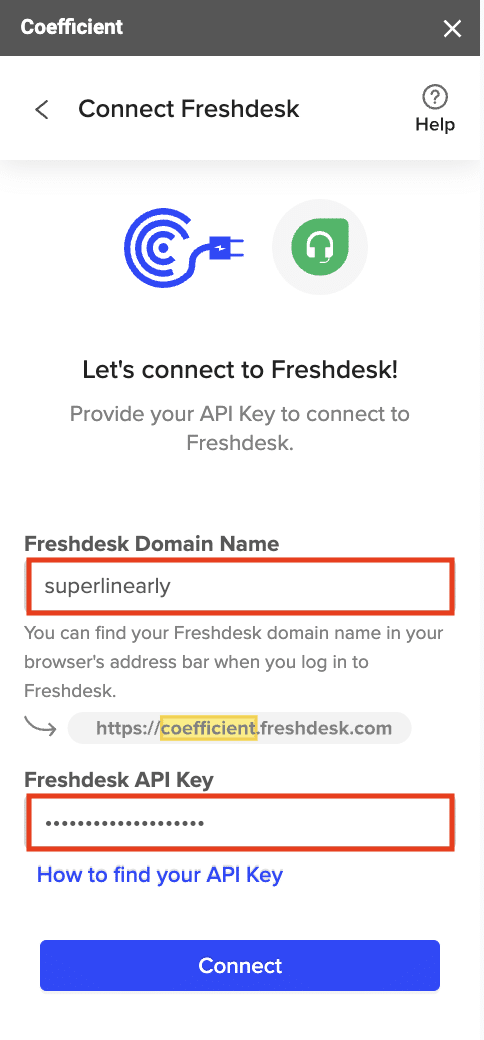
Add your Freshdesk domain name, which can be found in the URL when logged into Freshdesk (e.g., “Coefficient” in “coefficient.freshdesk.com”).
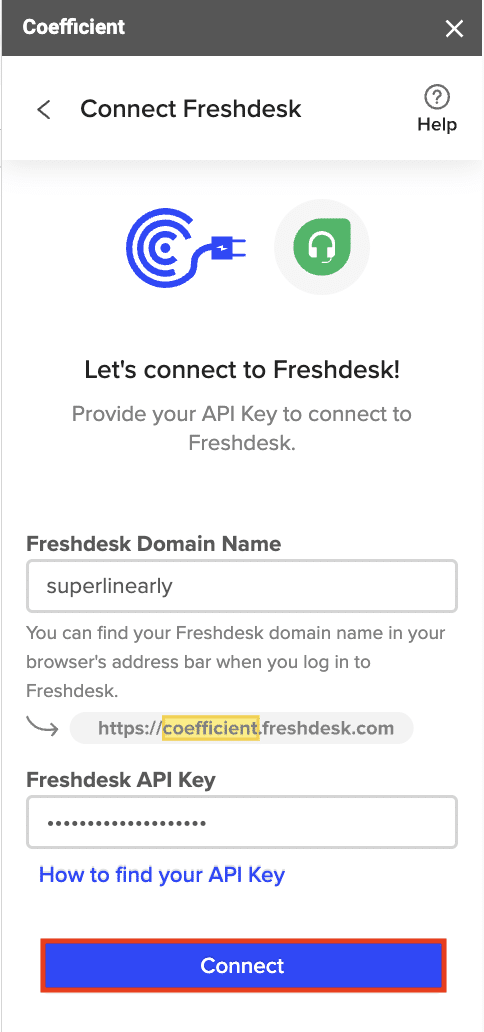
Enter your Freshdesk API key and click “Connect.”
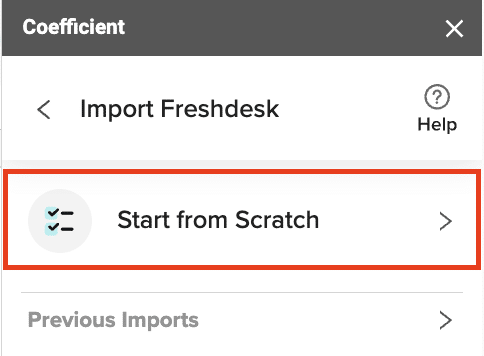
In the next screen, select “Start from Scratch.”
Select an endpoint, such as “Get Tickets”, to fetch data from.
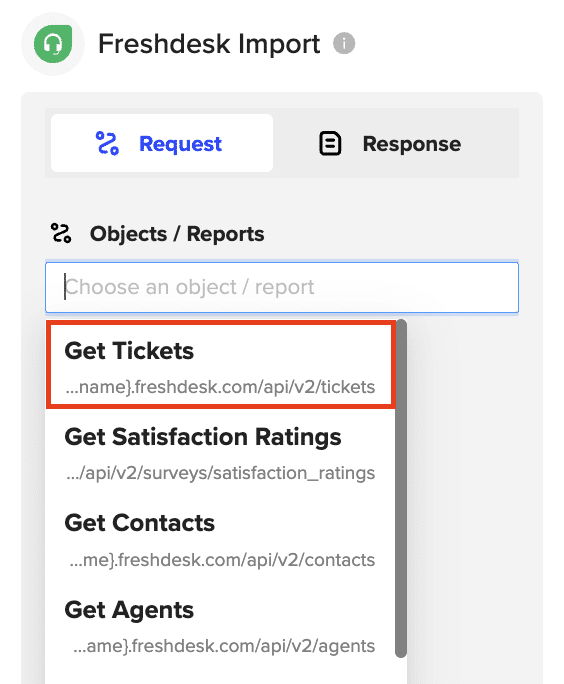
Optionally, add filters to refine your data import, such as searching for a specific requester’s email.
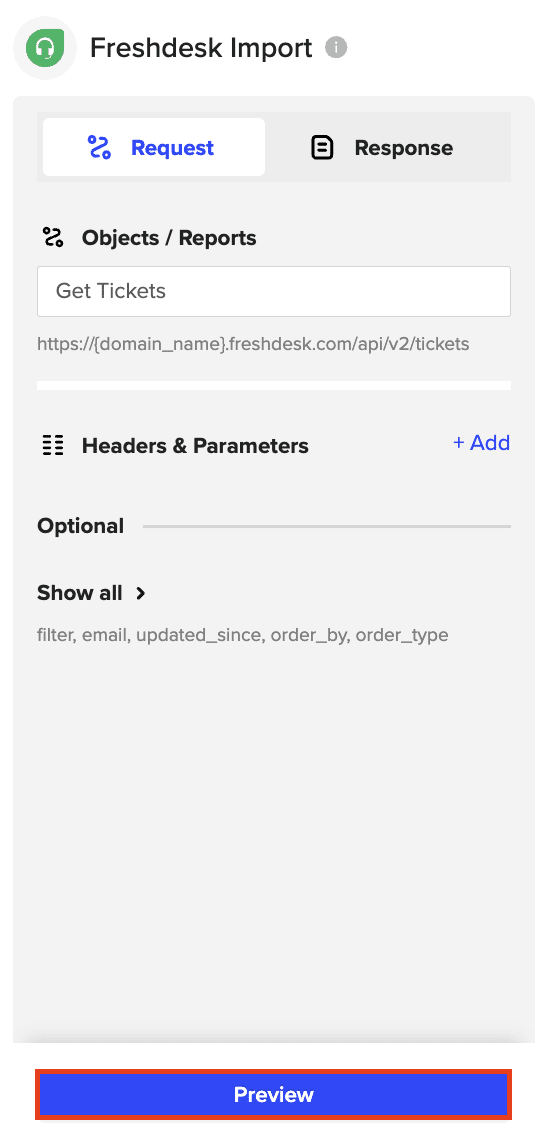
Click “Preview” to continue.
Choose the data fields you want to include in your import, such as subject, status, requester, priority, creation date, due date, ticket ID, and tags.
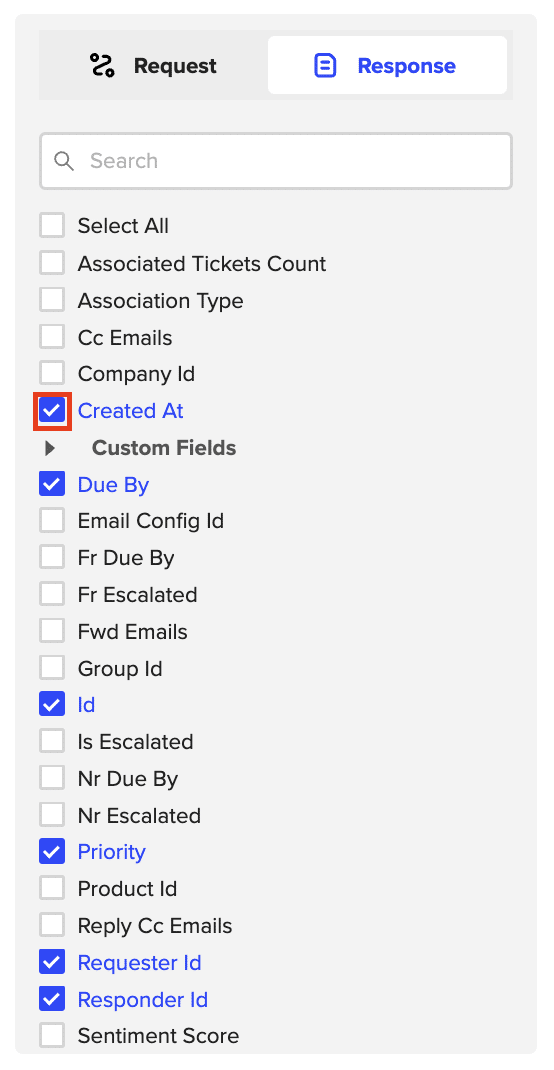
When you’re finished, click “Import” to fetch the selected data into your spreadsheet.

Step 3. Export Data from Your Spreadsheet to PostgreSQL
Before starting, make sure you’ve connected to PostgreSQ
Then, navigate to Coefficient’s menu. Click “Export to…”

Select PostgreSQL from the menu.
Choose the tab in your workbook that contains the data you want to export and specify the header row that contains the database field headers.
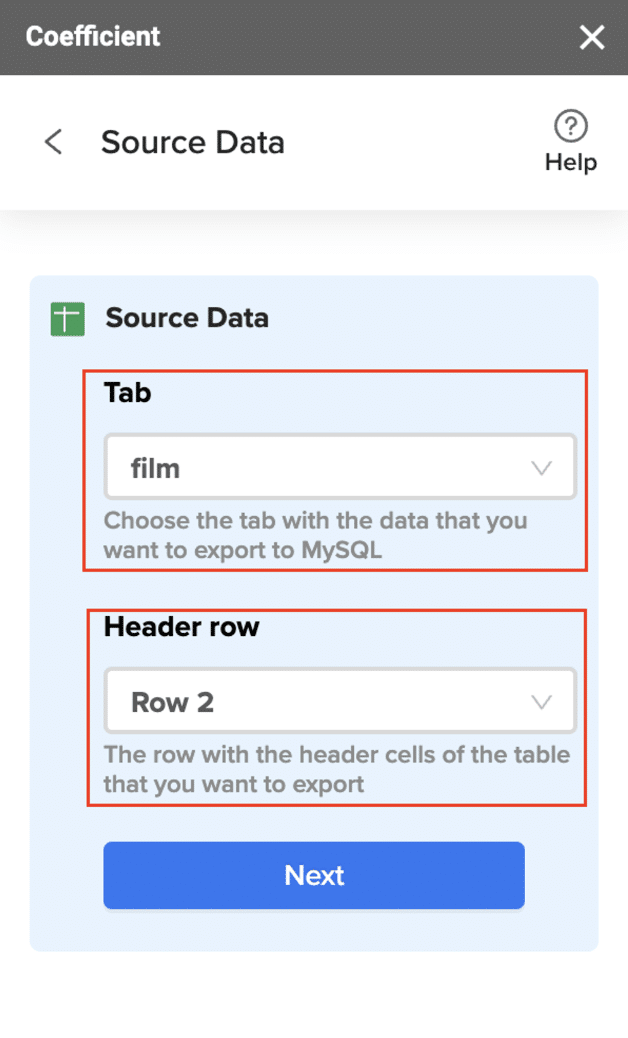
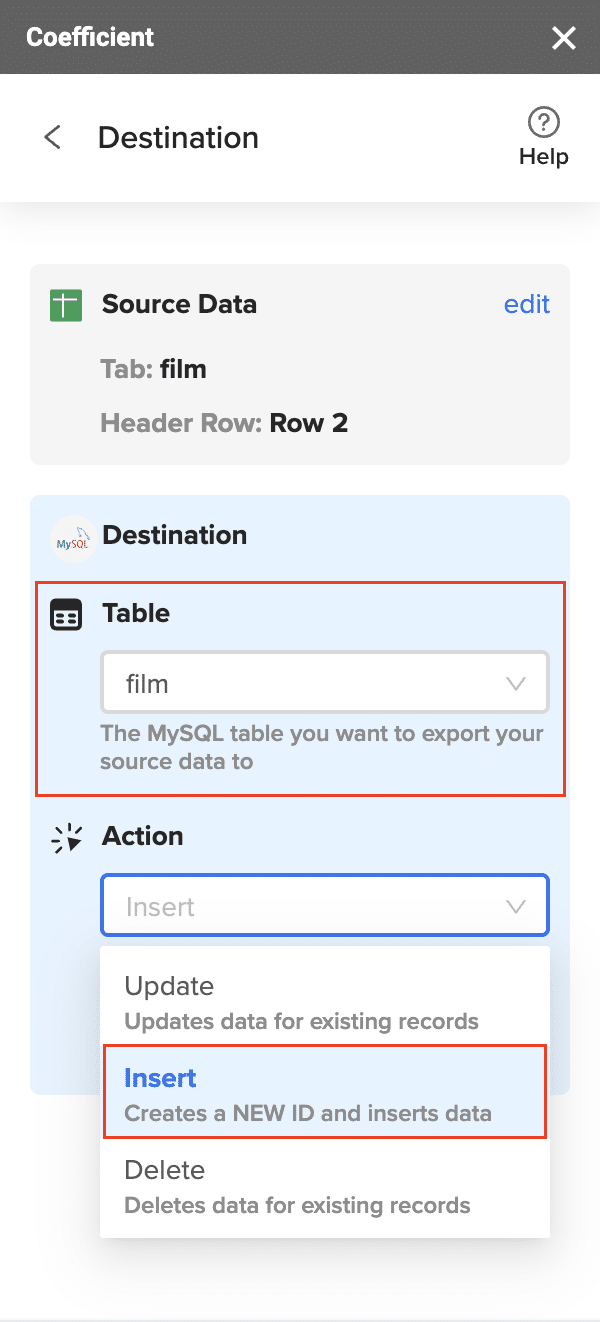
Specify the table in your database where you want to insert the data and choose the appropriate action (Insert, Update, Delete).
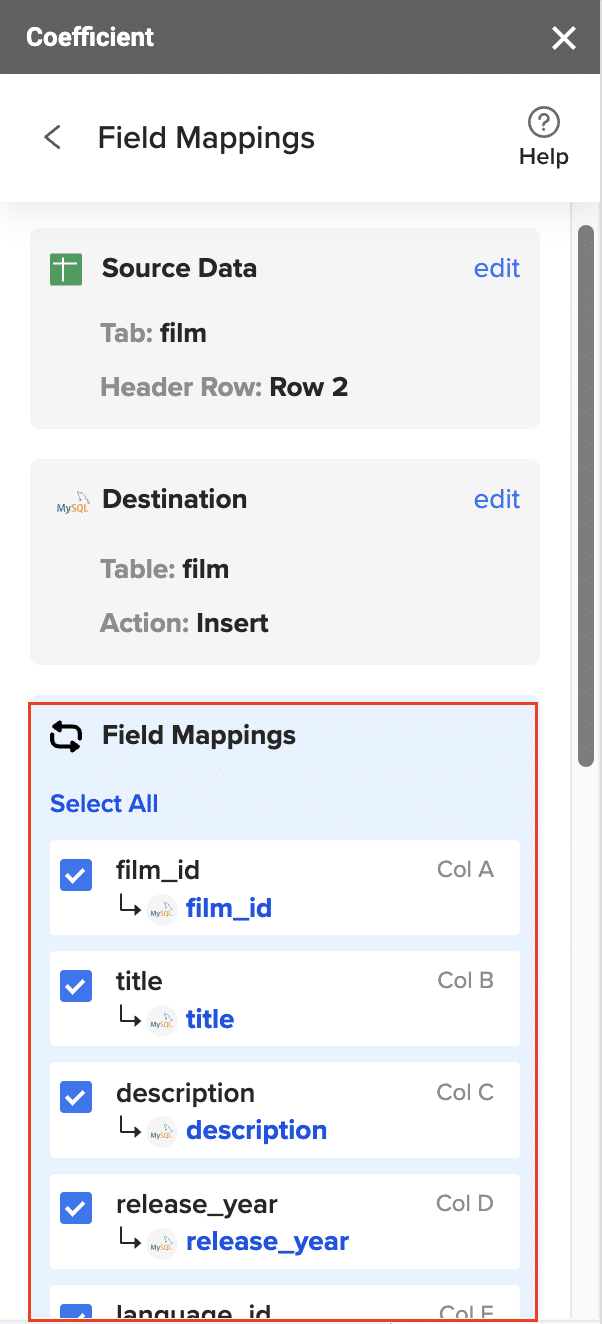
omplete the field mappings for the export. Ensure that primary keys or ID fields are mapped if required for the action you are performing.
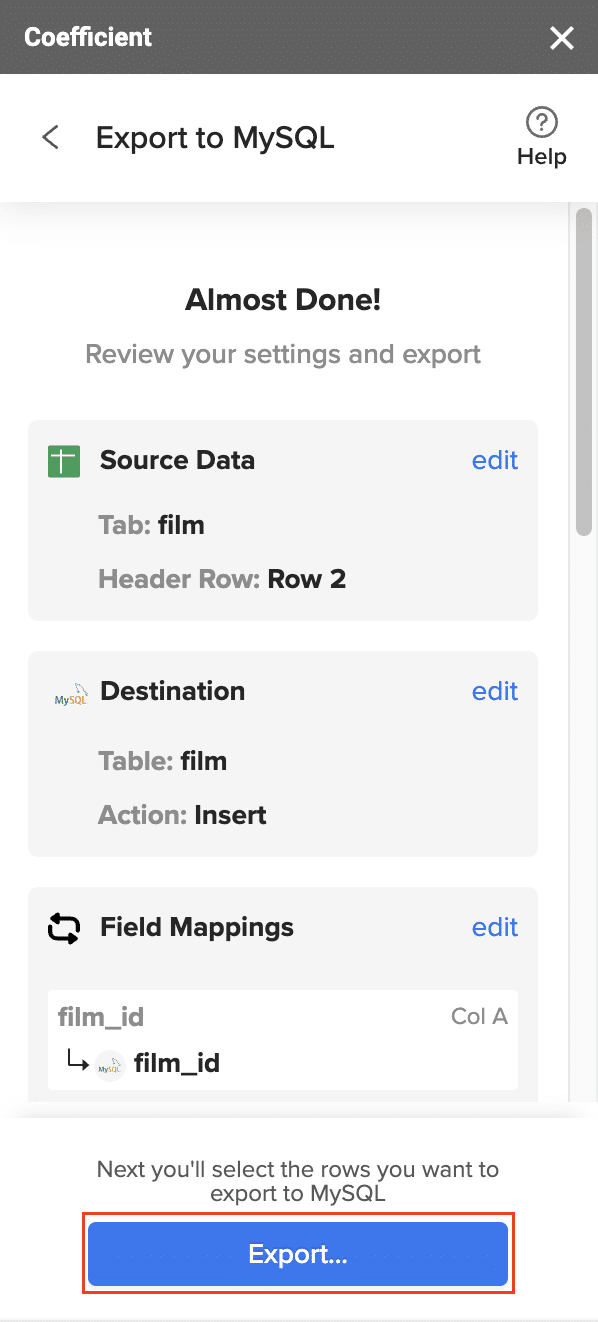
Confirm your settings and click “Export” to proceed.
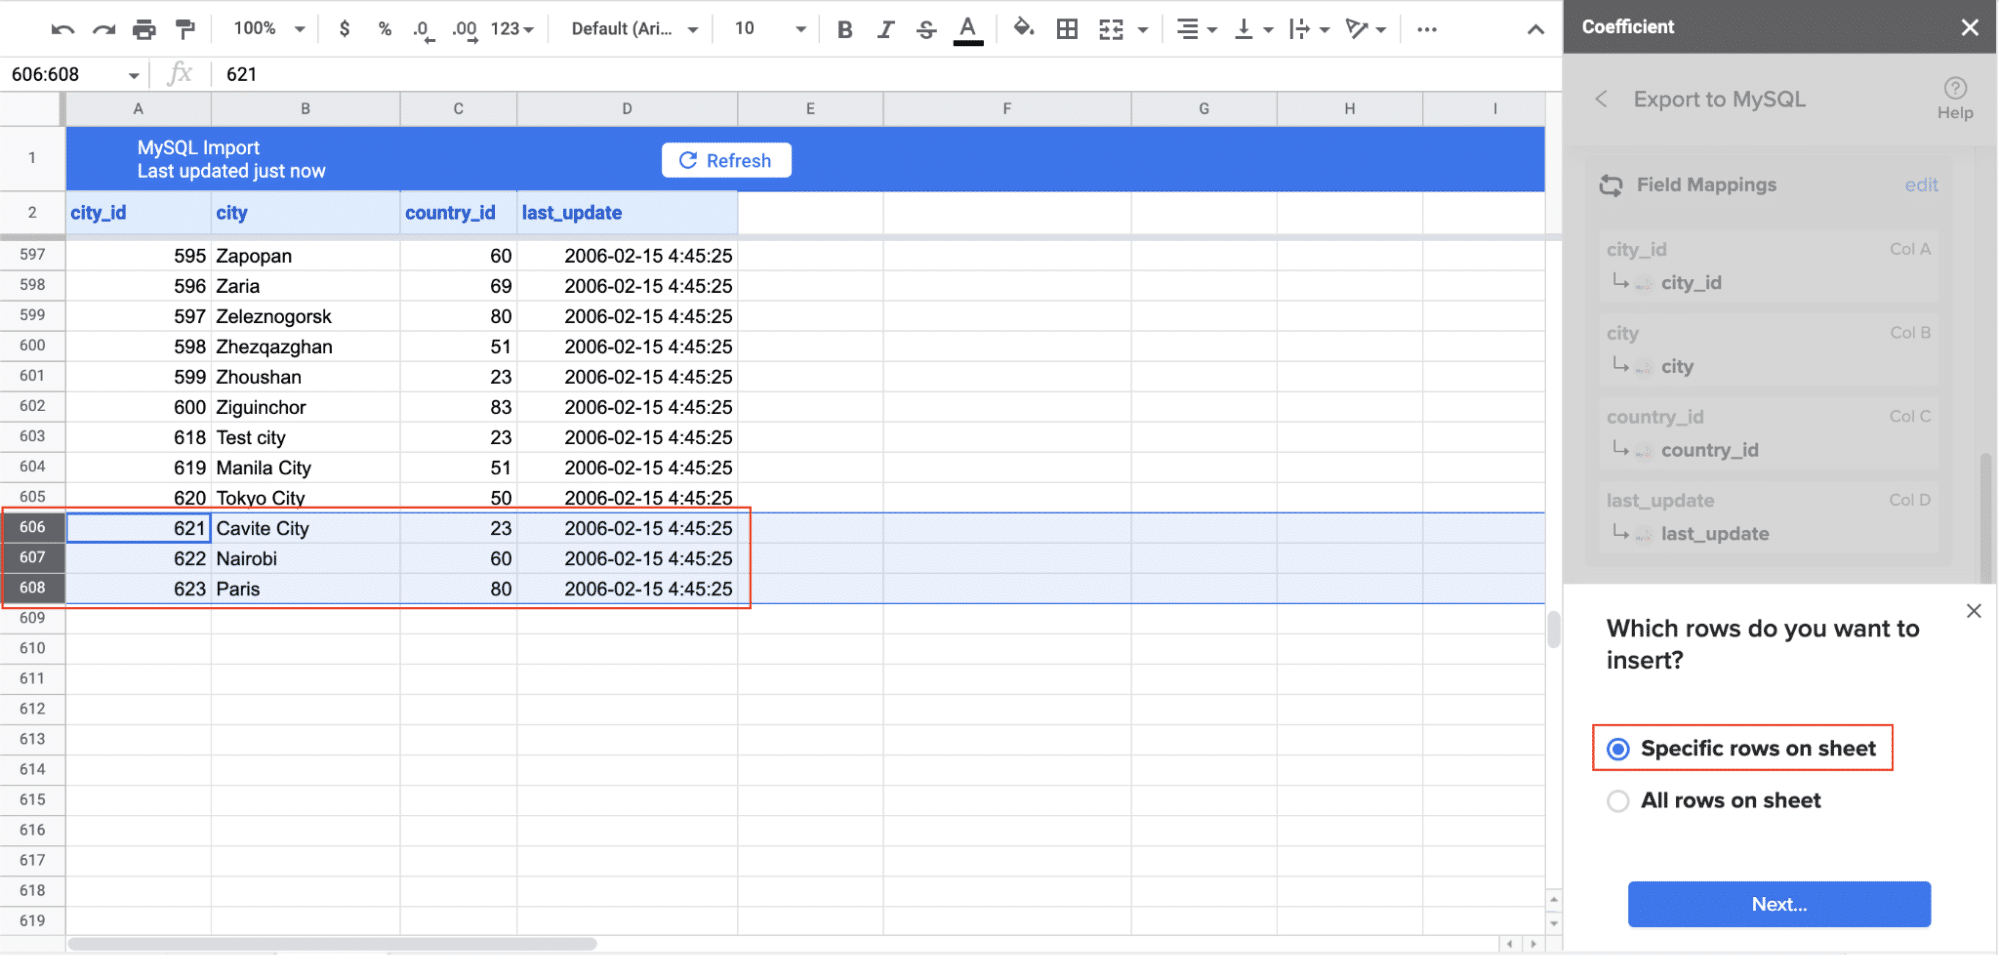
Highlight the specific rows in your sheet that you want to export, or choose to export all rows.
Review your settings and follow the prompts to push your data back to PostgreSQL.
Method 2: Skyvia
Skyvia is a cloud-based platform that enables you to integrate Freshdesk and PostgreSQL without writing code. Its extensive connector library and advanced transformation capabilities make it a robust choice.
Features
- No-code data integration: Easily connect Freshdesk to PostgreSQL without any coding, making it accessible for non-technical users.
- Wide range of connectors: Supports various data sources, allowing for flexible and comprehensive data integration.
- Cloud-based for easy access: Manage your integrations from anywhere, with no need for on-premise hardware or software.
- Data transformation options: Customize and transform your data as it moves between platforms to meet your specific business needs.
Pros and Cons
Pros:
- User-friendly interface: Navigate and set up integrations with ease, thanks to Skyvia’s intuitive design.
- Supports many data sources: Integrate with a wide variety of platforms, enhancing your data management capabilities.
- Advanced mapping and transformations: Tailor your data flow to match your business requirements with powerful customization tools.
Cons:
- Some SQL tools not supported: May lack compatibility with certain SQL-specific tools, which could be a limitation for some users.
- No 24/7 customer support: Limited support hours might be a drawback for businesses needing round-the-clock assistance.
How to Connect Freshdesk to PostgreSQL with Skyvia
Step 1. Sign up for a Skyvia account at https://skyvia.com/.
Step 2. Create a new connection for Freshdesk:
- Select Freshdesk from the connector library.
- Provide your Freshdesk API key and domain.
- Save the connection.
Step 3. Create a new connection for PostgreSQL:
- Select PostgreSQL from the list of databases.
- Enter your database credentials.
- Test and save the connection.
Step 4. Configure the data integration:
- Choose Freshdesk as the source and PostgreSQL as the target.
- Select the Freshdesk object to sync, such as tickets.
- Map the Freshdesk fields to PostgreSQL table columns.
- Set the synchronization schedule (e.g., hourly, daily).
Run the integration task.
Method 3: DBSync
DBSync specializes in real-time, bi-directional data synchronization. Its customizable workflows and advanced features make it ideal for businesses with complex integration needs.
Features
- Real-time data sync: Synchronize your Freshdesk and PostgreSQL data in real-time to ensure up-to-date information.
- Bi-directional data flow: Allows for data to be sent and received between both platforms, maintaining data integrity and consistency.
- Customizable sync workflows: Tailor your data synchronization processes to match your specific business needs with flexible workflow options.
- Pre-built connectors: Quick and easy integration setup with pre-built connectors for common platforms and applications.
Pros and Cons
Pros:
- Real-time synchronization: Keep your data up-to-date at all times with immediate sync capabilities.
- Granular control over data flows: Manage how data is moved and transformed with detailed control options.
- Handles complex data structures: Efficiently sync complex data, ensuring all necessary information is accurately transferred.
Cons:
- More complex setup process: Initial setup may require more time and effort compared to simpler integration tools.
- Higher learning curve: Users may need to invest time in learning how to fully utilize the platform’s advanced features.
- Higher cost: The robust capabilities might come at a higher price, which could be a consideration for budget-conscious businesses.
How to Connect Freshdesk to PostgreSQL with DBSync
Step 1. Sign up for a DBSync account and log in.
Step 2. Create a new connection for Freshdesk:
- Select Freshdesk from the connector list.
- Provide your Freshdesk API key and domain.
- Configure authentication settings.
Step 3. Create a new connection for PostgreSQL:
- Choose PostgreSQL from the database list.
- Enter your database connection details.
- Test and save the PostgreSQL connection.
Step 4. Set up a sync workflow:
- Select Freshdesk as the source and PostgreSQL as the target.
- Choose the data objects to sync, such as tickets or contacts.
- Map the fields between Freshdesk and PostgreSQL.
- Configure sync settings (frequency, conflict resolution, etc.).
- Save and enable the sync workflow.
Step 5. Monitor the synchronization process:
- View real-time sync status and logs.
- Manage and modify sync workflows as needed.
Connect Freshdesk to PostgreSQL: No Code Required
Connecting Freshdesk to PostgreSQL is a game-changer for businesses looking to enhance their customer support capabilities. By centralizing customer data, improving reporting, and gaining valuable insights, you can take your support operations to new heights.
Ready to streamline your data syncing process?
Get started with Coefficient for a smooth, no-code integration experience. With its intuitive interface, real-time updates, and affordable pricing, Coefficient makes connecting Freshdesk to PostgreSQL a breeze.
Don’t wait to transform your customer support operations. Get started with Coefficient now!


