How to Reconcile Stripe Payments In Quickbooks Online

QuickBooks Online (QBO) from Intuit is cloud accounting software used by many business owners. It offers a user-friendly and cost effective solution to solve numerous back-office and accounting functions. Quickbooks Online links to most of the major payment processing platforms including Stripe.

Stripe is a payment processing platform that allows you to transfer money from a customer’s account to yours and accept payments via credit card or other alternative payment methods.

This guide will walk through how to reconcile Stripe payments in Quickbooks Online if your business is using Stripe as their payment processing platform.

Let’s get started!

Step-by-Step Guide: How to Reconcile Stripe Payments in Quickbooks Online

Step 1: Create Folders to Save Out Quickbooks Online and Stripe Reports

Before going through the reconciliation process for Stripe payments in Quickbooks Online you will first want to create a folder repository on your shared drive, desktop, cloud platform, etc to save out reports at. In these folders you will want to save out Stripe transaction details, payouts, month-end reports, and QBO reconciliations so you don’t have to duplicate work as you continue to reconcile transactions.

Step 2: Download Stripe Reports

Once you’ve created your folder structure you will need to log into your Stripe account and pull down the relevant reports.

To do this you will need to navigate to the reports section in the menu section on the left side of your homepage. Once in the reports section you will need to download the balance summary, balance change from activity, and payouts reports for the relevant time frame and save them out in the folders you created in step 1. Depending on the volume of transactions you may want to reconcile payments weekly instead of monthly or quarterly.

Having the reports saved out and readily available from Stripe will be helpful when going through any transactions and reconciling items.

Step 3: Connect Stripe to Quickbooks

In order to seamlessly pull in Stripe transactions to Quickbooks Online in order to reconcile them you will need to connect your Stripe account. Once your account is connected it will help eliminate any manual entries and errors that can occur if you are manually uploading your Stripe transactions.

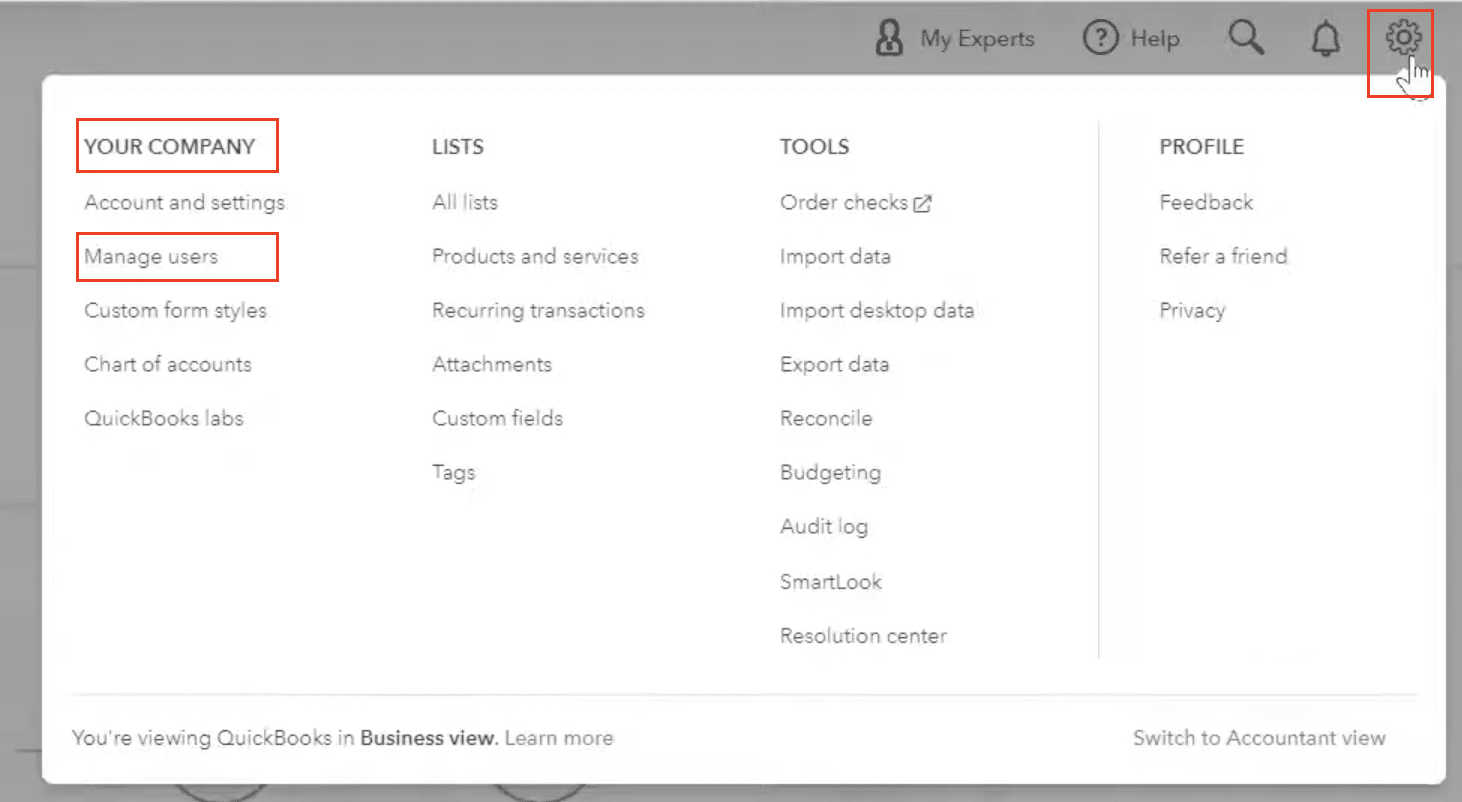
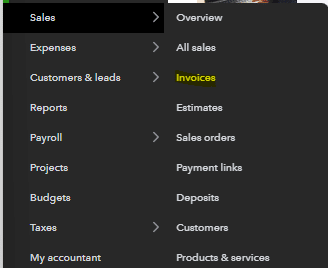
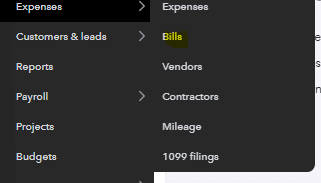
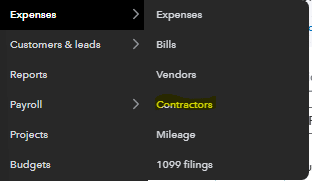
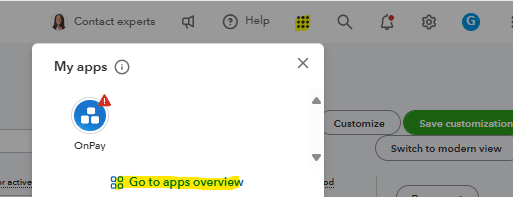
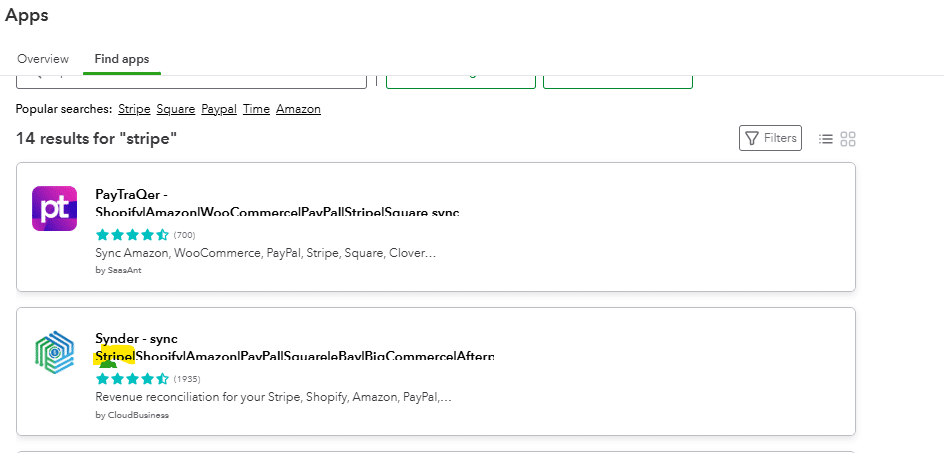
To link your Stripe account you will have to navigate to the apps section of your Quickbooks Online menu.

Navigation menu showing banking page and QuickBooks Online

Once in the apps section you will need to search for Stripe and link it to your Quickbooks Online instance. Once you’ve select Stripe you may be prompted for your login credentials so make sure you have those handy.

Stripe app search results in QuickBooks Online

Step 4: Import Stripe Transactions into Quickbooks

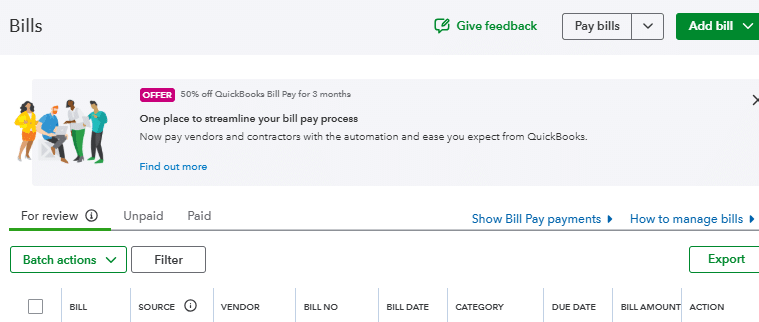
Now that you’ve connected your Stripe account in Quickbooks and have been regularly downloading Stripe transactions, you will need to upload those Stripe transactions in Quickbooks Online and begin the reconciliation process. The upload process can be done automatically by correctly linking your Stripe account in step 3. Otherwise you will have to do a manual upload process to Quickbooks Online from Stripe, which can take more time and cause more issues and reconciling items from the manual intervention.

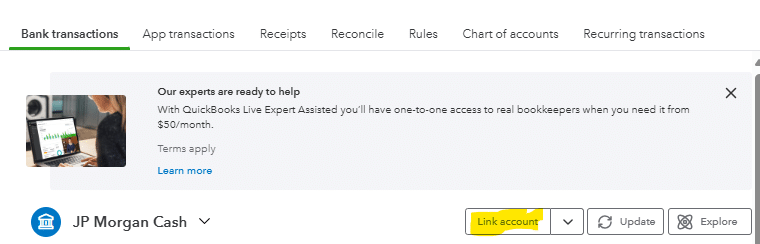
Once you’ve successfully connected the Stripe platform to Quickbooks Online through the apps section you will see transactions poplate for that particular company.

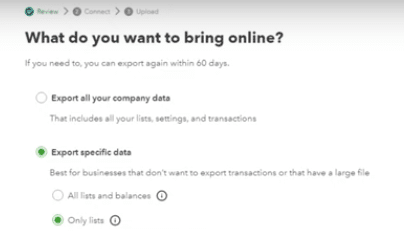
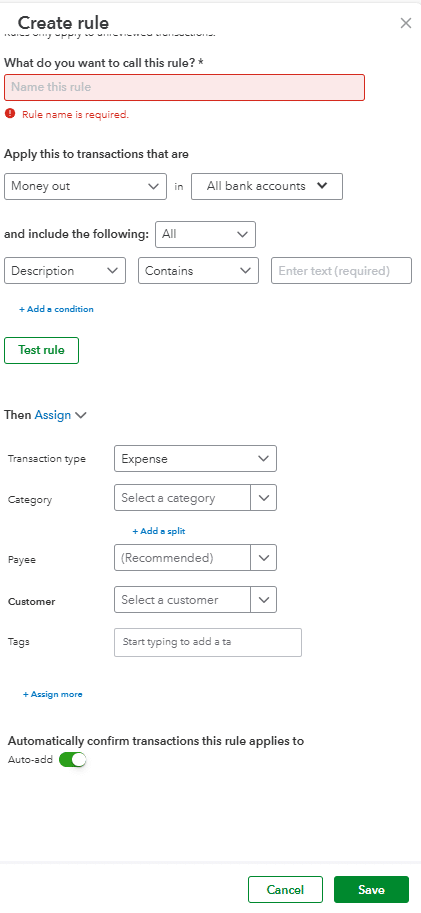
If you are unable to link the application and have to manually import transactions you will need to pick a start date for the transactions and then upload your csv file out of Stripe  to Quickbooks Online.

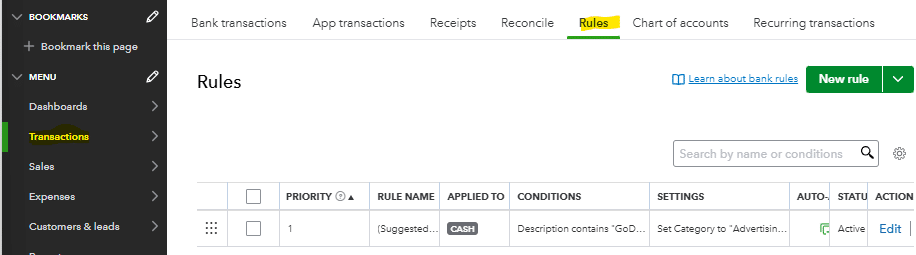
Step 4: Run Quickbooks Online Reconciliation  

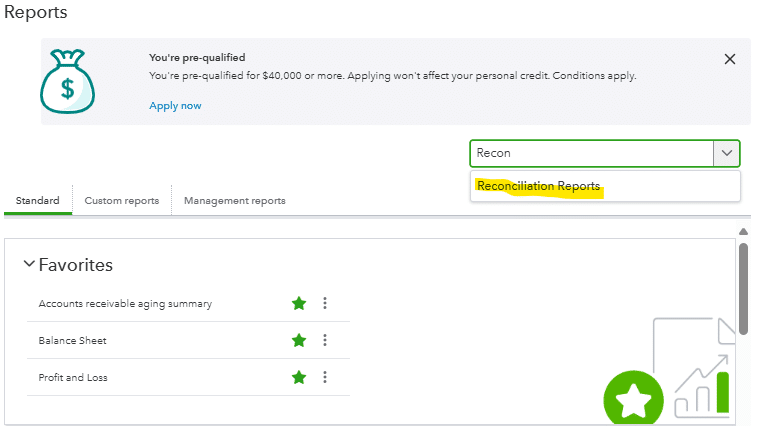
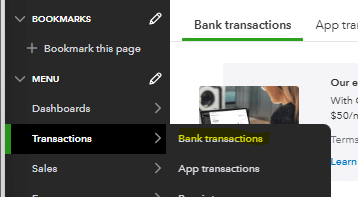
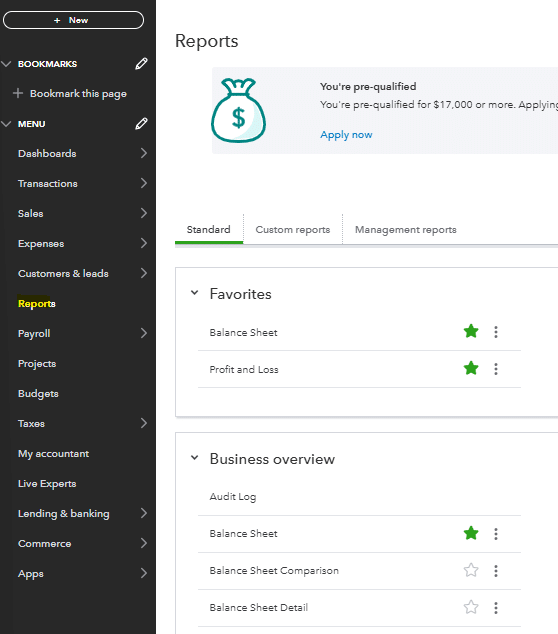
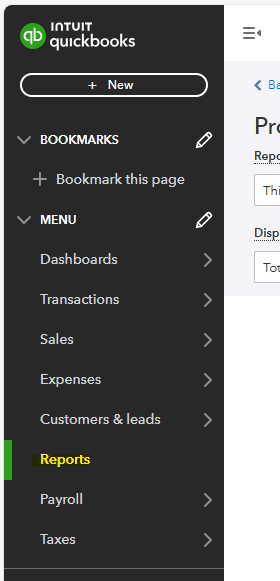
Now that your transactions from Stripe have pulled into the Quickbooks Online you are able to run your Stripe account reconciliation. In order to do this you first need to navigate to the reports section in Quickbooks Online.

Reports section navigation equipment interface.

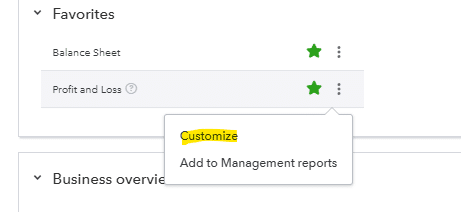
Once here you can search for the reconciliation discrepancy report in the account field to find report options.

Reconciliation discrepancies report search screen.

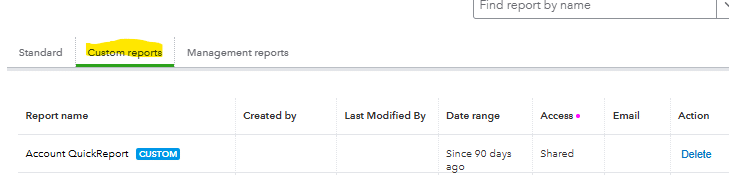
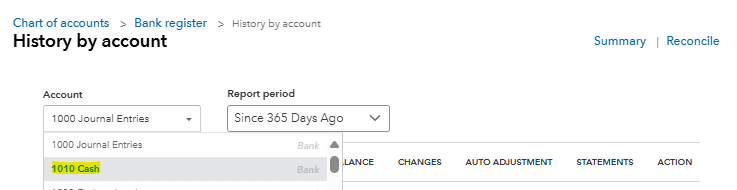
After you’ve searched for and located the reconciliation discrepancy report you will be prompted to select what account you want to reconcile from your chart of accounts. In this particular example we are reconciling our Stripe account so you will want to select the bank account you have created to pull in your Stripe transactions.

Bank Account Selection Screen for Reconciliation

Once you’ve selected the Stripe account to reconcile you will be able to select the date range that you want to reconcile and will be able to run your reconciliation report for that particular date range. At this point in time you will also want to have your Stripe reports you previously pulled down ready to go in the event you have a reconciling difference that you need to investigate. Typically, with Stripe and other payment processing platforms you will have reconciling differences due to timing, missing or duplicated transactions, or any manual adjustments you have made throughout the accounting period you are reconciling.

Now you are ready to select run on your Stripe account reconciliation.

A conciliation report showing account differences

In this particular example we are showing that there is a $30,848.20 difference between our Stripe balance and our Quickbooks Online balance.

Balanced difference of $30,848.20 displayed in report.

With this reconciling difference you will then need to go through the transaction level detail in your reconciliation and match it up with the Stripe transaction detail that was saved out in your folder. You shouldn’t have issues with reconciling items if you have linked your Stripe account to your Quickbooks Online instance, other than potential minor timing issues.

If you’ve manually uploaded or entered your Stripe transactions you will need to correct, add, or remove transactions to your Stripe account in Quickbooks Online as you go through each transaction. You have the functionality in Quickbooks Online to check the radial box on the right side of your reconciliation screen. This allows you to monitor and track which Stripe transactions you’ve already tied and reconciled to your Stripe statement.

For transactions that don’t appear or you are not able to tie back you will want to leave that radial box unchecked. This will remove the transaction from your Quickbooks Online reconciliation when you finish and process it.

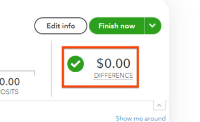
After you’ve fully reconciled your Stripe account you should have a reconciling difference of zero and will be able to select finish now to complete your Stripe account reconciliation for that particular time frame.

Final reconciliation screen with finish button.

Reconcile Your Stripe Payments in Quickbooks Online

Linking your Stripe Payment processing platform to your Quickbooks Online instance can provide easy and seamless accounting of transactions for business owners and accountants. The pre-built connector between Quickbooks Online and Stripe makes it possible to pull in Stripe transactions and reconcile them without the need of an information technology professional. This can save both time and money for businesses as they start-up their back-office processes.

Once you have accurate, reconciled Stripe data in your Quickbooks Online instance, it allows you to report more meaningful information for your business to help it succeed. Quickbooks Online also is able to connect to reporting tools such as Coefficient to seamlessly pull information out of Quickbooks Online. Coefficient also enhances your reporting capabilities out of Quickbooks Online so you can use transactional data to help tell the story of your business.

Ready to take your data analysis to the next level?

Try Coefficient to seamlessly integrate your Excel with live data from various business systems, enabling real-time analysis and more advanced financial modeling.

How to Fix Quickbooks Accounting Mistakes

QuickBooks Online (QBO) from Intuit is a leading accounting software used by many small business owners and medium-sized businesses. While many entrepreneurs choose between QuickBooks Online and QuickBooks Desktop, both platforms offer user-friendly solutions to handle numerous bookkeeping, credit card processing, and payment processing needs. QBO integrates with a plethora of other platforms that your business account may be using, including tools for managing accounts receivable and accounts payable.

While QuickBooks Online is user-friendly, accounting mistakes can occur due to manual error or integration issues with your company file. When these issues arise, there are several ways to tackle and fix the mistake, often with help from a CPA or ProAdvisor.

This guide will walk through how to fix common QuickBooks mistakes in QuickBooks Online, helping you maintain accurate records for your tax liability and sales tax reporting.

Let’s get started!

Common Quickbooks Accounting Mistakes

There are a lot of varying ways that accounting mistakes can occur in QuickBooks Online. Depending on the type of mistake, the fix or solution may be easier for one mistake compared to another. Some of the most common errors are:

  • Data Entry Error – The most common accounting mistake is a manual journal entry or data entry that was entered incorrectly.

This could either be to the incorrect account(s) or for the incorrect amount. Typically, this type of error is easily identified when performing your bank reconciliation.

  • Duplication Error – This could be a duplication error caused by two employees in your accounting department making the same entry without realizing someone else is duplicating it.

It could also be due to an integration error with your bank account that pulled in duplicate bank transactions for something that was either deposited or withdrawn from your bank account.

  • Omission Error – An omission error is when either a transaction doesn’t get booked by someone in the accounting department, that should have been posted or if there is an error when pulling in bank feeds that a particular transaction is omitted from that pull.

Typically, this is mainly an issue in accrual basis accounting, where there should be a journal entry posted for an asset or liability, that the cash flow hasn’t occurred yet. This can be a big issue when the company needs to report out financial statements to external investors or debtors. If the omission is big enough it can cause material discrepancies in the financial reports you are presenting.

  • Principle Errors – A principle error is when a particular journal entry or entries are not in compliance with the governing accounting principles that your business is required to follow.

This often isn’t done intentionally but may be due to a new accounting standard that came out, or someone classifying a transaction to the account that they thought it needed to go to but was incorrect. To help combat this error, it is important to keep your accounting team up-to-date on rules and regulations that apply to your business as it relates to accounting and financial reporting.

Step-by-Step Guide: How to Fix Accounting Mistakes in Quickbooks Online

Option 1: Fix the Mistake Manually

Depending on how recent and the magnitude/volume of the accounting mistakes you can fix the mistake manually. To find what is causing the mistake, you will want to ensure you are reconciling your accounts in QuickBooks Online to easily identify the mistake in your account.

To reconcile your accounts you first need to navigate to the reports section of the main menu.

QuickBooks Online navigation menu highlighting the report section

Once you’ve selected the reports section, you will need to search for the reconciliation reports in the search bar at the top right of the screen.

Reconciliation Report search bar in QuickBooks Online

Once you’ve selected the reconciliation reports, you can select the account that you would like to reconcile. In this particular example, we are selecting the cash flow account that we would like to run the reconciliation report for.

The Council Elections dropped down for reconciliation.

Now that you have selected the account that you would like to reconcile, you can then select the date range that you would like to run the reconciliation for.

Depending on the frequency your business / accounting team reconciles accounts this may be weekly, monthly, quarterly, etc. One way to limit accounting mistakes, in particular in the cash account, is to link your business account directly in QuickBooks and classify transactions as they come in.

Once you’ve selected the date range and account you are ready to run the bank reconciliation by selecting the start reconciling button.

Start reconciling button with the date range selector

As you go through the reconciliation you will be able to identify what bank transactions are incorrect or not matching with your bank statement to know what and how to fix the accounting transactions that are incorrect.

Once you’ve identified the mistake, one option is to book a manual entry to fix the mistake. To do this you first need to navigate to the main menu and select the + New button at the top of the menu.

QuickBooks main menu showing you button location

Once you select the + New button you will select the journal entry option in the other column.

Journal entry option in the other column menu.

This will take you to a journal entry landing page where you will be able to post a manual journal entry to fix whatever accounting mistakes may have occurred. There are several fields within the journal entry that you need to have information ready for when you go to post the entry.

  • What chart of accounts do you need to post to in order to fix the mistake?
  • What date does the entry need to be posted to? This may vary depending on what timeframe the accounting mistake was made in and if the accounting period the mistake was made in is still open.
  • What amount do you need to debit and credit for each account to fix the accounting mistake? This should be evident as you go through your reconciliations.
  • What description do you need to add to the entry? Typically, you will want to add a description that outlines what the entry is for so you and others in the accounting department will know what the entry is for if a question comes up in the future.
Journal Entry Forum: A field for account details

Once you’ve posted your manual journal entry to fix the accounting mistake, you should be able to review your reconciliations and financial statements to ensure that the journal entry resolved the accounting mistake, and the balances in the affected accounts are what you were expecting.

Option 2: Reverse the Journal Entry

If you just posted a journal entry or classified a transaction that is causing the accounting mistake you are able to reverse that journal entry and fix your accounting mistakes in QuickBooks Online.

In order to reverse out the journal entry you will first want to navigate to that particular transaction. Depending on what type of transaction is causing the issue it may be in a different section of QuickBooks Online. In this particular example we are going to navigate to the expense section of the main menu and find the journal entry that is causing the issue.

Once the journal entry has been found and selected you will pull a journal entry screen that shows the debit and credit that make up that particular entry. At this point you should review the journal entry and ensure that it is causing the accounting mistake within QuickBooks Online and deleting/reversing out that transaction will fix the mistake.

At the bottom of your selected journal entry there is a delete option for that particular journal entry. This will remove this journal entry from your general ledger and corresponding accounts that role into your balance sheet or income statement.

Fleet option at the bottom of the journal entry screen.

This is one of the easier solutions for fixing an accounting mistake in QuickBooks Online. Depending on the breadth of the mistakes in QuickBooks and how many months, journal entries, accounts, etc. the mistake involves this may not be an option.

Fixing Accounting Mistakes in Quickbooks

Having to investigate and fix accounting mistakes in any accounting software, including QuickBooks, can be time consuming and frustrating. Depending on the severity of the mistake and how long it has been occurring, it may take minutes or days to fully clean up.

There are several connectors that integrate with QuickBooks Online that make it possible to better report on and pull transactions out of QuickBooks Online in a digestible way. One such software is Coefficient.

By using Coefficient you may be able to identify and correct accounting mistakes sooner by slicing the data out of QuickBooks into easy to use financial reports. The speed of reporting out of Coefficient will also assist in identifying these mistakes sooner than if you are manually pulling and manipulating reports out of QuickBooks Online.

Get started with Coefficient to enhance your reporting capabilities and transform your accounting processes and reporting. Pull your transactional data into actionable business insights.

Ready to take your data analysis to the next level?

Try Coefficient to seamlessly integrate your Excel with live data from various business systems, enabling real-time analysis and more advanced financial modeling.

5 Ways to View QuickBooks Online Reports Without Full Access (With Tutorials)

Can you access QuickBooks Online reports without full permissions? Absolutely!

This comprehensive guide will show you seven proven methods to view QuickBooks Online reports, even without admin access. You’ll learn step-by-step processes, best practices, and discover how Coefficient can enhance your reporting capabilities without additional QuickBooks seats.

Let’s dive in!

Method 1: Share from Your Spreadsheet with Coefficient

Coefficient is a powerful spreadsheet add-on that connects your business data from various sources directly to Excel and Google Sheets. It offers a robust solution for accessing QuickBooks Online reports without needing additional QuickBooks seats. This method is particularly cost-effective for organizations looking to expand report access without increasing their QuickBooks subscription costs.

Setting Up Coefficient for QuickBooks Report Access

Step 1: Sign up for Coefficient.

  • Visit the Coefficient website and create an account.
  • Choose the plan that best fits your organization’s needs.

Step 2: Install the Coefficient add-on.

Step 3: Connect Coefficient to QuickBooks Online.

  • Open a new spreadsheet and launch the Coefficient add-on.
  • Select QuickBooks Online from the list of available integrations.
  • Follow the prompts to authenticate and connect your QuickBooks Online account.

Step 4: Import QuickBooks data into your spreadsheet.

  • Use Coefficient’s data import feature to select the reports or data you want to access.
  • Choose the specific fields and date ranges for your report.

Step 5 (optional): Set up automatic data refresh.

  • Configure Coefficient to automatically update your spreadsheet with the latest QuickBooks data.
  • Set the refresh frequency based on your reporting needs.

Step 6: Share your import.

Share the spreadsheet with team members using Google Sheets’ or Excel’s built-in sharing features. Your colleagues can view live QuickBooks data without needing their own QuickBooks login.

Method 2: Set Up a Reports-Only User in QuickBooks Online

Creating a Reports-Only user is an excellent way to provide limited access to QuickBooks Online reports.

Pros and Cons of Reports-Only User

Pros:

  • Built-in QuickBooks feature
  • Provides focused access to reports

Cons:

  • Limited customization options
  • Requires a QuickBooks Online subscription (Plus and Advanced subscription tier)

Step-by-Step Tutorial: Creating a Reports-Only User

Step 1: Log in to QuickBooks Online as an admin.

  • Access your QuickBooks Online account using administrator credentials.

Step 2: Navigate to user management.

  • Click on the gear icon in the top-right corner.
  • Select “Manage Users” under “Your Company.
User management settings page in QuickBooks Online

Step 3: Add a new user.

  • Click the “Add user” button.
Add user button interface?
  • Choose “Reports only” as the user type.
User type selection showing "Reports only" option?

Step 4: Enter user details.

  • Provide the new user’s email address and name.
Your entry form details.
  • Create a username or use their email address as the username.

Step 5: Set user permissions.

  • Review the default permissions for the Reports-Only user.
  • Adjust any specific report access settings if needed.

Step 6: Send invitation.

  • Click “Save” to create the user.
  • An invitation email will be sent to the new user with login instructions.

Reports Accessible to Reports-Only Users

Reports-Only users can access most standard QuickBooks Online reports, including:

  • Profit and Loss
  • Balance Sheet
  • Statement of Cash Flows
  • Accounts Receivable Aging
  • Accounts Payable Aging
  • Sales by Customer
  • Expenses by Vendor

Limitations and Considerations

While Reports-Only access is useful, it has some limitations:

  • Users cannot create or modify transactions.
  • Some advanced customization options may be restricted.
  • Access to certain sensitive reports (e.g., Audit Log) is not available.

Method 3: Share Specific Reports with Non-QuickBooks Users

QuickBooks Online allows you to share individual reports with users who don’t have a QuickBooks account.

Pros and Cons of Sharing Specific Reports

Pros:

  • No QuickBooks account required for recipients
  • Can set expiration dates for shared reports

Cons:

  • Limited to specific reports
  • Requires manual sharing for each report

Tutorial: Using the Shared Reports Feature

Step 1: Generate the desired report.

  • Open QuickBooks Online and navigate to the Reports section.
  • Select and customize the report you want to share.

Step 2: Access sharing options.

  • Click the “Share” button at the top of the report.
Report sharing options interface

Step 3: Configure sharing settings.

  • Enter the email addresses of the recipients.
  • Choose whether to allow recipients to view only or to view and export the report.

Step 4: Set an expiration date (optional).

  • Decide how long the shared link should remain active.

Step 5: Add a message (optional).

  • Include any necessary context or instructions for the report.

Step 6: Send the shared report.

  • Click “Send” to share the report with the specified recipients.

Setting Up Recurring Shared Reports

To automate report sharing:

Step 1: Open the report you want to share regularly.

Step 2: Click “Save customization” and then “Schedule.”

Save customization and schedule menu?

Step 3: Set the frequency (e.g., daily, weekly, monthly).

Report frequency. Interface

Step 4: Enter recipient email addresses.

Email entry interface.

Step 5: Choose the file format (e.g., PDF, Excel).

Configuration menus for exports

Step 6: Click “Save schedule” to activate recurring sharing.

Best Practices for Secure Report Sharing

  1. Regularly review and update your shared report list.
  2. Use expiration dates for sensitive reports.
  3. Avoid sharing reports with personal or sensitive information.
  4. Educate recipients on the confidentiality of shared reports.

Method 4: Use QuickBooks Online Accountant for Client Report Access

QuickBooks Online Accountant (QBOA) provides a way for accountants to access client reports without needing full access to the client’s QuickBooks Online account.

Pros and Cons of Using QBOA

Pros:

  • Designed specifically for accountants
  • Provides comprehensive access to client data

Cons:

  • Limited to accounting professionals
  • Requires separate QBOA account

Accessing Client Reports as an Accountant

Step 1: Sign up for QuickBooks Online Accountant.

  • Visit the QuickBooks Online Accountant website and create an account.

Step 2: Connect with your client.

  • In QBOA, go to the “Clients” tab and click “Add client.”
  • Enter your client’s QuickBooks Online information.

Step 3: Access client reports.

  • Once connected, select the client from your client list.
  • Navigate to the “Reports” section to view available reports.

Collaborating with Clients Through QBOA

  1. Use the “Work” tab to manage tasks and communicate with clients.
  2. Share report insights and recommendations through secure messaging.
  3. Schedule virtual meetings to discuss reports and financial strategies.

Tips for Maximizing QBOA Reporting Features

  1. Utilize the customizable client dashboard for quick financial overviews.
  2. Take advantage of the Accountant Toolbox for advanced reporting options.
  3. Use the “Books Review” feature to identify and resolve discrepancies in client reports.

Method 5: Utilize QuickBooks Online’s Report Export Feature

Exporting reports from QuickBooks Online allows you to share financial data without granting direct access to the system. For a more automated approach, consider exporting QuickBooks data to Google Sheets or Excel with Coefficient.

Pros and Cons of Report Exporting

Pros:

  • Easy to share reports with non-QuickBooks users
  • Allows for offline analysis of data

Cons:

  • Manual process for each report
  • Data may become outdated quickly

Step-by-Step Guide: Exporting Reports

Step 1: Generate the desired report in QuickBooks Online.

Step 2: Click the “Export” button at the top of the report.

Step 3: Choose the export format:

  • PDF: Best for preserving report layout
  • Excel: Ideal for further analysis
  • CSV: Suitable for importing into other systems

Step 4: Configure any additional export options:

  • For Excel/CSV: Choose to export formatted or raw data
  • For PDF: Select page orientation and paper size

Step 5: Click “Export” to download the report file.

Scheduling Automatic Report Exports

Step 1: Open the report you want to export regularly.

Step 2: Click “Save customization” and then “Schedule.”

Save customization and schedule menu?

Step 3: Set the export frequency and recipient email addresses.

Export setting configuration screen

Step 4: Choose the export format (PDF, Excel, or CSV).

Configuration menus for exports

Step 5: Click “Save schedule” to activate automatic exports.

QuickBooks Online Report Access 101: User Roles and Permissions Explained

Before diving into the methods, it’s crucial to understand how QuickBooks Online (QBO) manages user roles and permissions for report access.

Different User Roles in QuickBooks Online

QuickBooks Online offers several user roles, each with varying levels of access:

  1. Company Administrator
  2. Custom User
  3. Reports Only
  4. Time Tracking Only
  5. Vendor and Purchases Only

Specific Permissions for Report Access

Report access permissions vary depending on the user role:

  • Company Administrators have full access to all reports
  • Custom Users can be granted access to specific reports
  • Reports Only users can view and customize reports but can’t make changes to company data

The “Reports Only” User Role

The Reports Only role is designed specifically for users who need to view financial data without the ability to modify it. This role:

  • Can access and customize most reports
  • Cannot make changes to transactions or company settings
  • Is ideal for managers or stakeholders who need financial insights without full system access

Tips for Managing Exported Reports

  1. Create a consistent file naming convention for easy organization.
  2. Use cloud storage solutions to securely share exported reports.
  3. Implement version control for reports that are updated frequently.
  4. Regularly review and delete outdated exported reports.

Maximizing QuickBooks Online Report Access with Coefficient

Accessing QuickBooks Online reports without full access can be challenging, but the seven methods we’ve explored offer various solutions to this common problem.

While each method has its merits, Coefficient stands out as a comprehensive solution that addresses the limitations of other methods:

  • Seamless integration with QuickBooks Online
  • Cost-effective solution that doesn’t require additional QB seats
  • Advanced reporting and analysis capabilities
  • Easy sharing through familiar spreadsheet interfaces

 Ready to transform your QuickBooks Online reporting experience? Try Coefficient today and discover how it can streamline your financial reporting process while providing enhanced access and insights.

How to Move from QuickBooks Desktop to QuickBooks Online in 4 Steps

Whether you’re using QuickBooks Desktop Pro, QuickBooks Enterprise, or the Mac version of QuickBooks, this guide will help you transition to QuickBooks Online (QBO).

As a traditional accounting software, QuickBooks Desktop requires local installation on your computer, while QuickBooks Online from Intuit is a cloud-based solution preferred by many small business owners for its online version advantages.

One significant limitation of QB Desktop and other desktop versions is the installation requirement. Whether you’re running QuickBooks Desktop Enterprise or the standard version, this makes it challenging for QuickBooks Desktop users to collaborate across multiple devices.

This restriction has prompted many businesses to migrate to a new QuickBooks online version. Additionally, QBO offers enhanced functionality and integrates with numerous apps, providing continuous updates through its cloud-based platform at competitive pricing levels.

This comprehensive tutorial will guide you through the conversion process of moving from QuickBooks Desktop to your QuickBooks Online subscription.

Let’s get started!

Step-by-Step Guide: Migrating from QuickBooks Desktop to QuickBooks Online

Step 1: Making Sure QuickBooks Desktop is Up-to-Date

Before deciding to make the move from QuickBooks Desktop to QuickBooks Online, you will want to ensure the data in your QuickBooks Desktop instance is current. You will want to verify that any customers, vendors, or accounts that are no longer used are marked inactive. This will help prevent uploading unnecessary information and save you time as you move.

You will also want to clean up any unbilled charges, classify transactions that are still pending, and any other clean-up work that may be relevant to your bookkeeping. Depending on what functions you are performing out of your QB Desktop, you may also need to:

  • Terminate or deactivate employees that no longer are employed at your business if you are running online payroll out of QuickBooks Desktop. Additionally, you may want to wait a few days after running a payroll to move your company data to your QuickBooks Online subscription.
  • If you are using the software to track inventory or sales tax out of your QuickBooks Desktop, you may want to save a sales tax liability report in the event you need to enter adjustments in QuickBooks Online after you move.

While all of these may not be a necessity to move from QuickBooks Desktop to QuickBooks Online, having the most relevant and up-to-date information prior to converting will save time. It’s essential to review your chart of accounts and complete any pending reconciliations before proceeding.

Step 2: Download QuickBooks Desktop Information

Once you’re confident that your data file is clean and as up-to-date as possible, you will need to download your company file out of QuickBooks Desktop to upload into your QuickBooks Online company.

To do this, you will first need to export company file to QuickBooks Online. You will then select get started and will need to sign in as an administrator to your QuickBooks Online account.

If you have more than one company, you will then be prompted to select which company data you want to move to QuickBooks Online, and then will be able to export your QuickBooks Desktop company file to transfer to QuickBooks Online.

Step 3: Upload QuickBooks Desktop File to QuickBooks Online

Once you’ve set up and downloaded your QuickBooks Desktop data, you will need to log into your QuickBooks Online instance. You will be prompted to bring your company file to QuickBooks Online and can select “next” when you are ready.

Upload screen showing QuickBooks Next without file selection?

After selecting get started, you will be prompted to upload the QuickBooks Desktop file you previously downloaded in step 2. You can select the file at the path where you saved your backup file and begin the upload process.

After you’ve uploaded your file, you can determine what you would like to bring into QuickBooks Online.

Data selection screen for company file export

If you are doing a full migration of your company to QuickBooks Online, you can select to export all your company data. If you are only looking to move certain transactions, you can filter down to export specific data. This may be helpful for organizations that have a lot of transactions and only want to upload balances to QuickBooks Online.

Step 4: Set-Up QuickBooks Online

Once you’ve successfully migrated your QuickBooks Desktop information to QuickBooks Online, you will need to set up QuickBooks Online to function for your business.

To begin, you will need to connect your bank accounts and/or credit card accounts to QuickBooks Online to automatically pull in transactions. To do this, navigate to the transactions – bank transactions option in the main menu using the drop-down.

Bank Transactions Menu in QuickBooks Online

Once in the bank transactions section, you can select to link your account.

Bank account linking interface


You will be prompted to type in the name of your bank. QuickBooks Online has a pre-built connector with most major banks, which allows you to seamlessly upload transactions into QuickBooks Online. In the event that your bank doesn’t have a pre-built connection with QuickBooks Online, you may need to manually upload bank files to QuickBooks Online.

You will also need to verify that you are set up to create and send customer invoices. You can check the formatting of your invoices in QuickBooks Online by navigating to Sales – Invoices in the main menu.

Invoice Creation and Customization page

Once in the invoice section, you can select to create an invoice or change your current invoice formatting/template. This may be important for your customers who are accustomed to invoices coming out of QuickBooks Desktop. A customer may be less likely to think the invoice is legitimate if it is in a different format or doesn’t have the company’s logo in it.

If you were previously running your accounts payable out of QuickBooks Desktop, you will also want to get familiar with the bill payment functionality within QuickBooks Online. Navigate to Expenses – Bills in the main menu to manage this aspect.

Build payment status overview screen.

Once here you will be able to see which invoices you have that are in review, unpaid, and paid.

Contractors management interface.

You can also add any additional bills from the bills page as you operate the business out of QuickBooks Online.

Additionally, if you are paying 1099 contractors directly out of QuickBooks Online you will want to navigate to Expenses – Contractors from the main menu.

Contractors selected an interface.

Once here, you can verify that your contractors were imported correctly from QuickBooks Online and if you were previously paying via direct deposit to those contractors, ensure that their banking information is set up correctly and direct deposit is turned on for those vendors to pay out of QuickBooks Online.


These are just a few of the major set-up and learning items that you will need to look at as your business starts to operate out of QuickBooks Online instead of QuickBooks Desktop.

Benefits of Moving to QuickBooks Online

  • Cloud-based accessibility from any device, eliminating the need for specific desktop versions
  • Real-time collaboration with team members and your bookkeeping team
  • Automatic updates and enhanced functionality without manual installations
  • Integration with modern business apps and tools
  • Improved bookkeeping efficiency through automated features
  • Advanced reporting capabilities beyond traditional QuickBooks Desktop options
  • Automated bank feeds and reconciliations
  • Enhanced sales tax tracking and reporting
  • Better support for remote work and multi-user access

Improve Your Accounting Solution by Switching to QuickBooks Online

Running off of QuickBooks Desktop can be cumbersome and create issues for you and your organization. Many businesses are switching from on-premise downloadable platforms to cloud based solutions to allow more flexibility and ease of use.

Switching to QuickBooks Online creates an easier, more accessible platform to use across your organization and create efficiencies across your accounting team. QuickBooks Online also is able to connect to reporting tools such as Coefficient to seamlessly pull information out of QuickBooks Online. Coefficient also enhances your reporting capabilities out of QuickBooks Online so you aren’t reliant on reporting out of QuickBooks Desktop.

Ready to take your data analysis to the next level?

Try Coefficient to seamlessly integrate your Excel with live data from various business systems, enabling real-time analysis and more advanced financial modeling.

Meta data

Meta Title: How to Move from QuickBooks Desktop to QuickBooks Online: Step-by-Step Guide (2024)

Meta Description: Learn how to move from QuickBooks Desktop to QuickBooks Online

How to Automate QuickBooks

QuickBooks Online (QBO) from Intuit is cloud-based accounting software that helps small business owners manage their finances. By implementing automation in QBO, you can eliminate manual data entry, reduce human error, and focus on growing your business.

This guide walks through five practical ways to automate your accounting processes in QuickBooks Online, from basic features to advanced integrations.

Built-in Automation Features in QuickBooks Online

QBO includes several automation options within its core functionality. These built-in features offer cost-effective solutions for small businesses looking to reduce manual work. You can also connect additional apps to enhance your automation capabilities for tasks like payroll, timekeeping, accounts payable, and invoicing.

QuickBooks Online (QBO) from Intuit is cloud accounting software used by many business owners. QuickBooks Online allows accountants to do job costing within their software.

Automation 1: Payroll

To search for apps that QuickBooks Online may already have a pre-built connection with, navigate to the nine dots in the top right of your QBO home page.

QuickBooks Online apps menu accessed through nine dots in top-right corner

Once you’ve opened that prompt, select “go to apps overview” to review applications that integrate with QuickBooks Online. On this page, you can search for whatever application you want to connect.

If you’re using QBO and don’t yet have a payroll, invoicing, timekeeping, or other system, first check if QuickBooks Online has an existing connection with that application.

QuickBooks Online apps overview page showing integration options

In this example, we searched and selected Gusto, which is a payroll and human resources application. After selecting Gusto, choose “get the app now” to connect it to your QBO instance.

For existing users, you’ll need to provide login credentials and other relevant information such as general ledger coding and data you want to import into QuickBooks Online.

Gusto payroll app integration setup screen in QuickBooks Online

The more apps you have that integrate with QBO, the more you can automate.

In the Gusto example, any payroll you process will automatically pull into QuickBooks Online and code to the correct account based on your business rules.

Automation 2: Accounts Receivable / Invoicing

Automating your accounts receivable and invoicing processes can be extremely beneficial, especially for recurring invoices every month.

One way to automate your accounts receivable process is to automatically send out invoices to subscribers. This works particularly well for subscription models where the QuickBooks invoice goes out the same day each month.

To set this up:

  1. Navigate to the “+ New” button on the top left of your QBO home page
  2. Select the invoice module under the customer column
Creating new invoice using plus button in QuickBooks Online homepage

Once you’ve navigated to the invoice page and filled out the relevant customer and invoice information, you can set-up the invoice as recurring the scheduling drop-down. This creates automated workflow for regular billing.

Setting up recurring invoice schedule in QuickBooks Online

Within the accounts receivable/invoicing process another area that can be automated is the past due invoice reminders for customers. This is helpful to improve your company’s cash flow and get paid by customers on time.

In order to automate the past due reminders to customers you first navigate to the settings gearbox in the top right corner of QuickBooks Online and select account and settings under the your company column.

Image5

Once in account and settings you can select the edit button in reminders under the sales section.

QuickBooks Online settings menu accessed through gear icon

Then, toggle the automatic invoice reminders option. You will have the option to customize when you would like the past-due reminders to be sent out. You can select before the invoice due date, on the invoice due date, after the invoice due date, or a combination of all three. It may be helpful to send a reminder before the due date so customers to have ample time to process the invoice through their accounts payable system and bank.

Invoice reminders settings under sales section in QuickBooks

Automation 3: Financial Reporting

QuickBooks Online houses a plethora of reports that you can send to internal and external stakeholders.

A lot of times, businesses send out monthly, quarterly, or annual reports on a regular, scheduled basis. Instead of logging in and running each report everytime you need to send it, you can automate reports being sent directly out of QuickBooks Online.

To automate sending a report out of QuickBooks Online you first must navigate to the report section of the menu.

Configuring automatic invoice reminder options and timing

Once in the reports menu, you can select the report or reports that you would like to send out automatically. In this example, I’ve selected the profit and loss report and then hit customize.

QuickBooks Online reports menu navigation screen

Once in the customize report screen, adjust your time period and formatting to match your reporting needs. This creates near real-time access to financial data.

Profit and Loss report customization screen with time period options

,

Once you’ve customized your report to your liking, you can navigate back to the reports list and select the custom report you created.

Custom reports list showing available report templates

Next, select Edit in the action column for that particular report and toggle the set email schedule on.

Setting up automated email schedule for recurring reports

Once toggled on you can set the recurrence, end date, recipients, subject, and message that are sent out on a recurring basis.

You will want to make sure you give yourself ample time to record all transactions in a timely manner before scheduling the report to be sent out. For example, if your month-end close process is typically 5 days, you will want to wait until at least day 6 to automatically send out the report.

Report email configuration screen with recipient and timing options

Automation 4: Accounts Payable

Along with the accounts receivable/invoicing process, the accounts payable and bill payment process can also be automated within QuickBooks Online. This helps ensure timely invoice payments for your routine vendors and eliminates manual data entry in your accounting processes.

To automate a recurring bill in QBO, first navigate to the expenses and bills section of the menu.

QuickBooks Online expenses and bills menu navigation

Once in the bills module, select the create recurring bill option in the add bill dropdown.

Creating recurring bill template in QuickBooks Online

After selecting the recurring bill option, build out the bill with vendor and payment information. You’ll need to:

  1. Name the template
  2. Choose the vendor for payment
  3. Set up payment frequency
  4. Define start and end dates

This workflow automation is particularly helpful when setting up recurring bills for vendors with specific contract periods. The end date feature automatically stops payments when the contract ends, reducing human error in vendor management.

Next, categorize how you want the recurring bill coded in your general ledger by selecting the expense category and adding a description. This supports accurate bookkeeping and financial reporting.

General ledger coding screen for recurring bill setup

Beyond recurring bills, you can also:

  • Create reminders for non-regular invoices
  • Set up automated workflows for purchase orders
  • Manage credit card payments
  • Track vendor expenses in real-time

To set up automatic reminders in your QuickBooks Online account for upcoming bills, select “reminder” as the type instead of “scheduled.” This allows your team to review and adjust amounts or dates as needed.

Setting up bill payment reminders in QuickBooks Online

You can also automate the template creation and set it to unscheduled in the type dropdown. This is useful for infrequent vendor payments, saving less time on repetitive setup tasks.

Automation 5: Transaction Matching

Small business owners often receive transactions from regular vendors that need consistent general ledger coding. Instead of manually matching transactions from recurring vendors, you can set up automatic matching in QuickBooks Online.

This process automation reduces manual touches and helps your bookkeeping team work more efficiently.

To automatically match transactions:

  1. Navigate to the transactions section of the menu
  2. Select the rules header
Transaction rules setup screen for automated matching

In the rules header, click the new rule button. This opens the create rule prompt where you’ll:

  1. Name the rule
  2. Define applicable transaction types
  3. Set up assignment criteria
  4. Specify coding preferences

For regular vendor invoices, set up the rule as a money out transaction with the corresponding description. This automation helps maintain consistent accounting processes across your business.

Next, configure your transaction coding preferences, including:

  • Transaction type
  • Expense category
  • Payee information
  • Cash flow tracking

Test each rule thoroughly before activation. Once set up, transactions matching your criteria will automatically code as they enter your QBO system, supporting efficient accounting tasks and accurate financial reporting.


Configuring automated transaction matching rules

You can create multiple rules for both deposits and withdrawals, and adjust existing rules as your business needs change. This flexibility ensures your automated workflows evolve with your growing business while maintaining accurate transaction categorization in your QuickBooks Online instance.

Automate QuickBooks and Combine with All Your Business Data

While manual exports work well for occasional use, businesses that require frequent data updates or real-time reporting can benefit from using Coefficient.

Coefficient is a powerful tool that integrates seamlessly with QuickBooks, allowing for effortless and automated data exports to spreadsheets like Google Sheets and Microsoft Excel.

Key benefits of using Coefficient for QuickBooks exports:

  • Real-time data syncing
  • Automated scheduled refreshes
  • Custom data transformations
  • Advanced filtering and sorting capabilities

Watch this video to see how Coefficient simplifies the process of connecting QuickBooks to your spreadsheets:

Use Cases for Automation in QuickBooks Online

Automating processes within QBO helps businesses:

  • Eliminate manual data entry and human error
  • Create more efficient accounting processes
  • Generate accurate reports for stakeholders
  • Improve cash flow management
  • Save valuable time on routine tasks

Improve QuickBooks Online with Automation

Automation helps organizations reduce costs and improve efficiency. It allows your team to focus on strategic work instead of routine accounting tasks. By implementing these automated workflows, you’ll streamline your QuickBooks Online processes significantly.

Ready to take your data analysis further? Try Coefficient to seamlessly integrate your Excel and Google Sheets with live data from QuickBooks Online, enabling real-time analysis and advanced financial modeling. Get started with Coefficient today.

How to Fix Bank Reconciliation Discrepancies in QBO

QuickBooks Online (QBO) is a cloud accounting software used by many small and midsized businesses. Bank reconciliation is done on a routine basis to ensure that all bank accounts are appropriately accounted for and match the bank statement balance. Having proper bookkeeping practices helps maintain accurate records in your QuickBooks account.

There may be discrepancies in QBO when trying to reconcile your bank account. This guide will walk you through how to fix reconciliation discrepancies and maintain an accurate account balance.

Let’s get started!

Step-by-Step Guide: Fix Bank Reconciliation Discrepancies in QBO

Before diving into the fix process, it’s important to understand what causes bank reconciliation discrepancies in your QBO account. Here are common issues that may affect your account balance:

  • Wrong Transaction Amount – Incorrect recording of credit card payments or other transactions
  • Timing Differences – Transactions on your bank statement haven’t been recorded in your QBO bank account yet
  • Missing transactions – Deleted transactions or unreconciled items not appearing in your reconciliation report
  • Duplicate transactions – Multiple entries of the same transaction affecting your beginning balance
  • Reconciliation adjustments – Previous reconciliation issues carrying forward

Step 1: Navigate to the Reports Section in QBO

Within QBO, navigate to the reports menu in the menu section. Use the drop-down menu to access your reports.

Selecting reports from the QuickBooks menu?

Step 2: Run Reconciliation Report

Once you’ve navigated to the reports section of QBO, search “reconciliation discrepancy report” in the account field to find report options. The system will save your recent searches for quick access.

Selecting reconciliation reports from the dropdown.

After selecting the reconciliation reports, you will be prompted to choose the account you want to reconcile from the chart of accounts. In this case, we are reconciling the bank account, so you’ll want to select your cash account.

This report can also be used to reconcile other accounts such as accounts receivable, accounts payable, etc.

Selecting the account from the dropdown menu.

Step 3: Select Reconciliation Date Range

Once you’ve selected the cash account, you will be prompted to select the statement date and ending date. To fill out these fields, you will want to select the date you want to reconcile to.

Your beginning balance should match your last reconciliation, and your ending balance should match your current bank statement.

Once you’ve selected the date, in this example 12/31/2023, you will want to pull in the bank account balance from your bank statement at that particular point in time.

Selecting the date range you want the reports to pull from.

Step 4: Run Bank Reconciliation

After you’ve run your bank reconciliation, you will be able to view register entries and see the statement balance, cleared balance, opening balance, payments, and deposits. This will allow you to see what your reconciling difference is that you need to fix.

A screenshot showing the bank reconciliation report

Appearing below the summary will be a listing of detailed transactions with a checkmark option to the right of each transaction detail report.

A screenshot showing the summary of the detailed transactions.

Step 5: Reconcile to Bank Statement

After running the QuickBooks reconciliation, you will want to review your corresponding bank statement for the timeframe you are reconciling. Compare each entry in your bank register to ensure accuracy.

A screenshot showing discrepancies?

Any discrepancy between your bank statement and your QuickBooks reconciliation would be considered a reconciling item that is causing a difference between your QBO balance and statement balance.

For any transactions that appear in your bank statement and not in your QuickBooks reconciliation, you will want to navigate back to your dashboards and bank accounts to see if it was deleted or why it isn’t pulling in from the bank. It may also be a timing issue where the transaction is showing on your bank statement on the last day of a given month and didn’t flow into QBO until the first day of the following month.

For any transactions that don’t appear on your bank statement but are showing up in your QuickBooks reconciliation, you will want to uncheck the radial box in QuickBooks. This will remove that transaction from your reconciliation.


As you work through these steps you will fix and reduce your reconciling difference to zero. Once you’ve fully reconciled your bank/cash account you can click finish now in the top right corner of your reconciliation to complete it.

Selecting 'Finish now' from the dropdown in the top-right-hand corner of the screen.

Use Cases for Fixing Bank Reconciliation Discrepancies in QBO

Fixing and running a bank reconciliation in QBO can be useful for businesses in order to:

  • Distribute accurate information to shareholders.
  • Ensure you aren’t missing any transactions when reporting and running financial statements.
  • Be able to appropriately analyze financial information to make informed decisions about your business.

Fix Your Bank Reconciliation Discrepancies in QBO

Bank reconciliation along with other account reconciliations are useful tools for maintaining accurate financial records. By following this guide, you’ll be able to fix your bank reconciliation discrepancies in QBO and help your business make crucial decisions.

Ready to take your data analysis to the next level? Try Coefficient to seamlessly integrate your Excel with live data from various business systems, enabling real-time analysis and more advanced financial modeling.