QuickBooks Online, a leading accounting software for small business owners, offers essential sales tax report functionality to help manage your tax collected and sales transactions.
This tutorial will guide you through how to run a sales tax liability report to ensure accurate sales tax payable tracking across each tax agency jurisdiction where you operate. By learning to properly run report features, you’ll maintain better control over your business’s tax collected responsibilities.
Let’s get started!
Tutorial: Run a Sales Tax Liability Report in QBO
Step 1: Navigating in QuickBooks
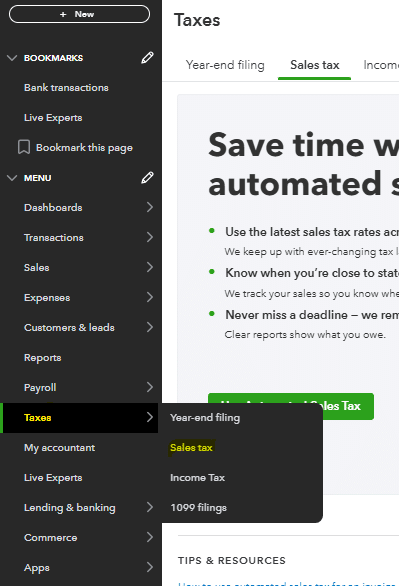
Once you’ve signed into your QuickBooks Online account, navigate to the drop-down menu at the left side of your screen. This works whether you’re using Mac or PC (note that QuickBooks Desktop has a slightly different interface).

Once you’ve accessed the menu, first verify if your sales tax has been enabled. Many businesses have non-taxable sales, or may not need to charge sales tax to their end user. If your business doesn’t need to process sales receipts with tax or pay sales tax, you won’t want this feature enabled.
To enable sales tax in QuickBooks Online, click on the taxes – sales tax section of the menu. This is where you can manage sales tax settings.

Once in this section, click “use tax” to begin setup. You can save your preferences for future use.
Step 2: Setting Up Automated Sales Tax
After selecting to use automated sales tax in QuickBooks Online, you’ll need to verify the correct tax category and tax rate for your jurisdiction.
The first prompt requires your business address. This helps determine the applicable sales tax rate based on your location. Click next to proceed.

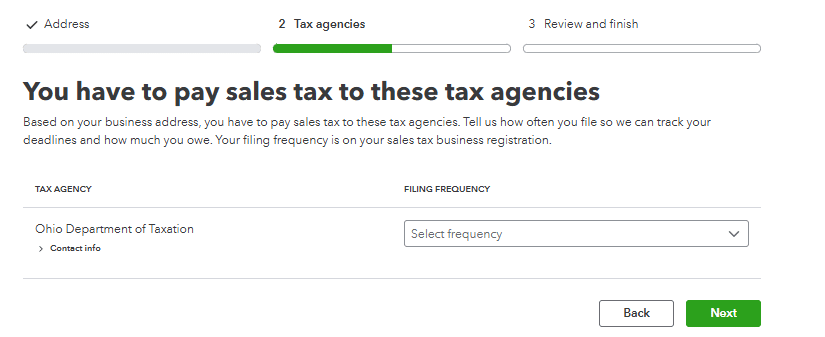
Once you’ve entered your address and selected next, you’ll reach the tax agency section. The corresponding tax agency from your business address will appear. You’ll need to select your filing frequency for your sales tax return. Consult with a bookkeeping expert about your report period.

After filling out the appropriate tax agency information, QuickBooks Online will prompt you to review and finalize. This enables tracking of your total sales tax liability and running the corresponding report.
Step 3: Navigating to Run Sales Tax Liability Report
Once you’ve enabled sales tax within QuickBooks Online, you can generate the report to see your tax amount due.
Navigate back to the reports menu in QuickBooks Online. Select “go to reports” from the menu.

Once in the menu, select the reports.

Step 4: Run Sales Tax Liability Report
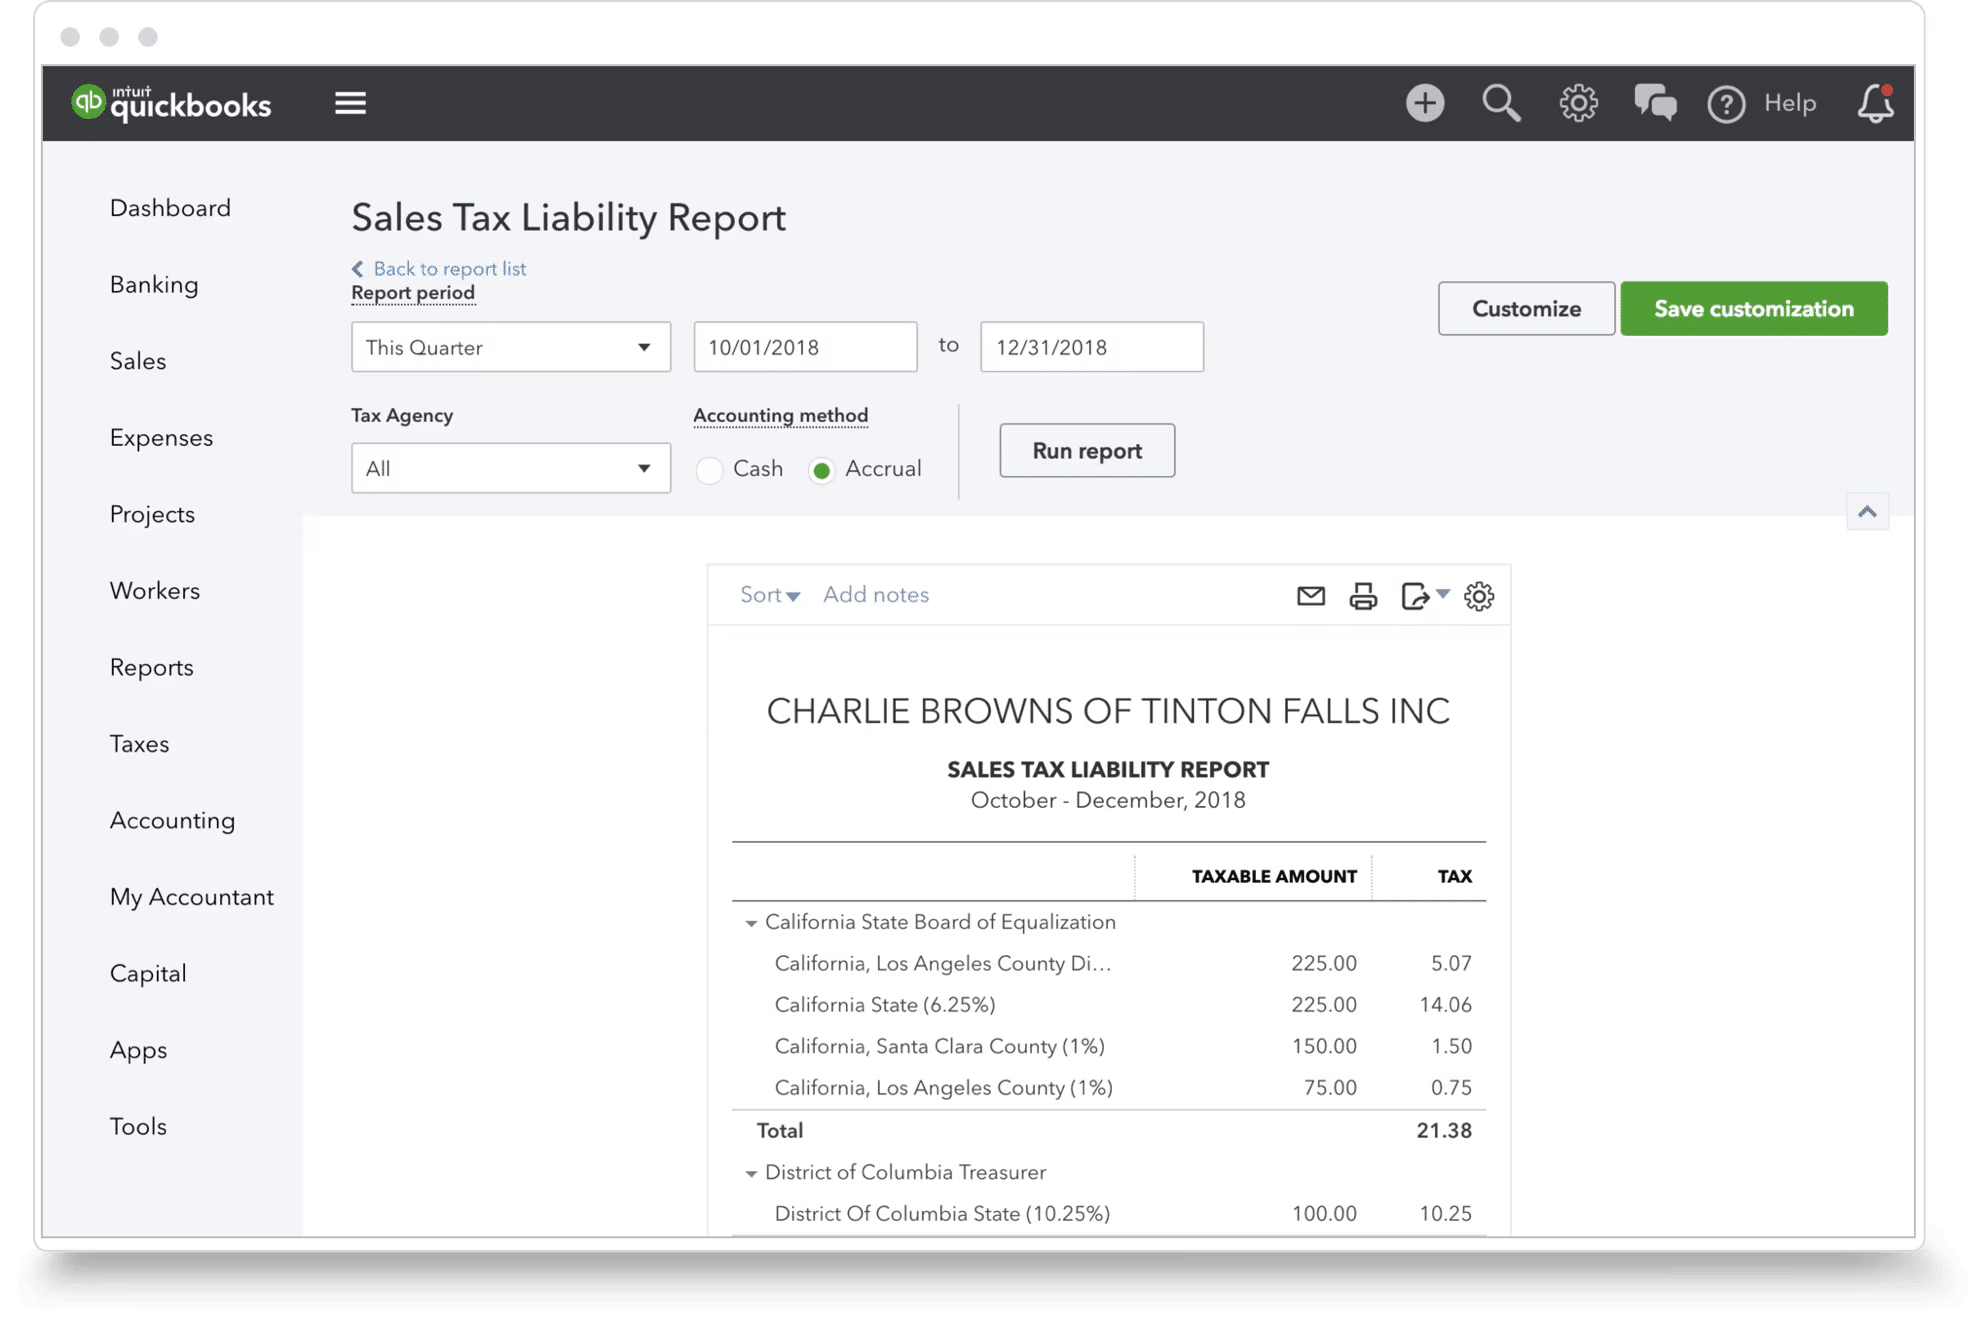
In the report module, search for “sales tax liability report” in the search bar at the top of the reports menu. You can customize reports as needed.

After selecting the sales tax liability report, choose the date range and tax agency. This reporting is typically done on a monthly or quarterly basis for sales tax payments. You can select a particular tax agency if your business operates across multiple jurisdictions.

After selecting the relevant timeframe and jurisdiction, you’ll have the necessary information about your sales tax due. This helps track how your total sales and taxable amount have changed over time.
Use Cases for Sales Tax Liability Reports
Sales tax liability reports can help businesses:
- Track and pay sales tax in a timely manner to avoid discrepancies
- Analyze which jurisdictions’ tax rate affects gross sales
- Provide reporting for journal entries and credit memo processing
- Accurately apply sales tax to each transaction based on location
Improve Your Sales Tax Accuracy and Reporting with Sales Tax Liability Reports and QuickBooks
Tax compliance is essential for every business. The sales tax liability report from QuickBooks Online provides an easy-to-use tool for ensuring accurate sales tax payments to appropriate jurisdictions. It helps verify correct tax collected on a transaction-by-transaction basis.
Try Coefficient to seamlessly integrate your Excel with live data from various business systems, enabling real-time analysis and more advanced financial modeling.


