Table of Contents
![]()
- 1. Fundamentals of Data Analysis in PostgreSQL
- 2. How to Query in Postgresql: Techniques, Examples & Tips
- 3. How to Query JSON in PostgreSQL: A Comprehensive Guide
- 4. How to Get Column Names in PostgreSQL
-
5. How to Add a Column to a Table in PostgreSQL
- ALTER TABLE ADD COLUMN Syntax Breakdown
- Specifying Column Data Types and Constraints
- Setting Default Values for New Columns
- Adding Multiple Columns in a Single Command
- Modifying Existing Columns with ALTER COLUMN
- Dropping Columns with DROP COLUMN
- Performance and Best Practices
- Add Columns to PostgreSQL without Code
- Add Columns in PostgreSQL in Seconds with Coefficient
- 6. How to Safely Delete a PostgreSQL Database?
- 7. How to delete tables in Postgresql?


Need to add a column to your PostgreSQL table? You’re in the right place. Adding columns is a common task for database administrators and developers. PostgreSQL’s ALTER TABLE command makes this process straightforward. This guide will show you how to use ALTER TABLE to add columns quickly and correctly.
ALTER TABLE ADD COLUMN Syntax Breakdown
The basic syntax for adding a new column to a table in PostgreSQL using the ALTER TABLE command is as follows:
ALTER TABLE table_name
ADD COLUMN column_name data_type [column_constraint];
Let’s break down the key components:
- ALTER TABLE table_name: This specifies the table you want to modify.
- ADD COLUMN: This tells PostgreSQL that you want to add a new column to the table.
- column_name: This is the name of the new column you’re adding.
- data_type: This is the data type for the new column, such as VARCHAR, INTEGER, TIMESTAMP, etc.
- [column_constraint]: This is an optional parameter where you can specify constraints for the new column, such as NOT NULL or CHECK constraints.
Here’s a simple example of adding a new column named email with a VARCHAR data type to the users table:
ALTER TABLE users
ADD COLUMN email VARCHAR(255);
This command will add a new email column to the users table, allowing you to store email addresses for each user.
Specifying Column Data Types and Constraints
When adding a new column, you’ll need to specify the appropriate data type for the information you plan to store. PostgreSQL offers a wide range of data types, including:
- Numeric types: INTEGER, BIGINT, DECIMAL, NUMERIC, REAL, DOUBLE PRECISION
- Text types: VARCHAR, TEXT, CHAR
- Temporal types: DATE, TIME, TIMESTAMP, INTERVAL
- Boolean type: BOOLEAN
- Binary types: BYTEA
In addition to the data type, you can also set column-level constraints when adding a new column. Some common constraints include:
- NOT NULL: Ensures that the column cannot contain null values.
- CHECK: Allows you to define a custom constraint expression that must be true for any row in the table.
- UNIQUE: Ensures that all values in the column are unique.
- PRIMARY KEY: Combines the NOT NULL and UNIQUE constraints, ensuring that the column (or set of columns) uniquely identifies each row in the table.
Here’s an example of adding a new email column with a VARCHAR data type and a NOT NULL constraint:
ALTER TABLE users
ADD COLUMN email VARCHAR(255) NOT NULL;
This will ensure that all rows in the users table have a non-null email address stored in the email column.
Setting Default Values for New Columns
When adding a new column, you can also specify a default value that will be used for any new rows inserted into the table. This is done using the DEFAULT keyword followed by the desired default value.
For example, let’s say you want to add a new is_active column to the users table, and you want all new users to be active by default. You can do this as follows:
ALTER TABLE users
ADD COLUMN is_active BOOLEAN DEFAULT TRUE;
Now, any new rows inserted into the users table will have a value of TRUE for the is_active column, unless a different value is explicitly provided.
You can set default values for columns of any data type, not just boolean. For example, you could set a default value of the current timestamp for a created_at column:
ALTER TABLE users
ADD COLUMN created_at TIMESTAMP DEFAULT CURRENT_TIMESTAMP;
Using default values can help ensure data consistency and reduce the amount of manual data entry required when adding new rows to your tables.
Adding Multiple Columns in a Single Command
If you need to add more than one column to a table, you can do so in a single ALTER TABLE command by comma-separating the new column definitions.
For example, let’s say you want to add three new columns to the users table: email, phone, and address. You can do this with a single statement:
ALTER TABLE users
ADD COLUMN email VARCHAR(255) NOT NULL,
ADD COLUMN phone VARCHAR(20),
ADD COLUMN address TEXT;
This will add all three new columns to the users table in a single operation. This can be more efficient than running multiple ALTER TABLE commands, especially for larger schema changes.
Modifying Existing Columns with ALTER COLUMN
Once you’ve created a table in PostgreSQL, you may need to modify the structure of the table by changing the definition of an existing column. This is where the ALTER COLUMN command comes into play. With ALTER COLUMN, you can rename a column, change its data type, or modify any constraints associated with the column.
For example, let’s say you have a users table with a first_name column that is currently defined as a VARCHAR(50). If you later decide that a 50-character limit is not sufficient, you can use ALTER COLUMN to increase the maximum length:
ALTER TABLE users
ALTER COLUMN first_name TYPE VARCHAR(100);
This will change the data type of the first_name column from a 50-character VARCHAR to a 100-character VARCHAR without losing any existing data.
You can also use ALTER COLUMN to rename a column:
ALTER TABLE users
RENAME COLUMN first_name TO given_name;
This will change the column name from first_name to given_name.
When should you use ALTER COLUMN versus adding a new column and dropping the old one? Generally, you’ll want to use ALTER COLUMN when the change is relatively minor, such as adjusting the data type or length of a column. If you need to make more significant changes, such as completely changing the purpose or meaning of a column, it’s often better to add a new column and deprecate the old one. This helps maintain data integrity and makes it easier to track changes to your schema over time.
Dropping Columns with DROP COLUMN
In addition to adding and modifying columns, you may sometimes need to remove a column from a table entirely. This is where the DROP COLUMN command comes in handy.
The basic syntax for dropping a column is:
ALTER TABLE table_name
DROP COLUMN column_name;
When you drop a column, PostgreSQL has two options for handling any existing data in that column:
- RESTRICT: This is the default behavior, and it will prevent the column from being dropped if there is any existing data in the column. This helps protect against accidentally deleting important data.
- CASCADE: This will automatically delete any data stored in the column before dropping the column itself.
Here’s an example of dropping a column with the CASCADE option:
ALTER TABLE users
DROP COLUMN middle_name CASCADE;
This will remove the middle_name column from the users table and delete any data that was previously stored in that column.
It’s important to carefully consider the implications of dropping a column, as it can have unintended consequences for your application or reporting. Make sure to thoroughly test any schema changes in a non-production environment before applying them to your live database.
Performance and Best Practices
When working with the ALTER TABLE command, it’s important to be mindful of the potential performance implications, especially when dealing with large tables.
Under the hood, when you use ALTER TABLE to add, modify, or drop a column, PostgreSQL needs to rewrite the entire table to accommodate the changes. This can be a resource-intensive operation, particularly for tables with a large amount of data.
To minimize the impact on performance, consider the following best practices:
- Plan ahead: Carefully consider the column definitions and structure of your tables upfront to avoid the need for frequent schema changes.
- Batch changes: If you need to make multiple changes to a table, try to group them together into a single ALTER TABLE statement rather than executing multiple individual commands.
- Avoid peak hours: If possible, schedule schema changes during off-peak hours or maintenance windows to minimize the impact on your application’s users.
- Monitor and optimize: Use PostgreSQL’s built-in monitoring tools or third-party tools to track the performance impact of your schema changes and identify any areas for optimization.
Additionally, when naming and defining columns, follow these guidelines:
- Use descriptive, meaningful names: Choose column names that clearly communicate the purpose and content of the data.
- Stick to a consistent naming convention: Adopt a standard naming convention (e.g., snake_case or camelCase) and apply it consistently across your database schema.
- Avoid unnecessary abbreviations: Unless there is a compelling reason, try to use full, descriptive names rather than abbreviations.
- Consider data types carefully: Select the appropriate data type for each column based on the expected data, and avoid over-provisioning (e.g., using a VARCHAR(255) when a VARCHAR(50) would suffice).
By following these best practices, you can ensure that your PostgreSQL database remains efficient, maintainable, and easy to work with over time.
Add Columns to PostgreSQL without Code
Coefficient connects your PostgreSQL database directly to Excel and Google Sheets. This connection opens up new possibilities for data management:
- Add, update, or delete data in bulk using the familiar interface of Excel or Google Sheets
- Protype and validate queries in your spreadsheet before committing changes to your database
- Reduce the need for manual SQL queries by automating common data tasks
Here’s a step-by-step guide on how to use Coefficient to insert data into your PostgreSQL database:
Before you begin, ensure you have installed Coefficient and connected it to your PostgreSQL database.
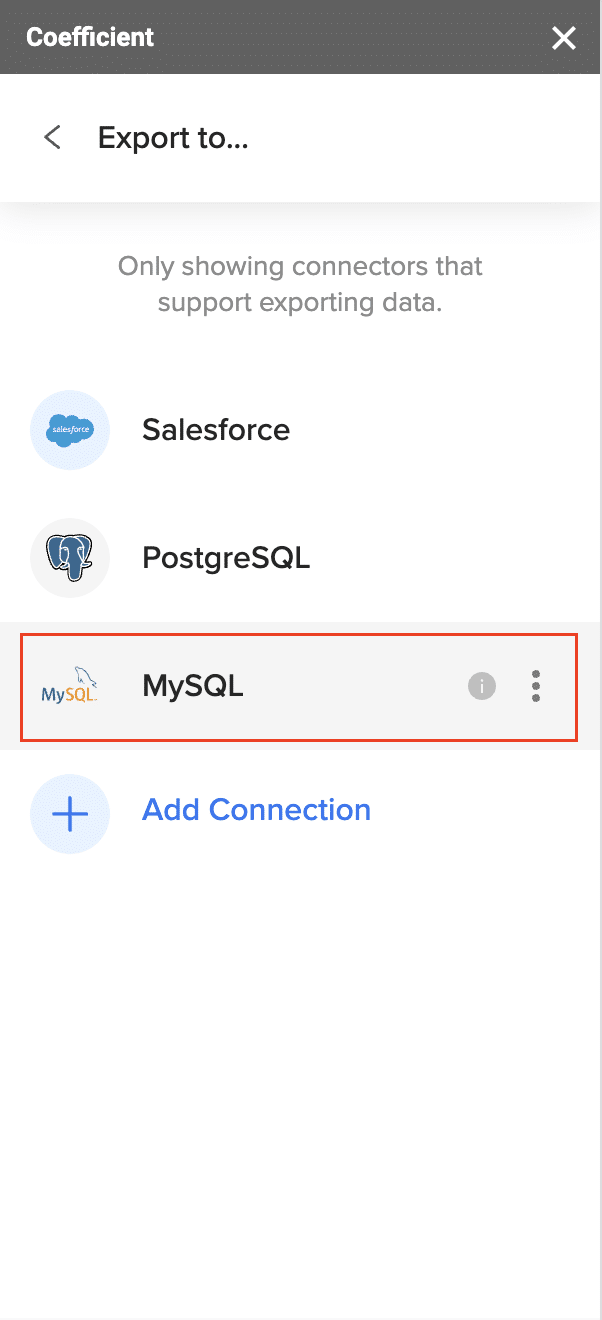
Then, navigate to Coefficient’s menu from your spreadsheet and click “Export to…”
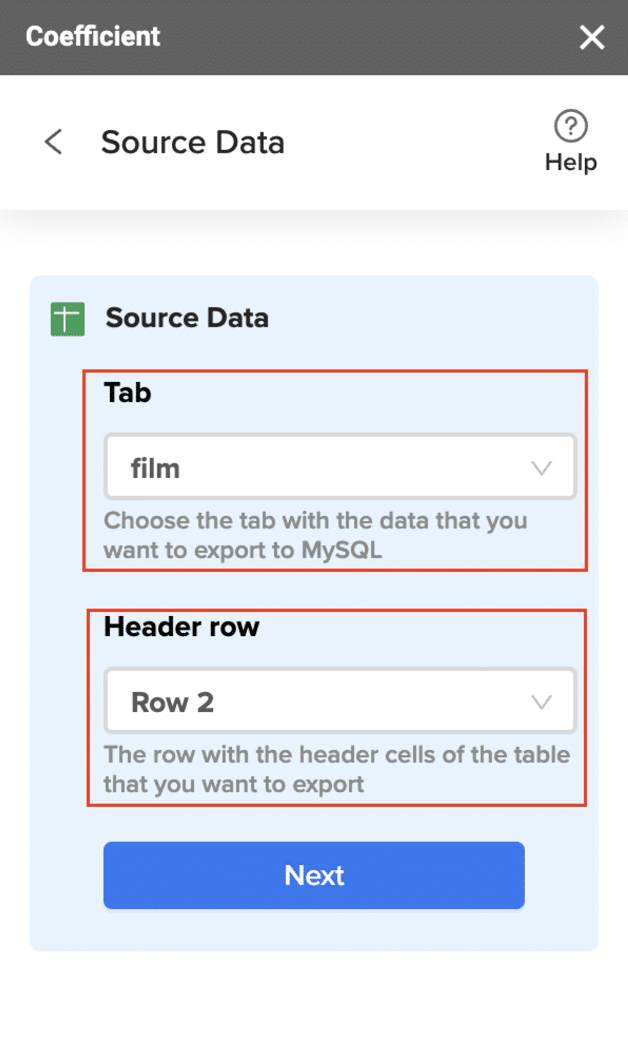
Select PostgreSQL from the menu.
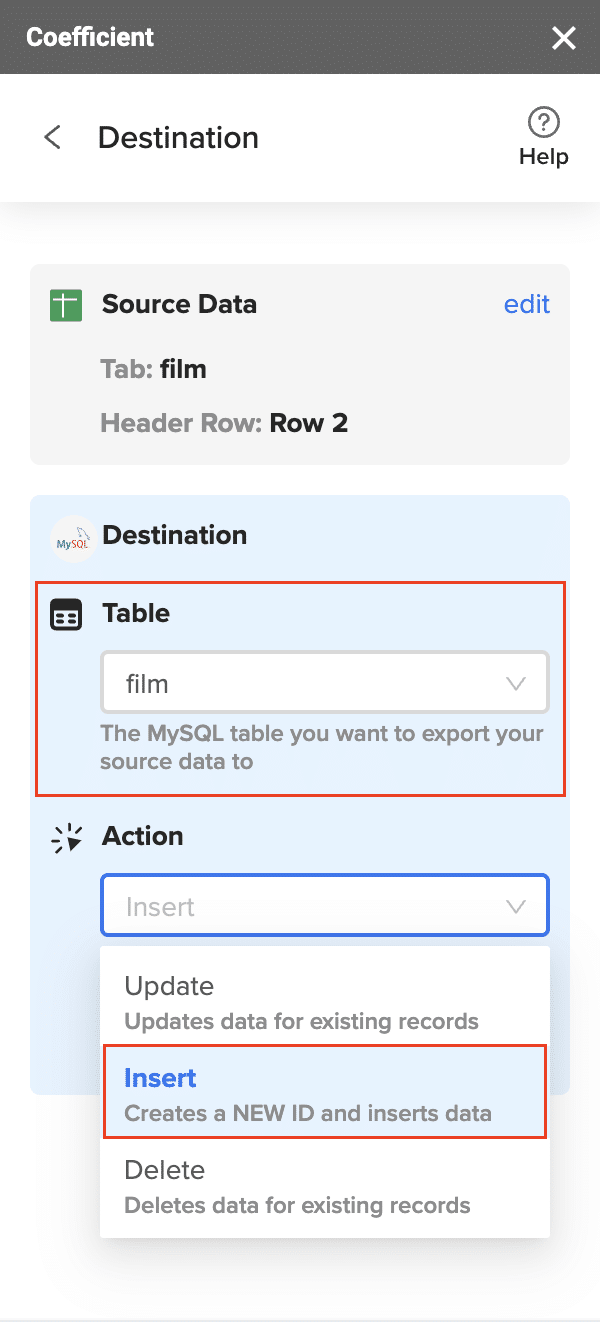
Choose the tab in your workbook that contains the data you want to export and specify the header row that contains the database field headers.
Specify the table in your database where you want to insert the data and choose the appropriate action (Insert, Update, Delete).
omplete the field mappings for the export. Ensure that primary keys or ID fields are mapped if required for the action you are performing.

Confirm your settings and click “Export” to proceed.
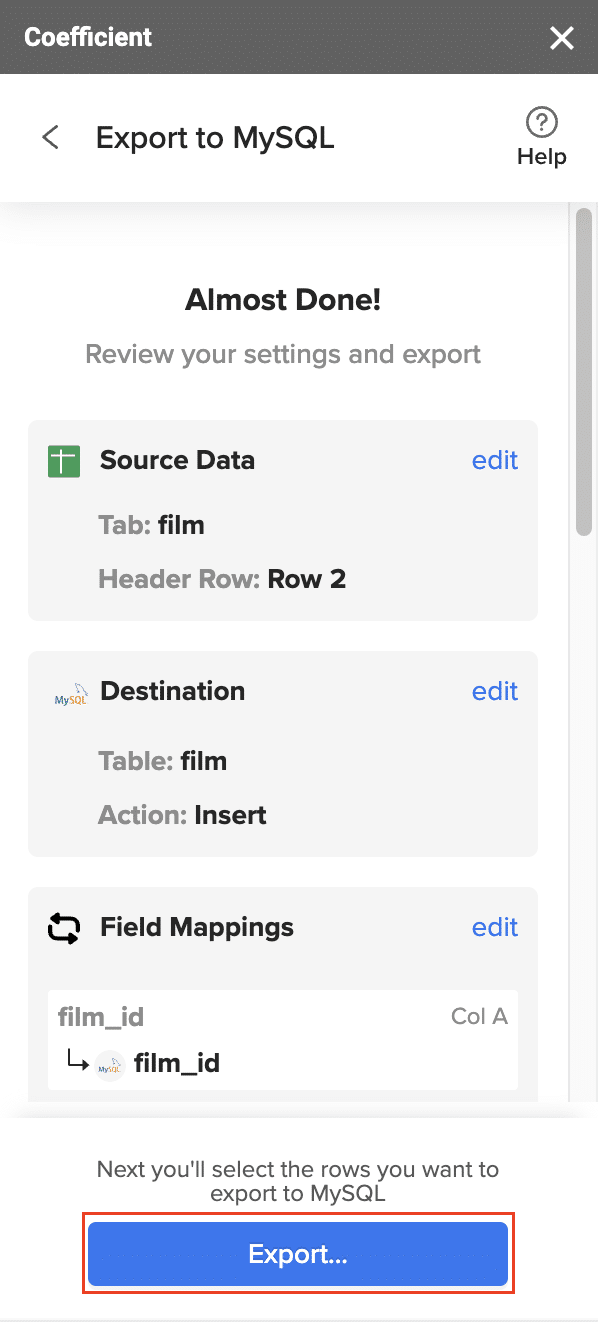
Highlight the specific rows in your sheet that you want to export, or choose to export all rows.
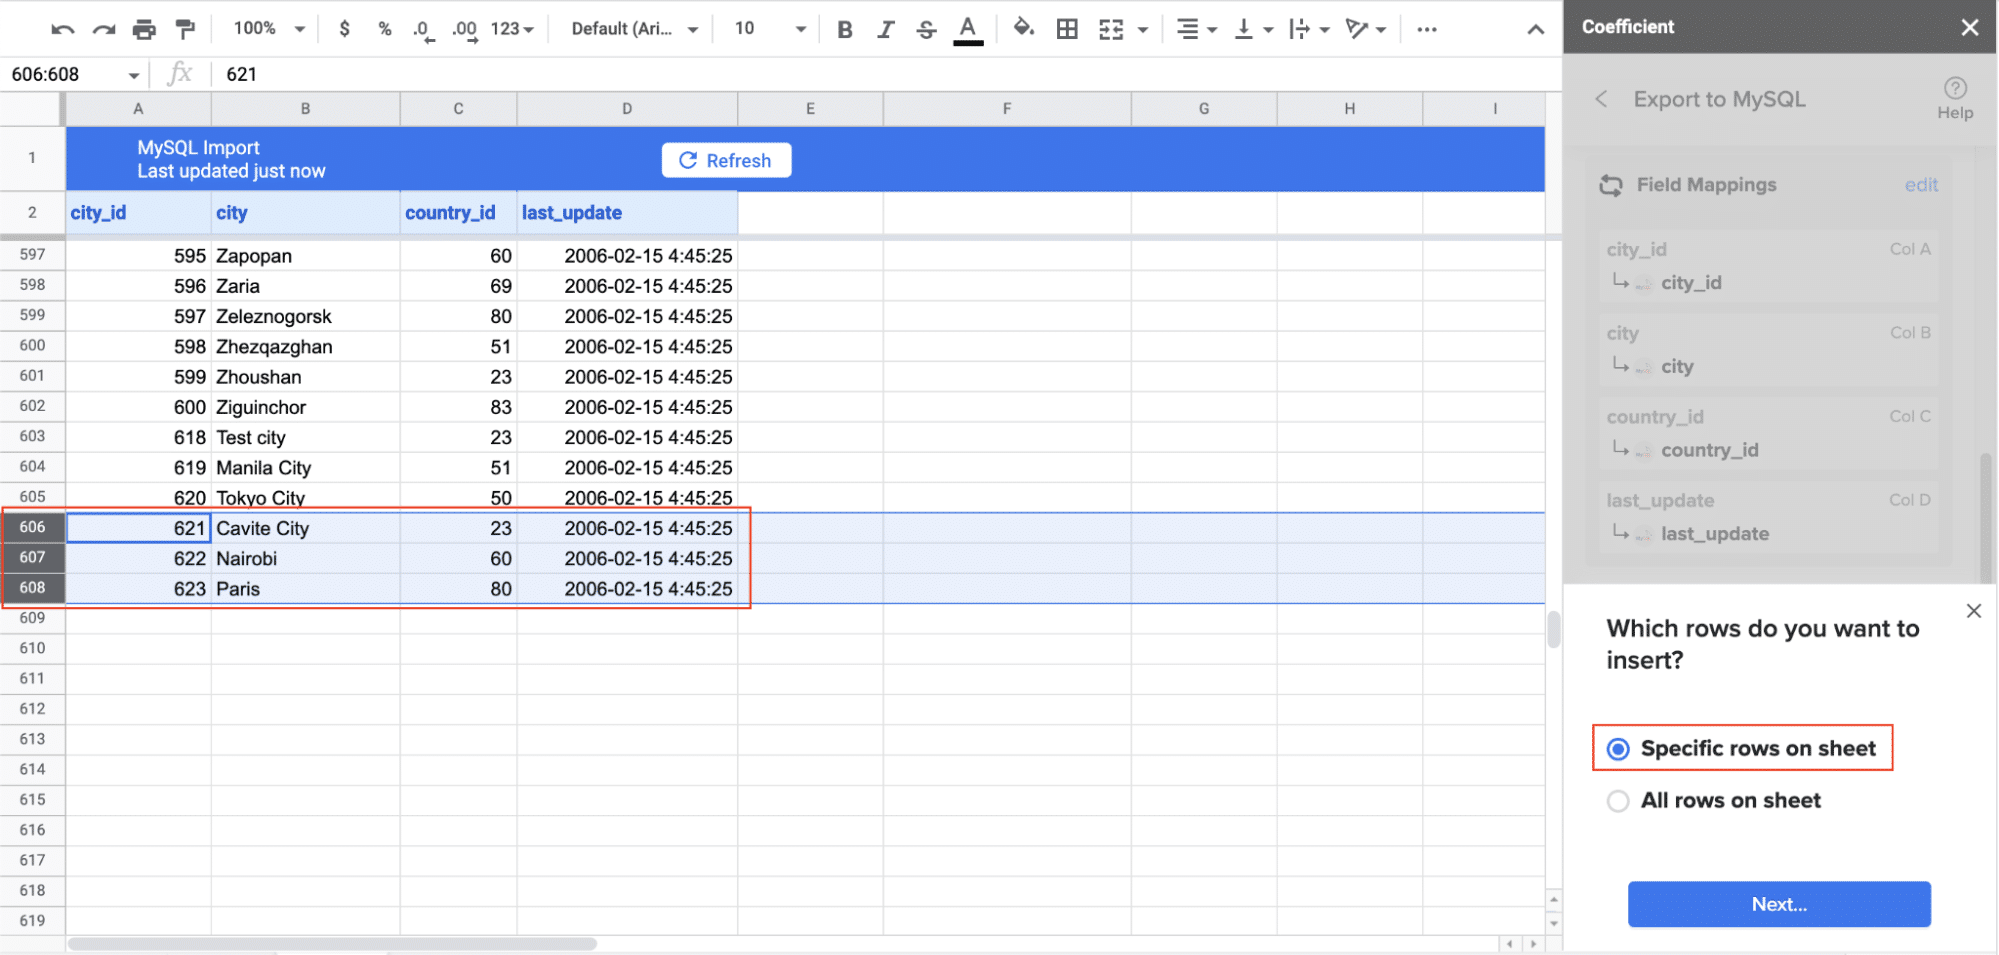
Review your settings and follow the prompts to push your data back to PostgreSQL.
Add Columns in PostgreSQL in Seconds with Coefficient
ALTER TABLE in PostgreSQL gives you the power to change your database as needed. You can add new columns, modify existing ones, or remove unnecessary data. Remember to plan your changes and test them before applying them to your live database.
Ready to make PostgreSQL data management easier? Try Coefficient today and see how it can speed up your work.