Bringing your WordPress Comments data into Google Sheets helps you manage audience engagement, track discussions, and analyze activity on your content.
Stop manually reviewing comments inside WordPress for reporting or moderation.
Learn how to quickly import your Comments data from WordPress to Google Sheets using the Coefficient add-on in this simple guide.
TLDR
-
Step 1:
Step 1. Install Coefficient in Google Sheets and connect your WordPress account.
-
Step 2:
Step 2. Select Import from Objects and choose the Comments object.
-
Step 3:
Step 3. Select the comment details you need and import the data into your sheet.
-
Step 4:
Step 4. Configure auto-refresh to keep your comments data updated automatically.
block:step-by-step
Here’s how to pull your WordPress comment data directly into Google Sheets with Coefficient.
Step 1: Install Coefficient and Connect to WordPress
Open Google Sheets > Extensions > Add-ons > Get add-ons > Install Coefficient from Google Workspace Marketplace
Once installed, open Coefficient from the Extensions menu. Click “”Import from…”” and look for WordPress. Follow the prompts to connect your WordPress account securely.

Step 2: Select Your Object
In the Coefficient sidebar, choose “”Import from Objects””.
Browse the list of WordPress objects and select “”Comments””.
Step 3: Configure and Import Data
Refine the comments data you’re importing. Select specific columns like author, email, comment content, status, date, and associated post/page. Apply filters if needed based on status or date ranges.
Click the “”Import”” button, and your WordPress comments data will appear in your Google Sheet.

Step 4: (Optional) Set Up Auto-Refresh
Keep your comment tracker current by setting up auto-refresh for your import.
In the Coefficient sidebar for your import configuration, toggle on “”Auto Refresh””. Choose a schedule (like hourly or daily) to automatically update the comments data. You can also set up email notifications.
Available WordPress Objects
- Pages
- Media
- Comments
- Categories
- Tags
- Taxonomies
- Users
- Post Types
- Post Statuses
- Revisions
block:related-resources:
How to Import Comments Data from WordPress into Google Sheets
Bringing your WordPress Comments data into Google Sheets helps you manage audience engagement, track discussions, and analyze activity on your content.
Stop manually reviewing comments inside WordPress for reporting or moderation.
Learn how to quickly import your Comments data from WordPress to Google Sheets using the Coefficient add-on in this simple guide.
TLDR
-
Step 1:
Step 1. Install Coefficient in Google Sheets and connect your WordPress account.
-
Step 2:
Step 2. Select Import from Objects and choose the Comments object.
-
Step 3:
Step 3. Select the comment details you need and import the data into your sheet.
-
Step 4:
Step 4. Configure auto-refresh to keep your comments data updated automatically.
block:step-by-step
Here’s how to pull your WordPress comment data directly into Google Sheets with Coefficient.
Step 1: Install Coefficient and Connect to WordPress
Open Google Sheets > Extensions > Add-ons > Get add-ons > Install Coefficient from Google Workspace Marketplace
Once installed, open Coefficient from the Extensions menu. Click “”Import from…”” and look for WordPress. Follow the prompts to connect your WordPress account securely.
Step 2: Select Your Object
In the Coefficient sidebar, choose “”Import from Objects””.
Browse the list of WordPress objects and select “”Comments””.
Step 3: Configure and Import Data
Refine the comments data you’re importing. Select specific columns like author, email, comment content, status, date, and associated post/page. Apply filters if needed based on status or date ranges.
Click the “”Import”” button, and your WordPress comments data will appear in your Google Sheet.
Step 4: (Optional) Set Up Auto-Refresh
Keep your comment tracker current by setting up auto-refresh for your import.
In the Coefficient sidebar for your import configuration, toggle on “”Auto Refresh””. Choose a schedule (like hourly or daily) to automatically update the comments data. You can also set up email notifications.
Available WordPress Objects
- Pages
- Media
- Comments
- Categories
- Tags
- Taxonomies
- Users
- Post Types
- Post Statuses
- Revisions
block:related-resources:
How to Import Users Data from WordPress into Google Sheets
Bringing your WordPress Users data into Google Sheets helps you manage user accounts, track roles and permissions, and analyze activity from your contributors and subscribers.
Stop manually exporting user lists from WordPress.
Learn how to quickly import your Users data from WordPress to Google Sheets using the Coefficient add-on in this simple guide.
TLDR
-
Step 1:
Step 1. Install Coefficient in Google Sheets and connect your WordPress account.
-
Step 2:
Step 2. Select Import from Objects and choose the Users object.
-
Step 3:
Step 3. Select the user details you need and import the data into your sheet.
-
Step 4:
Step 4. Configure auto-refresh to keep your users data updated automatically.
block:step-by-step
Here’s how to pull your WordPress user data directly into Google Sheets with Coefficient.
Step 1: Install Coefficient and Connect to WordPress
Open Google Sheets > Extensions > Add-ons > Get add-ons > Install Coefficient from Google Workspace Marketplace
Once installed, open Coefficient from the Extensions menu. Click “”Import from…”” and look for WordPress. Follow the prompts to connect your WordPress account securely.
Step 2: Select Your Object
In the Coefficient sidebar, choose “”Import from Objects””.
Browse the list of WordPress objects and select “”Users””.
Step 3: Configure and Import Data
Refine the users data you’re importing. Select specific columns like username, email, display name, registration date, and role. Apply filters if needed based on roles or registration dates.
Click the “”Import”” button, and your WordPress users data will appear in your Google Sheet.
Step 4: (Optional) Set Up Auto-Refresh
Keep your user list current by setting up auto-refresh for your import.
In the Coefficient sidebar for your import configuration, toggle on “”Auto Refresh””. Choose a schedule (like hourly or daily) to automatically update the users data. You can also set up email notifications.
Available WordPress Objects
- Pages
- Media
- Comments
- Categories
- Tags
- Taxonomies
- Users
- Post Types
- Post Statuses
- Revisions
block:related-resources:
How to Import Taxonomies Data from WordPress into Google Sheets
Bringing your WordPress Taxonomies data into Google Sheets helps you understand the structure of your content organization, including categories and tags.
Stop manually reviewing taxonomy settings within WordPress.
Learn how to quickly import your Taxonomies data from WordPress to Google Sheets using the Coefficient add-on in this simple guide.
TLDR
-
Step 1:
Step 1. Install Coefficient in Google Sheets and connect your WordPress account.
-
Step 2:
Step 2. Select Import from Objects and choose the Taxonomies object.
-
Step 3:
Step 3. Select the taxonomy details you need and import the data into your sheet.
-
Step 4:
Step 4. Configure auto-refresh to keep your taxonomies data updated automatically.
block:step-by-step
Here’s how to pull your WordPress taxonomy data directly into Google Sheets with Coefficient.
Step 1: Install Coefficient and Connect to WordPress
Open Google Sheets > Extensions > Add-ons > Get add-ons > Install Coefficient from Google Workspace Marketplace
Once installed, open Coefficient from the Extensions menu. Click “”Import from…”” and look for WordPress. Follow the prompts to connect your WordPress account securely.
Step 2: Select Your Object
In the Coefficient sidebar, choose “”Import from Objects””.
Browse the list of WordPress objects and select “”Taxonomies””.
Step 3: Configure and Import Data
Refine the taxonomies data you’re importing. Select specific columns like taxonomy name, slug, hierarchical status, and associated object types. Apply filters if needed.
Click the “”Import”” button, and your WordPress taxonomies data will appear in your Google Sheet.
Step 4: (Optional) Set Up Auto-Refresh
Keep your documentation of content organization current by setting up auto-refresh for your import.
In the Coefficient sidebar for your import configuration, toggle on “”Auto Refresh””. Choose a schedule (like hourly or daily) to automatically update the taxonomies data. You can also set up email notifications.
Available WordPress Objects
- Pages
- Media
- Comments
- Categories
- Tags
- Taxonomies
- Users
- Post Types
- Post Statuses
- Revisions
block:related-resources:
How to Import Tags Data from WordPress into Google Sheets
Bringing your WordPress Tags data into Google Sheets helps you manage your content tags, improve post discoverability, and refine your SEO strategy.
Stop manually tracking tag usage and relevance.
Learn how to quickly import your Tags data from WordPress to Google Sheets using the Coefficient add-on in this simple guide.
TLDR
-
Step 1:
Step 1. Install Coefficient in Google Sheets and connect your WordPress account.
-
Step 2:
Step 2. Select Import from Objects and choose the Tags object.
-
Step 3:
Step 3. Select the tag details you need and import the data into your sheet.
-
Step 4:
Step 4. Configure auto-refresh to keep your tags data updated automatically.
block:step-by-step
Here’s how to pull your WordPress tag data directly into Google Sheets with Coefficient.
Step 1: Install Coefficient and Connect to WordPress
Open Google Sheets > Extensions > Add-ons > Get add-ons > Install Coefficient from Google Workspace Marketplace
Once installed, open Coefficient from the Extensions menu. Click “”Import from…”” and look for WordPress. Follow the prompts to connect your WordPress account securely.
Step 2: Select Your Object
In the Coefficient sidebar, choose “”Import from Objects””.
Browse the list of WordPress objects and select “”Tags””.
Step 3: Configure and Import Data
Refine the tags data you’re importing. Select specific columns like tag name, slug, and description. Apply filters if needed.
Click the “”Import”” button, and your WordPress tags data will appear in your Google Sheet.
Step 4: (Optional) Set Up Auto-Refresh
Keep your tag list and usage tracker current by setting up auto-refresh for your import.
In the Coefficient sidebar for your import configuration, toggle on “”Auto Refresh””. Choose a schedule (like hourly or daily) to automatically update the tags data. You can also set up email notifications.
Available WordPress Objects
- Pages
- Media
- Comments
- Categories
- Tags
- Taxonomies
- Users
- Post Types
- Post Statuses
- Revisions
block:related-resources:
How to Import Revisions Data from WordPress into Google Sheets
Bringing your WordPress Revisions data into Google Sheets helps you track every change made to your posts and pages, providing a detailed version history for analysis and auditing.
Stop manually checking revision details within WordPress.
Learn how to quickly import your Revisions data from WordPress to Google Sheets using the Coefficient add-on in this simple guide.
TLDR
-
Step 1:
Step 1. Install Coefficient in Google Sheets and connect your WordPress account.
-
Step 2:
Step 2. Select Import from Objects and choose the Revisions object.
-
Step 3:
Step 3. Select the revision details you need and import the data into your sheet.
-
Step 4:
Step 4. Configure auto-refresh to keep your revisions data updated automatically.
block:step-by-step
Here’s how to pull your WordPress revision data directly into Google Sheets with Coefficient.
Step 1: Install Coefficient and Connect to WordPress
Open Google Sheets > Extensions > Add-ons > Get add-ons > Install Coefficient from Google Workspace Marketplace
Once installed, open Coefficient from the Extensions menu. Click “”Import from…”” and look for WordPress. Follow the prompts to connect your WordPress account securely.
Step 2: Select Your Object
In the Coefficient sidebar, choose “”Import from Objects””.
Browse the list of WordPress objects and select “”Revisions””.
Step 3: Configure and Import Data
Refine the revisions data you’re importing. Select specific columns like post ID, author, date, and content changes. Apply filters if needed to focus on revisions for a specific post or date range.
Click the “”Import”” button, and your WordPress revisions data will appear in your Google Sheet.
Step 4: (Optional) Set Up Auto-Refresh
Keep your history of content changes current by setting up auto-refresh for your import.
In the Coefficient sidebar for your import configuration, toggle on “”Auto Refresh””. Choose a schedule (like hourly or daily) to automatically update the revisions data. You can also set up email notifications.
Available WordPress Objects
- Pages
- Media
- Comments
- Categories
- Tags
- Taxonomies
- Users
- Post Types
- Post Statuses
- Revisions
block:related-resources:
How to Import Posts Data from WordPress into Google Sheets
Bringing your WordPress Posts data into Google Sheets helps you manage your content calendar, track publishing status, and perform detailed analysis on your articles.
Stop wasting time on manual exports that are out of date instantly.
Learn how to quickly import your Posts data from WordPress to Google Sheets using the Coefficient add-on in this simple guide.
TLDR
-
Step 1:
Step 1. Install Coefficient from the Google Workspace Marketplace and connect your WordPress account.
-
Step 2:
Step 2. Select Import from Objects and choose the Posts object.
-
Step 3:
Step 3. Pick the post details you want and import the data to your sheet.
-
Step 4:
Step 4. Set up auto-refresh to keep your posts data updated automatically.
block:step-by-step
Here’s how to pull your WordPress post data directly into Google Sheets with Coefficient.
Step 1: Install Coefficient and Connect to WordPress
Open Google Sheets > Extensions > Add-ons > Get add-ons > Install Coefficient from Google Workspace Marketplace
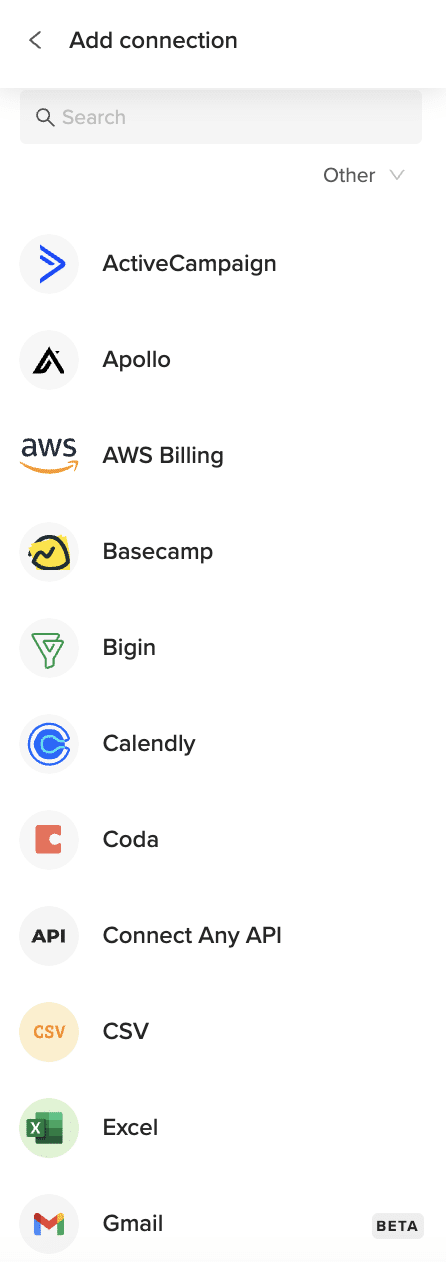
Once Coefficient is installed, open it from the Extensions menu. Click “”Import from…”” and look for WordPress. It might be listed directly or under an “”Other”” category. Follow the prompts to connect your WordPress account securely.
Step 2: Select Your Object
In the Coefficient sidebar, choose “”Import from Objects””.
Browse the list of WordPress objects and select “”Posts””.
Step 3: Configure and Import Data
Refine the posts data you’re importing. Select specific columns like title, author, date, status, categories, and tags. Apply filters if needed based on status, author, or date ranges.
Click the “”Import”” button, and your WordPress posts data will appear in your Google Sheet.
Step 4: (Optional) Set Up Auto-Refresh
Keep your content calendar or post tracker current by setting up auto-refresh for your import.
In the Coefficient sidebar for your import configuration, toggle on “”Auto Refresh””. Choose a schedule (like hourly or daily) to automatically update the posts data. You can also set up email notifications.
Available WordPress Objects
- Pages
- Media
- Comments
- Categories
- Tags
- Taxonomies
- Users
- Post Types
- Post Statuses
- Revisions
block:related-resources:
How to Import Post Statuses Data from WordPress into Google Sheets
Bringing your WordPress Post Statuses data into Google Sheets helps you understand and track the different workflow states your content can be in, like draft, published, or pending.
Stop manually checking status definitions within WordPress.
Learn how to quickly import your Post Statuses data from WordPress to Google Sheets using the Coefficient add-on in this simple guide.
TLDR
-
Step 1:
Step 1. Install Coefficient in Google Sheets and connect your WordPress account.
-
Step 2:
Step 2. Select Import from Objects and choose the Post Statuses object.
-
Step 3:
Step 3. Select the status details you need and import the data into your sheet.
-
Step 4:
Step 4. Configure auto-refresh to keep your post statuses data updated automatically.
block:step-by-step
Here’s how to pull your WordPress post statuses data directly into Google Sheets with Coefficient.
Step 1: Install Coefficient and Connect to WordPress
Open Google Sheets > Extensions > Add-ons > Get add-ons > Install Coefficient from Google Workspace Marketplace
Once installed, open Coefficient from the Extensions menu. Click “”Import from…”” and look for WordPress. Follow the prompts to connect your WordPress account securely.
Step 2: Select Your Object
In the Coefficient sidebar, choose “”Import from Objects””.
Browse the list of WordPress objects and select “”Post Statuses””.
Step 3: Configure and Import Data
Refine the post statuses data you’re importing. Select specific columns like status name, label, and public status. Apply filters if needed.
Click the “”Import”” button, and your WordPress post statuses data will appear in your Google Sheet.
Step 4: (Optional) Set Up Auto-Refresh
Keep your documentation of available post statuses current by setting up auto-refresh for your import.
In the Coefficient sidebar for your import configuration, toggle on “”Auto Refresh””. Choose a schedule (like hourly or daily) to automatically update the post statuses data. You can also set up email notifications.
Available WordPress Objects
- Pages
- Media
- Comments
- Categories
- Tags
- Taxonomies
- Users
- Post Types
- Post Statuses
- Revisions
block:related-resources:
How to Import Post Types Data from WordPress into Google Sheets
Bringing your WordPress Post Types data into Google Sheets helps you understand the different content structures available on your site, such as posts, pages, and custom types.
Stop manually checking post type definitions within WordPress settings.
Learn how to quickly import your Post Types data from WordPress to Google Sheets using the Coefficient add-on in this simple guide.
TLDR
-
Step 1:
Step 1. Install Coefficient in Google Sheets and connect your WordPress account.
-
Step 2:
Step 2. Select Import from Objects and choose the Post Types object.
-
Step 3:
Step 3. Select the post type details you need and import the data into your sheet.
-
Step 4:
Step 4. Configure auto-refresh to keep your post types data updated automatically.
block:step-by-step
Here’s how to pull your WordPress post type data directly into Google Sheets with Coefficient.
Step 1: Install Coefficient and Connect to WordPress
Open Google Sheets > Extensions > Add-ons > Get add-ons > Install Coefficient from Google Workspace Marketplace
Once installed, open Coefficient from the Extensions menu. Click “”Import from…”” and look for WordPress. Follow the prompts to connect your WordPress account securely.
Step 2: Select Your Object
In the Coefficient sidebar, choose “”Import from Objects””.
Browse the list of WordPress objects and select “”Post Types””.
Step 3: Configure and Import Data
Refine the post types data you’re importing. Select specific columns like name, label, public status, and hierarchical status. Apply filters if needed.
Click the “”Import”” button, and your WordPress post types data will appear in your Google Sheet.
Step 4: (Optional) Set Up Auto-Refresh
Keep your documentation of available post types current by setting up auto-refresh for your import.
In the Coefficient sidebar for your import configuration, toggle on “”Auto Refresh””. Choose a schedule (like hourly or daily) to automatically update the post types data. You can also set up email notifications.
Available WordPress Objects
- Pages
- Media
- Comments
- Categories
- Tags
- Taxonomies
- Users
- Post Types
- Post Statuses
- Revisions
block:related-resources:
How to Import Pages Data from WordPress into Google Sheets
Bringing your WordPress Pages data into Google Sheets helps you manage website structure, track page status, and analyze your important landing pages easily.
Stop manually tracking page details in separate documents.
Learn how to quickly import your Pages data from WordPress to Google Sheets using the Coefficient add-on in this simple guide.
TLDR
-
Step 1:
Step 1. Install Coefficient in Google Sheets and connect your WordPress account.
-
Step 2:
Step 2. Select Import from Objects and choose the Pages object.
-
Step 3:
Step 3. Select the page details you need and import the data into your sheet.
-
Step 4:
Step 4. Configure auto-refresh to keep your pages data updated automatically.
block:step-by-step
Here’s how to pull your WordPress page data directly into Google Sheets with Coefficient.
Step 1: Install Coefficient and Connect to WordPress
Open Google Sheets > Extensions > Add-ons > Get add-ons > Install Coefficient from Google Workspace Marketplace
Once installed, open Coefficient from the Extensions menu. Click “”Import from…”” and look for WordPress. Follow the prompts to connect your WordPress account securely.
Step 2: Select Your Object
In the Coefficient sidebar, choose “”Import from Objects””.
Browse the list of WordPress objects and select “”Pages””.
Step 3: Configure and Import Data
Refine the pages data you’re importing. Select specific columns like page title, author, date, status, and parent page. Apply filters if needed based on status or author.
Click the “”Import”” button, and your WordPress pages data will appear in your Google Sheet.
Step 4: (Optional) Set Up Auto-Refresh
Keep your website structure documentation current by setting up auto-refresh for your import.
In the Coefficient sidebar for your import configuration, toggle on “”Auto Refresh””. Choose a schedule (like hourly or daily) to automatically update the pages data. You can also set up email notifications.
Available WordPress Objects
- Pages
- Media
- Comments
- Categories
- Tags
- Taxonomies
- Users
- Post Types
- Post Statuses
- Revisions