Bringing your WordPress Media data into Google Sheets helps you manage your media library, track asset usage, and organize files alongside your content data.
Stop manually tracking media details outside of WordPress.
Learn how to quickly import your Media data from WordPress to Google Sheets using the Coefficient add-on in this simple guide.
TLDR
-
Step 1:
Step 1. Install Coefficient in Google Sheets and connect your WordPress account.
-
Step 2:
Step 2. Select Import from Objects and choose the Media object.
-
Step 3:
Step 3. Select the media details you need and import the data into your sheet.
-
Step 4:
Step 4. Configure auto-refresh to keep your media data updated automatically.
block:step-by-step
Here’s how to pull your WordPress media library data directly into Google Sheets with Coefficient.
Step 1: Install Coefficient and Connect to WordPress
Open Google Sheets > Extensions > Add-ons > Get add-ons > Install Coefficient from Google Workspace Marketplace
Once installed, open Coefficient from the Extensions menu. Click “”Import from…”” and look for WordPress. Follow the prompts to connect your WordPress account securely.

Step 2: Select Your Object
In the Coefficient sidebar, choose “”Import from Objects””.
Browse the list of WordPress objects and select “”Media””.
Step 3: Configure and Import Data
Refine the media data you’re importing. Select specific columns like file name, URL, type, size, and date uploaded. Apply filters if needed based on media type or date ranges.
Click the “”Import”” button, and your WordPress media data will appear in your Google Sheet.

Step 4: (Optional) Set Up Auto-Refresh
Keep your media library tracker current by setting up auto-refresh for your import.
In the Coefficient sidebar for your import configuration, toggle on “”Auto Refresh””. Choose a schedule (like hourly or daily) to automatically update the media data. You can also set up email notifications.
Available WordPress Objects
- Pages
- Media
- Comments
- Categories
- Tags
- Taxonomies
- Users
- Post Types
- Post Statuses
- Revisions
block:related-resources:
How to Import Categories Data from WordPress into Google Sheets
Bringing your WordPress Categories data into Google Sheets helps you manage your content structure, plan editorial calendars, and analyze how categories impact SEO.
Stop manually tracking category details and organization.
Learn how to quickly import your Categories data from WordPress to Google Sheets using the Coefficient add-on in this simple guide.
TLDR
-
Step 1:
Step 1. Install Coefficient in Google Sheets and connect your WordPress account.
-
Step 2:
Step 2. Select Import from Objects and choose the Categories object.
-
Step 3:
Step 3. Select the category details you need and import the data into your sheet.
-
Step 4:
Step 4. Configure auto-refresh to keep your categories data updated automatically.
block:step-by-step
Here’s how to pull your WordPress category data directly into Google Sheets with Coefficient.
Step 1: Install Coefficient and Connect to WordPress
Open Google Sheets > Extensions > Add-ons > Get add-ons > Install Coefficient from Google Workspace Marketplace
Once installed, open Coefficient from the Extensions menu. Click “”Import from…”” and look for WordPress. Follow the prompts to connect your WordPress account securely.
Step 2: Select Your Object
In the Coefficient sidebar, choose “”Import from Objects””.
Browse the list of WordPress objects and select “”Categories””.
Step 3: Configure and Import Data
Refine the categories data you’re importing. Select specific columns like category name, slug, description, and parent category. Apply filters if needed.
Click the “”Import”” button, and your WordPress categories data will appear in your Google Sheet.
Step 4: (Optional) Set Up Auto-Refresh
Keep your category list and structure current by setting up auto-refresh for your import.
In the Coefficient sidebar for your import configuration, toggle on “”Auto Refresh””. Choose a schedule (like hourly or daily) to automatically update the categories data. You can also set up email notifications.
Available WordPress Objects
- Pages
- Media
- Comments
- Categories
- Tags
- Taxonomies
- Users
- Post Types
- Post Statuses
- Revisions
block:related-resources:
How to Import Users Data from WordPress into Excel
Importing Users data from WordPress into Excel helps teams analyze author performance, manage user roles, and track content production metrics. Coefficient makes this process seamless and automatic.
This guide will show you how to import your WordPress Users data into Excel using Coefficient.
TLDR
-
Step 1:
Step 1. Open Excel > Insert tab > Get Add-ins > Install Coefficient from Office Add-ins store.
-
Step 2:
Step 2. Connect your WordPress account and select the Users object to import.
-
Step 3:
Step 3. (Optional) Enable auto-refresh to keep your data updated automatically.
Step 1: Install Coefficient and Connect to WordPress
First, you’ll need to install the Coefficient add-in for Excel and connect to your WordPress account:
- Open Excel and navigate to the Insert tab.
- Click on Get Add-ins and search for “Coefficient”.
- Install the Coefficient add-in from the Office Add-ins store.
- Once installed, open the Coefficient sidebar and click “Import from…”.
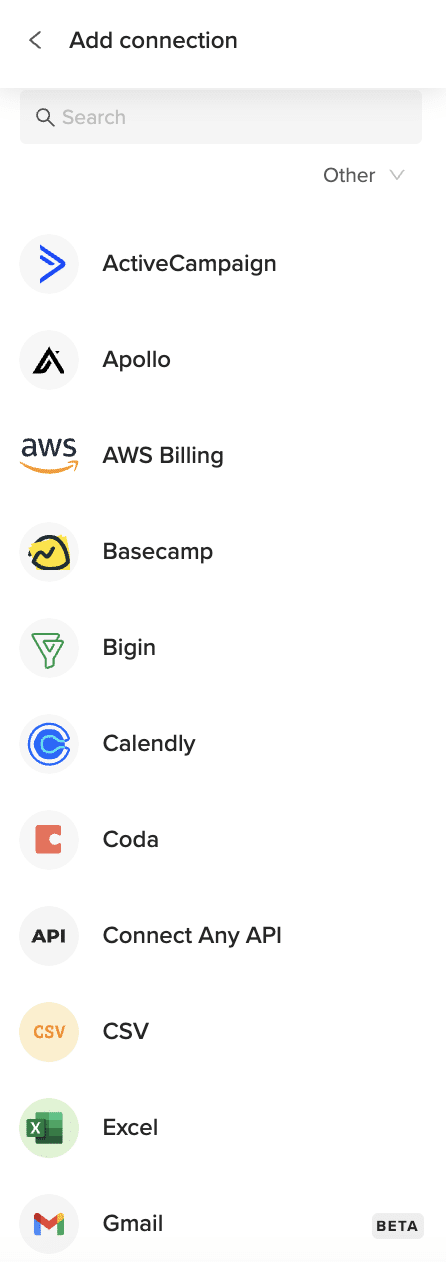
- In the connector selection screen, scroll to the “Other” category.
Step 2: Import WordPress Users Data
Now that you’re connected, you can import your WordPress Users data:
- Select “WordPress” from the list of available connectors.
- Enter your WordPress site URL and log in when prompted.
- Choose “Users” from the list of available objects.
- Select the fields you want to import (e.g., username, email, role, registered date, post count).
- Apply any filters if needed to narrow down the data.
- Click “Import” to bring your Users data into Excel.
Step 3: Set Up Auto-Refresh (Optional)
To keep your WordPress Users data fresh, set up an automatic refresh schedule:
- Click on the refresh icon next to your imported data.
- Select “Schedule refresh” from the dropdown menu.
- Choose your preferred refresh frequency (hourly, daily, or weekly).
- Set the specific time for the refresh to occur.
- Click “Save” to activate the auto-refresh schedule.
Available WordPress Objects
- Pages
- Media
- Comments
- Categories
- Tags
- Taxonomies
- Users
- Post Types
- Post Statuses
- Revisions
How to Import Taxonomies Data from WordPress into Excel
Importing Taxonomies data from WordPress into Excel helps content teams manage custom classification systems, analyze content organization, and optimize site structure. Coefficient makes this process seamless and automatic.
This guide will show you how to import your WordPress Taxonomies data into Excel using Coefficient.
TLDR
-
Step 1:
Step 1. Open Excel > Insert tab > Get Add-ins > Install Coefficient from Office Add-ins store.
-
Step 2:
Step 2. Connect your WordPress account and select the Taxonomies object to import.
-
Step 3:
Step 3. (Optional) Enable auto-refresh to keep your data updated automatically.
Step 1: Install Coefficient and Connect to WordPress
First, you’ll need to install the Coefficient add-in for Excel and connect to your WordPress account:
- Open Excel and navigate to the Insert tab.
- Click on Get Add-ins and search for “Coefficient”.
- Install the Coefficient add-in from the Office Add-ins store.
- Once installed, open the Coefficient sidebar and click “Import from…”.
- In the connector selection screen, scroll to the “Other” category.
Step 2: Import WordPress Taxonomies Data
Now that you’re connected, you can import your WordPress Taxonomies data:
- Select “WordPress” from the list of available connectors.
- Enter your WordPress site URL and log in when prompted.
- Choose “Taxonomies” from the list of available objects.
- Select the fields you want to import (e.g., name, label, description, hierarchical, public).
- Apply any filters if needed to narrow down the data.
- Click “Import” to bring your Taxonomies data into Excel.
Step 3: Set Up Auto-Refresh (Optional)
To keep your WordPress Taxonomies data fresh, set up an automatic refresh schedule:
- Click on the refresh icon next to your imported data.
- Select “Schedule refresh” from the dropdown menu.
- Choose your preferred refresh frequency (hourly, daily, or weekly).
- Set the specific time for the refresh to occur.
- Click “Save” to activate the auto-refresh schedule.
Available WordPress Objects
- Pages
- Media
- Comments
- Categories
- Tags
- Taxonomies
- Users
- Post Types
- Post Statuses
- Revisions
How to Import Revisions Data from WordPress into Excel
Importing Revisions data from WordPress into Excel helps editorial teams track content changes, analyze editing patterns, and maintain content quality control. Coefficient makes this process seamless and automatic.
This guide will show you how to import your WordPress Revisions data into Excel using Coefficient.
TLDR
-
Step 1:
Step 1. Open Excel > Insert tab > Get Add-ins > Install Coefficient from Office Add-ins store.
-
Step 2:
Step 2. Connect your WordPress account and select the Revisions object to import.
-
Step 3:
Step 3. (Optional) Enable auto-refresh to keep your data updated automatically.
Step 1: Install Coefficient and Connect to WordPress
First, you’ll need to install the Coefficient add-in for Excel and connect to your WordPress account:
- Open Excel and navigate to the Insert tab.
- Click on Get Add-ins and search for “Coefficient”.
- Install the Coefficient add-in from the Office Add-ins store.
- Once installed, open the Coefficient sidebar and click “Import from…”.
- In the connector selection screen, scroll to the “Other” category.
Step 2: Import WordPress Revisions Data
Now that you’re connected, you can import your WordPress Revisions data:
- Select “WordPress” from the list of available connectors.
- Enter your WordPress site URL and log in when prompted.
- Choose “Revisions” from the list of available objects.
- Select the fields you want to import (e.g., post ID, author, date, content changes).
- Apply any filters if needed to narrow down the data.
- Click “Import” to bring your Revisions data into Excel.
Step 3: Set Up Auto-Refresh (Optional)
To keep your WordPress Revisions data fresh, set up an automatic refresh schedule:
- Click on the refresh icon next to your imported data.
- Select “Schedule refresh” from the dropdown menu.
- Choose your preferred refresh frequency (hourly, daily, or weekly).
- Set the specific time for the refresh to occur.
- Click “Save” to activate the auto-refresh schedule.
Available WordPress Objects
- Pages
- Media
- Comments
- Categories
- Tags
- Taxonomies
- Users
- Post Types
- Post Statuses
- Revisions
How to Import Posts Data from WordPress into Excel
Importing Posts data from WordPress into Excel helps content teams track performance, manage publishing schedules, and analyze blog metrics. Coefficient makes this process seamless and automatic.
This guide will show you how to import your WordPress Posts data into Excel using Coefficient.
TLDR
-
Step 1:
Step 1. Open Excel > Insert tab > Get Add-ins > Install Coefficient from Office Add-ins store.
-
Step 2:
Step 2. Connect your WordPress account and select the Posts object to import.
-
Step 3:
Step 3. (Optional) Enable auto-refresh to keep your data updated automatically.
Step 1: Install Coefficient and Connect to WordPress
First, you’ll need to install the Coefficient add-in for Excel and connect to your WordPress account:
- Open Excel and navigate to the Insert tab.
- Click on Get Add-ins and search for “Coefficient”.
- Install the Coefficient add-in from the Office Add-ins store.
- Once installed, open the Coefficient sidebar and click “Import from…”.
- In the connector selection screen, scroll to the “Other” category.
Step 2: Import WordPress Posts Data
Now that you’re connected, you can import your WordPress Posts data:
- Select “WordPress” from the list of available connectors.
- Enter your WordPress site URL and log in when prompted.
- Choose “Posts” from the list of available objects.
- Select the fields you want to import (e.g., title, content, author, date, categories, tags).
- Apply any filters if needed to narrow down the data.
- Click “Import” to bring your Posts data into Excel.
Step 3: Set Up Auto-Refresh (Optional)
To keep your WordPress Posts data fresh, set up an automatic refresh schedule:
- Click on the refresh icon next to your imported data.
- Select “Schedule refresh” from the dropdown menu.
- Choose your preferred refresh frequency (hourly, daily, or weekly).
- Set the specific time for the refresh to occur.
- Click “Save” to activate the auto-refresh schedule.
Available WordPress Objects
- Pages
- Media
- Comments
- Categories
- Tags
- Taxonomies
- Users
- Post Types
- Post Statuses
- Revisions
How to Import Post Types Data from WordPress into Excel
Importing Post Types data from WordPress into Excel helps teams track content structure, manage custom types, and analyze website architecture. Coefficient makes this process seamless and automatic.
This guide will show you how to import your WordPress Post Types data into Excel using Coefficient.
TLDR
-
Step 1:
Step 1. Open Excel > Insert tab > Get Add-ins > Install Coefficient from Office Add-ins store.
-
Step 2:
Step 2. Connect your WordPress account and select the Post Types object to import.
-
Step 3:
Step 3. (Optional) Enable auto-refresh to keep your data updated automatically.
Step 1: Install Coefficient and Connect to WordPress
First, you’ll need to install the Coefficient add-in for Excel and connect to your WordPress account:
- Open Excel and navigate to the Insert tab.
- Click on Get Add-ins and search for “Coefficient”.
- Install the Coefficient add-in from the Office Add-ins store.
- Once installed, open the Coefficient sidebar and click “Import from…”.
- In the connector selection screen, scroll to the “Other” category.
Step 2: Import WordPress Post Types Data
Now that you’re connected, you can import your WordPress Post Types data:
- Select “WordPress” from the list of available connectors.
- Enter your WordPress site URL and log in when prompted.
- Choose “Post Types” from the list of available objects.
- Select the fields you want to import (e.g., name, label, description, hierarchical, public).
- Apply any filters if needed to narrow down the data.
- Click “Import” to bring your Post Types data into Excel.
Step 3: Set Up Auto-Refresh (Optional)
To keep your WordPress Post Types data fresh, set up an automatic refresh schedule:
- Click on the refresh icon next to your imported data.
- Select “Schedule refresh” from the dropdown menu.
- Choose your preferred refresh frequency (hourly, daily, or weekly).
- Set the specific time for the refresh to occur.
- Click “Save” to activate the auto-refresh schedule.
Available WordPress Objects
- Pages
- Media
- Comments
- Categories
- Tags
- Taxonomies
- Users
- Post Types
- Post Statuses
- Revisions
How to Import Post Statuses Data from WordPress into Excel
Importing Post Statuses data from WordPress into Excel helps editorial teams track content workflows, analyze publishing pipelines, and manage content calendars. Coefficient makes this process seamless and automatic.
This guide will show you how to import your WordPress Post Statuses data into Excel using Coefficient.
TLDR
-
Step 1:
Step 1. Open Excel > Insert tab > Get Add-ins > Install Coefficient from Office Add-ins store.
-
Step 2:
Step 2. Connect your WordPress account and select the Post Statuses object to import.
-
Step 3:
Step 3. (Optional) Enable auto-refresh to keep your data updated automatically.
Step 1: Install Coefficient and Connect to WordPress
First, you’ll need to install the Coefficient add-in for Excel and connect to your WordPress account:
- Open Excel and navigate to the Insert tab.
- Click on Get Add-ins and search for “Coefficient”.
- Install the Coefficient add-in from the Office Add-ins store.
- Once installed, open the Coefficient sidebar and click “Import from…”.
- In the connector selection screen, scroll to the “Other” category.
Step 2: Import WordPress Post Statuses Data
Now that you’re connected, you can import your WordPress Post Statuses data:
- Select “WordPress” from the list of available connectors.
- Enter your WordPress site URL and log in when prompted.
- Choose “Post Statuses” from the list of available objects.
- Select the fields you want to import (e.g., name, label, public, protected, private).
- Apply any filters if needed to narrow down the data.
- Click “Import” to bring your Post Statuses data into Excel.
Step 3: Set Up Auto-Refresh (Optional)
To keep your WordPress Post Statuses data fresh, set up an automatic refresh schedule:
- Click on the refresh icon next to your imported data.
- Select “Schedule refresh” from the dropdown menu.
- Choose your preferred refresh frequency (hourly, daily, or weekly).
- Set the specific time for the refresh to occur.
- Click “Save” to activate the auto-refresh schedule.
Available WordPress Objects
- Pages
- Media
- Comments
- Categories
- Tags
- Taxonomies
- Users
- Post Types
- Post Statuses
- Revisions
How to Import Pages Data from WordPress into Excel
Importing Pages data from WordPress into Excel helps content teams manage site structure, track static content performance, and optimize website organization. Coefficient makes this process seamless and automatic.
This guide will show you how to import your WordPress Pages data into Excel using Coefficient.
TLDR
-
Step 1:
Step 1. Open Excel > Insert tab > Get Add-ins > Install Coefficient from Office Add-ins store.
-
Step 2:
Step 2. Connect your WordPress account and select the Pages object to import.
-
Step 3:
Step 3. (Optional) Enable auto-refresh to keep your data updated automatically.
Step 1: Install Coefficient and Connect to WordPress
First, you’ll need to install the Coefficient add-in for Excel and connect to your WordPress account:
- Open Excel and navigate to the Insert tab.
- Click on Get Add-ins and search for “Coefficient”.
- Install the Coefficient add-in from the Office Add-ins store.
- Once installed, open the Coefficient sidebar and click “Import from…”.
- In the connector selection screen, scroll to the “Other” category.
Step 2: Import WordPress Pages Data
Now that you’re connected, you can import your WordPress Pages data:
- Select “WordPress” from the list of available connectors.
- Enter your WordPress site URL and log in when prompted.
- Choose “Pages” from the list of available objects.
- Select the fields you want to import (e.g., title, content, author, date, parent page).
- Apply any filters if needed to narrow down the data.
- Click “Import” to bring your Pages data into Excel.
Step 3: Set Up Auto-Refresh (Optional)
To keep your WordPress Pages data fresh, set up an automatic refresh schedule:
- Click on the refresh icon next to your imported data.
- Select “Schedule refresh” from the dropdown menu.
- Choose your preferred refresh frequency (hourly, daily, or weekly).
- Set the specific time for the refresh to occur.
- Click “Save” to activate the auto-refresh schedule.
Available WordPress Objects
- Pages
- Media
- Comments
- Categories
- Tags
- Taxonomies
- Users
- Post Types
- Post Statuses
- Revisions
How to Import Media Data from WordPress into Excel
Importing Media data from WordPress into Excel helps teams track and manage digital assets, analyze media usage, and optimize website resources. Coefficient makes this process seamless and automatic.
This guide will show you how to import your WordPress Media data into Excel using Coefficient.
TLDR
-
Step 1:
Step 1. Open Excel > Insert tab > Get Add-ins > Install Coefficient from Office Add-ins store.
-
Step 2:
Step 2. Connect your WordPress account and select the Media object to import.
-
Step 3:
Step 3. (Optional) Enable auto-refresh to keep your data updated automatically.
Step 1: Install Coefficient and Connect to WordPress
First, you’ll need to install the Coefficient add-in for Excel and connect to your WordPress account:
- Open Excel and navigate to the Insert tab.
- Click on Get Add-ins and search for “Coefficient”.
- Install the Coefficient add-in from the Office Add-ins store.
- Once installed, open the Coefficient sidebar and click “Import from…”.
- In the connector selection screen, scroll to the “Other” category.
Step 2: Import WordPress Media Data
Now that you’re connected, you can import your WordPress Media data:
- Select “WordPress” from the list of available connectors.
- Enter your WordPress site URL and log in when prompted.
- Choose “Media” from the list of available objects.
- Select the fields you want to import (e.g., title, URL, file size, dimensions, upload date).
- Apply any filters if needed to narrow down the data.
- Click “Import” to bring your Media data into Excel.
Step 3: Set Up Auto-Refresh (Optional)
To keep your WordPress Media data fresh, set up an automatic refresh schedule:
- Click on the refresh icon next to your imported data.
- Select “Schedule refresh” from the dropdown menu.
- Choose your preferred refresh frequency (hourly, daily, or weekly).
- Set the specific time for the refresh to occur.
- Click “Save” to activate the auto-refresh schedule.
Available WordPress Objects
- Pages
- Media
- Comments
- Categories
- Tags
- Taxonomies
- Users
- Post Types
- Post Statuses
- Revisions