Connecting Snowflake to MySQL: A Step-by-Step Guide for Seamless Data Integration
Are you looking to bridge the gap between your Snowflake data warehouse and MySQL database? You’re in the right place. This guide will walk you through the process of connecting Snowflake to MySQL, offering you a range of methods to suit your technical expertise and specific needs.
Snowflake and MySQL are powerful data management tools in their own right. But when combined, they create a formidable duo that can transform your data analysis capabilities. Let’s dive into the advantages of this connection and explore the top methods to make it happen.
Advantages of Connecting Snowflake to MySQL
- Optimize data storage costs: Move historical data from MySQL to Snowflake for cost-effective long-term storage. Keep frequently accessed data in MySQL for fast transactional processing, reducing overall data management costs.
- Enhance real-time analytics: Combine Snowflake’s powerful analytics with MySQL’s real-time data. This allows you to perform complex analyses on large datasets while incorporating up-to-the-minute transactional data for timely decision-making.
- Simplify compliance and data governance: Utilize Snowflake’s advanced security features for sensitive MySQL data. This enables easier implementation of data masking, access controls, and audit trails across both platforms, streamlining compliance efforts.
Top 3 Methods to Connect Snowflake to MySQL: Choose Your Path
| Solution | Best For |
| Coefficient | Non-technical users who want to integrate Snowflake data with MySQL using Google Sheets as an intermediary for data transformation and analysis |
| Airbyte | Data engineers and developers seeking an open-source solution for automated data synchronization between Snowflake and MySQL |
| Snowflake Connector for MySQL | Organizations already using Snowflake who need native integration capabilities with MySQL databases |
Let’s break down each method in detail.
Method 1: Coefficient

Coefficient is a game-changer for those who want to harness the power of Snowflake and MySQL without diving into complex code. It’s an add-on that brings your Snowflake data directly into Google Sheets, where you can then export to MySQL. This method is perfect for teams who are comfortable with spreadsheets and want a visual, intuitive way to work with their data.
Here’s how to use Coefficient to connect Snowflake to MySQL:
Step 1. Install Coefficient
For Google Sheets
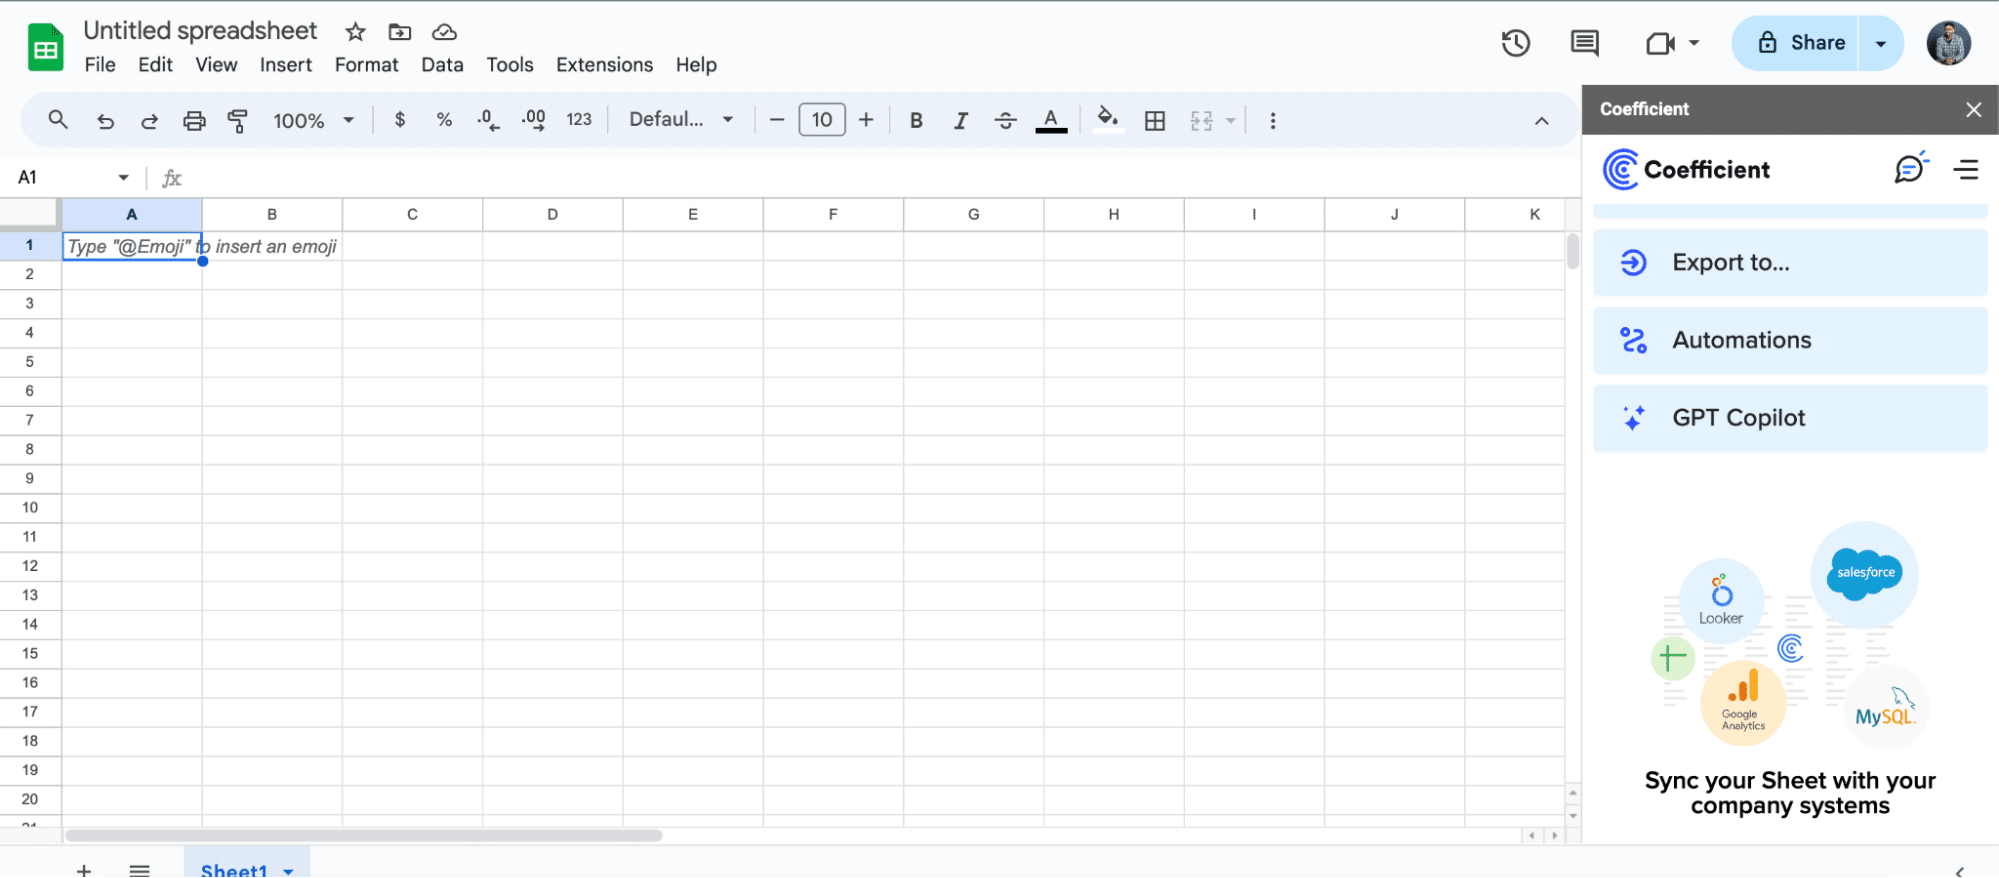
- Open a new or existing Google Sheet, navigate to the Extensions tab, and select Add-ons > Get add-ons.
- In the Google Workspace Marketplace, search for “Coefficient.”
- Follow the prompts to grant necessary permissions.
- Launch Coefficient from Extensions > Coefficient > Launch.
- Coefficient will open on the right-hand side of your spreadsheet.
For Microsoft Excel
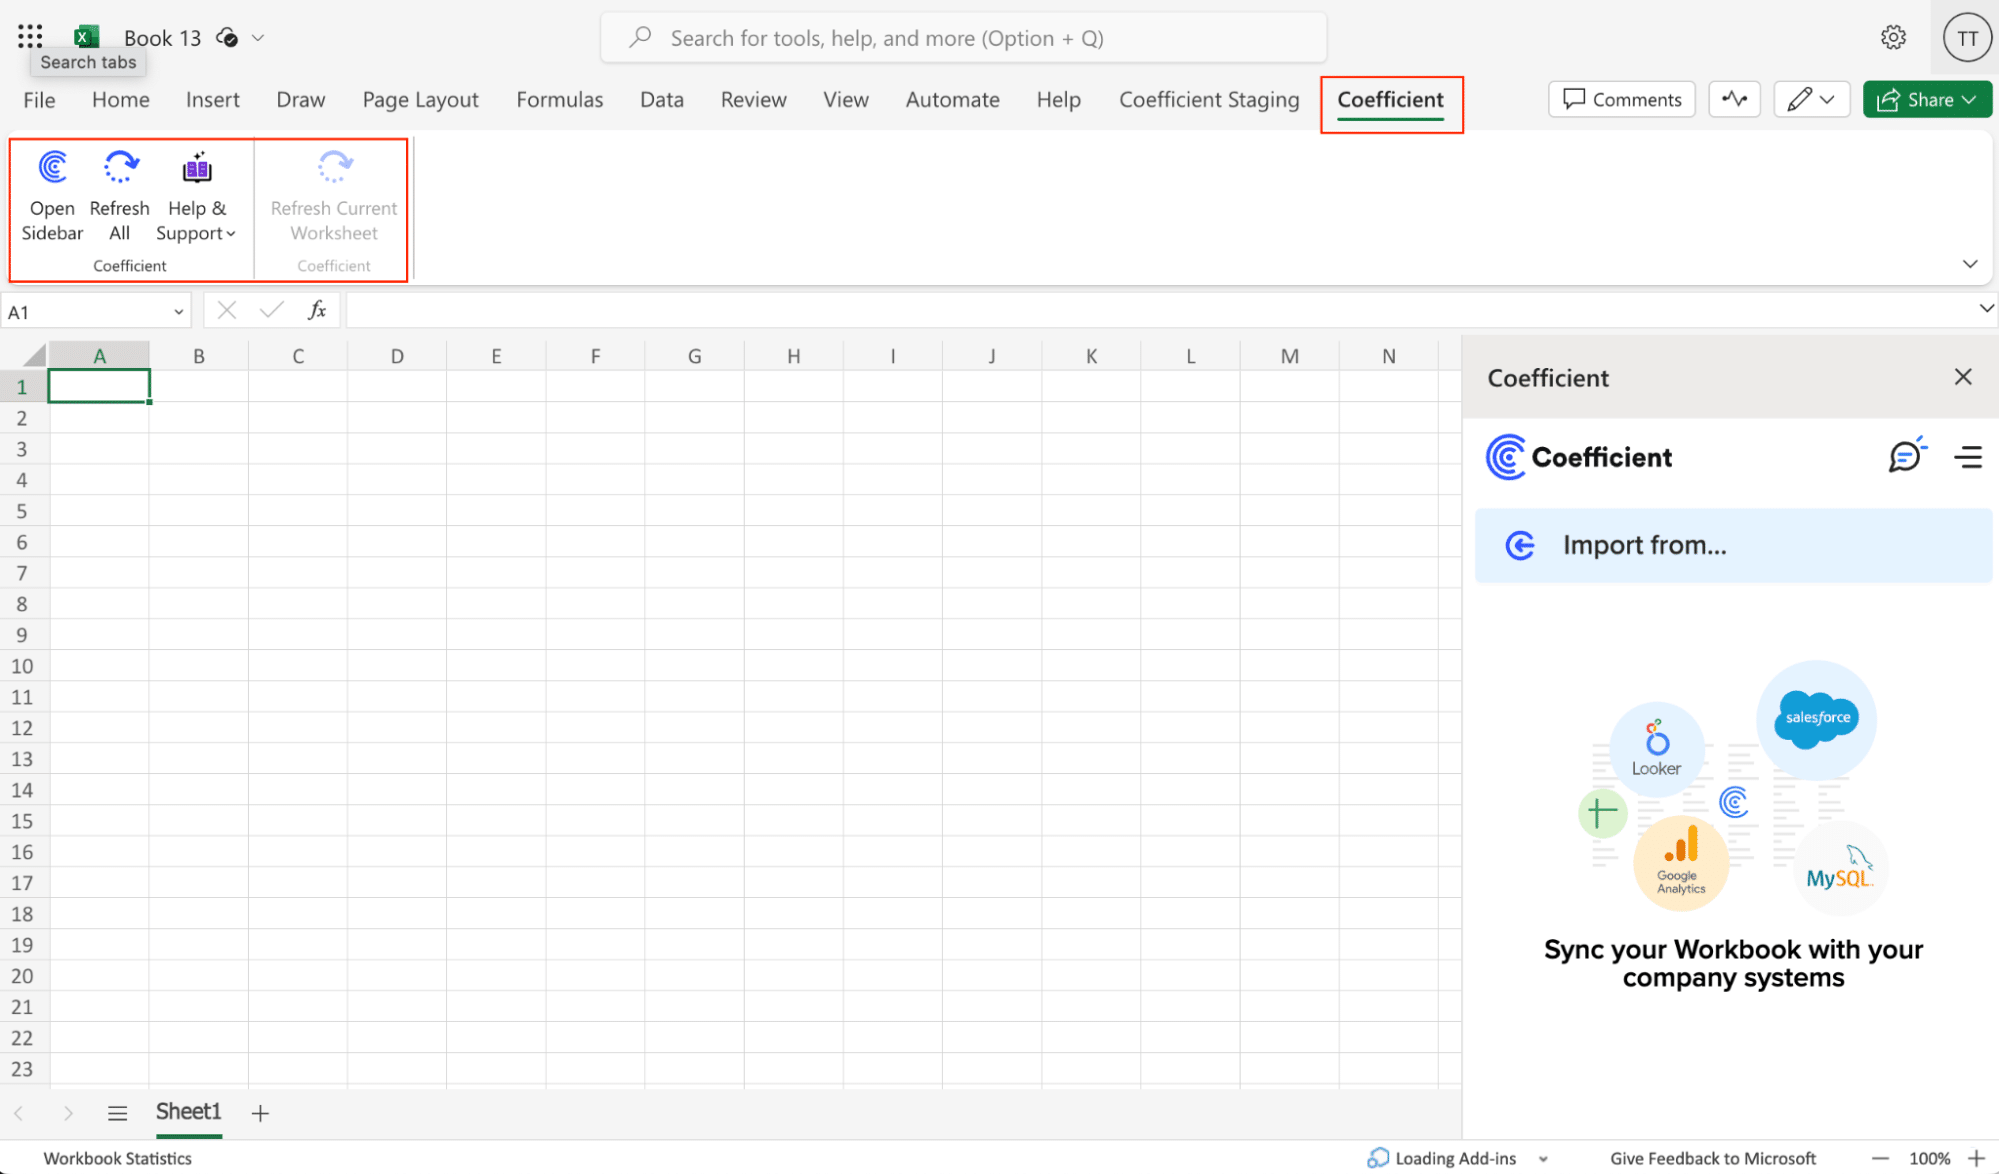
- Open Excel from your desktop or in Office Online. Click ‘File’ > ‘Get Add-ins’ > ‘More Add-Ins.’
- Type “Coefficient” in the search bar and click ‘Add.’
- Follow the prompts in the pop-up to complete the installation.
- Once finished, you will see a “Coefficient” tab in the top navigation bar. Click ‘Open Sidebar’ to launch Coefficient.
Step 2: Connect and Import Data from Snowflake
- Open Coefficient Sidebar: In Google Sheets, go to Extensions > Coefficient > Launch.
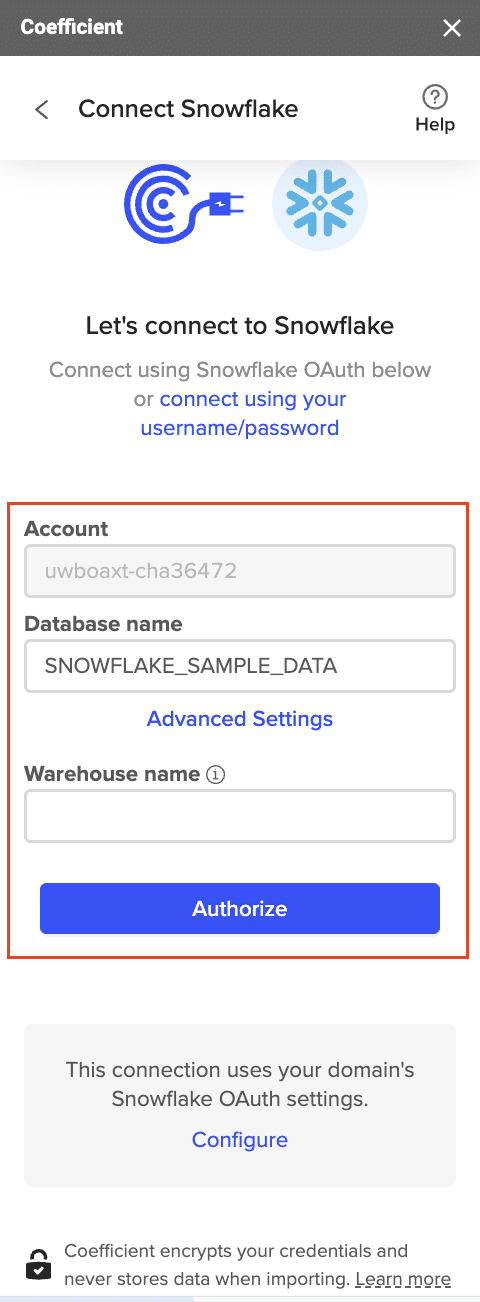
- Connect Snowflake: Click Import from… and select Snowflake.
- Authenticate: Enter Snowflake credentials (Account Name, Database Name, Username, Password, Warehouse Name).
- Select Data: Choose tables/columns or run a custom SQL query, then click Import.

Step 3. Export Data to MySQL
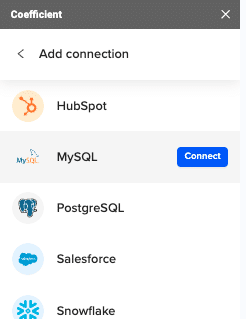
- Navigate to Export: In Coefficient’s sidebar, click Export to…, then select MySQL.
- Select Data and Action: Choose the tab and header row in your sheet that contains the data you want to export. Define your tab and header row. Specify the table in your database where you want to insert the data and choose the action type: Update, Insert, Upsert, or Delete.
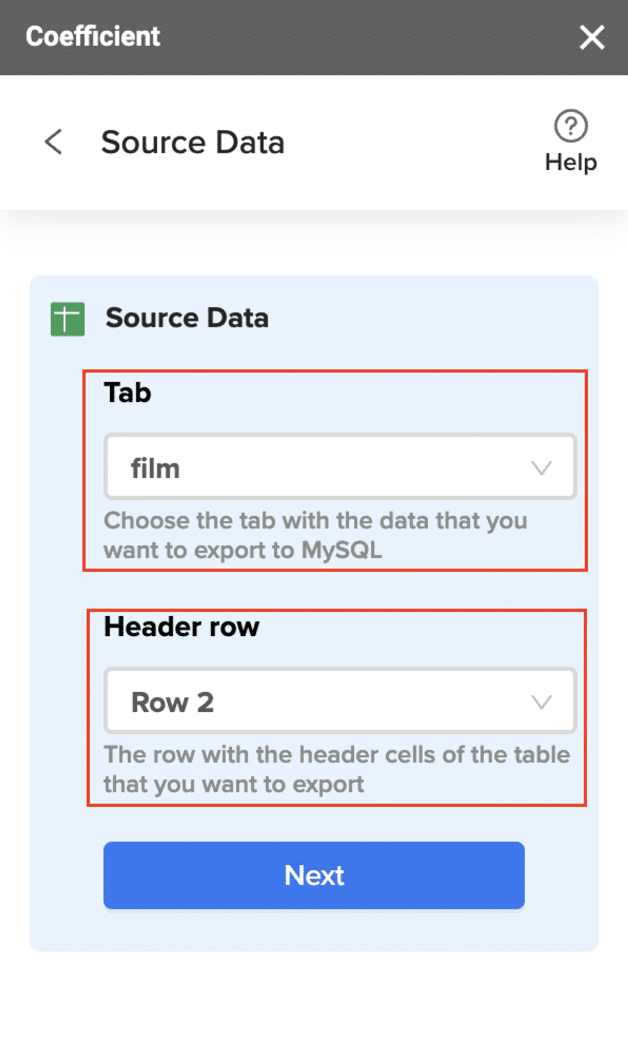
- Map Fields: Map the rows from your spreadsheet to the corresponding fields in MySQL. Manual mapping is required for first-time setups.

- Customize and Export: Specify batch size and any additional settings. Confirm your settings and click Export.

Pros:
- User-friendly interface, ideal for non-technical users
- Leverages the familiar Google Sheets environment
- Allows for easy data transformation before export to MySQL
Cons:
- Requires an intermediary step (Google Sheets)
- May not be suitable for extremely large datasets
Coefficient’s Snowflake Integration for Google Sheets makes it easy to bring your Snowflake data into a familiar spreadsheet environment. From there, you’re just a few clicks away from MySQL integration.
Method 2: Airbyte

Airbyte is an open-source data integration platform that allows for robust and customizable connections between various data sources and destinations, including Snowflake and MySQL. This solution is well-suited for data engineers and developers who require more control over the data synchronization process.
Step-by-step walkthrough:
Step 1. Set up Airbyte Begin by installing Airbyte on your local machine or cloud environment. You can use Docker for a quick setup:
git clone https://github.com/airbytehq/airbyte.git
cd airbyte
docker-compose up
Once installed, access the Airbyte UI by navigating to http://localhost:8000 in your web browser.
Step 2. Configure Snowflake as a source In the Airbyte UI, click on “Sources” and then “New Source.” Select Snowflake from the list of available connectors. Provide your Snowflake connection details, including account name, username, password, warehouse, database, and schema.
Step 3. Set up MySQL as a destination Click on “Destinations” and then “New Destination.” Choose MySQL from the list of connectors. Enter your MySQL connection information, including host, port, database name, username, and password.
Step 4. Create a connection Navigate to the “Connections” page and click “New Connection.” Select your Snowflake source and MySQL destination. Configure the sync settings, including which tables to replicate and the sync frequency.
Step 5. Define data mapping In the connection settings, map the Snowflake tables and columns to their corresponding MySQL tables and columns. Airbyte allows for custom transformations using SQL queries if needed.
Step 6. Run initial sync Start the initial sync to transfer data from Snowflake to MySQL. Monitor the progress in the Airbyte UI.
Step 7. Set up incremental syncs Configure incremental sync settings to ensure only new or updated data is transferred in subsequent syncs. This can be done by specifying a cursor field (e.g., a timestamp or ID column) in the connection settings.
Step 8. Monitor and maintain Regularly check the Airbyte logs and sync history to ensure data is being transferred correctly. Update your connection settings as needed to accommodate changes in your data structure or sync requirements.
Pros:
- Offers high level of customization and flexibility
- Supports incremental syncs for efficient data transfer
- Provides detailed logs and monitoring capabilities
- Open-source nature allows for community contributions and extensions
Cons:
- Requires technical expertise to set up and maintain
- May need additional resources for hosting and scaling the Airbyte infrastructure
Method 3: Snowflake Connector for MySQL
The Snowflake Connector for MySQL is a native integration solution provided by Snowflake. It allows for direct data transfer between Snowflake and MySQL databases, making it an excellent choice for organizations already heavily invested in the Snowflake ecosystem.
Step-by-step walkthrough:
Step 1. Enable the Snowflake Connector Log in to your Snowflake account and ensure you have the necessary privileges to create integrations. Enable the Snowflake Connector for MySQL by running the following SQL command:
USE ROLE ACCOUNTADMIN;
CREATE OR REPLACE API INTEGRATION mysql_connector
API_PROVIDER = mysql_connector
ENABLED = true;
Step 2. Create a Snowflake stage Create a stage to store the data that will be transferred between Snowflake and MySQL:
CREATE OR REPLACE STAGE mysql_stage
FILE_FORMAT = (TYPE = ‘CSV’ FIELD_DELIMITER = ‘,’ SKIP_HEADER = 1);
Step 3. Set up MySQL connection In Snowflake, create an external table that points to your MySQL database. Replace the placeholders with your actual MySQL connection details:
CREATE OR REPLACE EXTERNAL TABLE mysql_table (
column1 VARCHAR,
column2 INTEGER,
column3 DATE
)
WITH LOCATION = @mysql_stage
CONNECTION = (

Stop exporting data manually. Sync data from your business systems into Google Sheets or Excel with Coefficient and set it on a refresh schedule.
Get Started
ACCOUNT = ‘your_snowflake_account’
USER = ‘your_mysql_username’
PASSWORD = ‘your_mysql_password’
HOST = ‘your_mysql_host’
PORT = ‘your_mysql_port’
DATABASE = ‘your_mysql_database’
)
PATTERN = ‘.*’
FILE_FORMAT = (TYPE = CSV);
Step 4. Query MySQL data from Snowflake You can now query your MySQL data directly from Snowflake using standard SQL:
SELECT * FROM mysql_table LIMIT 10;
Step 5. Transfer data from Snowflake to MySQL To move data from Snowflake to MySQL, use the INSERT INTO statement with your external table:
INSERT INTO mysql_table
SELECT column1, column2, column3
FROM snowflake_source_table;
Step 6. Schedule data transfers Set up Snowflake tasks to automate regular data transfers between Snowflake and MySQL:
CREATE OR REPLACE TASK mysql_sync_task
WAREHOUSE = your_warehouse
SCHEDULE = ‘USING CRON 0 0 * * * America/New_York’
AS
INSERT INTO mysql_table
SELECT column1, column2, column3
FROM snowflake_source_table;
Step 7. Monitor and optimize Regularly check the performance of your data transfers using Snowflake’s query history and performance monitoring tools. Optimize your queries and connection settings as needed to ensure efficient data synchronization.
Pros:
- Native integration within the Snowflake ecosystem
- Supports direct querying of MySQL data from Snowflake
- Leverages Snowflake’s powerful data processing capabilities
- Allows for scheduled and automated data transfers
Cons:
- Requires Snowflake Enterprise Edition or higher
- May have limitations when dealing with complex MySQL schemas or data types
Streamline Your Snowflake to MySQL Connection Today
Connecting Snowflake to MySQL can significantly enhance your organization’s data management and analysis capabilities. Whether you choose Coefficient for its user-friendly approach, Airbyte for its flexibility, or the Snowflake Connector for native integration, each method offers unique advantages to suit different needs and technical expertise levels.
By implementing one of these connection methods, you’ll be able to leverage the combined power of Snowflake’s cloud data warehouse and MySQL’s relational database system. This integration will enable more comprehensive data analysis, improved data accessibility, and streamlined business intelligence processes.
Ready to take your data integration to the next level? Get started with Coefficient today and experience seamless connectivity between Snowflake and MySQL through the familiar interface of Google Sheets.
For more information on working with Snowflake data, check out these related resources:


