Exporting data from Snowflake to CSV is a common task for data professionals who need to work with Snowflake data in spreadsheets or other tools.
In this step-by-step guide, we’ll walk you through various methods to download data from Snowflake to CSV. We’ll also cover best practices and potential challenges to keep in mind when exporting large datasets. If you find yourself doing this often, over 2,500 Snowflake-powered orgs like Miro use pre-built Snowflake Google Sheets connectors to make their spreadsheet feel like an instance of Snowflake.
Now, let’s dive in!
Method 1. Exporting Snowflake Data to Spreadsheets
The best method for exporting data from Snowflake to CSV is to skip the manual processes altogether and use a tool like Coefficient. Coefficient offers secure, self-service access to live Snowflake data directly from spreadsheets.
Step 1. Install Coefficeint
Before getting started, install Coefficient for your spreadsheet. Coefficient’s 2-way Snowflake connector for spreadsheets is available in both Google Sheets and Excel. It only takes a few seconds to install, and you only have to do it once.
Step 2: Connect to Snowflake
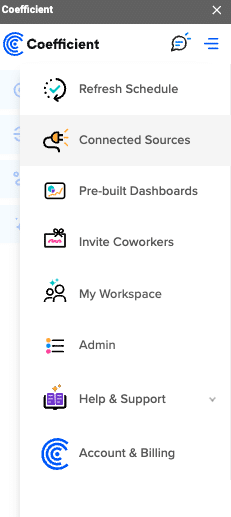
Open the Coefficient Sidebar. Click on the menu icon and select “Connected Sources.”
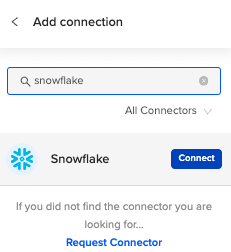
Search for Snowflake and click “Connect”.
Authenticate your Snowflake connection by providing your account details.
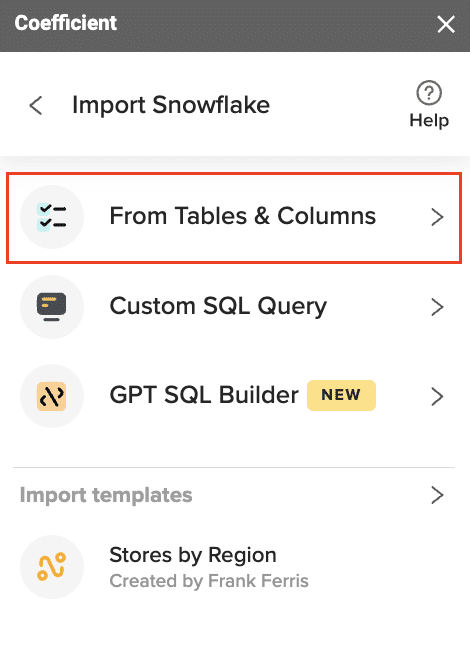
Coefficient offers three options to import your data from Snowflake: Tables and Columns, Custom SQL Query, and GPT SQL Builder.
Step 3: Import from Tables & Columns
Select ‘From Tables and Columns’ to proceed.
Step 4. Preview and Select Data
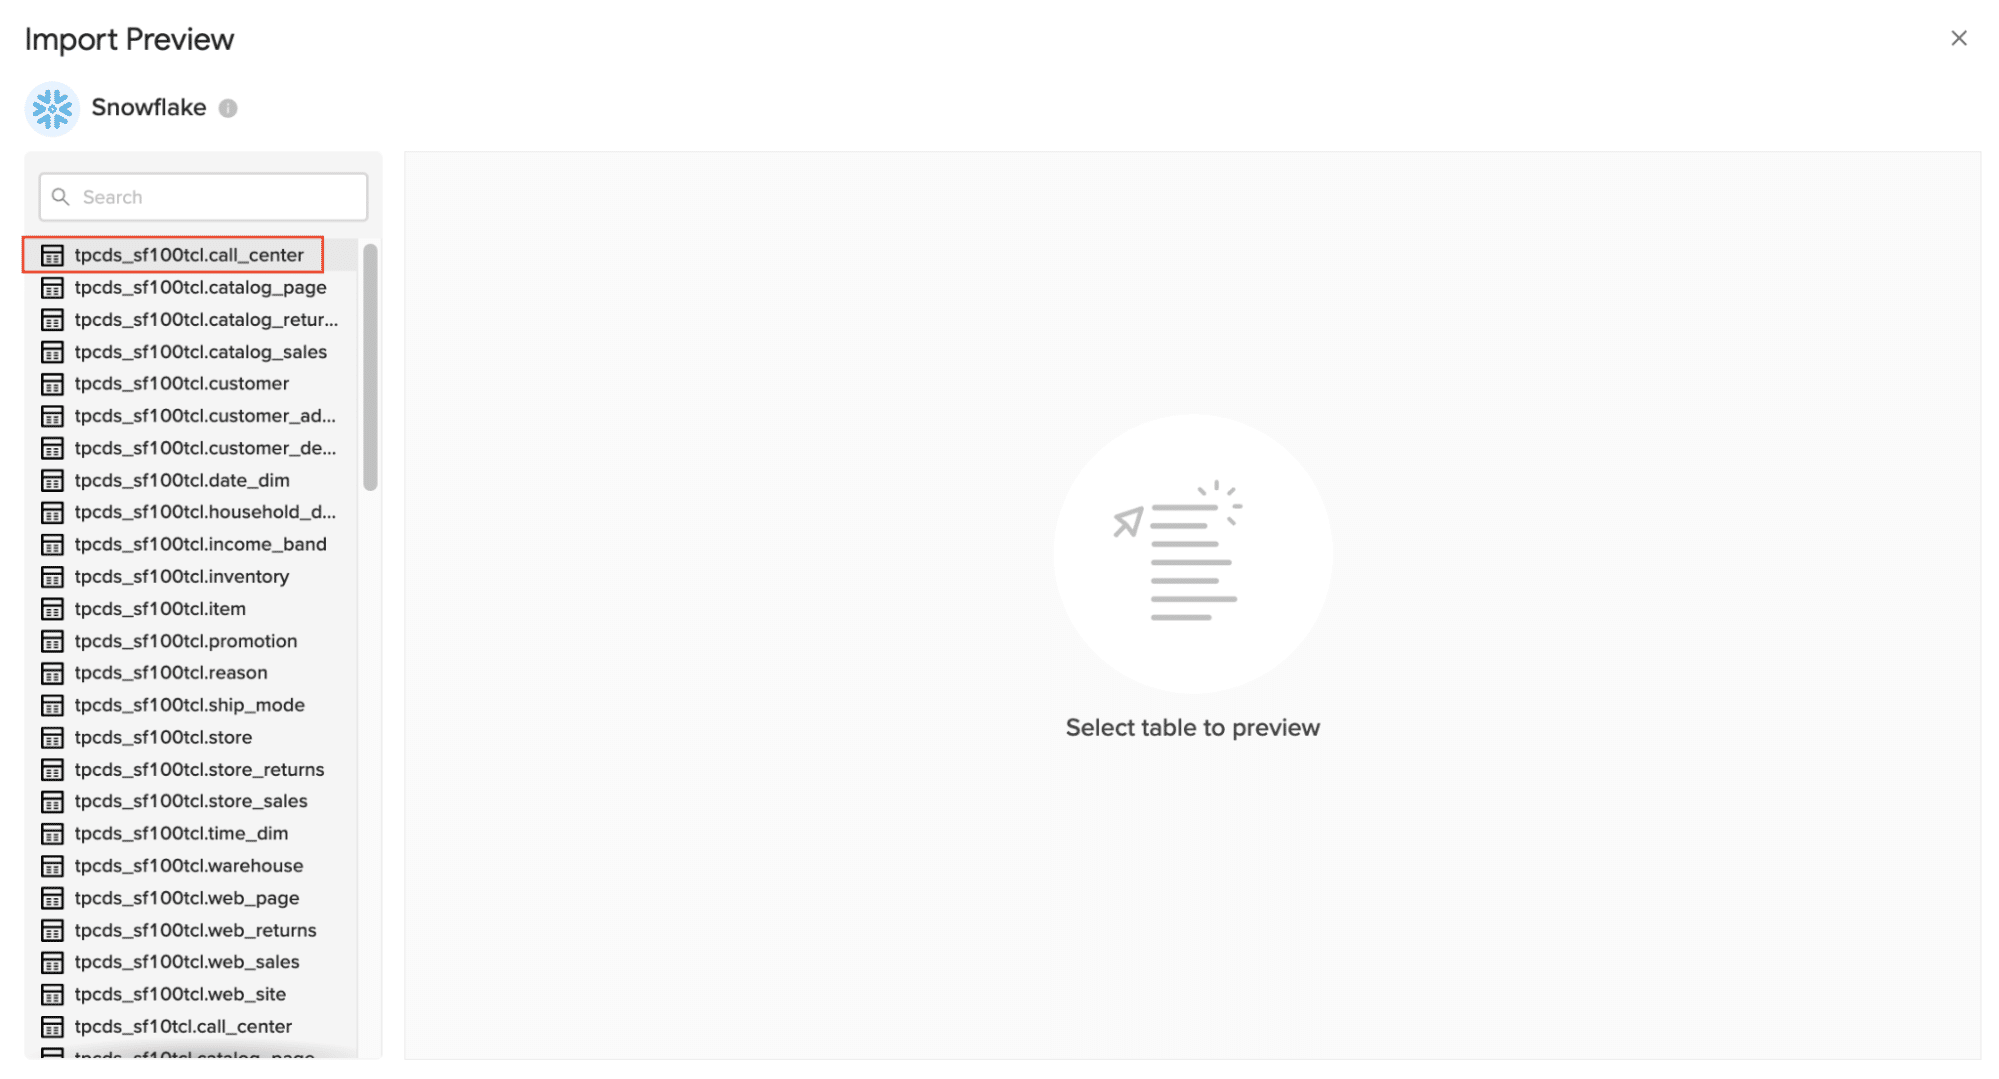
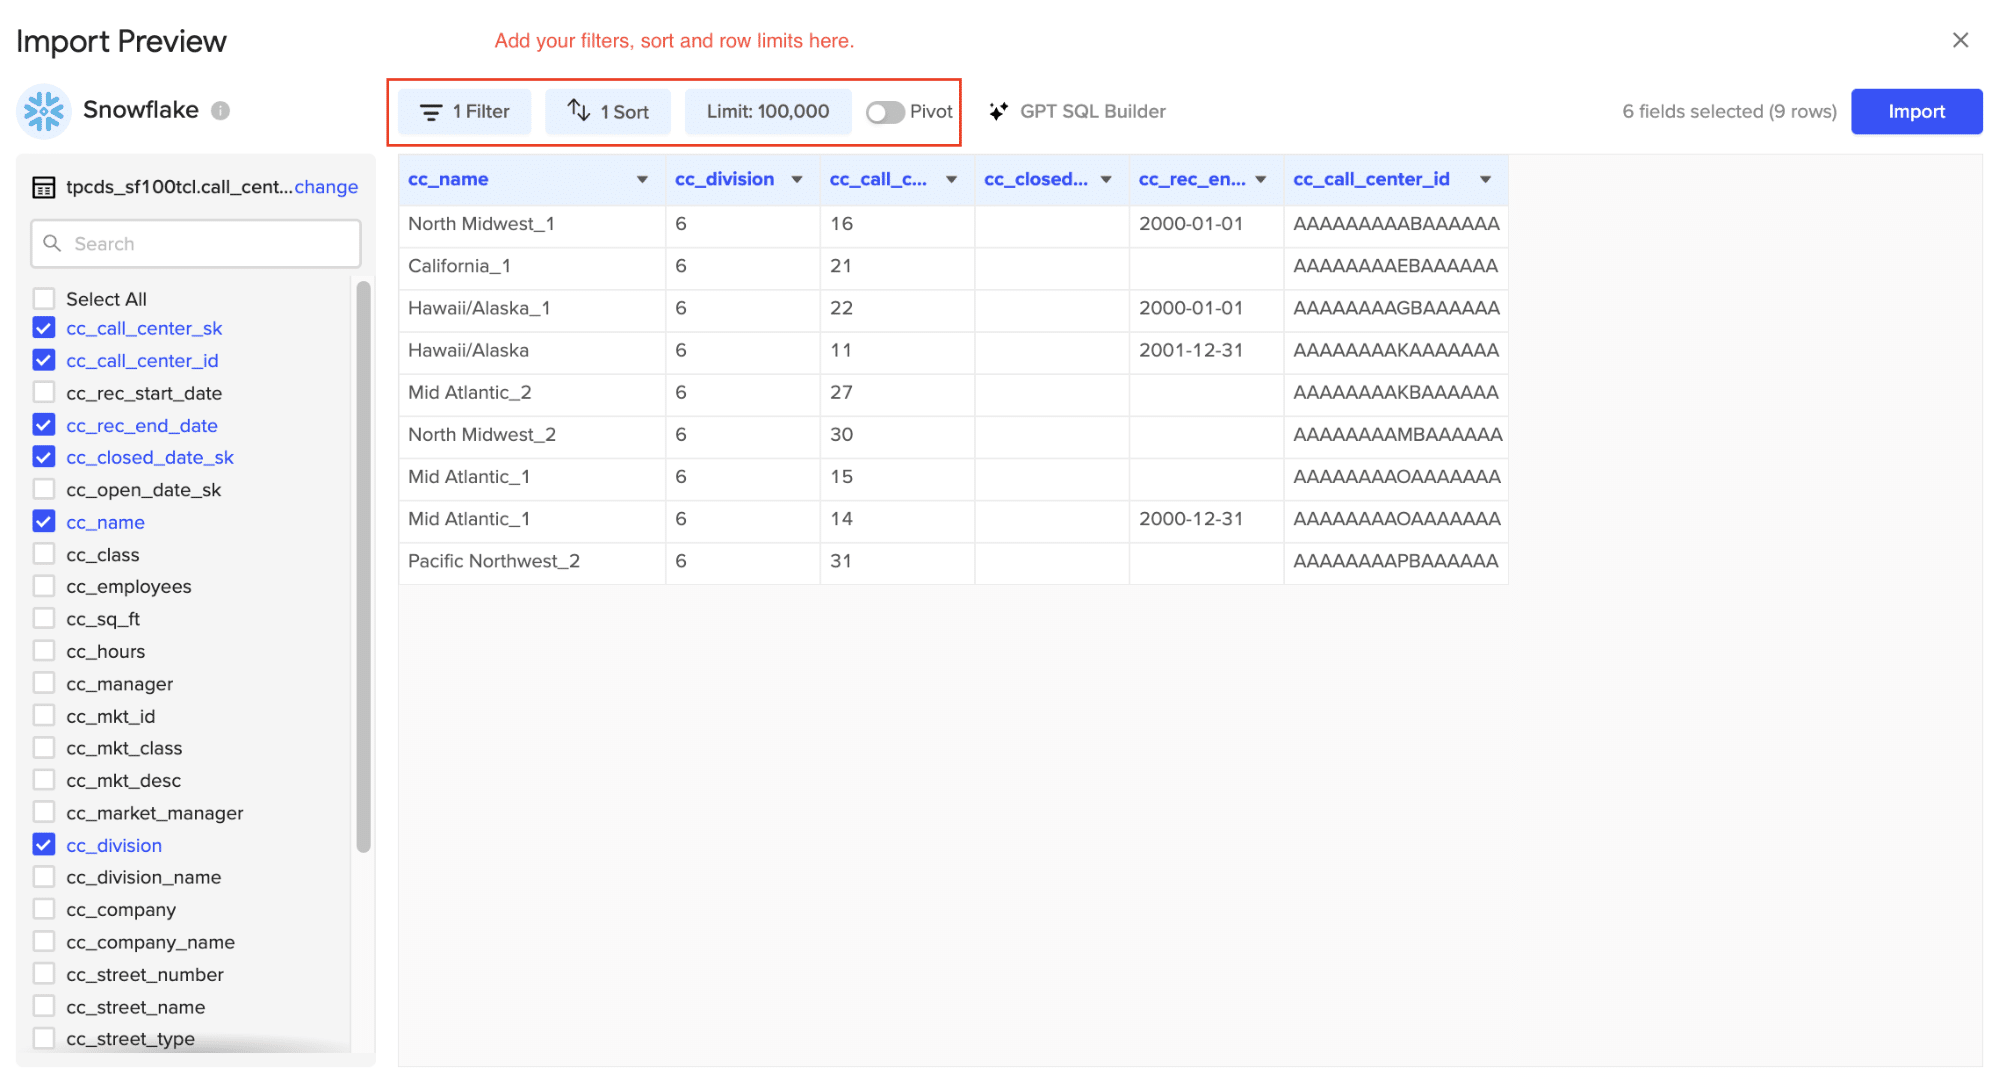
The Import Preview window will display the schemas of the tables available. Select the table you wish to import and choose the necessary columns
Step 4. Export Data from Snowflake
Customize your import by adding filters, and row limits as needed. When done click “Import”.
Step 5. Export to CSV
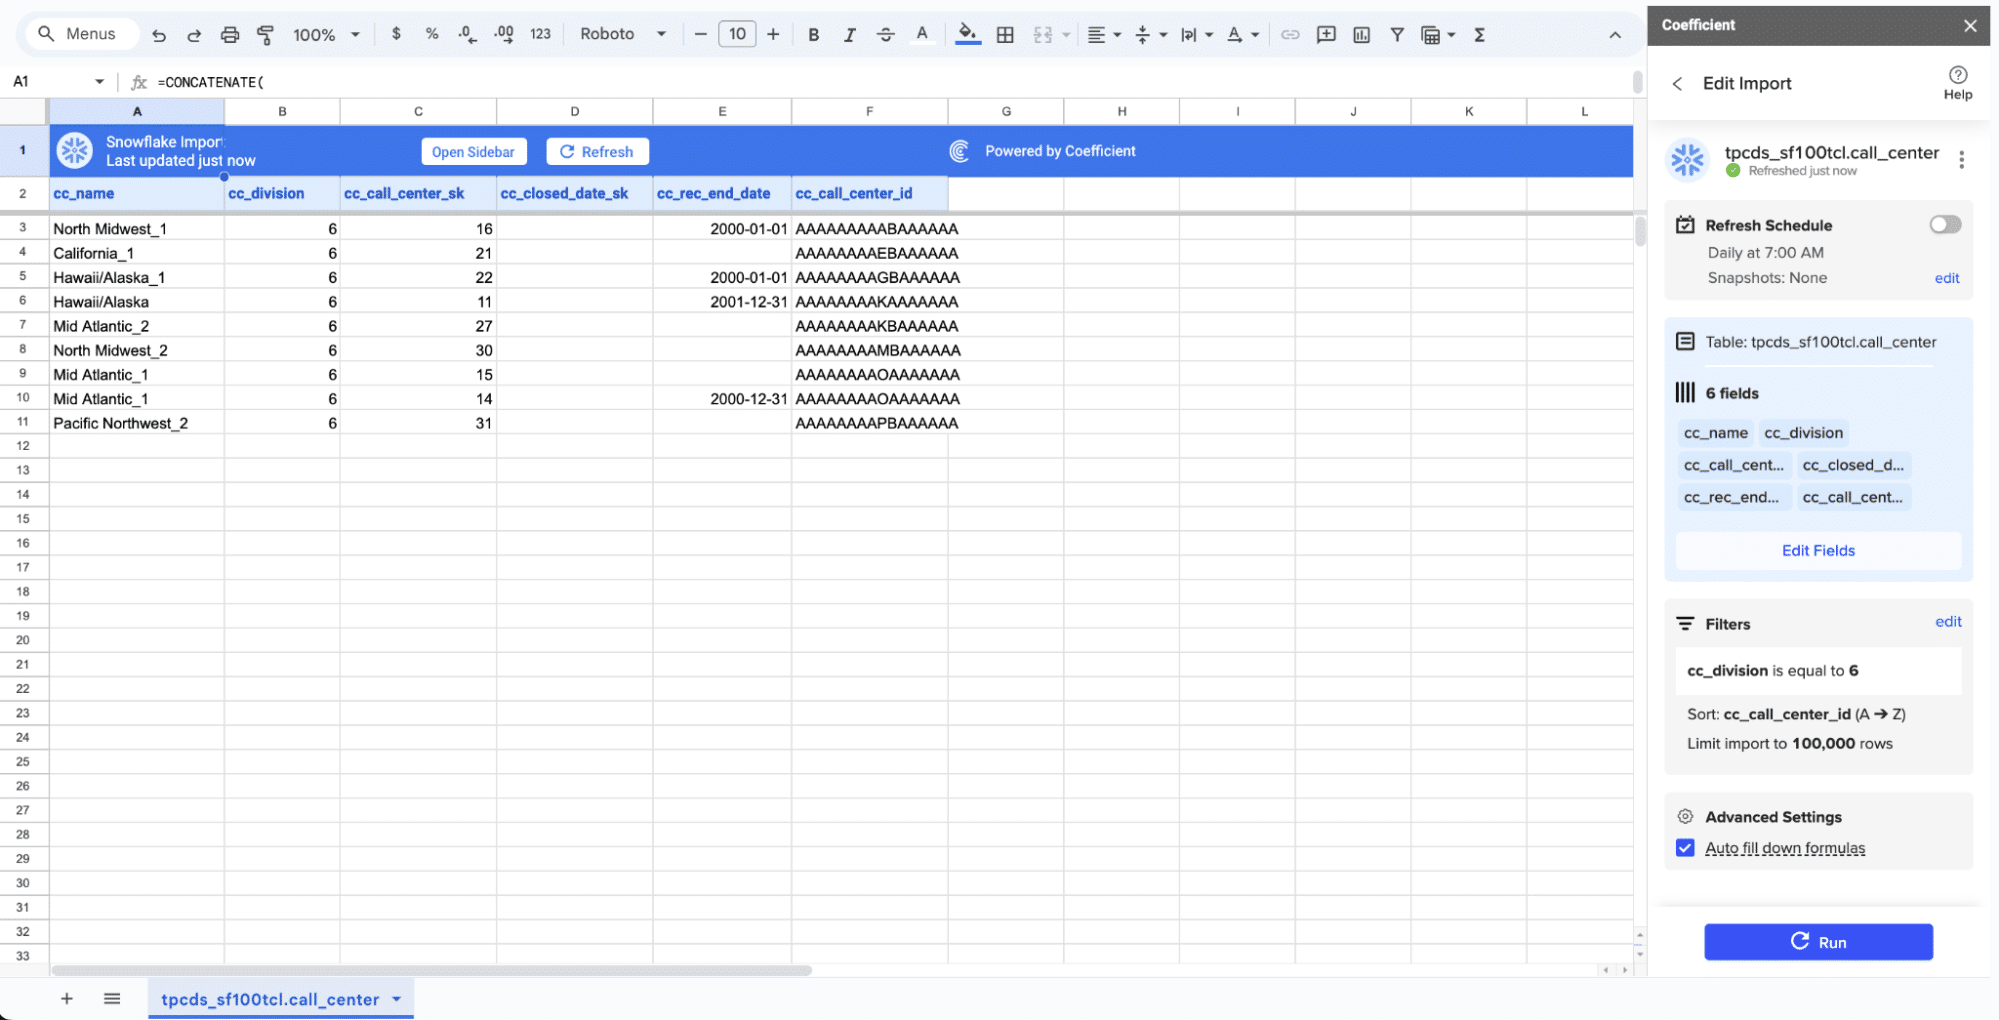
If you do, in fact, need your data in a CSV and weren’t planning on moving it from CSV to Google Sheets or Excel, once your data is in the spreadsheet, export it via CSV from your spreadsheet just as you normally would.
Step 6. Set Up Auto-Refresh
To keep your data up to date, set up an auto-refresh schedule in Coefficient. Choose an update frequency (hourly, daily, or weekly) and specify a time for the data to refresh automatically.

Method 2. Exporting Data Using SQL Commands
Exporting data directly using SQL commands in Snowflake is straightforward once you get the hang of it. This method can be broken down into two main approaches.
The COPY INTO Command
The COPY INTO command is a handy tool for exporting large datasets from Snowflake to CSV files. Here’s a step-by-step guide:
- Create a Staging Area: You need to create a staging area where the CSV file will be temporarily stored.
CREATE STAGE my_stage
- FILE_FORMAT = (TYPE = ‘CSV’ FIELD_DELIMITER = ‘,’ SKIP_HEADER = 1);
Export Data: Use the COPY INTO command to export data from a table or a query result into the staging area.
COPY INTO @my_stage/output/
FROM (SELECT * FROM mytable WHERE condition)
FILE_FORMAT = (TYPE = ‘CSV’ FIELD_DELIMITER = ‘,’ SKIP_HEADER = 1)
- HEADER = TRUE;
Download the CSV File: Finally, use the GET command to download the exported CSV file(s) from the staging area to your local machine. - GET @my_stage/output/ file://C:pathtodestination ;
Exporting Directly to a Local File
If you prefer to skip the staging area, you can export data directly to a local file using the COPY INTO command. Note that this requires ACCOUNTADMIN privileges.
COPY INTO ‘file://C:pathtooutput.csv’
FROM mytable
FILE_FORMAT = (TYPE = CSV FIELD_DELIMITER = ‘,’ SKIP_HEADER = 1)
HEADER = TRUE;
Method 3. Exporting Data via the Snowflake Web UI
For smaller datasets or quick one-off exports, you can use the Snowflake Web UI. Here’s how:
- Run a SELECT Query: Execute a SELECT query to retrieve the data you want to export.
- Download the Data: In the query results pane, click the “Download” button, choose “CSV” as the file format, and click “Download” to save the file to your local machine.
Keep in mind that the Web UI is useful for small datasets and quick tasks but may not be suitable for large datasets or automated workflows.
Method 4. Exporting Data with SnowSQL
SnowSQL, Snowflake’s command-line client, is another way to export data. Here’s a clear guide:
Setting Up SnowSQL for CSV Export
- Configure SnowSQL: Open the SnowSQL configuration file located at ~/.snowsql/config in a text editor.
- Set Output Format: Change the output_format parameter to csv to specify the CSV format.
- Additional Settings: Optionally, customize other settings like field delimiter and whether to include headers.
Executing Export Commands
- Using COPY INTO Command: Use the COPY INTO command with the file:// prefix to export data to a local file.
COPY INTO ‘file://C:pathtooutput.csv’
FROM mytable
FILE_FORMAT = (TYPE = CSV FIELD_DELIMITER = ‘,’ SKIP_HEADER = 1)
- HEADER = TRUE;
Monitor Export Progress: Run the command and monitor the export process using SnowSQL’s built-in logging features.- Verify Exported File: Check the exported file’s size and content to ensure it has been exported correctly.
Best Practices for Handling Data Exports from Snowflake
Optimizing for Large Data Sets
When dealing with large volumes of data, consider the following techniques to minimize export time and resource usage:
- Partition your data and export in smaller chunks to avoid memory constraints.
- Use columnar storage formats like Parquet or ORC for faster query processing and reduced storage costs.
- Leverage Snowflake’s clustering keys to improve query performance on large tables.
Chunked Data Export
For extremely large datasets, exporting data in chunks can help manage the process more efficiently:
- Divide your data into smaller, manageable chunks based on a suitable criteria (e.g., date range, primary key).
- Export each chunk separately and save them as individual CSV files.
- Merge the individual files into a single consolidated CSV file if required.
Common Challenges and Troubleshooting Tips
Handling Common Errors
During the data export process, you may encounter various challenges. Here are some common pitfalls and how to avoid them:
- Data type mismatches: Ensure that the data types in your SELECT query match the expected format in the CSV file. Use appropriate data type conversion functions if necessary.
- Encoding issues: Specify the correct character encoding (e.g., UTF-8) in your export command to avoid garbled or missing characters in the CSV file.
- Network connectivity problems: Check your network connection and firewall settings to ensure a stable connection between your local machine and the Snowflake server.
Ensuring Data Accuracy
To maintain the accuracy of your exported data, consider the following tips:
- Perform data validation checks on the exported CSV file to identify any discrepancies or anomalies.
- Verify that the number of records in the exported file matches the count returned by your SELECT query.
- Double-check the formatting of the CSV file, including field delimiters and line endings, to ensure compatibility with your target system.
From Snowflake to Spreadsheets: Klaviyo’s Success Story
Klaviyo, a leading marketing automation platform, faced challenges with a growing number of data requests from across the organization. By adopting Coefficient, Klaviyo’s data team was able to:
- Enable self-serve analytics, saving the data team months of manual work
- Centralize reporting with automated data refreshes from Snowflake
- Expand Coefficient usage to multiple teams for use cases like product analytics and financial planning
Don’t Export Snowflake Data to CSV. Use Coefficient.
Exporting data from Snowflake to CSV is common for many organizations, but it comes with the risk of errors and outdated data. Instead of dealing with these issues, you can use Coefficient to get live data directly into your spreadsheet.
Skip the CSVs. Try Coefficient today to keep your data live and error-free in your spreadsheet.


