
Updating Snowflake can be a challenge. The available options often involve navigating complicated GitHub repositories or relying on unreliable workarounds.
But there’s a better way.
This guide introduces a straightforward, no-code method to import data into Snowflake, and set it on a refresh schedule if you’d like. Discover a hassle-free way to keep your data in sync directly from your Connected Spreadsheet.
Let’s dive in!
How to Update Snowflake Without Code? Use Coefficient.
Coefficient is a no-code add-on that seamlessly integrates live data from various business solutions and databases directly into Connected Spreadsheets: Excel or Google Sheets.
As a Snowflake Technology Partner, Coefficient makes it safe and easy to connect to Snowflake to import your desired data. This frees you and your team from countless hours of moving your Snowflake data to your spreadsheets manually without sacrificing peace of mind.
Any update on your connected Snowflake data automatically syncs with your Google Spreadsheets in real time, so you always work with the latest information.
Plus, Coefficient allows you to upload data to Snowflake from any of the other systems we connect with like Tableau or Salesforce.
Let’s walk through the complete process of loading data to Snowflake with Coefficient to see how easy it is.
Push Data to Snowflake: A Step-by-Step Guide
Step 1: Install Coefficient
Note: In this tutorial, we will use Google Sheets.
Start by opening up a new spreadsheet.
Navigate to the top menu and click Extensions> Add-ons > Get add-ons.
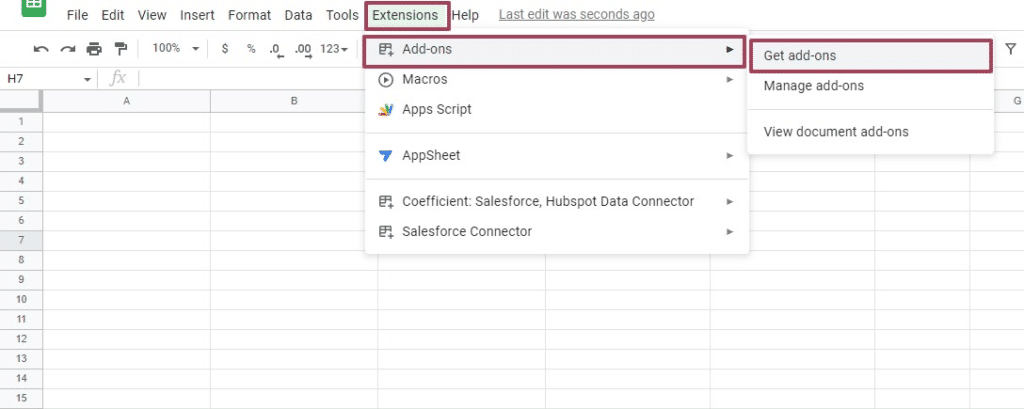
This will direct you to the Google Workspace Marketplace.
Type in “Coefficient” in the search bar and select the Coefficient app.

Accept the prompts to install.
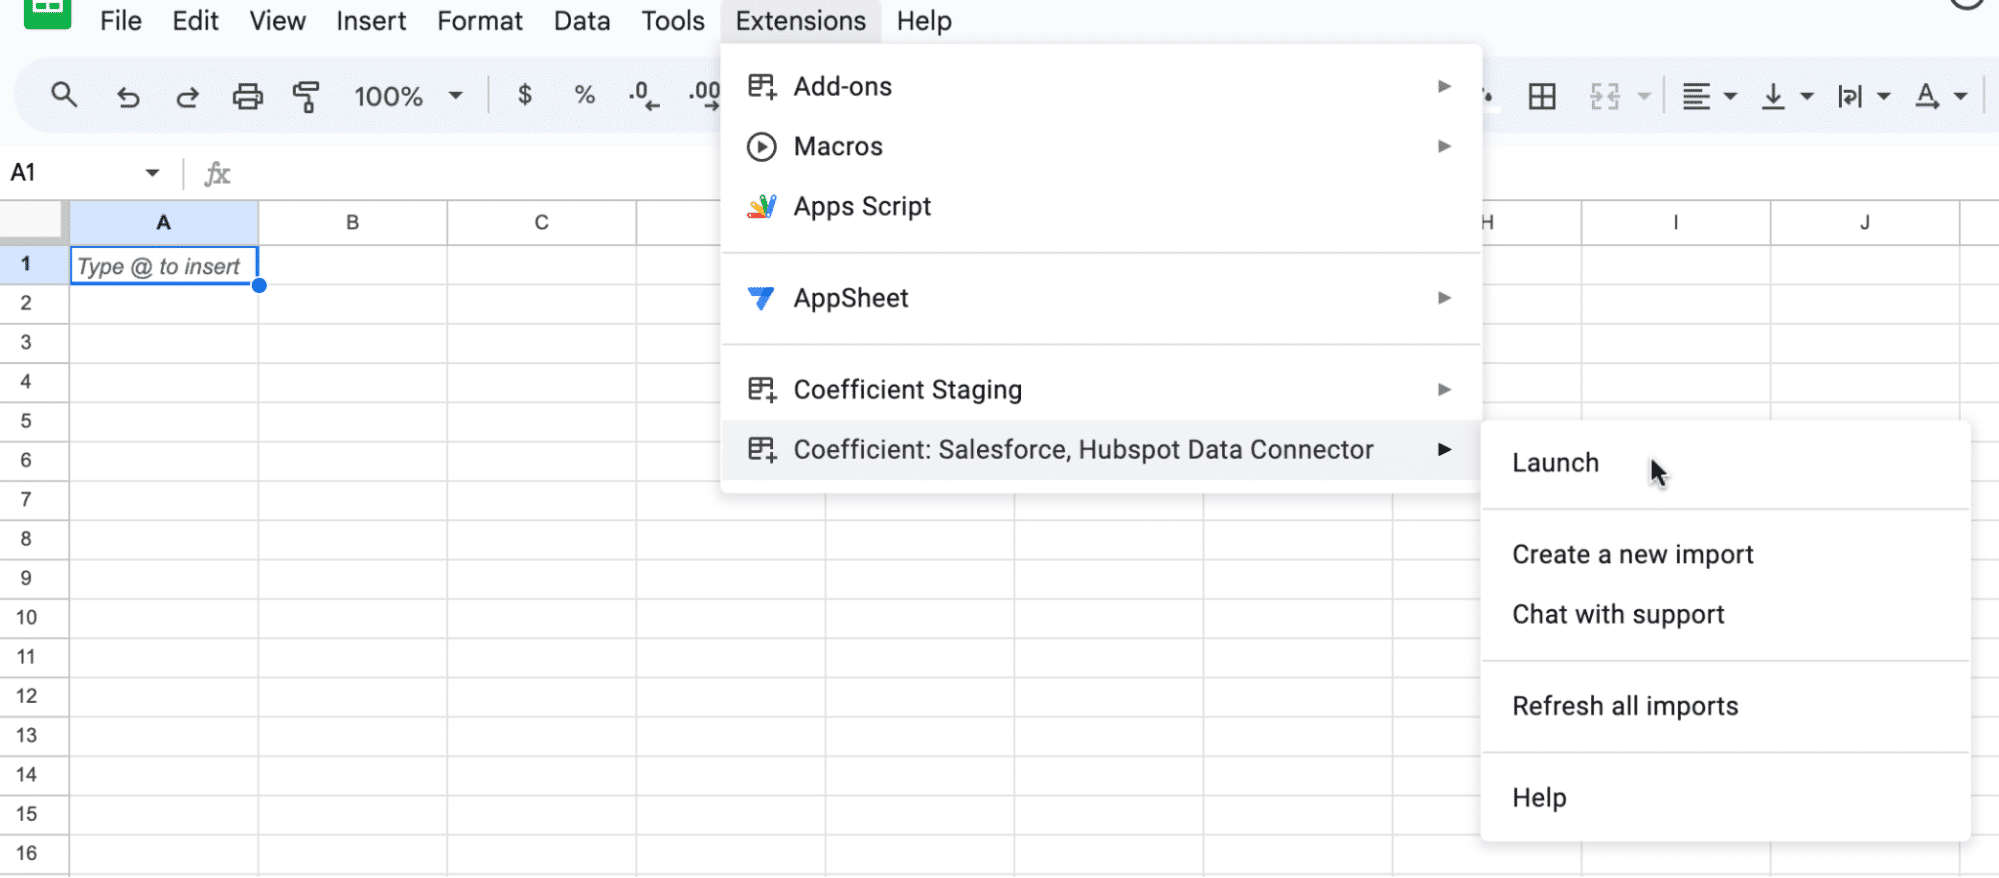
Once installation is finished, return to Extensions on the Google Sheets menu.
You’ll see that Coefficient is now available as an add-on.
Launch Coefficien to continue.
Step 2: Import Snowflake Data
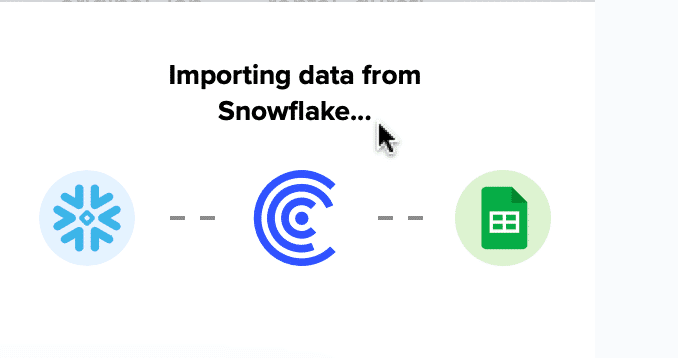
Launch Coefficient and click ‘Import from…’

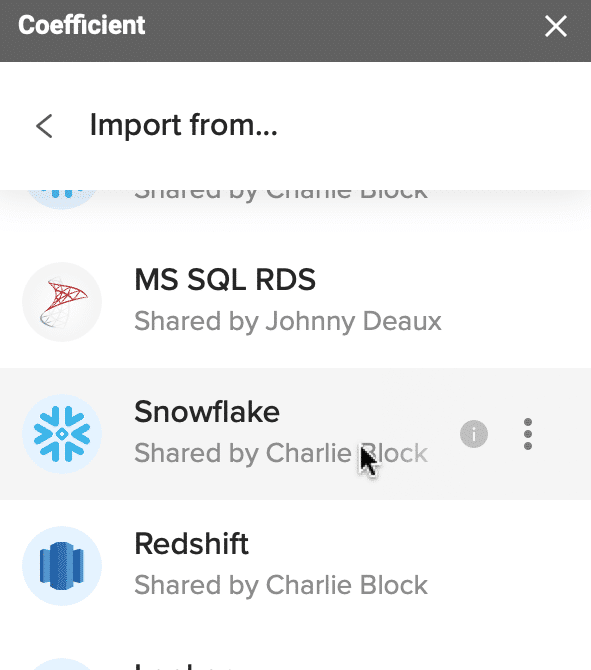
Select Snowflake as your data source.
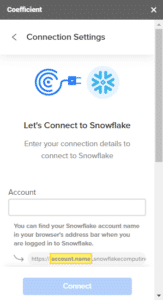
If this is your first time connecting to Snowflake, you will have to authorize Coefficient to access your Snowflake database.
Follow the prompts to continue.
Once connected, select the Snowflake data you want to import.
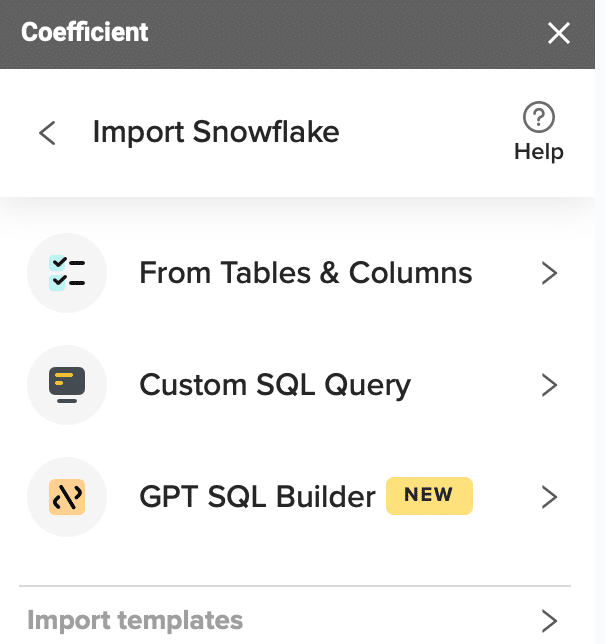
Coefficient allows you select and import your Snowflake Tables in a visual editor. You can also write a custom SQL Query.
Pro-tip: Use Coefficient’s GPT SQL Builder to help you create a custom query with a simple prompt.
For the purpose of this example, we’ll select ‘From Tables & Columns.’
This will open Coefficient’s Import Preview window.
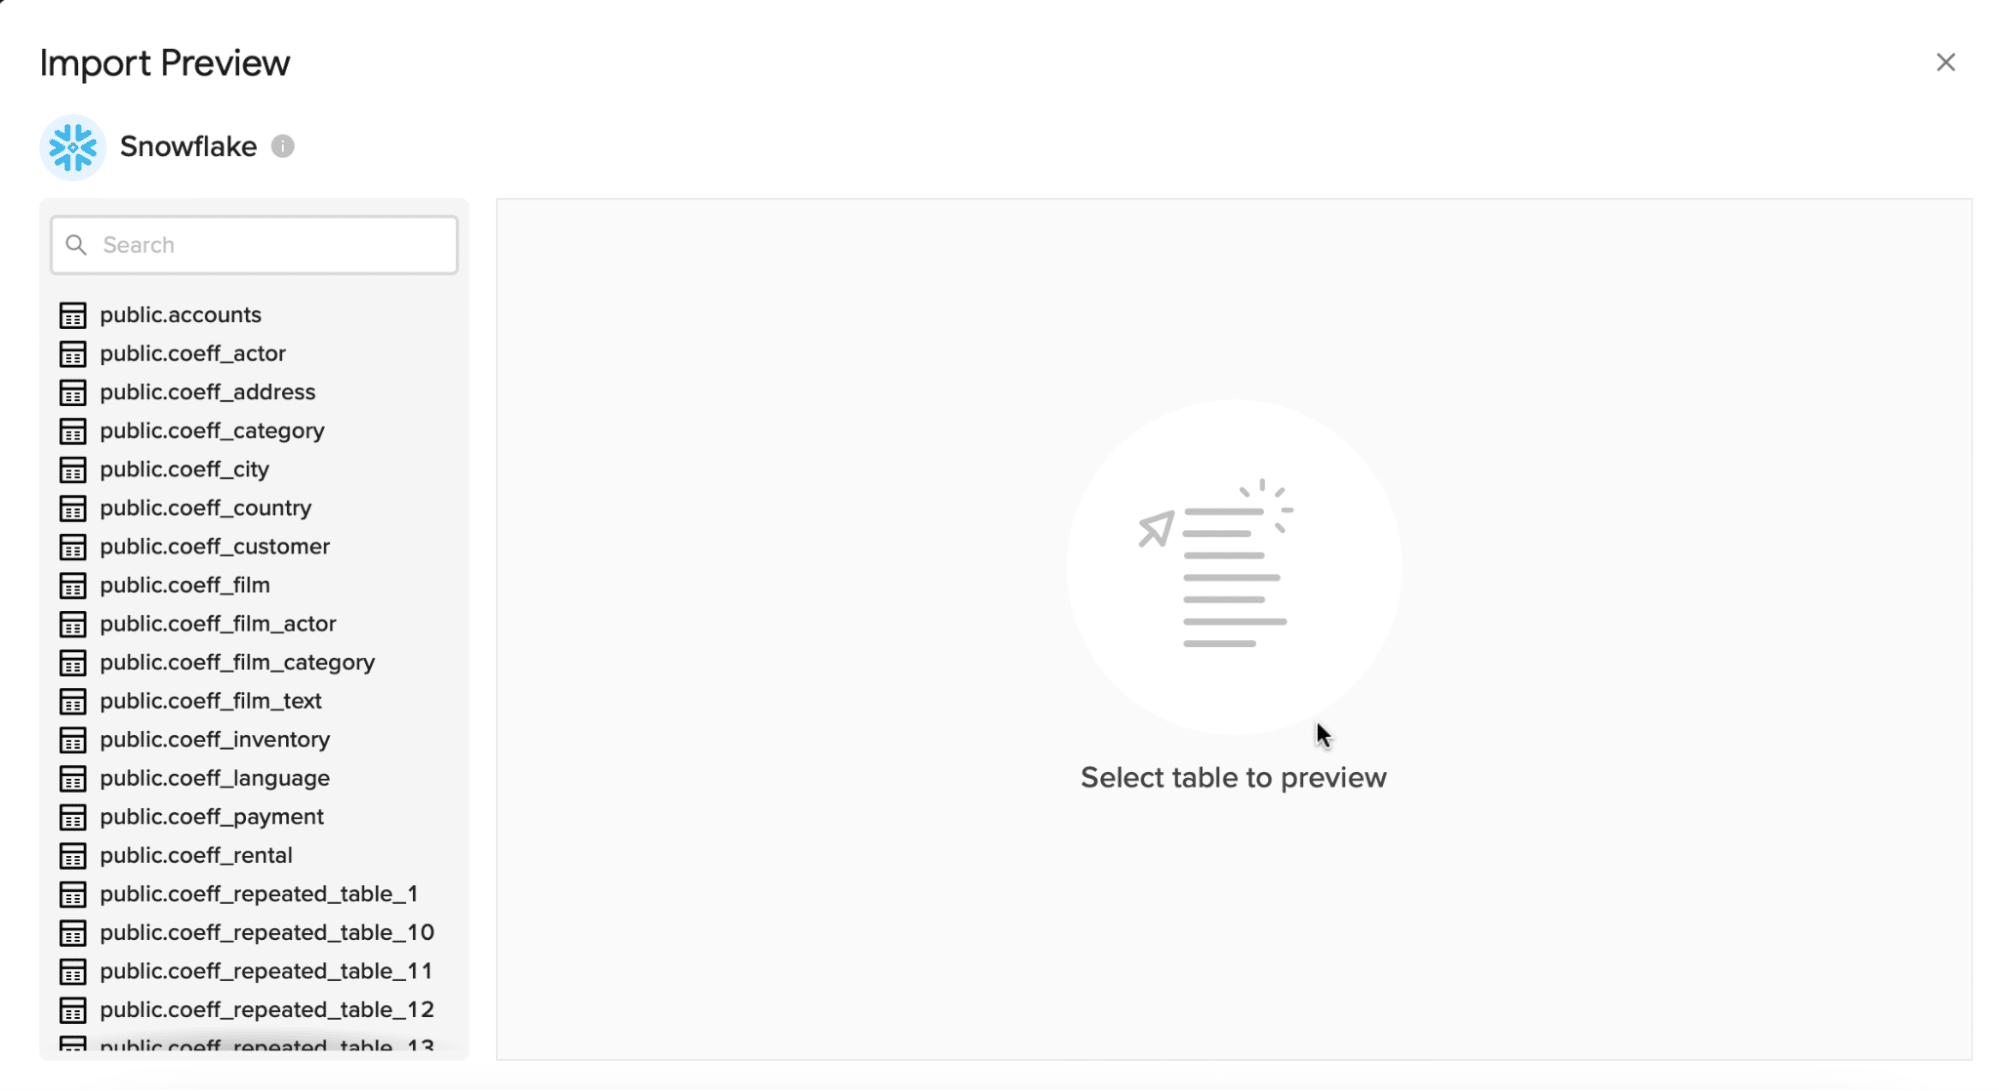
Select the table you want to import from the left-hand column of the Import Preview menu.
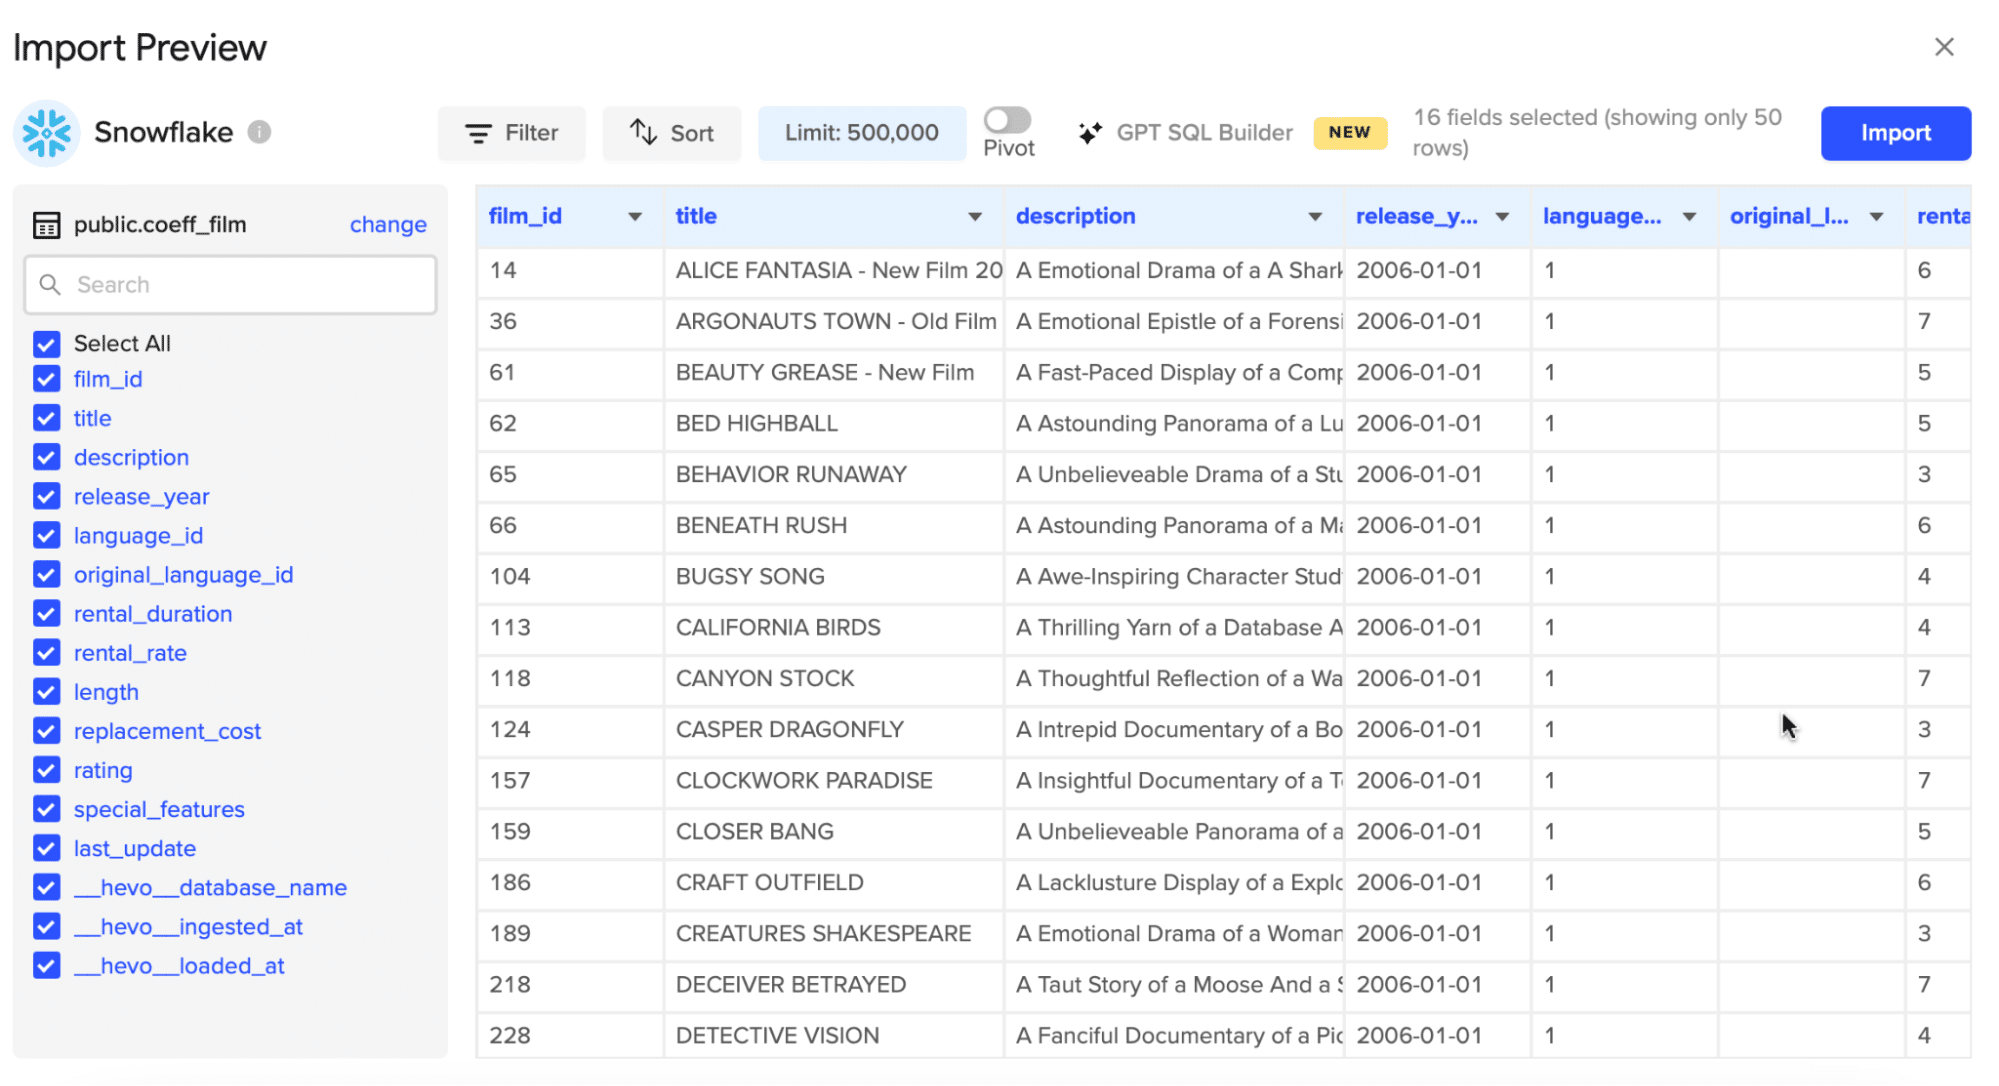
From here, you can customize your import by selecting and unselecting columns from the menu.
Click ‘Import’ when you’re finished.
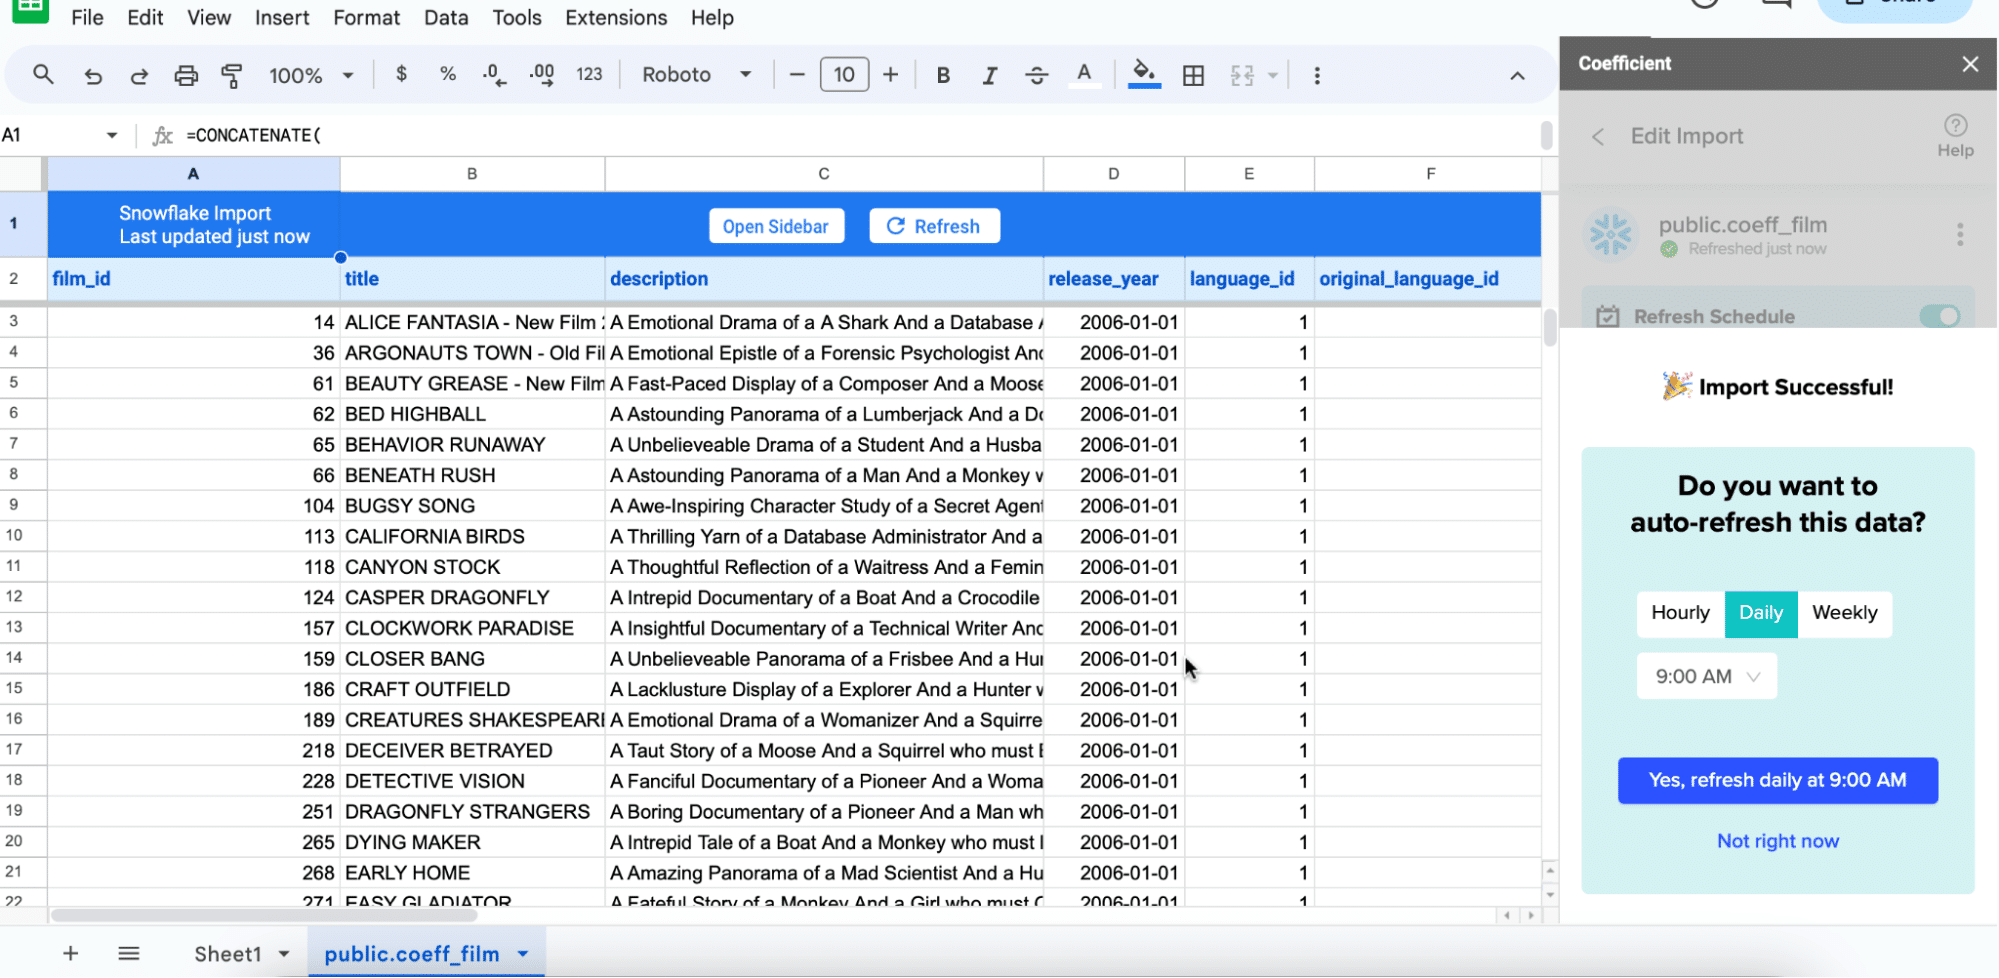
Within a few seconds, your Snowflake data will automatically populate your Google spreadsheet without a single line of code!
The true power of Snowflake lies in being the single source of truth for live data.
Coefficient’s Auto-Refresh feature allows anyone to access this real-time data in their Connected Spreadsheets.
Choose your update frequency – hourly, daily, or weekly. Coefficient takes care of the rest.

Step 3: Upload data to Snowflake
Now, let’s focus on how you can edit your data extract and import it back to Snowflake.
After importing data into Google Sheets with Coefficient, you have the flexibility to edit it as needed. This could involve adjusting sales figures, updating customer information, or refining data sets for analysis.

Stop exporting data manually. Sync data from your business systems into Google Sheets or Excel with Coefficient and set it on a refresh schedule.
Get Started
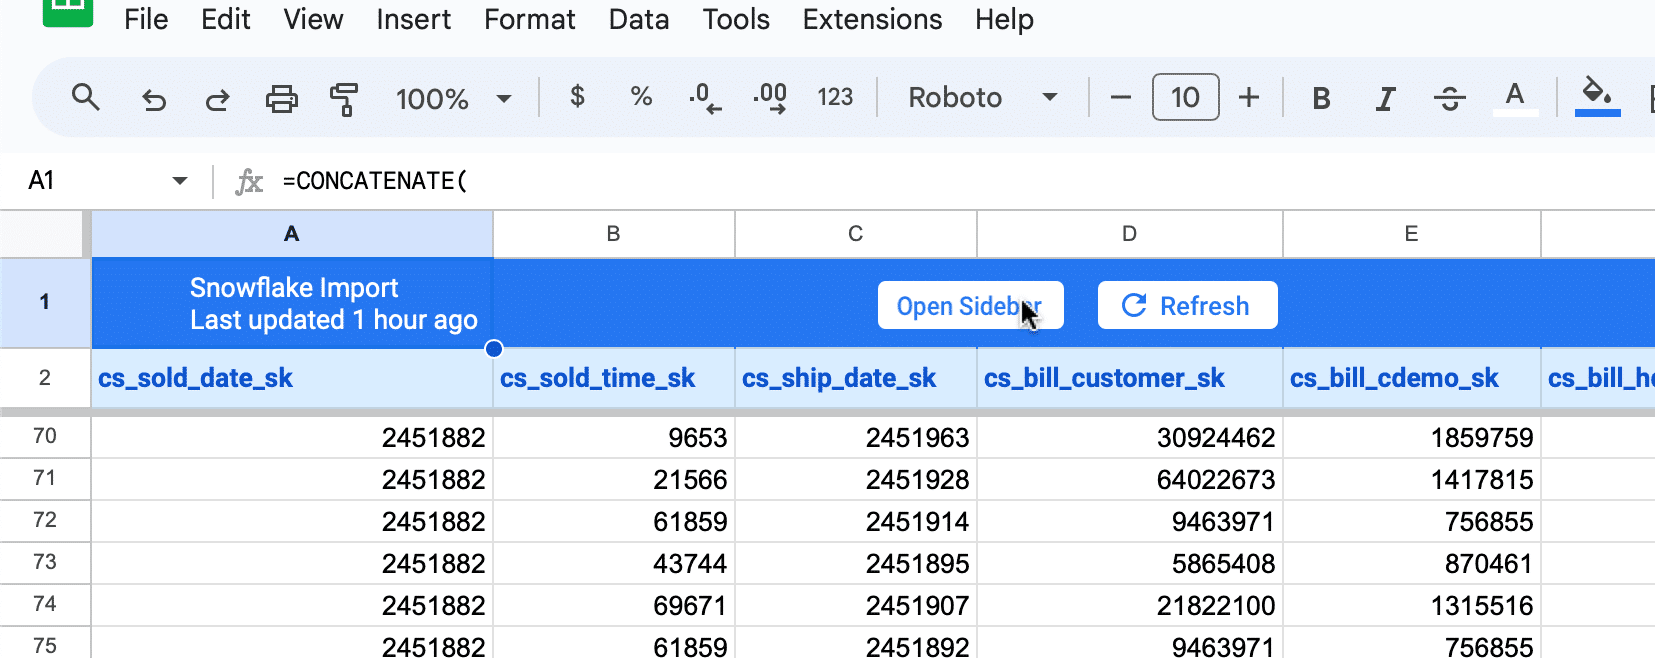
Once your edits are complete, navigate to the top of your import and click ‘Open Sidebar.’
To upload data to Snowflake, scroll down the Coefficient sidebar until you see the the ‘Export to Snowflake’ option.
Click ‘Configure…’
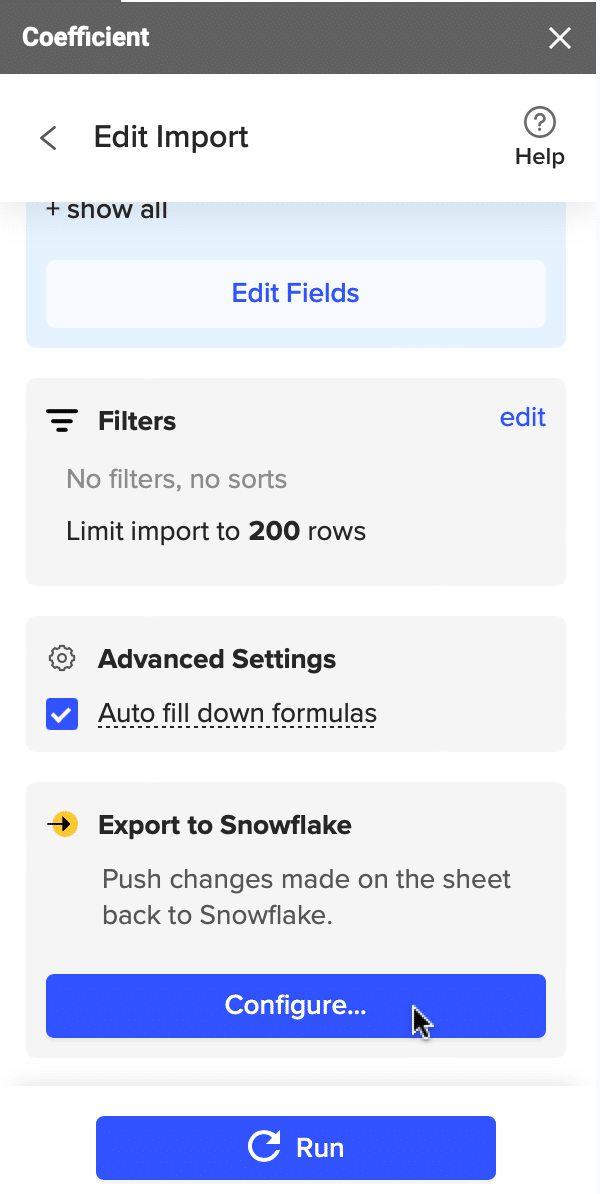
Note: You can also do this by returning to the Coefficient menu > Export to… > Snowflake. This approach is particularly beneficial when you need to upload CSVs to Snowflake that are not part of Coefficient imports
Next, identify the data you wish to export.
Select the specific tab and the header row for your Snowflake export using the drop-down menus.
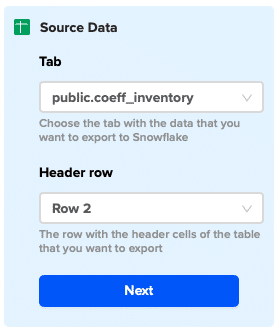
Click ‘Next’ to continue to select your destination.
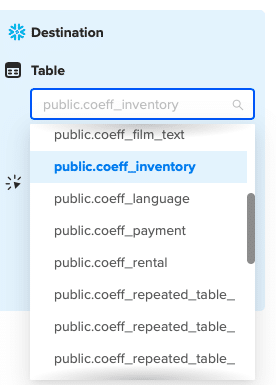
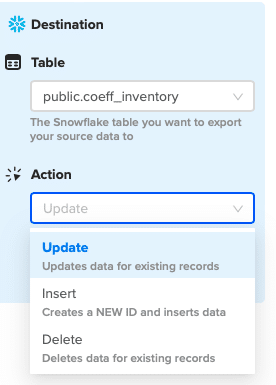
Open the drop-down under ‘Table’ and select the appropriate Snowflake table.
Next, open the Action drop-down menu . You’ll notice three options:
- Update: Updates data for existing records
- Insert: Creates a NEW ID and inserts data
- Delete: Deletes data for existing records
Select ‘Update’ and click ‘Next’ to continue.
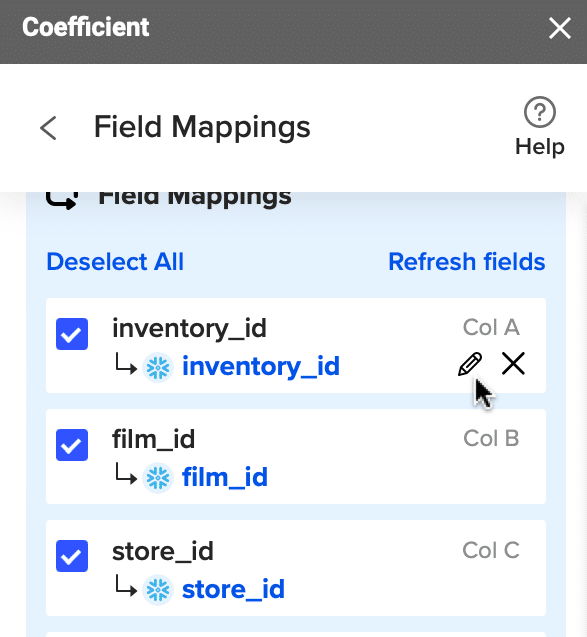
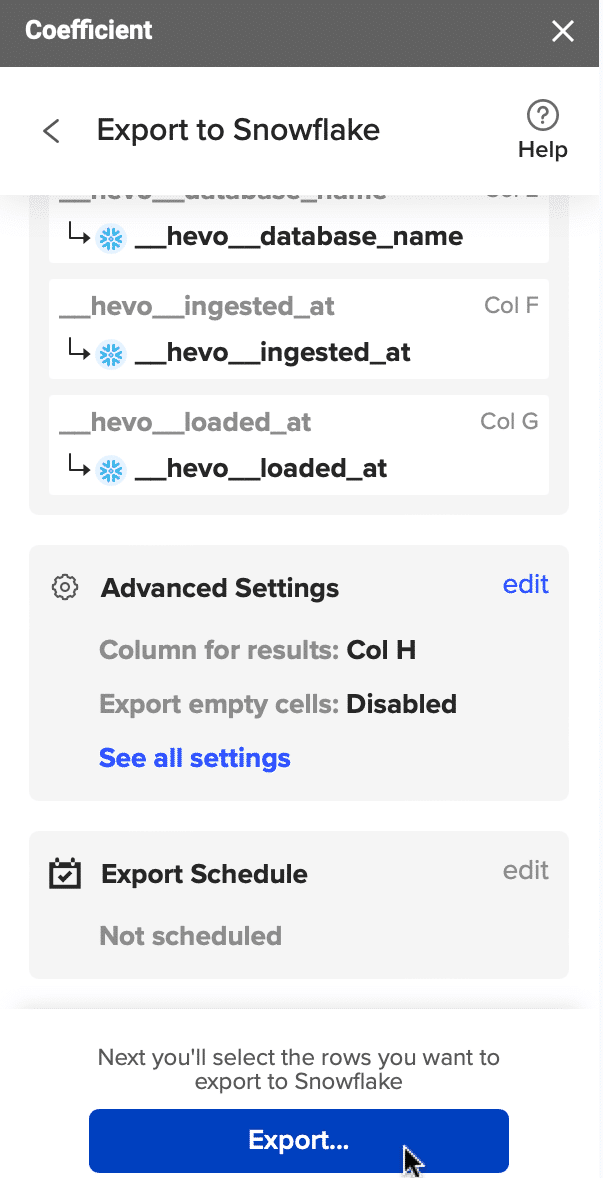
The final step to loading data to Snowflake is to verify that the columns in your spreadsheet are mapped correctly to their respective fields in Snowflake.
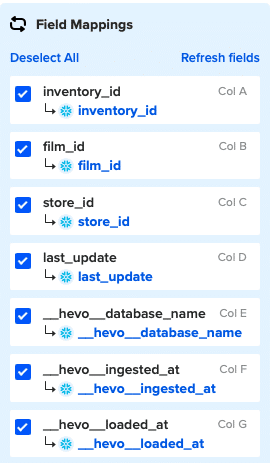
If adjustments are needed, simply click the pencil icon to edit or the ‘x’ icon to delete a mapping.
In this example, there is no need to update fields. Simply click ‘Save’ at the bottom of the menu to proceed.
Verify your selections in the next menu. If everything is correct, click ‘Export…’
Coefficient will ask you to choose which rows to update.
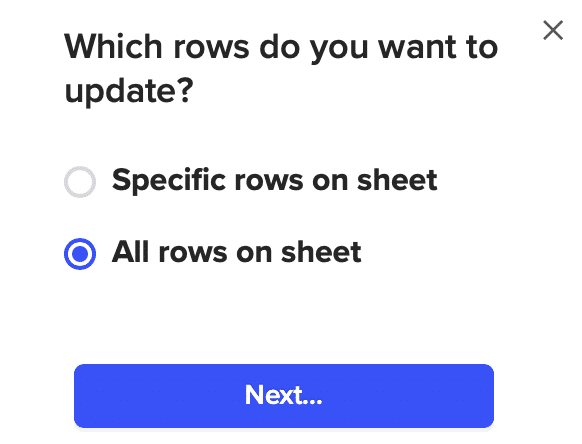
Select ‘All rows on sheet’ and click ‘Next…’
When prompted, press the button to confirm one final time.
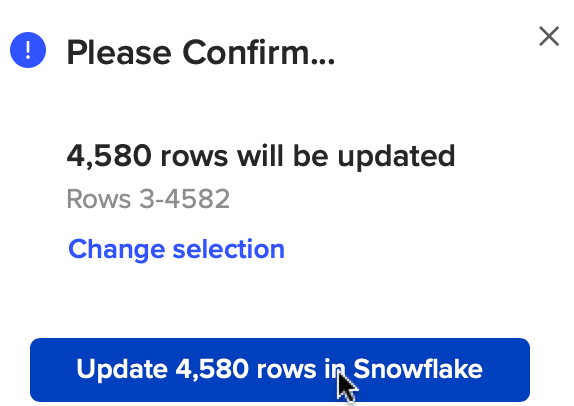
Wait a few moments while Coefficient pushes data to Snowflake.
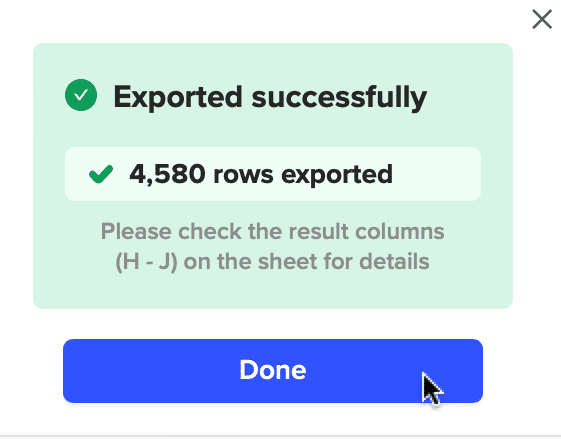
Afterward, return to your spreadsheet to confirm the update in Columns H-J in your spreadsheet.
Congratulations! You’ve successfully updated Snowflake without a single line of code.
Writeback Data to Snowflake with Coefficient
Why manually update Snowflake if you don’t have to?
Coefficient’s Snowflake integration allows you to seamlessly import, update, and push back data to Snowflake without ever leaving your spreadsheet.
Get started for free today to try Coefficient for yourself!


