The following guide will teach you how to export Shopify data, using automatic and manual methods.
Shopify is an ubiquitous e-commerce platform used by more than 2 million businesses as an online store and point of sales system.
However, because Shopify’s native reporting capabilities are limited, store owners frequently export Shopify data into other platforms, including spreadsheets.
Spreadsheets in particular are popular destinations for Shopify data. Google Sheets enable store owners to perform reconciliations, track store inventories, visualize revenue, and execute other critical tasks with ease.
Read on to learn all the top ways to export data from Shopify, so you can leverage the e-commerce data in platforms such as Google Sheets.
Why Export Your Shopify Data into Google Sheets?
Exporting Shopify data into Google Sheets simplifies analysis and visualization of your store’s data. Here are some of the top benefits of exporting Shopify data into Sheets:
- Improved data analysis. Google spreadsheets offer more robust analytical capabilities than Shopify’s built-in reporting features. Google Sheets provides powerful tools to help you analyze and visualize data, allowing you to identify trends and make data-driven decisions quickly.
- Collaborative work. Google Sheets lets multiple users work on the same spreadsheet simultaneously. This makes collaborating with your store workers, clients, and vendors much easier.
- Better inventory management. Exporting Shopify data to Google Sheets lets you track your inventory levels, sales data, and other vital metrics. This helps you make strategic decisions about restocking and sales forecasting.
- Flexibility and customization. Google Sheets offers a high degree of flexibility and customization, allowing you to create custom dashboards, reports, and visualizations tailored to your specific Shopify store.
These are just a few benefits of exporting Shopify data. Others will depend on your store’s unique operations.
Exporting Shopify Data into Google Sheets: Top 3 Methods
1. Coefficient
Coefficient allows you to connect Shopify to Google Sheets and export live data into your spreadsheet within seconds.
Follow the steps below to learn how to use Coefficient to export your Shopify data into Google Sheets.
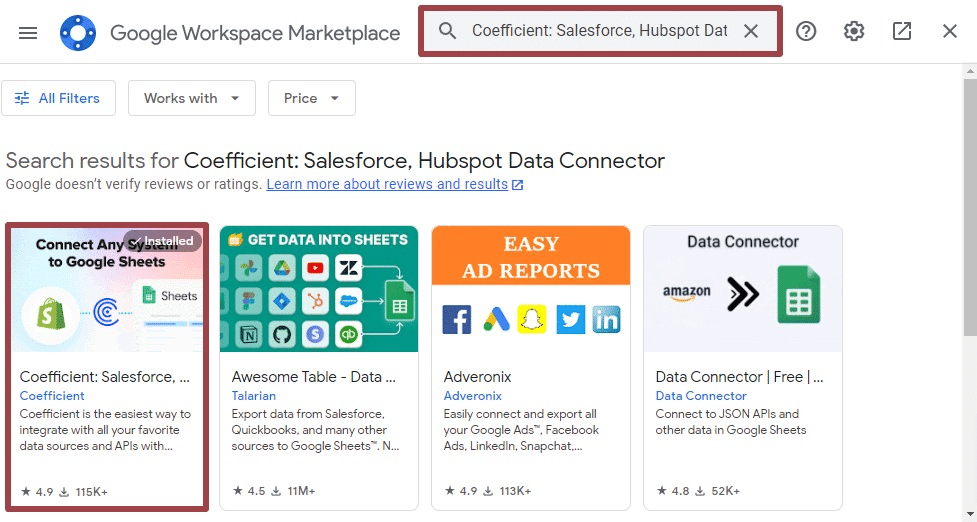
First, install the Coefficient Google Sheets add-on from the Google Workspace Marketplace.
Open a Google spreadsheet and click on Extensions on the top menu. Select Add-ons from the dropdown and click on Get add-ons.

Search for Coefficient in the Google Workspace Marketplace and follow the prompts for installation.
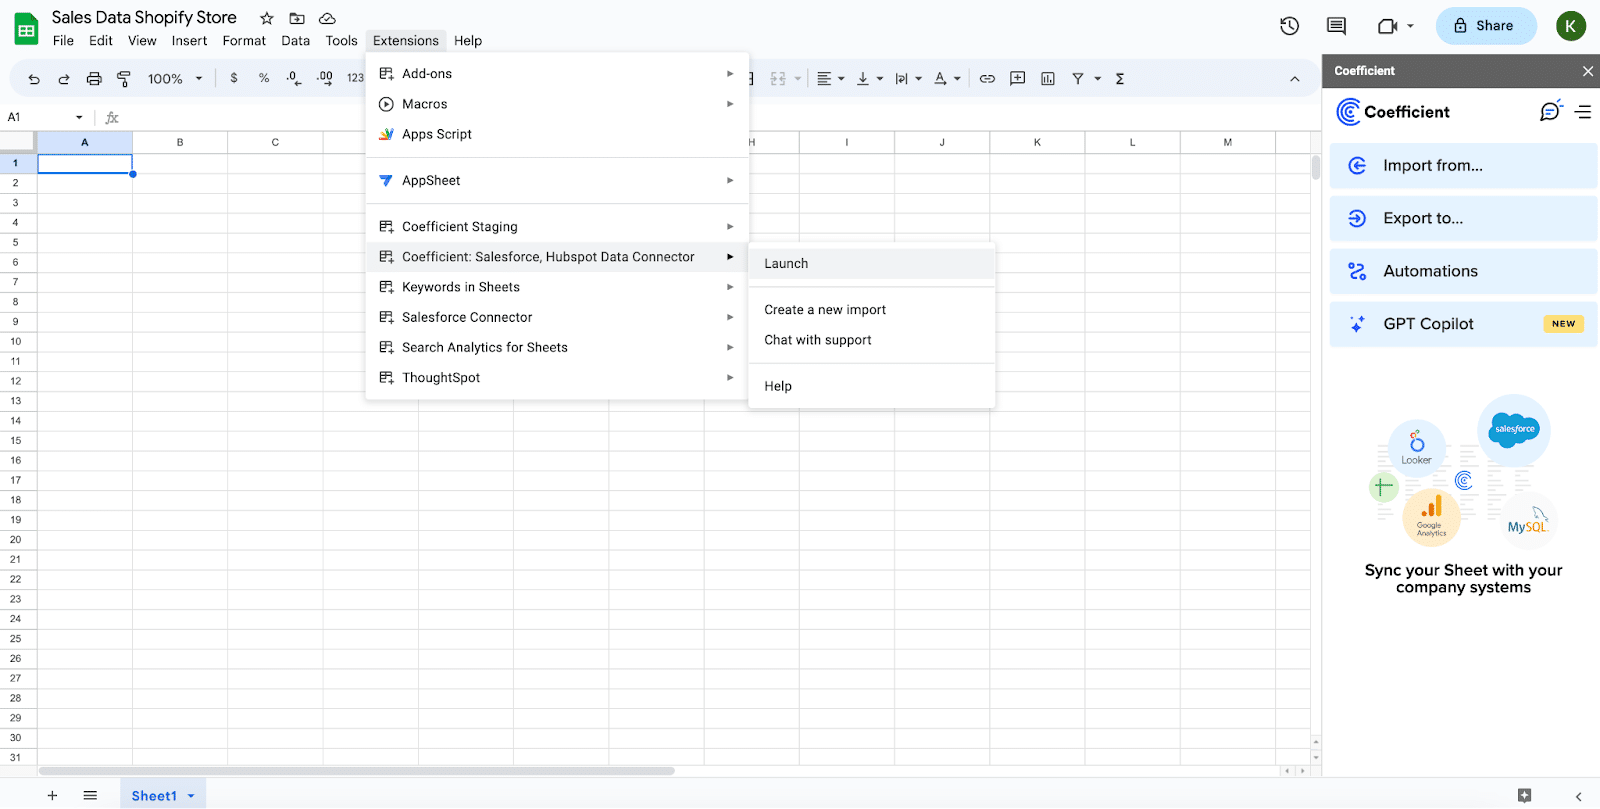
Once installed, launch Coefficient from the Extensions menu. You’ll see the Coefficient sidebar on the right side of your screen.
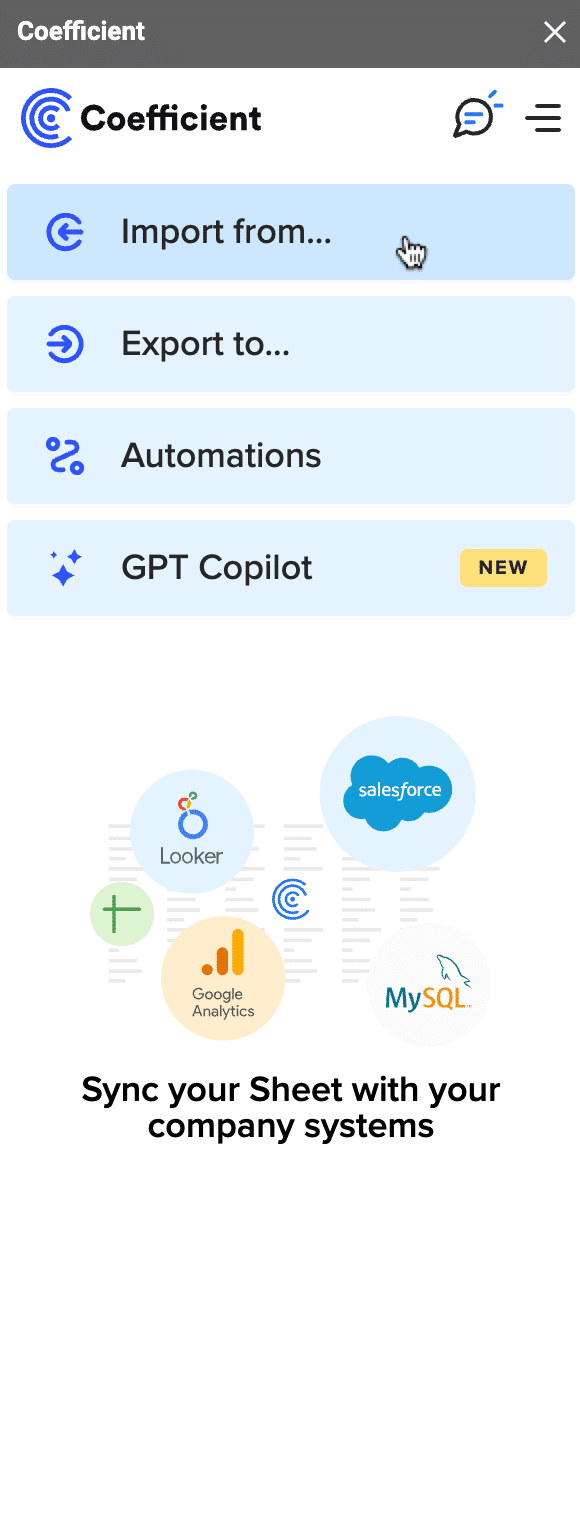
Click on Import from….
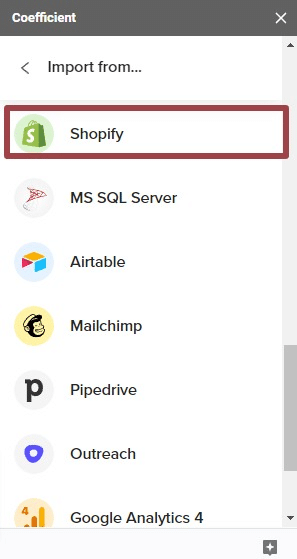
Select Shopify as your data source.
Enter your Shopify store name and click Authorize.
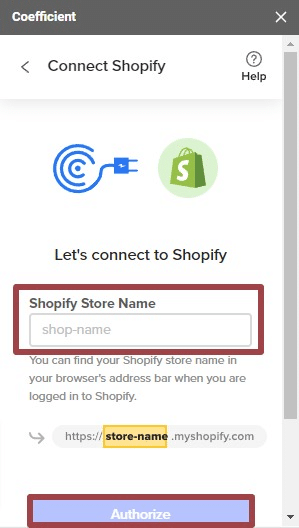
Click Install app on this window.

Next, choose the table that contains the Shopify data you want to export.
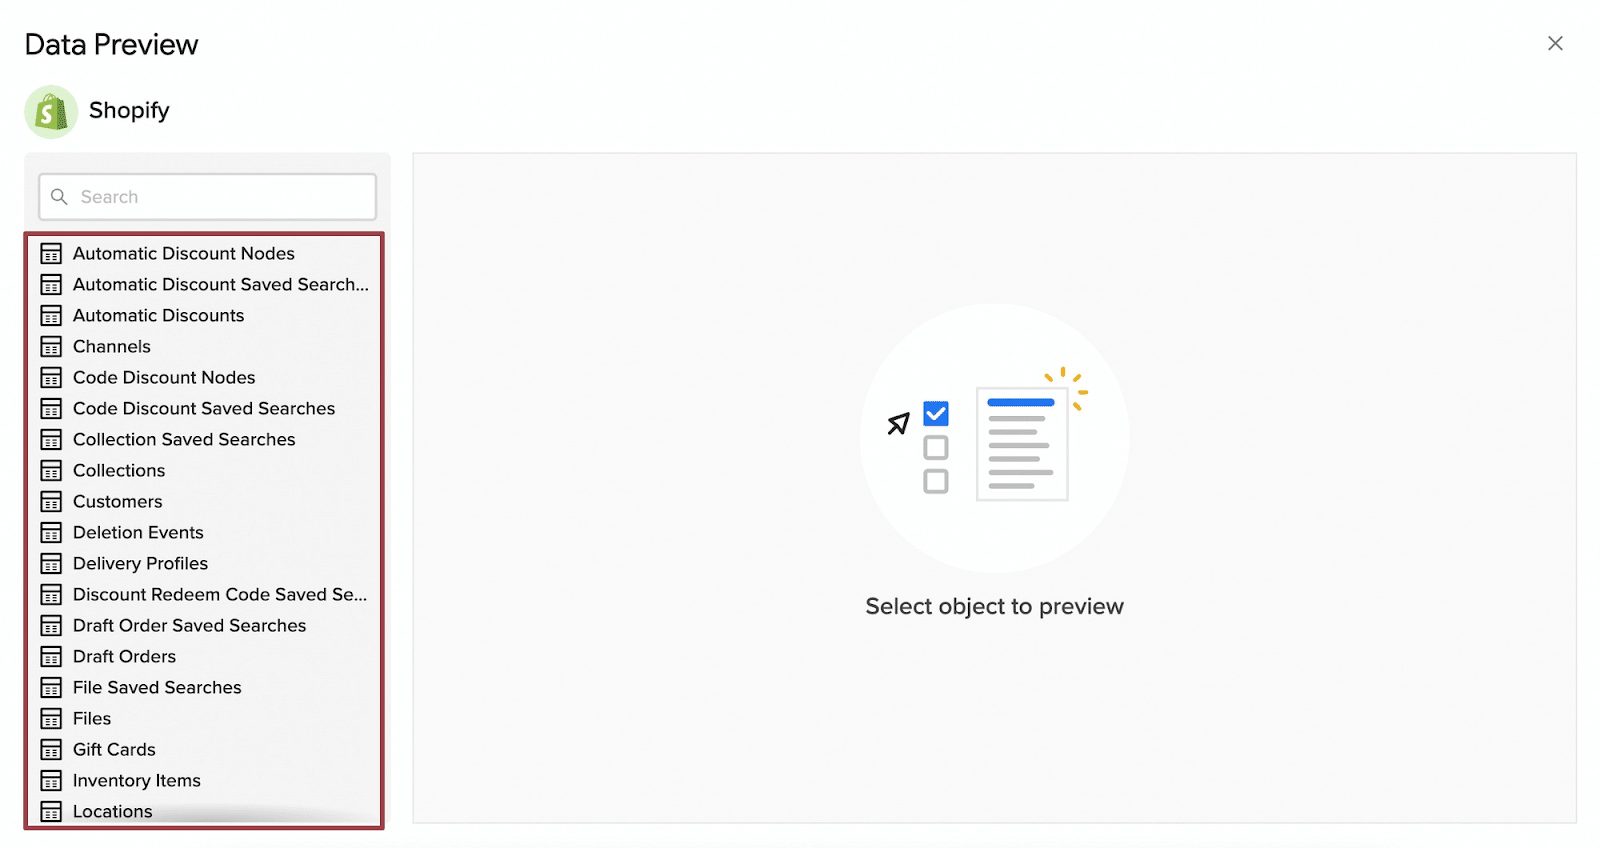
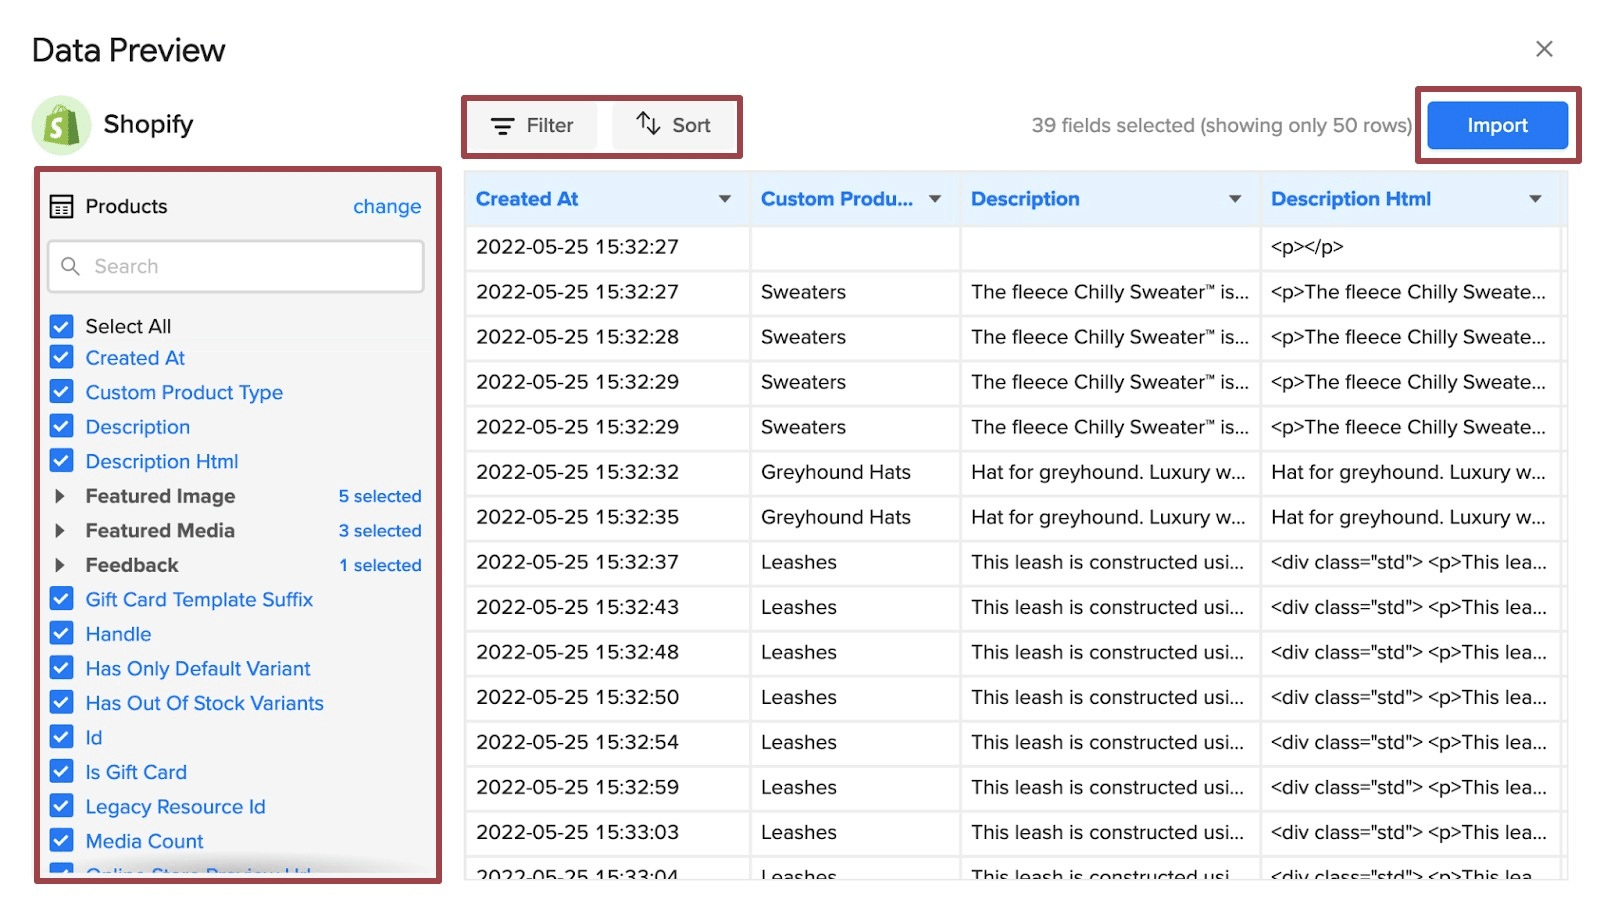
You can preview each table to view the data it contains. Select data fields, add filters, and sort options to customize your data export. Then click Import.
The Shopify data will automatically populate in your Google spreadsheet instantly.
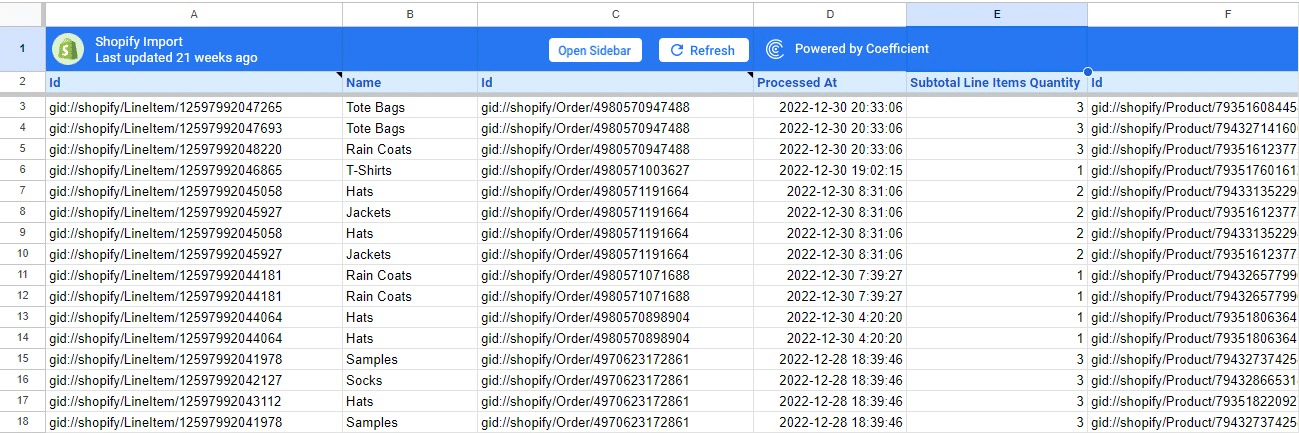
Set up an auto-refresh schedule so you don’t have to manually update your Shopify data. And that’s all it takes — you now have live Shopify data in your spreadsheet, at all times.
Coefficient eliminates complex and time-consuming Shopify exports. Set up your exports once and automate the rest, streamlining your spreadsheet workflows.
Besides Shopify, Coefficient also enables you to automatically export data from Zendesk, Redshift, MySQL, Snowflake, and other systems into Google Sheets. Try the free Coefficient add-on for yourself.
2. Google Apps Script
Another way to export Shopify data into Google Sheets is by running code in Google Apps Script. Here’s a step-by-step guide on how to do this.
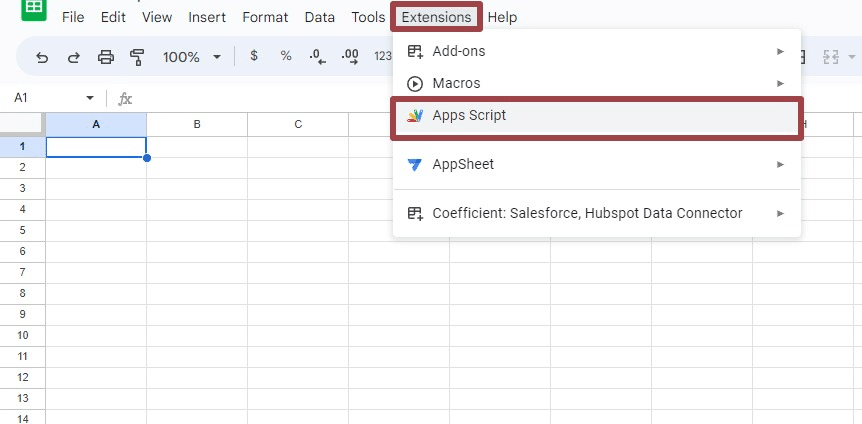
First, go to Extensions on the top menu of Google Sheets and select Apps Script.
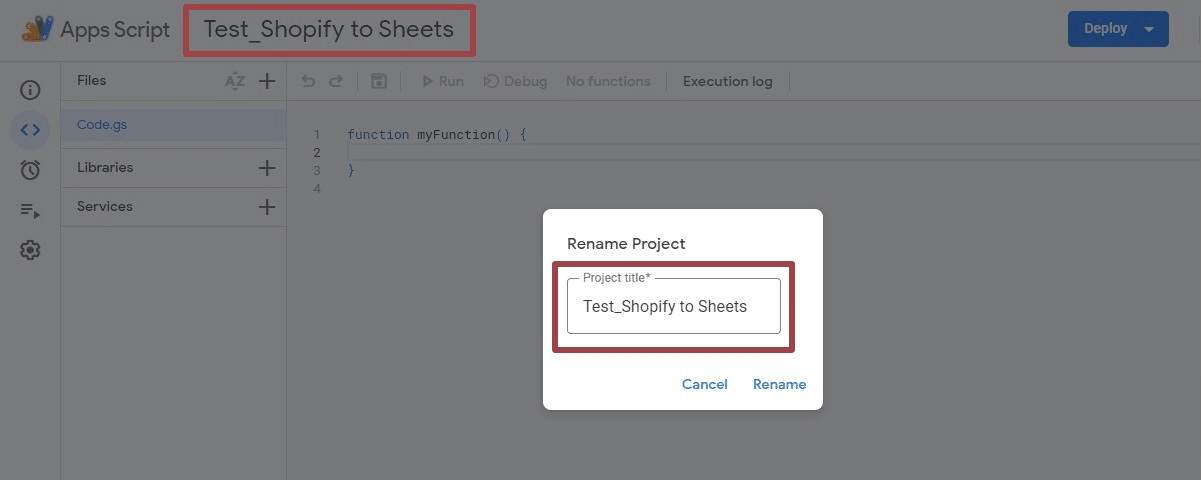
Name your project by clicking Untitled project at the top and entering your project name.
Review Shopify’s API documentation to determine the data types you can export from the platform into Google Sheets, including where to find the Shopify API key.
You can use Shopify tools such as Postman collection or an API explorer to get an idea of the data that is accessible to you.
As an example, let’s create a Google sheet file of all the API users with the Name and Email columns. To do this, we will write the code below:
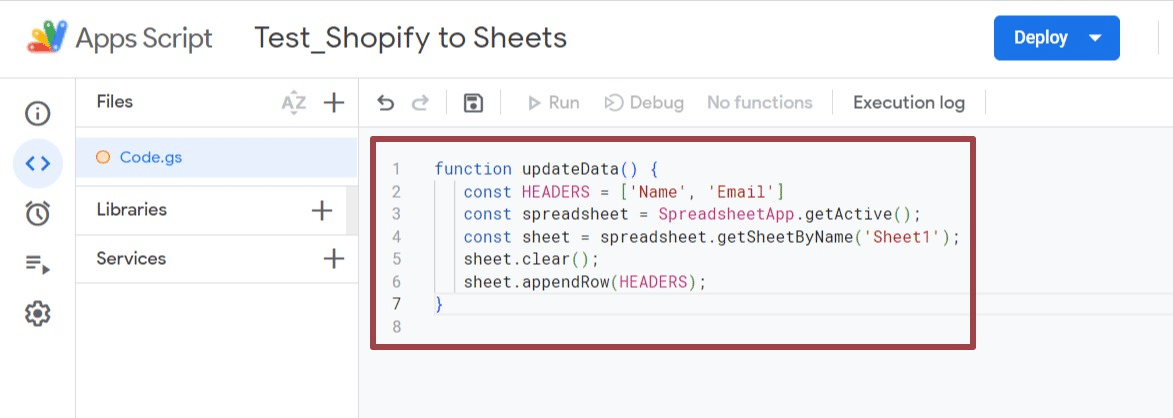
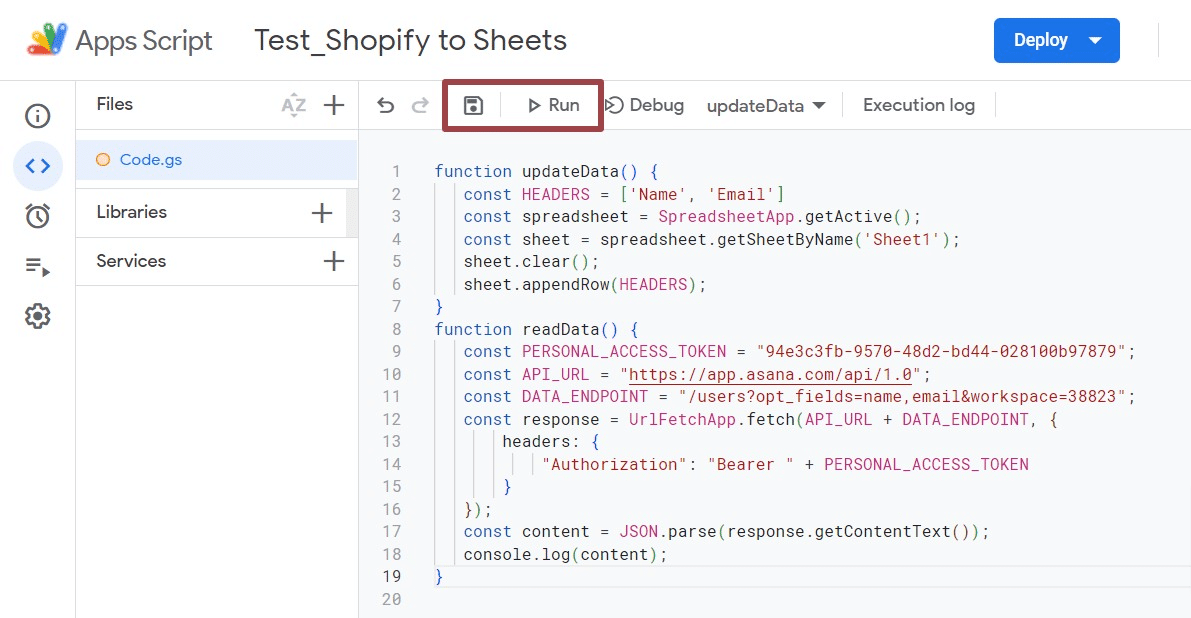
Click on the Save icon, and Run.

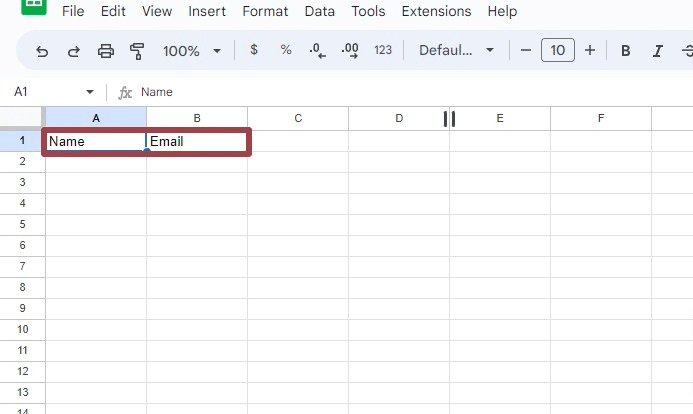
Review the permissions. Once the code runs and the execution is complete, go back to your Google spreadsheet. You should see your new column headers.
Look for the section on authentication within the API documentation. You’ll want to reference Node.js or JavaScript (JS) documentation (Apps Script code is in JS).
Now let’s write code that performs an OAuth authentication or personal access token verification.
To do this, you must create a token on your Shopify account first. Then write the code below as a new function:
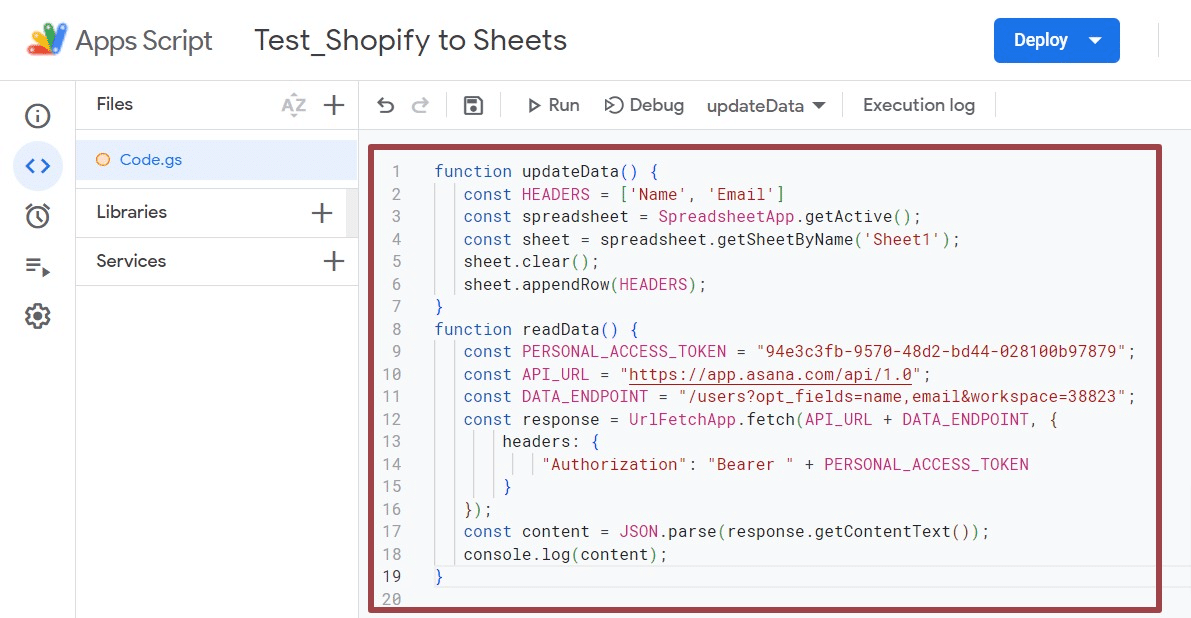
Save and run your readData code to ensure you get your expected output.
Now it’s time to connect readData to updateData. Write the code below to create a new data row for each result you get from readData.
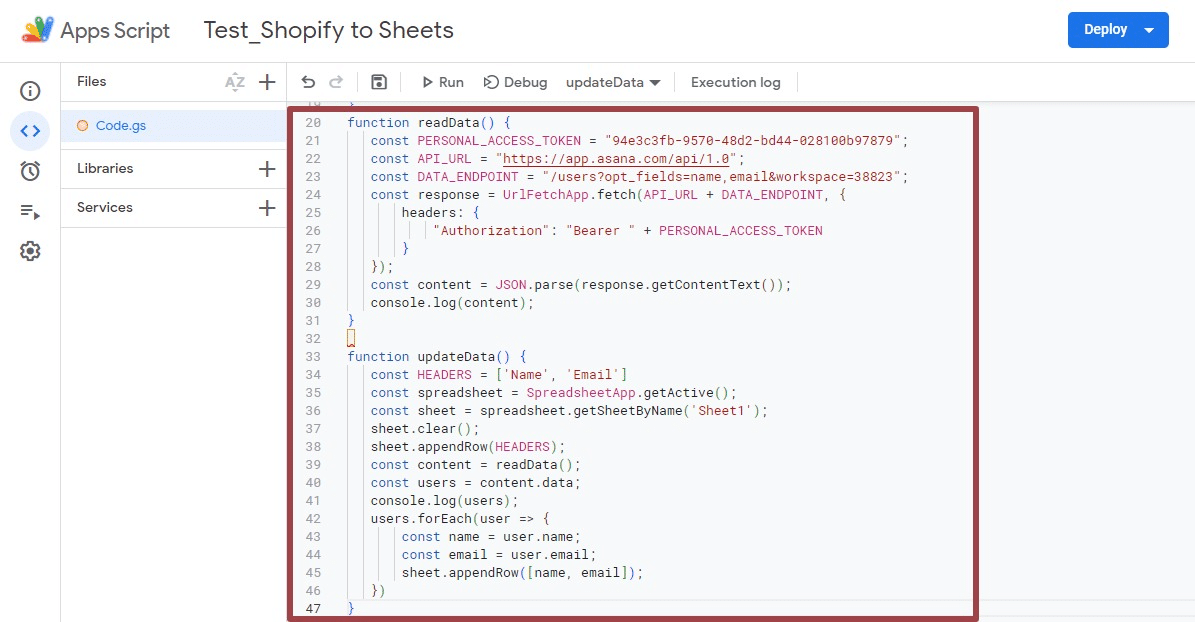
Rerun the function, and your Google spreadsheet should now show the updated data.
However, exporting your Shopify data with Apps Script requires coding skills, which your team might not have.
This method also requires maintenance and debugging that can frustrate even the most experienced programmers.
3. Zapier
Zapier lets you connect apps and services to automate workflows. You can use Zaps (automated workflows) to execute a workflow when certain events in Shopify occur.
For instance, you can create Zaps to automatically export Shopify orders, receipts, or add your new paid Shopify order data to Google Sheets.
Here’s how to create a Zap to export Shopify data. First, you must connect Shopify to Google Sheets.
To accomplish this, you must set your trigger to fire based on events in Shopify. For example, a trigger that fires when there’s a new purchase on your Shopify website.
Now select Google Sheets as the platform where the resultant action occurs. For instance, build a Zap that creates a spreadsheet row for each new paid order in the store.
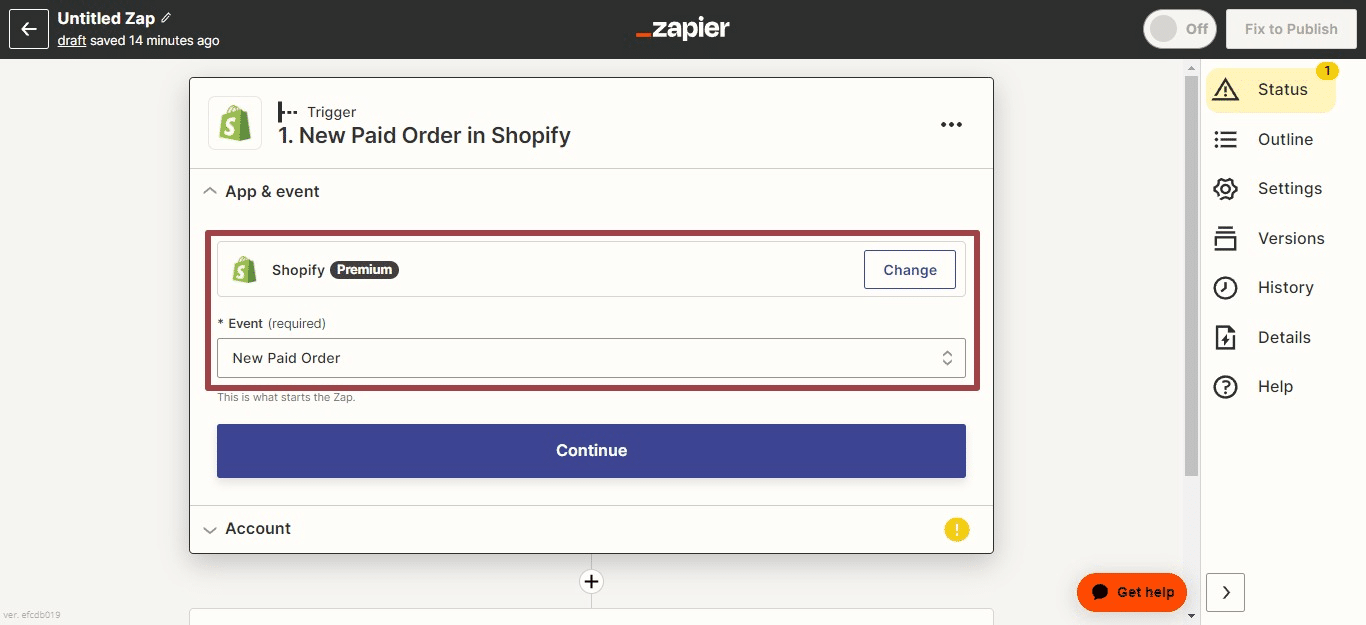
Add more actions and adjust your Zap settings, including naming your automated workflow, adding it to a folder, and creating a description.
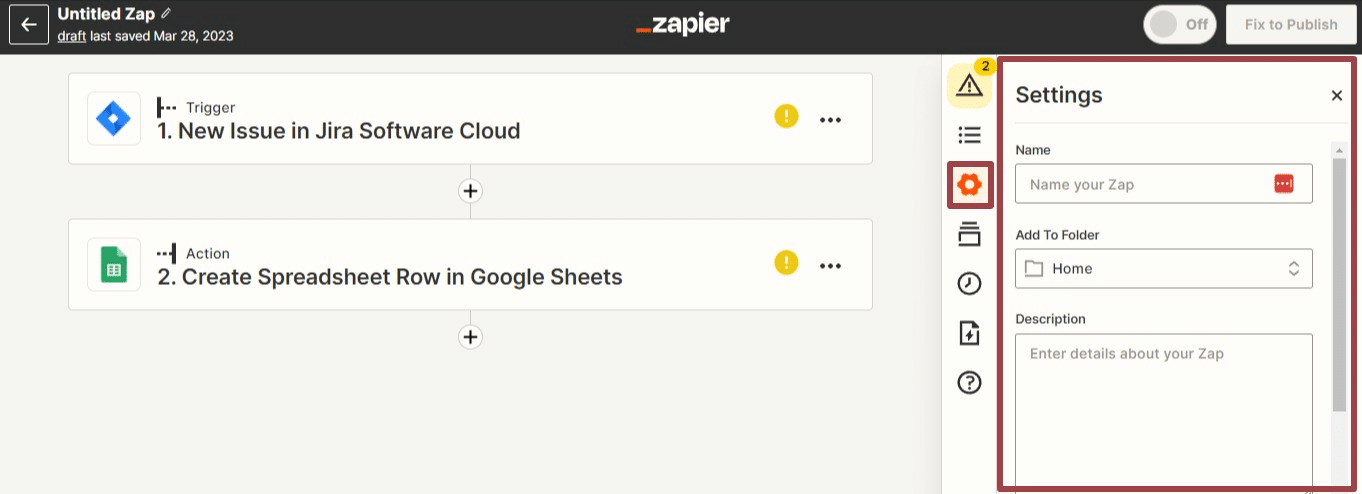
Publish your Zap when you’re done. Zapier will run your configured action steps automatically every time your triggered event happens.
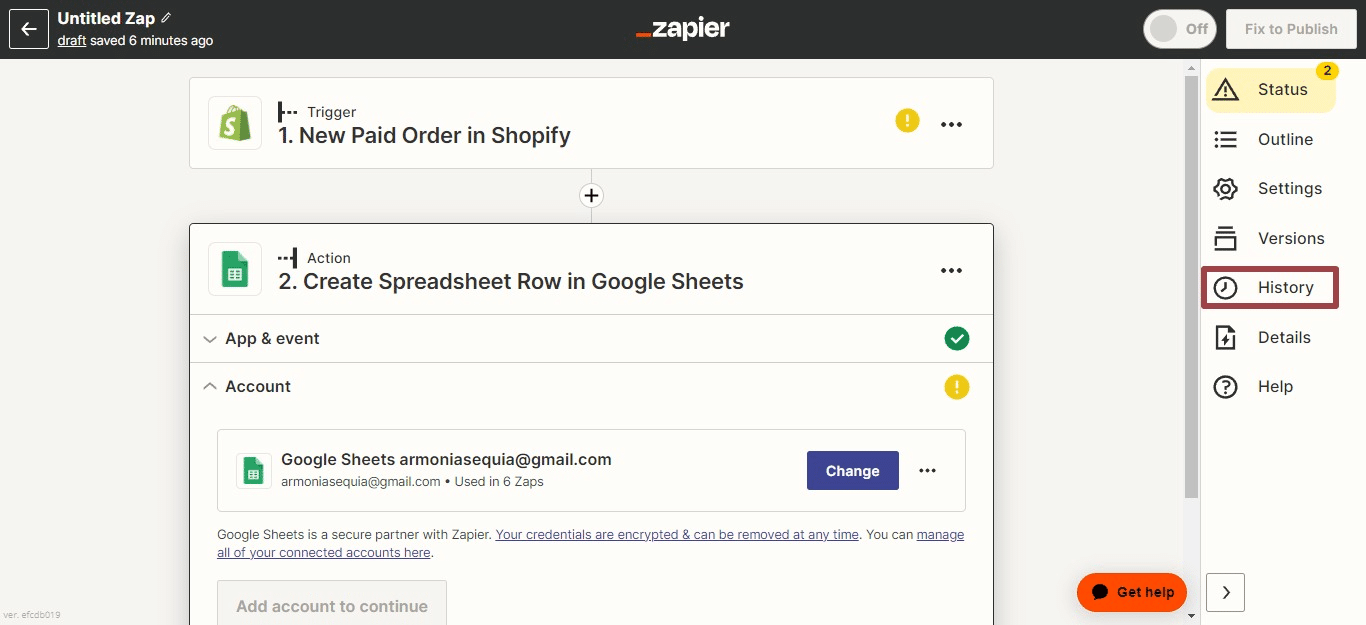
View your Zap activity logs within your Zap History, including all the data that moves in and out of your Zap steps.
While Zapier’s workflows can export Shopify data to Google Sheets, the automations are often limited. Certain triggers and actions are unavailable in the platform, curtailing the functionality of your workflows.
Resources you will also love…
- How to Export Data from Tableau
- How to Export Data from PostgreSQL
- How to Export Data from Looker
- How to Export HubSpot Data to Google Sheets
- How to Export Jira Data from Google Sheets
- How to Export Google Analytics Data Into Google Sheets
- How to Export Snowflake Data into Google Sheets
- How to Export MySQL Data Into Google Sheets
Export Shopify Data: A Method for Every Use Case
Don’t bog down your team with manual data export processes. Coefficient’s user-friendly interface, quick setup, and automation options offer the most efficient way to export your Shopify data.
Try Coefficient for free to automatically export your Shopify data instantly, so you can maximize revenue for your Shopify store.


