Table of Contents
![]()
- 1. PostgreSQL Data Integration Tools for Every Direction Your Data Flows
- 2. 7 Postgres ETL Tools for Excel in 2025
- 3. 5 Postgres Reporting Tools [2026 Feature Showdown]
- 4. Top PostgreSQL Migration Tools
- 5. How to Connect Salesforce to PostgreSQL
- 6. The Ultimate Guide to Exporting Your PostgreSQL Database
- 7. How to Migrate MySQL to PostgreSQL: Step-by-Step Guide
- 8. How to Import Data from Excel to PostgreSQL
- 9. Migrating Data from MongoDB to PostgreSQL: Best Practices and Guide
- 10. How to Migrate from BigQuery to PostgreSQL: A Comprehensive Guide
- 11. How to Connect PostgreSQL to Salesforce? Top 3 Methods
- 12. How to Connect Stripe to PostgreSQL
- 13. How to Connect MongoDB to Postgres
- 14. How to Connect Airtable to Postgres
- 15. How to Connect Google Ads to PostgreSQL: Comprehensive Guide
- 16. How to Connect HubSpot to PostgreSQL
- 17. How to Connect Freshdesk to PostgreSQL


In this blog, you’ll learn how to connect PostgreSQL to Salesforce seamlessly. We will explore three methods: Coefficient, DBSync, and Skyvia. By the end, you’ll understand the advantages of each method and how to implement them. Whether you’re in Revenue Operations, Marketing, Finance, or Business Intelligence, this guide is for you.
Advantages of Connecting PostgreSQL to Salesforce
- Unify customer data: Combine customer data from PostgreSQL with Salesforce records for a single, comprehensive view of your customers.
- Automate data synchronization: Keep Salesforce records up-to-date with the latest information from PostgreSQL, reducing manual data entry.
- Enhance reporting capabilities: Use Salesforce’s reporting features to analyze and visualize your PostgreSQL data alongside your CRM data.
Connecting PostgreSQL and Salesforce: 3 Methods
Connecting PostgreSQL and Salesforce is crucial for businesses looking to streamline data management and gain valuable insights. With a range of solutions catering to different needs, organizations can choose the best tool to sync, analyze, and enrich their data. The following table provides an overview of three distinct solutions, each tailored to specific use cases and user requirements.
|
Solution |
Best For |
|
Coefficient |
Business users who want to analyze PostgreSQL data alongside Salesforce records in Google Sheets without relying on IT support. |
|
Skyvia |
Companies seeking a simple, no-code solution for syncing PostgreSQL data with Salesforce on a scheduled basis. |
|
DBSync |
Organizations requiring real-time, bi-directional data synchronization between PostgreSQL and |
How to Connect PostgreSQL to Salesforce
Method 1: Coefficient – No-Code, User-Friendly
Coefficient connects your spreadsheet to all your business data without a single line of code. It is particularly useful for syncing Salesforce and PostgreSQL data without needing technical expertise.
Pros and Cons:
Pros:
- Simple, no-code setup
- Automatic data updates
- Affordable pricing plans
Cons:
- Scheduled automations are not free forever, but pricing plans are affordable
Step-by-Step Walkthrough:
Step 1. Install Coefficient
For Google Sheets
Open a new or existing Google Sheet, navigate to the Extensions tab, and select Add-ons > Get add-ons.

In the Google Workspace Marketplace, search for “Coefficient.”
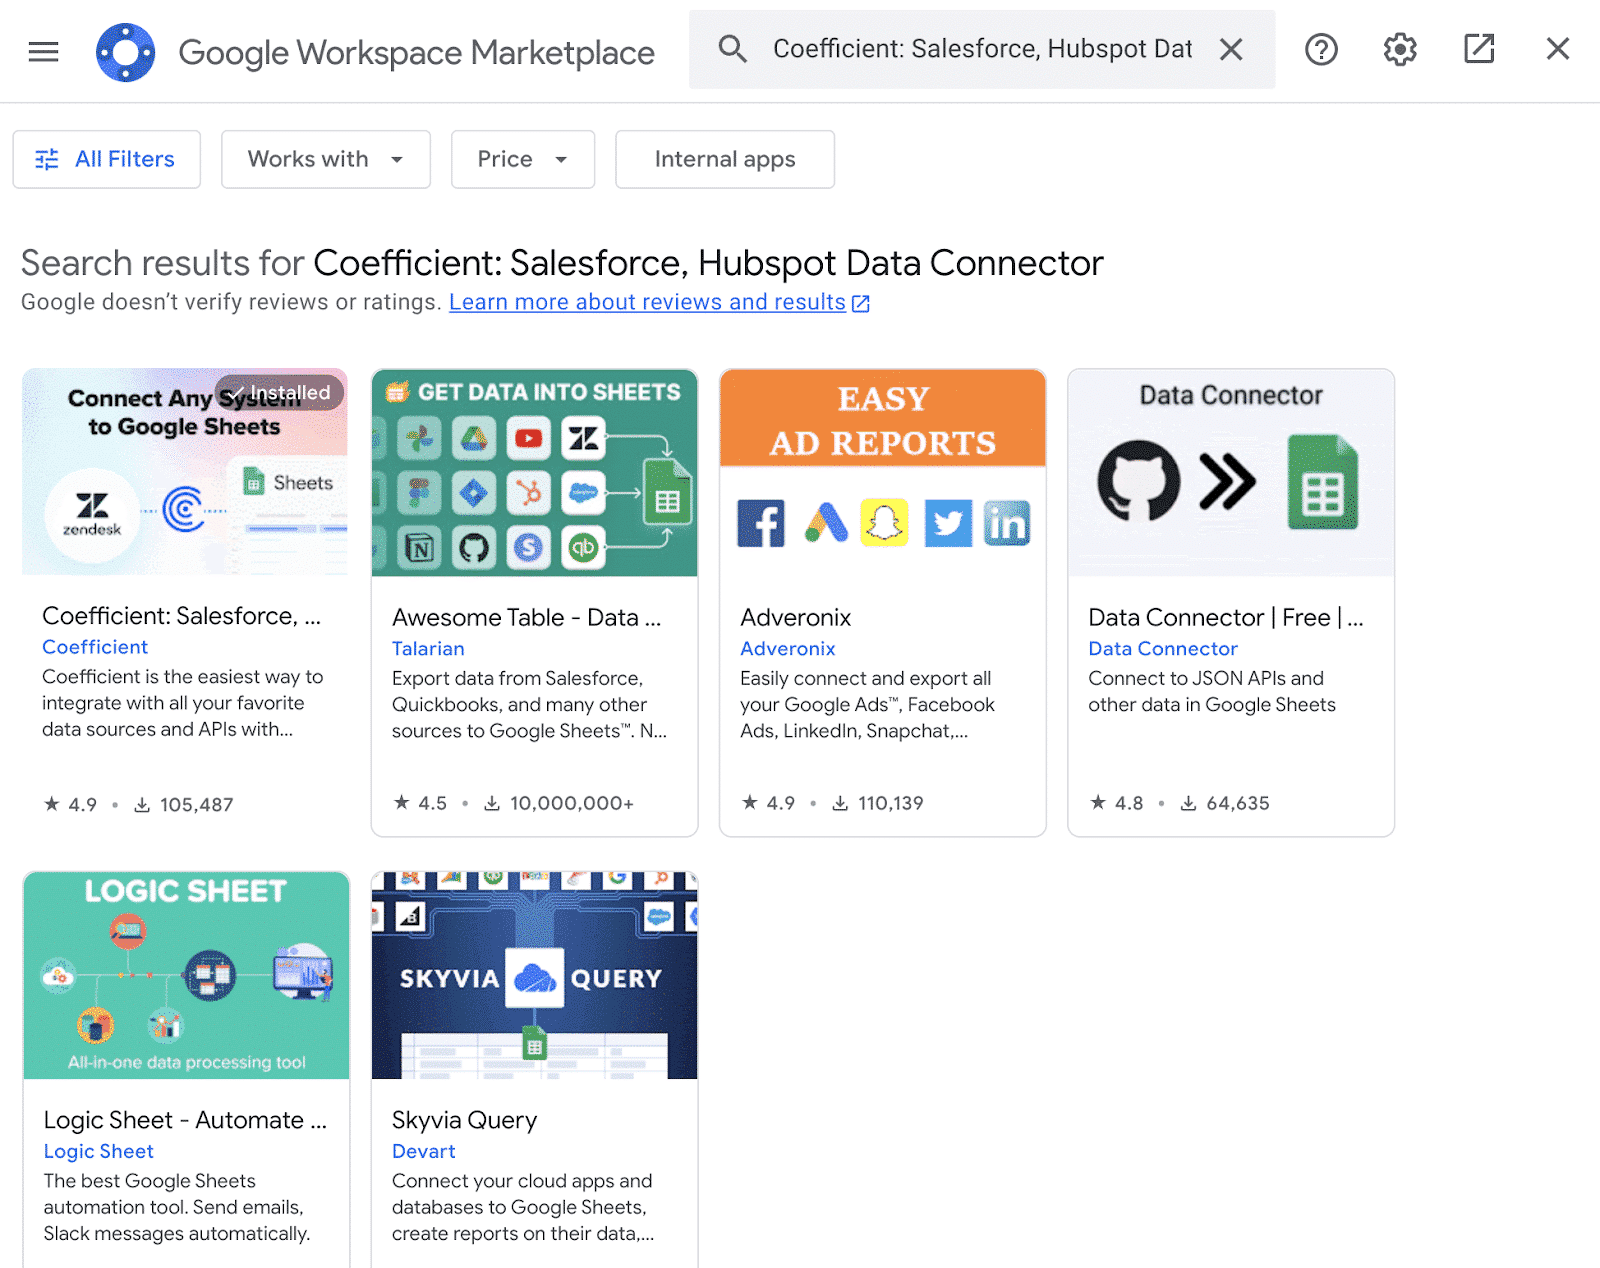
Follow the prompts to grant necessary permissions.

Launch Coefficient from Extensions > Coefficient > Launch.
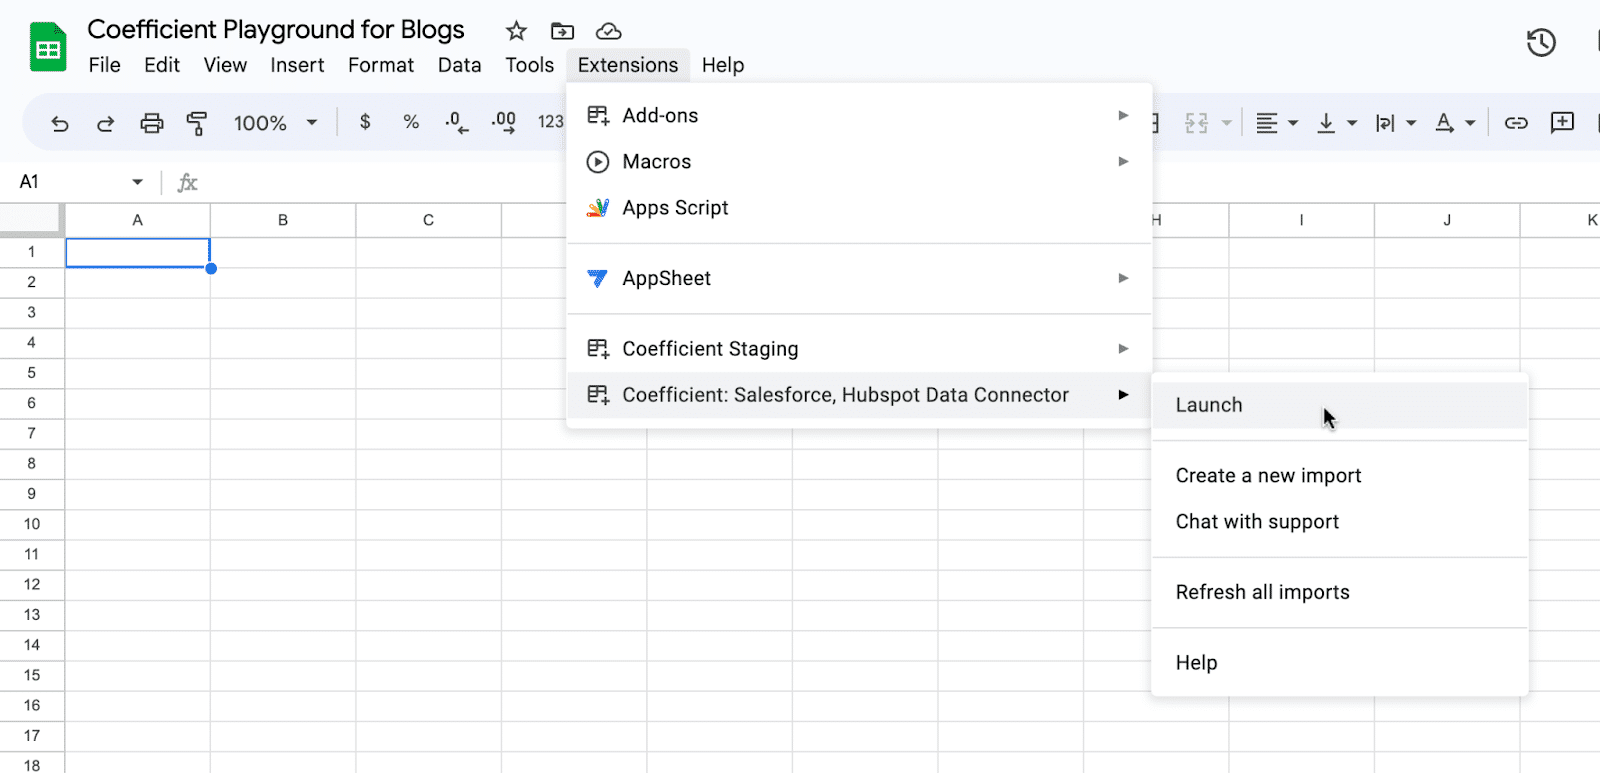
Coefficient will open on the right-hand side of your spreadsheet.
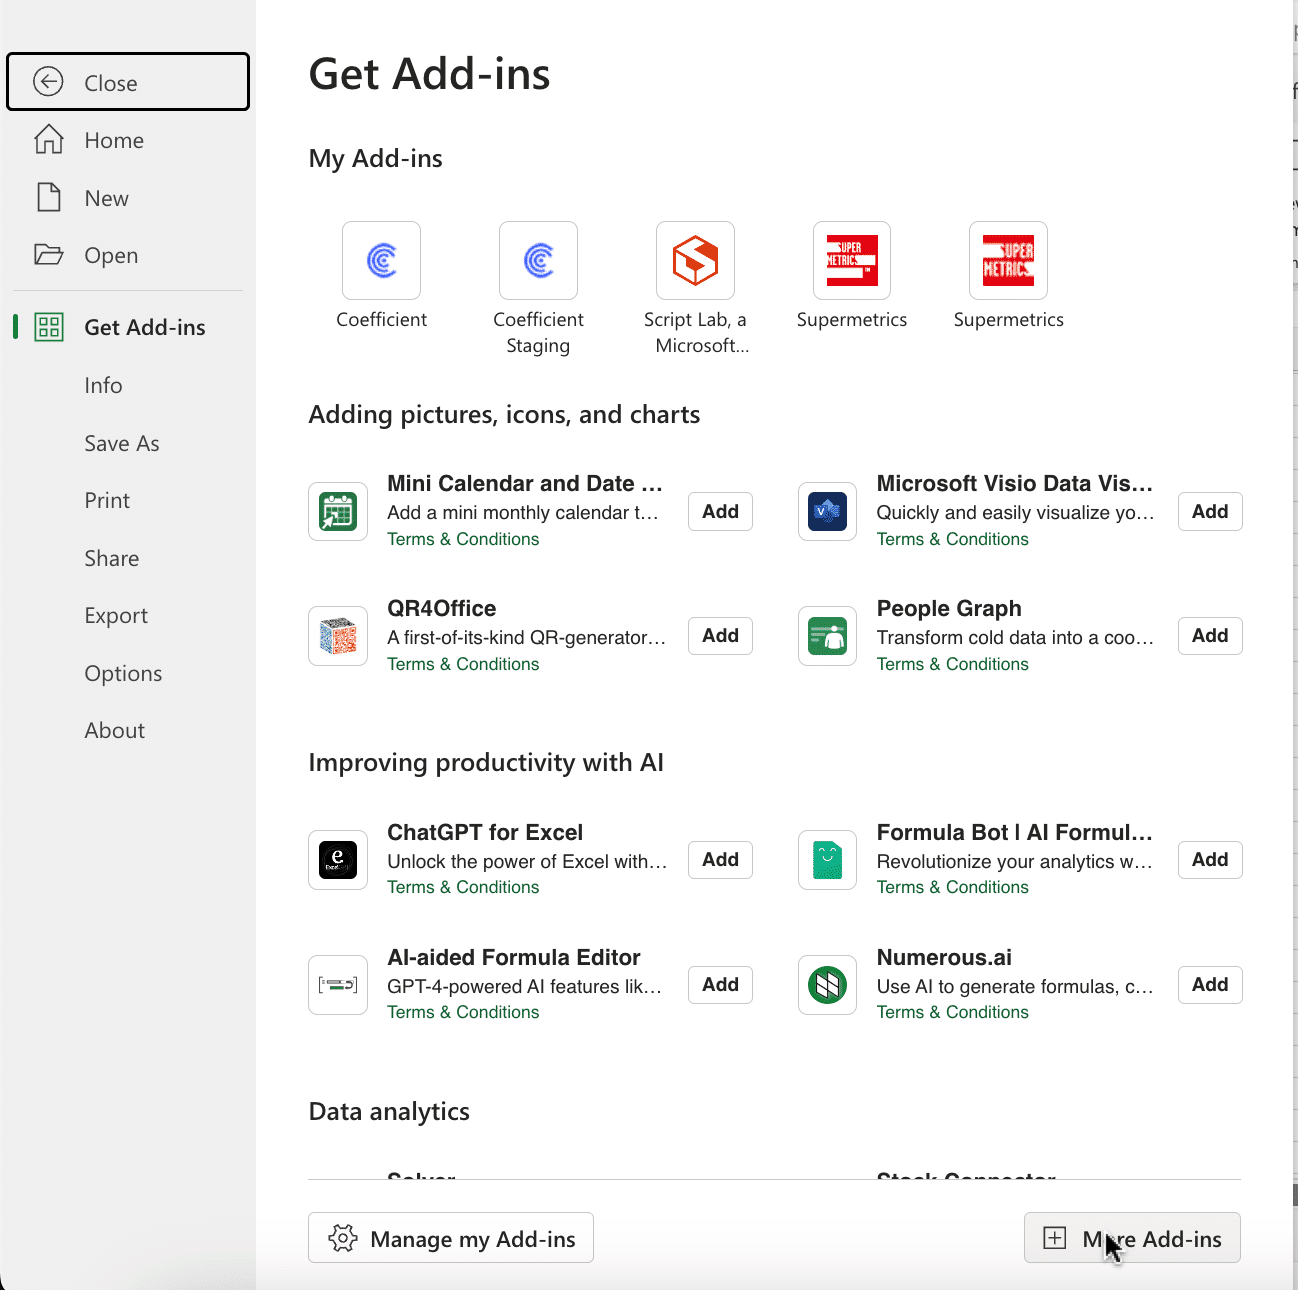
For Microsoft Excel
Open Excel from your desktop or in Office Online. Click ‘File’ > ‘Get Add-ins’ > ‘More Add-Ins.’
Type “Coefficient” in the search bar and click ‘Add.’
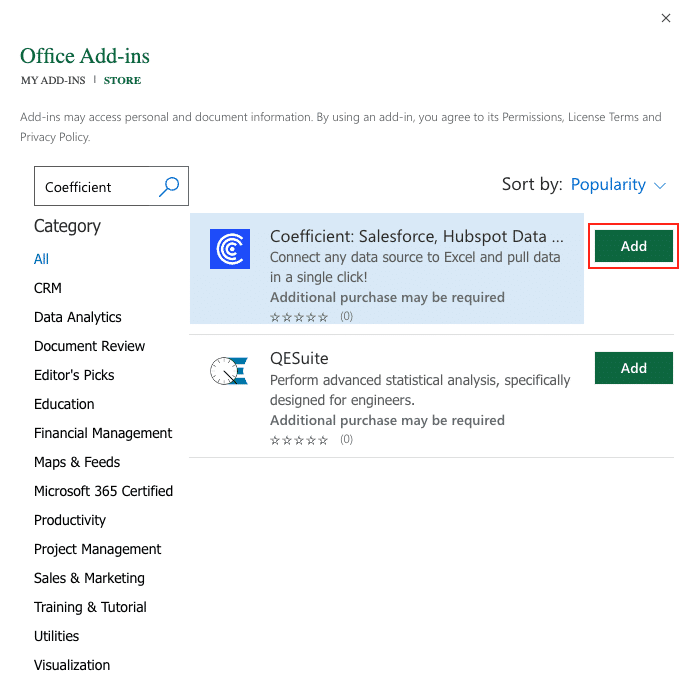
Follow the prompts in the pop-up to complete the installation.
Once finished, you will see a “Coefficient” tab in the top navigation bar. Click ‘Open Sidebar’ to launch Coefficient.
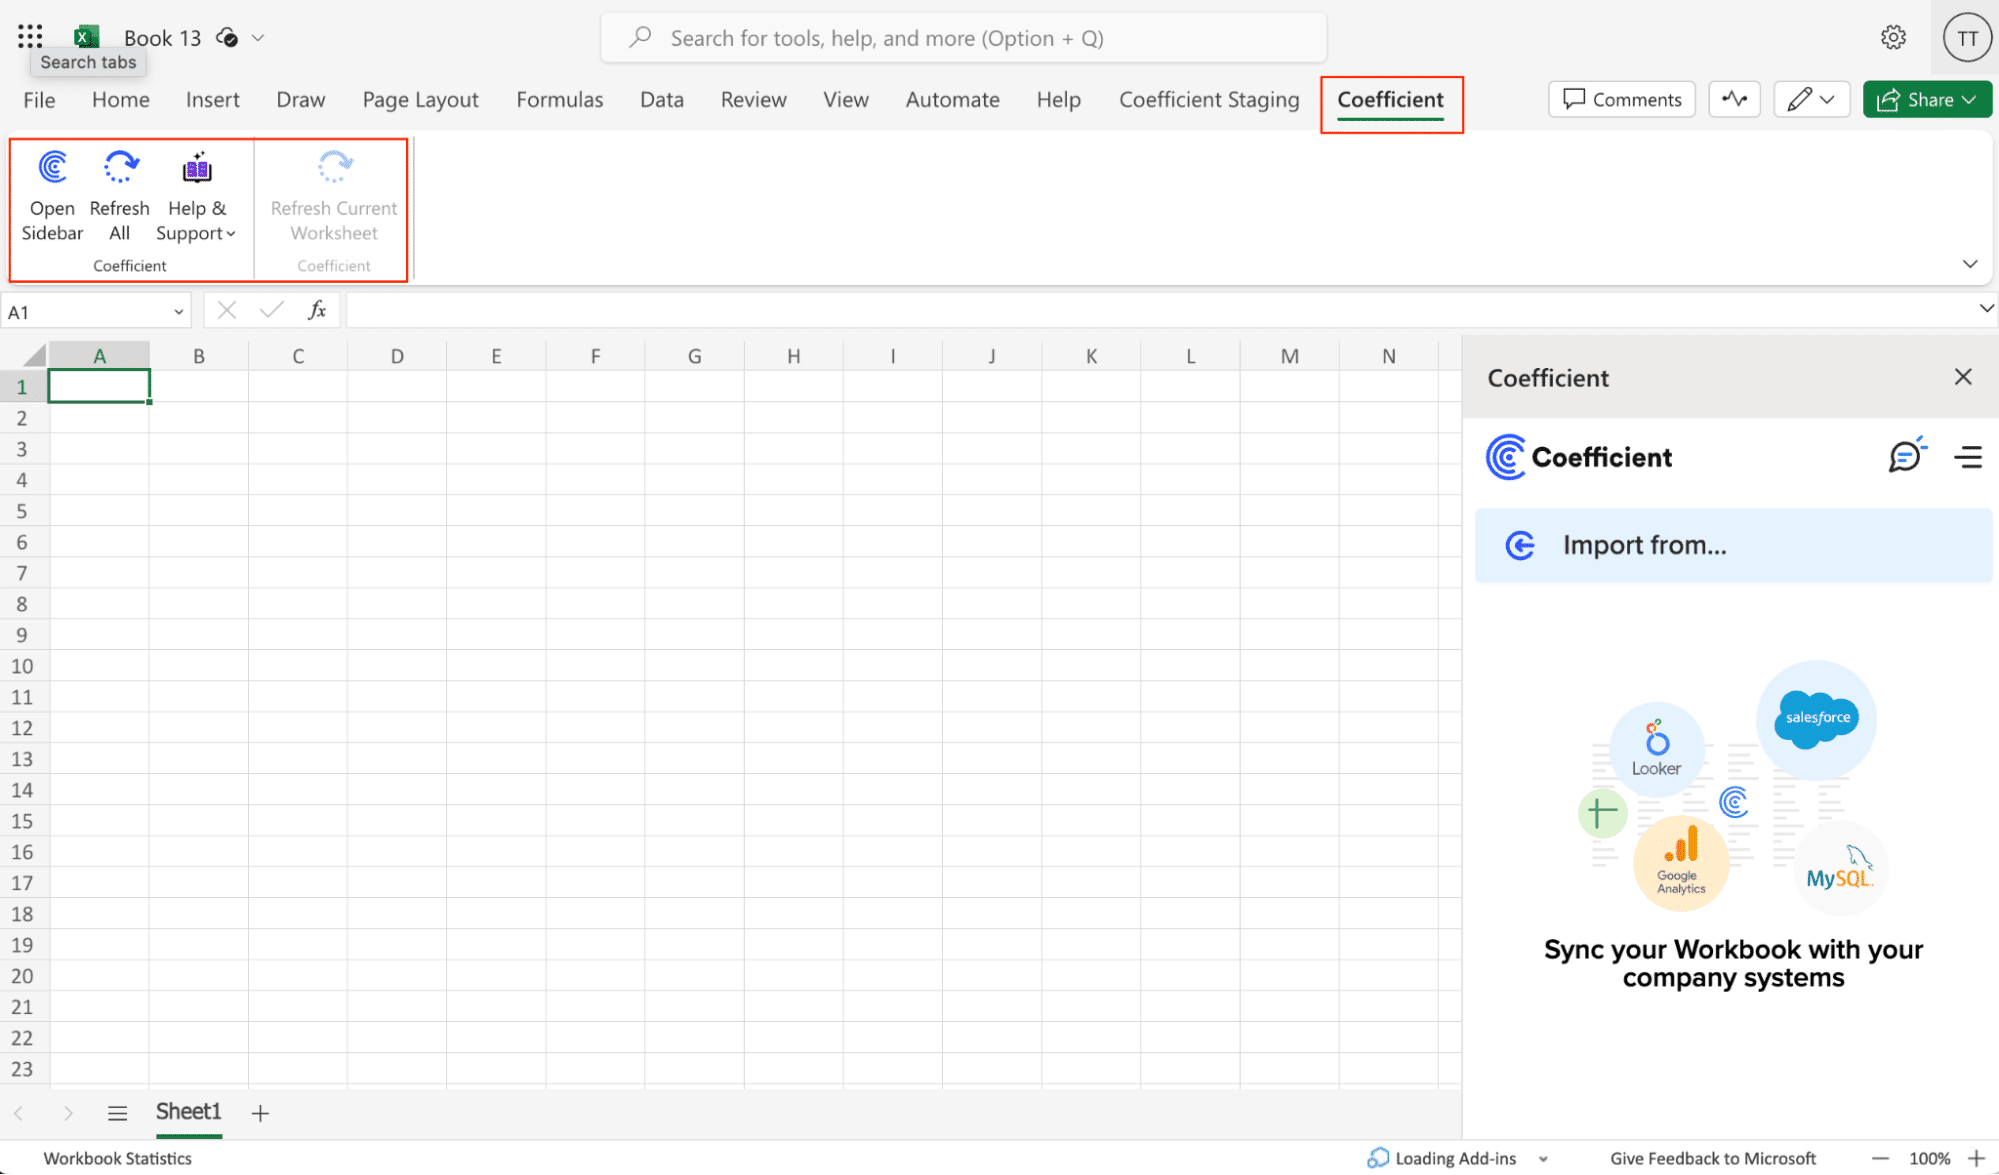
Step2. Import PostgreSQL Data into Your Spreadsheet
Click ‘Import from…’ in the Coefficient menu.

Scroll down the list of data sources until you find PostgresSQL

Choose whether to import from tables or custom SQL queries. With Coefficient, you can perform SQL queries on top of your PostgreSQL database directly from Excel.
Click ‘From Tables & Columns.’

Provide the connection details, such as the host, database username, password, port, and IP addresses.
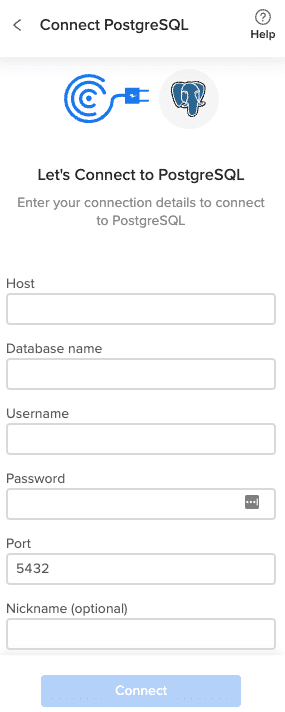
After connecting Coefficient to your Postgres database, you will be returned to the Import Preview screen.
Select the table in your database that you would like to pull data from from the list on the left.
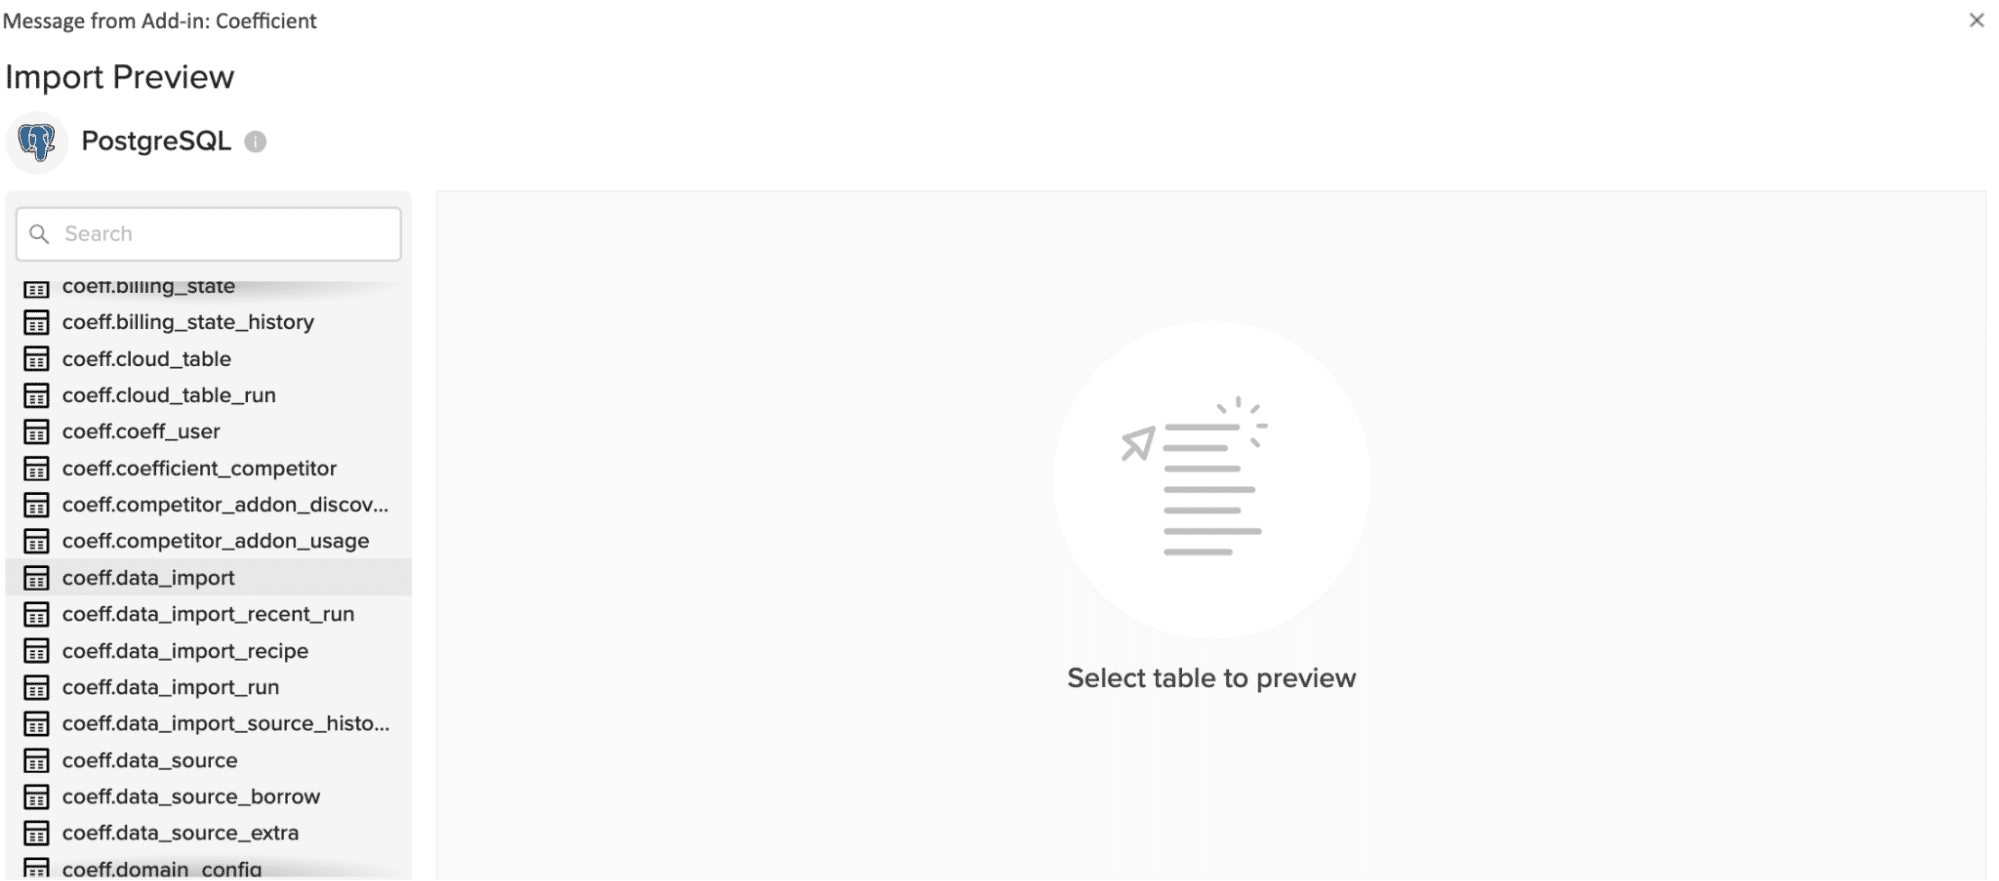
In a few seconds, the Import Preview window will automatically populate with the first 50 rows of your dataset.
From here you can set the filters, sort the data, set limits or import a cloud pivot to customize your Postgres to Excel import.
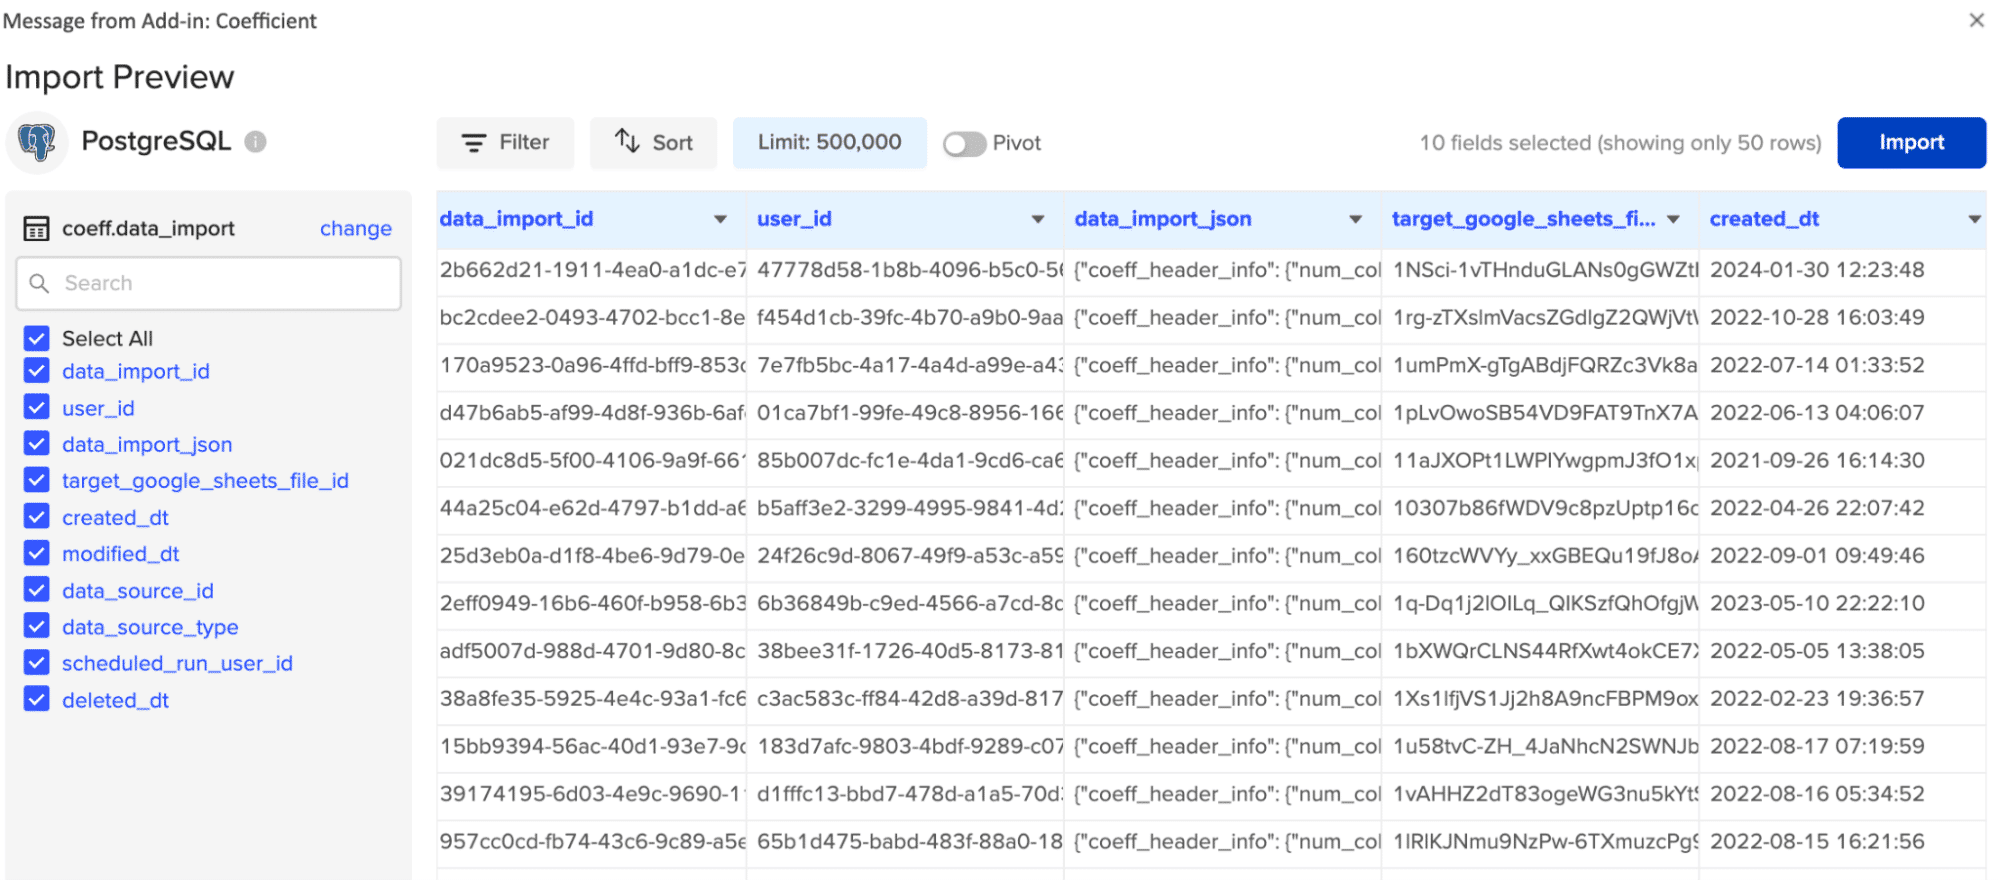
Click “Import” when you’re finished.

Your data will automatically populate your spreadsheet in just a few seconds.
Step 3. Export Data from Your Spreadsheet to Salesforce
Before starting, make sure you’ve connected to Salesforce.
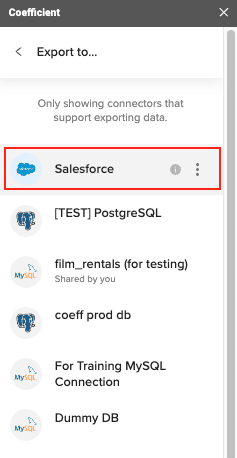
Then, navigate to Coefficient’s menu. Click “Export to…”

Choose Salesforce from the list of available data sources.
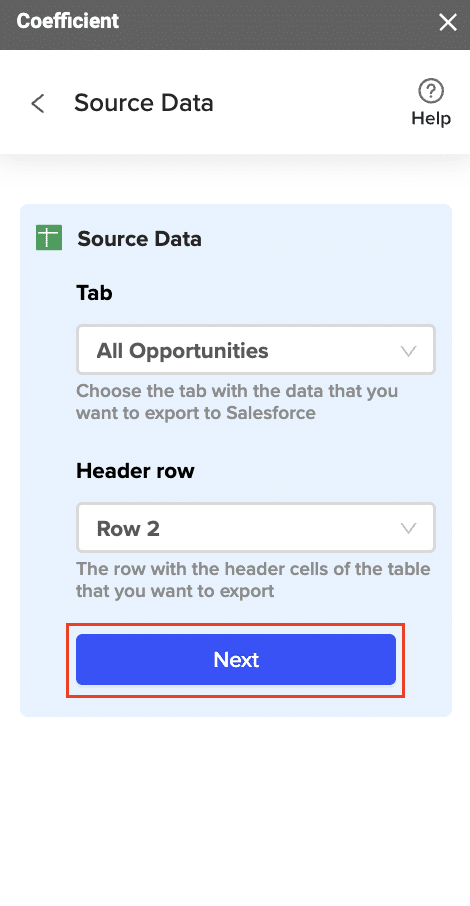
Select the tab and header rows in your spreadsheet that contain the data you want to export.
Define your tab and header row.
Next, select the Salesforce Object you want to export data to, e.g., “Opportunity”, “Contacts”, etc.
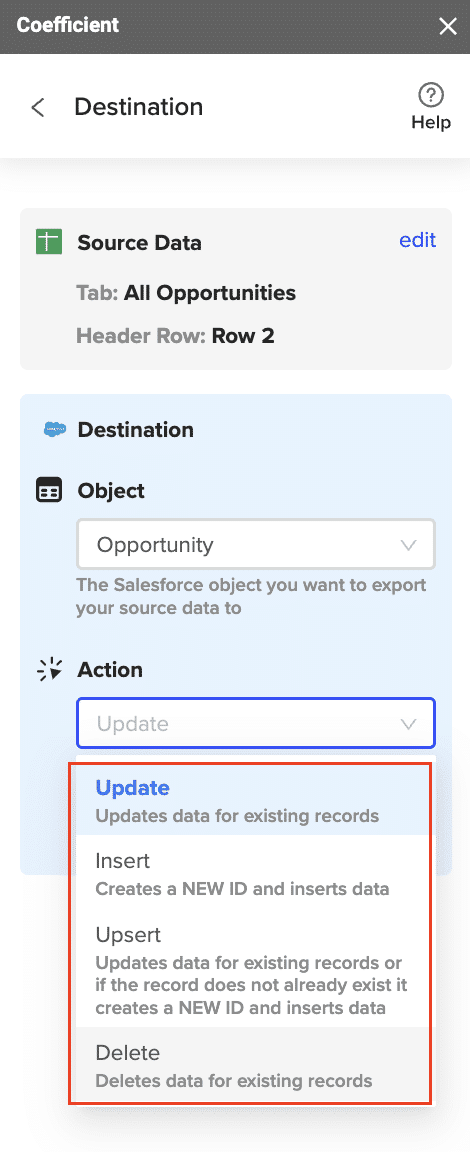
Then, select the type of action you want to perform—Update, Insert, Upsert, or Delete.
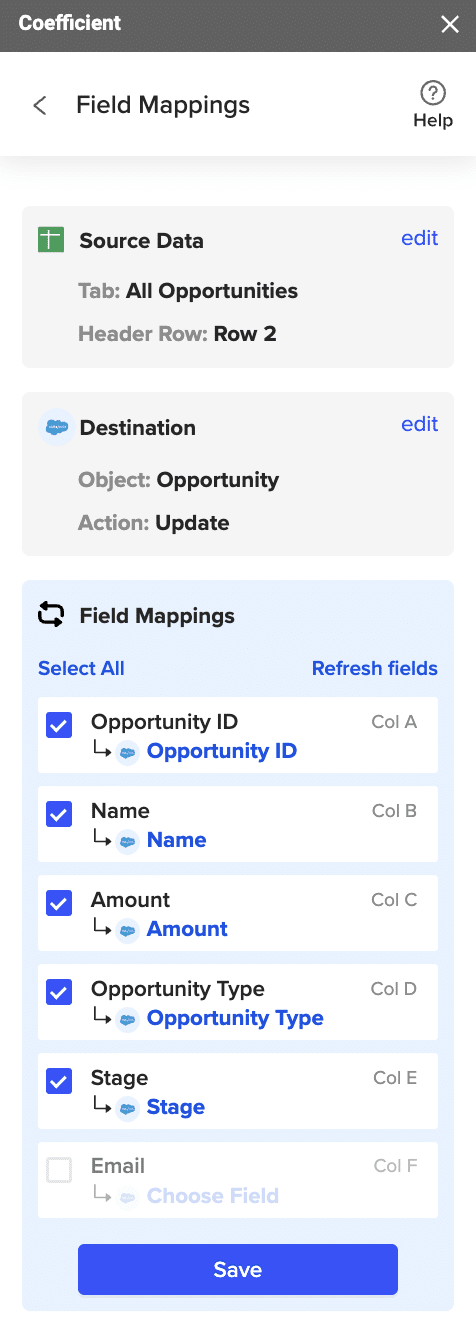
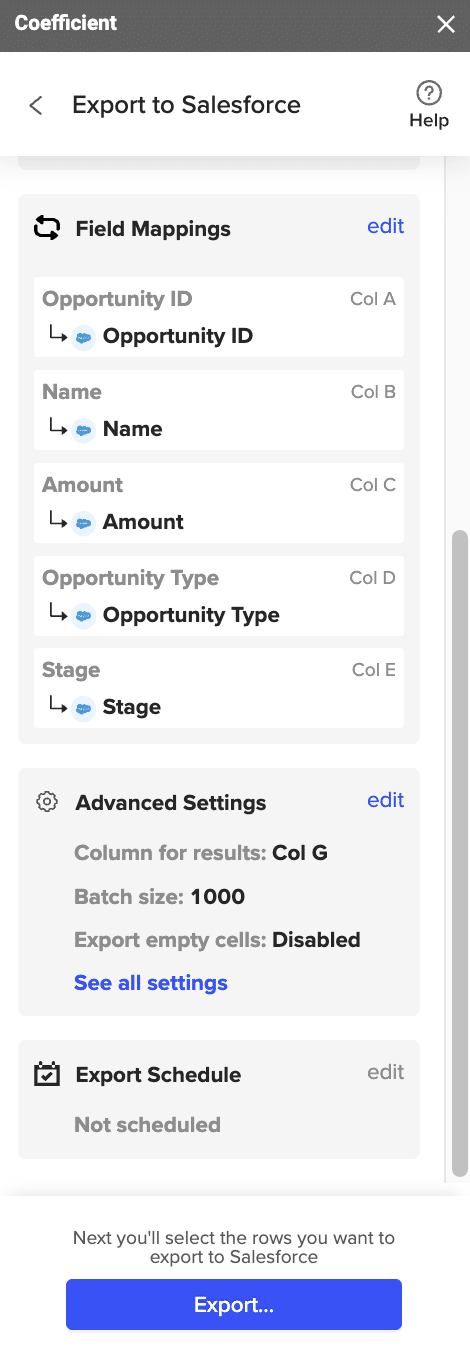
Step 5: Map Fields
Map the fields from your spreadsheet to the corresponding Salesforce fields.
(Optional) Specify additional settings such as batch size, whether to export empty cells on an update, and the column for results.
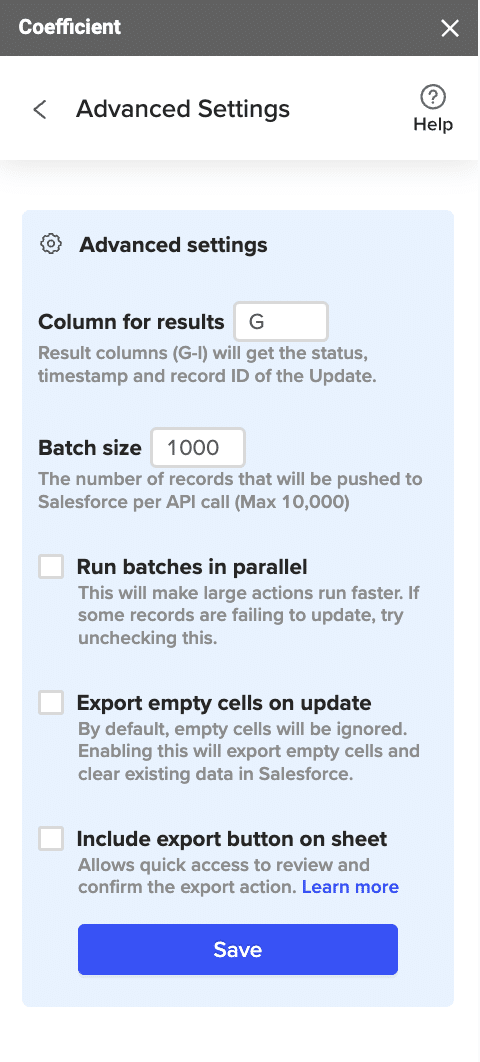
Note: Batch size is capped at 10,000 rows due to Salesforce API limitations.
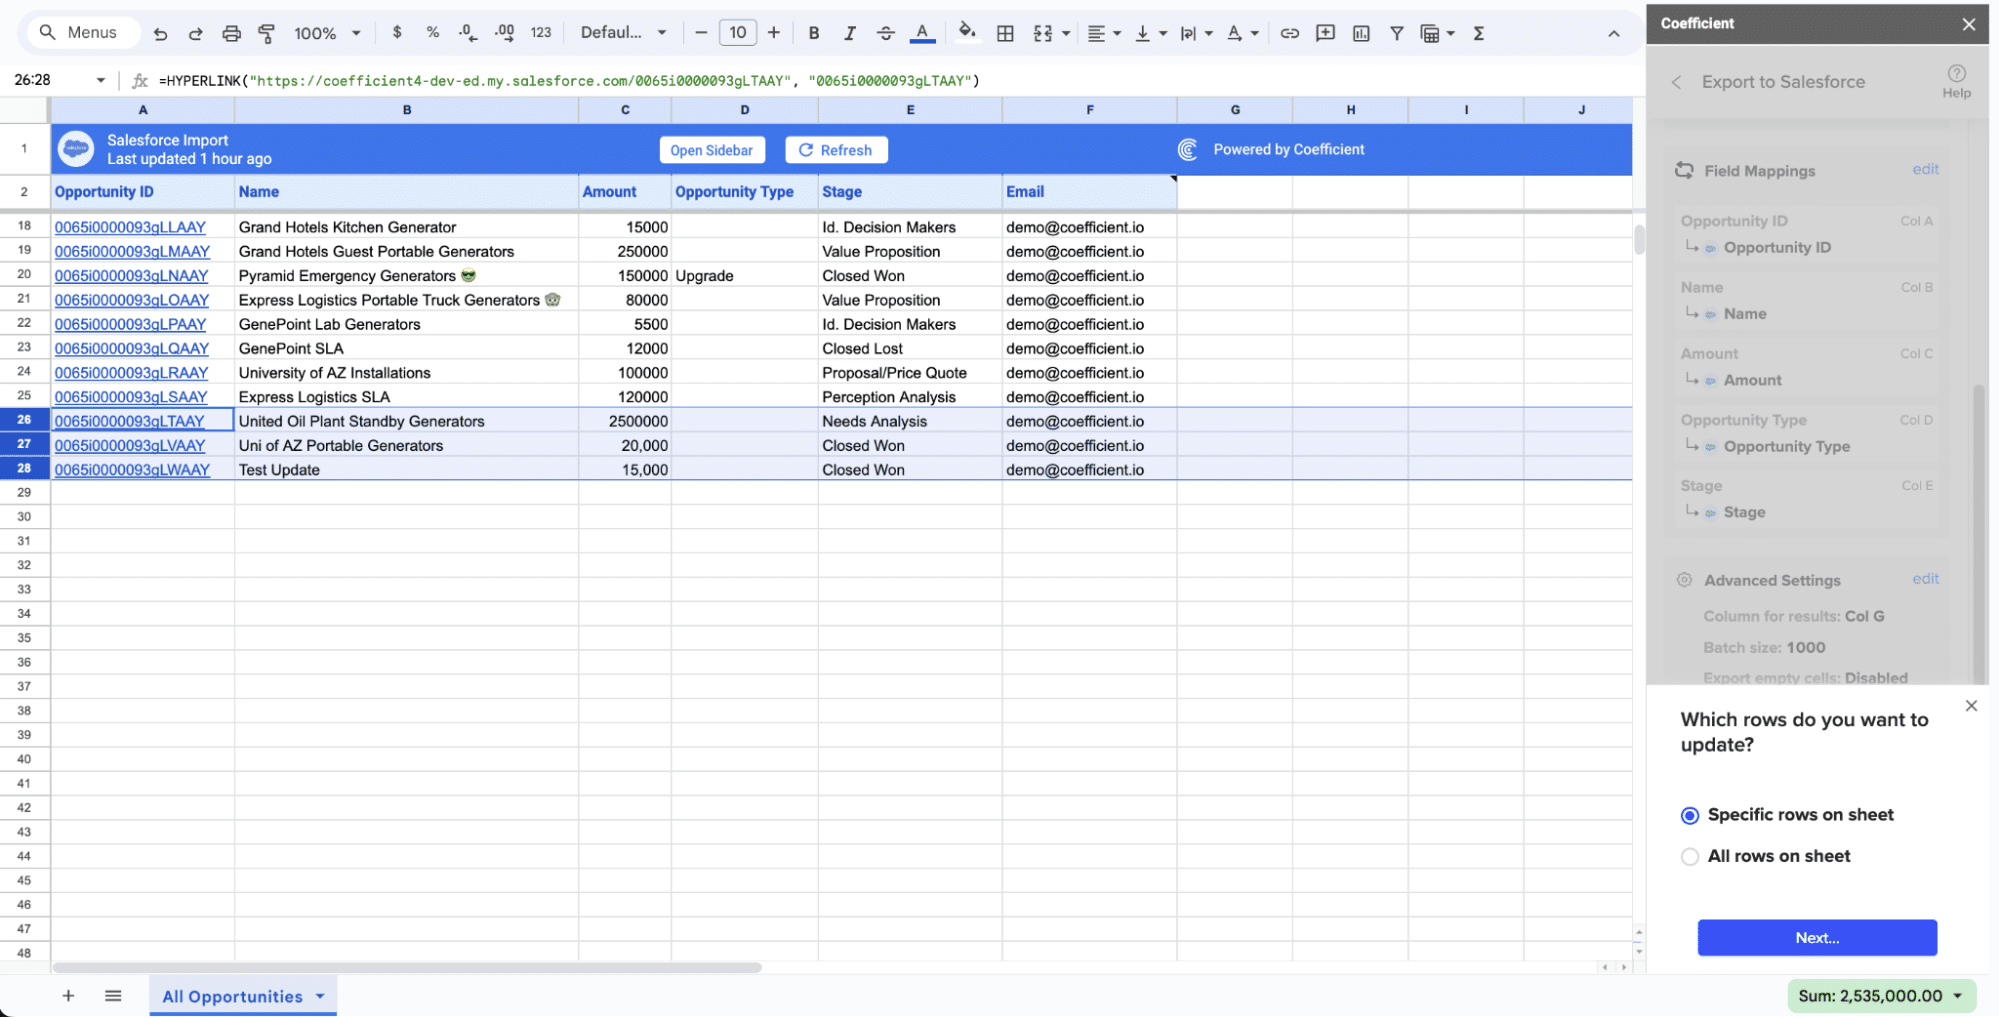
Step 7: Select Rows to Export
Confirm your settings and click “Export”.
Then, highlight the rows you want to update or export. You can choose to export all rows or specific rows.
After you’re finished, review your settings and click “Export.”
Follow the prompts to confirm your changes.
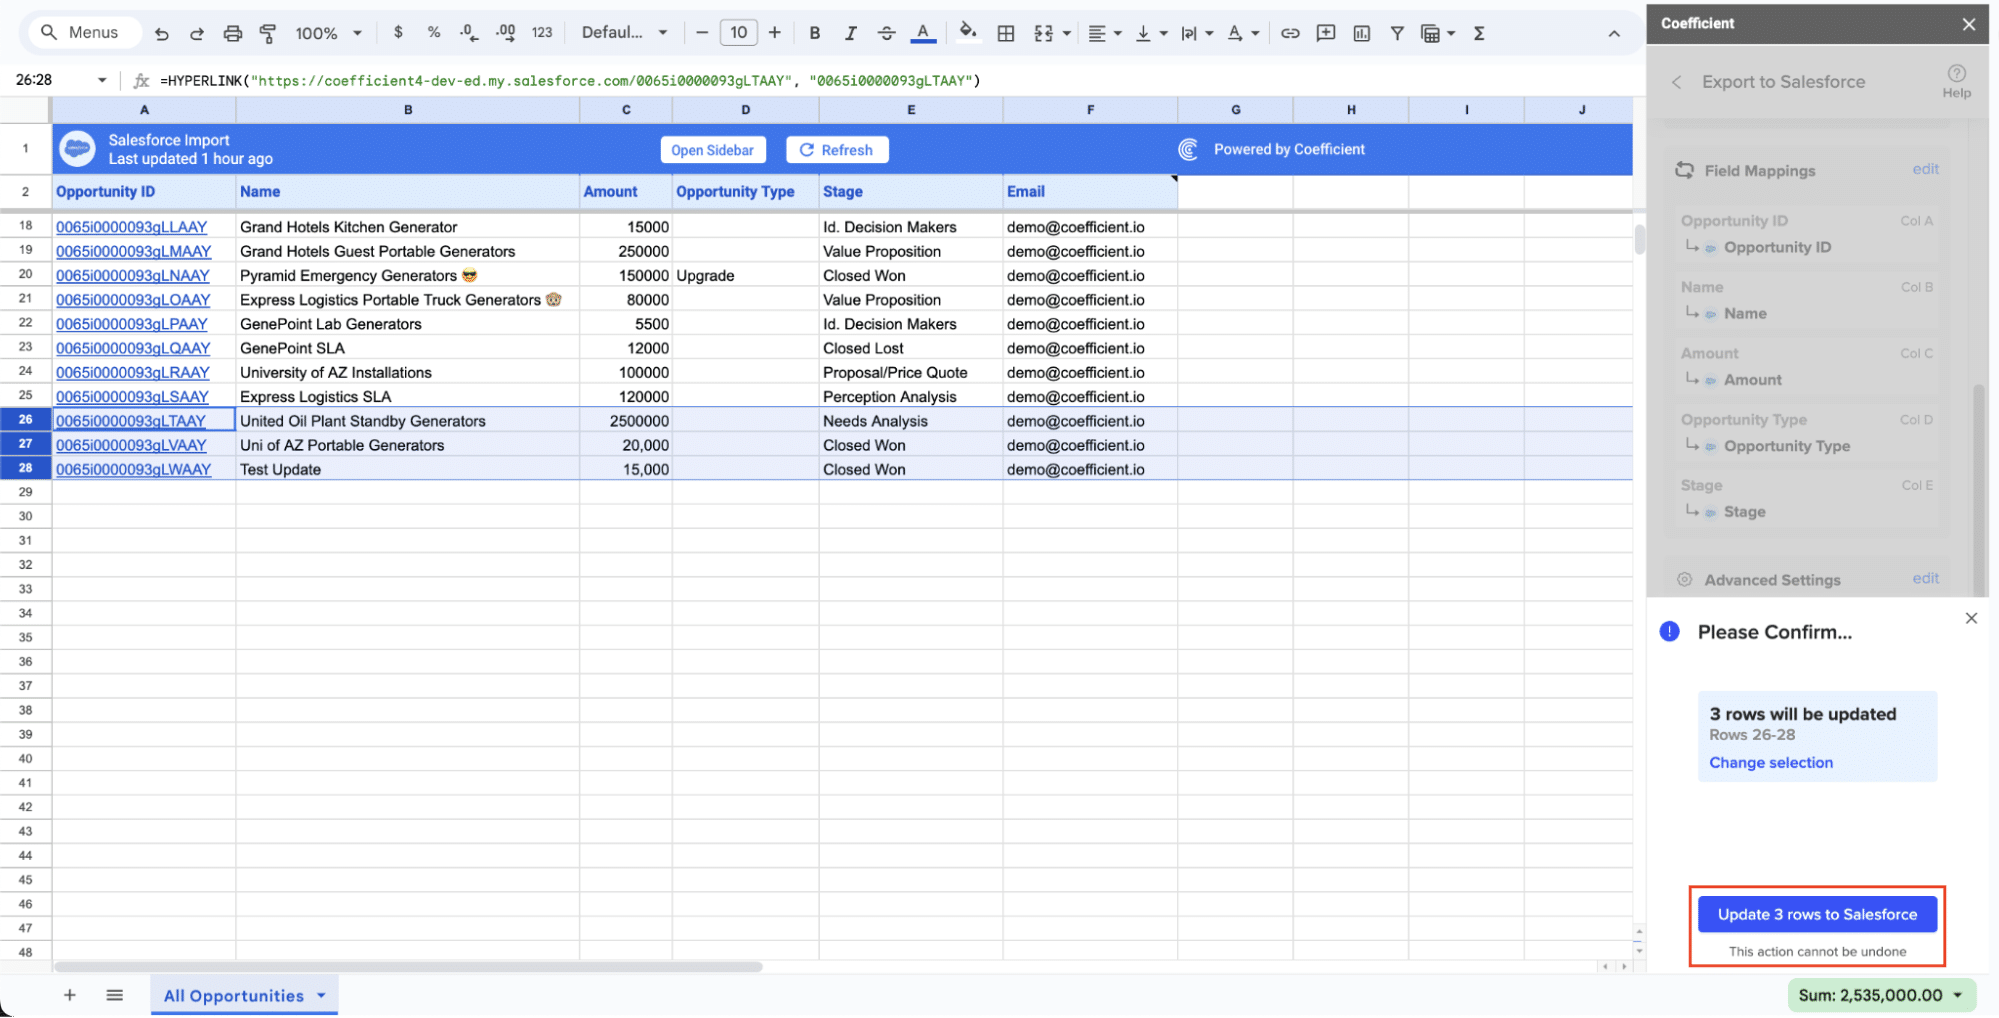
In a few seconds, data from your spreadsheet will push to Salesforce.
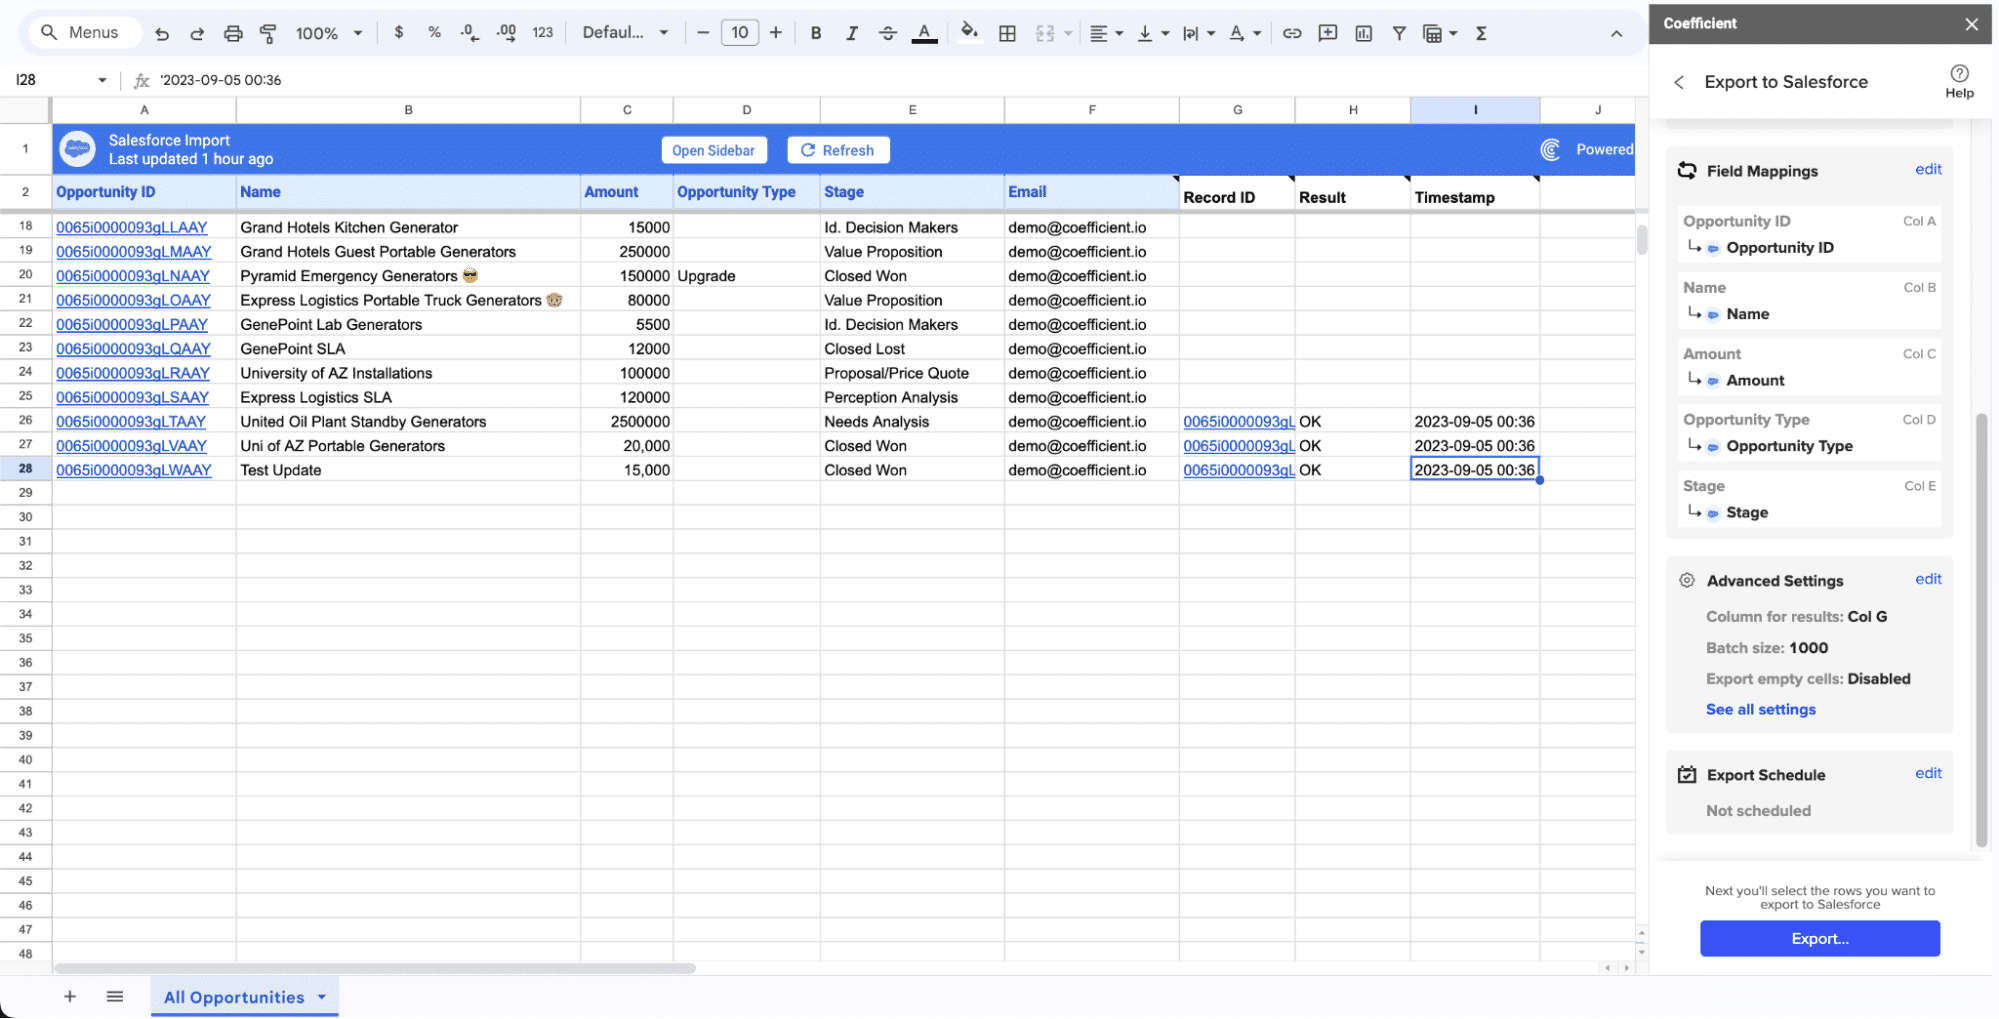
Your spreadsheet will display updated records, along with their export status and the date/time stamp of the update.
Method 2: Skyvia – No-Code, Simple Solution
Skyvia is a cloud-based data integration tool that offers a no-code solution for ETL processes with over 180 connectors, making it an ideal choice for businesses looking to automate data synchronization without the need for extensive technical knowledge.
Pros and Cons:
Pros:
- Easy no-code tools
- Advanced transformation capabilities
- Supports many connectors
Cons:
- No support for NoSQL databases
- No 24/7 support
- No on-premise option
Step-by-Step Guide:
- Create a New Connection:
- Log in to your Skyvia account. If you don’t have one, sign up for a free trial.
- Navigate to the “Connections” tab and click on “New Connection.”
- Select “PostgreSQL” from the list of available connectors.
- Enter the required connection details, such as host, database name, username, and password.
- Test the connection to ensure it’s successful.
- Create a new connection for Salesforce by selecting it from the list and entering the necessary credentials.
- Test this connection as well.
- Set Up Data Integration:
- Go to the “Integrations” section and click on “New Integration.”
- Name your integration task and select “Replication” for synchronizing data from PostgreSQL to Salesforce.
- Choose PostgreSQL as the source and Salesforce as the target.
- Configure whether the integration should run on a schedule or on-demand.
- Map Fields and Configure Settings:
- In the mapping section, map the fields from PostgreSQL to their corresponding fields in Salesforce.
- Use Skyvia’s drag-and-drop interface to perform the mapping.
- Configure any necessary data transformations.
- Set up error handling rules and notifications.
- Run and Monitor Integration:
- Review your integration settings and mappings.
- Click “Save” and then “Run” to start the integration process.
- Monitor the progress and results in the Skyvia dashboard.
- Check logs, view errors, and ensure data synchronization is as expected.
Method 3: DBSync – Real-Time, Bi-Directional Sync

DBSync offers real-time, bi-directional data synchronization between PostgreSQL and Salesforce, making it an excellent choice for organizations needing up-to-date data flow between systems.
Pros and Cons:
Pros:
- Real-time data synchronization
- Bi-directional sync capabilities
- Customizable workflows
Cons:
- May require technical expertise for setup
- Higher cost for advanced features
Step-by-Step Guide:
- Create a New Connection:
- Sign up for a DBSync account and log in.
- Go to the “Connections” tab and click “New Connection.”
- Select “PostgreSQL” as your source.
- Enter the connection details, such as host, database name, username, and password.
- Test the connection to ensure it’s successful.
- Create a new connection for Salesforce by selecting it from the list.
- Enter the necessary credentials and test this connection as well.
- Configure Data Sync:
- Navigate to the “Sync” tab and click “New Sync.”
- Select “PostgreSQL” as your source and “Salesforce” as your target.
- Choose the type of sync (real-time, scheduled, or manual).
- Specify the frequency if you choose scheduled sync.
- Map Fields:
- In the mapping section, map the fields between PostgreSQL and Salesforce.
- Use DBSync’s interface to define transformation rules.
- Set Up Sync Options:
- Customize your sync workflow.
- Set up rules for data conflict resolution and error handling.
- Configure notifications for sync status.
- Run and Monitor Sync:
- Save your sync configuration.
- Click “Run” to start the synchronization process.
- Monitor the real-time data flow in the DBSync dashboard.
- Check logs and adjust settings as needed.
Choosing the Right Tool for Your Needs
By using Skyvia or DBSync, you can ensure efficient, real-time data synchronization between PostgreSQL and Salesforce, enhancing data accuracy and operational efficiency.
If you’re looking for a simple, no-code solution, Coefficient is a great choice.