Table of Contents
![]()
- 1. How to integrate Google Forms with Salesforce: Top 2 methods
- 2. How to Automate Salesforce Data Imports from Any System (Even Without an API)
- 3. Common Methods to Export and Import Salesforce Data
- 4. How to Connect Salesforce to Google Sheets
- 5. How to Connect Salesforce to Excel
- 6. How Can I Open a Large Salesforce Export
- 7. How to Set Up Salesforce Reporting Snapshots
- 8. How to Export Data from Salesforce into Excel
- 9. How to Import Leads in Salesforce Like a Pro
- 10. How to Install Coefficient on Salesforce
- 11. Top 5 Alternatives to Google’s Salesforce Connector (2026 Comparison)
- 12. A Simpler Way to Use Salesforce Change Data Capture
- 13. How The Pros Are Setting Up Salesforce Lead Scoring in 2026
- 14. Salesforce Data Management for Teams Who Need Real Answers

Many operators export Salesforce reports and data into Excel for more flexible analysis, reporting, and sharing.
In this guide, we’ll provide a step-by-step walkthrough on exporting reports, objects, and fields into Excel and introduce Coefficient’s two-way Salesforce connector for Excel if you’re interested in automating Salesforce data exports and imports for free.
So let’s start!
TLDR
-
Step 1:
In Excel, click File -> Add-ins.
-
Step 2:
Search & Install Coefficient from Excel Add-ins.
-
Step 3:
Once installed, you will see a “Coefficient” tab at the top navigation bar.
-
Step 4:
Click ‘Open Sidebar’ to launch Coefficient in Excel.
-
Step 5:
Click Import Data from the Coefficient sidebar, then select Salesforce as your data source.
-
Step 6:
Specify your import’s Object fields by clicking Select Fields.
-
Step 7:
Click Run to start exporting data directly from Salesforce to Excel.
Method 1: Coefficient, a free, no-code option to export Salesforce reports and data
To support a wider spectrum of Salesforce export options, like learning how to export opportunities from Salesforce to Excel or previously built reports in Salesforce, you’ll need an add-on to help you out.
Coefficient is one of Salesforce AppExchange’s top-rate connectors for Salesforce and spreadsheets.
Here’s a step-by-step breakdown of how it works:
- Install Coefficient: Get started for free by installing Coefficient for Excel.
- Access Salesforce data: Open up the Coefficient extension in your spreadsheet, select ‘Import From’ -> Salesforce. You’ll be prompted to connect Salesforce.
- Select your import type (Reports, Object/Fields, or SOQL): Choose the data or report you want to export to your spreadsheet within a simple WYSIWYG sidebar app.
Your import will automatically populate into a new tab in your spreadsheet. And, you’ll have the option to keep your import on a refresh schedule hourly, daily, or weekly. Here’s a quick walkthrough in Google Sheets; the process will be the same in Excel.
Method 2: Manually in Salesforce
Here’s how to export a report in Salesforce from inside the Salesforce user interface. This option requires more technical chops and familiarity with SOQL.
- Install and Launch Data Loader
Access Salesforce’s built-in Data Loader tool. You can install it separately within the Salesforce ecosystem. Once installed, double-click on the Data Loader icon to launch the application.
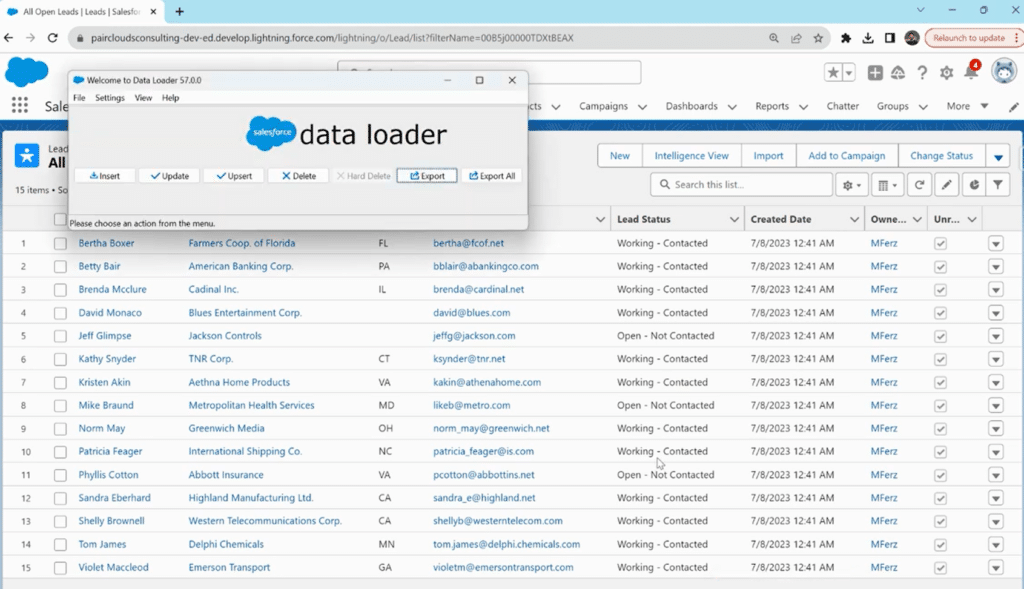
- Authenticate Your Account
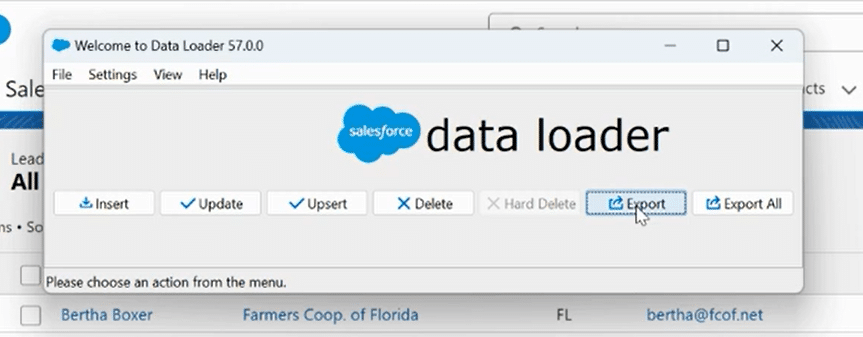
Click on ‘Export’ on the pop-up window for the Data Loader.
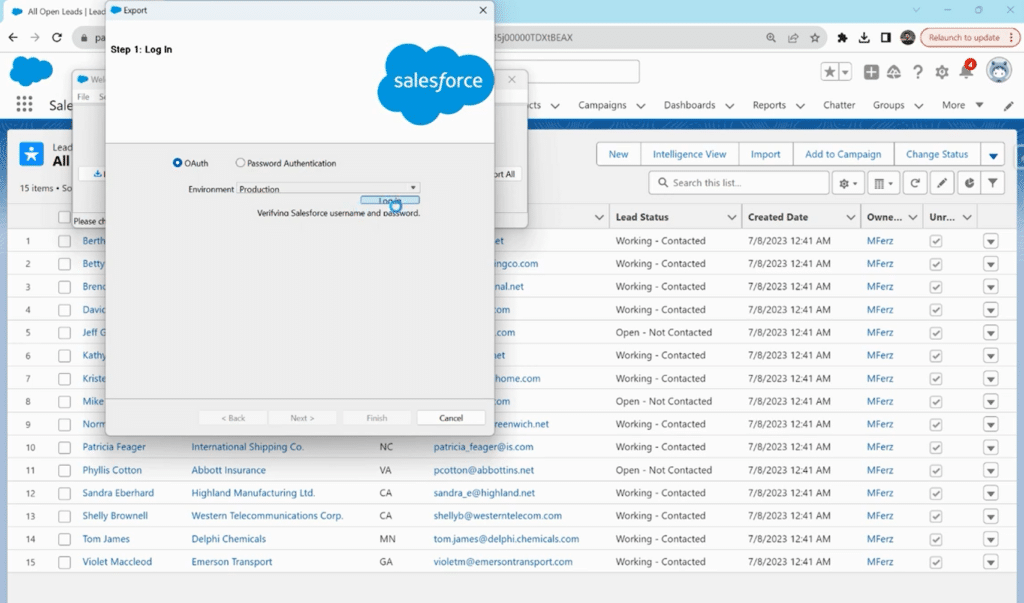
It will automatically connect to your logged-in Salesforce account and prompt you to authenticate in several steps. Follow the directions for authentication using your Salesforce account.
Once done, relaunch the data loader tool. It will show ‘login successful’ this time.
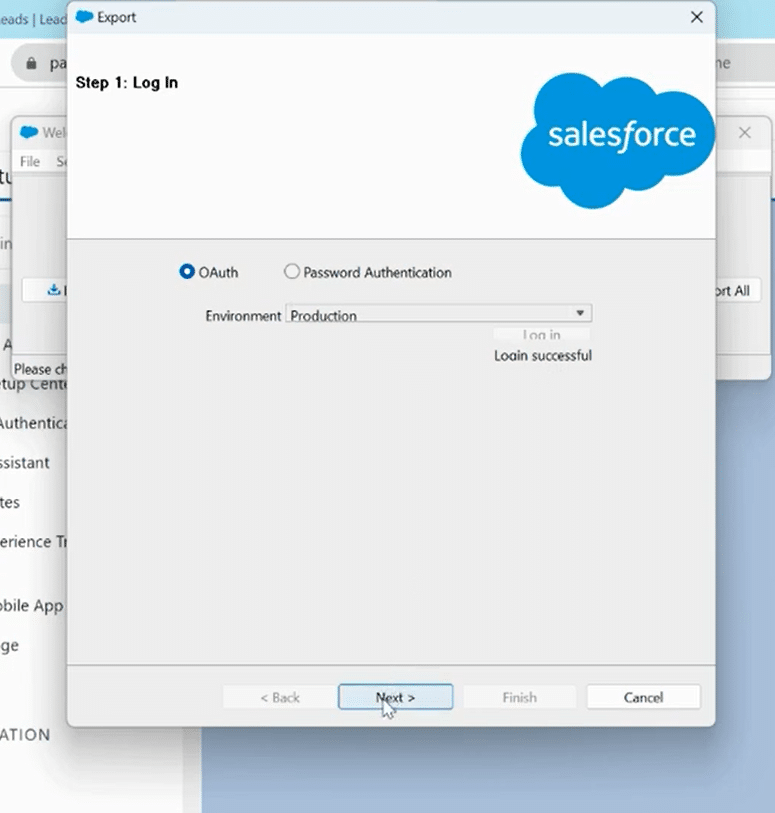
Click on ‘Next’ to start the data export process.
- Select Data Objects
The next step is to select which object you need the data from. The drop-down list will show several options, e.g., accounts, Leads, and Opportunities. Select the object that holds your data to export.

If you can not find the object category you need, Click on the ‘Show all Salesforce objects’ checkbox. A complete list will appear in the drop-down menu, including your custom abject categories or unnamed categories.
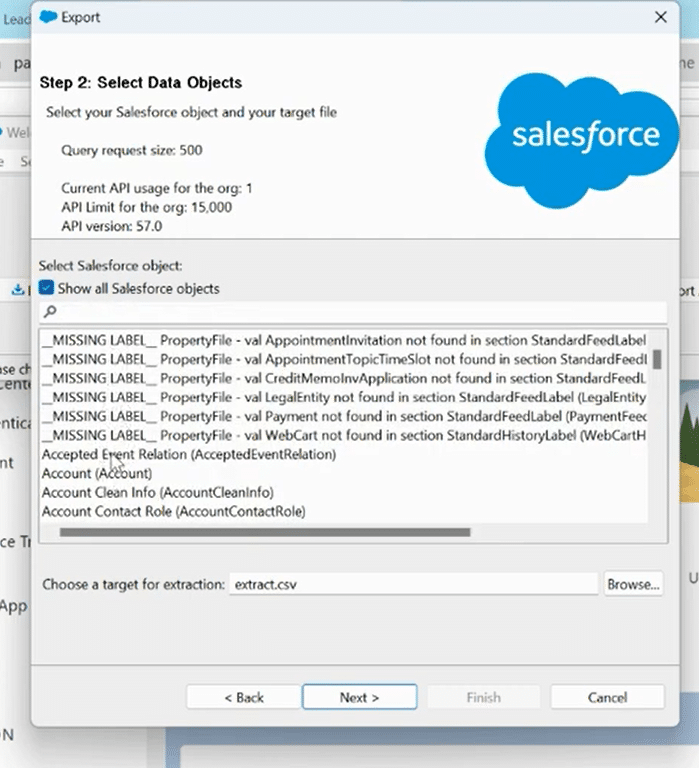
- Choose Target Location
In the same window, at the bottom, Click on ‘Browse’ to select the target location for the extraction of your CSV file.
A new pop-up window will appear. Select the folder where you wish to store your exported file and click ‘Save.’
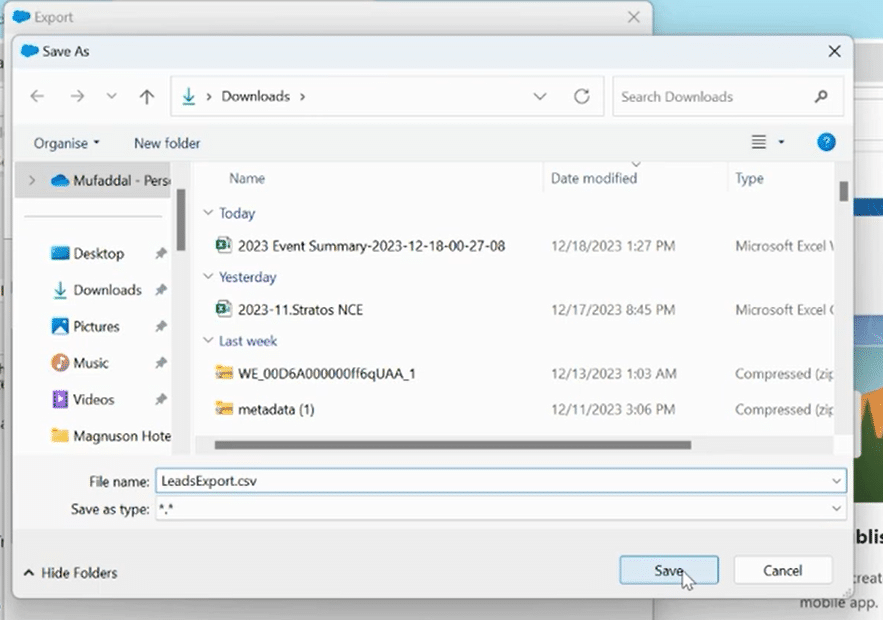
Once the window returns to export, click ‘Next’ to proceed with the final steps.
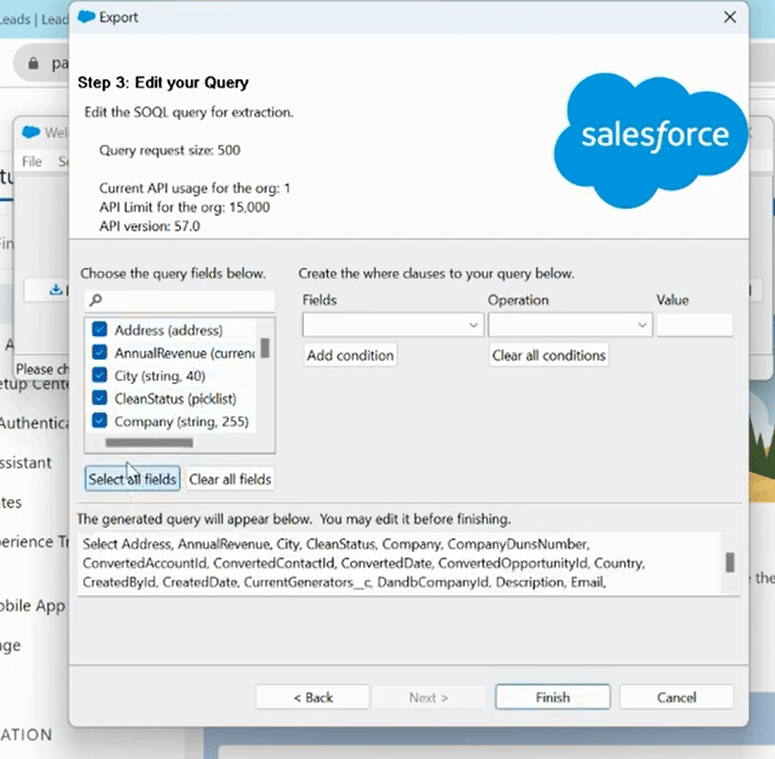
- Edit Query or Condition
You can edit your SOQL query for extraction and add conditions to sort and filter out data before saving your CSV file. In the Query drop-down list, you can select a range of fields you want to keep in your export file.
You can choose selective fields manually or click ‘Select all fields.’
In the conditions section, you can create where clauses for your query. You can add fields, operations, and values to specify the data you want to export.
For example, to only get Leads from LA, you can fill in Fields: City, Operation: Equals, Value: LA. The resulting data will consist of only what qualifies for this condition.
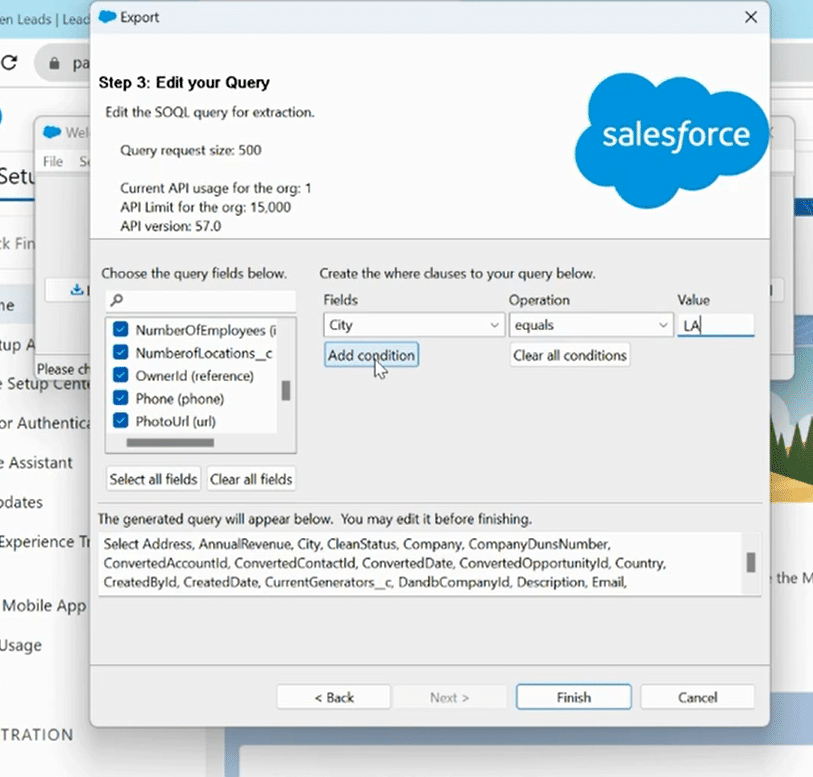
If you don’t wish to add any conditions, simply leave the section blank or click ‘Clear all conditions.’
- Save the File
Once you finish the last step, navigate and click on the ‘Finish’ button.
That’s all! The final window will show how many extractions went into your CSV file based on your criteria. You can also view your file by clicking on ‘View Extraction’ here.
Salesforce Data Export: Best Practices and Tips
Efficient Salesforce data export is not only about the process itself but also about ensuring data integrity, security, and usability.
Implementing best practices and tips in your data export strategy will provide a seamless, error-free experience.
- Choose Appropriate File Formats
Before exporting data, ensure compatibility between Salesforce and Excel file formats. Choose file formats that preserve data integrity and formatting. Consider using CSV (Comma-Separated Values) for straightforward data transfer within the Salesforce interface for simple data backup.
- Maintain Data Integrity
Verify the accuracy of your data during and after the export process. Ensure that data relationships, such as parent-child connections, are maintained. Regularly check for duplicate records and discrepancies to prevent data corruption.
- Automate Data Updates
Leverage Coefficient’s automation capabilities to schedule regular data updates. By automating the export process, you reduce the risk of human error, ensure data is consistently up-to-date, and free up valuable time for more strategic tasks.
- Implement Data Filters
When exporting specific datasets, utilize Salesforce’s filtering options. Narrow your export to relevant records by applying filters based on criteria such as date ranges, record types, or custom fields. This enhances data relevance and reduces the volume of exported data.
- Backup Your Data
Before initiating any significant data export, back up your Salesforce data. This precautionary measure ensures that you have a secure copy of your data to fall back on even in the event of unexpected issues or errors during the export process.
Export Salesforce Data to Multiple Fronts with Coefficient!
By following this comprehensive guide on how to export Salesforce list to Excel, you can scale your business with the tools and knowledge necessary to harness the full potential of your data, lists, reports, and opportunities.
Take the first step by trying Coefficient for free toward streamlined imports and exports from Salesforce to Excel.