Tracking Facebook campaign performance requires easy access to your metrics data. With Coefficient, you can bring all your Facebook Insights Campaign Metrics directly into Excel for better analysis.
This guide shows you how to import Facebook Insights Campaign Metrics into Excel efficiently.
TLDR
-
Step 1:
Install the Coefficient add-in for Excel from the Office Add-ins store
-
Step 2:
Connect your Facebook Insights account through Coefficient
-
Step 3:
Import Campaign Metrics data using Coefficients import tool
-
Step 4:
Set up auto-refresh to keep your campaign data updated automatically
How to Import Facebook Insights Campaign Metrics into Excel
Step 1: Install Coefficient and Connect Your Facebook Insights Account
First, you’ll need to install the Coefficient add-in and connect it to your Facebook account:
- Open Excel
- Go to the Insert tab
- Click Get Add-ins
- Search for “Coefficient” and install it from the Office Add-ins store
- Once installed, open the Coefficient sidebar
- Click “Import from…” to see available data sources

Step 2: Select Facebook Insights as Your Data Source
Now you’ll need to select Facebook Insights and authenticate your account:
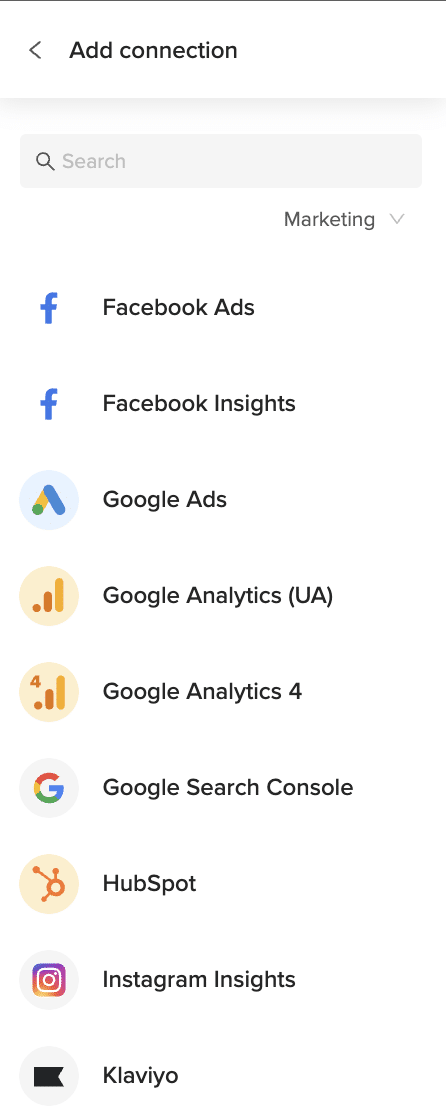
- In the Coefficient sidebar, select “Marketing” from the categories
- Choose “Facebook Insights” from the available marketing integrations
- Click “Connect” and follow the authentication prompts to link your Facebook account
- Once connected, you’ll see the available data objects from Facebook Insights
Step 3: Import Facebook Insights Campaign Metrics Data
After connecting your account, you can import your Campaign Metrics data:
- Select “Campaign Metrics” from the list of available objects
- Choose the specific metrics you want to import (reach, impressions, clicks, conversions, etc.)
- Apply any filters needed (date range, campaign types, etc.)
- Select where to import the data in your spreadsheet
- Click “Import” to bring the campaign data into Excel

With your campaign metrics in Excel, you can create performance dashboards, compare campaigns side by side, and calculate custom ROI metrics to better understand your Facebook marketing effectiveness.
What Facebook Insights Data Can You Import?
Objects
- Engagement Metrics
- Campaign Metrics
- Post Insights
- Page Insights
- Messaging Insights
- Audience Insights
How to Import Campaign Performance Data from Microsoft Ads into Excel
Analyzing your Microsoft Ads campaign performance in Excel enables marketers to spot trends, identify underperforming campaigns, and allocate budget more effectively for maximum ROI.
Rather than repeatedly downloading reports that quickly become outdated, you can establish a live connection for always-current data.
TLDR
-
Step 1:
Install Coefficient from the Office Add-ins store in Excel
-
Step 2:
Connect your Microsoft Ads account through Coefficient
-
Step 3:
Import Campaign Performance data with a few clicks
-
Step 4:
Set up auto-refresh to keep your campaign data current
Step 1: Install Coefficient and Connect Your Microsoft Ads Account
Begin by installing the Coefficient add-in in your Excel workbook and connecting to your Microsoft Ads account.
- Open Excel and navigate to the Insert tab
- Click Get Add-ins and search for “Coefficient”
- Install the Coefficient add-in from the Office Add-ins store
- Once installed, open the Coefficient sidebar and click “Import”
- Select “Microsoft Ads” from the list of available connectors
- Follow the authentication prompts to connect your Microsoft Ads account
Step 2: Import Campaign Performance Data
After connecting your Microsoft Ads account, you can import your Campaign Performance data:
- In the Coefficient sidebar, click “Import from Microsoft Ads”
- Select “Campaign Performance” from the list of available objects
- Choose which metrics and dimensions you want to import (impressions, clicks, CTR, cost, etc.)
- Apply any filters to limit the data (e.g., specific date ranges, campaign status)
- Click “Import” to bring the data into your Excel spreadsheet
Step 3: Set Up Auto-Refresh for Your Data
Keep your Microsoft Ads campaign data fresh by setting up automatic refreshes:
- Select any cell in your imported data range
- Open the Coefficient sidebar and click “Refresh”
- Click “Schedule Refresh” to set up automated updates
- Choose your preferred refresh frequency (hourly, daily, or weekly)
- Confirm your settings to activate the auto-refresh schedule
Create Custom Campaign Analysis in Excel
With your Campaign Performance data in Excel, you can build dynamic dashboards, create trend analysis charts, or calculate custom metrics like ROAS and CPA. Leverage Excel’s powerful features to identify which campaigns deliver the best results and deserve additional investment.
Compare performance across different time periods or measure campaigns against your KPI targets to ensure your Microsoft Ads strategy remains on track.
Microsoft Ads Data Available in Coefficient
Available Objects
- Campaign Performance
- Conversion Performance
- Keyword Performance
- Search Query Performance
- Account Performance
- Ad Dynamic Text Performance
- Ad Extension By Ad
- Ad Extension By Keyword
- Ad Extension Detail
- Ad Performance
- Age Gender Audience
- Audience Performance
How to Import Companies Data from Bigin into Google Sheets
Importing Companies data from Bigin into Google Sheets helps you manage company information and collaborate effectively. Coefficient makes this process seamless and automatic.
This guide will show you how to import your Bigin Companies data into Google Sheets using Coefficient.
TLDR
-
Step 1:
Step 1. Open Google Sheets > Extensions > Add-ons > Get add-ons > Install Coefficient from Google Workspace Marketplace.
-
Step 2:
Step 2. Connect your Bigin account and select the Companies object to import.
-
Step 3:
Step 3. (Optional) Enable auto-refresh to keep your data updated automatically.
Available Bigin Objects
- Contacts
- Pipelines
- Events
- Calls
- Companies
- Products
- Tasks

How to Import Contacts Data from Bigin into Excel
Importing Contacts data from Bigin into Excel allows you to manage your customer relationships efficiently and analyze your sales pipeline. Coefficient keeps your data live and accurate for better insights.
This guide will walk you through importing your Bigin Contacts data into Excel using Coefficient.
TLDR
-
Step 1:
Step 1. Open Excel > Insert tab > Get Add-ins > Install Coefficient from Office Add-ins store.
-
Step 2:
Step 2. Connect your Bigin account and select the Contacts object to import.
-
Step 3:
Step 3. (Optional) Set up auto-refresh to keep your data updated automatically.
Available Bigin Objects
- Contacts
- Pipelines
- Events
- Calls
- Companies
- Products
- Tasks
How to Import Contacts Data from Bigin into Google Sheets
Importing Contacts data from Bigin into Google Sheets helps you manage customer relationships and collaborate effectively. Coefficient makes this process seamless and automatic.
This guide will show you how to import your Bigin Contacts data into Google Sheets using Coefficient.
TLDR
-
Step 1:
Step 1. Open Google Sheets > Extensions > Add-ons > Get add-ons > Install Coefficient from Google Workspace Marketplace.
-
Step 2:
Step 2. Connect your Bigin account and select the Contacts object to import.
-
Step 3:
Step 3. (Optional) Enable auto-refresh to keep your data updated automatically.
Available Bigin Objects
- Contacts
- Pipelines
- Events
- Calls
- Companies
- Products
- Tasks
How to Import Account Statement Reports from Razorpay into Google Sheets
Tracking your Razorpay account statements in Google Sheets gives you better visibility into your financial flows. But manual exports waste time and quickly become outdated.
With a direct connection, you’ll have fresh data ready for analysis whenever you need it.
TLDR
-
Step 1:
Install Coefficient from Google Workspace Marketplace
-
Step 2:
Connect your Razorpay account
-
Step 3:
Select Import from Reports and choose Account Statement
-
Step 4:
Configure any filters and import the data
-
Step 5:
Set up auto-refresh to keep your data updated automatically
Step-by-step guide to importing Razorpay Account Statement reports
Step 1: Install Coefficient and connect to Razorpay
First, you’ll need to install the Coefficient add-on and connect it to your Razorpay account.
- Open your Google Sheet
- Extensions > Add-ons > Get add-ons Click on
- Search for “Coefficient” and install it from the Google Workspace Marketplace
- Once installed, open Coefficient from the Extensions menu
- Import Data In the Coefficient sidebar, click
- Razorpay Selectfrom the list of connectors
- Follow the prompts to authorize and connect your Razorpay account
Step 2: Import the Account Statement report
Now that you’re connected, you can import your Account Statement report data.
- Import from Reports In the Coefficient sidebar, select
- Account Statement Browse or search forin the list of available reports
- Configure any filters you need (date range, payment status, etc.)
- Choose where in your spreadsheet you want the data to appear
- Import Clickto bring your Account Statement data into Google Sheets
Step 3: Set up auto-refresh (optional)
Keep your Account Statement data fresh with automatic updates.
- Refresh Click thebutton next to your imported data
- Schedule Refresh Select
- Choose your preferred frequency (hourly, daily, weekly)
- Set specific times for the refresh to occur
- Save Clickto activate your auto-refresh schedule

That’s it! Your Razorpay Account Statement data will now be available in Google Sheets, ready for analysis, reporting, or sharing with your team.
Available Razorpay Data in Coefficient
Reports
- Vendor Payments
- Payouts
- Account Statement
- Purchase Orders
- Vendor Invoices
- Vendor Advances
Objects
- Customers
- Orders
- Settlements
- Documents
- Invoices
- Subscriptions
- Payments
- Refunds
- Payment Links
- Disputes
Take control of your Razorpay financial data
Importing your Razorpay Account Statement reports into Google Sheets gives you powerful analysis capabilities without the hassle of manual exports. With Coefficient, you can maintain a live connection to your financial data, ensuring you always have the most current information at your fingertips.
The ability to schedule automatic refreshes means your reports are always up-to-date. And with options to set up automated alerts and report distribution, you can keep your entire team informed about important financial metrics.
This approach eliminates data silos and empowers your team to make data-driven decisions based on accurate, timely financial information. No more waiting for reports or dealing with outdated exports.
Whether you’re tracking payments, analyzing cash flow, or preparing financial reports, having your Razorpay Account Statement data in Google Sheets streamlines your workflow and improves accuracy.
Try Coefficient todayReady to transform how you work with your Razorpay financial data?and experience the difference that live, automated data can make for your financial reporting.
How to Import Bank Interest Income/Charges Data from Sage Intacct into Excel
Importing Accounts Receivable from Sage Intacct into Excel gives you a live view of what customers owe.
This guide shows you how to connect Coefficient, import your Accounts Receivable object, and set up auto-refresh.
TLDR
-
Step 1:
Install Coefficient, connect Sage Intacct.
-
Step 2:
Select “Import from Objects” → “Accounts Receivable.”
-
Step 3:
Click “Import” and verify fields.
-
Step 4:
Enable auto-refresh for continuous updates.
Step-by-Step Guide
What Sage Intacct Data is Imported?
- Bills
- Customers
- Deposits
- Expense Reports
- Fund Transfers
- Invoices
- Journal Entries
- Payments
- Tax Details
- Vendors
- Accounts Payable
- Accounts Receivable
Importing Bank Interest Income/Charges from Sage Intacct into Excel gives you clear insight into bank fees and earnings.
This guide covers connecting Coefficient, importing your Bank Interest Income/Charges object, and automating refresh.
TLDR
-
Step 1:
Install Coefficient, connect Sage Intacct.
-
Step 2:
Select “Import from Objects” → “Accounts Receivable.”
-
Step 3:
Click “Import” and verify fields.
-
Step 4:
Enable auto-refresh for continuous updates.
Step-by-Step Guide
What Sage Intacct Data is Imported?
- Bills
- Customers
- Deposits
- Expense Reports
- Fund Transfers
- Invoices
- Journal Entries
- Payments
- Tax Details
- Vendors
- Accounts Payable
- Accounts Receivable
| Objects | |
| Accounts Receivable | |
| Bank Interest Income/Charges | |
| Charge Card Transactions | |
| Charge Payoffs | |
| Charge Payoff Lines |
| How to get Bank Interest Income/Charges from Sage Intacct? | 1. Open Coefficient pane → “Import from Objects.”2. Select “Bank Interest Income/Charges” → “Import.”Coefficient brings live fee data into Excel. |
| How do I get a list of Bank Interest Income/Charges in Sage Intacct? | Use “Import from Objects,” choose “Bank Interest Income/Charges.”All bank charge entries load instantly. |
| How to export Bank Interest Income/Charges to Excel? | Click “Export to Excel,” map fields, then run.Your sheet syncs back to Sage Intacct. |
| How do I update Bank Interest Income/Charges from Excel to Sage Intacct? | Choose “Export to Sage Intacct,” configure mappings, then “Update.”Edits push back into Sage Intacct. |
| How to send email alerts about Bank Interest Income/Charges data? | Configure an email automation in Coefficient.Select fee fields and schedule.Receive notifications on interest changes. |
How to Import Bills Data from Sage Intacct into Excel
Importing Bills from Sage Intacct into Excel keeps your payables up to date without manual exports.
This guide shows you how to set up Coefficient, import your Bills object, and automate data refresh.
TLDR
-
Step 1:
Install Coefficient and connect Sage Intacct in Excel.
-
Step 2:
Select “Import from Objects” → “Bills.”
-
Step 3:
Click “Import” and verify columns.
-
Step 4:
Optionally, set up auto-refresh.
Step-by-Step Guide
What Sage Intacct Data is Imported?
- Bills
- Customers
- Deposits
- Expense Reports
- Fund Transfers
- Invoices
- Journal Entries
- Payments
- Tax Details
- Vendors
- ACCOUNTS PAYABLE
- ACCOUNTS RECEIVABLE
How to Import Charge Card Transactions Data from Sage Intacct into Excel
Importing Charge Card Transactions from Sage Intacct into Excel gives you a detailed view of card spend.
This tutorial covers connecting Coefficient, importing your Charge Card Transactions object, and setting up auto-refresh.
TLDR
-
Step 1:
Install Coefficient, connect Sage Intacct.
-
Step 2:
Select “Import from Objects” → “Charge Card Transactions.”
-
Step 3:
Click “Import,” verify fields.
-
Step 4:
Enable auto-refresh for up-to-date data.
Step-by-Step Guide
What Sage Intacct Data is Imported?
- Charge Card Transactions
- Charge Payoffs
- Charge Payoff Lines
- Checking Account Reconciliations
- Credit Card Charges/Other Fees
How to Import Clients Data from Harvest into Google Sheets
Time tracking data is gold. But locked in Harvest, it loses its shine.
Bringing your Clients data into Google Sheets opens new doors for analysis, reporting, and collaboration across teams.
Let’s get your Harvest client data flowing into spreadsheets where it belongs.
TLDR
-
Step 1:
Install Coefficient from Google Workspace Marketplace
-
Step 2:
Connect your Harvest account
-
Step 3:
Select Import from Objects and choose Clients
-
Step 4:
Configure any filters you need
-
Step 5:
Set up auto-refresh to keep your data current
Step-by-step guide to importing Harvest Clients data
Step 1: Install Coefficient and connect to Harvest
First, you’ll need to install the Coefficient add-on and connect it to your Harvest account.
- Open Google Sheets
- Click on Extensions > Add-ons > Get add-ons
- Search for “Coefficient” and install it from Google Workspace Marketplace
- Once installed, open the Coefficient sidebar by clicking Extensions > Coefficient > Launch
- In the sidebar, click “Import Data”
Step 2: Select Harvest as your data source
Now, let’s connect to Harvest and select the Clients object.
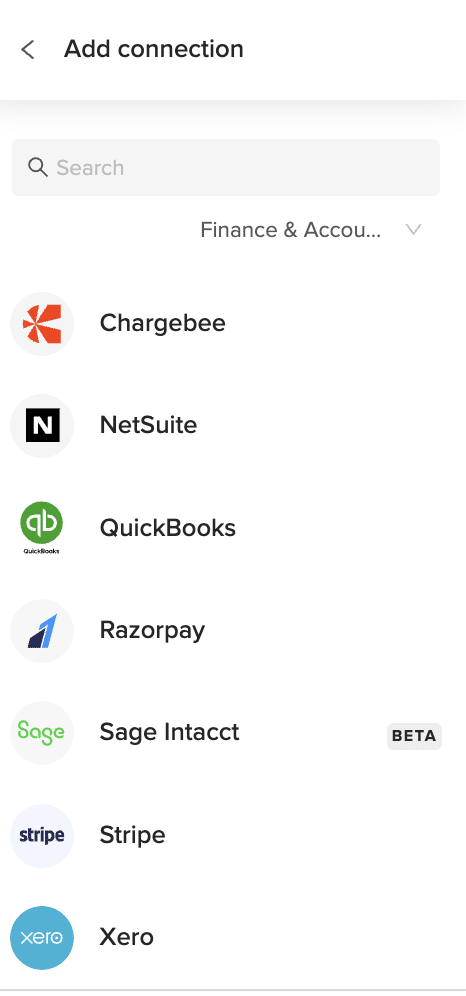
- In the Import Data menu, scroll to find Harvest under the Finance & Accounting section
- Click on Harvest to select it as your data source
- If this is your first time connecting, you’ll be prompted to authenticate your Harvest account
- After connecting, select “Import from Objects”
- Choose “Clients” from the list of available objects
Step 3: Configure and import your Clients data
With Harvest connected, you can now customize your data import.
- Select the specific client fields you want to import (name, address, contact info, etc.)
- Apply any filters if you only want specific clients (active, inactive, by date, etc.)
- Choose where in your spreadsheet you want the data to appear
- Click “Import” to bring your Harvest client data into Google Sheets
Step 4: Set up auto-refresh (optional)
Keep your client data fresh without manual updates.
- Click on the “Auto-refresh” button in the Coefficient sidebar
- Choose your preferred refresh frequency (hourly, daily, weekly)
- Set specific times for the refresh to occur
- Click “Save” to activate automatic updates
Available Harvest Data in Coefficient
Reports
- Uninvoiced Report
- Projects Time Report
- Team Time Report
- Clients Time Report
- Clients Expense Report
- Projects Expense Report
- Team Expense Report
Objects
- Invoices
- Clients
- Expenses
- Projects
- Client Contacts
What can you do with Harvest Clients data in Google Sheets?
Once your client data is in Google Sheets, the possibilities expand.
- Create custom client dashboards showing project status, hours billed, and outstanding invoices
- Build reports that combine client data with information from other systems
- Set up alerts for important client milestones or billing thresholds
- Share client insights with team members who don’t have Harvest access
The real power comes from combining this data with other sources. Mix client information with project timelines, team capacity, or financial data for complete business visibility.
Start working with live Harvest data today
Importing your Harvest Clients data into Google Sheets doesn’t have to be complicated. With Coefficient, you can create a live connection in minutes.
No more CSV exports. No more outdated information. Just real-time client data where you need it.
Your team can make better decisions with current client information at their fingertips. Project planning becomes more accurate when based on up-to-date client details.
Try Coefficient todayBest of all, the setup process is simple and the data stays fresh automatically. Ready to transform how you work with your Harvest client data?and experience the difference of having live Harvest data in your spreadsheets.