Managing client contacts in Harvest is essential. But analyzing this data in Google Sheets unlocks deeper insights.
Stop the tedious copy-paste routine. Connect directly to your Harvest data instead.
This guide shows you how to import Client Contacts from Harvest into Google Sheets using Coefficient.
TLDR
-
Step 1:
Install Coefficient from Google Workspace Marketplace
-
Step 2:
Connect your Harvest account to Coefficient
-
Step 3:
Select Import from Objects and choose Client Contacts
-
Step 4:
Configure any filters if needed
-
Step 5:
Set up auto-refresh to keep your data current
Step-by-step guide to importing Harvest Client Contacts
Step 1: Install Coefficient and connect to Harvest
First, you’ll need to install the Coefficient add-on and connect it to your Harvest account.
- Open Google Sheets
- Click on Extensions > Add-ons > Get add-ons
- Search for “Coefficient” and install it from Google Workspace Marketplace
- Once installed, open the Coefficient sidebar by clicking Extensions > Coefficient > Launch
- In the sidebar, click “Import Data”
- Select “Harvest” from the list of available connectors
- Log in with your Harvest credentials when prompted

Step 2: Import Client Contacts data
Now that you’re connected, you can import your Client Contacts data.
- In the Coefficient sidebar, select “Import from Objects”
- Choose “Client Contacts” from the list of available objects
- Select the fields you want to import (e.g., name, email, phone, company)
- Apply any filters if needed to narrow down your data
- Click “Import” to bring the data into your Google Sheet
Step 3: Set up auto-refresh (Optional)
Keep your client contact data fresh with automatic updates.
- Click on the “⋮” menu next to your imported data
- Select “Schedule Refresh”
- Choose your preferred frequency (hourly, daily, weekly)
- Set specific times for the refresh to occur
- Click “Save” to activate the auto-refresh schedule

Available Harvest Data in Coefficient
Reports
- Uninvoiced Report
- Projects Time Report
- Team Time Report
- Clients Time Report
- Clients Expense Report
- Projects Expense Report
- Team Expense Report
Objects
- Invoices
- Clients
- Expenses
- Projects
- Client Contacts
Take control of your Harvest data
Importing Client Contacts from Harvest into Google Sheets doesn’t have to be complicated. With Coefficient, you can create a live connection that keeps your data fresh and accessible.
This approach eliminates manual exports and gives you the flexibility to analyze your client information alongside other business data. You’ll save hours each week while gaining deeper insights into your client relationships.
The best part? Once set up, your data refreshes automatically. No more outdated spreadsheets or manual updates.
Your team can focus on using the data rather than gathering it. And with Coefficient’s automation features, you can set up alerts and scheduled reports to keep everyone informed.
Try Coefficient todayReady to streamline your Harvest data management?and transform how you work with client contact information.
How to Import Clients Data from Harvest into Google Sheets
Time tracking data is gold. But locked in Harvest, it loses its shine.
Bringing your Clients data into Google Sheets opens new doors for analysis, reporting, and collaboration across teams.
Let’s get your Harvest client data flowing into spreadsheets where it belongs.
TLDR
-
Step 1:
Install Coefficient from Google Workspace Marketplace
-
Step 2:
Connect your Harvest account
-
Step 3:
Select Import from Objects and choose Clients
-
Step 4:
Configure any filters you need
-
Step 5:
Set up auto-refresh to keep your data current
Step-by-step guide to importing Harvest Clients data
Step 1: Install Coefficient and connect to Harvest
First, you’ll need to install the Coefficient add-on and connect it to your Harvest account.
- Open Google Sheets
- Click on Extensions > Add-ons > Get add-ons
- Search for “Coefficient” and install it from Google Workspace Marketplace
- Once installed, open the Coefficient sidebar by clicking Extensions > Coefficient > Launch
- In the sidebar, click “Import Data”
Step 2: Select Harvest as your data source
Now, let’s connect to Harvest and select the Clients object.
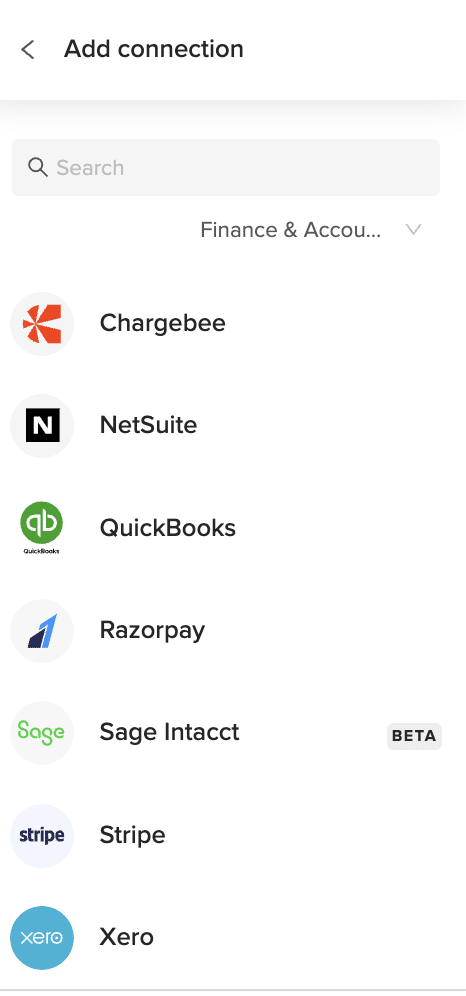
- In the Import Data menu, scroll to find Harvest under the Finance & Accounting section
- Click on Harvest to select it as your data source
- If this is your first time connecting, you’ll be prompted to authenticate your Harvest account
- After connecting, select “Import from Objects”
- Choose “Clients” from the list of available objects
Step 3: Configure and import your Clients data
With Harvest connected, you can now customize your data import.
- Select the specific client fields you want to import (name, address, contact info, etc.)
- Apply any filters if you only want specific clients (active, inactive, by date, etc.)
- Choose where in your spreadsheet you want the data to appear
- Click “Import” to bring your Harvest client data into Google Sheets
Step 4: Set up auto-refresh (optional)
Keep your client data fresh without manual updates.
- Click on the “Auto-refresh” button in the Coefficient sidebar
- Choose your preferred refresh frequency (hourly, daily, weekly)
- Set specific times for the refresh to occur
- Click “Save” to activate automatic updates
Available Harvest Data in Coefficient
Reports
- Uninvoiced Report
- Projects Time Report
- Team Time Report
- Clients Time Report
- Clients Expense Report
- Projects Expense Report
- Team Expense Report
Objects
- Invoices
- Clients
- Expenses
- Projects
- Client Contacts
What can you do with Harvest Clients data in Google Sheets?
Once your client data is in Google Sheets, the possibilities expand.
- Create custom client dashboards showing project status, hours billed, and outstanding invoices
- Build reports that combine client data with information from other systems
- Set up alerts for important client milestones or billing thresholds
- Share client insights with team members who don’t have Harvest access
The real power comes from combining this data with other sources. Mix client information with project timelines, team capacity, or financial data for complete business visibility.
Start working with live Harvest data today
Importing your Harvest Clients data into Google Sheets doesn’t have to be complicated. With Coefficient, you can create a live connection in minutes.
No more CSV exports. No more outdated information. Just real-time client data where you need it.
Your team can make better decisions with current client information at their fingertips. Project planning becomes more accurate when based on up-to-date client details.
Try Coefficient todayBest of all, the setup process is simple and the data stays fresh automatically. Ready to transform how you work with your Harvest client data?and experience the difference of having live Harvest data in your spreadsheets.
How to Import Clients Time Report from Harvest into Excel
Time tracking data is gold for project managers and finance teams. But exporting Harvest time reports manually is a pain that leaves you with stale data.
What if you could get live Harvest time data in Excel? That’s where Coefficient comes in.
TLDR
-
Step 1:
Install Coefficient from the Office Add-ins store
-
Step 2:
Connect your Harvest account to Excel
-
Step 3:
Import the Clients Time Report with a few clicks
-
Step 4:
Set up auto-refresh to keep your time data current
-
Step 5:
Use Excels tools to analyze and visualize your time tracking data
How to import Harvest Clients Time Report into Excel
Follow these simple steps to get your Harvest time tracking data into Excel.
Step 1: Install Coefficient and connect to Harvest
- Insert Open Excel and click on thetab
- Get Add-ins Clickin the ribbon
- Search for “Coefficient” in the Office Add-ins store
- Add Clickto install Coefficient
- Home > Coefficient Once installed, open the Coefficient sidebar by clicking
- Import Data Clickto begin
Step 2: Select Harvest and the Clients Time Report
- Harvest In the Import Data menu, find and selectfrom the list of connectors
- Connect If this is your first time, clickand follow the prompts to authorize Coefficient to access your Harvest account
- Import from Reports Once connected, select
- Clients Time Report Find and selectfrom the available reports
Step 3: Configure and import your data
- Choose the date range for your time data (Last 30 days, Last quarter, Custom range, etc.)
- Select any additional filters you need (specific clients, projects, team members)
- Next Clickto preview your data
- Select the cell where you want the data to appear in your spreadsheet
- Import Clickto bring the Clients Time Report into Excel
Keep your Harvest time data fresh with auto-refresh
Manual imports get old fast. Set up auto-refresh to keep your time data current.
- In the Coefficient sidebar, find your imported Harvest report
- Click the three dots menu (…) next to the report name
- Configure Refresh Select
- Choose your preferred schedule (hourly, daily, weekly)
- Save Clickto activate automatic refreshes
Now your Excel spreadsheet will always show the latest time tracking data from Harvest without manual exports or imports.
Available Harvest data in Coefficient
Reports
- Uninvoiced Report
- Projects Time Report
- Team Time Report
- Clients Time Report
- Clients Expense Report
- Projects Expense Report
- Team Expense Report
Objects
- Invoices
- Clients
- Expenses
- Projects
- Client Contacts
Take control of your time tracking data
Time tracking data is only valuable when it’s accessible and current. With Coefficient, you’ve unlocked a direct pipeline from Harvest to Excel that keeps your time data fresh and actionable.
No more manual exports. No more outdated reports. Just live Harvest data right where you need it.
Your time reports now update automatically, giving you more time to focus on what matters: analyzing the data and making informed decisions about resource allocation and client billing.
Finance teams can create more accurate invoices. Project managers can better understand team capacity. And executives get clearer visibility into how time is spent across the organization.
Try Coefficient todayReady to transform how you work with Harvest time data?and see the difference live data makes.
How to Import Contacts Data from Razorpay into Excel
Managing your Razorpay contacts in Excel gives you better visibility into your payment relationships. But manual exports waste time and quickly become outdated.
A direct connection between Razorpay and Excel keeps your data fresh and analysis accurate.
TLDR
-
Step 1:
Install Coefficient from the Office Add-ins store
-
Step 2:
Connect your Razorpay account
-
Step 3:
Select Import from Objects and choose Contacts
-
Step 4:
Configure any filters needed and import the data
-
Step 5:
Set up auto-refresh to keep your data current
Step-by-step guide to importing Razorpay Contacts into Excel
Step 1: Install Coefficient and connect to Razorpay
First, you’ll need to install the Coefficient add-in for Excel and connect it to your Razorpay account.
- Insert tab Open Excel and click on the
- Get Add-ins Selectfrom the ribbon
- Search for “Coefficient” in the Office Add-ins store
- Add Clickto install Coefficient
- Once installed, open the Coefficient sidebar
- Import Data Razorpay Clickand selectfrom the list of connectors
- Follow the authentication prompts to connect your Razorpay account
Step 2: Import Contacts data from Razorpay
Now that you’re connected, you can import your Contacts data.
- Import from Objects In the Coefficient sidebar, select
- Contacts Choosefrom the list of available objects
- Select the fields you want to import (or choose “Select All”)
- Apply any filters if needed to narrow down your data
- Import Clickto bring your Contacts data into Excel
Step 3: Set up auto-refresh (Optional)
Keep your Razorpay Contacts data fresh with automatic updates.
- Refresh Click thebutton in the Coefficient data block header
- Schedule Refresh Selectfrom the dropdown menu
- Choose your preferred refresh frequency (hourly, daily, weekly)
- Set specific times for the refresh to occur
- Save Clickto activate your auto-refresh schedule
Your Razorpay Contacts data will now update automatically according to your schedule, ensuring you always have the most current information for your analysis and reporting.
Available Razorpay Data in Coefficient
Reports
- Vendor Payments
- Payouts
- Account Statement
- Purchase Orders
- Vendor Invoices
- Vendor Advances
Objects
- Customers
- Orders
- Settlements
- Documents
- Invoices
- Subscriptions
- Payments
- Refunds
- Payment Links
- Disputes
Take control of your Razorpay data
Importing Contacts data from Razorpay into Excel doesn’t have to be a manual, time-consuming process. With Coefficient, you can create a direct connection that keeps your data fresh and your analysis accurate.
The live connection ensures you’re always working with the most current information. Set up automated refreshes to eliminate the need for manual exports and imports.
Your payment processing data becomes more valuable when it’s accessible in Excel, where you can create custom reports, visualizations, and combine it with other business data.
Plus, with Coefficient’s automation features, you can set up alerts and scheduled reports to keep your team informed of important changes or trends in your Razorpay data.
Try Coefficient todayReady to streamline your Razorpay data workflow?and transform how you work with your payment processing data.
How to Import Contacts Data from Razorpay into Google Sheets
Managing your Razorpay contacts in Google Sheets gives you better visibility into your payment ecosystem. No more manual exports or outdated data.
With a direct connection, you’ll have fresh contact information at your fingertips whenever you need it.
TLDR
-
Step 1:
Install Coefficient from Google Workspace Marketplace
-
Step 2:
Connect your Razorpay account
-
Step 3:
Select Import from Objects and choose Contacts
-
Step 4:
Configure any filters and import the data
-
Step 5:
Set up auto-refresh to keep your data current
Step-by-step guide to importing Razorpay Contacts
Step 1: Install Coefficient and connect to Razorpay
First, you need to install the Coefficient add-on and connect it to your Razorpay account.
- Open your Google Sheet
- Extensions > Add-ons > Get add-ons Click on
- Search for “Coefficient” and install it from Google Workspace Marketplace
- Extensions > Coefficient > Launch Once installed, open the Coefficient sidebar by clicking
- Import Data Click
- Razorpay Selectfrom the list of connectors
- Follow the authentication prompts to connect your Razorpay account
Step 2: Import Contacts data from Razorpay
Now that you’re connected, you can import your Contacts data.
- Import from Objects In the Coefficient sidebar, select
- Contacts Choosefrom the list of available objects
- Select the fields you want to import (or choose “Select All”)
- Apply any filters if needed to narrow down your data
- Import Clickto bring the data into your spreadsheet
Step 3: Set up auto-refresh (Optional)
Keep your Razorpay Contacts data fresh with automatic updates.
- Refresh Click thebutton next to your imported data
- Schedule Refresh Select
- Choose your preferred frequency (hourly, daily, weekly)
- Set the specific time and days for the refresh
- Save Clickto activate the auto-refresh schedule
That’s it! Your Razorpay Contacts data will now be available in your Google Sheet. You can use all of Google Sheets’ features to analyze, visualize, and share this data with your team.
Available Razorpay Data in Coefficient
Reports
- Vendor Payments
- Payouts
- Account Statement
- Purchase Orders
- Vendor Invoices
- Vendor Advances
Objects
- Customers
- Orders
- Settlements
- Documents
- Invoices
- Subscriptions
- Payments
- Refunds
- Payment Links
- Disputes
Take control of your Razorpay data
Importing your Razorpay Contacts into Google Sheets opens up powerful possibilities for data analysis and reporting. No more manual exports or outdated information.
With Coefficient, you get a live connection to your payment data that updates automatically. This means your reports are always accurate and your team always has the latest information.
The setup process takes just minutes, but the time savings and improved data accuracy will benefit your team for months to come.
Plus, with features like scheduled refreshes and automated alerts, you can ensure everyone stays informed without any manual effort.
Try Coefficient todayReady to streamline your Razorpay data management?and see how easy it can be to keep your payment data flowing into your spreadsheets.
How to Import Credit Card Charges/Other Fees Data from Sage Intacct into Excel
Importing Credit Card Charges/Other Fees from Sage Intacct into Excel gives you full transparency on all card fees and service charges.
This tutorial shows you how to connect Coefficient, import your Credit Card Charges/Other Fees object, and set up auto-refresh.
TLDR
-
Step 1:
Install Coefficient, connect Sage Intacct.
-
Step 2:
Select “Import from Objects” → “Credit Card Charges/Other Fees.”
-
Step 3:
Click “Import,” verify fields.
-
Step 4:
Enable auto-refresh for live fee data.
Step-by-Step Guide
Complete Sage Intacct Object List
Bills
- Deposits
- Fund Transfers
- Journal Entries
- Tax Details
- Accounts Payable
- Bank Interest Income/Charges
- Charge Payoffs
- Checking Account Reconciliations
- Other Receipts
- Audit History
- Entities
- Offline Jobs
Customers
- Expense Reports
- Invoices
- Payments
- Vendors
- Accounts Receivable
- Charge Card Transactions
- Charge Payoff Lines
- Credit Card Charges/Other Fees
- Advanced Audit Trails
- Contacts
- Locations
- Roles
How to Import Disputes Data from Square into Excel
Importing Disputes from Square into Excel gives your team a clear view of chargebacks as they happen. No more manual exports or stale spreadsheets.
In this guide, you’ll learn how to set up Coefficient, import your Disputes object, and keep it fresh with auto-refresh.
TLDR
-
Step 1:
Step 1. Install Coefficient in Excel and connect to your Square account.
-
Step 2:
Step 2. Select “Import from Objects” and pick “Disputes.”
-
Step 3:
Step 3. Configure filters and import into your sheet.
-
Step 4:
Step 4. (Optional) Set up auto-refresh on a schedule.
Step-by-Step Guide

What Square Data is Imported?
- Disputes
- Bank Accounts
- Gift Cards
- Merchants
- Locations
- Payments
- Invoices
- Payouts
- Customers
- Refunds
How to Import General Ledger Report Data from Razorpay into Excel
Tracking your Razorpay General Ledger data is crucial for financial oversight. But manually exporting this data creates outdated reports and wastes precious time.
What if you could pull this data directly into Excel and keep it fresh automatically?
TLDR
-
Step 1:
Install Coefficient from the Office Add-ins store
-
Step 2:
Connect your Razorpay account
-
Step 3:
Select Import from Objects and choose General Ledger Report
-
Step 4:
Configure any filters and import the data
-
Step 5:
Set up auto-refresh to keep your data updated
Step-by-step guide to importing Razorpay General Ledger Report data
Step 1: Install Coefficient and connect to Razorpay
First, you’ll need to install the Coefficient add-in for Excel and connect it to your Razorpay account.
- Insert Open Excel and click on thetab
- Get Add-ins Clickin the ribbon
- Search for “Coefficient” in the Office Add-ins store
- Add Clickto install Coefficient
- Import Data Once installed, open the Coefficient sidebar and click
- Razorpay Selectfrom the list of connectors
- Follow the authentication prompts to connect your Razorpay account
Step 2: Import General Ledger Report data
Now that you’re connected, you can import your General Ledger Report data.
- Import from Objects In the Coefficient sidebar, select
- General Ledger Report Browse or search forin the objects list
- Select the columns you want to import (or choose “Select All”)
- Apply any filters to narrow down the data if needed
- Import Clickto bring the data into your Excel spreadsheet
Step 3: Set up auto-refresh (optional)
Keep your General Ledger Report data fresh with automatic updates.
- ⋮ Click the(three dots) menu next to your imported data
- Schedule Refresh Select
- Choose your preferred refresh frequency (hourly, daily, weekly)
- Set the specific time and days for the refresh
- Save Clickto activate the auto-refresh schedule
That’s it! Your Razorpay General Ledger Report data is now in Excel and will stay updated based on your schedule.
Available Razorpay Data in Coefficient
Reports
- Vendor Payments
- Payouts
- Account Statement
- Purchase Orders
- Vendor Invoices
- Vendor Advances
Objects
- Customers
- Orders
- Settlements
- Documents
- Invoices
- Subscriptions
- Payments
- Refunds
- Payment Links
- Disputes
Take control of your Razorpay data
Importing your Razorpay General Ledger Report data into Excel doesn’t have to be complicated. With Coefficient, you can create a direct connection that keeps your financial data fresh and accessible.
This approach eliminates manual exports, reduces errors, and saves hours of repetitive work. Your finance team can focus on analysis instead of data gathering.
The auto-refresh capability ensures you’re always working with the latest information, making your financial reporting more reliable and timely.
Plus, with access to both reports and objects from Razorpay, you can build comprehensive dashboards that give you complete visibility into your payment operations.
Try Coefficient todayReady to streamline your Razorpay reporting?and transform how you work with financial data in Excel.
How to Import Harvest Invoices Data into Google Sheets
Tracking invoices in Harvest is great. But analyzing that data in Google Sheets is even better.
Instead of manual exports that quickly become outdated, you can create a live connection between Harvest and Google Sheets.
This guide shows you how to import your Harvest Invoices data directly into Google Sheets for real-time analysis.
TLDR
-
Step 1:
Install Coefficient from Google Workspace Marketplace
-
Step 2:
Connect your Harvest account
-
Step 3:
Select Import from Objects and choose Invoices
-
Step 4:
Configure any filters you need
-
Step 5:
Set up auto-refresh to keep your data updated
How to import Harvest Invoices data into Google Sheets
Follow these simple steps to get your Harvest Invoices data into Google Sheets using Coefficient.
Step 1: Install Coefficient and connect to Harvest
- Open Google Sheets
- Click on Extensions > Add-ons > Get add-ons
- Search for “Coefficient” and install it from Google Workspace Marketplace
- Once installed, open the Coefficient sidebar by clicking Extensions > Coefficient > Launch
- In the sidebar, click “Import Data”
- Select “Harvest” from the list of available connectors
- Log in with your Harvest credentials when prompted
Step 2: Import Invoices data from Harvest
- In the Coefficient sidebar, select “Import from Objects”
- Choose “Invoices” from the list of available objects
- Select the fields you want to import (e.g., Invoice Number, Client, Amount, Issue Date, Due Date, Status)
- Apply any filters if needed (e.g., only show unpaid invoices or invoices from a specific time period)
- Click “Import” to bring the data into your Google Sheet
Step 3: Set up auto-refresh for your Harvest data
- With your imported data selected, click “Schedule Refresh” in the Coefficient sidebar
- Choose your preferred refresh frequency (hourly, daily, weekly)
- Set specific times for the refresh to occur
- Optionally, set up Slack or email notifications for when data changes
- Click “Save” to activate the auto-refresh schedule
That’s it! Your Harvest Invoices data is now in Google Sheets and will stay updated based on your refresh schedule.
Available Harvest Data in Coefficient
Reports
- Uninvoiced Report
- Projects Time Report
- Team Time Report
- Clients Time Report
- Clients Expense Report
- Projects Expense Report
- Team Expense Report
Objects
- Invoices
- Clients
- Expenses
- Projects
- Client Contacts
Take control of your Harvest invoice data
Importing your Harvest Invoices data into Google Sheets opens up powerful analysis possibilities. You can track payment trends, monitor outstanding invoices, and create custom reports that Harvest doesn’t offer natively.
With Coefficient’s auto-refresh feature, you’ll always have the most current data without manual exports. This saves time and ensures decisions are made with accurate information.
The ability to combine invoice data with other business metrics in Google Sheets gives you a more complete financial picture. You can correlate invoicing with project profitability, team utilization, or client value.
Plus, sharing these insights with stakeholders becomes easier through Google Sheets’ collaborative features and Coefficient’s automated report distribution.
Try Coefficient todayReady to transform how you work with your Harvest invoice data?and experience the difference that live, connected data makes for your financial reporting.
How to Import Invoices Data from Sage Intacct into Excel
Importing Invoices from Sage Intacct into Excel gives you a live view of billing amounts and statuses.
This guide shows how to import your Invoices object with Coefficient and set up auto-refresh.
TLDR
-
Step 1:
Install Coefficient, connect Sage Intacct.
-
Step 2:
Select “Import from Objects” → “Invoices.”
-
Step 3:
Click “Import,” verify fields.
-
Step 4:
Enable auto-refresh as needed.
Step-by-Step Guide
What Sage Intacct Data is Imported?
- Bills
- Customers
- Deposits
- Expense Reports
- Fund Transfers
- Invoices
- Journal Entries
- Payments
- Tax Details
- Vendors
- ACCOUNTS PAYABLE
- ACCOUNTS RECEIVABLE