Keeping track of HubSpot Postal Mail data in Excel helps marketing teams analyze campaign performance and make data-driven decisions. With Coefficient, you can easily import this data without manual exports or copy-pasting.
TLDR
-
Step 1:
Step 1: Install Coefficient add-in from Office Add-ins store and connect to HubSpot
-
Step 2:
Step 2: Import Postal Mail data by selecting it from available HubSpot objects
-
Step 3:
Step 3: Configure fields to import and apply any necessary filters
-
Step 4:
Step 4: Set up auto-refresh to keep your Excel data synchronized with HubSpot
How to Import HubSpot Postal Mail Data into Excel
Step 1: Install Coefficient and Connect to HubSpot
Before importing any data, you’ll need to install the Coefficient add-in and connect it to your HubSpot account:
- Open Excel and navigate to the Insert tab
- Click on “Get Add-ins” in the Add-ins section
- Search for “Coefficient” in the Office Add-ins store
- Click “Add” to install the Coefficient add-in
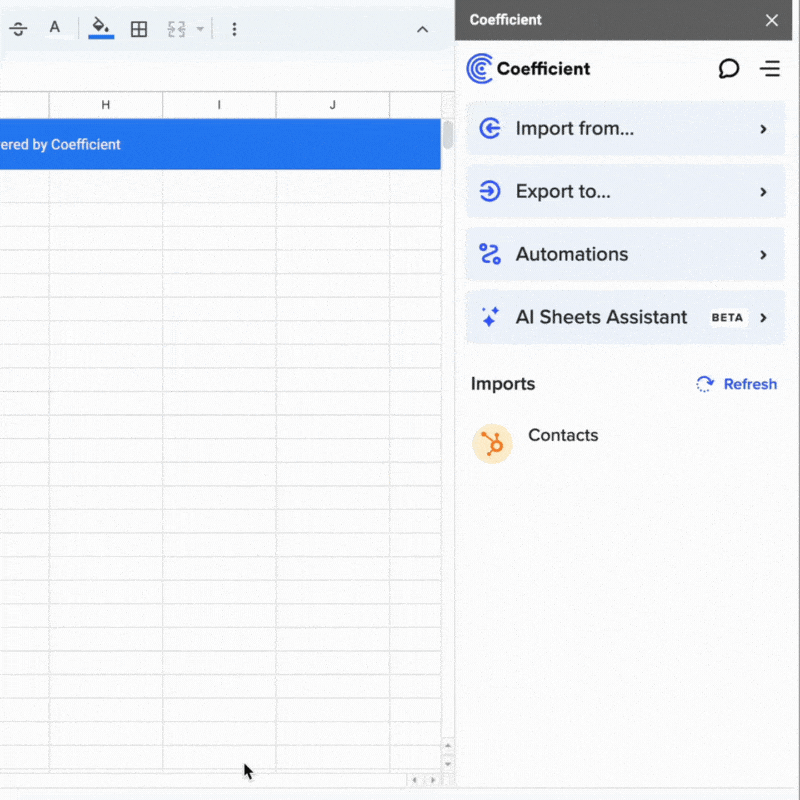
- Once installed, open the Coefficient sidebar and click “Import Data”
- Select “HubSpot” from the list of available connectors
- Log in with your HubSpot credentials and authorize Coefficient

Step 2: Select and Import Postal Mail Data
After connecting to HubSpot, follow these steps to import Postal Mail data:
- In the Coefficient sidebar, click “Import from HubSpot”
- Under “Import Type,” select “Objects”
- Navigate through the list of available objects and select “Postal mail”
- Choose which fields you want to import (e.g., subject, created date, status, etc.)
- Apply any filters if needed to narrow down the data
- Click “Import” to bring the data into your Excel spreadsheet

Step 3: Set Up Auto-Refresh (Optional)
To ensure your Excel spreadsheet always contains the most up-to-date HubSpot Postal Mail data:
- Click on the “…” menu next to your imported data in the Coefficient sidebar
- Select “Set up auto-refresh”
- Choose your preferred refresh frequency (hourly, daily, or weekly)
- Set specific times or intervals for the refresh to occur
- Click “Save” to activate the auto-refresh schedule

With auto-refresh enabled, your Excel spreadsheet will automatically update with the latest HubSpot Postal Mail data according to your schedule, eliminating the need for manual updates.
Available HubSpot Objects and Reports
Here’s a comprehensive list of the data you can import from HubSpot using Coefficient:
Objects
- Arr
- Leads
- Billing histories
- Blueprints
- Calls
- Carts
- Clients
- Company lists
- Companies
- Contact lists
- Contacts
- Communications
- Marketing emails
- Merchant account
- Meetings
- Notes
- Onboarding
- Opportunities
- Orders
- Organizations
- Partners
- Payments
- Postal mail
- Prospects
Frequently Asked Questions
By following this guide, you can easily import HubSpot Postal Mail data into Excel using Coefficient, enabling better analysis and reporting for your marketing campaigns. The auto-refresh feature ensures your data stays up-to-date, eliminating the need for manual exports and imports.
Try Coefficient’s HubSpot integration for ExcelReady to streamline your marketing data workflow?and transform how you work with your marketing data.
How to Import Programs Data from HubSpot into Excel
Managing your HubSpot Programs data in Excel allows marketing teams to build powerful custom reports and gain deeper insights. Without the right tools, this process can be tedious and result in outdated information.
This guide shows you how to create a live connection between HubSpot and Excel for seamless, up-to-date Programs data analysis.
TLDR
-
Step 1:
Install the Coefficient add-in for Excel from the Office Add-ins store
-
Step 2:
Connect your HubSpot account to Coefficient
-
Step 3:
Import Programs data by selecting it from the Objects list
-
Step 4:
Set up auto-refresh to keep your data current
-
Step 5:
Customize your Programs data view with Excels analysis tools
Importing HubSpot Programs Data to Excel: Step-by-Step Guide
Step 1: Install Coefficient and Connect to HubSpot
Before importing Programs data, you’ll need to install Coefficient and connect it to your HubSpot account:
- Open Excel and navigate to the Insert tab
- Click on “Get Add-ins” in the ribbon menu
- Search for “Coefficient” in the Office Add-ins store
- Click “Add” to install the Coefficient add-in
- Once installed, click the Coefficient icon to open the sidebar
- Select “Import Data” from the sidebar menu
- Choose “HubSpot” from the list of available connectors
- Log in with your HubSpot credentials when prompted
Step 2: Import Programs Data from HubSpot
Now that you’re connected to HubSpot, you can import Programs data:
- In the Coefficient sidebar, select “Import from Objects”
- Browse or search for “Programs” in the objects list
- Select the specific Programs fields you want to import (e.g., name, ID, status, creation date)
- Apply any filters to narrow down the data if needed
- Click “Import” to pull the Programs data into your Excel worksheet
Step 3: Set Up Auto-Refresh for Real-Time Data (Optional)
To ensure your Programs data stays current, set up auto-refresh:
- Click the “⋮” (menu) button next to your imported data
- Select “Schedule Refresh”
- Choose your preferred refresh frequency (hourly, daily, weekly)
- Set the specific time for refreshes
- Click “Save” to activate the auto-refresh schedule
Making the Most of Your HubSpot Programs Data in Excel
Once your Programs data is imported, you can leverage Excel’s powerful features to analyze and visualize it:
- Create pivot tables to summarize program performance metrics
- Build custom dashboards with charts showing program engagement
- Apply Excel formulas to calculate custom metrics
- Use filtering and sorting to focus on specific program segments
- Create automated reports that refresh with the latest data
Objects Available in HubSpot
- Arr
- Leads
- Billing histories
- Blueprints
- Calls
- Carts
- Clients
- Company lists
- Companies
- Contact lists
- Contacts
- Communications
- Marketing emails
- Merchant account
- Meetings
- Notes
- Onboarding
- Opportunities
- Orders
- Organizations
- Partners
- Payments
- Postal mail
- Prospects
Conclusion
Importing HubSpot Programs data into Excel using Coefficient streamlines your marketing analytics workflow and provides deeper insights. With real-time data synchronization, you eliminate manual exports and ensure your analysis is always based on current information.
The step-by-step process is straightforward: install Coefficient, connect to HubSpot, select Programs data to import, and optionally set up auto-refresh. From there, you can leverage Excel’s powerful analysis tools to gain valuable insights from your HubSpot Programs data.
Get started with Coefficient for Excel todayReady to transform how you work with HubSpot Programs data?and experience seamless HubSpot data integration.
How to Import Products Data from HubSpot into Excel
Managing your HubSpot product catalog in Excel provides greater flexibility for pricing analysis, inventory management, and sales planning. With Coefficient, you can create a live connection to your HubSpot Products data that stays current without manual exports.
TLDR
-
Step 1:
Install Coefficient from the Office Add-ins store and connect to your HubSpot account
-
Step 2:
Use the Coefficient sidebar to import Products data from HubSpot
-
Step 3:
Configure columns and filters to customize your product data view
-
Step 4:
Set up auto-refresh to keep your Excel spreadsheet updated with the latest HubSpot product information
Step-by-Step Guide to Importing HubSpot Products Data into Excel
Step 1: Install Coefficient and Connect to HubSpot
Before importing your Products data, you’ll need to install Coefficient and connect it to your HubSpot account:
- Open Excel and navigate to the Insert tab in the ribbon
- Click Get Add-ins and search for “Coefficient”
- Install the Coefficient add-in from the Office Add-ins store
- Once installed, open the Coefficient sidebar by clicking on the Coefficient icon
- Click “Import Data” and select “HubSpot” from the list of available connectors
- Follow the authentication prompts to connect your HubSpot account to Coefficient
Step 2: Import Products Data
After connecting HubSpot, you can now import your Products data:
- In the Coefficient sidebar, under the HubSpot connection, choose “Import From Objects”
- From the list of available objects, select “Products”
- Choose the specific product fields you want to import (e.g., name, price, description, SKU)
- Apply any filters if you only want to import specific products (optional)
- Click “Import” to bring your HubSpot Products data into Excel
Step 3: Set Up Auto-Refresh (Optional)
To ensure your product data stays current, set up an automatic refresh schedule:
- In the Coefficient sidebar, find your imported Products data
- Click the “…” menu and select “Schedule Refresh”
- Choose your preferred refresh frequency (hourly, daily, weekly)
- Set specific times for the refresh to occur
- Click “Save” to activate your auto-refresh schedule
Now your HubSpot Products data will automatically update in your Excel spreadsheet according to your set schedule, ensuring you always have the most current information for analysis and reporting.
Objects
- Arr
- Billing histories
- Calls
- Clients
- Companies
- Contacts
- Contracts
- Custom objects
- Deal lists
- Dealers
- Demos
- Emails
- Leads
- Blueprints
- Carts
- Company lists
- Contact lists
- Communications
- Credit
- Deal history
- Deal split
- Deals
- Discounts
- Employees
Start Working with HubSpot Products Data in Excel Today
By following this guide, you can easily bring your HubSpot Products data into Excel using Coefficient. This integration enables you to build more powerful analyses, combine product data with other business metrics, and keep everything updated automatically.
Whether you’re managing pricing strategies, planning inventory, or creating sales reports, having your HubSpot Products data in Excel provides the flexibility and analytical power you need to make better business decisions.
Install Coefficient for ExcelReady to get started?today and connect to your HubSpot account in minutes.
How to Import Schemes Data from HubSpot into Excel
Managing your HubSpot Schemes data in Excel allows for deeper analysis and better collaboration. Instead of manual exports that quickly become outdated, you can establish a live connection to your HubSpot data.
In this guide, we’ll show you how to import your HubSpot Schemes data directly into Excel for real-time analysis and reporting.
TLDR
-
Step 1:
Install Coefficient from the Office Add-ins store
-
Step 2:
Connect your HubSpot account to Excel via Coefficient
-
Step 3:
Select Schemes from the list of available HubSpot objects
-
Step 4:
Configure your data import settings and pull data into Excel
-
Step 5:
Set up auto-refresh to keep your Schemes data updated automatically
How to Import HubSpot Schemes Data into Excel
Step 1: Install Coefficient and Connect to HubSpot
- Open Excel on your computer
- Go to the Insert tab in the Excel ribbon
- Click on “Get Add-ins” in the Add-ins section
- Search for “Coefficient” in the Office Add-ins store
- Click “Add” to install Coefficient to your Excel
- Once installed, open the Coefficient sidebar
- Click on “Import” to see available data sources
- Select “HubSpot” from the list of available connectors
- Log in to your HubSpot account when prompted and authorize Coefficient
Step 2: Select and Import Schemes Data
- In the Coefficient sidebar, select “Import from HubSpot”
- Choose “Objects” from the import options
- Browse through the available objects or use the search function to find “Schemes”
- Select “Schemes” from the list of HubSpot objects
- Choose the specific fields you want to import (or select “All fields”)
- Apply any filters if needed to limit the data based on specific criteria
- Preview your data to ensure it meets your requirements
- Click “Import” to pull the Schemes data into your Excel worksheet
Step 3: Set Up Auto-Refresh (Optional)
- With your imported data visible in Excel, click on the “Auto-refresh” button in the Coefficient sidebar
- Choose your preferred refresh frequency: hourly, daily, weekly, or custom
- Select the specific days and times for the refresh to occur
- Click “Save” to set up the automated refresh schedule
- Your HubSpot Schemes data will now automatically update according to your schedule
Additional Tips for Working with HubSpot Schemes in Excel
Once you’ve imported your HubSpot Schemes data into Excel, you can leverage Excel’s powerful functions to analyze and visualize this information:
- Create pivot tables to summarize your Schemes data across different dimensions
- Build custom dashboards with charts and graphs for visual analysis
- Use Excel formulas to perform calculations on your Schemes data
- Set up data validation rules to maintain data quality
- Share your workbook with team members for collaborative analysis
Objects
- Arr
- Leads
- Billing histories
- Blueprints
- Calls
- Carts
- Clients
- Company lists
- Companies
- Contact lists
- Contacts
- Communications
- Lead insights
- Licenses
- Line items
- Listings
- Marketing activities
- Marketing campaigns
- Marketing emails
- Merchant account
- Meetings
- Notes
- Onboarding
- Opportunities
Conclusion
Importing your HubSpot Schemes data into Excel with Coefficient eliminates the need for manual exports and ensures you always have access to the most current information. This seamless integration enables more powerful analysis and reporting capabilities while saving you valuable time.
By following the steps outlined in this guide, you can establish a reliable connection between HubSpot and Excel that automatically refreshes based on your preferred schedule. Whether you’re building custom reports, creating dashboards, or sharing insights with your team, Coefficient makes working with your HubSpot Schemes data in Excel simple and efficient.
Get started with Coefficient for Excel todayReady to streamline your HubSpot data workflow?and transform how you work with your Schemes data.
How to Import Sites Data from HubSpot into Excel
Managing your HubSpot Sites data in Excel lets you analyze website performance alongside other business metrics for more comprehensive reporting. But manual exports quickly become outdated and time-consuming.
This guide will show you how to create a live connection between HubSpot and Excel, giving you access to real-time Sites data whenever you need it.
TLDR
-
Step 1:
Install Coefficient from the Office Add-ins store and connect your HubSpot account
-
Step 2:
Use Coefficient to import Sites data directly into your Excel spreadsheet
-
Step 3:
Configure filters to get exactly the Sites data you need
-
Step 4:
Set up auto-refresh to keep your data updated automatically
How to Import HubSpot Sites Data into Excel
Step 1: Install Coefficient and Connect to HubSpot
- Insert Open Excel and click on thetab in the ribbon
- Get Add-ins Clickto open the Office Add-ins store
- Add Search for “Coefficient” and clickto install the add-in
- Once installed, open the Coefficient sidebar by clicking the Coefficient icon in the ribbon
- Import Data In the sidebar, click
- HubSpot Selectfrom the list of available connectors
- Follow the authentication prompts to connect your HubSpot account
Step 2: Import Sites Data from HubSpot
- Import Object In the Coefficient sidebar, after connecting to HubSpot, click
- Sites From the objects list, scroll and select
- Choose the specific properties (columns) you want to import, such as name, domain, created date, etc.
- Apply any filters if you only need specific site data (optional)
- Import Clickto bring your Sites data into Excel
Step 3: Set Up Auto-Refresh (Optional)
- Refresh To keep your Sites data updated automatically, click thebutton in the Coefficient data table header
- Schedule Refresh Selectto set up automatic updates
- Choose your preferred frequency: hourly, daily, weekly, or monthly
- Configure additional refresh settings if needed
- Save Clickto activate your auto-refresh schedule
Now you have a live connection between your HubSpot Sites data and Excel. Any changes to your Sites in HubSpot will be reflected in your spreadsheet based on your refresh settings.
Available HubSpot Objects and Reports
HubSpot offers various objects that you can import into Excel using Coefficient. Here’s a breakdown of what’s available:
Objects
- Arr
- Leads
- Billing histories
- Blueprints
- Calls
- Carts
- Clients
- Company lists
- Companies
- Contact lists
- Contacts
- Communications
- Marketing activities
- Marketing campaigns
- Marketing emails
- Merchant account
- Meetings
- Notes
- Onboarding
- Opportunities
- Orders
- Organizations
- Partners
- Payments
Frequently Asked Questions
By following this guide, you can easily import HubSpot Sites data into Excel using Coefficient, enabling real-time analysis and reporting. The automatic refresh feature ensures your data stays up-to-date, eliminating the need for manual exports and giving you more time to focus on analysis and decision-making.
Get started with Coefficient for ExcelReady to streamline your HubSpot reporting?today.
How to Import Stripe Invoice Data from HubSpot into Excel
Managing your Stripe invoices directly in Excel gives you greater flexibility for financial analysis and reporting. By connecting HubSpot’s Stripe invoice data to Excel, you can create custom dashboards, perform deeper analysis, and integrate with your existing financial workflows.
TLDR
-
Step 1:
Install Coefficient from the Office Add-ins store and connect to your HubSpot account
-
Step 2:
Use Coefficients sidebar to import Stripe invoice data from HubSpot
-
Step 3:
Configure columns and filters to customize your data import
-
Step 4:
Set up auto-refresh to keep your Excel data synchronized with HubSpot
How to Import Stripe Invoice Data from HubSpot to Excel
Step 1: Install Coefficient and Connect to HubSpot
- Open Excel and navigate to the Insert tab
- Click on Get Add-ins
- Search for “Coefficient” in the Office Add-ins store
- Install the Coefficient add-in
- Once installed, click on the Coefficient icon in your Excel ribbon
- In the Coefficient sidebar, click “Import” and select “Import from HubSpot”
- Log in to your HubSpot account when prompted and authorize Coefficient
Step 2: Import Stripe Invoice Data
- In the Coefficient sidebar, select “Import from Objects” under HubSpot
- Browse or search for “Stripe invoice” in the objects list
- Select the properties (columns) you want to import, such as invoice number, amount, status, and date
- Apply any filters if needed (e.g., invoices from a specific date range or with a particular status)
- Click “Import” to bring your Stripe invoice data into Excel
Step 3: Set Up Auto-Refresh (Optional)
- After importing your data, click on the “Schedule Refresh” button in the Coefficient sidebar
- Choose how frequently you want your data to update (hourly, daily, weekly, etc.)
- Set specific days and times for the refresh to occur
- Enable email notifications for successful refreshes or errors (optional)
- Click “Save” to confirm your auto-refresh settings
Once your Stripe invoice data is imported, you can use Excel’s powerful features to create pivot tables, charts, or formulas to analyze your invoice data effectively. Any changes made to your Stripe invoices in HubSpot will be automatically reflected in your Excel spreadsheet if you’ve set up auto-refresh.
HubSpot Objects
- Arr
- Leads
- Billing histories
- Blueprints
- Calls
- Carts
- Clients
- Company lists
- Companies
- Contact lists
- Contacts
- Communications
- Marketing activities
- Marketing campaigns
- Marketing emails
- Merchant account
- Meetings
- Notes
- Onboarding
- Opportunities
- Orders
- Organizations
- Partners
- Payments
By following this guide, you can efficiently import and manage your HubSpot Stripe invoice data in Excel. This integration allows you to leverage Excel’s robust analysis capabilities while maintaining up-to-date financial information from HubSpot.
For more help with HubSpot and Excel integration, check out Coefficient’s other resources and support documentation.
How to Import Stripe Invoice Data from HubSpot into Google Sheets
Managing Stripe invoice data from HubSpot in Google Sheets gives you more flexibility to analyze payment information, track revenue trends, and share insights with stakeholders. Instead of manual exports, you can create a live connection that updates automatically.
TLDR
-
Step 1:
Install Coefficient from Google Workspace Marketplace and connect to HubSpot
-
Step 2:
Use the Coefficient sidebar to import Stripe invoice data from HubSpot
-
Step 3:
Configure columns and filters to customize your data view
-
Step 4:
Set up auto-refresh to keep your invoice data current
Step-by-Step Guide to Import HubSpot Stripe Invoice Data
Step 1: Install Coefficient and Connect to HubSpot
First, you’ll need to install the Coefficient add-on and connect it to your HubSpot account:
- Open Google Sheets
- Click on Extensions > Add-ons > Get add-ons
- Search for “Coefficient” and install it from the Google Workspace Marketplace
- Once installed, open the Coefficient sidebar by clicking Extensions > Coefficient > Launch
- In the sidebar, click “Import Data”
- Select “HubSpot” from the list of available connectors
- Follow the authentication prompts to connect your HubSpot account
Step 2: Import Stripe Invoice Data
Now that you’re connected to HubSpot, you can import your Stripe invoice data:
- In the Coefficient sidebar, select “Import from Objects”
- Browse or search for “Stripe invoice” in the list of available objects
- Select the columns you want to import (e.g., invoice number, amount, status, date)
- Apply any filters if needed to narrow down the data
- Choose where in your spreadsheet you want the data to appear
- Click “Import” to bring the data into your Google Sheet
Step 3: Set Up Auto-Refresh (Optional)
To keep your Stripe invoice data up to date without manual refreshes:
- Click on the Coefficient data cell in your spreadsheet
- In the Coefficient sidebar, click on “Schedule Refresh”
- Choose your preferred refresh frequency (hourly, daily, weekly)
- Set specific times for the refresh to occur
- Click “Save” to activate the auto-refresh schedule
With auto-refresh enabled, your Stripe invoice data will update automatically according to your schedule, ensuring you always have the most current information for analysis and reporting.
Available HubSpot Objects and Data Types
HubSpot offers a wide range of objects you can import into Google Sheets using Coefficient. Here’s a list of some key objects available:
Objects
- Arr
- Billing histories
- Calls
- Clients
- Companies
- Contacts
- Contracts
- Custom objects
- Deal lists
- Dealers
- Demos
- Emails
- Leads
- Blueprints
- Carts
- Company lists
- Contact lists
- Communications
- Credit
- Deal history
- Deal split
- Deals
- Discounts
- Employees
Frequently Asked Questions
By following this guide, you can easily import and analyze your HubSpot Stripe invoice data in Google Sheets. The live connection ensures your data stays current, while Coefficient’s automation features save you time and eliminate manual export processes.
Start leveraging your Stripe invoice data today to gain deeper insights into your payment patterns, revenue trends, and customer billing behavior.
How to Import Subsidiaries Data from HubSpot into Google Sheets
Managing subsidiary relationships in HubSpot is crucial for businesses with complex organizational structures. But analyzing this data directly in HubSpot can be limiting.
By importing your Subsidiaries data into Google Sheets, you can create custom reports, combine it with other data sources, and share insights across your organization.
Quick Walkthrough Demo
TLDR
-
Step 1:
Install Coefficient from the Google Workspace Marketplace
-
Step 2:
Connect your HubSpot account to Coefficient
-
Step 3:
Import Subsidiaries data using the HubSpot connector
-
Step 4:
Set up auto-refresh to keep your data current
-
Step 5:
Create custom reports with your Subsidiaries data
Step-by-Step Guide to Import HubSpot Subsidiaries Data
Step 1: Install Coefficient and Connect to HubSpot
First, you’ll need to install the Coefficient add-on and connect it to your HubSpot account:
- Open your Google Sheet
- Click on Extensions > Add-ons > Get add-ons
- Search for “Coefficient” and install it from the Google Workspace Marketplace
- Once installed, open Coefficient from the Extensions menu
- In the Coefficient sidebar, click “Import Data”
- Select “HubSpot” from the list of available connectors
- Follow the authentication prompts to connect your HubSpot account
Step 2: Import Subsidiaries Data
Now that you’re connected, you can import your Subsidiaries data:
- In the Coefficient sidebar, select “Import from HubSpot”
- Under “Objects,” find and select “Subsidiaries”
- Choose the specific fields you want to import (e.g., name, parent company, location)
- Apply any filters if needed to narrow down your data
- Click “Import” to bring the data into your Google Sheet
Step 3: Set Up Auto-Refresh (Optional)
To ensure your data stays current, set up an automatic refresh schedule:
- In the Coefficient sidebar, click on the “…” menu next to your imported data
- Select “Schedule Refresh”
- Choose your preferred frequency (hourly, daily, weekly)
- Set specific times for the refresh to occur
- Click “Save” to activate your auto-refresh schedule
Available HubSpot Objects in Coefficient
Coefficient allows you to import various types of data from HubSpot. Here’s a list of available objects you can import:
Objects
- Arr
- Billing histories
- Calls
- Clients
- Companies
- Contacts
- Contracts
- Custom objects
- Deal lists
- Dealers
- Demos
- Emails
- Leads
- Blueprints
- Carts
- Company lists
- Contact lists
- Communications
- Credit
- Deal history
- Deal split
- Deals
- Discounts
- Employees
Frequently Asked Questions
By following this guide, you can seamlessly import your HubSpot Subsidiaries data into Google Sheets using Coefficient. This integration enables you to create more powerful reports, combine your Subsidiaries data with other business metrics, and share insights across your organization—all while maintaining data accuracy through automated refreshes.
Get started with Coefficient’s HubSpot integrationReady to take your HubSpot data analysis to the next level?today.
How to Import Zip Codes Data from HubSpot into Excel
Working with HubSpot Zip Codes data in Excel helps marketers and sales teams analyze regional performance and target specific geographic areas. Instead of manual exports that quickly become outdated, a direct connection keeps your data fresh and analysis accurate.
TLDR
-
Step 1:
Step 1: Install Coefficient from the Office Add-ins store and connect your HubSpot account
-
Step 2:
Step 2: Import Zip Codes data from HubSpot using Coefficients intuitive interface
-
Step 3:
Step 3: Set up auto-refresh to keep your Excel data updated automatically
-
Step 4:
Step 4: Use Excels native tools to analyze your HubSpot Zip Codes data
Step-by-Step Guide to Importing HubSpot Zip Codes into Excel
Step 1: Install and Connect Coefficient to HubSpot
Begin by installing the Coefficient add-in for Excel:
- Insert Open Excel and click on thetab in the ribbon
- Get Add-ins Clickin the Add-ins section
- Coefficient Search forin the Office Add-ins store
- Add Clickto install Coefficient to Excel
- Once installed, click the Coefficient icon in your Excel ribbon to open the sidebar
- Connect to HubSpot Clickand follow the authentication prompts
Step 2: Import HubSpot Zip Codes Data
Now that you’re connected, import the Zip Codes data:
- Import Data In the Coefficient sidebar, select
- HubSpot Choosefrom your connected data sources
- Import from Objects Select
- Zip codes Find and click onfrom the objects list
- Select the specific fields you want to import
- Use filters if needed to narrow down the data
- Import Clickto bring the data into your Excel worksheet
Step 3: Set Up Auto-Refresh (Optional)
Keep your data fresh with automatic updates:
- Click on the imported data range in your spreadsheet
- Refresh Options In the Coefficient sidebar, select
- Choose your preferred refresh schedule (hourly, daily, weekly)
- Set specific times for the refresh to occur
- Save Clickto confirm your auto-refresh settings
Available HubSpot Objects and Data Types
HubSpot offers numerous objects you can import into Excel using Coefficient. Here’s a comprehensive list:
Objects
- Arr
- Billing histories
- Calls
- Clients
- Companies
- Contacts
- Contracts
- Custom objects
- Deal lists
- Dealers
- Demos
- Emails
- Leads
- Blueprints
- Carts
- Company lists
- Contact lists
- Communications
- Credit
- Deal history
- Deal split
- Deals
- Discounts
- Employees
Frequently Asked Questions
Connect HubSpot to Excel with CoefficientReady to streamline your HubSpot data analysis?today and transform how you work with your Zip codes data.
How to Import HubSpot Schemes Data into Google Sheets
Managing HubSpot Schemes data in Google Sheets allows marketing and sales teams to analyze, manipulate, and share critical information more effectively. Instead of manual exports that quickly become outdated, you can establish a live connection that keeps your data fresh.
In this guide, you’ll learn how to import HubSpot Schemes data directly into Google Sheets using Coefficient.
TLDR
-
Step 1:
Install Coefficient from the Google Workspace Marketplace
-
Step 2:
Connect your HubSpot account to Coefficient
-
Step 3:
Select Schemes from the HubSpot Objects list
-
Step 4:
Import your data and set up auto-refresh to keep it updated
Quick Walkthrough Demo
How to Import HubSpot Schemes Data into Google Sheets
Step 1: Install Coefficient and Connect to HubSpot
First, you’ll need to install the Coefficient add-on and connect it to your HubSpot account:
- Open your Google Sheet
- Click on Extensions > Add-ons > Get add-ons
- Search for “Coefficient” and install it from the Google Workspace Marketplace
- Once installed, click Extensions > Coefficient > Launch to open the sidebar
- In the sidebar, click “Import Data”
- Select “HubSpot” from the list of available connectors
- Follow the prompts to authorize Coefficient to access your HubSpot account
Step 2: Select and Import Schemes Data
Now that you’re connected to HubSpot, you can import your Schemes data:
- In the Coefficient sidebar, select “Import from Objects”
- Browse through the list of available HubSpot objects and select “Schemes”
- Choose the specific fields you want to import (you can select all fields or just the ones you need)
- Apply any filters if you want to narrow down the data
- Click “Import” to bring the data into your Google Sheet
Step 3: Set Up Auto-Refresh (Optional)
To ensure your data stays up-to-date, you can set up automatic refreshes:
- Click on the “…” menu next to your imported data in the Coefficient sidebar
- Select “Schedule Refresh”
- Choose your preferred refresh frequency (hourly, daily, weekly, etc.)
- Set the specific time and days for the refresh to occur
- Click “Save” to activate the auto-refresh schedule
With auto-refresh enabled, your HubSpot Schemes data will automatically update according to your schedule, ensuring you always have the most current information in your Google Sheet.
Available HubSpot Objects in Coefficient
Coefficient allows you to import various types of data from HubSpot. Here’s a list of available objects you can import:
Objects
- Arr
- Billing histories
- Calls
- Clients
- Companies
- Contacts
- Contracts
- Custom objects
- Deal lists
- Dealers
- Demos
- Emails
- Leads
- Blueprints
- Carts
- Company lists
- Contact lists
- Communications
- Credit
- Deal history
- Deal split
- Deals
- Discounts
- Employees
Frequently Asked Questions
By following this guide, you can easily import your HubSpot Schemes data into Google Sheets using Coefficient. This integration enables you to work with your data more efficiently, create custom reports, and keep everything updated automatically.
For more information about connecting HubSpot to Google Sheets, check out our related resources: