The following blog is the ultimate guide on how to change cell size in Google Sheets.
Google Sheets is a flexible interface for organizing, storing, and analyzing data. However, if your data doesn’t fit into the cells, your spreadsheet can become unreadable.
In that case, you’ll need to change the cell size to fit the data, especially if you’re sharing the spreadsheet with team members.
This guide will teach you all the ways to change cell size in Google Sheets, based on step-by-step walkthroughs and real use cases.
Benefits of Changing Cell Size in Sheets
Changing the size of a cell allows you to present your data clearly, making it easy to consume and analyze.
Some other benefits of changing cell size include:
- Improved readability. Adjusting cell size can improve your spreadsheet’s readability by displaying unobstructed data.
- Better organization. Resizing cells helps you organize your spreadsheet better, so it’s easier to find and manipulate data.
- Increased productivity. An uncluttered spreadsheet helps increase productivity by allowing you to quickly access the data you need.
- Enhanced aesthetics. Adjusting cell size can improve your spreadsheet’s overall appearance, so it’s easier to navigate.
However, these are just a few of the advantages. Resizing cells covers a broad array of use cases.
Four Methods for Changing Cell Size in Google Sheets
Every row and column in Google Sheets is set to a standard width and height.
These default sizes are not always enough to accommodate your data, so you’ll need to adjust them accordingly.
Check out the examples below to learn all the different methods for changing cell size in Google Sheets.
1. Change Cell Size by Adjusting the Column Width
Before diving into our walkthroughs, let’s prepare a sample dataset to illustrate our examples.
We’ll use Coefficient to import a Shopify dataset into Google Sheets.
Coefficient is a powerful Google Sheets add-on that allows you to pull live business data from HubSpot, Shopify, Salesforce, Redshift, Jira, Looker, and other systems into your Google spreadsheet.
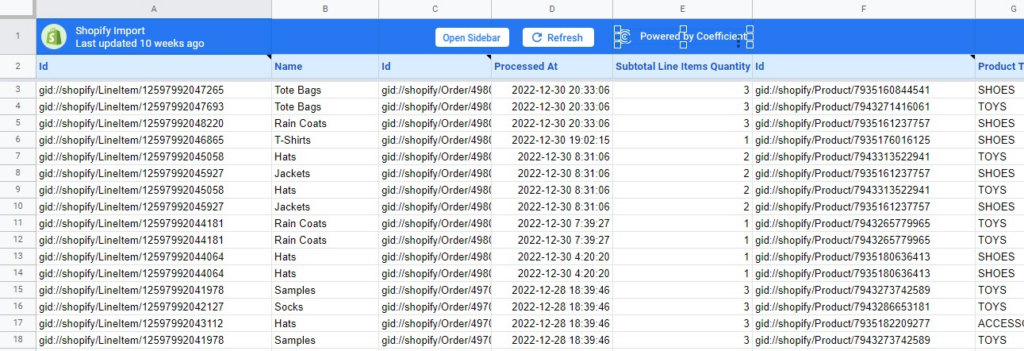
Find more information on how to do this in our blog post on how to connect Shopify to Google Sheets.
Now back to resizing cells in Google Sheets.
One way of changing a Google Sheets cell size is to adjust the column’s width. Once your sample data is ready, follow the steps below to modify your cell’s column width.
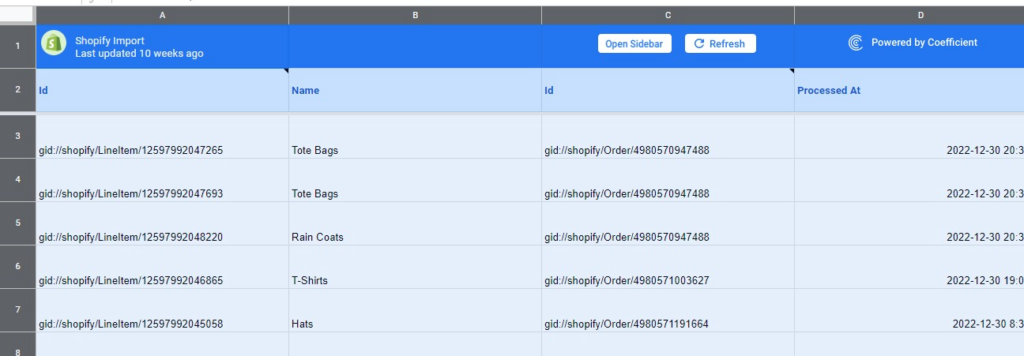
As you can see, the values under the ID column do not show the complete data because the cell’s width is too short.
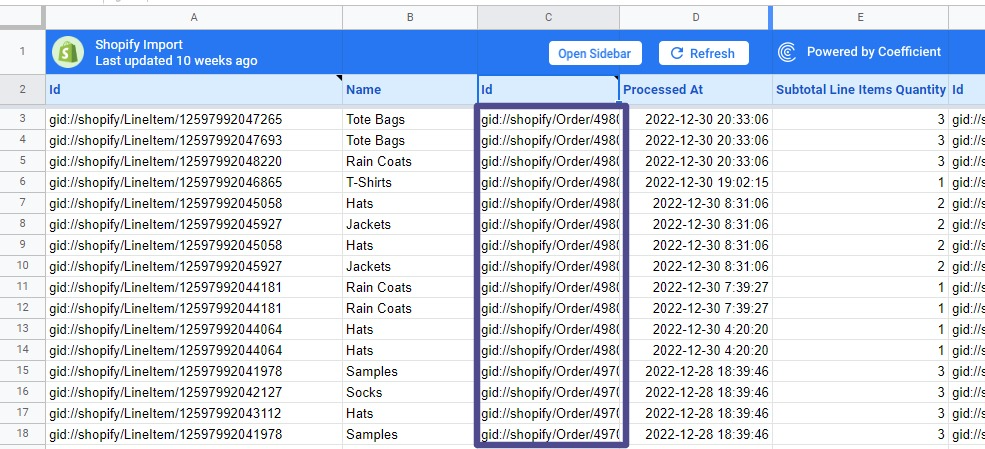
Manually adjust the width to ensure the data fits the cell. Hover your mouse’s cursor on the line between columns C and D until it shows a double arrow. Then click and drag the line to the right to increase the column width.
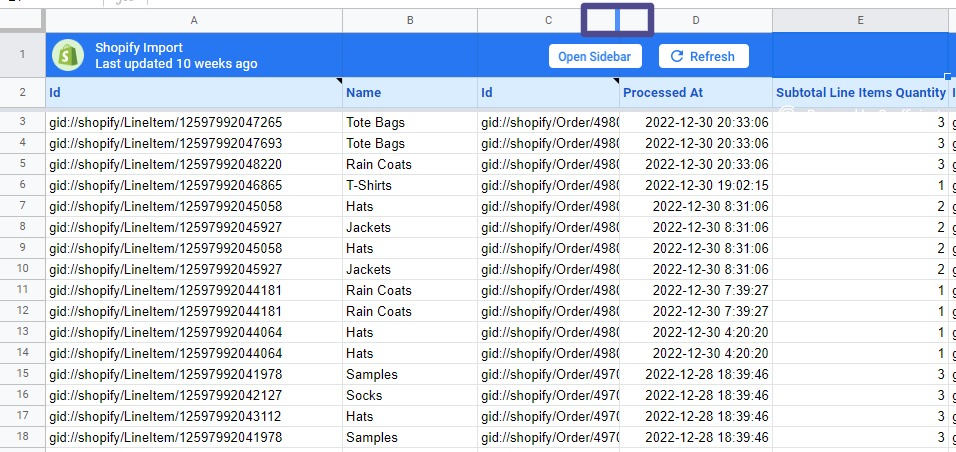
Adjust the width accordingly until all the cell’s content is visible. It’s that simple.
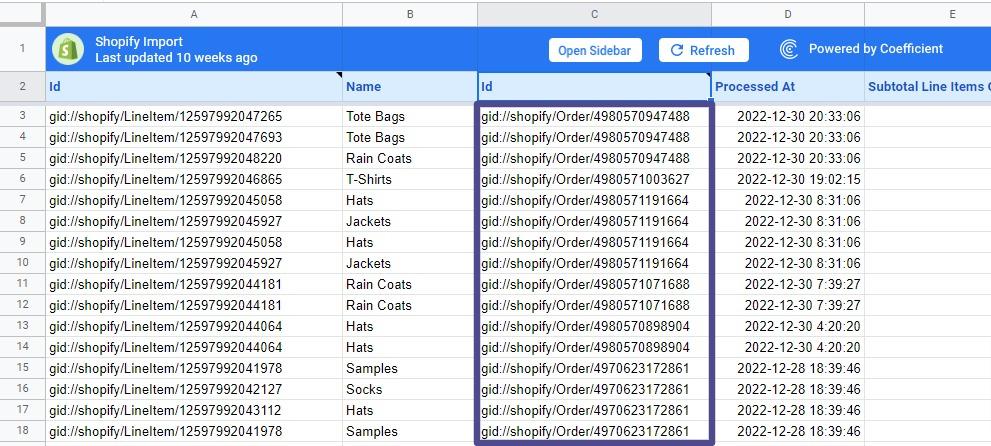
You can also use Google Sheets’ auto-resize feature to automatically set a cell column’s width to fit all the content.
Hover your mouse’s cursor over the same line between columns C and D until it shows a double arrow.
Now double-click your mouse, and Google Sheets will automatically adjust the cell’s width to fit the data.
2. Change Cell Size by Modifying the Row Height
Besides adjusting the cell width, you can also modify the row height to create additional space for your data.
As you can see in the sample table below, cell E2 doesn’t show all of the data.
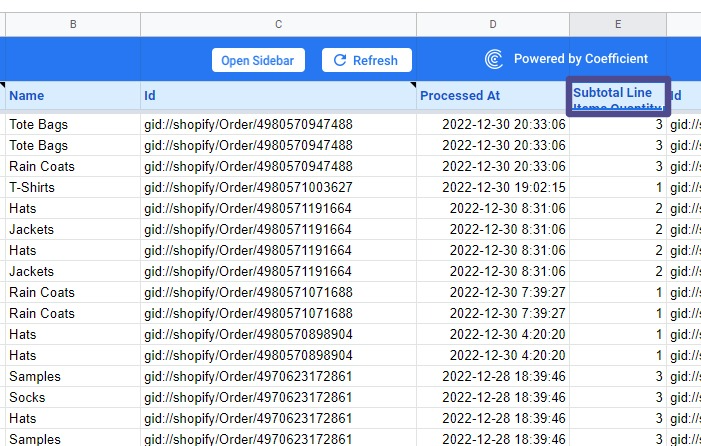
Adjust the cell’s row height by hovering your mouse over the line between rows two and three until the icon shows a double arrow.
Click and drag the row’s line down until all of cell E3’s content displays clearly.
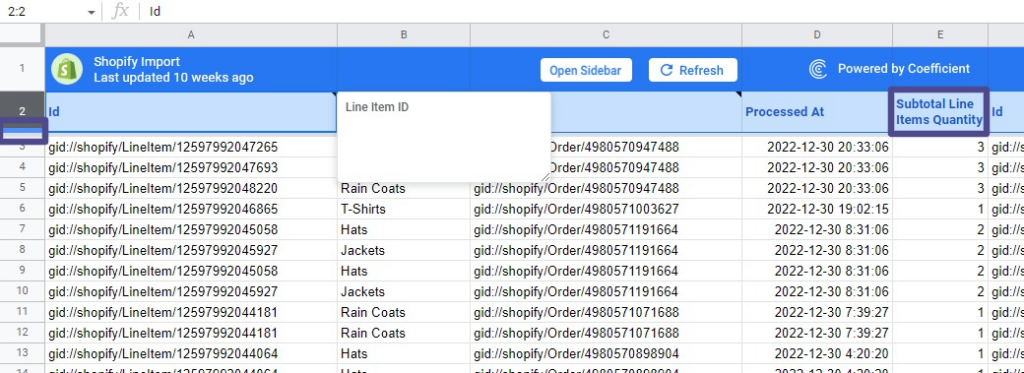
Drag the row border up or down to increase or decrease the height accordingly.
You can also use the auto-resize feature shown in the previous example by double-clicking your mouse on the row border.
Google Sheets will automatically resize columns or row height to accommodate the text.
3. Change Cell Size by Modifying the Cell Row and Height Simultaneously
Instead of resizing your cell rows and columns individually, you can adjust the height and width simultaneously with the Select All button.
This will turn the rows and columns into the same size instantly. Click the Select All button or the blank cell below the name box.
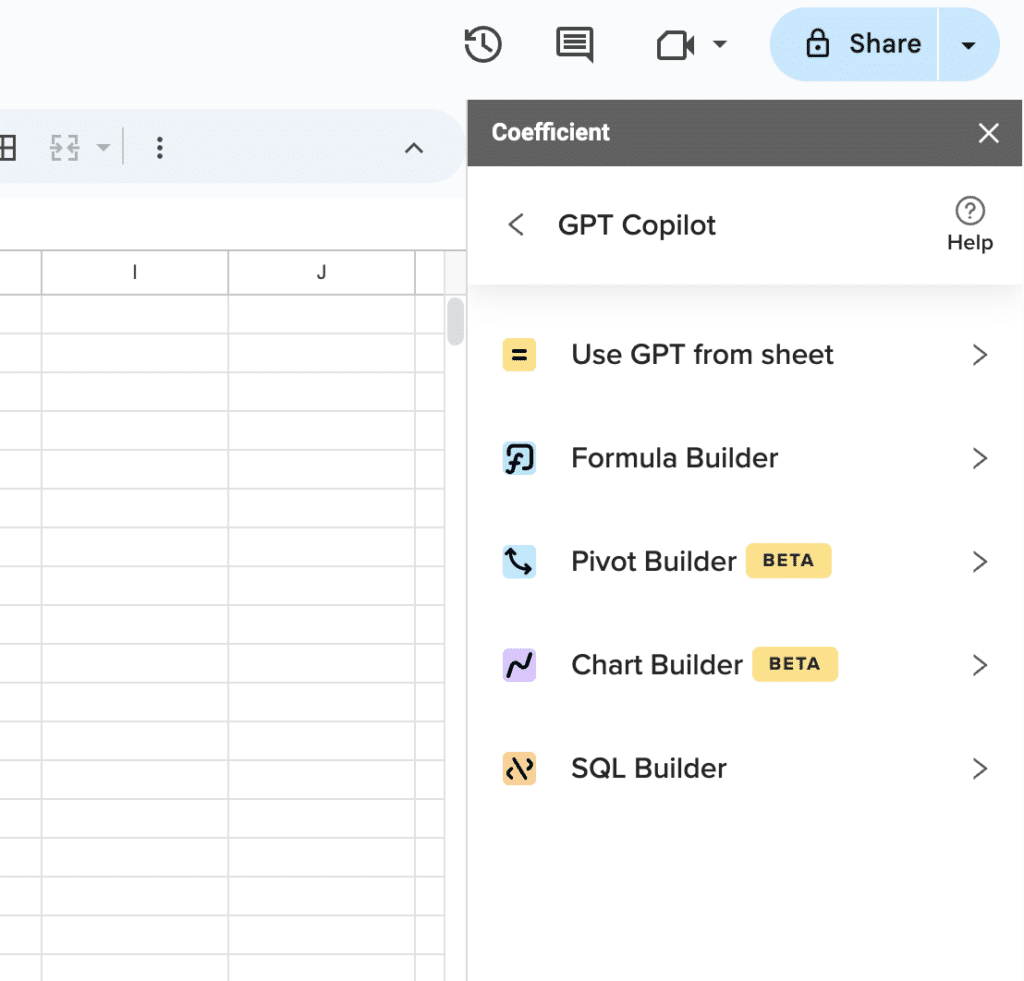
Supercharge your spreadsheets with GPT-powered AI tools for building formulas, charts, pivots, SQL and more. Simple prompts for automatic generation.

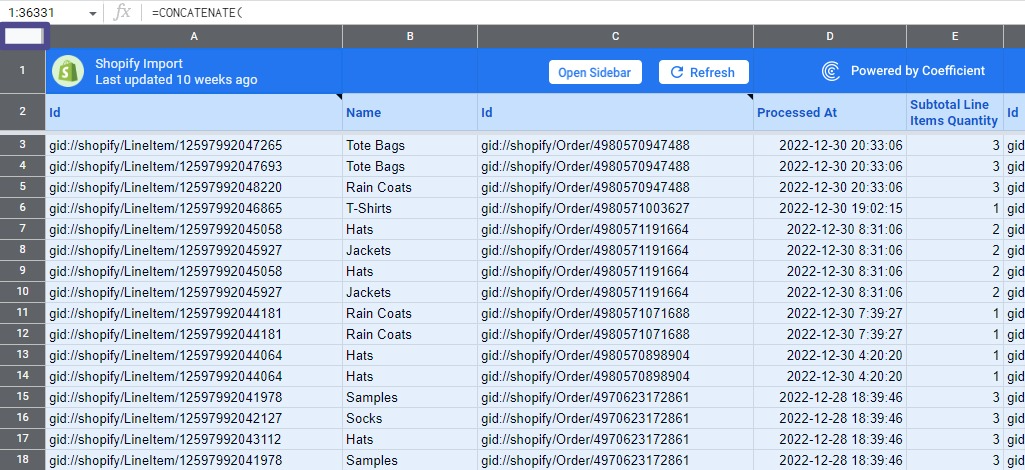
This will select all the cells in your spreadsheet.
Follow the steps in our previous examples to adjust the row width and column height accordingly.
All the cells will instantly adjust to uniform sizes as you change the row width and column height.
Besides changing cell sizes, you can also wrap text in Google Sheets, so your text doesn’t spill over the adjacent cells.
4. Change Cell Size by Adjusting Multiple Rows and Columns at Once
Google Sheets lets you resize multiple cells, columns, and rows simultaneously.
Press the Ctrl key (cmd key in Mac) and click your mouse icon on the column letter or row number to highlight the columns or rows you wish to resize.
Using our Shopify table, select rows three to six.
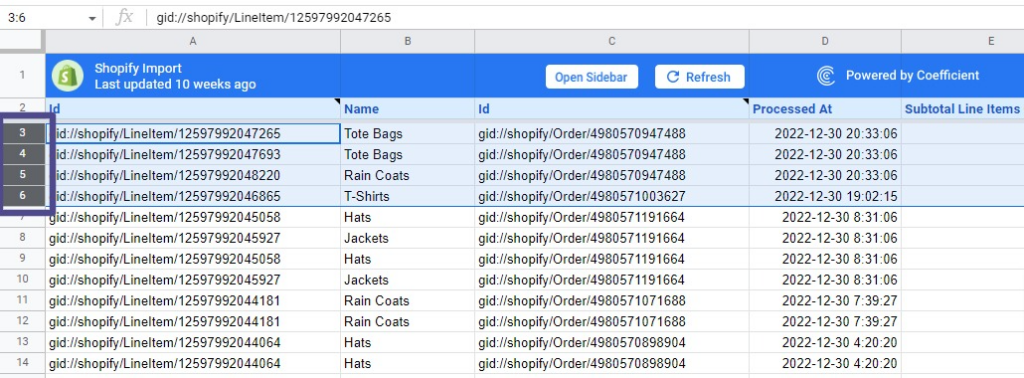
Hover your mouse icon on the line between rows until a double arrow appears. Click the line. Drag the line up or down to adjust the cell rows accordingly.
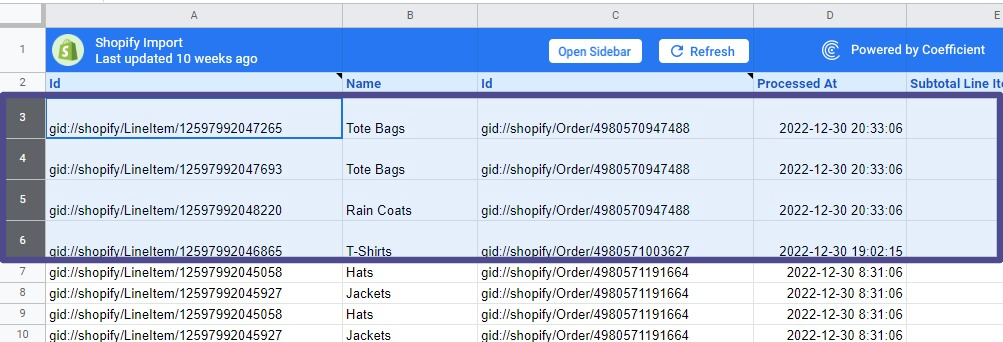
The multiple selected cells should show narrower or wider rows based on how you want to adjust the cells.
You can also specify your cells’ row height. Right click your mouse on the last selected cell (row six in our example) and select Resize rows 3 – 6 from the drop-down.
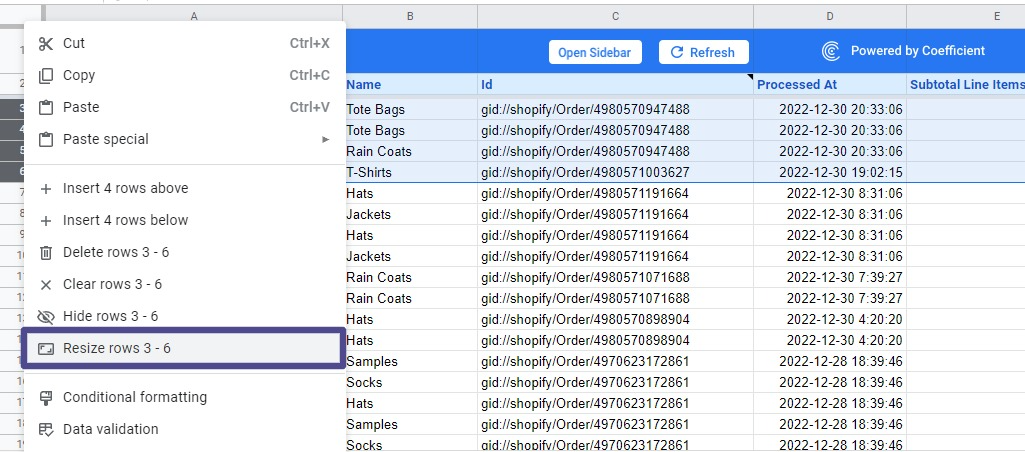
Specify your desired row height in the pop up menu. Setting lower amounts will make your rows smaller.
You can also select the Fit to data option to allow Google Sheets to automatically adjust the row height based on the data in the highest cell.
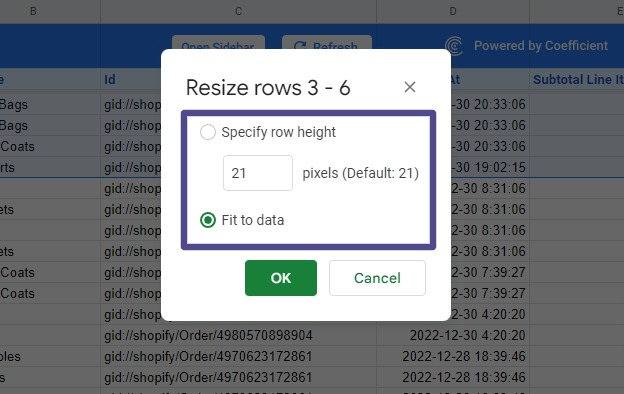
Click OK, and you should see your resulting custom row adjustments or new column width in your Google spreadsheet.
After changing your cell sizes, you can start applying your desired formatting. For instance, you can apply filters to your desired column header or freeze a row in Google Sheets.
What to Watch Out for When Resizing Google Sheets Cells
Below are important factors you should consider when you’re changing cell sizes in Google Sheets.
- Avoid merging cells to resize a cell. The merge cells feature combines multiple cells into one. However, using this option to resize cells can cause formatting and calculation issues.
- Consider adjusting cell sizes using the fit to data feature. Manually adjusting cell sizes can accidentally make the cells too small to display all of their contents. To avoid this, use the fit to data option by double-clicking the line between two rows or columns.
- Avoid resizing cells in a table with a row or column header. Resizing cells within a table with a header row or column can cause formatting issues if the header row or column doesn’t align properly with the rest of the table.
In general, resizing cells is straightforward, and most of the problems you run into will be formatting issues.
Change Cell Size in Google Sheets Effortlessly
Changing cell size in Google Sheets is a simple process that can greatly enhance your spreadsheet’s readability and organization.
Whether you want to increase the size of a single cell or adjust the dimensions of multiple cells at once, Google Sheets offers a range of options to help you customize your spreadsheet to your liking.
And don’t forget, you can import real-time business data from your company systems into Google Sheets with Coefficient.
Get started with Coefficient today and explore its robust features and benefits for busy teams like yours.
