Are you looking to upload CSV files to Snowflake? This comprehensive guide will walk you through the top three methods for importing CSV data into Snowflake efficiently. You’ll learn step-by-step processes, best practices, and tips to streamline your data import workflow.
Top 3 Methods to Upload CSV to Snowflake
Let’s explore the three most effective methods for uploading CSV files to Snowflake:
- Coefficient: A streamlined solution for spreadsheet-based imports and real-time data syncing
- Snowflake’s Native Tools: Built-in options including the Web Interface and SnowSQL
- Fivetran: A popular ETL tool for handling complex data imports
1. Coefficient: Streamlined CSV Upload to Snowflake
Coefficient offers a user-friendly solution for uploading CSV data to Snowflake, especially for those working with spreadsheets. This method excels in providing real-time data syncing and bi-directional capabilities. Benefits include:
- Seamless integration between spreadsheets and Snowflake
- Real-time data syncing for up-to-date information
- User-friendly interface, ideal for non-technical users
- Automated data refresh and scheduling options
Step-by-Step Walkthrough
Step 1. Install Coefficient
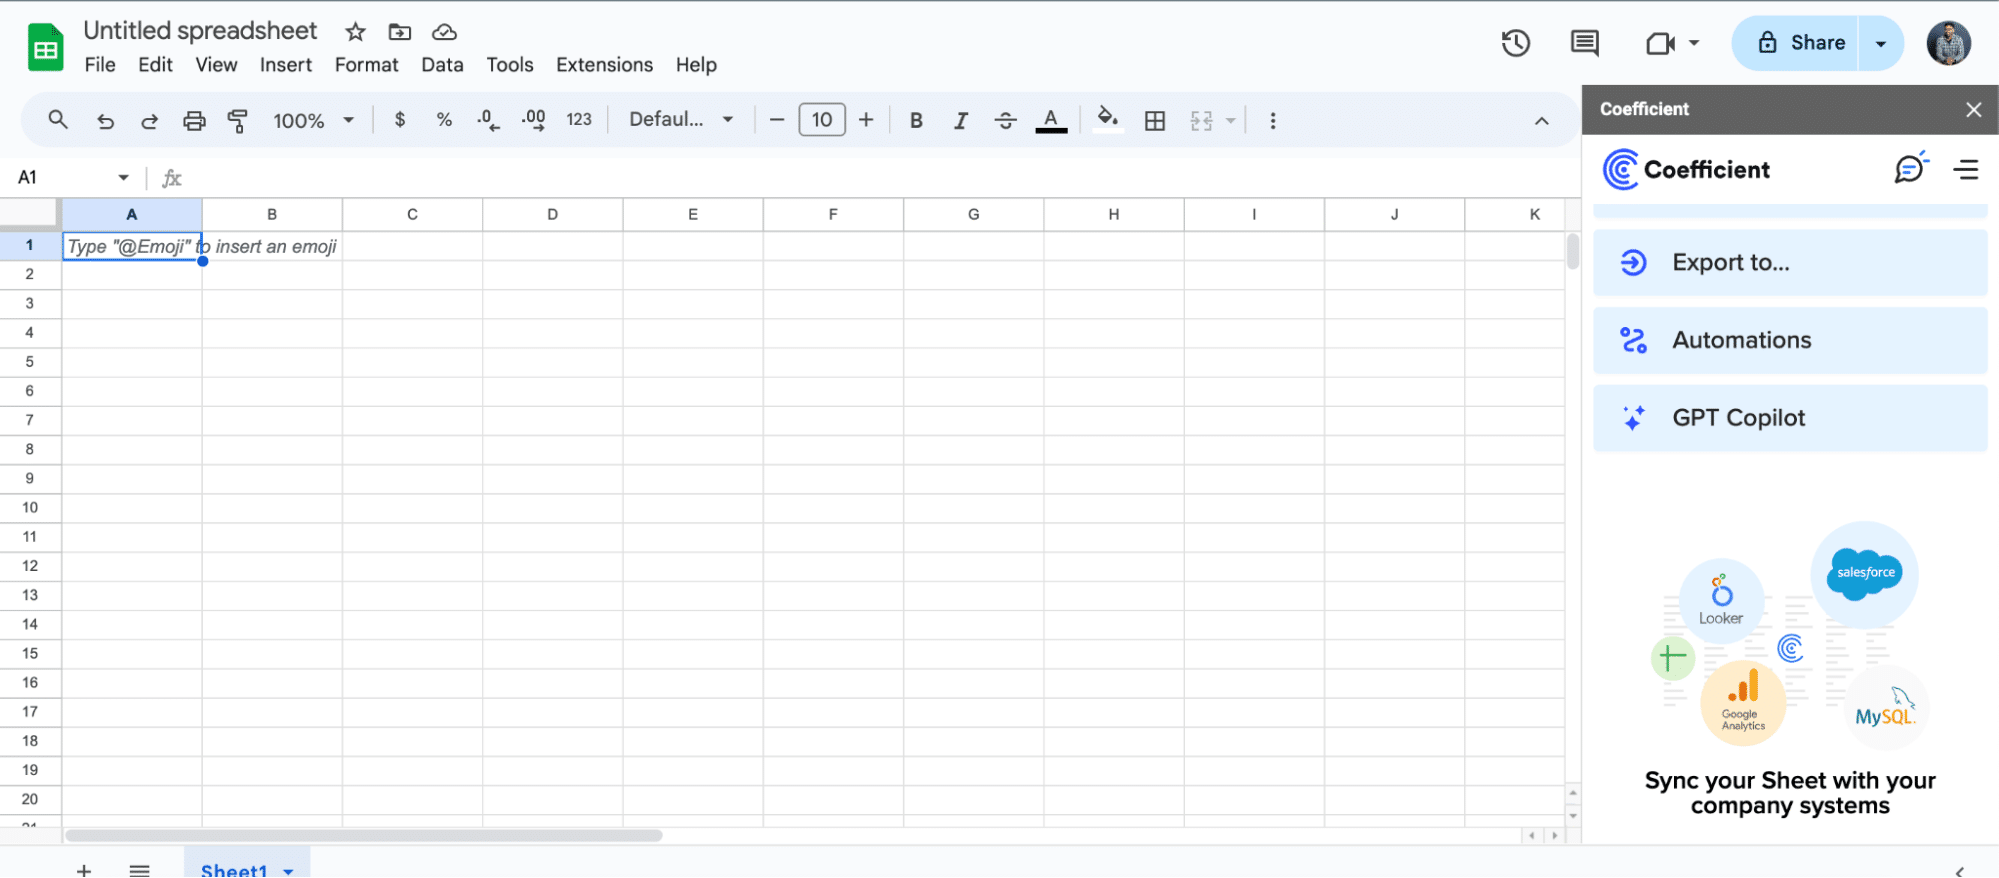
For Google Sheets: Open Google Sheets, go to the Extensions tab, select Add-ons, then Get add-ons. Search for “Coefficient” and follow the prompts to install it.
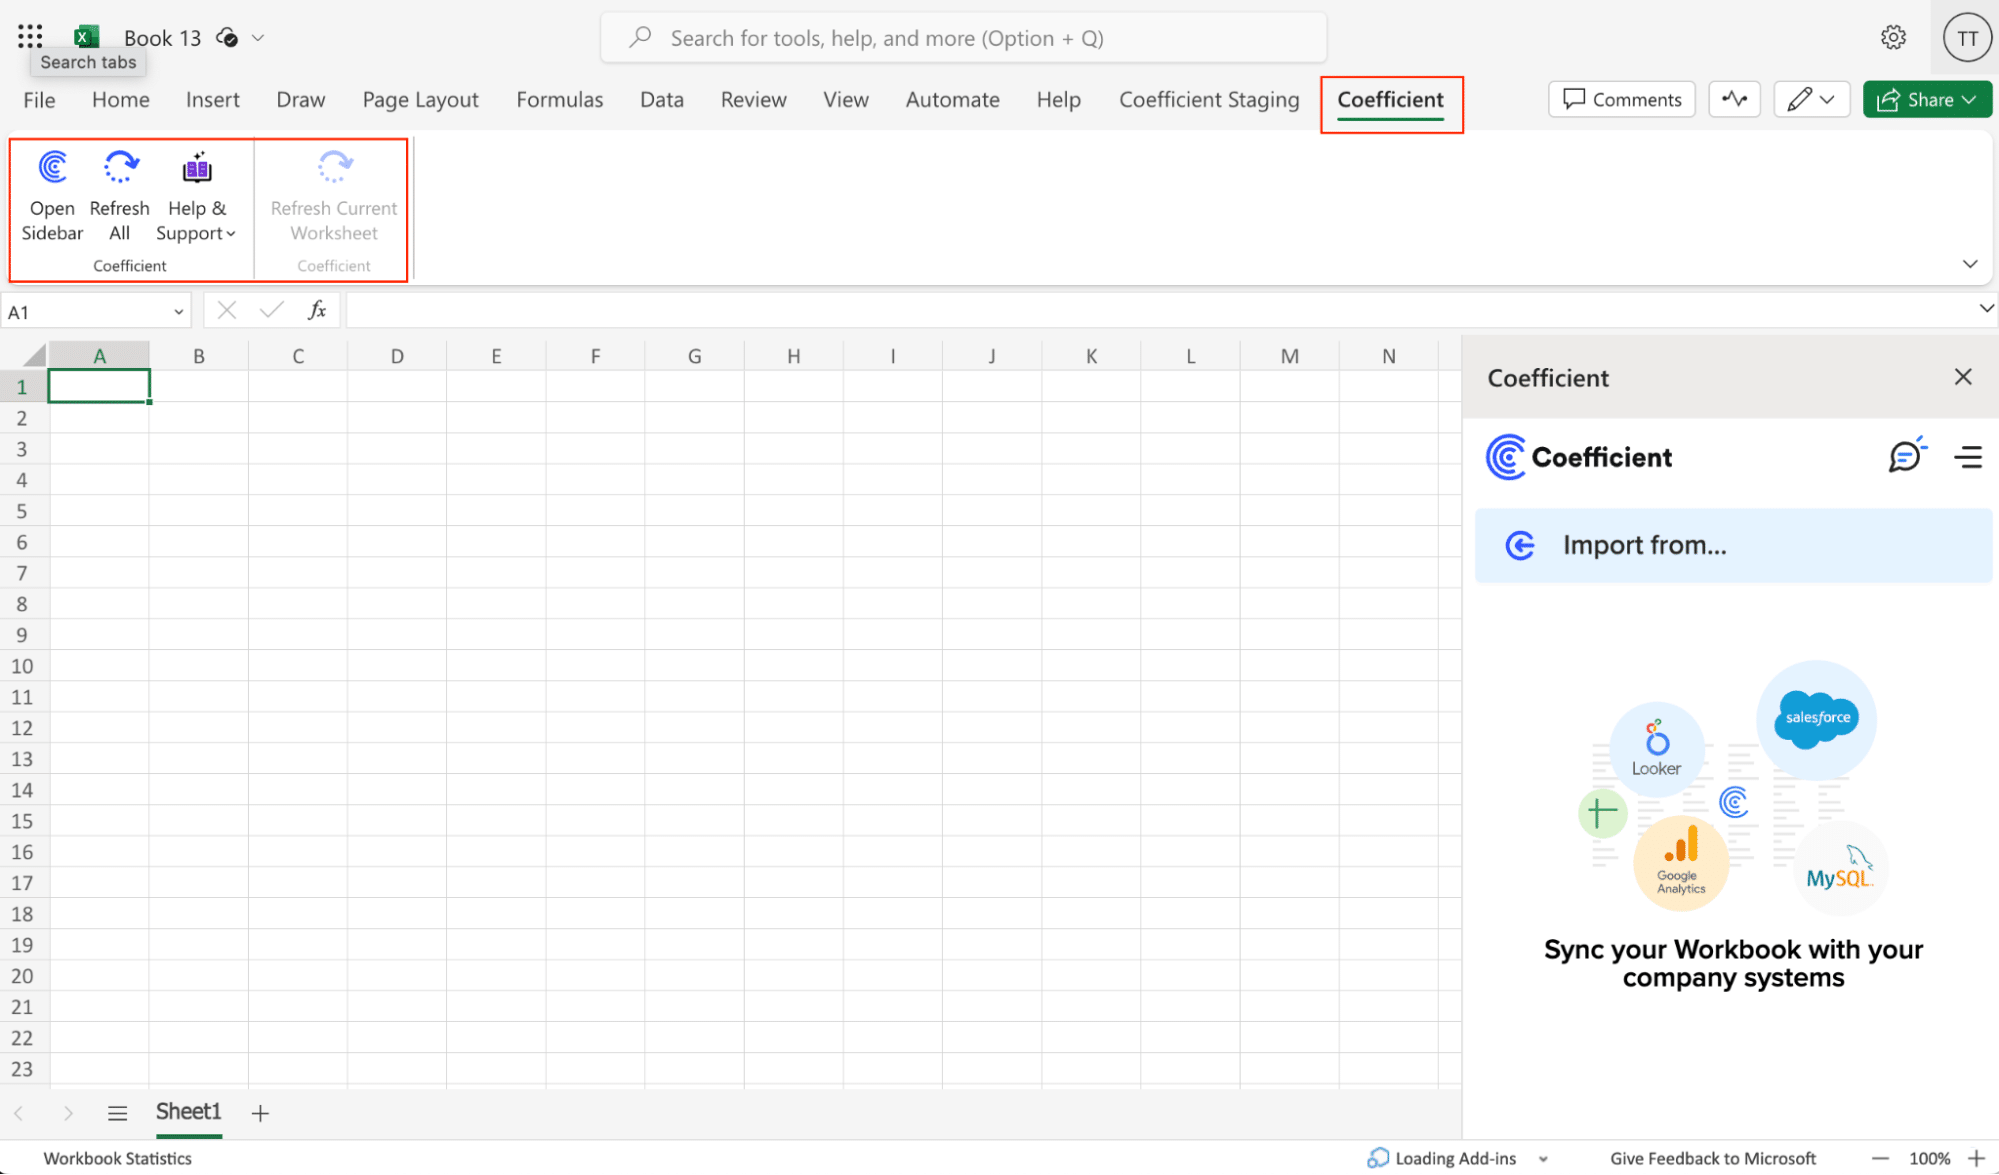
For Excel: Open Excel (desktop or Office Online), click ‘File’, then ‘Get Add-ins’, and select ‘More Add-Ins’. Search for “Coefficient” and click ‘Add.’
Step 2: Import Data into Coefficient
With Coefficient open in your spreadsheet, you can import data from various sources:
- In the Coefficient sidebar, click “Import from…”
- Choose from a wide range of data sources, including:
- Databases (e.g., MySQL, PostgreSQL, SQL Server)
- CRM systems (e.g., Salesforce, HubSpot)
- Marketing platforms (e.g., Google Analytics, Facebook Ads)
- Finance tools (e.g., QuickBooks, Stripe)
- Project management tools (e.g., Jira, Asana)
- Enter the necessary connection details for your chosen data source.
- Select the specific data you want to import (tables, objects, or custom queries).
- Choose the destination sheet and starting cell for your imported data.
- Click “Import” to bring the data into your spreadsheet.
- Prepare your CSV data
- Ensure your CSV data is properly formatted in
- Verify column names and data types match your Snowflake table structure.
Step 3: Prepare and Export Data to Snowflake
Note: Before starting, make sure you’ve connected to Snowflake.
https://www.youtube.com/watch?v=Zjym92WHgLM
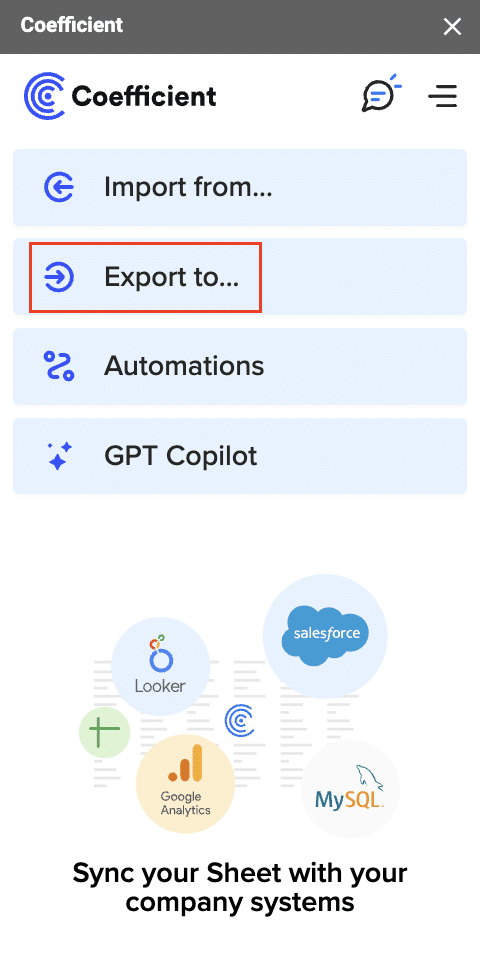
- Click “Export to…” in Coefficient’s menu and select Snowflake.
- Choose the data range and specify the header row.
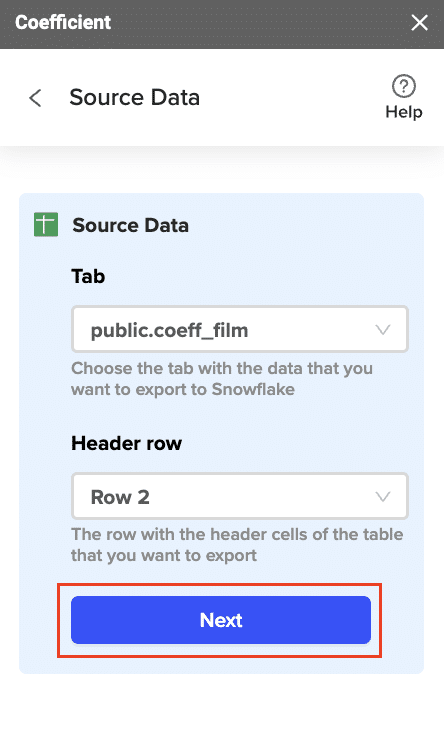
- Select the target Snowflake table and action type (Update, Insert, Upsert, or Delete).
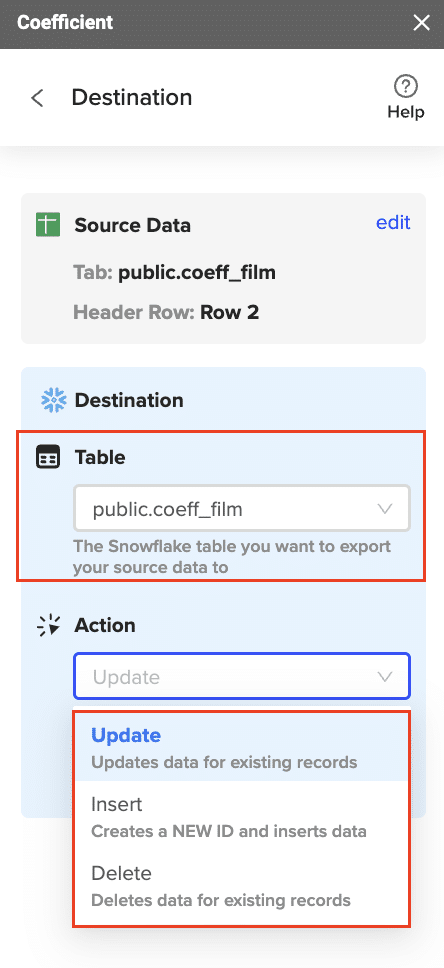
- Map your spreadsheet columns to Snowflake fields.

- Configure additional settings like batch size and empty cell handling.

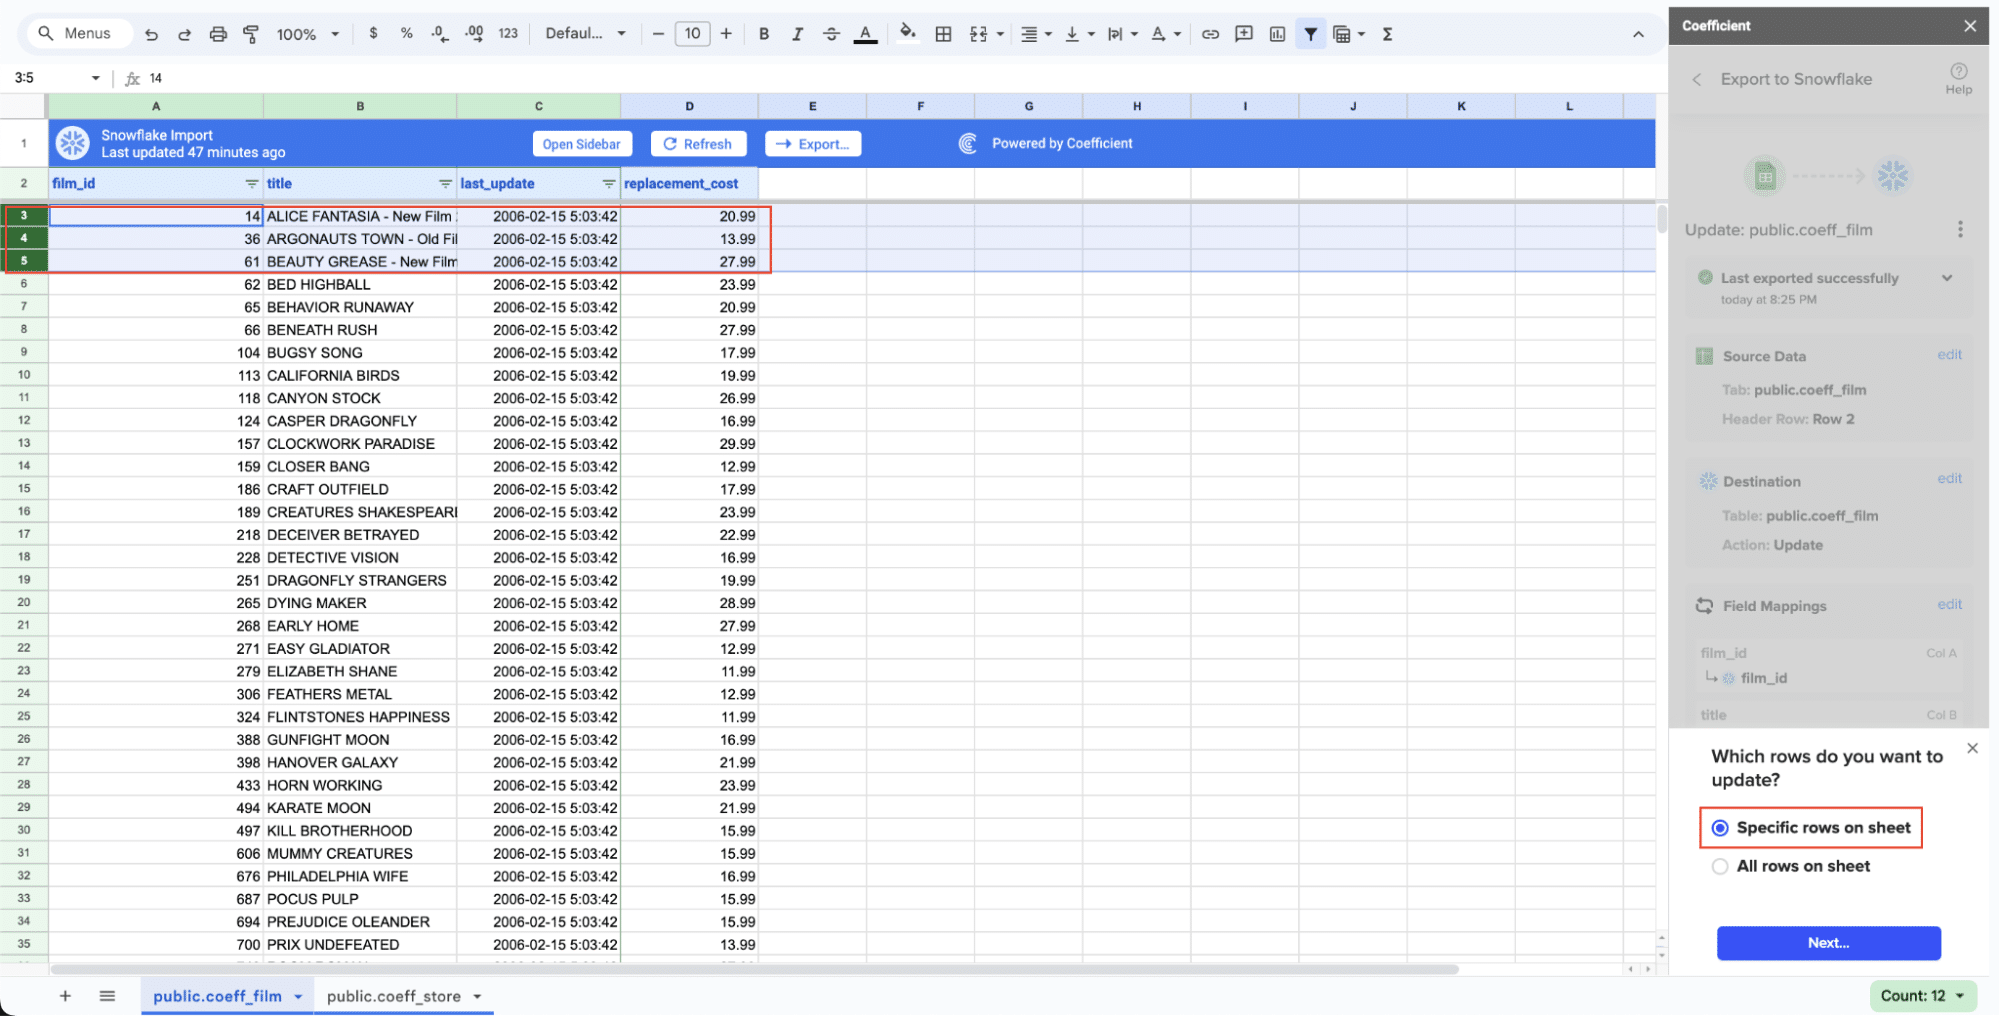
- Select rows to export or choose all.
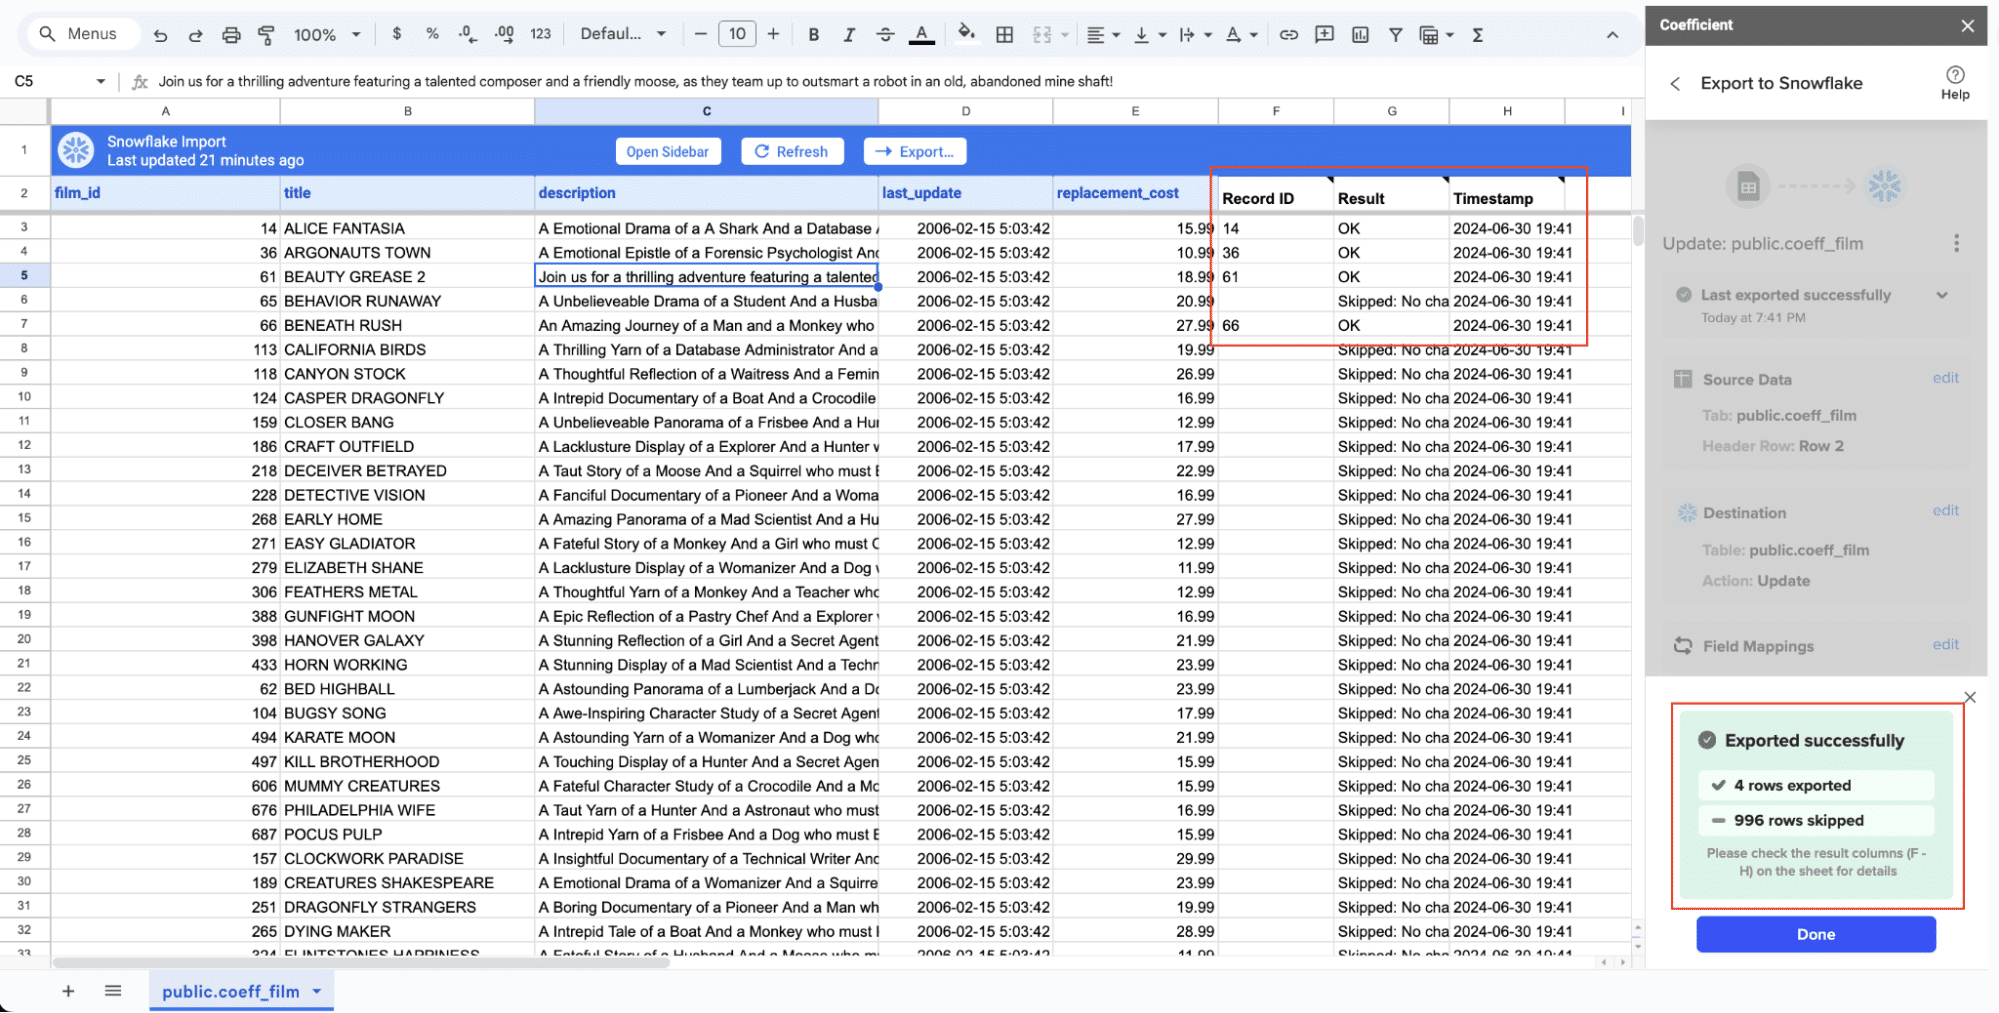
- Review settings and click “Export” to transfer your data to Snowflake. Coefficient will update Snowflake and display the status in your spreadsheet.
Pros and Cons of Using Coefficient
Pros:
- Eliminates manual data entry and reduces errors
- Creates live, auto-updating reports and dashboards
- Provides version history and collaboration features
- Offers data governance and access controls
- Includes alerting and notification capabilities for data changes
Cons: The only downside to Coefficient is that any scheduled automations are not free forever. However, its pricing plans are affordable, and its benefits far outweigh the app’s costs.
Coefficient’s Snowflake Integration for Google Sheets offers a powerful solution for those who frequently work with spreadsheet data and need a seamless connection to Snowflake.
2. Snowflake’s Native Tools: Web Interface and SnowSQL
Snowflake provides built-in tools for data ingestion, including a web interface and the SnowSQL command-line tool. These native options are ideal for users who prefer direct interaction with Snowflake or need to perform occasional CSV uploads.
Using Snowflake’s Web Interface
Step 1: Log in to Snowflake
- Access your Snowflake account through a web browser.
- Navigate to the Worksheets or Data section.
Step 2: Create a stage (if necessary)
- In a worksheet, run:
CREATE OR REPLACE STAGE my_csv_stage;
Step 3: Upload the CSV file
- Click on the “Files” tab in the Snowflake interface.
- Select your stage and click “Upload”.
- Choose your CSV file and wait for the upload to complete.
Step 4: Create a table for your data
In a worksheet, create a table that matches your CSV structure:
CREATE OR REPLACE TABLE my_table (
column1 VARCHAR,
column2 INTEGER,
column3 DATE
);
Step 5: Load data from the staged file
Use the COPY INTO command to load the data:
COPY INTO my_table
FROM @my_csv_stage/your_file.csv
FILE_FORMAT = (TYPE = CSV FIELD_OPTIONALLY_ENCLOSED_BY = ‘”‘ SKIP_HEADER = 1);
Step 6: Verify the data load
- Run a SELECT query to check if the data was imported correctly:
SELECT * FROM my_table LIMIT 10;
Using SnowSQL for CSV Upload
Step 1: Install SnowSQL
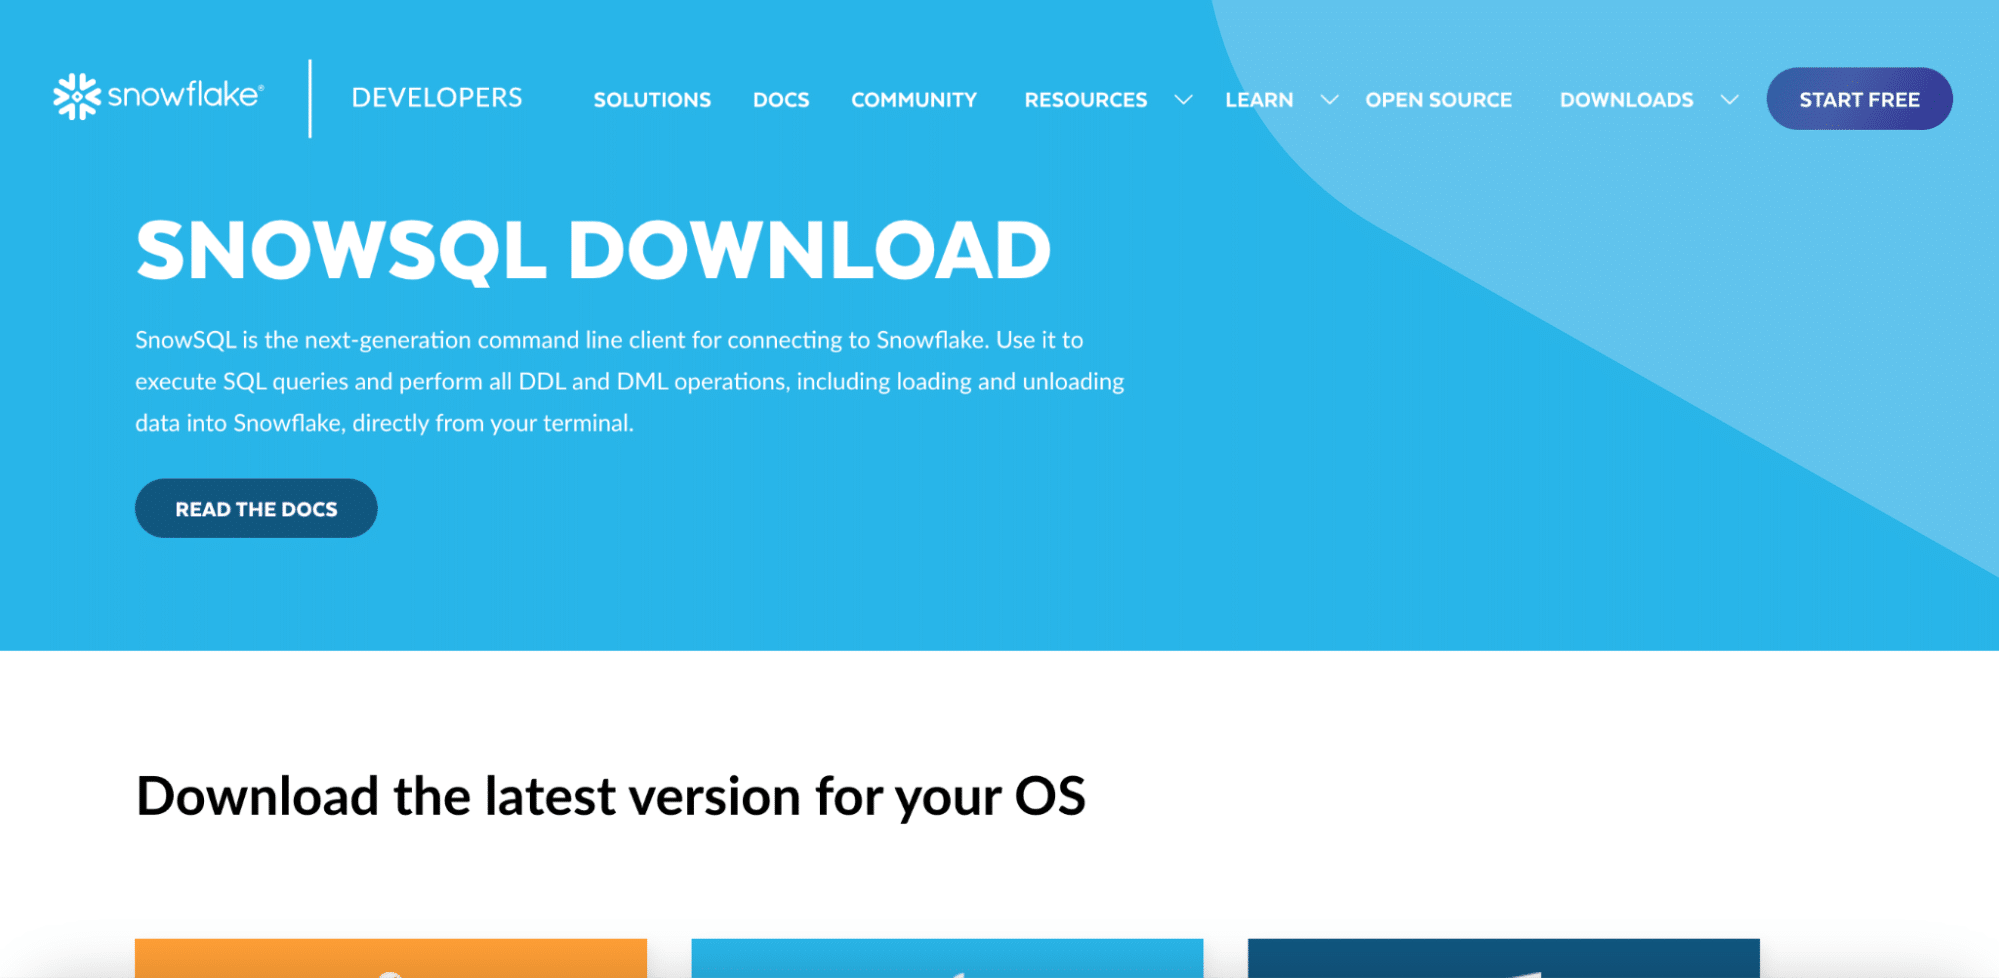
- Download and install SnowSQL from the Snowflake website.
- Configure SnowSQL with your account details.
Step 2: Connect to your Snowflake account
- Open a terminal or command prompt.
- Connect to Snowflake using:
snowsql -a your_account -u your_username
Step 3: Create a table (if not already existing)
- Use the same CREATE TABLE command as in the web interface method.
Step 4: Stage your CSV file
- Use the PUT command to stage your file:
PUT file:///path/to/your/local/file.csv @my_csv_stage;
Step 5: Load data into the table
- Use the COPY INTO command as shown in the web interface method.
Step 6: Verify the data load
- Run a SELECT query to ensure the data was imported correctly.
These native tools are most effective for users who are comfortable with SQL and prefer direct control over the import process. They’re also useful for automating imports through scripts or scheduled jobs.
3. Fivetran ETL Tool: Automated CSV Uploads to Snowflake

Fivetran is a powerful ETL (Extract, Transform, Load) tool that can automate and streamline the process of uploading CSV files to Snowflake, especially for large-scale or complex data imports. It’s particularly useful for:
- Handling large volumes of data
- Automating regular data imports
- Performing data transformations during the import process
- Maintaining data consistency across multiple sources
Step-by-Step Walkthrough for CSV Upload with Fivetran
Step 1: Set up a Fivetran account
- Sign up for a Fivetran account if you don’t have one.
- Log in to your Fivetran dashboard.
Step 2: Create a new connector
- In the Fivetran dashboard, click “Add Connector”.
- Search for and select the “CSV” or “File” connector option.
Step 3: Configure the CSV source
- Choose your CSV file location (e.g., FTP, SFTP, Amazon S3, Google Cloud Storage).
- Provide necessary credentials and path information for accessing your CSV files.
Step 4: Set up Snowflake as the destination
- In the connector setup, select Snowflake as your destination.
- Enter your Snowflake account details, including account name, username, password, and warehouse.
Step 5: Configure schema and table mapping
- Define how Fivetran should map your CSV columns to Snowflake table columns.
- Set up any necessary data transformations or cleansing rules.
Step 6: Set sync frequency
- Choose how often Fivetran should check for new or updated CSV files and sync them to Snowflake.
Step 7: Initialize the sync
- Save your configuration and start the initial sync.
- Monitor the progress in the Fivetran dashboard.
Step 8: Verify data in Snowflake
- Once the sync is complete, log in to your Snowflake account.
- Query the destination table to ensure data has been correctly imported.
Step 9: Set up ongoing monitoring
- Configure alerts in Fivetran for sync failures or data discrepancies.
- Regularly review sync logs and performance metrics.
Fivetran excels in scenarios where you need to:
- Automate regular imports of CSV files from various sources
- Handle complex data transformations during the import process
- Ensure data consistency across multiple CSV files and other data sources
- Scale your data import process as your data volume grows
By leveraging Fivetran’s ETL capabilities, you can create a robust, automated pipeline for uploading CSV data to Snowflake, reducing manual effort and ensuring data accuracy and timeliness.
Simplify Your Snowflake CSV Uploads Today
Uploading CSV files to Snowflake doesn’t have to be a complex process. Whether you choose the user-friendly Coefficient for spreadsheet-based workflows, Snowflake’s native tools for direct control, or Fivetran for automated, large-scale imports, you now have the knowledge to efficiently get your data into Snowflake. Each method offers unique advantages, so select the one that best fits your specific needs and technical expertise. Ready to streamline your data import process? Get started with Coefficient and experience seamless CSV uploads to Snowflake today.
For those looking to move data in the opposite direction, learn how to export data from Snowflake to CSV to complete your data workflow.
Frequently Asked Questions
Can you import Excel files into Snowflake?
Yes, you can import Excel files into Snowflake. While Snowflake doesn’t directly support Excel file formats (.xlsx or .xls), you can easily convert Excel files to CSV format, which Snowflake readily accepts. Many of the methods described for CSV uploads, such as using Coefficient or Fivetran, also support Excel file imports with automatic conversion to CSV or direct integration capabilities.
How do I upload a CSV file to my Snowflake storage account?
To upload a CSV file to your Snowflake storage account, you can use one of the following methods:
- Snowflake Web Interface: Use the “Stages” section to create an internal stage and upload your CSV file directly through the browser.
- SnowSQL: Utilize the PUT command in SnowSQL to upload your CSV file to a Snowflake stage.
- Coefficient: Connect your Google Sheets to Snowflake and import your CSV data for seamless syncing.
- Fivetran: Set up a CSV connector in Fivetran to automatically upload and sync your CSV files to Snowflake.
Each method has its own steps and considerations, as detailed in the main sections of this guide.
What is the best way to load large CSV files into Snowflake?
For loading large CSV files into Snowflake, consider the following approaches:
- Use Snowflake’s COPY command with a staged file: This method is efficient for large files and can be automated.
- Leverage Snowpipe for continuous, incremental loading of data as new CSV files arrive.
- Utilize an ETL tool like Fivetran, which can handle large file uploads and provide additional features like data transformation and scheduling.
- For very large files, consider splitting them into smaller chunks and using parallel loading techniques to improve performance.
The best method depends on your specific use case, frequency of uploads, and integration requirements.
How can I automate CSV uploads to Snowflake?
Automating CSV uploads to Snowflake can be achieved through several methods:
- Snowflake Tasks: Create scheduled tasks in Snowflake to run COPY commands at regular intervals.
- Snowpipe: Set up Snowpipe to automatically ingest data as soon as new files are added to a stage.
- Coefficient: Use Coefficient’s scheduling features to automate regular syncs between your spreadsheets and Snowflake.
- Fivetran or other ETL tools: Configure scheduled jobs to regularly check for new CSV files and upload them to Snowflake.
- Custom scripts: Develop scripts using SnowSQL or Snowflake connectors in programming languages like Python to automate the upload process.
Automation not only saves time but also ensures consistency in your data integration processes.


