Uploading data to Snowflake is an essential step in harnessing the power of this cloud-based data warehousing platform. Whether you’re handling gigabytes or petabytes of data, Snowflake provides flexible and efficient methods to load your data quickly and securely.
In this comprehensive guide, we’ll explore various data loading techniques, best practices, and expert tips to help you master the art of data loading in Snowflake.
Common Methods for Uploading Data to Snowflake
Snowflake offers a variety of data loading methods to cater to different use cases and data sources:
SnowSQL: A powerful command-line interface that allows you to execute SQL queries and data loading commands directly from your terminal. With SnowSQL, you have granular control over the data-loading process.
Snowflake Web Interface: A user-friendly graphical interface that enables you to manage your Snowflake account, databases, and data-loading tasks with ease. The web interface provides a visual way to monitor and control your data ingestion process.
Snowflake Connectors: Seamless integrations with popular ELT solutions like Fivetran. These connectors allow you to leverage the capabilities of these tools while benefiting from Snowflake’s performance and scalability.
How Do I Upload Data to Snowflake? Step-by-Step Tutorial
Method 1: SQL Commands
Step 1. Create a Stage in Snowflake
A stage is a location where you store your data files before loading them into Snowflake tables. You can create an internal stage within Snowflake or use an external stage in cloud storage like Amazon S3, Azure Blob Storage, or Google Cloud Storage.
To create an internal stage, use the CREATE STAGE command:
CREATE STAGE my_stage;
Step 2. Upload Files to the Snowflake Stage Using PUT
Once you have a stage set up, upload your data files to the stage using the PUT command. This command is available in SnowSQL and the Snowflake web interface.
In SnowSQL, use this syntax to upload a local file to a stage:
PUT file://path/to/your/file.csv @my_stage;
Step 3. Load Data into Snowflake Tables with COPY INTO
With your data files staged, use the COPY INTO command to load the data into a Snowflake table. The COPY INTO command provides options to control the data loading process, such as file format, compression, and error handling.
Here’s an example of loading data from a staged CSV file into a table:
COPY INTO my_table
FROM @my_stage/file.csv
FILE_FORMAT = (TYPE = CSV);
Step 4. Loading Data: Local Files vs Cloud Storage
Snowflake supports loading data from both local files and cloud storage. When loading from local files, you first need to use the PUT command to upload the files to a Snowflake stage. Loading from cloud storage allows you to directly reference the files in your COPY INTO command, skipping the staging step.
Consider performance and scalability when choosing between local files and cloud storage. Loading from cloud storage generally offers better performance and scalability, especially for large datasets.
Method 2: No-Code from Your Spreadsheet
Coefficient is a data connector for your spreadsheet. It allows you to pull live data from sources like CRMs, BI solutions and Snowflake, into Excel or Google Sheets in just a few clicks.
With Coefficient, you can upload data into Snowflake without leaving your spreadsheet. Here’s how:
Step 1. Install Coefficeint
Before getting started, install Coefficient for your spreadsheet. It only takes a few seconds, and you only have to do it once.
Step 2: Connect to Snowflake
Open the Coefficient Sidebar. Click on the menu icon and select “Connected Sources.”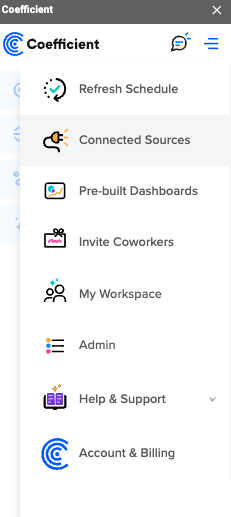
Search for Snowflake and click “Connect”.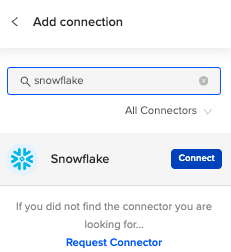
Enter your account credentials (Snowflake Account Name, Database Name, Username, Password, and Warehouse Name) to complete the connection.
Step 3: Prepare Your Data
Ensure your spreadsheet is organized with a header row that matches the Snowflake table fields and is ready for export.
Step 4: Start the Export Process
In the Coefficient sidebar, click on “Export to” and select “Snowflake.”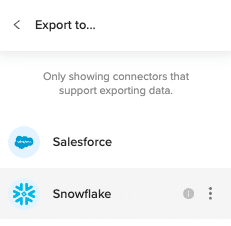
Choose the tab and the header row containing the Snowflake field headers. Coefficient automatically selects the sheet you have open, but you can choose a different tab if needed.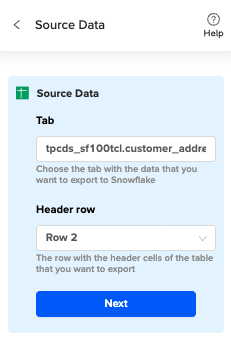
Select the table in your database that you want to update.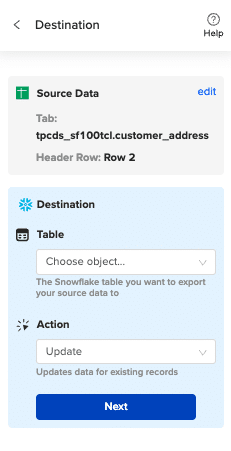
Then select “Insert” from the drop-down.
Step 5: Map Fields
Map the sheet columns to Snowflake table fields and click “Save”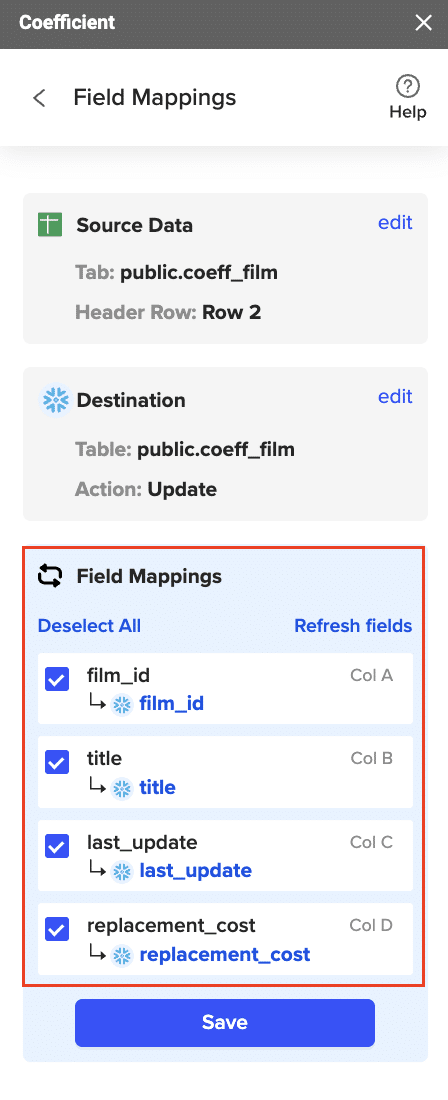
Review and confirm your settings. Click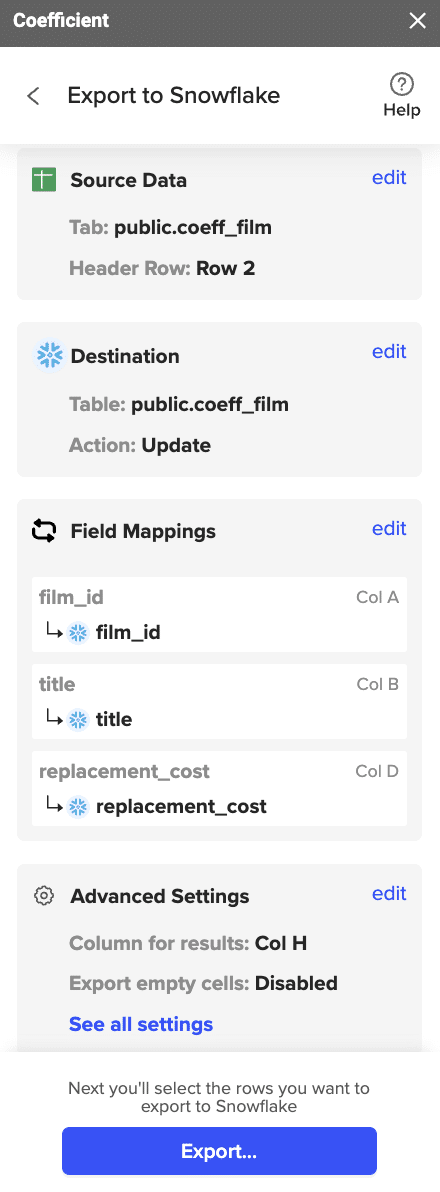
Step 6: Select and Export Rows
Highlight the rows in your sheet that you need to export.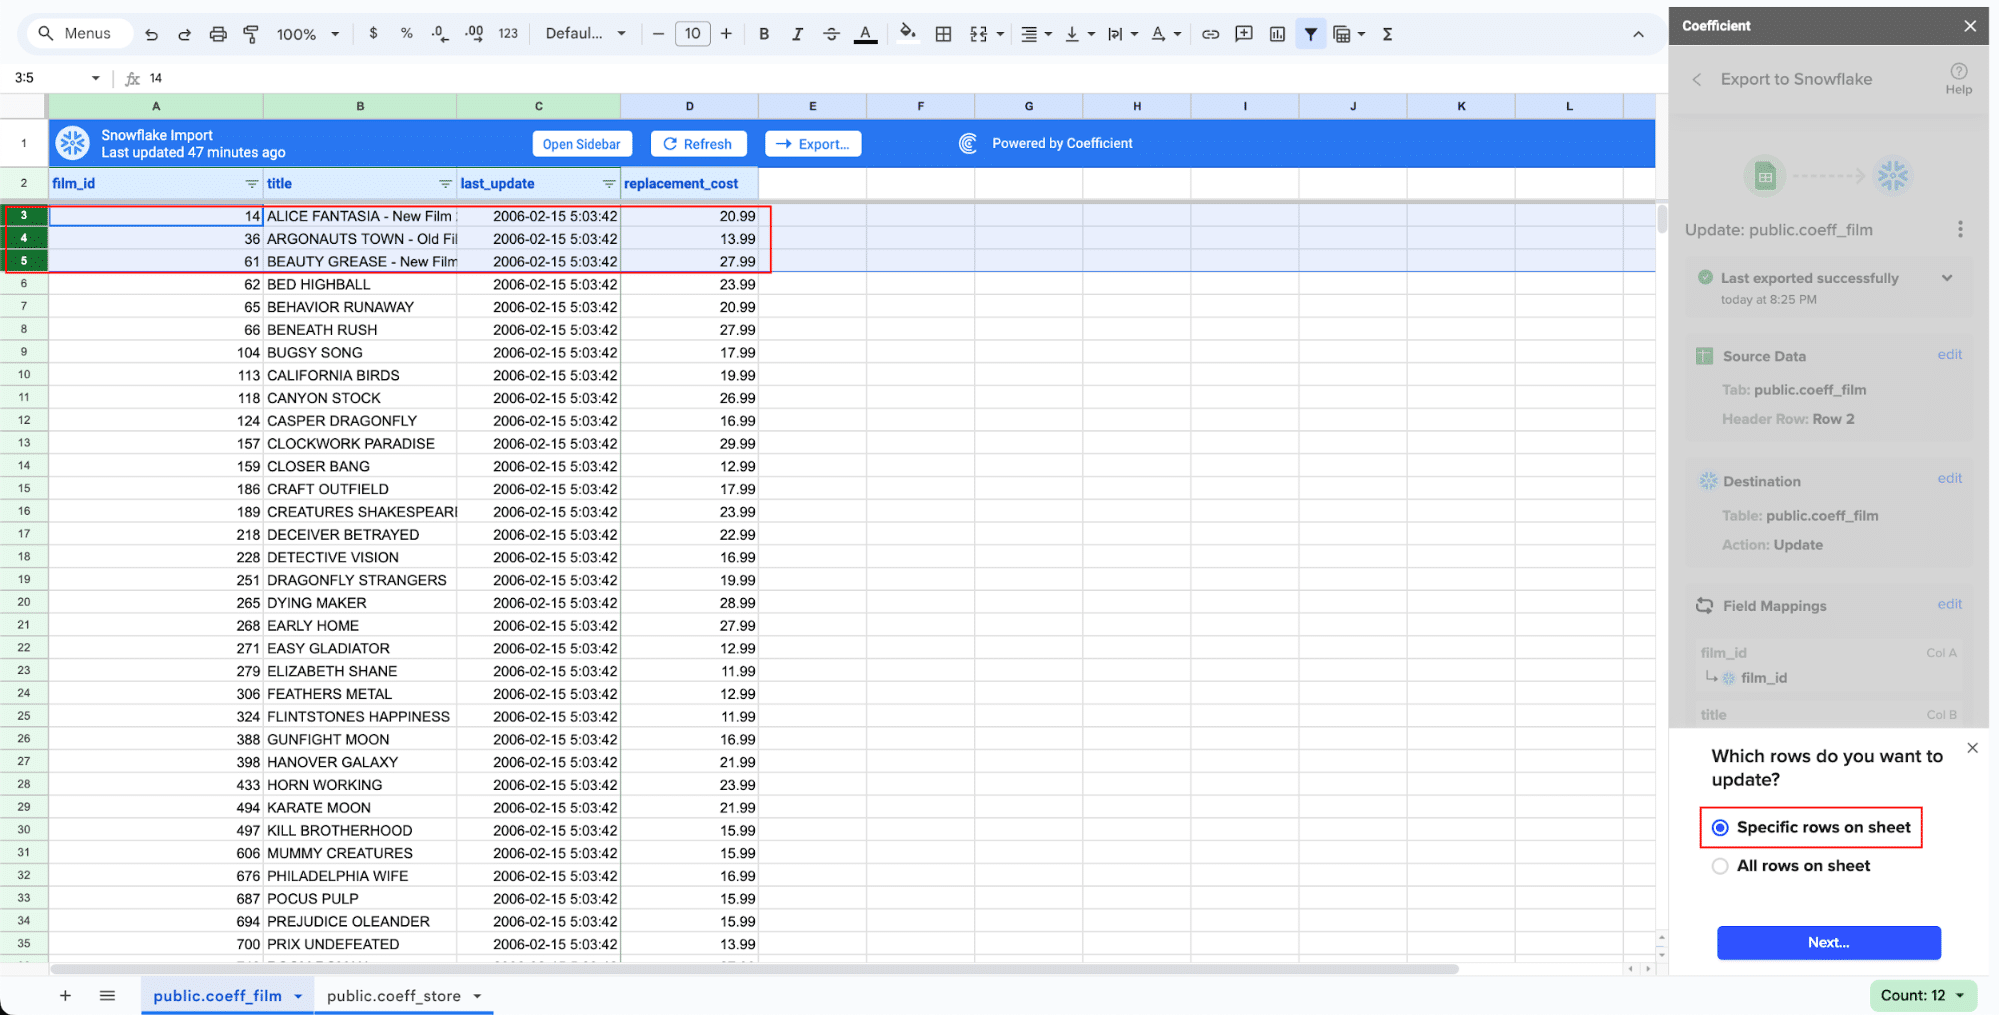
Confirm the rows to update and commit the changes. Note that these actions cannot be undone.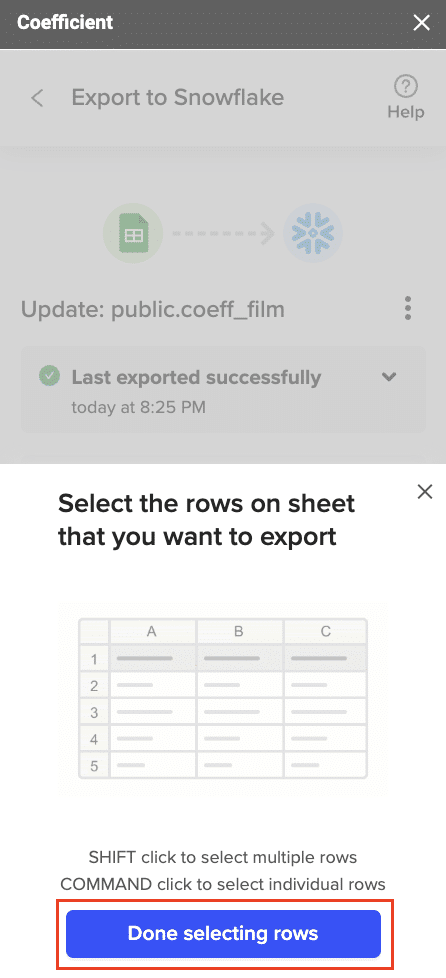
Records that have been updated will have the export status and the date/time stamp of the update in your Sheet.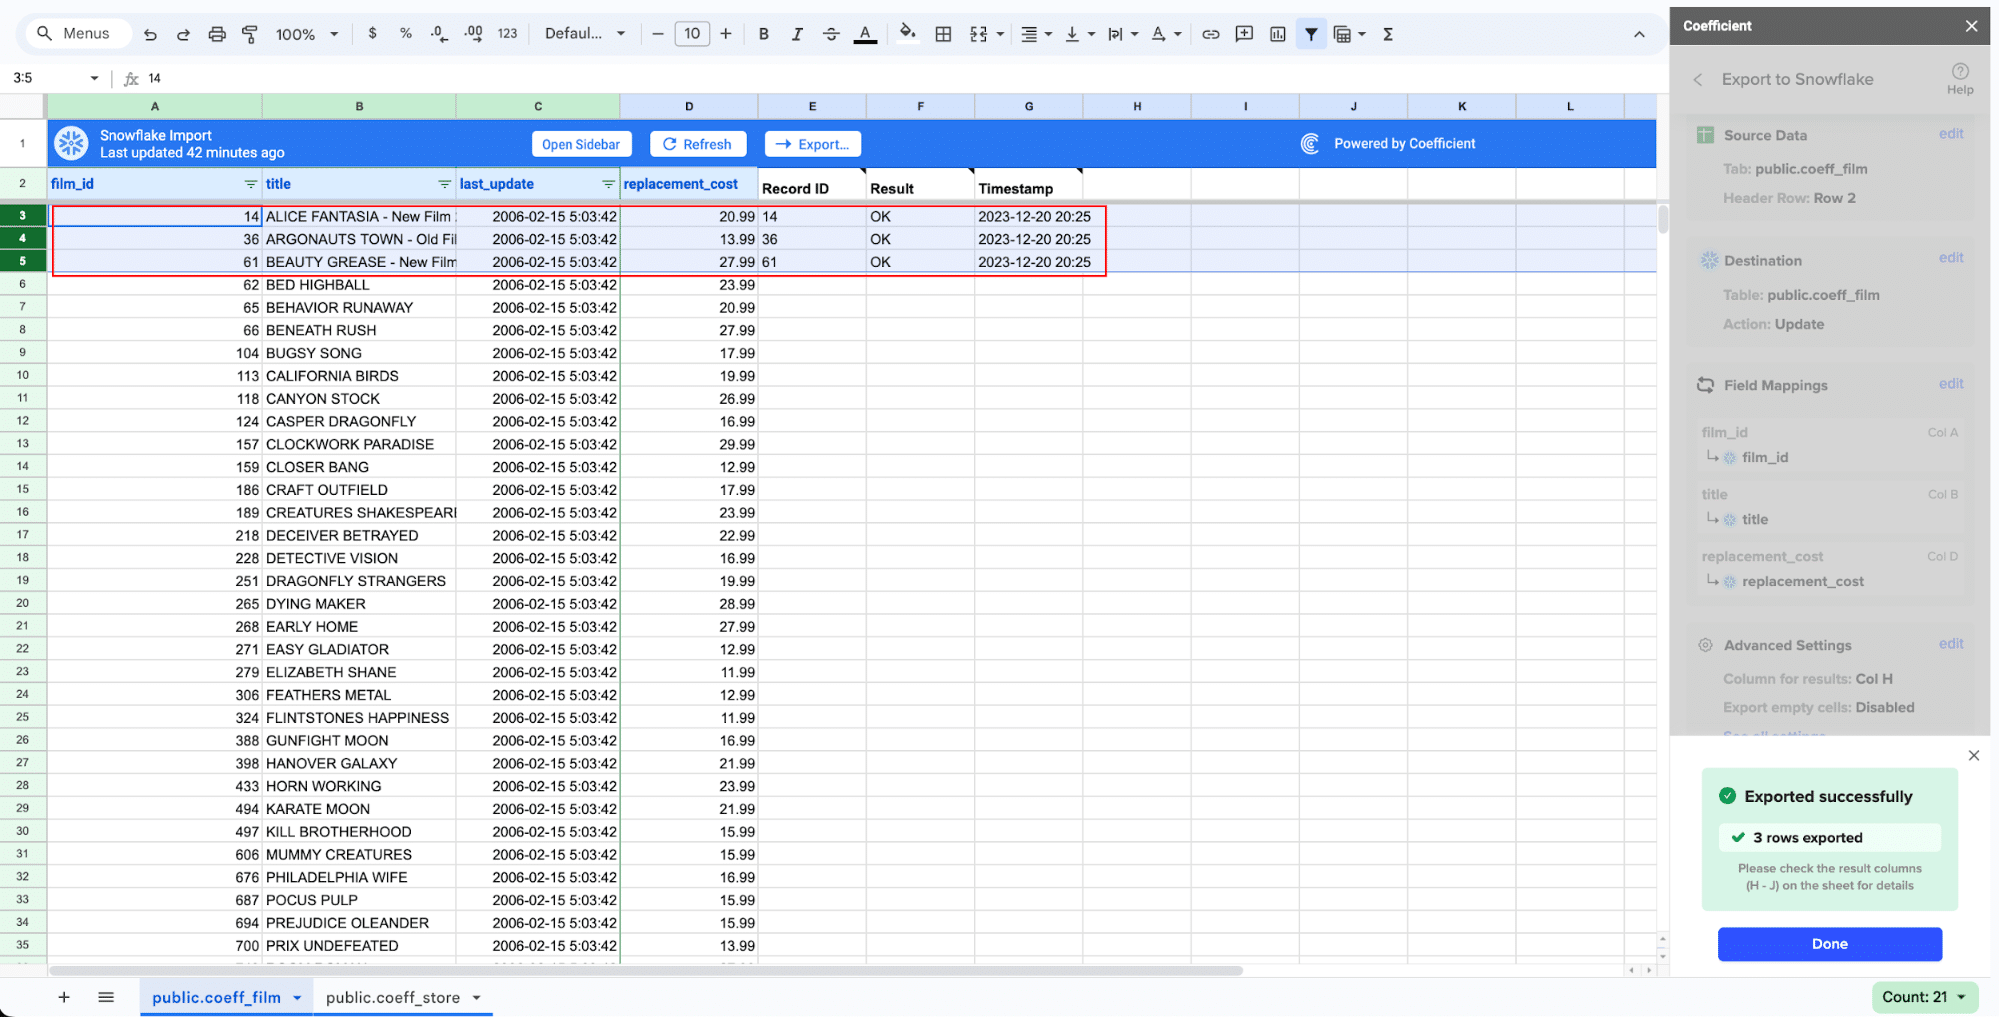
Optimizing Data Loading in Snowflake: Tips and Tricks
When you’re working with Snowflake, optimizing the data loading process can make a big difference in efficiency and performance. Here are some practical tips to help you streamline this process.
Use Compressed File Formats
One straightforward way to speed up data loading is by using compressed file formats like Gzip or Bzip2. These formats reduce the file size, making the data transfer process faster and more efficient.
Split Large Files
Splitting large files into smaller chunks can significantly improve loading times. Smaller files enable parallel loading, allowing Snowflake to process multiple chunks at once. This takes full advantage of Snowflake’s ability to handle concurrent operations efficiently.
Choose the Right File Format
The file format you choose should match your data structure and querying needs. Here are some common options:
CSV and JSON are widely used for their simplicity and ease of use.
For more complex data, consider formats like Parquet or Avro, which offer better schema support and efficient storage.
Leverage Automatic File Format Detection
Snowflake’s automatic file format detection can simplify the loading process by handling mixed file formats automatically. This feature allows you to focus more on your data and less on configuration.
Implement Data Validation and Error Handling
To ensure data integrity, it’s crucial to implement robust data validation and error handling. This can involve checking for schema consistency and detecting anomalies before they affect your database.
Use Snowflake’s Data Transformation Features
Snowflake offers built-in data transformation features, such as SQL functions and User-Defined Functions (UDFs). These tools allow you to clean and transform data as it’s being loaded, which can eliminate the need for separate ETL (Extract, Transform, Load) jobs.
Troubleshooting Errors in Snowflake
Despite your best efforts, errors can still occur during data loading. Common issues include file format problems, data type mismatches, and network connectivity errors. Snowflake provides detailed error messages and logs to help you resolve these issues.
Common Error Handling Techniques
Here are some effective techniques to manage errors:
Use the ON_ERROR Option
The COPY INTO command offers the ON_ERROR option to specify how to handle errors:
CONTINUE: Skip the problematic records and continue the load.
ABORT: Stop the load process when an error occurs.
SKIP_FILE: Skip the entire file with the error and proceed to the next one.
Review Error Messages and Logs
Snowflake’s web interface and SnowSQL provide detailed error messages and logs. Reviewing these can help you identify the root cause of issues quickly and effectively.
Validate and Pre-Process Your Data
Pre-validate and preprocess your data files to ensure they meet the expected format and structure. This proactive step can prevent many common errors and save you time and resources.
Coefficient Simplifies Snowflake Data Loading
Looking for a quick, no-code solution for loading data into Snowflake?
Coefficient enables you to easily move data from your spreadsheets and business apps into Snowflake in just a few clicks. No SQL required.
Get started today for free!
How to Upload Data to Snowflake
Published: December 13, 2024

Ashley Lenz
Product Researcher @ Coefficient


