Loading data into Snowflake is critical for building a powerful cloud data warehouse. But the process can make or break your Data Cloud’s performance.
In this guide, we’ll share advanced techniques and best practices for optimizing data loading in Snowflake. By the end, you’ll be equipped to load data into Snowflake with confidence and efficiency.
Let’s dive in!
Why Optimized Data Loading Matters
The way you load data into Snowflake can significantly impact query performance, data integrity, and overall cost-effectiveness. When you optimize your data loading processes, you can expect:
Faster time-to-insight: With data readily available for analysis, you can uncover actionable insights and make data-driven decisions more quickly. This is especially valuable in fast-paced, competitive business environments where agility is key.
Improved data accuracy and consistency: By ensuring data is loaded correctly and completely, you can have greater confidence in the quality and reliability of your analytics. This is critical for building trust in your data and avoiding costly errors due to inconsistent or inaccurate information.
Lower data storage and compute costs: By using techniques like file compression, columnar storage, and auto-scaling, you can minimize the storage and compute resources required for data loading. This translates to lower costs and more budget available for other data initiatives.
Loading Data into Snowflake: 4 Methods
Snowflake offers several methods for loading data, each with its own use cases and benefits. The main loading methods are:
Web interface: A user-friendly, point-and-click option for loading small to medium-sized files
SnowSQL: A command-line interface for loading data using SQL commands
Snowpipe: A continuous data ingestion service that automatically loads data from cloud storage
Third-party tools: Partner connectors and ETL solutions that simplify and automate data loading
Let’s take a closer look at each method and when to use them.
Method 1: Loading Data via the Web Interface
The Snowflake web interface is a good choice for loading small to medium-sized files (up to about 50 GB) on an ad hoc basis. It provides a simple, point-and-click experience that doesn’t require any coding.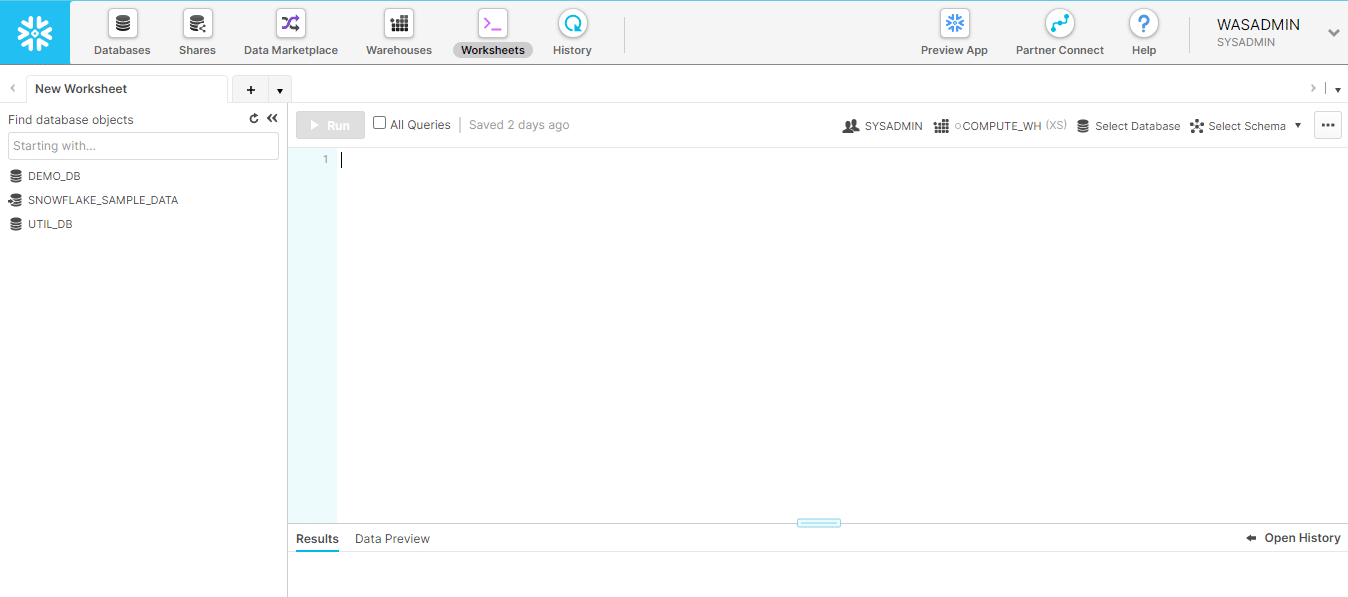
Here’s how to load data via the web interface:
Select the target database, schema, and virtual warehouse for loading the data
Create the destination table using the required SQL commands (e.g., CREATE TABLE)
Navigate to the “Data” tab and select the local file(s) you want to load
Specify the file format, compression type, and other loading options
Preview the data to ensure it looks correct, then click “Load” to start the loading process
Method 2: SnowSQL
SnowSQL is a command-line tool that enables you to load data into Snowflake using SQL commands. It’s a good choice for loading larger files (up to about 1 TB) and for users who are comfortable with SQL.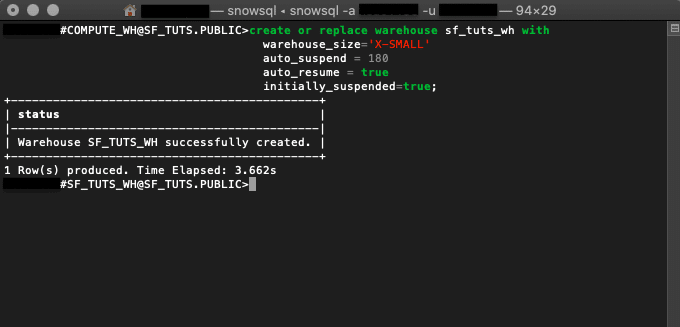
To load data with SnowSQL, you’ll typically follow these steps:
Stage the data files in a Snowflake internal or external stage using the PUT command: PUT file://path/to/file.csv @my_stage;
Copy the staged data into the target table using the COPY INTO command:
COPY INTO my_table
FROM @my_stage/file.csv
FILE_FORMAT = (TYPE = CSV);
Optionally, validate the loaded data by querying the target table and checking row counts, data types, and other attributes.
SnowSQL is best for users who are comfortable with SQL and need more control and flexibility over the data loading process than the web interface provides.
Method 3: Snowpipe
Snowpipe is a serverless data ingestion service that automatically loads data from files as soon as they land in a specified cloud storage location. It’s a good choice for continuous, near-real-time data loading with minimal manual effort.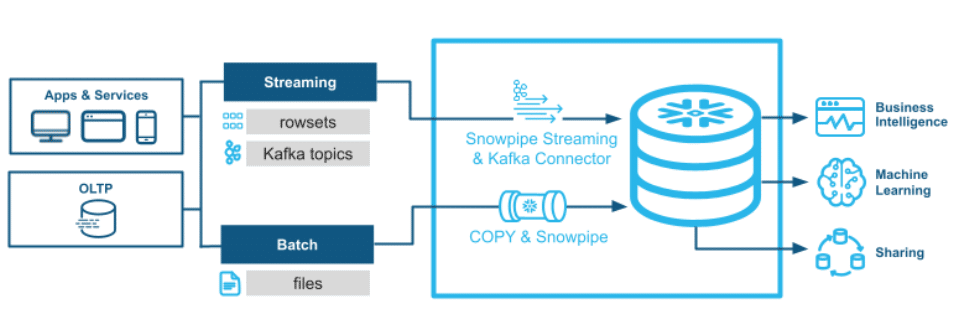
To set up Snowpipe, you’ll need to:
Create an external stage that points to the cloud storage location where data files will be dropped
Define a Snowpipe using the CREATE PIPE command, specifying the target table and external stage
Configure cloud storage event notifications to trigger the Snowpipe when new files arrive
Once configured, Snowpipe will automatically load new data files into the target table as soon as they are detected in the external stage.
This makes it ideal for use cases that require frequent data updates with minimal latency, such as IoT data streaming or clickstream analytics.
Method 4: Your Spreadsheet
Coefficient is a data connector for your spreadsheet. It allows you to pull live data from sources like CRMs, BI solutions and Snowflake, into Excel or Google Sheets in just a few clicks.
With Coefficient, you can load data into Snowflake without leaving your spreadsheet. Here’s how:
Step 1. Install Coefficeint
Before getting started, install Coefficient for your spreadsheet. It only takes a few seconds, and you only have to do it once.
https://www.youtube.com/watch?v=pbXa8zCZ_ss&pp=ygUTaW5zdGFsbCBjb2VmZmljaWVudA%3D%3D
Step 2: Connect to Snowflake
Open the Coefficient Sidebar. Click on the menu icon and select “Connected Sources.”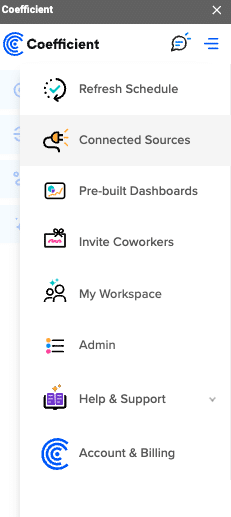
Search for Snowflake and click “Connect”.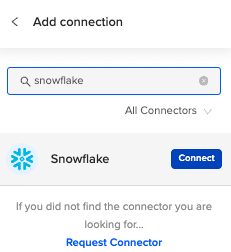
Enter your account credentials (Snowflake Account Name, Database Name, Username, Password, and Warehouse Name) to complete the connection.
Step 3: Prepare Your Data
Ensure your spreadsheet is organized with a header row that matches the Snowflake table fields and is ready for export.
Step 4: Start the Export Process
In the Coefficient sidebar, click on “Export to” and select “Snowflake.”
Choose the tab and the header row containing the Snowflake field headers. Coefficient automatically selects the sheet you have open, but you can choose a different tab if needed.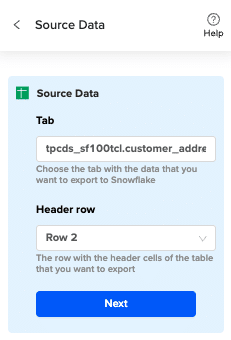
Select the table in your database that you want to update.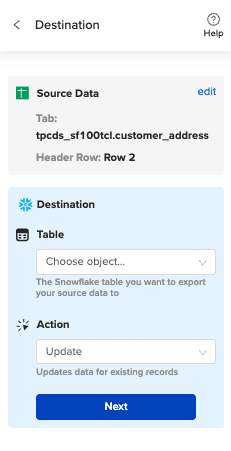
Then select “Insert” from the drop-down.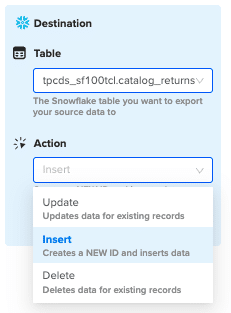
Step 5: Map Fields
Map the sheet columns to Snowflake table fields and click “Save”
Review and confirm your settings. Click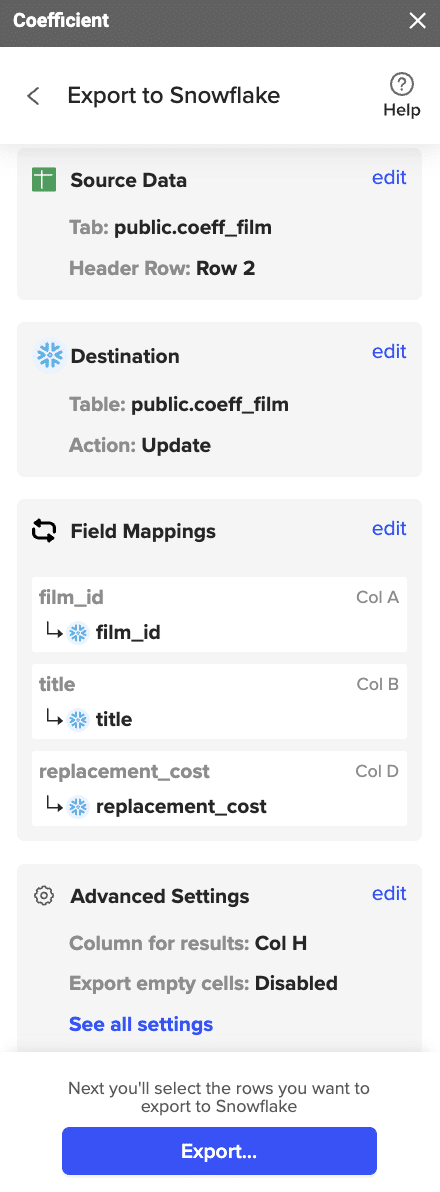
Step 6: Select and Export Rows
Highlight the rows in your sheet that you need to export.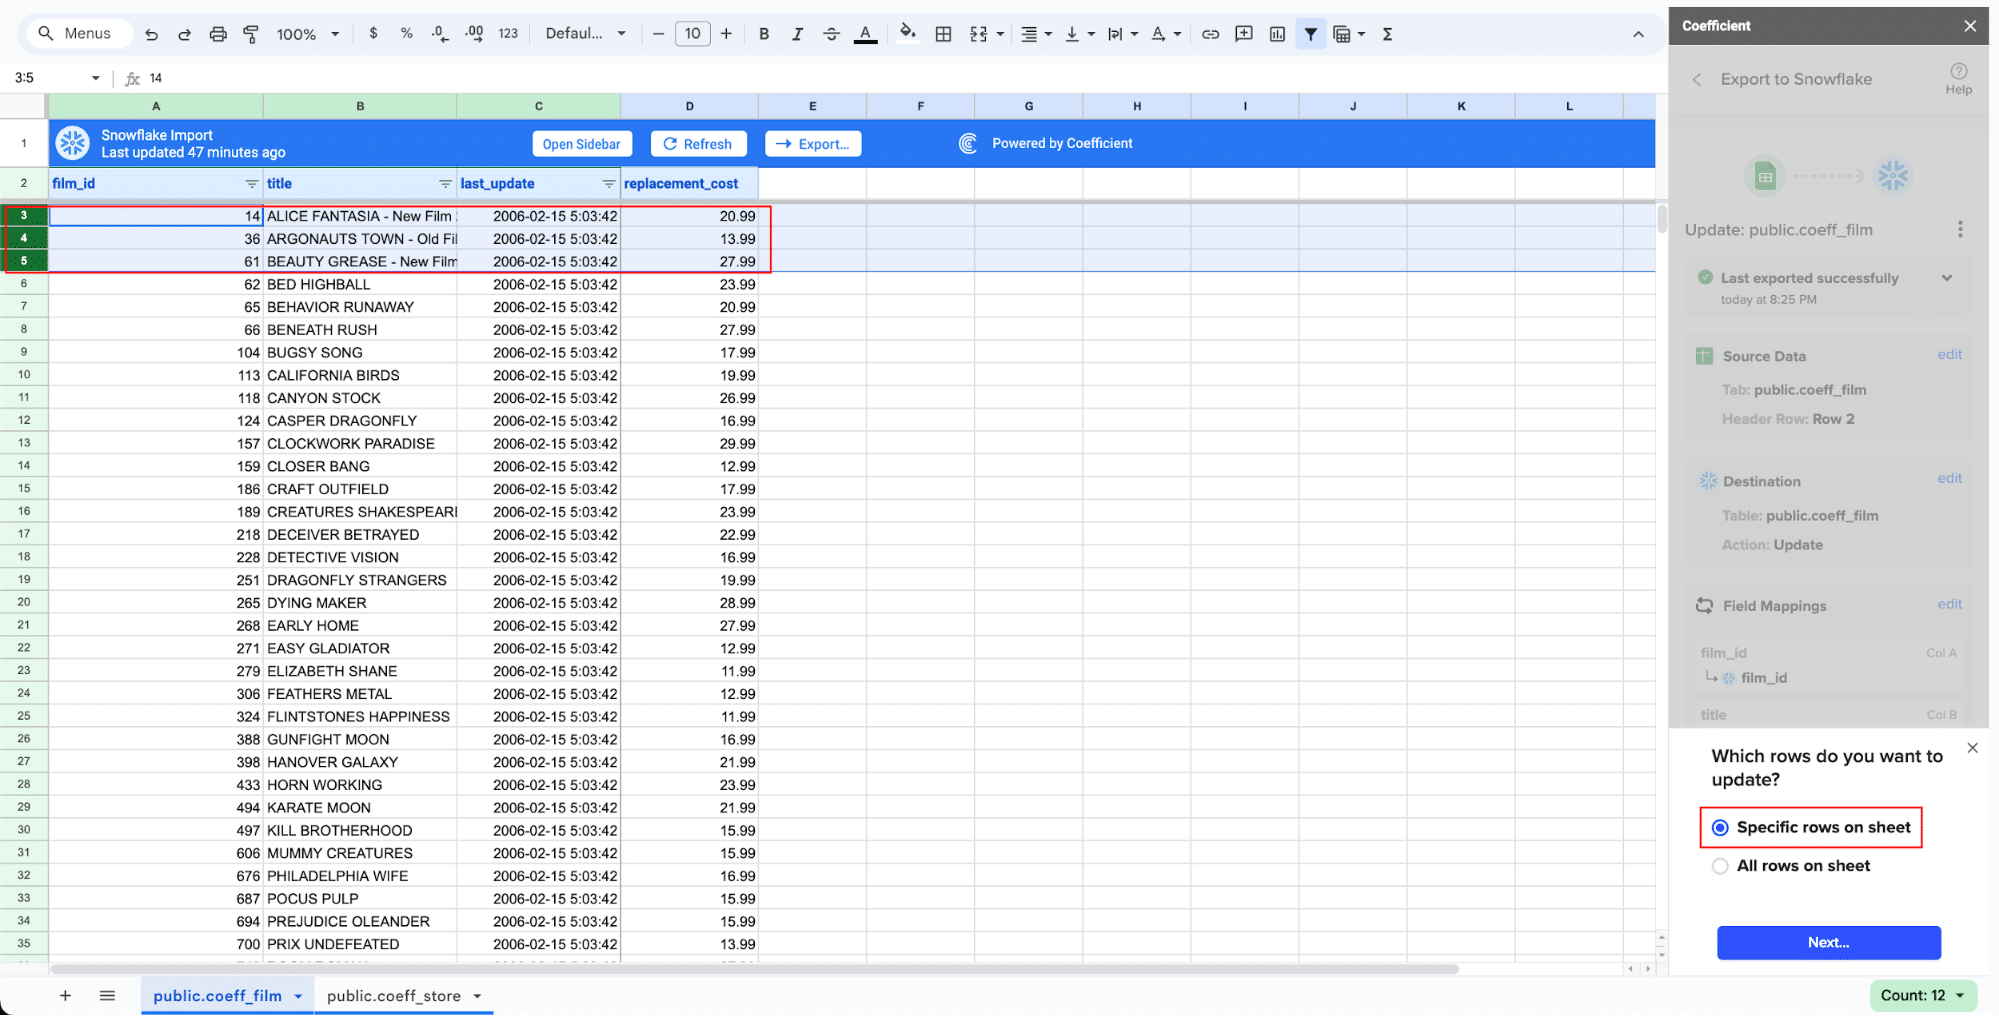
Confirm the rows to update and commit the changes. Note that these actions cannot be undone.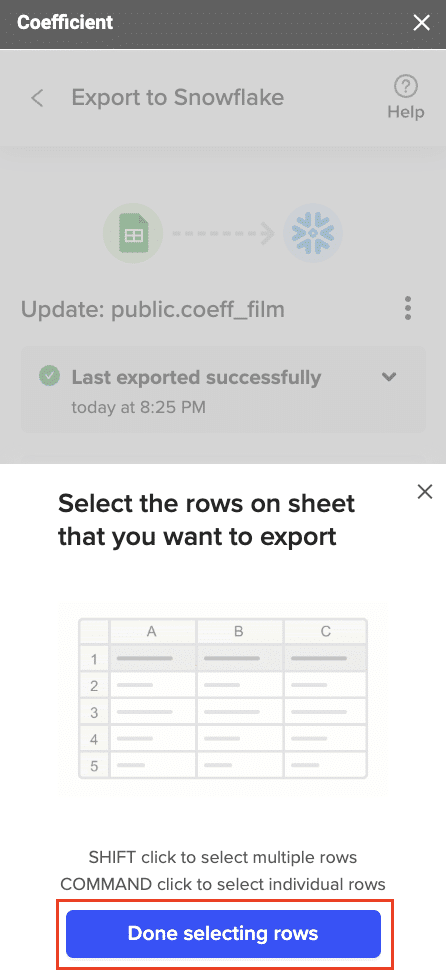
Records that have been updated will have the export status and the date/time stamp of the update in your Sheet.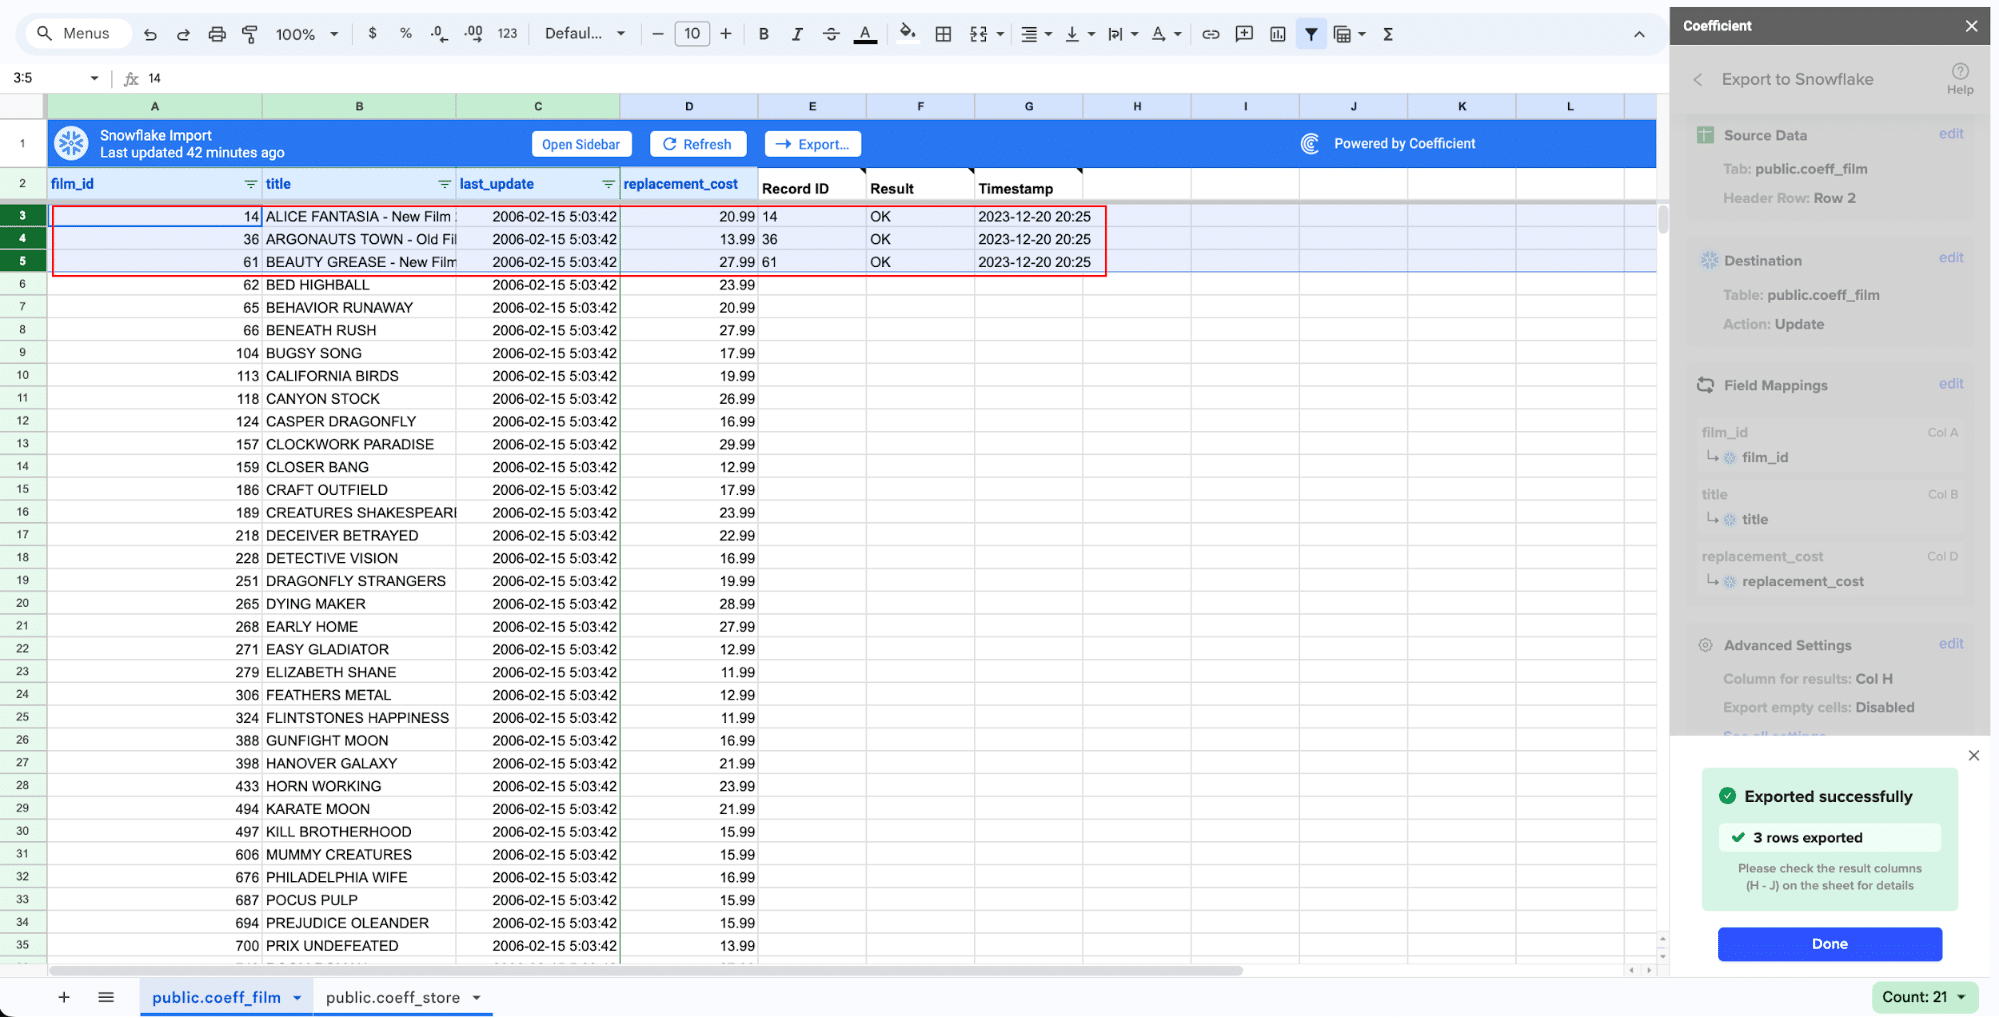
Data Loading Best Practices
To ensure your data loading processes are as efficient and reliable as possible, follow these best practices:
Optimize File Sizes and Formats
Aim for file sizes between 10 MB and 100 MB for optimal loading performance
Avoid loading many small files, which can slow down the loading process; instead, combine small files into larger ones or use compression to reduce file sizes
Use columnar file formats like Parquet or ORC for faster queries and better compression
Prepare and Clean Data
Remove any unnecessary columns or rows from your source data before loading
Handle missing, null, or malformed values appropriately (e.g., by filtering them out or replacing them with default values)
Ensure data types and formats are consistent and match the target table schema
Apply data compression to reduce file sizes and minimize storage costs
Maximize Loading Performance
Use appropriately sized warehouses for the data volume and loading requirements; consider using larger warehouses for initial bulk loads and scaling down for incremental loads
Load data during off-peak hours when possible to minimize the impact on other workloads
Take advantage of Snowflake’s auto-scaling and auto-suspend features to automatically adjust warehouse resources based on the loading workload
Monitor data loading jobs and optimize performance as needed by tuning parameters like the number of loading threads or the size of the warehouse
Validate and Test Loaded Data
Always validate the accuracy and completeness of loaded data by comparing row counts, data types, and values between the source and target
Implement data quality checks to identify and handle issues like missing or inconsistent values
Regularly test the end-to-end data loading process to ensure it remains reliable and performant as data volumes and requirements evolve
Troubleshooting Common Data Loading Issues
Despite your best efforts, you may occasionally encounter issues when loading data into Snowflake. Here are some common problems and how to troubleshoot them:
Data Loading Failures
If a data loading job fails, the first step is to carefully review the error message returned by Snowflake.
Common causes of data loading failures include:
File format mismatch: Ensure the file format specified in the COPY INTO command or file format options matches the actual format of the data file(s)
Incorrect file path, name, or permissions: Double-check that the staged file path and name are correct and that the Snowflake user has the necessary permissions to access the files
Data type mismatches: Ensure the data types of the loaded data match the target table schema; if necessary, use the CAST function to convert data types during loading
Insufficient storage space: Ensure there is enough storage space in the target database and schema to accommodate the loaded data
Slow Data Loading Performance
If data loading is taking longer than expected or consuming too many resources, consider the following optimizations:
Adjust file sizes and formats: Ensure you’re using optimal file sizes (10-100 MB) and columnar formats like Parquet or ORC for better loading performance
Minimize small files: Combine small files into larger ones or use compression to reduce the number of files being loaded
Tune warehouse size: Ensure the warehouse used for data loading is appropriately sized for the data volume and loading requirements; consider using a larger warehouse for initial bulk loads and scaling down for incremental loads
Schedule loads during off-peak hours: If possible, run data loading jobs during off-peak hours to minimize the impact on other workloads and avoid resource contention
Use auto-scaling and auto-suspend: Take advantage of Snowflake’s auto-scaling and auto-suspend features to automatically adjust warehouse resources based on the loading workload, minimizing costs and maximizing efficiency
Data Quality Issues
Even if data loading succeeds, you may encounter data quality issues like missing, inconsistent, or inaccurate values. To identify and resolve these issues:
Validate loaded data: Always validate the accuracy and completeness of loaded data by comparing row counts, data types, and values between the source and target
Implement data quality checks: Use SQL queries or third-party tools to identify and flag data quality issues like null values, duplicates, or out-of-range values
Handle data quality issues: Depending on the nature and severity of the issues, you may need to filter out bad data, replace invalid values with defaults, or refine the data loading process to prevent issues from occurring in the first place
Monitor data quality over time: Regularly monitor the quality of loaded data to identify trends and proactively address issues before they impact downstream analyses or applications
Load Data into Snowflake in Seconds with Coefficient
Loading data into Snowflake is a critical first step in unlocking the full value of your data. By following the best practices and techniques outlined in this guide, you’ll be well-equipped to load data efficiently, reliably, and at scale.
Ready to start loading data into Snowflake? Get started with Coefficient and experience the power of seamless data integration and analysis.
How to Load Data into Snowflake
Published: December 13, 2024

Nikesh Vora
Technical Product Manager @ Coefficient


