TL;DR
Getting your Salesforce opportunities data out for analysis doesn’t have to be challenging. You can automate the entire process or export manually.
- Automated approach: Use Coefficient to pull live opportunity data into Google Sheets/Excel with auto-refresh
- Manual export: Use Salesforce Data Loader to export static CSV files
- Best practices: Secure storage, field validation, and regular backups
Navigating the vast functionalities of Salesforce, especially when it comes to managing your opportunities, can be a daunting task.
However, exporting your opportunities data for analysis, backup, or integration purposes doesn’t have to be.
In this comprehensive guide, we’ll walk you through the process of exporting opportunities from Salesforce with ease, ensuring you have the data you need at your fingertips.
Why Export Opportunities?
Exporting opportunities from Salesforce can be transformative for businesses. It allows for deeper data analysis, integration with other analysis tools, and preparation of comprehensive reports that drive strategic decisions.
Whether you’re looking to assess sales trends, forecast future growth, or integrate Salesforce data with other business intelligence tools, mastering the export process is essential.
The Automated Way: Live Data with Coefficient
Skip the manual export altogether. Coefficient connects your Salesforce opportunities directly to Google Sheets or Excel with live data that updates automatically.
Step 1: Connect Salesforce to Coefficient
Open Coefficient in your spreadsheet. Click “Import from…” and select Salesforce.
Authorize the connection to your Salesforce org. You’ll be redirected to Salesforce to log in and grant permissions.
Step 2: Import Your Opportunities
Choose “From Objects & Fields” to build a custom opportunity report.
Select “Opportunity” as your object. Pick the fields you need – Account Name, Amount, Stage, Close Date, or any custom fields your team uses.
Add filters if needed. Want only this quarter’s opportunities? Filter by Close Date. Need opportunities over $10K? Add an Amount filter.
Click “Save & Run” to pull your data.
Step 3: Set Up Auto-Refresh
Here’s where automation shines. Click on your imported data and select “Schedule Refresh.”
Choose your frequency – hourly, daily, or weekly. Your opportunities data will update automatically without lifting a finger.
Set up Slack or email alerts when new opportunities are added or when deal stages change. Your team stays informed in real-time.
Why this matters: Your data is always current. No more stale reports or missed opportunities because someone forgot to export the latest data.
Step-by-Step Walkthrough on Exporting Opportunities from Salesforce
Preparing to Export
Before diving into the export process, ensure you have the necessary permissions in Salesforce and a clear understanding of the data you need.
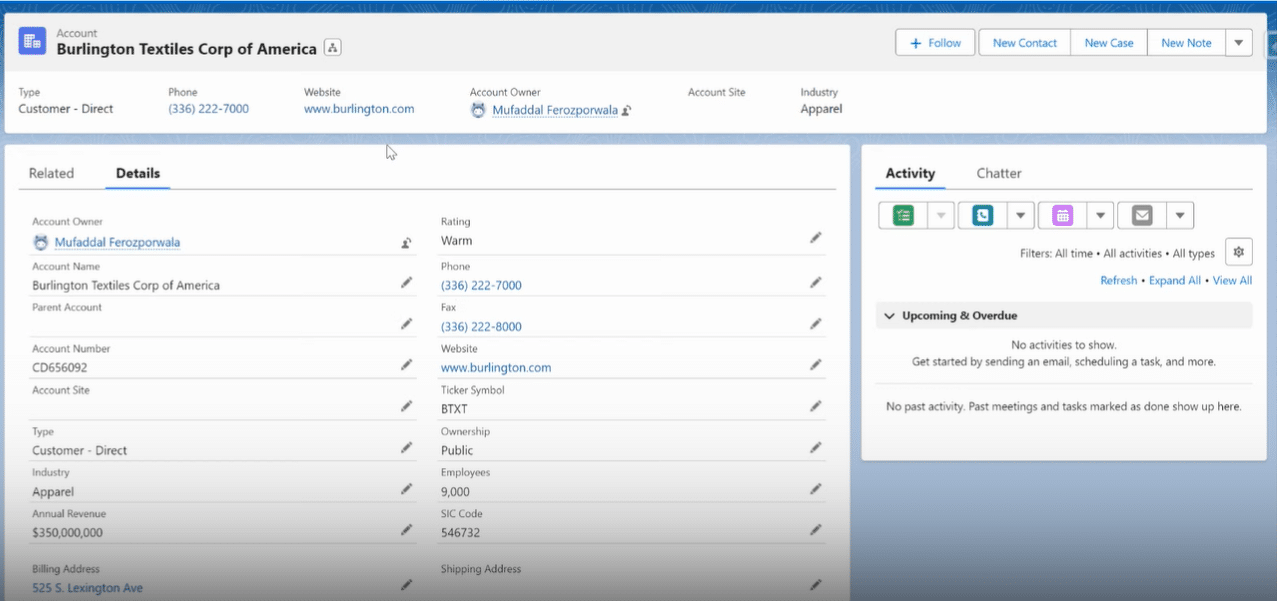
Step 1. Accessing Your Opportunities
Navigate to the Opportunities section within Salesforce to view the data you plan to export. This initial step lays the groundwork for a successful export.
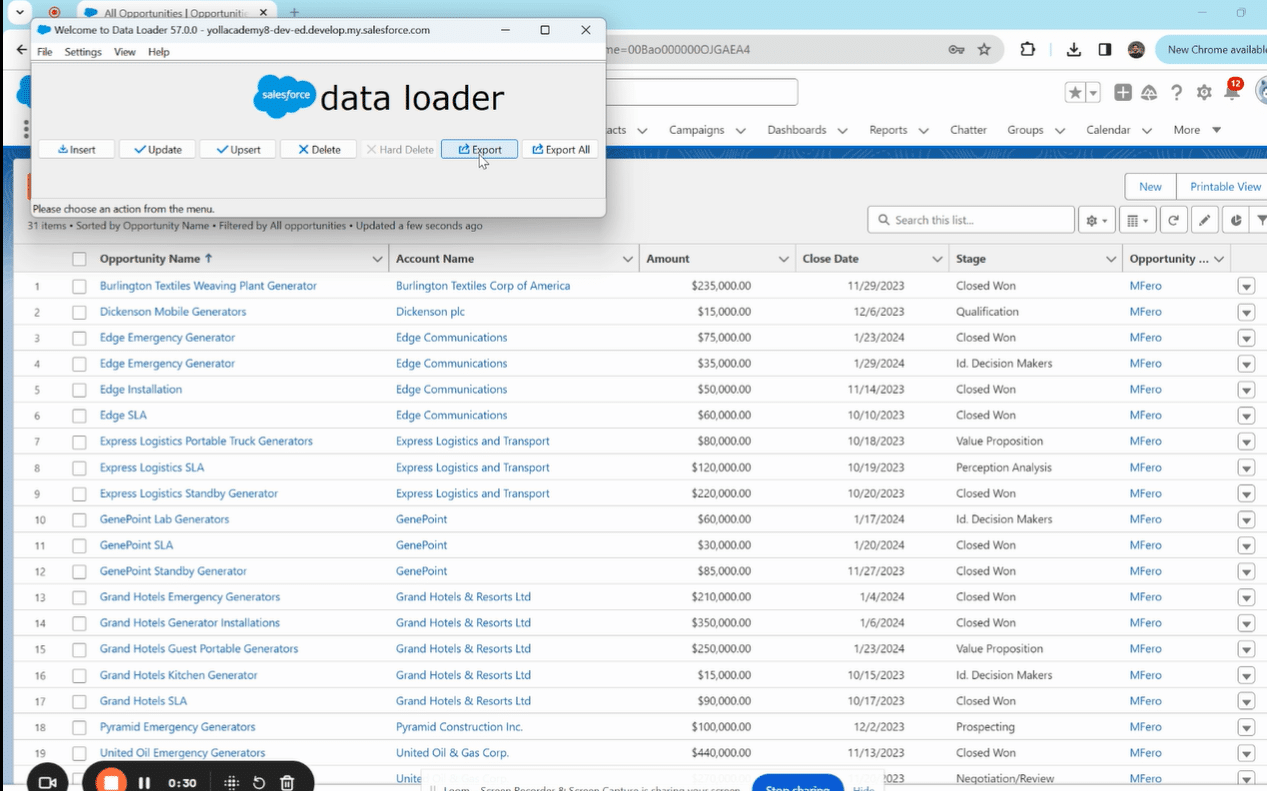
Step 2. Selecting the ‘Opportunity’ Object for Export
In Data Loader, choose ‘Opportunity’ as your object. This specifies the source of the data you’re exporting.
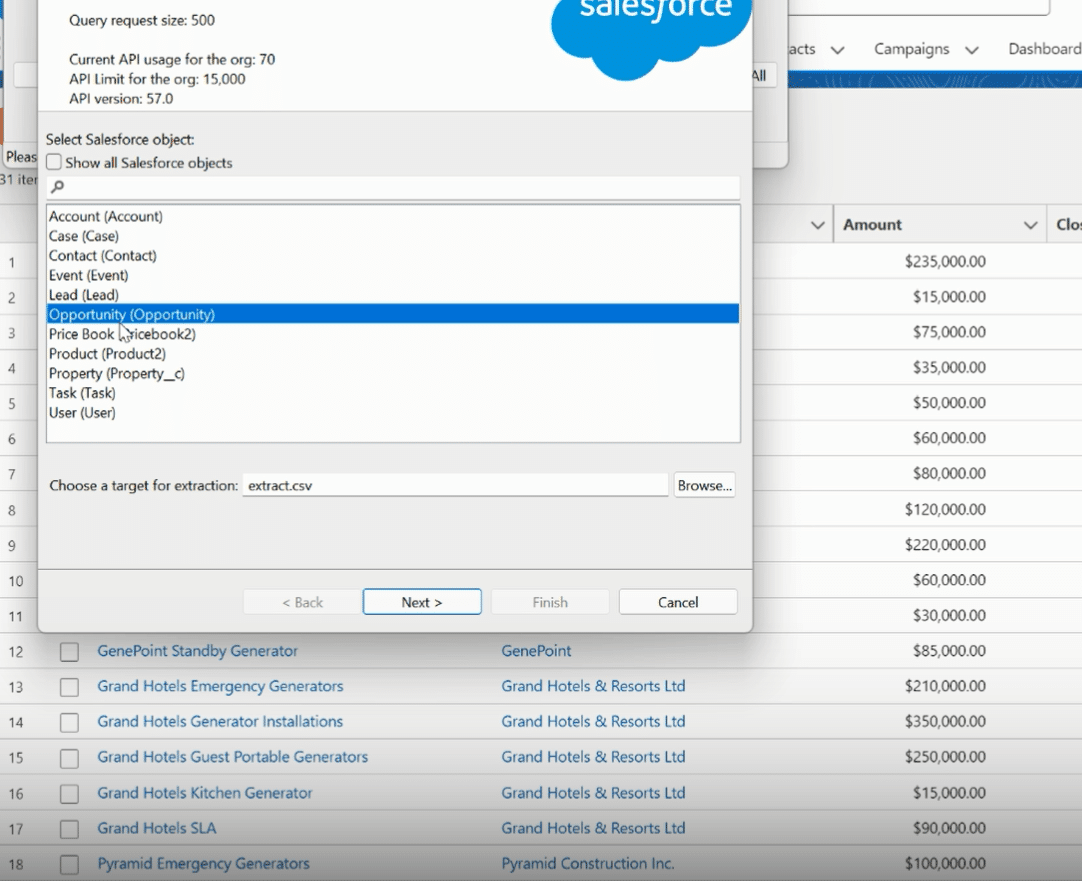
Step 3. Setting the Target Location for Exported Data
Select a target location on your computer to save the exported file.
This is crucial for organizing and accessing your data post-export.
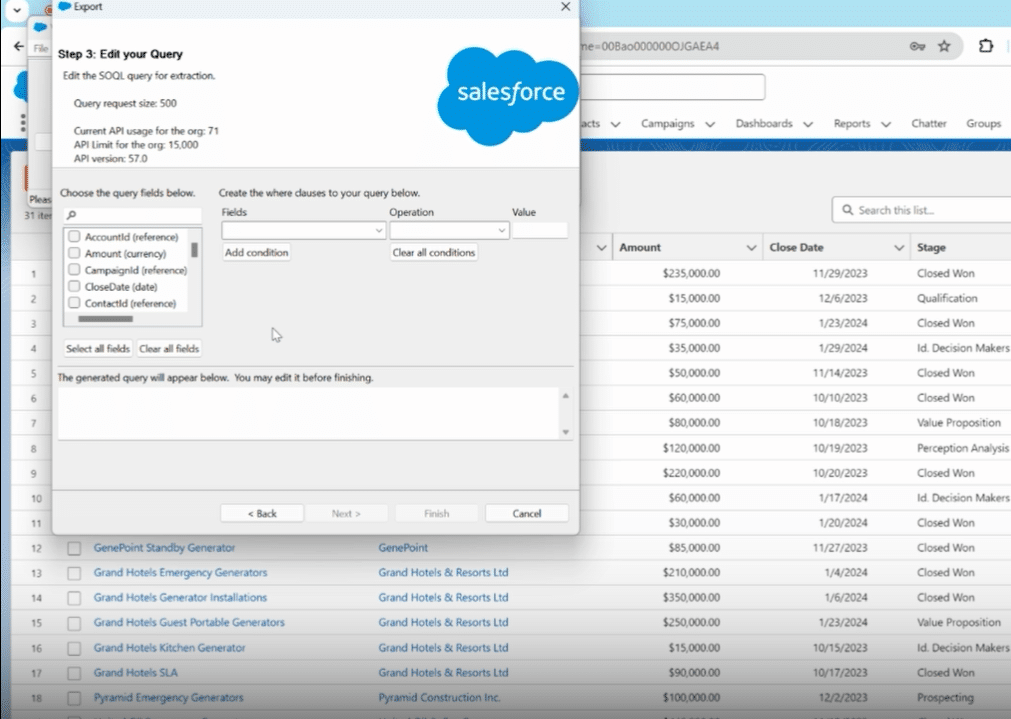
Step 4. Selecting Fields for Export
Customize your export by selecting specific fields or choose ‘Select All Fields’ to export every available data point from the Opportunity object.
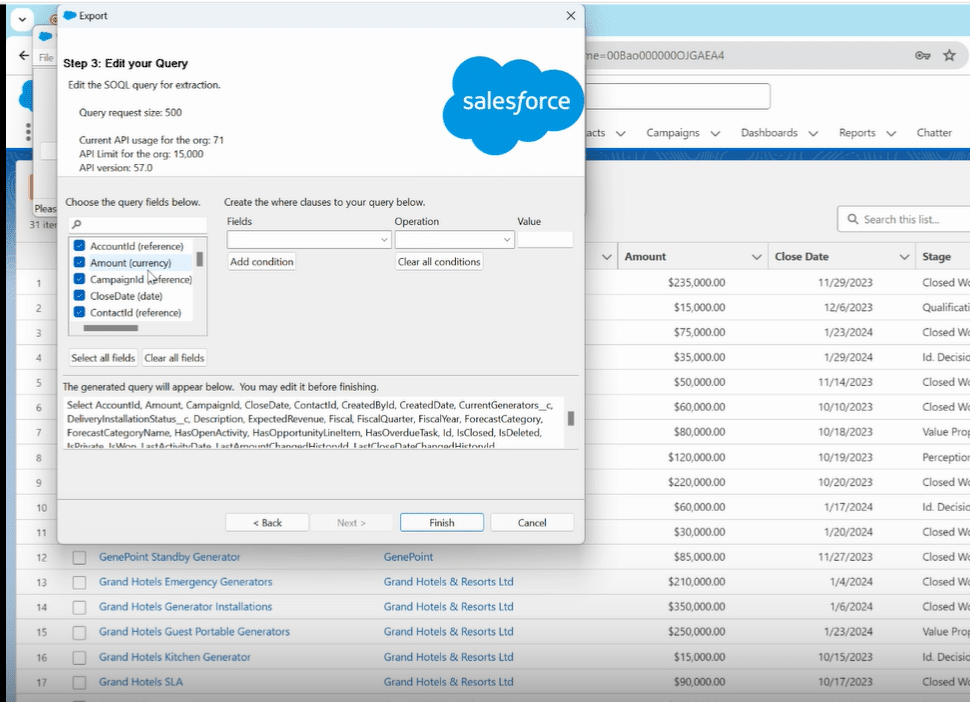
Step 5. Completing the Export
Confirm your selections and initiate the export process. This step moves the selected opportunity data out of Salesforce and into a designated file on your computer.

Step 6. Reviewing the Export Results
Once the export is complete, verify the success of your operation and locate the exported data file on your computer.

Leveraging Third-Party Tools for Enhanced Export Functionality
While Salesforce provides robust tools for exporting data, third-party tools can offer enhanced functionality for specific needs.
For instance, Coefficient is a formidable tool that bridges Salesforce data with Google Sheets or Excel, making data analysis and sharing more accessible and real-time. By integrating Salesforce with Coefficient, users can easily manage, analyze, and share their exported data, enhancing productivity and strategic insight.
Tips and Tricks When Exporting Opportunities
Common Pitfalls and How to Avoid Them.
Data exports can sometimes be tricky. Common issues include exporting incomplete data sets or failing to export certain data fields. To mitigate these risks, always double-check your field selections and filter conditions before initiating an export.
Best Practices for Managing Exported Data.
Once your data is exported, ensure it’s stored securely and organized in a manner that facilitates easy access and analysis. Consider encrypting sensitive data files and backing up important datasets to prevent data loss.
Conclusion
Exporting opportunities from Salesforce can significantly impact your sales analysis and forecasting capabilities.
Ready to take your Salesforce data management to the next level? Explore how Coefficient can streamline your processes and enhance your data analysis capabilities. Get Started with Coefficient.


