Importing Refunds from Square into Excel helps you monitor refund trends and manage customer returns.
This guide covers importing your Refunds object with Coefficient and setting up auto-refresh.
TLDR
-
Step 1:
Install Coefficient, connect Square.
-
Step 2:
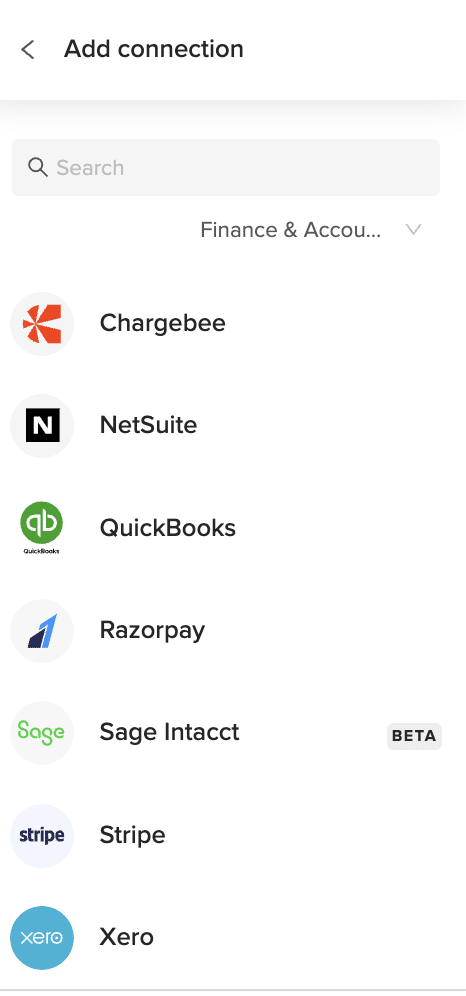
Select “Import from Objects” → “Refunds.”
-
Step 3:
Click “Import,” verify columns.
-
Step 4:
Enable auto-refresh if needed.
Step-by-Step Guide


What Square Data is Imported?
- Disputes
- Bank Accounts
- Gift Cards
- Merchants
- Locations
- Payments
- Invoices
- Payouts
- Customers
- Refunds
How to Import Saved Searches Data from Razorpay into Google Sheets
Need your Razorpay payment data in Google Sheets? Stop the manual exports.
With Coefficient, you can pull Saved Searches and other Razorpay objects directly into your spreadsheets. This keeps your payment analytics fresh and your reporting accurate.
TLDR
-
Step 1:
Install Coefficient from Google Workspace Marketplace
-
Step 2:
Connect your Razorpay account
-
Step 3:
Select Import from Objects and choose Saved Searches
-
Step 4:
Configure any filters and import the data
-
Step 5:
Set up auto-refresh to keep data updated automatically
How to import Razorpay Saved Searches into Google Sheets
Follow these simple steps to get your Razorpay Saved Searches data into Google Sheets using Coefficient.
Step 1: Install Coefficient and connect to Razorpay
- Open Google Sheets
- Click on Extensions > Add-ons > Get add-ons
- Search for “Coefficient” and install from Google Workspace Marketplace
- Once installed, open the Coefficient sidebar by clicking Extensions > Coefficient > Launch
- Click “Import Data” in the sidebar
- Select “Razorpay” from the list of available connectors
- Log in to your Razorpay account when prompted and authorize Coefficient
Step 2: Import Saved Searches data
- In the Coefficient sidebar, select “Import from Objects”
- Browse or search for “Saved Searches” in the objects list
- Select the specific Saved Searches you want to import
- Choose the columns you want to include in your import
- Apply any filters to narrow down the data (optional)
- Click “Import” to bring the data into your Google Sheet
Step 3: Set up auto-refresh (optional)
- Click on the Coefficient menu in your sheet
- Select “Manage Imports”
- Find your Razorpay Saved Searches import
- Click the “Auto-refresh” toggle
- Choose your preferred refresh frequency (hourly, daily, weekly)
- Save your settings

Now your Razorpay Saved Searches data will automatically update according to your schedule. No more manual exports or outdated information.
Analyze your payment data
With your Razorpay data in Google Sheets, you can create custom reports, charts, and dashboards. Track payment trends, monitor refunds, or analyze customer payment behavior—all with live data.
Use Google Sheets’ built-in formulas and functions to perform calculations on your payment data. Or combine it with data from other sources for comprehensive business analytics.
Available Razorpay Data in Coefficient
Reports
- Vendor Payments
- Payouts
- Account Statement
- Purchase Orders
- Vendor Invoices
- Vendor Advances
Objects
- Customers
- Orders
- Settlements
- Documents
- Invoices
- Subscriptions
- Payments
- Refunds
- Payment Links
- Disputes
Take control of your payment data
Importing Razorpay Saved Searches into Google Sheets doesn’t have to be complicated. With Coefficient, you can set up a live connection in minutes.
No more CSV exports. No more outdated data. Just real-time payment information ready for analysis.
Your finance team will thank you for the time saved on manual data work. Your executives will appreciate the accurate, up-to-date reporting.
And you’ll wonder why you didn’t set this up sooner.
Try Coefficient todayReady to streamline your Razorpay reporting?and see how easy it can be to work with live payment data in Google Sheets.
How to Import Saved Searches Data from Razorpay into Excel
Managing payment data from Razorpay in Excel gives you more control over your financial reporting. But manual exports waste time and quickly become outdated.
With Coefficient, you can pull live Saved Searches data directly into your spreadsheets.
TLDR
-
Step 1:
Install Coefficient from the Office Add-ins store
-
Step 2:
Connect your Razorpay account
-
Step 3:
Select Import from Objects and choose Saved Searches
-
Step 4:
Configure filters if needed and import the data
-
Step 5:
Set up auto-refresh to keep your data current
Step-by-step guide to importing Razorpay Saved Searches into Excel
Step 1: Install Coefficient and connect to Razorpay
First, you’ll need to install the Coefficient add-in for Excel and connect it to your Razorpay account.
- Insert Open Excel and click on thetab
- Get Add-ins Clickin the ribbon
- Add Search for “Coefficient” and click
- Once installed, open the Coefficient sidebar
- Import from… Clickto see available data sources
- Razorpay Selectfrom the list of connectors
- Follow the authentication prompts to connect your account
Step 2: Import Saved Searches data
Now that you’re connected, you can import your Saved Searches data from Razorpay.
- Import from Objects In the Coefficient sidebar, select
- Saved Searches Browse or search forin the objects list
- Select the specific saved searches you want to import
- Choose which fields to include in your import
- Apply any filters to narrow down the data (optional)
- Import Clickto bring the data into your Excel worksheet
Step 3: Set up auto-refresh (optional)
Keep your Razorpay data fresh by setting up automatic refreshes.
- ⋮ Click the(three dots) menu next to your imported data
- Schedule Refresh Select
- Choose your preferred refresh frequency (hourly, daily, weekly)
- Set specific times for the refresh to occur
- Save Clickto activate the auto-refresh schedule
Your Razorpay Saved Searches data will now automatically update according to your schedule, ensuring you always have the most current information in your Excel spreadsheet.
Available Razorpay Data in Coefficient
Reports
- Vendor Payments
- Payouts
- Account Statement
- Purchase Orders
- Vendor Invoices
- Vendor Advances
Objects
- Customers
- Orders
- Settlements
- Documents
- Invoices
- Subscriptions
- Payments
- Refunds
- Payment Links
- Disputes
Take control of your Razorpay data
Importing Saved Searches from Razorpay into Excel doesn’t have to be a manual, time-consuming process. With Coefficient, you can create a direct connection that brings your payment data into your spreadsheets in just a few clicks.
The live connection ensures your data stays current, while the auto-refresh feature eliminates the need for manual updates. This means more time analyzing your payment data and less time managing imports and exports.
Plus, with access to both reports and objects from Razorpay, you can build comprehensive dashboards that give you complete visibility into your payment operations.
Whether you’re tracking customer payments, analyzing refund patterns, or monitoring disputes, having your Razorpay data in Excel gives you the flexibility to create custom reports tailored to your specific needs.
Try Coefficient todayReady to streamline your Razorpay reporting?and transform how you work with payment data in Excel.
How to Import Trial Balance Report Data from Razorpay into Google Sheets
Need your Razorpay Trial Balance Report data in Google Sheets? Financial teams often struggle with manual exports that quickly become outdated.
A live connection between Razorpay and Google Sheets solves this problem. Let’s explore how to set this up in minutes.
TLDR
-
Step 1:
Install Coefficient from Google Workspace Marketplace
-
Step 2:
Connect your Razorpay account
-
Step 3:
Select Import from Objects and choose Trial Balance Report
-
Step 4:
Configure any filters and import the data
-
Step 5:
Set up auto-refresh to keep your data updated automatically
How to import Razorpay Trial Balance Report into Google Sheets
Follow these simple steps to get your Razorpay Trial Balance Report data flowing into Google Sheets.
Step 1: Install Coefficient and connect to Razorpay
- Open Google Sheets > Extensions > Add-ons > Get add-ons > Install Coefficient from Google Workspace Marketplace
- Once installed, click on the Coefficient icon in the sidebar
- Select “Import Data” from the menu
- Choose “Razorpay” from the list of available connectors
- Log in with your Razorpay credentials when prompted
Step 2: Import Trial Balance Report data
- After connecting to Razorpay, select “Import from Objects”
- Browse or search for “Trial Balance Report” in the objects list
- Choose the columns you want to import (or select all)
- Apply any filters if needed (date range, account types, etc.)
- Click “Import” to bring the data into your spreadsheet
Step 3: Set up auto-refresh (optional)
- Click on the “…” menu next to your imported data
- Select “Schedule Refresh”
- Choose your preferred frequency (hourly, daily, weekly)
- Set specific times or days for the refresh to occur
- Click “Save” to activate automatic updates
That’s it! Your Razorpay Trial Balance Report data is now in Google Sheets and can be automatically refreshed on your schedule.
Working with your imported Razorpay data
Once your Trial Balance Report data is in Google Sheets, you can:
- Create custom financial reports and dashboards
- Perform trend analysis across different time periods
- Set up conditional formatting to highlight key metrics
- Share insights with stakeholders through charts and visualizations
- Combine with data from other sources for comprehensive reporting
Available Razorpay Data in Coefficient
Reports
- Vendor Payments
- Payouts
- Account Statement
- Purchase Orders
- Vendor Invoices
- Vendor Advances
Objects
- Customers
- Orders
- Settlements
- Documents
- Invoices
- Subscriptions
- Payments
- Refunds
- Payment Links
- Disputes
Take control of your Razorpay financial data
Importing your Razorpay Trial Balance Report into Google Sheets doesn’t have to be a manual, time-consuming process. With Coefficient, you can create a live connection that keeps your financial data fresh and accurate.
This approach eliminates the need for constant exports and imports. Your finance team can focus on analysis rather than data gathering.
The ability to schedule automatic refreshes means your reports are always up-to-date. Set it once and let the system handle the rest.
Coefficient’s integration with Google Sheets makes it easy to build custom reports that combine Razorpay data with information from other systems. This gives you a complete financial picture in one place.
Try Coefficient todayReady to streamline your financial reporting?and transform how you work with Razorpay data.
How to Import Uninvoiced Report from Harvest into Google Sheets
Tracking unbilled time and expenses is crucial for service businesses. But jumping between Harvest and spreadsheets wastes precious hours.
What if your Uninvoiced Report data lived right in Google Sheets? You could analyze it alongside other metrics and build custom reports that matter.
TLDR
-
Step 1:
Install Coefficient from Google Workspace Marketplace
-
Step 2:
Connect your Harvest account
-
Step 3:
Select Import from Reports and choose Uninvoiced Report
-
Step 4:
Configure any filters and import the data
-
Step 5:
Set up auto-refresh to keep your data current
How to import Harvest Uninvoiced Report into Google Sheets
Follow these simple steps to get your Harvest Uninvoiced Report data into Google Sheets using Coefficient.
Step 1: Install Coefficient and connect to Harvest
- Open Google Sheets
- Click Extensions > Add-ons > Get add-ons
- Search for “Coefficient” and install from Google Workspace Marketplace
- Once installed, open the Coefficient sidebar by clicking Extensions > Coefficient > Launch
- In the sidebar, click “Import Data”
- Select “Harvest” from the list of available connectors
- Log in to your Harvest account when prompted
Step 2: Import the Uninvoiced Report
- In the Coefficient sidebar, select “Import from Reports”
- Browse or search for “Uninvoiced Report” in the list
- Select any filters you want to apply (date range, clients, projects, etc.)
- Choose where in your spreadsheet you want the data to appear
- Click “Import” to bring the data into your Google Sheet
Step 3: Set up auto-refresh (optional)
- With your imported data selected, click “Schedule Refresh” in the Coefficient sidebar
- Choose how often you want the data to update (hourly, daily, weekly)
- Set specific times for the refresh to occur
- Click “Save” to activate the auto-refresh schedule
Now your Harvest Uninvoiced Report data will stay current in your Google Sheet without manual updates. This lets you build dashboards and reports that always show the latest information.
What you can do with Harvest data in Google Sheets
Once you’ve imported your Uninvoiced Report, you can:
- Create custom calculations to analyze unbilled time by client or project
- Build visualizations to track unbilled work over time
- Set up alerts for when unbilled time exceeds certain thresholds
- Combine with other financial data for comprehensive reporting
Available Harvest Data in Coefficient
Reports
- Uninvoiced Report
- Projects Time Report
- Team Time Report
- Clients Time Report
- Clients Expense Report
- Projects Expense Report
- Team Expense Report
Objects
- Invoices
- Clients
- Expenses
- Projects
- Client Contacts
Take control of your Harvest data
Importing your Harvest Uninvoiced Report into Google Sheets doesn’t have to be a manual chore. With Coefficient, you can create a live connection that keeps your data fresh and actionable.
The days of CSV exports and manual data entry are over. Now you can focus on analyzing your unbilled time and expenses, not just collecting the data.
Your team deserves better visibility into unbilled work. Your finance department needs accurate, timely data for forecasting. And you need the tools to make it all happen without the headaches.
Ready to transform how you work with Harvest data? Coefficient makes it simple to connect your time tracking data with the flexibility of Google Sheets.
start automatingStop wasting time on manual exports andyour Harvest reporting today.
How to Import Vendor Payments Reports from Razorpay into Excel
Tracking vendor payments is crucial for managing cash flow and vendor relationships. But manually exporting Razorpay reports wastes time and creates stale data.
With Coefficient, you can pull live Vendor Payments reports directly into Excel. No more CSV exports or manual updates.
TLDR
-
Step 1:
Install Coefficient from the Office Add-ins store
-
Step 2:
Connect your Razorpay account
-
Step 3:
Select Import from Reports and choose Vendor Payments
-
Step 4:
Configure any filters and import the data
-
Step 5:
Set up auto-refresh to keep your payment data current
Step-by-step guide to importing Razorpay Vendor Payments reports
Step 1: Install Coefficient and connect to Razorpay
First, add Coefficient to your Excel workbook:
- Insert Open Excel and click on thetab
- Get Add-ins Clickin the ribbon
- Search for “Coefficient” in the Office Add-ins store
- Add Clickto install Coefficient
- Once installed, open the Coefficient sidebar
- Import Data Clickand select Razorpay from the list of connectors
- Follow the authentication prompts to connect your Razorpay account
Step 2: Import Vendor Payments report data
Now that you’re connected, let’s import your Vendor Payments report:
- Import from Reports In the Coefficient sidebar, select
- Browse or search for “Vendor Payments” in the list of available reports
- Select the columns you want to import (or choose “Select All”)
- Apply any filters to narrow down the data (optional)
- Import Clickto pull the data into your Excel worksheet
Step 3: Set up auto-refresh for real-time data
Keep your vendor payment data fresh with automatic updates:
- ⋮ Click the(three dots) menu next to your imported data
- Schedule Refresh Select
- Choose your preferred frequency (hourly, daily, weekly)
- Set specific times for the refresh to occur
- Save Clickto activate the auto-refresh schedule
Your Vendor Payments report will now update automatically according to your schedule. No more manual exports!
Available Razorpay Data in Coefficient
Reports
- Vendor Payments
- Payouts
- Account Statement
- Purchase Orders
- Vendor Invoices
- Vendor Advances
Objects
- Customers
- Orders
- Settlements
- Documents
- Invoices
- Subscriptions
- Payments
- Refunds
- Payment Links
- Disputes
Take control of your payment data
Managing vendor payments is critical for financial health. With Coefficient, you’ve now got a direct pipeline from Razorpay to Excel.
No more manual exports. No more outdated data. Just live payment information that updates automatically.
This setup gives you more than convenience. It creates a foundation for better financial analysis, forecasting, and vendor relationship management.
Your finance team can focus on insights instead of data gathering. Your payment tracking becomes more accurate. And your reporting becomes more timely.
Try Coefficient todayReady to transform how you work with Razorpay payment data?and experience the difference that live, automated data can make for your business.
How to Import Lists Data from ActiveCampaign into Excel
Analyzing ActiveCampaign Lists in Excel helps marketing teams understand audience growth and engagement patterns. With direct data integration, you can track list performance metrics and optimize your segmentation strategy for better campaign results.
TLDR
-
Step 1:
Step 1: Install Coefficient from the Office Add-ins store and connect to your ActiveCampaign account
-
Step 2:
Step 2: Select Import from Objects and choose Lists from ActiveCampaign
-
Step 3:
Step 3: Configure your data preferences and import the lists data
-
Step 4:
Step 4: Set up auto-refresh to keep your list metrics updated automatically
Step-by-Step Guide to Importing ActiveCampaign Lists
Step 1: Install and Connect Coefficient
Before importing ActiveCampaign data, you need to install the Coefficient add-in and connect to your ActiveCampaign account:
- Open Excel and navigate to the Insert tab in the ribbon
- Click on “Get Add-ins” to open the Office Add-ins store
- Search for “Coefficient” and click “Add” to install the add-in
- After installation, the Coefficient sidebar will appear on the right side of your Excel sheet
- Click on “Import from…” in the Coefficient sidebar
- Select “ActiveCampaign” from the list of available connectors
- Follow the authentication prompts to connect your ActiveCampaign account
Step 2: Import Lists Data
Now that you’re connected to ActiveCampaign, you can import your lists data:
- In the Coefficient sidebar, under ActiveCampaign, select “Objects”
- From the available objects list, select “Lists”
- Configure which list attributes you want to include (name, description, subscriber count, growth rate, engagement metrics, etc.)
- Choose any filters you’d like to apply to your data (e.g., specific list types, size thresholds, or creation dates)
- Click “Import” to bring the data into your Excel spreadsheet

Step 3: Set Up Auto-Refresh (Optional)
To ensure your ActiveCampaign lists data stays current:
- With your imported data selected, click on “Automations” in the Coefficient sidebar
- Select “Auto-refresh” to open the scheduling options
- Choose your preferred refresh frequency (hourly, daily, or weekly)
- Set specific times for the refresh to occur
- Click “Save” to activate the auto-refresh schedule
ActiveCampaign Lists FAQ
Deals, Groups, Tags, Users, Accounts, Contacts, Campaigns, Messages, Lists
- In ActiveCampaign, you can access lists by navigating to the Lists section, but the native interface provides limited analytical capabilities for tracking list growth trends, comparing performance across lists, or correlating list metrics with campaign results. Coefficient allows you to import all your ActiveCampaign lists data directly into Excel, where you can create dynamic reports that track subscriber growth, engagement rates, and list health metrics across your entire marketing database.
- How do I get a list of Lists in ActiveCampaign?
- Getting a comprehensive overview of all your lists in ActiveCampaign requires viewing them in the platform's interface, which doesn't facilitate detailed comparative analysis or historical tracking of list performance metrics. With Coefficient, you can import a complete inventory of your lists with detailed performance metrics directly into Excel, enabling you to create dashboards that track list health, growth patterns, and engagement trends over time.
- How to automate importing ActiveCampaign Lists to Excel daily?
- Traditional methods for tracking list metrics over time require either manual exports or creating custom API connections that need technical expertise to implement and maintain. Coefficient's auto-refresh feature provides a user-friendly solution that lets you schedule automatic updates of your lists data at your preferred frequency, ensuring you always have current metrics for making informed segmentation decisions.
- How do I download Lists data from ActiveCampaign?
- ActiveCampaign doesn't offer robust export options for comprehensive lists data with performance metrics, making it difficult to track list health and growth patterns over time. Coefficient creates a direct connection to your ActiveCampaign account that enables you to import detailed lists data into Excel with a single click, including subscriber counts, engagement metrics, and growth trends.
- How to send email alerts about Lists data from ActiveCampaign?
- Setting up monitoring systems for list performance typically requires manual review or creating custom tracking solutions that are difficult to maintain and customize. Coefficient includes sophisticated alert functionality that can monitor your imported lists data and automatically send email notifications when specific conditions are met, such as subscriber count thresholds, unusual unsubscribe rates, or significant changes in list composition.
How to Import Messages Data from ActiveCampaign into Excel
Analyzing ActiveCampaign Messages in Excel helps marketers understand which content resonates with their audience. By tracking message performance metrics, you can refine your communication strategy and improve engagement rates across campaigns.
TLDR
-
Step 1:
Step 1: Install Coefficient from the Office Add-ins store and connect to your ActiveCampaign account
-
Step 2:
Step 2: Select Import from Objects and choose Messages from ActiveCampaign
-
Step 3:
Step 3: Configure your data preferences and import the messages data
-
Step 4:
Step 4: Set up auto-refresh to keep your message performance metrics updated automatically
Step-by-Step Guide to Importing ActiveCampaign Messages
Step 1: Install and Connect Coefficient
Before importing ActiveCampaign data, you need to install the Coefficient add-in and connect to your ActiveCampaign account:
- Open Excel and navigate to the Insert tab in the ribbon
- Click on “Get Add-ins” to open the Office Add-ins store
- Search for “Coefficient” and click “Add” to install the add-in
- After installation, the Coefficient sidebar will appear on the right side of your Excel sheet
- Click on “Import from…” in the Coefficient sidebar
- Select “ActiveCampaign” from the list of available connectors
- Follow the authentication prompts to connect your ActiveCampaign account
Step 2: Import Messages Data
Now that you’re connected to ActiveCampaign, you can import your messages data:
- In the Coefficient sidebar, under ActiveCampaign, select “Objects”
- From the available objects list, select “Messages”
- Configure which message attributes you want to include (subject lines, content details, send dates, associated campaigns, etc.)
- Choose any filters you’d like to apply to your data (e.g., specific message types, time periods, or content themes)
- Click “Import” to bring the data into your Excel spreadsheet
Step 3: Set Up Auto-Refresh (Optional)
To ensure your ActiveCampaign messages data stays current:
- With your imported data selected, click on “Automations” in the Coefficient sidebar
- Select “Auto-refresh” to open the scheduling options
- Choose your preferred refresh frequency (hourly, daily, or weekly)
- Set specific times for the refresh to occur
- Click “Save” to activate the auto-refresh schedule
ActiveCampaign Messages FAQ
Deals, Groups, Tags, Users, Accounts, Contacts, Campaigns, Messages, Lists
- In ActiveCampaign, message data is typically accessed within individual campaigns or automations, making it difficult to analyze content performance across your entire marketing program. This fragmented approach limits your ability to identify messaging patterns that drive engagement. Coefficient allows you to import all your ActiveCampaign messages data directly into Excel, creating a centralized repository where you can analyze subject line effectiveness, content engagement patterns, and message timing across your entire communication strategy.
- How do I get a list of Messages in ActiveCampaign?
- Getting a comprehensive list of all messages from ActiveCampaign requires navigating through multiple campaigns and automations, making it time-consuming to compile a complete inventory of your communication assets. With Coefficient, you can import a consolidated list of all your messages with their associated metrics directly into Excel, enabling you to build a searchable content library that tracks performance and facilitates content reuse strategies.
- How to automate importing ActiveCampaign Messages to Excel daily?
- Traditional methods for tracking message performance over time require manual exports or custom development work to create monitoring systems that capture data as engagement metrics continue to evolve. Coefficient's auto-refresh feature provides an elegant solution that lets you schedule automatic updates of your messages data, ensuring you always have current performance metrics without the need for repetitive manual exports.
- How do I download Messages data from ActiveCampaign?
- ActiveCampaign doesn't offer a direct way to export comprehensive message content data across your entire account, making content analysis and performance tracking challenging. Coefficient creates a direct connection to your ActiveCampaign account that enables you to import detailed message data into Excel with a single click, including content attributes, performance metrics, and associated campaign information.
- How to send email alerts about Messages data from ActiveCampaign?
- Setting up monitoring systems for message performance typically requires manual review of campaign reports or creating complex custom tracking solutions. Coefficient includes sophisticated alert functionality that can monitor your imported messages data and automatically send email notifications when specific conditions are met, such as message engagement thresholds, content performance milestones, or significant deviations from baseline metrics.
How to Import Credit Notes Data from Chargebee into Excel
Importing your Chargebee Credit Notes data into Excel enables more detailed analysis of refunds, credits, and revenue adjustments beyond what Chargebee’s standard reporting provides.
With Coefficient, you can create a live connection that keeps your credit notes data current in Excel without manual exports, ensuring accurate financial reporting and reconciliation.
TLDR
-
Step 1:
Install Coefficient from the Office Add-ins store
-
Step 2:
Connect to your Chargebee account
-
Step 3:
Select and import Credit Notes data
-
Step 4:
Set up auto-refresh to keep data current
Step-by-Step Guide to Importing Chargebee Credit Notes into Excel
Step 1: Install Coefficient in Excel
First, add the Coefficient add-in to Excel:
- Open Excel
- Click on the “Insert” tab in the ribbon
- Select “Get Add-ins”
- Search for “Coefficient” in the Office Add-ins store
- Click “Add” to install the Coefficient add-in
Step 2: Connect to Chargebee and Import Credit Notes Data
After installing Coefficient, follow these steps to import your Credit Notes data:
- Open the Coefficient sidebar in Excel
- Click “Import” to see available data sources
- Select “Chargebee” from the finance connectors list
- Log in with your Chargebee credentials when prompted
- From the object list, select “Credit Notes”
- Choose which credit note fields you want to import (e.g., amount, reason, date, customer)
- Apply any filters if needed (e.g., date range, credit type)
- Click “Import” to bring the data into your spreadsheet

Step 3: Set Up Auto-Refresh (Optional)
To ensure your Credit Notes data remains up-to-date:
- Select your imported Credit Notes data in Excel
- In the Coefficient sidebar, click “Refresh”
- Choose “Set up auto-refresh”
- Select your preferred refresh schedule (hourly, daily, or weekly)
- Configure any notification settings
- Click “Save” to enable automatic updates
Available Chargebee Data
Available Objects
- Customers
- Subscriptions
- Invoices
- Credit Notes
- Gifts
- Hosted Pages
- Orders
- Payment Sources
- Promotional Credits
- Quotes
- Transactions
- Unbilled Charges
How to Import Customers Data from Chargebee into Excel
Importing your Chargebee Customers data into Excel enables deeper analysis of your subscriber base, spending patterns, and customer segments beyond what Chargebee’s standard reporting offers.
With Coefficient, you can establish a live connection that keeps your customer data current in Excel without manual exports, ensuring you always have the latest information for decision-making.
TLDR
-
Step 1:
Install Coefficient from the Office Add-ins store
-
Step 2:
Connect to your Chargebee account
-
Step 3:
Select and import Customers data
-
Step 4:
Set up auto-refresh to keep data current
Step-by-Step Guide to Importing Chargebee Customers into Excel
Step 1: Install Coefficient in Excel
First, add the Coefficient add-in to Excel:
- Open Excel
- Click on the “Insert” tab in the ribbon
- Select “Get Add-ins”
- Search for “Coefficient” in the Office Add-ins store
- Click “Add” to install the Coefficient add-in
Step 2: Connect to Chargebee and Import Customers Data
After installing Coefficient, follow these steps to import your Customers data:
- Open the Coefficient sidebar in Excel
- Click “Import” to see available data sources
- Select “Chargebee” from the finance connectors list
- Log in with your Chargebee credentials when prompted
- From the object list, select “Customers”
- Choose which customer fields you want to import (e.g., name, email, created date, billing info)
- Apply any filters if needed (e.g., active customers only)
- Click “Import” to bring the data into your spreadsheet
Step 3: Set Up Auto-Refresh (Optional)
To ensure your Customers data remains up-to-date:
- Select your imported Customers data in Excel
- In the Coefficient sidebar, click “Refresh”
- Choose “Set up auto-refresh”
- Select your preferred refresh schedule (hourly, daily, or weekly)
- Configure any notification settings
- Click “Save” to enable automatic updates
Available Chargebee Data
Available Objects
- Customers
- Subscriptions
- Invoices
- Credit Notes
- Gifts
- Hosted Pages
- Orders
- Payment Sources
- Promotional Credits
- Quotes
- Transactions
- Unbilled Charges