Are you ready to unlock the full potential of your NetSuite data? Whether you’re a seasoned NetSuite pro or just getting started, mastering data export is crucial for making informed business decisions.
In this guide, we’ll walk you through three game-changing methods to export NetSuite data, each tailored to different needs and skill levels.
#1 Coefficient: Streamlined NetSuite Data Export
Coefficient offers a user-friendly solution for exporting NetSuite data to popular spreadsheet applications like Google Sheets and Excel. This method stands out for its automation capabilities and real-time data synchronization.
Benefits of Using Coefficient
- Real-time data synchronization ensures you’re always working with the most up-to-date information
- No coding required, making it accessible to users of all technical levels
- Automated scheduling of exports saves time and reduces manual effort
- Data transformation capabilities allow you to clean and format data during the export process
Step-by-Step Guide to Export NetSuite Data with Coefficient
Step 1. Install Coefficient
For Google Sheets
- Open a new or existing Google Sheet, navigate to the Extensions tab, and select Add-ons > Get add-ons.
- In the Google Workspace Marketplace, search for “Coefficient.”
- Follow the prompts to grant necessary permissions.
- Launch Coefficient from Extensions > Coefficient > Launch.
- Coefficient will open on the right-hand side of your spreadsheet.

For Microsoft Excel
- Open Excel from your desktop or in Office Online. Click ‘File’ > ‘Get Add-ins’ > ‘More Add-Ins.’
- Type “Coefficient” in the search bar and click ‘Add.’
- Follow the prompts in the pop-up to complete the installation.
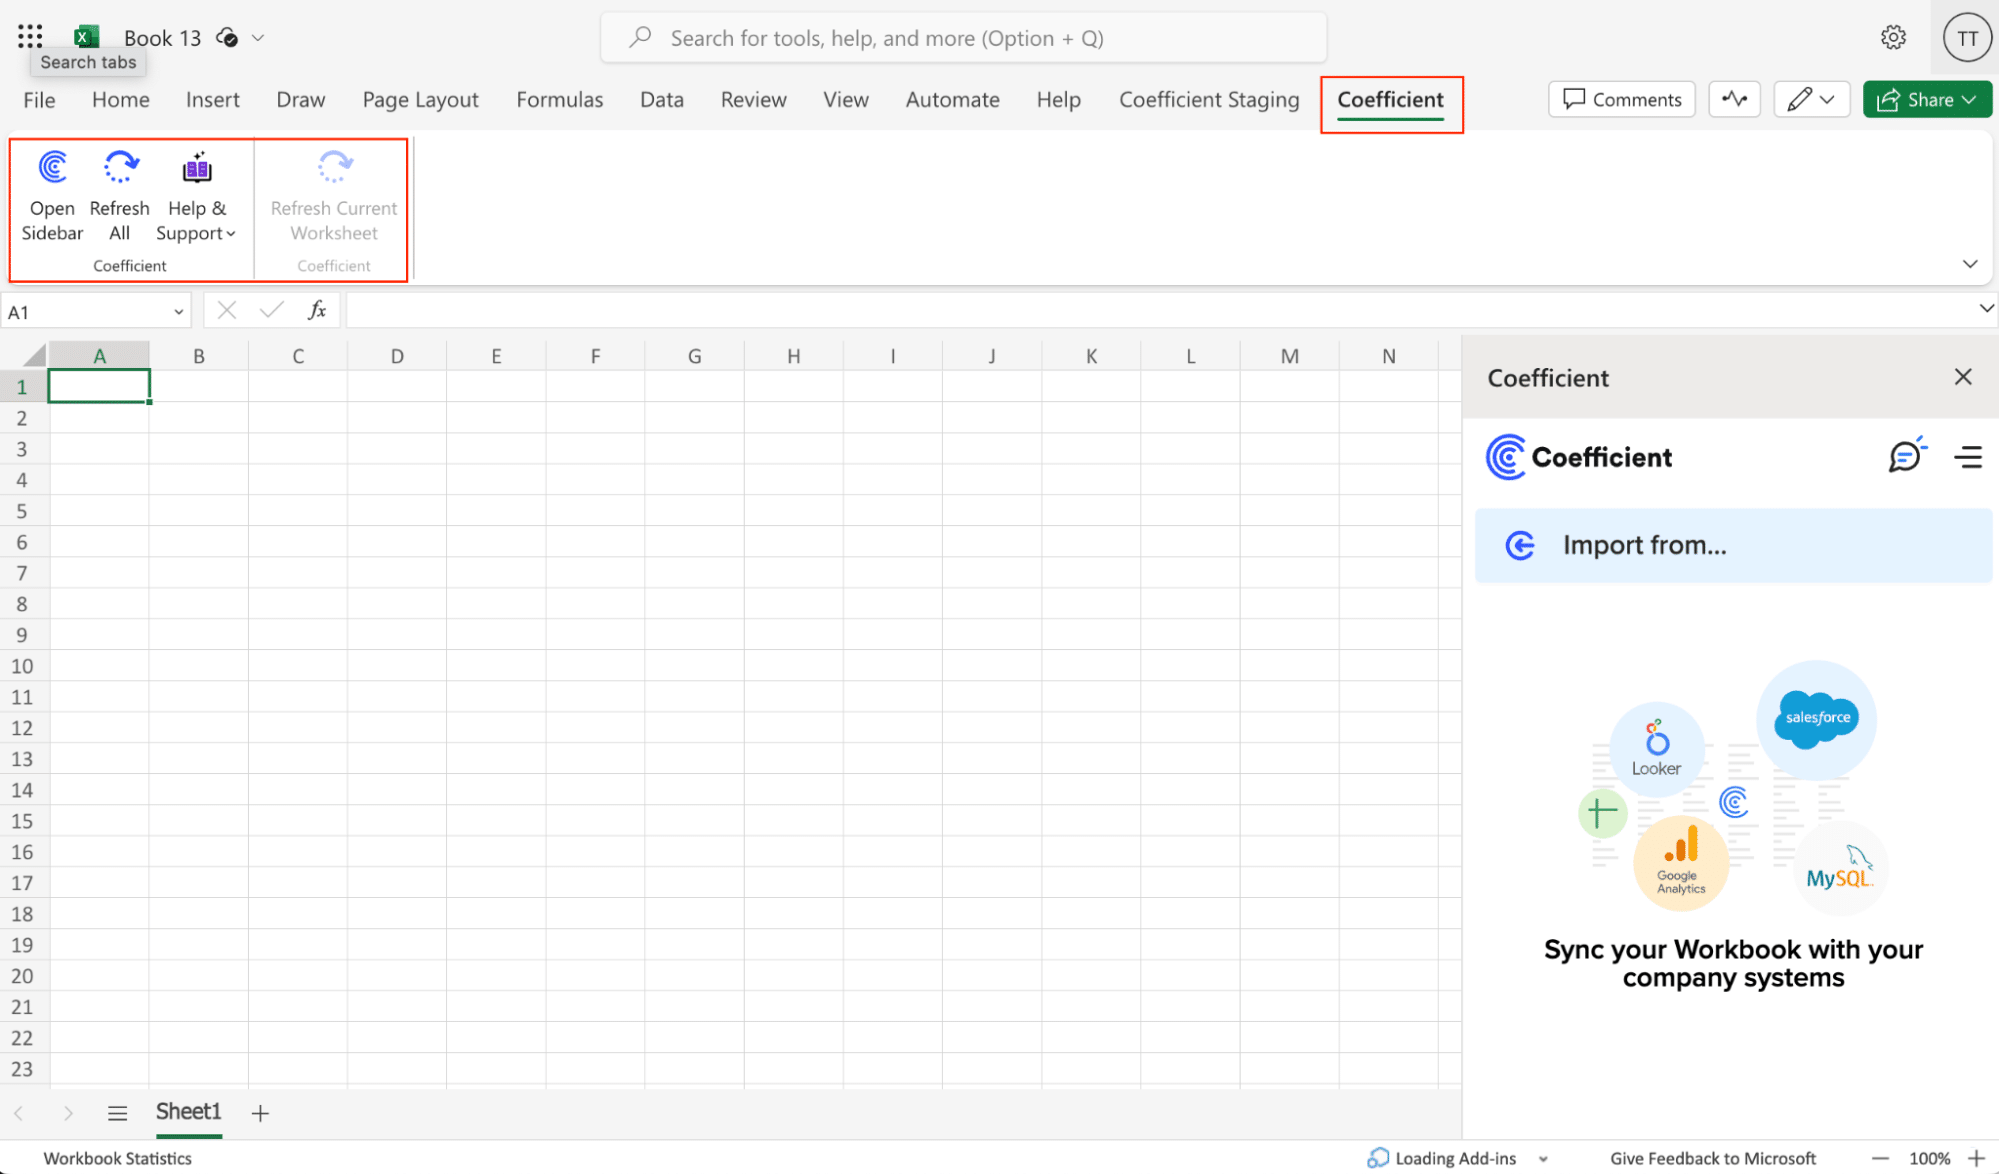
- Once finished, you will see a “Coefficient” tab in the top navigation bar. Click ‘Open Sidebar’ to launch Coefficient.
Step 2. Connect NetSuite to Coefficient
Select “Import from…” in Coefficient’s side menu.

Click “Add Connection” and search for “NetSuite.” Click “Connect” to continue.

Choose your account from the drop-down and click “Authorize.”

You will be redirected to a NetSuite login page.
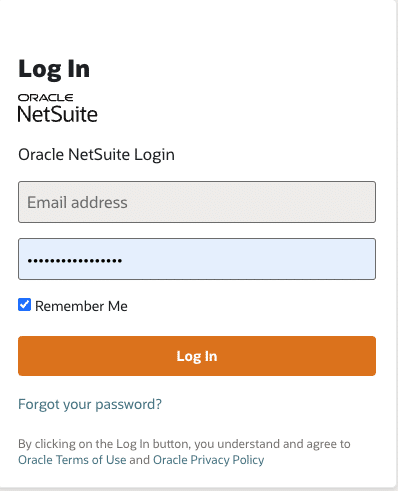
Enter your credentials, review the permissions, and click “Continue.”

Once confirmed, you will be redirected back to Coefficient to begin your first import with NetSuite.
Step 3. Export your NetSuite data to your spreadsheet
There are several ways to import data from NetSuite using Coefficient:
- Records & Lists
- Datasets
- Saved Searches
- SuiteQL Query
Each method follows a similar process:
Navigate back to NetSuite from the Coefficient Sidebar > Import from… > NetSuite.
Select “Records & Lists” from the menu.

Configure your import settings, such as selecting fields, adding filters, and setting limits.
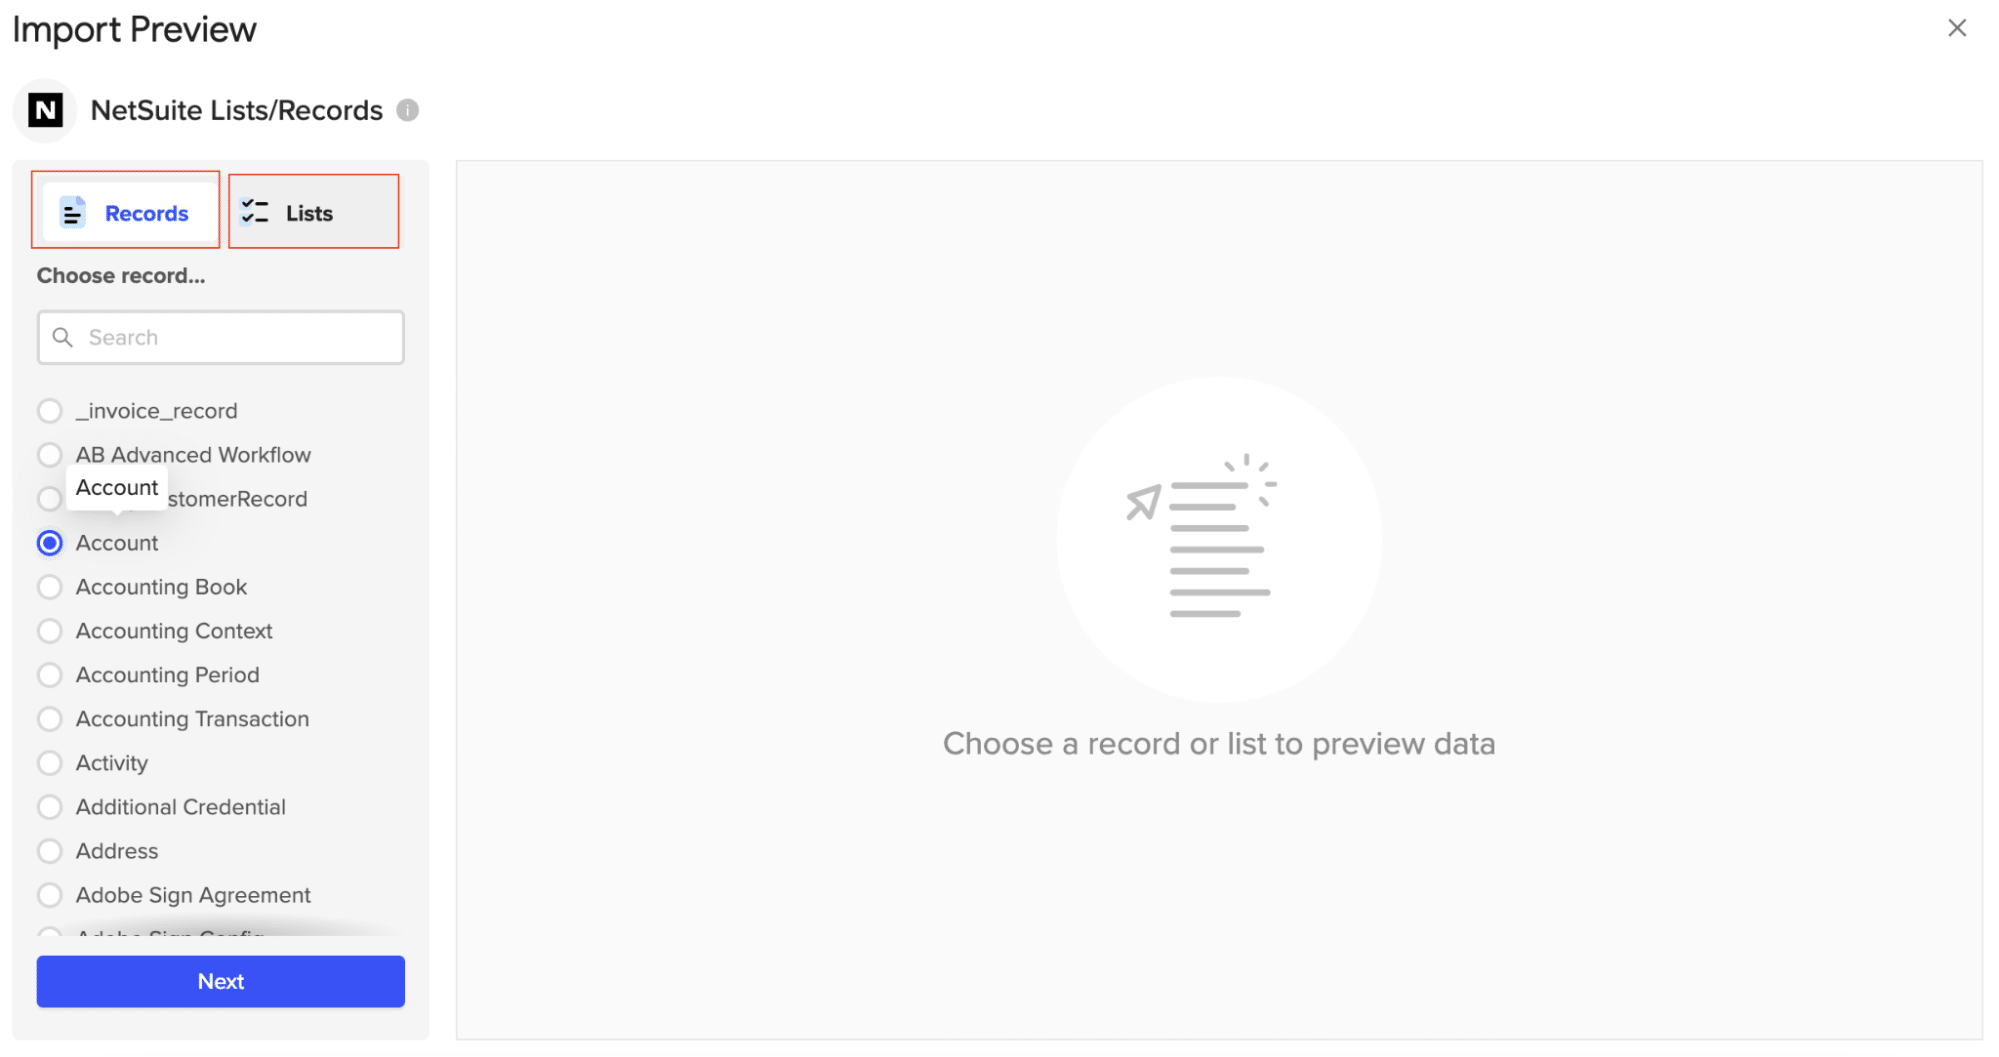
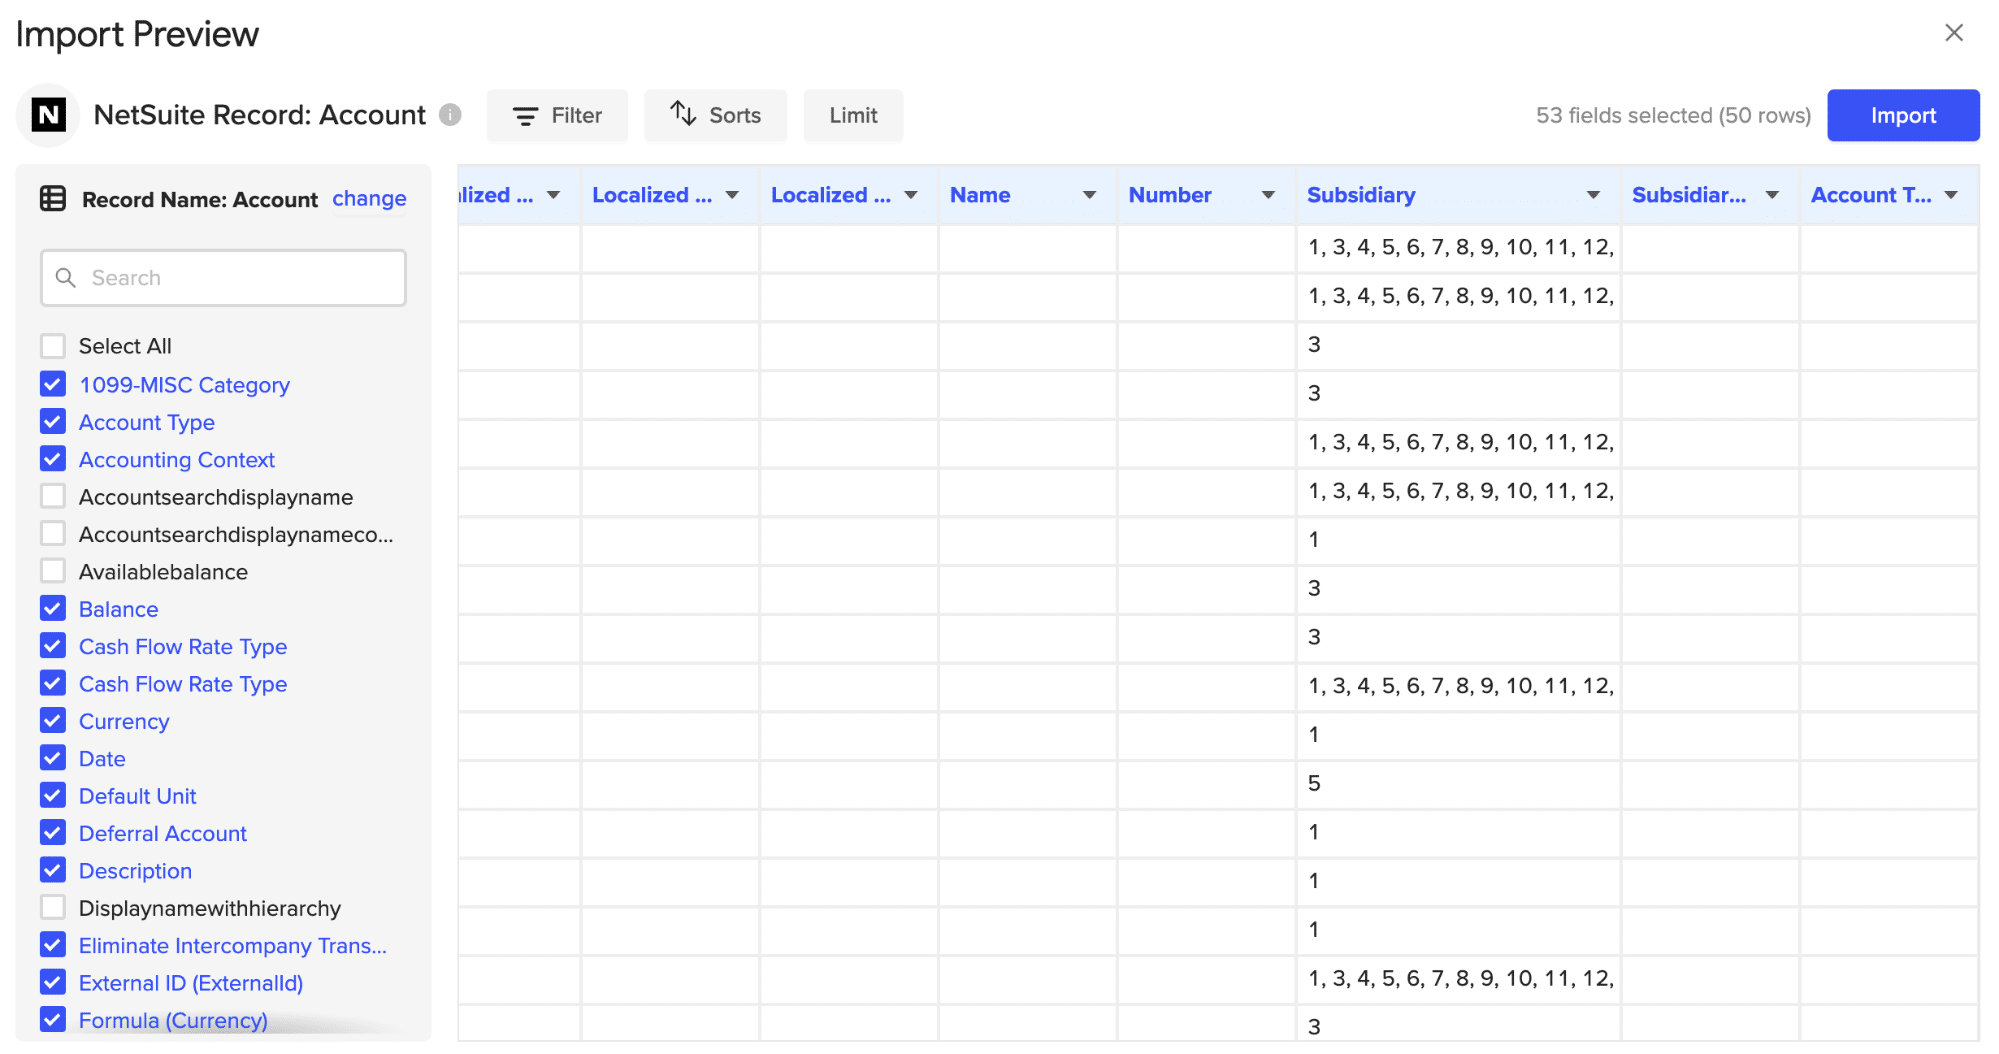
You can customize your import by adding filters, sorts, and limits here as well. When you are done, click “Import.”
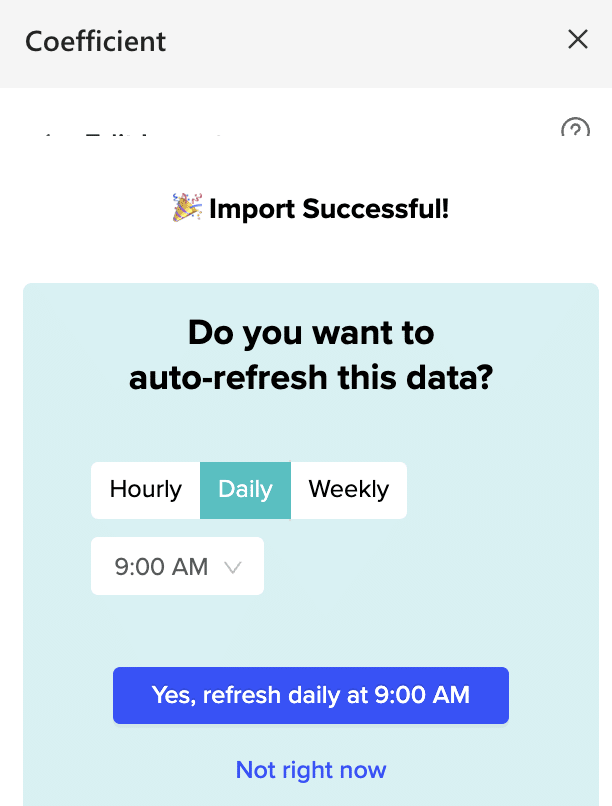
Step 4. Set up an automation schedule (if desired)
To keep your data up-to-date automatically, configure an export schedule.
- Navigate to the “Automation” section in Coefficient
- Click on “Create New Schedule”
- Set the frequency of updates (e.g., hourly, daily, weekly)
- Specify the time and days for the automated exports to run
- Save your automation settings
For more detailed information on connecting NetSuite to specific platforms, check out these resources:
- Connect NetSuite to Google Sheets
- Connect NetSuite to Excel
- NetSuite Integration for Google Sheets
- NetSuite Integration for Excel
#2 Native NetSuite Export Options
NetSuite offers built-in export features that allow users to extract data directly from the platform. These options include the built-in CSV export and Saved Searches.
CSV Export
The built-in CSV export feature in NetSuite provides a straightforward way to export data for various record types.
Step 1. Navigate to the export section
- Log in to your NetSuite account
- Go to Setup > Import/Export > Export Tasks > Full CSV Export
Step 2. Select data types to export

Stop exporting data manually. Sync data from your business systems into Google Sheets or Excel with Coefficient and set it on a refresh schedule.
Get Started
- In the export interface, you’ll see a list of available record types
- Check the boxes next to the record types you want to export
- Use the search function to find specific record types if needed
Step 3. Configure export settings
- Choose the file format (CSV is the default)
- Select the date range for the data you want to export
- Decide whether to include header rows in your export file
- Choose the character encoding (UTF-8 is recommended for most cases)
Step 4. Generate and download CSV file
- Click the “Generate Export” button
- Wait for NetSuite to process your request (this may take some time for large datasets)
- Once the export is ready, click the “Download” button to save the CSV file to your computer
Saved Searches
Saved Searches offer a more flexible approach to exporting specific data sets from NetSuite.
Step 1. Navigate to the Saved Searches section
- Go to Lists > Search > Saved Searches
- Click on “New” to create a new saved search
Step 2. Define search criteria and results
- Select the record type you want to search (e.g., Transactions, Customers, Items)
- Set up your search criteria using the available filters
- Choose the fields you want to include in your search results
- Arrange the columns in your desired order
Step 3. Save the search
- Click “Save” or “Save & Run”
- Give your saved search a descriptive name
- Set permissions for who can access and run this search
Step 4. Export results to desired format
- Run your saved search
- In the search results view, click on “Export”
- Choose your preferred format (CSV, Excel, or PDF)
- Configure any additional export options (e.g., file name, column separator)
- Click “Export” to download the file
Advantages and Disadvantages of Native NetSuite Exports
Advantages:
- No additional tools required, reducing dependency on third-party software
- Customizable exports through Saved Searches allow for tailored data extraction
- Direct access to all NetSuite data types ensures comprehensive coverage
- Familiar interface for NetSuite users minimizes the learning curve
Disadvantages:
- Manual process can be time-consuming, especially for frequent exports
- Limited to specific data types in the built-in CSV export feature
- Lack of real-time updates means exported data may quickly become outdated
- No automated scheduling options for recurring exports
#3 SuiteAnalytics Connect
SuiteAnalytics Connect provides direct access to the NetSuite database, offering a powerful solution for advanced users and developers who need granular control over data exports.
Overview of SuiteAnalytics Connect
SuiteAnalytics Connect allows you to connect to your NetSuite account using ODBC (Open Database Connectivity) or JDBC (Java Database Connectivity) drivers. This method enables you to write custom SQL queries to extract precisely the data you need.
Steps to Use SuiteAnalytics Connect
- Before you begin, ensure you have downloaded and installed the latest SuiteAnalytics Connect ODBC driver and configured it to connect to your NetSuite data source.
- In Microsoft Excel, go to the Data tab and select New Query > From Other Sources > From ODBC.

- In the connection string field, type DSN=NetSuite; to use the Connect driver DSN for connection.
- Expand the SQL Statement area and enter your SQL query. For example, to run a query over all columns in the Service Items table, enter select * from service_items;.

- Click OK, provide your NetSuite login and password if prompted, and click Connect.
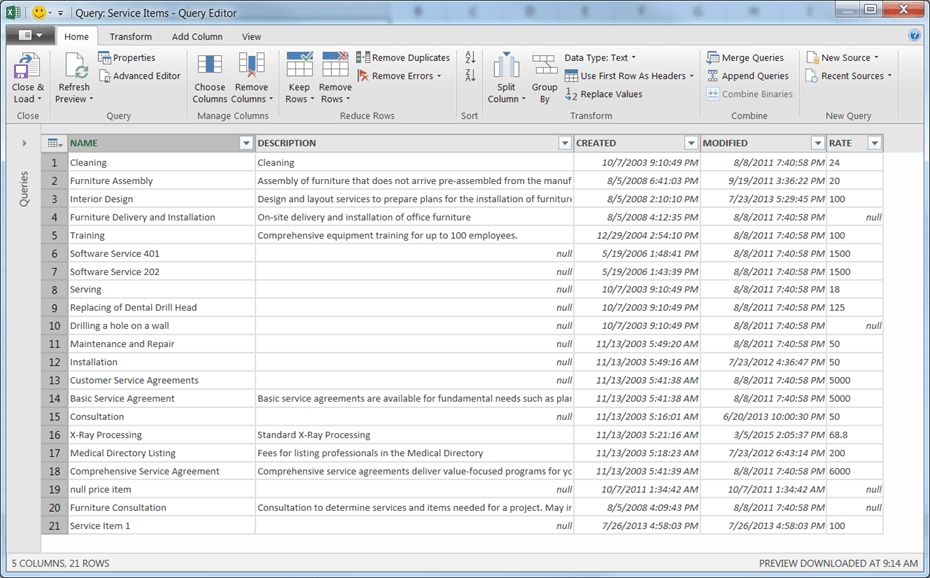
- In the Query Editor, rearrange or remove columns as needed, then click Close & Load to import the data into your Excel workbook.
Advantages and Limitations
Advantages:
- Highly flexible, allowing for complex data queries and joins across multiple tables
- Access to all data within NetSuite, including custom fields and records
- Suitable for large datasets, with the ability to optimize queries for performance
- Integration with various business intelligence and data analysis tools
Limitations:
- Requires technical expertise in SQL and database concepts
- Potential for performance impact on the NetSuite instance if not used carefully
- Learning curve associated with understanding NetSuite’s database schema
- May require additional setup and maintenance of ODBC/JDBC connections
Wrapping Up: Your NetSuite Data Export Journey Begins
Exporting data from NetSuite doesn’t have to be a headache. Whether you choose the automated ease of Coefficient, the built-in flexibility of native NetSuite options, or the power of SuiteAnalytics Connect, you’re now equipped to make the most of your NetSuite data.
Ready to take your NetSuite data export to the next level? Get started with Coefficient today and experience the joy of effortless, real-time data exports.
For more insights on leveraging your NetSuite data, check out our guides on connecting NetSuite to Power BI and connecting NetSuite to Salesforce.
Remember, the right data export method isn’t just about getting data out of NetSuite – it’s about turning that data into decisions that drive your business forward. Happy exporting!

