


Table of Contents
![]()
- 1. Top 7 Financial Consolidation Tools in 2025 | Complete Comparison Guide
- 2. Top 7 Financial Forecasting Tools in 2025 [w/ Feature Comparison]
- 3. Best 6 AI Tools for CFOs in 2026 [w/ Feature Comparison Table]
- 4. Finance controller checklist: Weekly and monthly tasks
-
5. New accounting client checklist: Streamline your onboarding process
- What to include in your accounting client onboarding checklist
- Step-by-step: Creating your accounting client onboarding checklist
- 7 Common mistakes in accounting client onboarding and how to avoid them
- Sample new accounting client checklist template
- Build better client relationships from day one
- Frequently asked questions
- 6. Top 8 Strategic Workforce Planning Tools in 2025 [w/ Feature Comparison]


Onboarding new accounting clients without a standardized process leads to missed documents, project delays, and poor first impressions. A well-structured new accounting client checklist transforms this chaotic process into a smooth, professional experience that builds trust from day one.
This guide walks through what to include in your checklist, step-by-step onboarding procedures, common mistakes to avoid, and best practices for ongoing client success.
What to include in your accounting client onboarding checklist
A comprehensive new accounting client checklist should cover five essential categories.
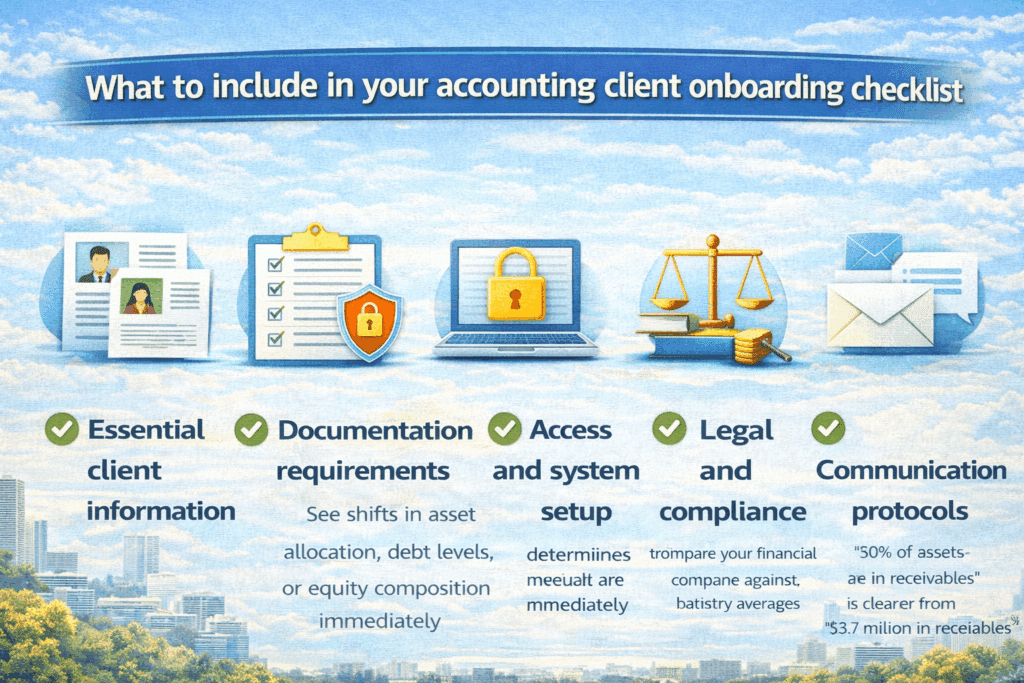
1. Essential client information
Start with the basics. You need the legal business name and entity type (LLC, S-Corp, C-Corp, Partnership, Sole Proprietorship), all tax identification numbers (EIN, SSN), business address and contact details, names and contact information for key decision-makers, and previous accountant information if the client is transferring.
2. Documentation requirements
Collect prior year tax returns (typically 2-3 years), recent financial statements (P&L, Balance Sheet, Cash Flow), bank and credit card statements, articles of incorporation or business formation documents, and current year-to-date financial records.
3. Access and system setup
Obtain accounting software credentials (QuickBooks, Xero, etc.), bank account access (read-only preferred), payroll system access if you manage payroll, sales tax filing credentials, and credit card merchant account information.
4. Legal and compliance
Secure an engagement letter defining scope of services, fee agreement and payment terms, non-disclosure agreements if needed, power of attorney forms for tax representation, and state-specific compliance requirements.
5. Communication protocols
Establish a primary point of contact designation, preferred communication channels (email, phone, portal), meeting cadence expectations, response time expectations, and emergency contact procedures.
These categories form the foundation of your bookkeeping client checklist. Each element serves a specific purpose in establishing a smooth working relationship and ensuring you have everything needed to deliver excellent service from day one.
Step-by-step: Creating your accounting client onboarding checklist
Step 1: Pre-onboarding phase
Before you officially bring someone on, you need to figure out if they’re actually a good fit. Not every prospect will align with your firm’s expertise, capacity, or service model.
Run a free consultation call—15 to 30 minutes max. Let the client do most of the talking. Take detailed notes about their business challenges, goals, and pain points. You’re assessing whether your firm has the industry knowledge and bandwidth to serve them well.
Cover the basics: high-level service expectations, timelines, your firm’s processes. Watch for red flags like unrealistic expectations, poor organization, or incompatible values.
This initial conversation builds rapport while giving you the intelligence to inform your proposal. Make them feel heard and establish trust before any formal engagement begins.
Step 2: Collect essential client information
You can’t set up files, understand compliance obligations, or communicate effectively without accurate basic information. This data is the foundation for everything that follows.
Request the legal business name, entity type, and formation date. Collect all tax identification numbers (EIN, state tax IDs). Gather contact information for key stakeholders. Document the business address and operating locations. Identify preferred communication channels.
Use secure digital intake forms to streamline collection. Practice management tools with automated reminders reduce follow-up burden. Set clear deadlines for information submission.
Instead of asking for documents one by one, provide a comprehensive checklist upfront. This saves hours of back-and-forth and sets professional expectations. Tools like Karbon or Canopy can automate reminders if items aren’t completed.
Step 3: Document collection
Missing documents cause delays, prevent accurate bookkeeping, and can lead to compliance issues. This is where your checklist becomes most valuable—it provides a clear roadmap for what’s needed.
Must-have documents:
- Prior year tax returns (2-3 years recommended)
- Year-to-date financial statements (P&L, Balance Sheet, Cash Flow)
- Bank statements for all accounts (current year)
- Credit card statements for all business cards
- Articles of incorporation or LLC operating agreement
- Current loan documents and payment schedules
- Outstanding accounts receivable and payable reports
- Payroll records and tax filings (if applicable)
- Sales tax returns and documentation
- Fixed asset schedules with depreciation details
Nice-to-have documents:
- Prior accountant’s workpapers
- Board meeting minutes
- Shareholder agreements
- Vendor contracts and lease agreements
- Business licenses and permits
Provide a secure client portal for document uploads—avoid email for sensitive data. Use automated document requests with built-in tracking. Send reminder notifications for incomplete submissions. Organize documents in a standardized folder structure.
Step 4: System access and setup
You can’t perform bookkeeping or accounting services without access to the client’s systems. This step often creates bottlenecks if not handled proactively.
Required access:
- Accounting software (QuickBooks, Xero, NetSuite)—request admin or accountant-level access
- Bank accounts—set up read-only access or bank feeds
- Credit card accounts
- Payroll systems (Gusto, ADP, Paychex) if managing payroll
- Point of sale systems for retail or restaurant clients
- E-commerce platforms (Shopify, Amazon Seller Central) for online sellers
Use accountant-specific login credentials separate from the client’s primary login. Enable two-factor authentication for all systems. Document login credentials in a secure password manager. Test all connections to ensure data flows correctly. Set up automatic bank feeds where possible.
Never use shared passwords between clients. Implement role-based access controls limiting team member access. Use encrypted communication for sharing credentials.
Step 5: Initial account assessment
Most new clients have some level of disorganization or errors in their records. Understanding the current state before beginning regular services prevents misunderstandings and sets proper expectations.
Review the chart of accounts for proper structure and categorization. Check opening balances against prior period financial statements. Identify uncategorized or miscategorized transactions. Review reconciliation status of all accounts. Assess data quality and completeness. Evaluate internal controls and segregation of duties.
Common issues you’ll find:
- Unreconciled bank accounts going back months or years
- Personal expenses mixed with business transactions
- Incorrect revenue or expense categorization
- Missing or incomplete fixed asset records
- Payroll liabilities not properly tracked
- Sales tax collected but not remitted or tracked
Create a written assessment report documenting the current state, identified issues, recommended cleanup work, estimated time and cost to remediate, and timeline for getting to current status. This protects both parties by establishing clear expectations and prevents scope creep.
Step 6: Establish communication protocols
Clear communication prevents misunderstandings and ensures smooth ongoing operations. Without defined protocols, you end up with ad-hoc interactions that waste time and cause frustration.
Define communication channels:
- Primary contact person on both sides
- Preferred method for routine questions (email, portal, Slack)
- Meeting schedule (weekly, monthly, quarterly)
- Emergency contact procedures
- Document sharing method (portal, shared drive)
Set response time expectations:
- Routine inquiries: 24-48 business hours
- Urgent requests: Same day if received before cutoff time
- Month-end close coordination: Daily check-ins
- Tax season: Faster turnaround commitments
Create a communication protocol document that both parties sign. Include it in your engagement letter or as a separate exhibit. Reference it when clients deviate from agreed protocols.
Step 7: Conduct the kickoff meeting
This meeting sets the tone for your working relationship and ensures both parties have a shared understanding of what to expect.
Cover these items:
- Introductions of all team members on both sides
- Review of engagement scope and deliverables
- Walk through communication protocols and tools
- Clarify roles and responsibilities
- Review timeline for first deliverables
- Answer client questions and address concerns
- Set next meeting date and recurring schedule
Both parties should leave with clarity on who does what, when deliverables are due, and what success looks like. Document action items and send a follow-up email summarizing discussion points and next steps.
Step 8: Set up recurring service delivery
Consistent, predictable service delivery builds trust and allows you to scale your firm efficiently.
Create recurring task lists:
- Daily: bank categorization, bill payment approvals
- Weekly: payroll processing, AR follow-up
- Monthly: reconciliations, financial statement prep, close procedures
- Quarterly: tax planning, board reporting
- Annual: tax preparation, budgeting
Use practice management software like Karbon, Canopy, or practice-specific project management tools to automate task creation, reminders, and workflow management. This ensures nothing falls through the cracks and provides visibility into work status.
Put regular check-in meetings on the calendar for the entire year. This might include weekly status calls, monthly close review meetings, quarterly strategic reviews, and annual planning sessions.
For established client relationships, use tools that automatically pull live data for recurring reports. Coefficient can connect your clients’ QuickBooks or Xero data directly to Google Sheets or Excel, enabling you to build self-updating financial dashboards. This eliminates manual data exports and ensures your monthly reporting packages always reflect the latest figures.
7 Common mistakes in accounting client onboarding and how to avoid them
Mistake 1: Overwhelming clients with too much at once
You send a massive 50-item checklist on day one. The client feels overwhelmed and does nothing.
Break onboarding into phases with clear priorities. Start with just the essentials needed to begin work. Add additional requests in subsequent phases.
A phased approach looks like this:
- Phase 1 (Week 1): Engagement letter, basic info, bank access
- Phase 2 (Week 2): Historical financials, tax returns
- Phase 3 (Week 3): System setup and initial assessment
Mistake 2: Not qualifying clients properly
You accept every client who walks through the door. This leads to unprofitable engagements or clients you’re not equipped to serve.
Develop clear ideal client criteria including industry expertise, engagement size and profitability, geographic location, technology sophistication, and cultural fit.
Be willing to refer prospects who don’t fit to other firms. Your reputation and team morale will thank you.
Mistake 3: Poor communication about fees and scope
Clients are surprised by bills or expect services not included in the engagement letter.
Be crystal clear upfront about what’s included and what’s not, fees and payment terms, additional services available and their costs, and how scope changes are handled.
Have clients initial specific line items in the engagement letter so they can’t claim they didn’t understand.
Mistake 4: Failing to follow up on incomplete items
You send the checklist and then wait passively, hoping the client completes it. Weeks go by with no progress.
Schedule specific follow-ups. Send a reminder at day 3, day 7, and day 14. After that, make a phone call. Automate where possible, but stay proactive.
Mistake 5: Not having a consistent process
Your onboarding looks different every time because you don’t have documented procedures. This makes it impossible to delegate and scale.
Document your exact process, create a standardized checklist, and use practice management software to standardize workflows. This allows you to delegate onboarding and ensure quality regardless of who handles it.
Mistake 6: Taking on the wrong clients
You say yes to every prospect without assessing fit. You end up with clients you’re not equipped to serve well.
During the discovery phase, honestly evaluate whether your firm has the expertise, capacity, and industry knowledge to serve this client excellently. It’s okay to say no or refer them elsewhere.
Mistake 7: Disappearing after onboarding
You complete onboarding and then vanish for weeks. Clients feel abandoned and experience buyer’s remorse.
Schedule a 30-day check-in to address early concerns, then regular ongoing touchpoints. This shows you’re invested in the relationship beyond just getting them signed up.
Sample new accounting client checklist template
Here’s a streamlined new accounting client checklist template you can adapt for your firm.
Phase 1: Initial client setup
- ☐ Signed engagement letter received
- ☐ Fee agreement executed
- ☐ Business name, entity type, and EIN documented
- ☐ Key contact information collected
- ☐ Client created in practice management system
Phase 2: Document collection
- ☐ Prior 2-3 years tax returns received
- ☐ Current year financial statements obtained
- ☐ Bank and credit card statements collected
- ☐ Business formation documents uploaded
- ☐ Loan and lease agreements provided
Phase 3: System access and setup
- ☐ Accounting software access granted
- ☐ Bank account connection established
- ☐ Payroll system access configured (if applicable)
- ☐ Client portal access provided
- ☐ File structure created and organized
Phase 4: Onboarding finalization
- ☐ Initial account review completed
- ☐ Opening balances verified
- ☐ Kickoff meeting conducted
- ☐ Communication protocols established
- ☐ First deliverable scheduled
- ☐ 30-day check-in scheduled
This template provides a starting framework. Customize it based on your specific services, industry focus, and firm procedures. Consider creating service-specific versions (tax-only, bookkeeping, full-service) to streamline further.
Build better client relationships from day one
A well-executed new accounting client checklist transforms chaotic onboarding into a professional, efficient process that builds trust from day one. By standardizing your approach, you ensure consistent service quality, reduce errors, and free up time for higher-value advisory work.
The key is to create a repeatable system that covers all essential steps while remaining flexible enough to accommodate different client needs. Start with the framework provided in this guide, customize it for your firm, and refine it based on experience.
For ongoing client management, consider tools that automate routine data tasks. Get started with Coefficient to streamline your financial reporting workflows and spend less time on manual data entry.
Here’s the updated version:
Frequently asked questions
What should be included in a new accounting client checklist?
Your checklist should cover five core categories:
- Essential client information: business name, entity type, EIN, contact details
- Documentation requirements: tax returns, financial statements, bank statements, formation documents
- System access and setup: accounting software, bank connections, payroll access
- Legal and compliance items: engagement letter, fee agreement, power of attorney forms
- Communication protocols: primary contacts, meeting cadence, response expectations
Must-have documents are prior tax returns, year-to-date financials, bank statements, and signed engagement paperwork.
How long should the client onboarding process take?
A well-structured onboarding process typically takes 2-4 weeks from initial consultation to full service delivery.
- Pre-onboarding and initial information collection: 3-5 days
- Document collection: 1-2 weeks depending on client organization
- System setup and initial account assessment: 3-5 days
Without a standardized process, average onboarding can stretch to 100 days. A structured checklist with automated reminders can reduce this timeline by up to 40%.
What documents do you need from new accounting clients?
Must-have documents:
- Prior 2-3 years of tax returns
- Current year-to-date financial statements (P&L, Balance Sheet, Cash Flow)
- All bank and credit card statements
- Business formation documents (Articles of Incorporation or LLC Agreement)
- Signed engagement letter and fee agreement
- Accounting software credentials and bank account access
Nice-to-have documents:
- Prior accountant workpapers
- Board meeting minutes and shareholder agreements
- Major contracts, business licenses, and insurance policies
How do you onboard a bookkeeping client?
Onboarding follows eight steps:
- Run a discovery call to qualify fit and understand needs
- Collect essential business information (legal name, entity type, EIN, contacts)
- Gather required documents (tax returns, financial statements, bank records)
- Set up system access to accounting software, bank accounts, and payroll
- Conduct an initial account assessment to establish clean opening balances
- Establish clear communication protocols and workflow expectations
- Hold a kickoff meeting to align on responsibilities and deliverables
- Set up recurring service delivery with scheduled tasks and automated reminders
What is the best software for managing accounting client onboarding?
The best software combines practice management, document collection, and workflow automation.
Top options:
- Karbon: workflow management with automated task assignments
- Canopy: designed for accounting firms with built-in checklists
- SmartVault: secure document portal with e-signatures
For ongoing client data management, Coefficient automates financial reporting by connecting your clients’ QuickBooks or Xero data directly to Google Sheets or Excel. This eliminates manual data exports and keeps your reporting packages current.
How do you create a client onboarding checklist in Excel?
Set up a structured workbook with multiple tabs:
- Master checklist tab: all tasks organized by phase with columns for task name, assigned team member, due date, status, and notes
- Documents tab: required items with checkboxes
- Timeline tab: expected completion dates for each phase
Use conditional formatting to highlight overdue items in red and completed items in green. Add data validation for status columns to create dropdown menus.
For more advanced automation, Coefficient connects your Excel checklist to live data sources to auto-populate client information and track progress in real-time.