Are you looking to sync your Stripe payment data with MySQL? Whether you need real-time payment processing data or automated financial reporting, connecting Stripe to MySQL can simplify your data operations. This guide explores three proven methods to integrate Stripe with MySQL, helping you choose the best solution for your needs.
Why Connect Stripe to MySQL?
Before we dive into the methods, let’s explore the benefits of connecting Stripe to MySQL:
- Automated Financial Reporting: Sync payment data directly to your MySQL database for real-time financial analysis and reporting.
- Simplified Payment Processing: Store and analyze transaction data efficiently for better payment flow management.
- Enhanced Customer Insights: Combine payment behavior with other customer data in MySQL for deeper business intelligence.
Top 3 Methods to Connect Stripe to MySQL
Here’s a quick overview of the three methods we’ll cover:
| Solution | Best For |
| Coefficient | Business users who need a no-code solution to sync Stripe data into MySQL through spreadsheets, with built-in scheduling and automation features |
| Airbyte | Technical teams requiring an open-source solution with custom data transformation capabilities |
| Stitch Data | Enterprise organizations needing a scalable ETL platform with advanced data integration features |
Let’s explore each method in detail.
#1 Coefficient: No-Code Spreadsheet Solution
Coefficient offers a spreadsheet-native solution that makes connecting Stripe to MySQL accessible for business users. By using familiar spreadsheet interfaces, users can easily import, transform, and sync Stripe data to MySQL without writing code.
Step-by-Step Guide:
Step 1. Install Coefficient
For Google Sheets
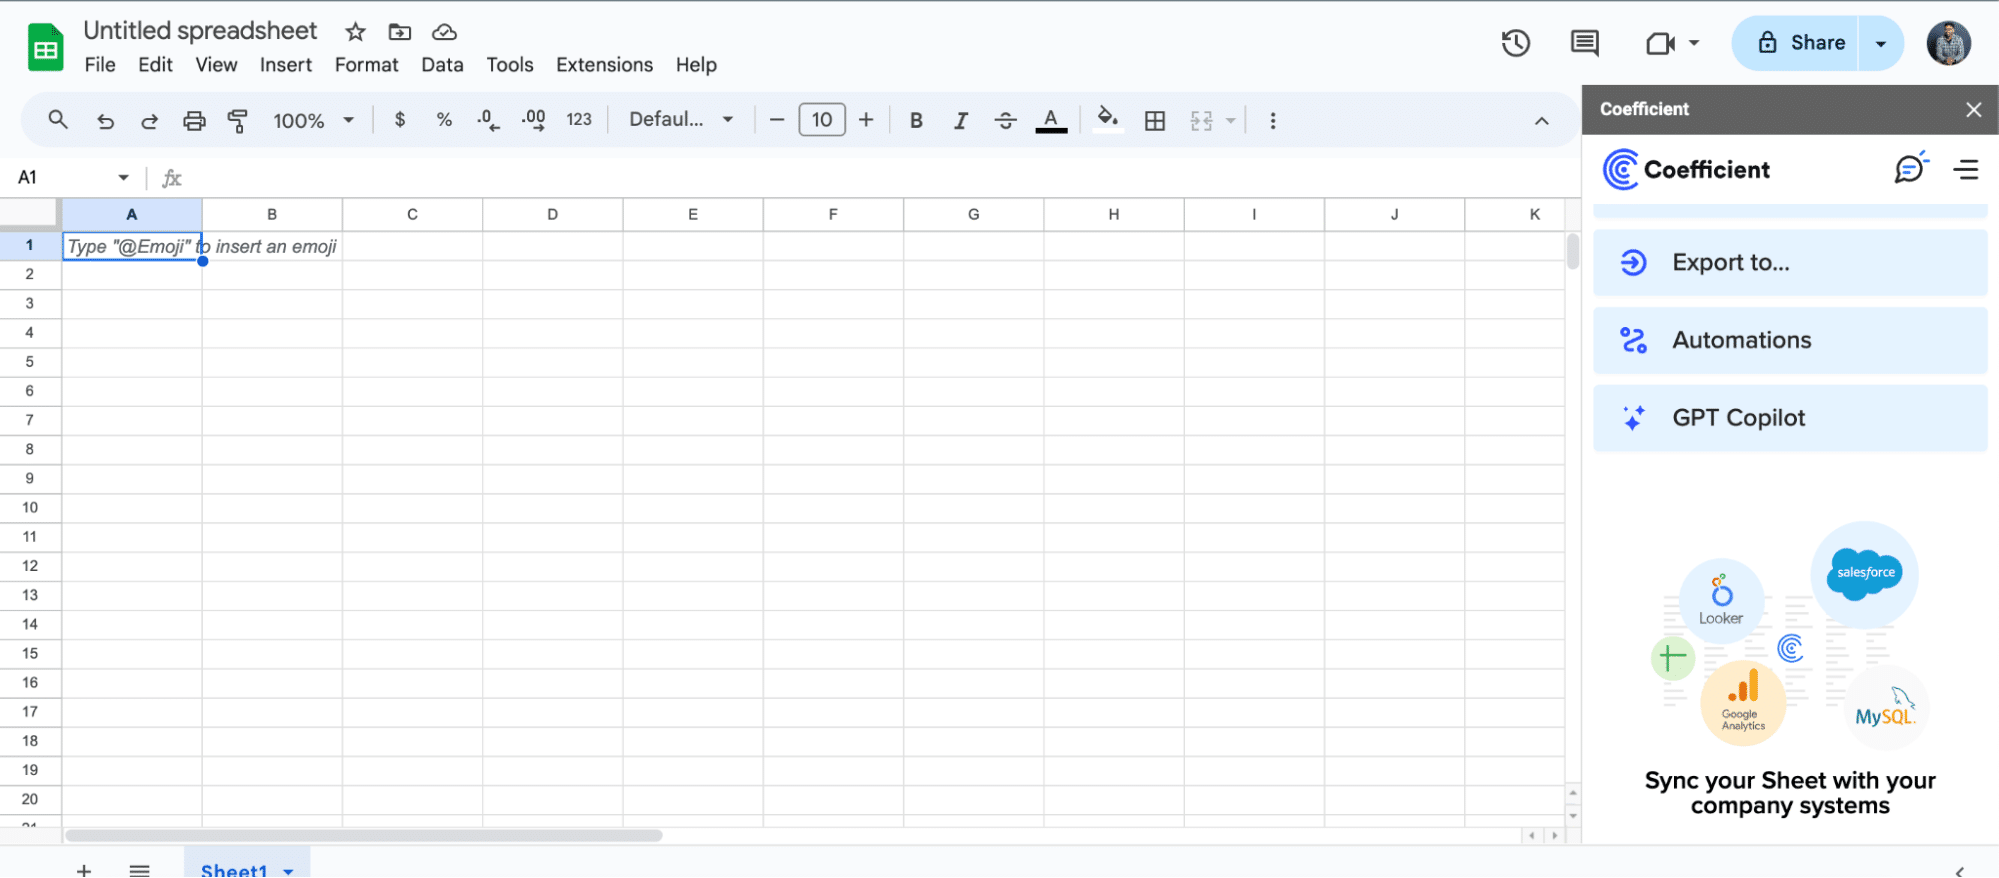
- Open a new or existing Google Sheet, navigate to the Extensions tab, and select Add-ons > Get add-ons.
- In the Google Workspace Marketplace, search for “Coefficient.”
- Follow the prompts to grant necessary permissions.
- Launch Coefficient from Extensions > Coefficient > Launch.
- Coefficient will open on the right-hand side of your spreadsheet.
For Microsoft Excel
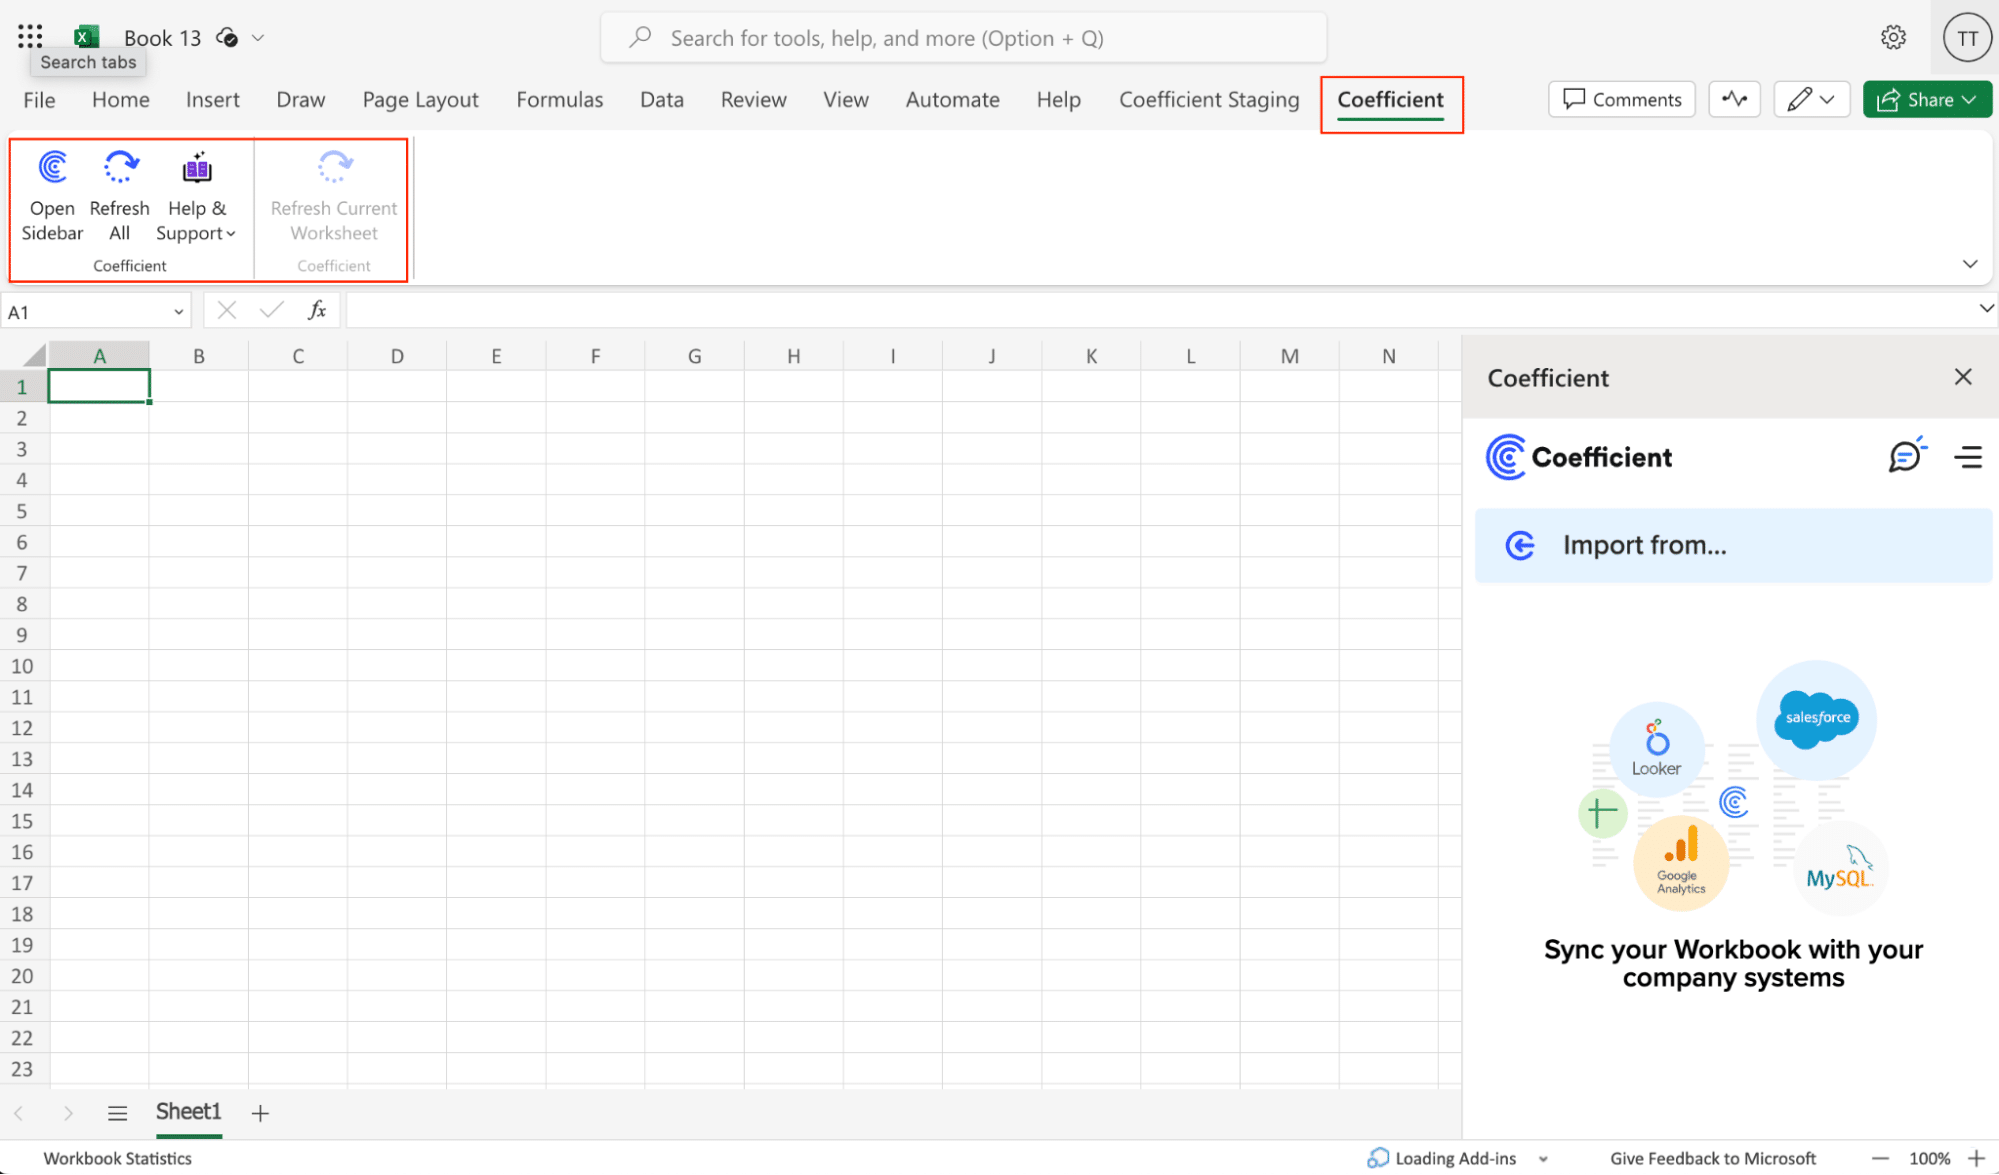
- Open Excel from your desktop or in Office Online. Click ‘File’ > ‘Get Add-ins’ > ‘More Add-Ins.’
- Type “Coefficient” in the search bar and click ‘Add.’
- Follow the prompts in the pop-up to complete the installation.
- Once finished, you will see a “Coefficient” tab in the top navigation bar. Click ‘Open Sidebar’ to launch Coefficient.
Step 2: Connect and Import Data from Stripe
- Open Coefficient Sidebar: In Google Sheets, go to Extensions > Coefficient > Launch.
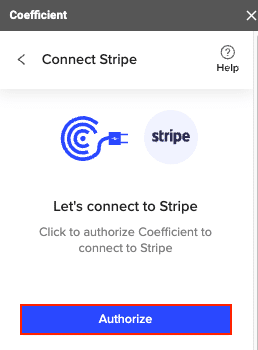
- Connect Stripe: Click Import Data from the Coefficient sidebar, then select Stripe.
- Authenticate: Select the Stripe account you want to connect and click Connect.
- Select Data: Choose the object fields you want to import by clicking Select Fields. Configure any necessary filters and click Import.
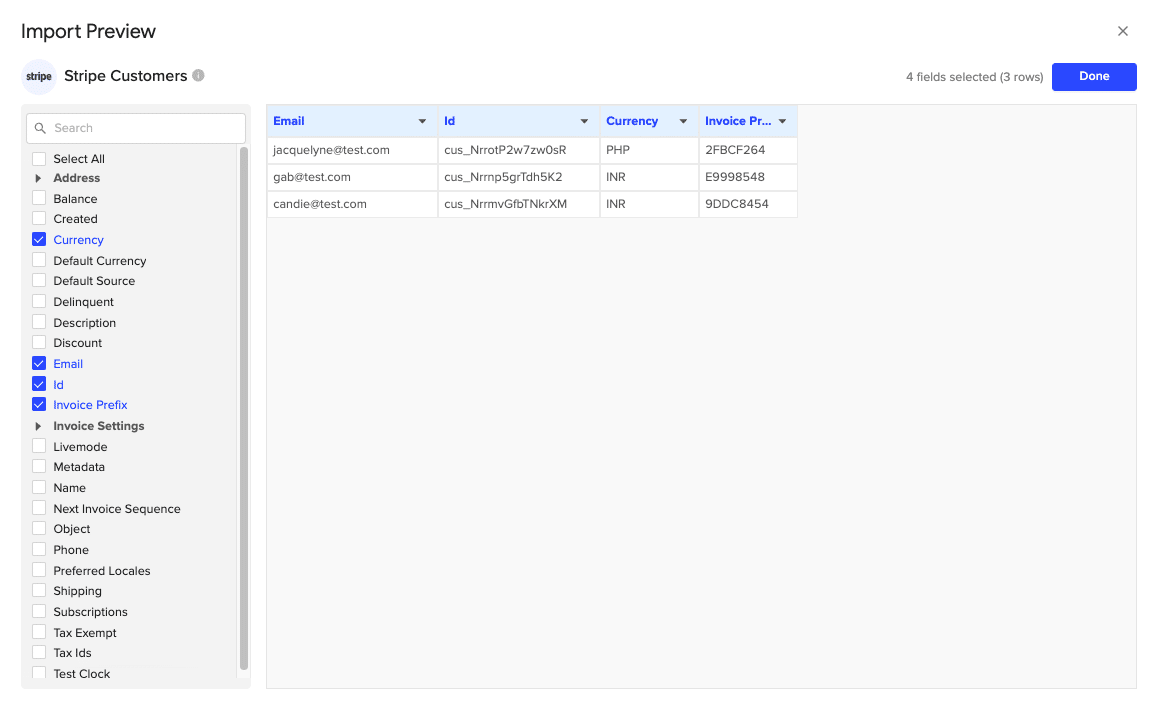
Step 3. Export Data to MySQL
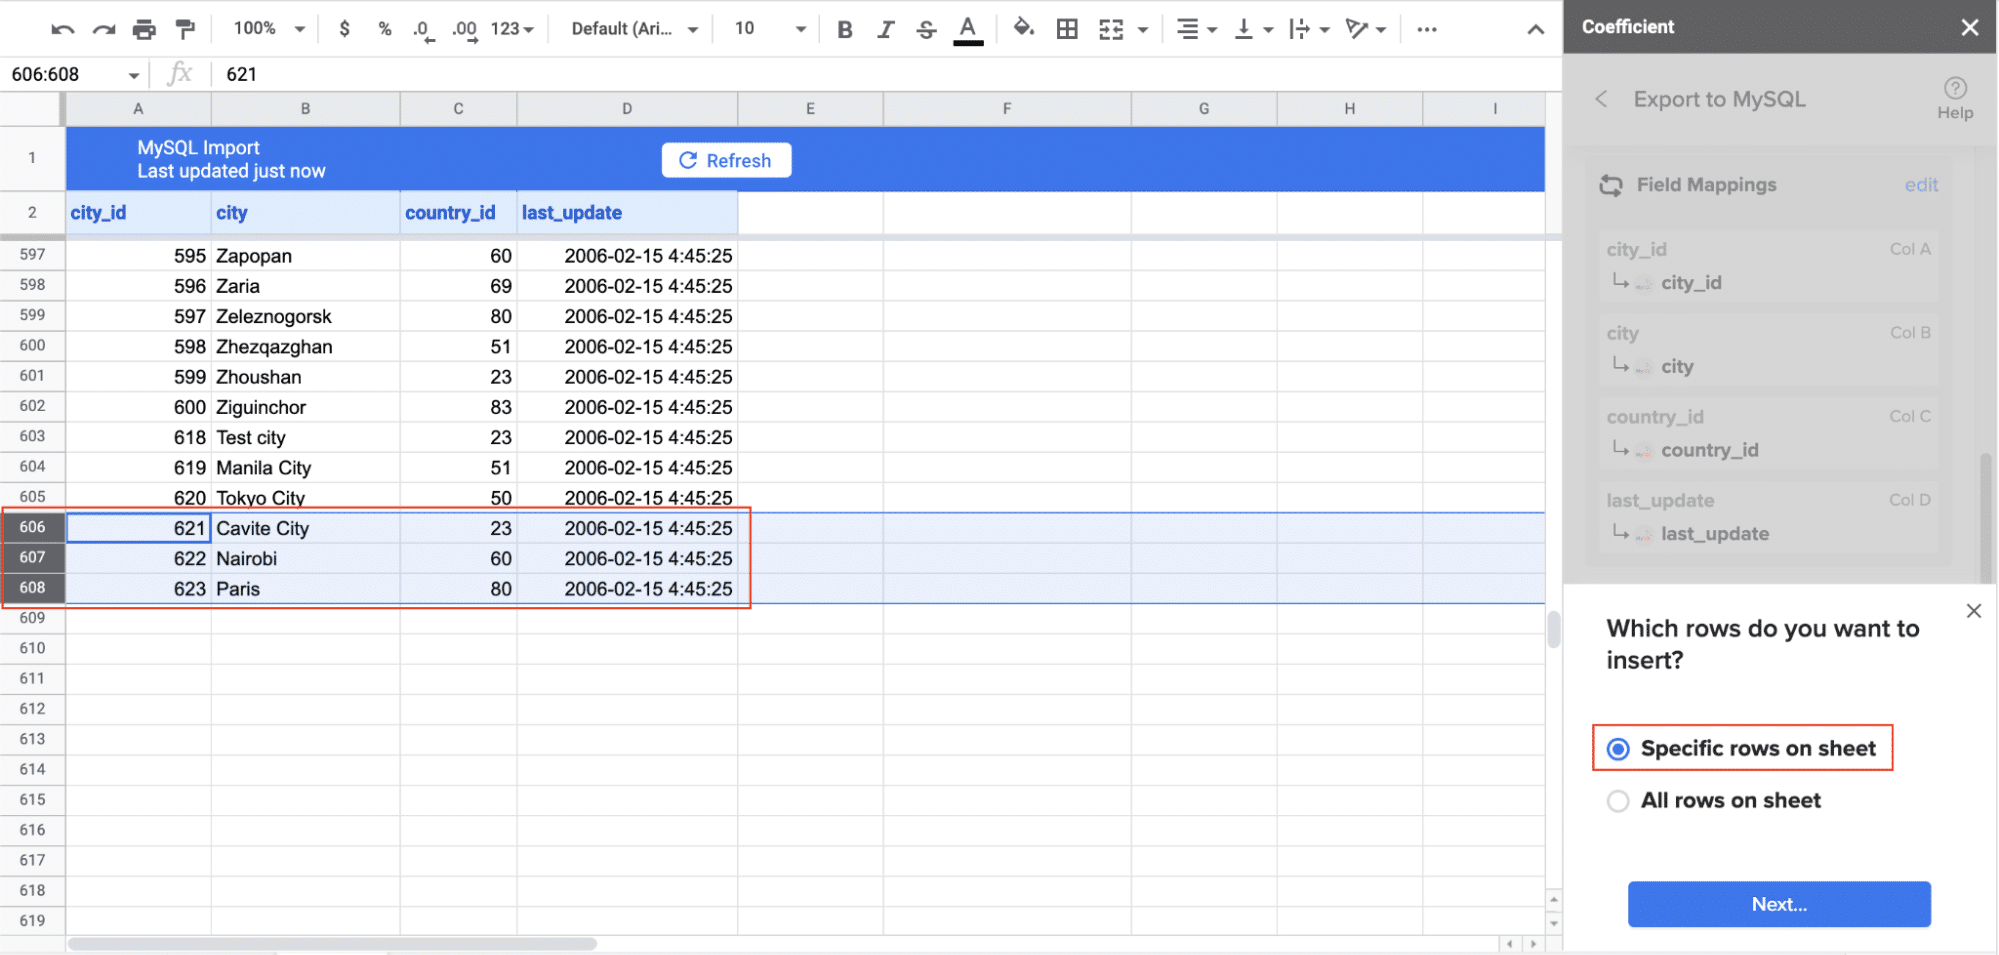
- Navigate to Export: In Coefficient’s sidebar, click Export to…, then select MySQL.
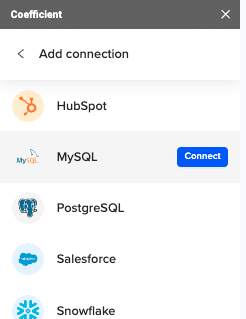
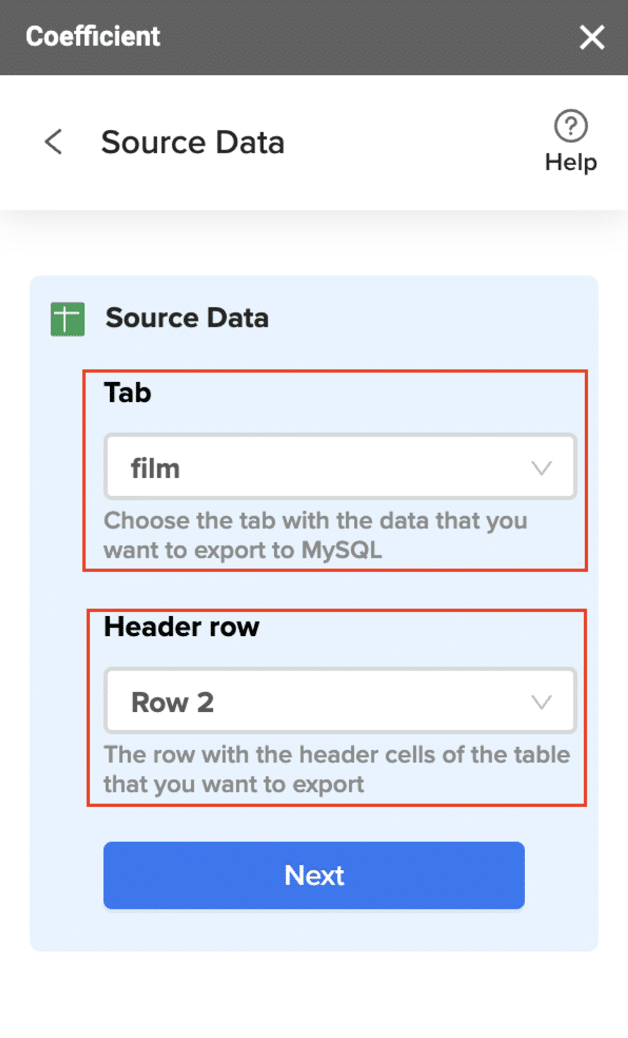
- Select Data and Action: Choose the tab and header row in your sheet that contains the data you want to export. Define your tab and header row. Specify the table in your database where you want to insert the data and choose the action type: Update, Insert, Upsert, or Delete.
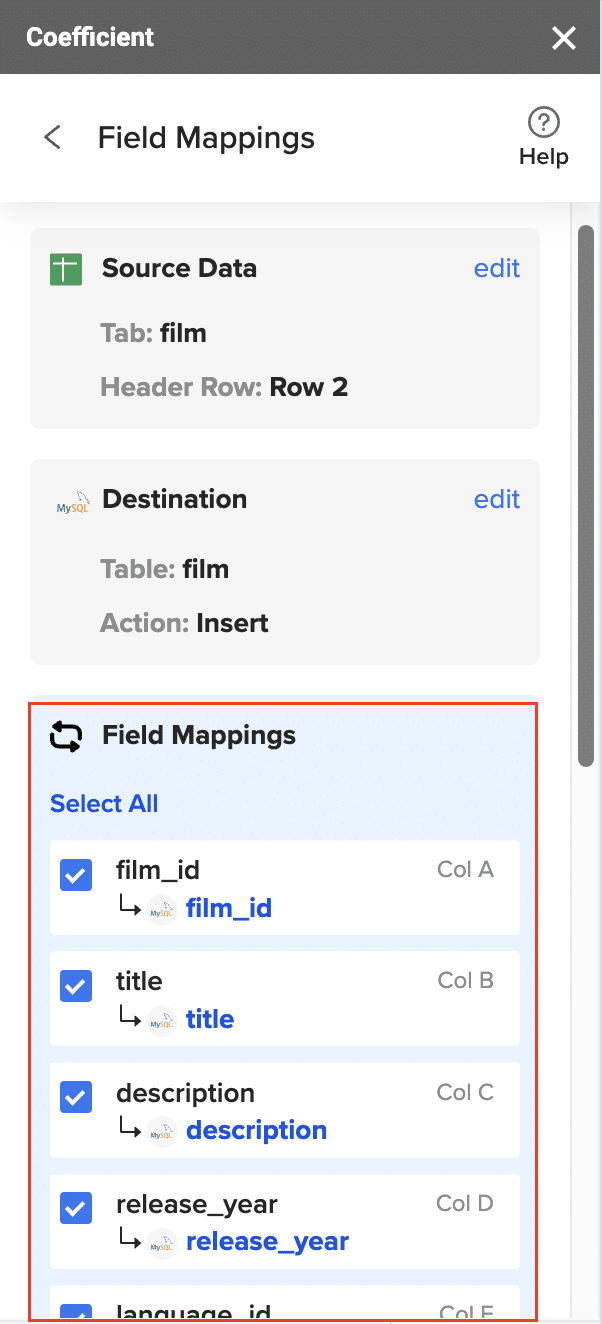
- Map Fields: Map the rows from your spreadsheet to the corresponding fields in MySQL. Manual mapping is required for first-time setups.
- Customize and Export: Specify batch size and any additional settings. Confirm your settings and click Export.
Pros:
- No coding required
- Familiar spreadsheet interface
- Real-time data syncing
- Automated scheduling
- Built-in data transformation capabilities
Cons:
- Requires spreadsheet as intermediary
- Limited to spreadsheet row limits
- May not suit very large data volumes
#2 Airbyte: Open-Source Data Integration Platform

Airbyte provides an open-source data integration platform that enables technical teams to build custom data pipelines between Stripe and MySQL.
Step-by-Step Guide:
Step 1: Airbyte Deployment
Deploy Airbyte’s data integration platform either locally using Docker or in a cloud environment for scalable operations.
# Docker-based installation (recommended for 2024)
git clone https://github.com/airbytehq/airbyte.git
cd airbyte
docker-compose up -d
For cloud environments:
- Deploy using Kubernetes with Helm charts
- Configure resource allocation based on data volume
- Set up monitoring with Prometheus/Grafana
Step 2: Stripe Source Configuration
Configure the Stripe connection with secure authentication and appropriate data sync parameters.
{
“client_secret”: “${STRIPE_SECRET_KEY}”,
“account_id”: “${STRIPE_ACCOUNT_ID}”,
“start_date”: “2024-01-01T00:00:00Z”,
“lookback_window_days”: 7,
“data_request_window_days”: 30,
“slice_range”: 365
}
Additional settings:
- Enable expansion fields for detailed customer data
- Configure API version (2024-01-01 recommended)
- Set up webhook endpoints for real-time updates
Step 3: MySQL Destination Setup
Establish a secure connection to your MySQL database with proper encryption and authentication settings.
destination_type: mysql
host: your-mysql-host
port: 3306
database: stripe_data
username: ${MYSQL_USER}
password: ${MYSQL_PASSWORD}
jdbc_url_params:
useSSL: true
requireSSL: true
enabledTLSProtocols: TLSv1.2,TLSv1.3
Step 4: Data Transformation Configuration
Define custom transformations to normalize and enrich your Stripe data before loading into MySQL.
transformations:
– name: normalize_currency
sql: >
UPDATE charges
SET amount = amount / 100,
currency = UPPER(currency)
– name: enrich_customer_data
sql: >
CREATE VIEW customer_insights AS
SELECT
c.*,
COUNT(ch.id) as total_charges,
SUM(ch.amount) as lifetime_value
FROM customers c
LEFT JOIN charges ch ON c.id = ch.customer_id
GROUP BY c.id
Step 5: Monitoring and Maintenance
Implement comprehensive monitoring systems to ensure data pipeline health and reliability.
- Implement Airbyte’s new health check system
- Set up anomaly detection for data volumes
- Configure error alerting via Slack/email
- Enable debug logging for troubleshooting
Pros:
- Open-source flexibility
- Custom transformation options
- Scalable architecture
- Community support
Cons:
- Requires technical expertise
- Self-hosted maintenance
- Setup complexity
#3 Stitch Data: Enterprise-Grade ETL Service
Stitch Data offers a managed ETL service for enterprises needing robust data integration capabilities between Stripe and MySQL.
Step-by-Step Guide:
Step 1: Account Configuration
Set up a secure enterprise environment with proper authentication and access controls.
- Enable organization-wide SSO
- Configure IP allowlisting
- Set up audit logging
- Implement role-based access control
Step 2: Stripe Integration Setup
Configure comprehensive data extraction settings from Stripe with optimal sync parameters.
{
“api_key”: “${STRIPE_SECRET_KEY}”,
“start_date”: “2024-01-01T00:00:00Z”,
“selected_streams”: [
“charges”,
“customers”,
“subscriptions”,
“invoices”,
“payment_intents”,
“refunds”,
“disputes”
],
“data_retention_period”: 90,
“batch_size_rows”: 20000,
“sync_mode”: “incremental”
}
Step 3: MySQL Database Configuration
Optimize your MySQL database structure for efficient data storage and querying.
CREATE TABLE stripe_transactions (
id VARCHAR(255) PRIMARY KEY,
created_timestamp DATETIME,
amount DECIMAL(10,2),
currency VARCHAR(3),
customer_id VARCHAR(255),
payment_intent_id VARCHAR(255),
status VARCHAR(50),
metadata JSON,
INDEX idx_customer (customer_id),
INDEX idx_created (created_timestamp),
INDEX idx_status (status)
) ENGINE=InnoDB ROW_FORMAT=COMPRESSED;
Step 4: Replication Configuration
Set up robust data replication mechanisms with proper versioning and tracking.
- Configure change data capture (CDC)
- Set up incremental replication
- Implement data versioning
- Enable historical data tracking
Step 5: Monitoring Implementation
Establish comprehensive monitoring systems for pipeline health and performance.
from stitch_client import StitchClient
def monitor_replication():
client = StitchClient(api_token=API_TOKEN)
metrics = client.get_replication_metrics()
# Check for replication lag
if metrics[‘lag_minutes’] > 15:
send_alert(‘High replication lag detected’)
# Monitor data volume
if metrics[‘rows_synced’] > THRESHOLD:
scale_resources()
Step 6: Data Quality Setup
Implement automated data validation and quality control measures.
- Set up automated data validation
- Configure custom data transformations
- Implement data quality checks
- Enable automatic schema evolution
Pros:
- Enterprise-grade reliability
- Managed service
- Advanced monitoring
- Comprehensive support
Cons:
- Higher cost
- Less flexibility
- Potential vendor lock-in
Start Syncing Your Stripe Data to MySQL Today
Connecting Stripe to MySQL doesn’t have to be complicated. Whether you choose Coefficient’s user-friendly spreadsheet approach, Airbyte’s open-source flexibility, or Stitch Data’s enterprise solution, you can start syncing your payment data today.
For a quick, no-code solution that gets you up and running in minutes, try Coefficient. With its intuitive interface and powerful features, you can start benefiting from integrated Stripe and MySQL data in no time.


