Bringing your Asana Tags data into Excel helps you analyze how tags are used, track common topics, and manage your tagging system. Manually exporting this data is inefficient and quickly becomes old.
Coefficient offers a live connection for automatic data updates.
This guide shows you the steps to easily import your Tags data from Asana into Excel.
TLDR
-
Step 1:
Step 1. Install Coefficient in Excel and connect your Asana account.
-
Step 2:
Step 2. Choose the Asana connector from the Import from… options.
-
Step 3:
Step 3. Select the Tags object and pick the relevant fields.
-
Step 4:
Step 4. Import the data into your sheet and set up auto-refresh.
Step-by-step guide to importing Asana Tags into Excel
Step 1: Install and connect Coefficient
Get Coefficient installed in your Excel application to start.
- Open Excel.
- Go to the Insert tab.
- Click Get Add-ins.
- Search for “”Coefficient”” and install it from the Office Add-ins store.
- Open the Coefficient sidebar, found in the Home or Add-ins tab.
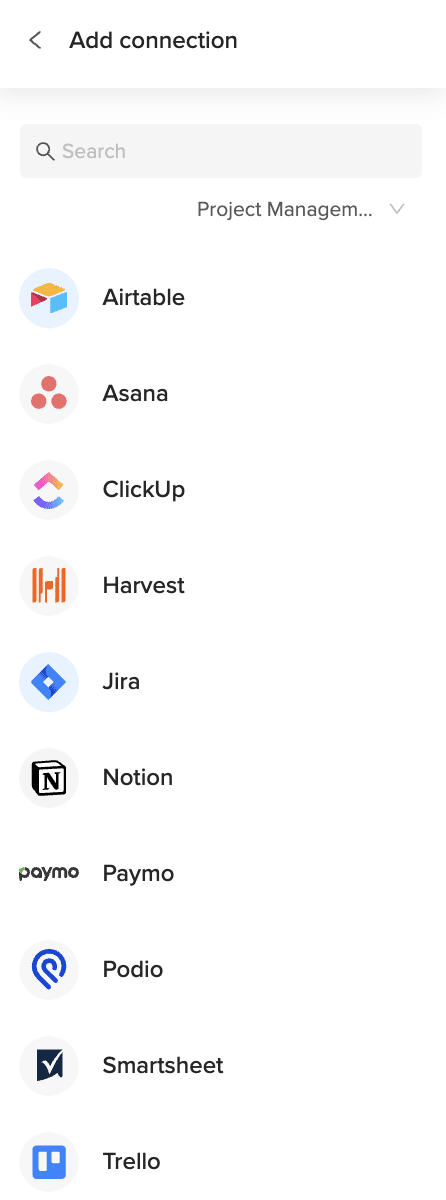
- Click “”Import from…”” and select Asana. Follow the steps to connect your Asana account.

Step 2: Import the Tags data
With the connection ready, you can now bring in your Tags data.
- In the Coefficient sidebar for Asana, choose to import from an **Object**.
- Find and select the “”Tags”” object from the list.
- Choose the specific data fields from Tags that you want in your Excel sheet.
- Apply any filters or sorting if needed.
- Click “”Import”” to pull the data into your sheet.
Step 3: Set up auto-refresh (Optional)
Keep your Tags data current automatically.
- After the data is imported, find your import listed in the Coefficient sidebar next to the Refresh button.
- Click the refresh settings icon.
- Select “”Schedule”” to automate updates.
- Choose how often the data should refresh (e.g., hourly, daily) and set a time.
- Save the schedule. Your Tags data will update automatically.

Available Asana Objects
- Users
- Teams
- Projects
- Tasks
- Sections
- Stories
- Tags
- Portfolios
- Goals
How to Import Tags Data from Podio into Excel
Bringing your Podio Tags data into Excel helps you analyze how tags are used, track common topics, and manage your tagging system. Manually exporting this data is inefficient and quickly becomes old.
Coefficient offers a live connection for automatic data updates.
This guide shows you the steps to easily import your Tags data from Podio into Excel.
TLDR
-
Step 1:
Step 1. Install Coefficient in Excel and connect your Podio account.
-
Step 2:
Step 2. Choose the Podio connector from the Import from… options.
-
Step 3:
Step 3. Select the Tags object and pick the relevant fields.
-
Step 4:
Step 4. Import the data into your sheet and set up auto-refresh.
Step-by-step guide to importing Podio Tags into Excel
Step 1: Install and connect Coefficient
You need Coefficient installed in your Excel application.
- Open Excel.
- Go to the Insert tab.
- Click Get Add-ins.
- Search for “”Coefficient”” and install it from the Office Add-ins store.
- Once installed, open the Coefficient sidebar from the Home or Add-ins tab.
- Click “”Import from…”” and find the Podio connector. You will be guided through connecting your Podio account.
Step 2: Import the Tags data
Now you can pull your Tags data into Excel.
- In the Coefficient sidebar for Podio, select to import from an **Object**.
- Choose the “”Tags”” object from the list.
- Select the specific data fields related to your Tags that you need in Excel.
- Apply any filters or sorting if required.
- Click the “”Import”” button to bring the data into your sheet.
Step 3: Set up auto-refresh (Optional)
Keep your Tags data current without manual updates.
- After the import is complete, find your import in the Coefficient sidebar next to the Refresh button.
- Click the settings icon for refresh options.
- Select “”Schedule”” to set up automated updates.
- Choose how often the data should refresh (e.g., hourly, daily) and set a specific time.
- Save your schedule. Your Tags data will now update automatically.
Available Podio Objects
- Alerts
- App market
- Applications
- Batch
- Calendar
- Comments
- Contacts
- Conversations
- Devices
- Embeds
- Files
How to Import Task Data from Outreach into Excel
Importing Outreach Task records into Excel helps you monitor team workloads, due dates, and completion rates. Coefficient keeps your sheet synced so you always have up-to-date task information.
This guide walks you through installing Coefficient, selecting the Task object, importing your tasks, and enabling scheduled refresh.
TLDR
-
Step 1:
Step 1. Install Coefficient for Excel and connect your Outreach account.
-
Step 2:
Step 2. Click “Import from Objects” and select “Task” under Outreach.
-
Step 3:
Step 3. Apply filters (e.g. due date, status), choose fields, and click “Import.”
-
Step 4:
Step 4. Enable auto-refresh to keep your task list current automatically.
Step-by-step guide
Use these steps to bring Outreach Task data into Excel.
Step 1: Install and Connect Coefficient
In Excel, go to Insert → Get Add-ins → My Add-ins, install Coefficient, then open the pane and authorize Outreach.
Step 2: Import Task Data
Click “Import from Objects,” pick Outreach, and choose “Task.” Optionally filter by due date or status before importing.

Step 3: Set Up Auto-Refresh (Optional)
After importing, click the refresh icon and schedule hourly, daily, or weekly updates to maintain live task data.
Available Outreach Objects
- Call
- Opportunity
- Sequence
- Call Disposition
- Call Purpose
- Compliance Request
- Content Category
- Content Category Membership
- Content Category Ownership
- Duty
- Email Address
- Event
How to Import Task Priority Data from Outreach into Excel
Importing Outreach Task Priority records into Excel lets you sort and filter tasks by urgency—High, Medium, or Low—to optimize team workflows. Coefficient keeps your sheet synced so you always have the latest priority assignments.
This guide shows you how to install Coefficient, connect to Outreach, import Task Priority data, and enable scheduled refresh in Excel.
TLDR
-
Step 1:
Step 1. Install Coefficient for Excel and link your Outreach account.
-
Step 2:
Step 2. Click “Import from Objects” and choose “Task Priority” under Outreach.
-
Step 3:
Step 3. Apply filters (e.g. priority level), select fields, and click “Import.”
-
Step 4:
Step 4. Enable auto-refresh to keep priorities up to date automatically.
Step-by-step guide
Follow these steps to pull Task Priority data into Excel.
Step 1: Install and Connect Coefficient
In Excel, go to Insert → Get Add-ins → My Add-ins, search for Coefficient, and install. Then open the pane and authorize Outreach.
Step 2: Import Task Priority Data
Click “Import from Objects,” select Outreach, and pick “Task Priority.” Optionally filter by level (High, Medium, Low) before importing.
Step 3: Set Up Auto-Refresh (Optional)
After importing, click the auto-refresh icon in the Coefficient pane and choose hourly, daily, or weekly schedules to maintain live priority data.
Available Outreach Objects
- Call
- Opportunity
- Sequence
- Call Disposition
- Call Purpose
- Compliance Request
- Content Category
- Content Category Membership
- Content Category Ownership
- Duty
- Email Address
- Event
How to Import Tasks Data from Apollo into Excel
Getting your Apollo Tasks data into Excel allows you to track sales activities and manage workloads effectively. Coefficient connects Apollo directly to your spreadsheet.
This guide walks you through importing your Apollo Tasks data into Excel using Coefficient.
TLDR
-
Step 1:
Step 1. Install Coefficient for Excel and connect your Apollo account.
-
Step 2:
Step 2. Choose Import from… and select the Tasks object.
-
Step 3:
Step 3. Apply any necessary filters and import the data to your sheet.
-
Step 4:
Step 4. Set up an auto-refresh schedule to keep the data current.
Step-by-step guide
Follow these steps to bring your Apollo Tasks data into Excel.
Step 1: Install and Connect Coefficient
To start, install the Coefficient add-in in Excel. Go to the Insert tab, click “Get Add-ins,” search for Coefficient, and install it from the store.
Open the Coefficient add-in from the Home tab. Select Apollo when prompted to connect a data source.
Log in to your Apollo account and authorize Coefficient to access your data.
Step 2: Import Tasks Data
With Apollo connected, click “Import from…” in the Coefficient sidebar.
Select Apollo, then choose “Tasks” from the list of objects to import.
You can select specific task fields or filter the data as needed before clicking “Import” to bring it into your Excel sheet.
Step 3: Set Up Auto-Refresh (Optional)
Keep your Tasks data in Excel automatically updated by setting up auto-refresh. Find the auto-refresh settings in the Coefficient sidebar after importing.
Schedule refreshes hourly, daily, or weekly. Your Excel sheet will then automatically sync with the latest task information from Apollo.
Available Apollo Objects
- Tasks
- Contacts
- Contact Stages
- Deals
- Lists
- Accounts
- Account Stages
- Organization Job Postings
- Sequences
- Tags
How to Import Tasks Data from Asana into Excel
Bringing your Asana Tasks data into Excel helps you track tasks, manage assignments, and get an overview of your project workloads. Manually exporting this data is inefficient and quickly becomes old.
Coefficient creates a live connection for automatic data updates.
This guide shows you the steps to easily import your Tasks data from Asana into Excel.
TLDR
-
Step 1:
Step 1. Install Coefficient in Excel and connect your Asana account.
-
Step 2:
Step 2. Choose the Asana connector from the Import from… options.
-
Step 3:
Step 3. Select the Tasks object and pick the relevant fields.
-
Step 4:
Step 4. Import the data into your sheet and set up auto-refresh.
Step-by-step guide to importing Asana Tasks into Excel
Step 1: Install and connect Coefficient
You need Coefficient installed in your Excel application.
- Open Excel.
- Go to the Insert tab.
- Click Get Add-ins.
- Search for “”Coefficient”” and install it from the Office Add-ins store.
- Once installed, open the Coefficient sidebar from the Home or Add-ins tab.
- Click “”Import from…”” and find the Asana connector. You will be guided through connecting your Asana account.
Step 2: Import the Tasks data
Now you can pull your Tasks data into Excel.
- In the Coefficient sidebar for Asana, select to import from an **Object**.
- Choose the “”Tasks”” object from the list.
- Select the specific data fields related to your Tasks that you need in Excel.
- Apply any filters or sorting if required.
- Click the “”Import”” button to bring the data into your sheet.
Step 3: Set up auto-refresh (Optional)
Keep your Tasks data current without manual updates.
- After the import is complete, find your import in the Coefficient sidebar next to the Refresh button.
- Click the settings icon for refresh options.
- Select “”Schedule”” to set up automated updates.
- Choose how often the data should refresh (e.g., hourly, daily) and set a specific time.
- Save your schedule. Your Tasks data will now update automatically.
Available Asana Objects
- Users
- Teams
- Projects
- Tasks
- Sections
- Stories
- Tags
- Portfolios
- Goals
How to Import Tasks Data from Podio into Excel
Importing your Podio Tasks data into Excel helps you manage assignments, track progress, and analyze workload. Manually exporting tasks is slow and they quickly become outdated.
Coefficient provides a live link that automatically refreshes your data.
This guide shows you how to easily import your Tasks data from Podio into Excel.
TLDR
-
Step 1:
Step 1. Install Coefficient in Excel and connect your Podio account.
-
Step 2:
Step 2. Select the Podio connector using Import from….
-
Step 3:
Step 3. Choose the Tasks object and select the fields you need.
-
Step 4:
Step 4. Import the data and set up auto-refresh for live updates.
Step-by-step guide to importing Podio Tasks into Excel
Step 1: Install and connect Coefficient
You need Coefficient installed in your Excel application.
- Open Excel.
- Go to the Insert tab.
- Click Get Add-ins.
- Search for “”Coefficient”” and install it from the Office Add-ins store.
- Once installed, open the Coefficient sidebar from the Home or Add-ins tab.
- Click “”Import from…”” and find the Podio connector. You’ll be guided to log in and connect your Podio account.
Step 2: Import the Tasks data
Now that you’re connected, let’s get the data.
- In the Coefficient sidebar for Podio, choose to import from an **Object**.
- Find and select the “”Tasks”” object from the list.
- Choose the specific task fields you want to bring into Excel.
- Apply any filters or sorting needed for your data.
- Click the “”Import”” button to pull the data into Excel.
Step 3: Set up auto-refresh (Optional)
Keep your Tasks data current without manual effort.
- After your data is imported, look for the “”Refresh”” button in the Coefficient sidebar next to your import.
- Click the refresh options icon.
- Choose “”Schedule”” to set up automatic refreshes.
- Select how often you want the data to update (e.g., daily) and pick a time.
- Save your schedule. Your Tasks data will now update on its own.
Available Podio Objects
- Alerts
- App market
- Applications
- Batch
- Calendar
- Comments
- Contacts
- Conversations
- Devices
- Embeds
- Files
How to Import User Data from Outreach into Excel
Importing Outreach User records into Excel gives you a centralized view of every team member, including roles, permissions, and contact details. Coefficient keeps your sheet synced so you always work with the latest user directory.
This guide walks you through installing Coefficient, connecting Outreach, importing User data, and scheduling live refresh in Excel.
TLDR
-
Step 1:
Step 1. Install Coefficient for Excel and authorize your Outreach account.
-
Step 2:
Step 2. Click “Import from Objects” and select “User” under Outreach.
-
Step 3:
Step 3. Apply filters (e.g. role or status), choose fields, and click “Import.”
-
Step 4:
Step 4. Enable auto-refresh to keep your user directory updated automatically.
Step-by-step guide
Follow these steps to bring Outreach User data into Excel.
Step 1: Install and Connect Coefficient
In Excel, go to Insert → Get Add-ins → My Add-ins, search for Coefficient, and install it. Then open the Coefficient pane and connect to Outreach to grant access.
Step 2: Import User Data
Click “Import from Objects,” choose Outreach, and pick “User.” Optionally filter by role (Admin, User) or status (Active, Inactive) before importing.
Step 3: Set Up Auto-Refresh (Optional)
After importing, click the auto-refresh icon in the Coefficient pane and choose hourly, daily, or weekly schedules to maintain a live user list.
Available Outreach Objects
- User
How to Import Users Data from Asana into Excel
Bringing your Asana Users data into Excel helps you manage your user base, track user details, and analyze user activity. Manually exporting this data is inefficient and quickly becomes old.
Coefficient offers a live connection for automatic data updates.
This guide shows you the steps to easily import your Users data from Asana into Excel.
TLDR
-
Step 1:
Step 1. Install Coefficient in Excel and connect your Asana account.
-
Step 2:
Step 2. Use Import from… to select the Asana connector.
-
Step 3:
Step 3. Choose the Users object and select the fields you need.
-
Step 4:
Step 4. Import the data into your sheet and set up auto-refresh.
Step-by-step guide to importing Asana Users into Excel
Step 1: Install and connect Coefficient
Get Coefficient installed in your Excel application to start.
- Open Excel.
- Go to the Insert tab.
- Click Get Add-ins.
- Search for and install “”Coefficient”” from the Office Add-ins store.
- Open the Coefficient sidebar, found in the Home or Add-ins tab.
- Click “”Import from…”” and select Asana. Follow the steps to connect your Asana account.
Step 2: Import the Users data
With the connection ready, you can now bring in your Users data.
- In the Coefficient sidebar for Asana, choose to import from an **Object**.
- Find and select the “”Users”” object from the list.
- Choose the specific data fields from Users that you want in your Excel sheet.
- Apply any filters or sorting if needed.
- Click “”Import”” to pull the data into your sheet.
Step 3: Set up auto-refresh (Optional)
Keep your Users data current automatically.
- After the data is imported, find your import listed in the Coefficient sidebar next to the Refresh button.
- Click the refresh settings icon.
- Select “”Schedule”” to automate updates.
- Choose how often the data should refresh (e.g., hourly, daily) and set a time.
- Save the schedule. Your Users data will update automatically.
Available Asana Objects
- Users
- Teams
- Projects
- Tasks
- Sections
- Stories
- Tags
- Portfolios
- Goals
How to Import To-Do List Data from Basecamp into Excel
Bringing your Basecamp To-Do List data into Excel helps you track tasks, manage assignments, and get an overview of your project workloads. Manually exporting this data is inefficient and quickly becomes old.
Coefficient creates a live connection for automatic data updates.
This guide shows you the steps to easily import your To-Do List data from Basecamp into Excel.
TLDR
-
Step 1:
Step 1. Install Coefficient in Excel and connect your Basecamp account.
-
Step 2:
Step 2. Choose the Basecamp connector from the Import from… options.
-
Step 3:
Step 3. Select the To-Do List object and pick the relevant fields.
-
Step 4:
Step 4. Import the data into your sheet and set up auto-refresh.
Step-by-step guide to importing Basecamp To-Do List into Excel
Step 1: Install and connect Coefficient
You need Coefficient installed in your Excel application.
- Open Excel.
- Go to the Insert tab.
- Click Get Add-ins.
- Search for “”Coefficient”” and install it from the Office Add-ins store.
- Once installed, open the Coefficient sidebar from the Home or Add-ins tab.
- Click “”Import from…”” and find the Basecamp connector. You will be guided through connecting your Basecamp account.
Step 2: Import the To-Do List data
Now you can pull your To-Do List data into Excel.
- In the Coefficient sidebar for Basecamp, select to import from an **Object**.
- Choose the “”To-Do List”” object from the list.
- Select the specific data fields related to your To-Do List that you need in Excel.
- Apply any filters or sorting if required.
- Click the “”Import”” button to bring the data into your sheet.
Step 3: Set up auto-refresh (Optional)
Keep your To-Do List data current without manual updates.
- After the import is complete, find your import in the Coefficient sidebar next to the Refresh button.
- Click the settings icon for refresh options.
- Select “”Schedule”” to set up automated updates.
- Choose how often the data should refresh (e.g., hourly, daily) and set a specific time.
- Save your schedule. Your To-Do List data will now update automatically.
Available Basecamp Objects
- People
- Messages
- To-Do List
- Calendar Events