NetSuite vs Xero: Quick Guide for 2025

As your company grows, so do your accounting needs. Two popular options stand out in the market: NetSuite and Xero. 

But which one is the perfect fit for your evolving business? 

Let’s dive into a comprehensive comparison to help you make an informed decision.

The Contenders: NetSuite and Xero at a Glance

NetSuite: The All-in-One Powerhouse

NetSuite isn’t just accounting software; it’s a comprehensive Enterprise Resource Planning (ERP) solution. It brings together Customer Relationship Management (CRM), accounting, operations, and more under one digital roo. This unified approach makes NetSuite a powerhouse for businesses with complex needs and ambitious growth plans.

Xero: The Small Business Champion

Xero, on the other hand, zeroes in on what small businesses need most: straightforward, cloud-based accounting and bookkeeping. It’s designed to simplify financial management for entrepreneurs and small business owners who want powerful features without the complexity.

CategoryNetSuiteXero
Target Business SizeMid-size to large enterprisesSmall to medium-sized businesses
Core FunctionalityComprehensive ERP (including CRM, HR, and more)Cloud-based accounting and bookkeeping
ScalabilityHighly scalable, supports complex multi-entity operationsScalable for small business growth, may have limitations for very large operations
Ease of UseSteeper learning curve, more complex interfaceUser-friendly, intuitive interface
Pricing ModelCustom quotes, typically annual contractsTransparent tiered pricing, monthly subscriptions
Mobile CapabilitiesBasic mobile app, focuses on approvals and reportingComprehensive mobile app with full feature parity

Feature Face-Off: What Can Each Platform Do?

Crunching the Numbers: Accounting and Financial Management

Both NetSuite and Xero offer the essentials: general ledger, accounts payable and receivable, and financial reporting. But that’s where the similarities end.

NetSuite takes financial management to the next level with:

  • Multi-entity consolidation for businesses with complex structures
  • Advanced revenue recognition
  • Comprehensive fixed asset management

Xero keeps it simpler but still powerful:

  • Bank reconciliation
  • Inventory tracking
  • Basic project costing

For businesses juggling multiple entities or dealing with complex financial scenarios, NetSuite’s advanced capabilities give it a clear edge. But for small businesses focused on core accounting tasks, Xero’s streamlined approach might be just right.

Room to Grow: Scalability and Expansion Support

As your business expands, your software needs to keep pace. Here’s how our contenders stack up:

NetSuite:

  • Supports multi-national, multi-currency operations
  • Offers industry-specific solutions
  • Scales from small business to enterprise-level without changing platforms

Xero:

  • Handles basic multi-currency transactions
  • Supports growing businesses with additional users and features
  • May require migration to more robust systems for very large or complex operations

NetSuite clearly has the advantage for businesses with aggressive growth plans or complex organizational structures. Xero, while capable of supporting growth, may hit limitations for rapidly expanding or highly complex businesses.

Playing Well with Others: Integration and Ecosystem

In today’s interconnected business world, your accounting software can’t exist in isolation. Let’s see how NetSuite and Xero connect with other tools:

NetSuite:

  • Offers a vast array of built-in applications covering most business needs
  • Provides APIs for custom integrations
  • Has a smaller but more enterprise-focused third-party app marketplace

Xero:

  • Boasts a large ecosystem of third-party integrations
  • Offers open APIs for developers
  • Particularly strong in integrations for small business tools

While both platforms offer robust integration options, Xero’s extensive marketplace of small business apps gives it an edge for smaller operations. NetSuite’s built-in applications and enterprise-focused integrations make it more suitable for larger, more complex businesses.

User Experience: Navigating the Software Seas

Finding Your Way: Interface and Navigation

The best features in the world don’t matter if you can’t figure out how to use them. Let’s compare the user experience of NetSuite and Xero:

NetSuite:

  • Comprehensive interface with many options and customization possibilities
  • Steeper learning curve due to its extensive feature set
  • Highly customizable dashboards and reports

Xero:

  • Clean, intuitive interface designed for non-accountants
  • Shorter learning curve for basic functions
  • User-friendly dashboard with key financial metrics at a glance

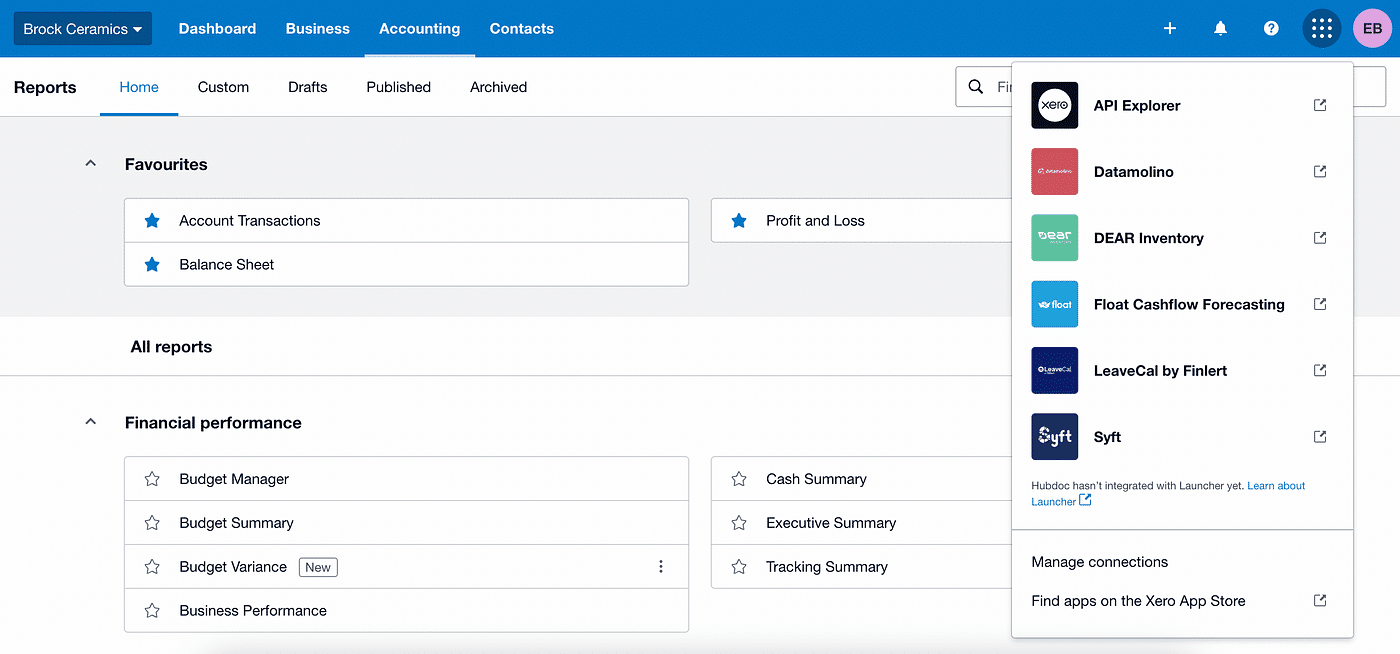
[Insert Screenshot: Side-by-side comparison of NetSuite and Xero dashboards] This visual should highlight the differences in complexity and layout between the two platforms.

For small business owners who want to dive in quickly, Xero’s intuitive interface is a major plus. However, for businesses that need deep customization and don’t mind investing time in learning the system, NetSuite’s powerful interface can offer significant long-term benefits.

On the Go: Mobile Accessibility

In our increasingly mobile world, the ability to manage finances on the go is crucial. Here’s how NetSuite and Xero perform on mobile devices:

NetSuite:

  • Offers a mobile app with access to key features
  • Provides a responsive web interface for tablet users
  • Mobile functionality focuses on approvals, expense management, and basic reporting

Xero:

  • Features a highly rated mobile app for iOS and Android
  • Allows for invoice creation, expense tracking, and bank reconciliation on mobile devices
  • Offers a consistent experience between mobile and desktop versions

While both platforms offer mobile solutions, Xero’s mobile app is more comprehensive and user-friendly, making it a better choice for business owners who frequently work on the go.

Dollars and Sense: Pricing and Cost Considerations

Now for the million-dollar question (hopefully not literally): How much will these solutions set you back?

Pricing Models: Transparency vs. Customization

NetSuite pricing:

  • Customized pricing based on business needs and size
  • Requires contacting sales for a quote
  • Often involves a significant upfront investment

Xero pricing:

  • Transparent, tiered pricing structure
  • Plans starting from $12/month for very small businesses
  • Higher tiers available for growing businesses with more complex needs

Key Stat: While specific NetSuite pricing isn’t publicly available, industry reports suggest implementation costs can range from $25,000 to $100,000+ for mid-sized businesses.

Xero’s transparent pricing is appealing for small businesses with straightforward needs. NetSuite’s custom pricing reflects its enterprise-grade capabilities but can be a significant investment.

The Long Game: Total Cost of Ownership

When considering costs, it’s crucial to look beyond the sticker price:

NetSuite additional costs:

  • Implementation and customization fees
  • Staff training and change management
  • Potential need for dedicated IT support

Xero additional considerations:

  • Costs of add-ons for advanced features
  • Potential need for third-party integrations
  • Less extensive training requirements

While Xero may seem more economical upfront, businesses with complex needs might find NetSuite’s comprehensive solution more cost-effective in the long run, despite the higher initial investment.

Support When You Need It: Customer Service and Resources

Even the most user-friendly software can leave you scratching your head sometimes. Let’s compare the support offered by both platforms.

Help is on the Way: Support Options

NetSuite support:

  • 24/7 phone and email support
  • Dedicated account managers for enterprise clients
  • Comprehensive knowledge base and community forums

Xero support:

  • Email support with 24/48 hour response times
  • Live chat during business hours
  • Extensive online help center and community

NetSuite’s support is more comprehensive, reflecting its enterprise focus. Xero’s support, while more limited, is generally sufficient for its target market of small businesses.

Learning the Ropes: Training and Educational Resources

Both platforms recognize the importance of user education:

NetSuite offers:

  • In-depth training programs and certification courses
  • Regular webinars and virtual events
  • A vast library of educational content

Xero provides:

  • Free online courses through Xero Central
  • Regular webinars and video tutorials
  • A network of certified advisors for personalized guidance

While both platforms invest heavily in user education, NetSuite’s resources are more extensive, reflecting the complexity of its system.

Making the Right Choice: Your Business, Your Decision

Now that we’ve compared NetSuite and Xero across key areas, let’s look at which businesses might benefit most from each platform.

When NetSuite Shines

NetSuite is ideal for:

  • Mid to large-sized businesses with complex operations
  • Companies experiencing rapid growth or planning significant expansion
  • Businesses requiring advanced financial management and reporting
  • Organizations needing a unified system for multiple business functions

Xero’s Sweet Spot

Xero is perfect for:

  • Small businesses and startups
  • Solopreneurs and freelancers
  • Companies with straightforward accounting needs
  • Businesses prioritizing user-friendliness and cost-effectiveness

Your Decision Checklist

Consider these factors when making your choice:

  • Current business size and complexity
  • Projected growth and future needs
  • Budget for software and implementation
  • Required features and integrations
  • In-house IT capabilities
  • Importance of mobile accessibility
  • Need for advanced reporting and analytics

Choosing Between NetSuite and Xero

The choice between NetSuite and Xero ultimately depends on your business size, complexity, and growth trajectory. 

Remember, regardless of which platform you choose, the key to maximizing your accounting software’s potential lies in how well you can integrate it with your other business systems and leverage real-time data for decision-making.

Ready to take your financial reporting and analysis to the next level? Get started with Coefficient to seamlessly integrate your accounting data with spreadsheets, enabling real-time updates and powerful insights that drive business growth.
How to Export Xero Data from Multiple Accounts: A Comprehensive Guide

Looking to consolidate financial data from multiple Xero accounts? You’re not alone.

Many face this challenge – and unfortunately, Xero doesn’t allow users to copy all of an organization’s data at once.

But don’t worry – we’ve got you covered. This guide will walk you through the process of exporting data from multiple Xero accounts, helping you streamline your financial reporting and analysis.

Export Xero Data from Multiple Accounts: Top 3 Methods

SolutionBest For
CoefficientOrganizations managing multiple Xero accounts that need consolidated reporting, real-time data access, and automated updates in spreadsheets.
Manually Exporting Each AccountSmall businesses with a few Xero accounts who need infrequent exports and prefer direct interaction with Xero’s interface.
Leveraging the Xero APILarge enterprises or accounting firms handling numerous Xero accounts, requiring automated, scalable solutions for bulk data extraction and processing.

Method 1. Exporting Xero Data with Coefficient

Coefficient syncs live data from various business systems, like Xero, directly into Excel and Google Sheets. For Xero users, this means you can build real-time financial reports, automate data updates, and streamline your accounting workflows without leaving your spreadsheet.

Key features of Coefficient:

  1. Live Data Export: Pull real-time data directly into Excel or Google Sheets.
  2. Automated Reporting: Set up scheduled data refreshes for up-to-date reports.
  3. Data Accuracy: Ensure precision with direct connections to Xero.

Step-by-Step-Guide

Step 1. Install Coefficient

For Google Sheets

  • Open a new or existing Google Sheet, navigate to the Extensions tab, and select Add-ons > Get add-ons.
  • In the Google Workspace Marketplace, search for “Coefficient.”
  • Follow the prompts to grant necessary permissions.
  • Launch Coefficient from Extensions > Coefficient > Launch.
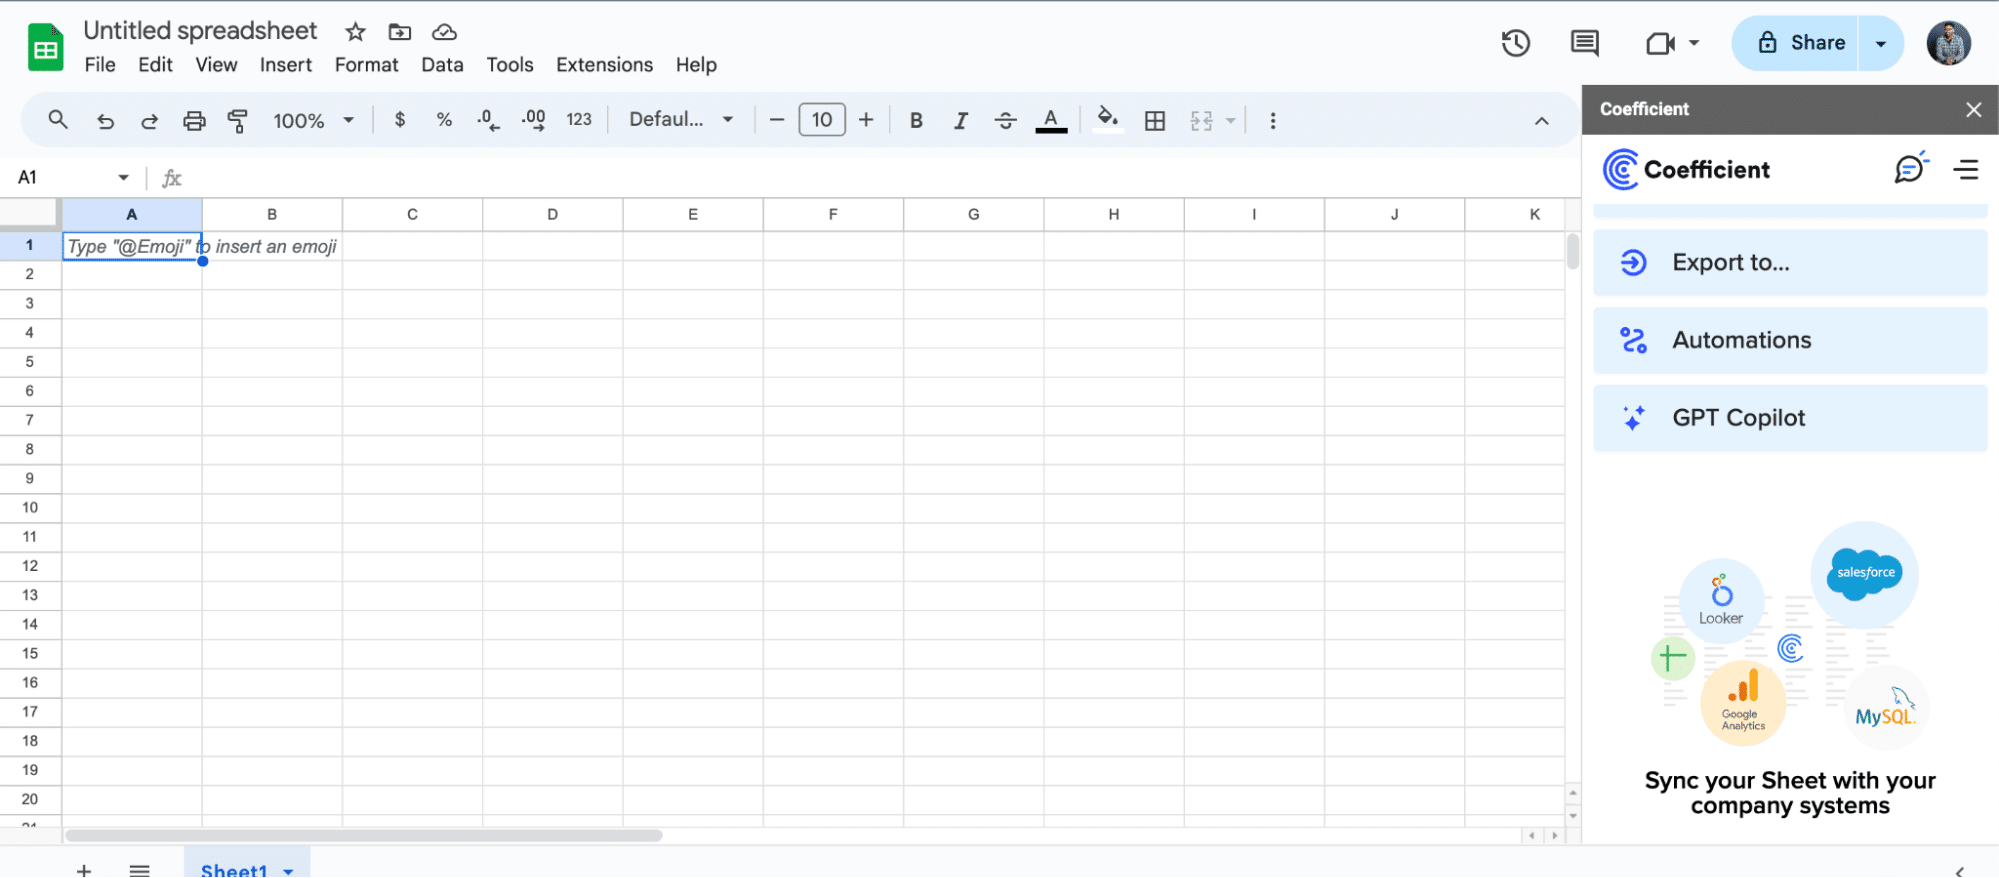
  • Coefficient will open on the right-hand side of your spreadsheet.
Coefficient open in sidebar

For Microsoft Excel

  • Open Excel from your desktop or in Office Online. Click ‘File’ > ‘Get Add-ins’ > ‘More Add-Ins.’
  • Type “Coefficient” in the search bar and click ‘Add.’
  • Follow the prompts in the pop-up to complete the installation.
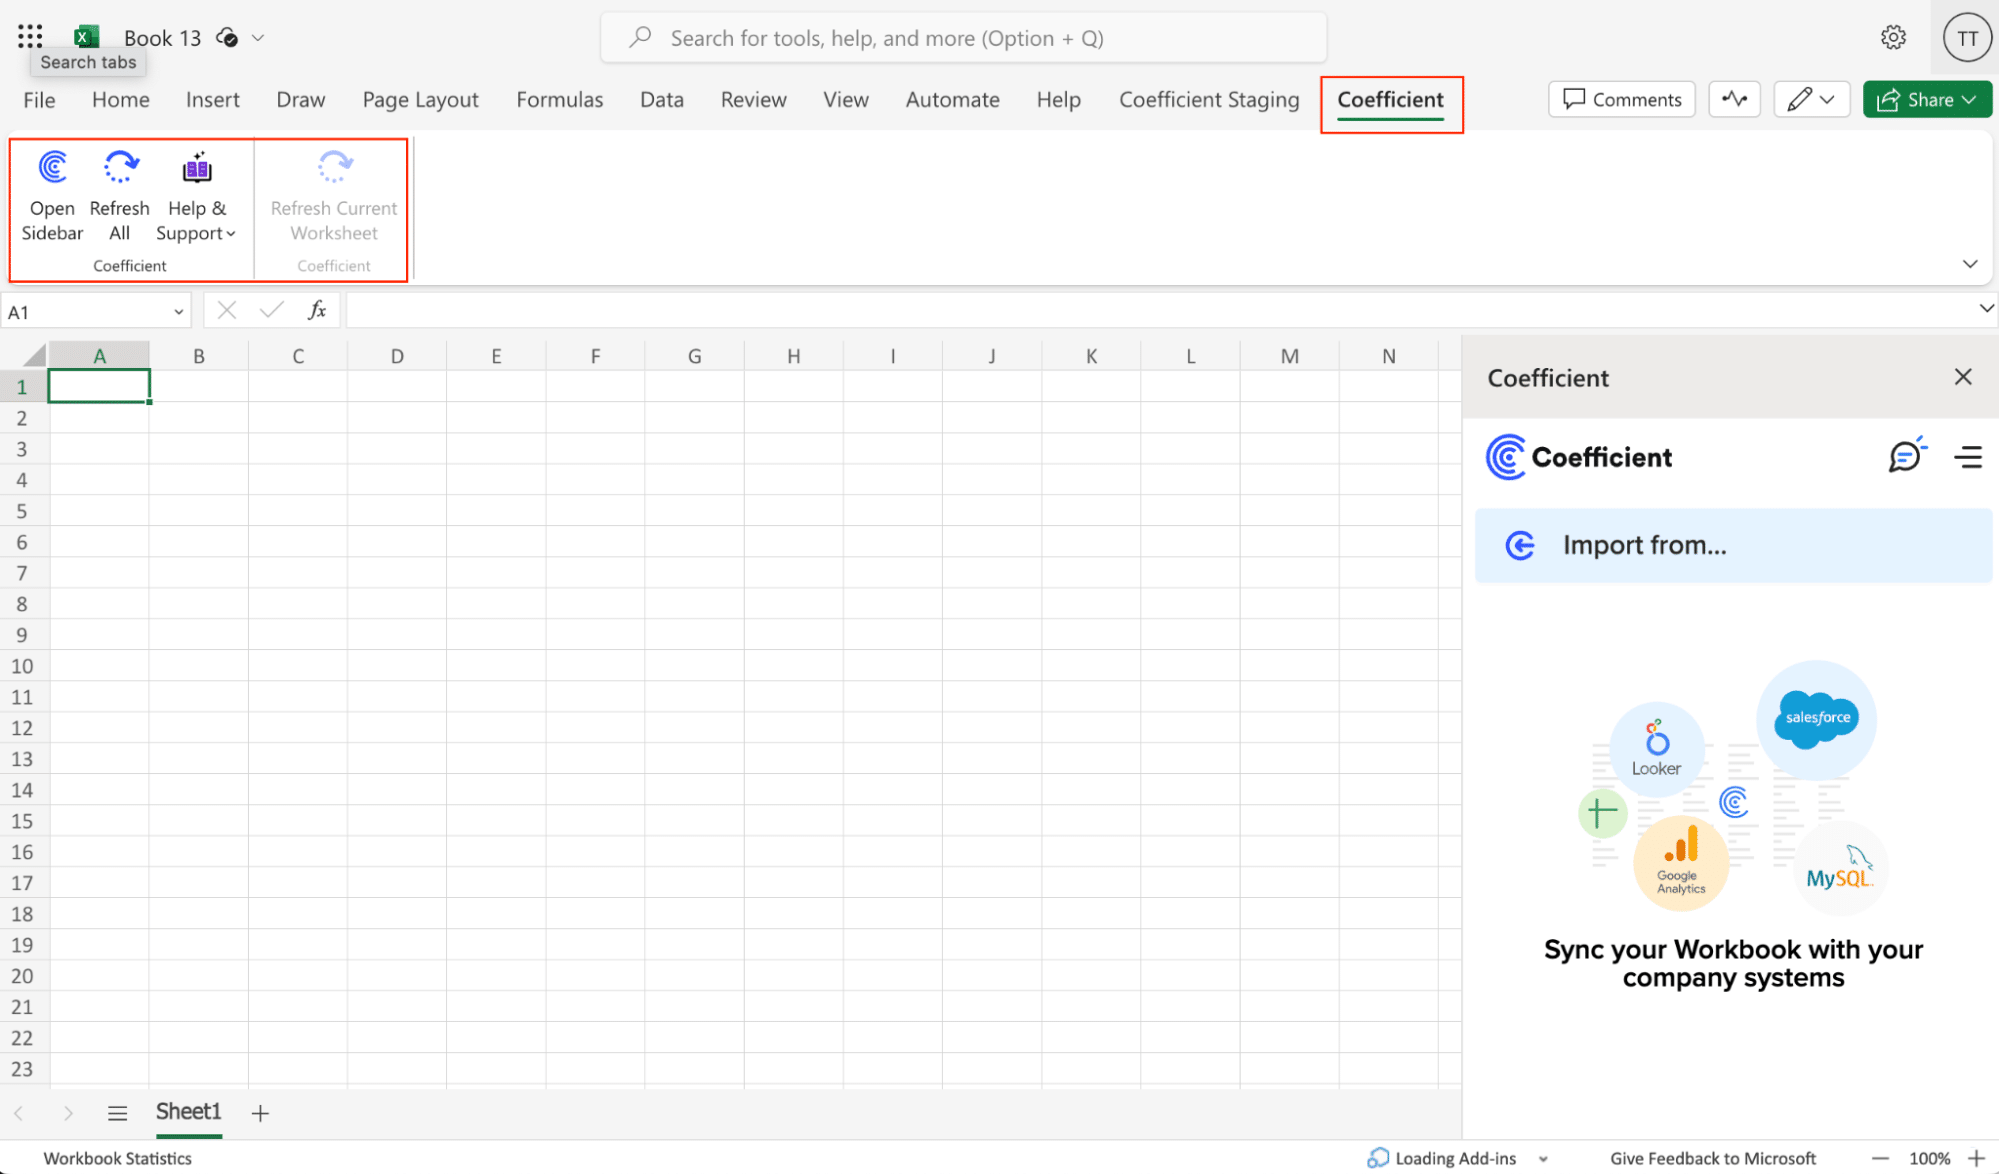
  • Once finished, you will see a “Coefficient” tab in the top navigation bar. Click ‘Open Sidebar’ to launch Coefficient.
 Launching Coefficient sidebar

Step 2: Connect to Xero

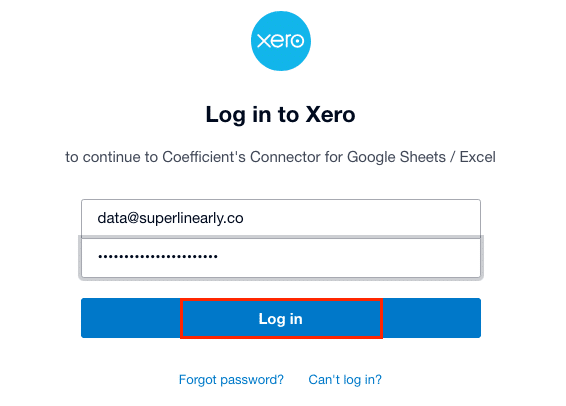
Enter your Xero demo credentials and click “Login.”

Entering Xero demo credentials

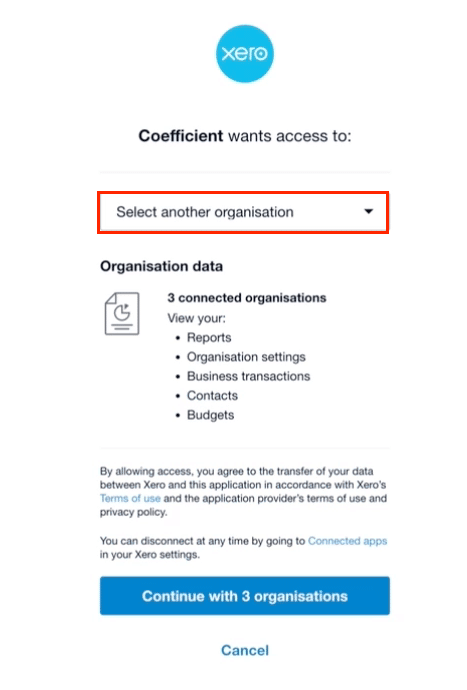
Select one or more of the available organizations to connect to Coefficient.

Selecting Xero organizations

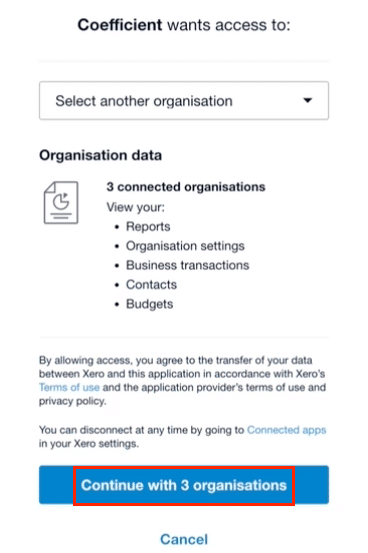
Click “Continue” to proceed with the selected organization(s).

Continuing with selected organization

Step 3: Export Your Data

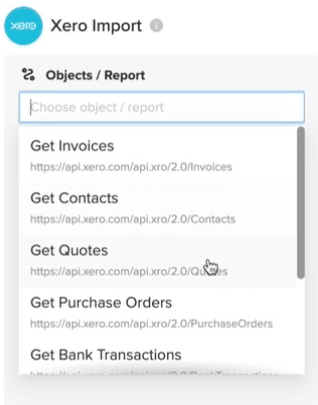
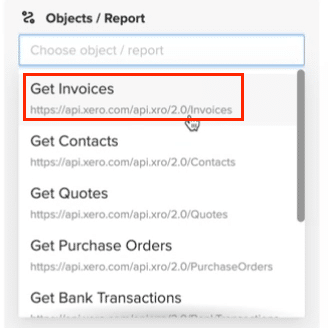
Choose an endpoint from the available options, such as Invoices, Contacts, or Users.

Choosing endpoint option

For this example, select “Get Invoices” to fetch invoice data from Xero.

Selecting Get Invoices

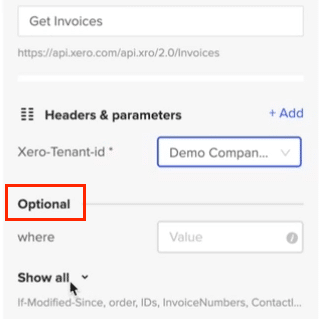
Enter the Tenant ID (organization ID) for your organization.

Entering Tenant ID

Optionally, select additional fields to include in the data import.

Selecting additional fields

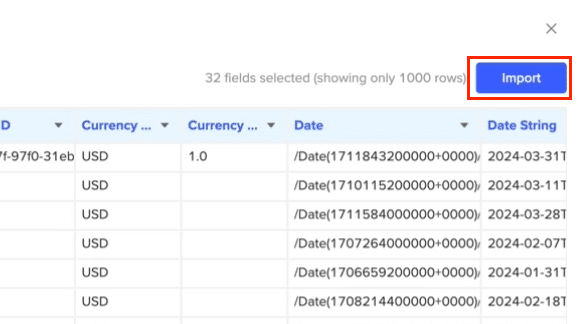
Click “Import” to fetch the invoice data into Google Sheets spreadsheet.

Importing invoice data

From here, follow these steps to consolidate your data:

  1. Set up data imports for the P&L data from each account
  2. Combine your datasets together
  3. Create a summary sheet that pulls data from each account’s import
  4. Set up automatic refreshes to keep the consolidated report up-to-date

Pro tip: Coefficient also offers pre-built reports templates to sync your live Xero data into, including a Xero Finance Dashboard, a consolidated cashflow report, and Xero finance projections template.

Method 2. Manually Exporting Each Account

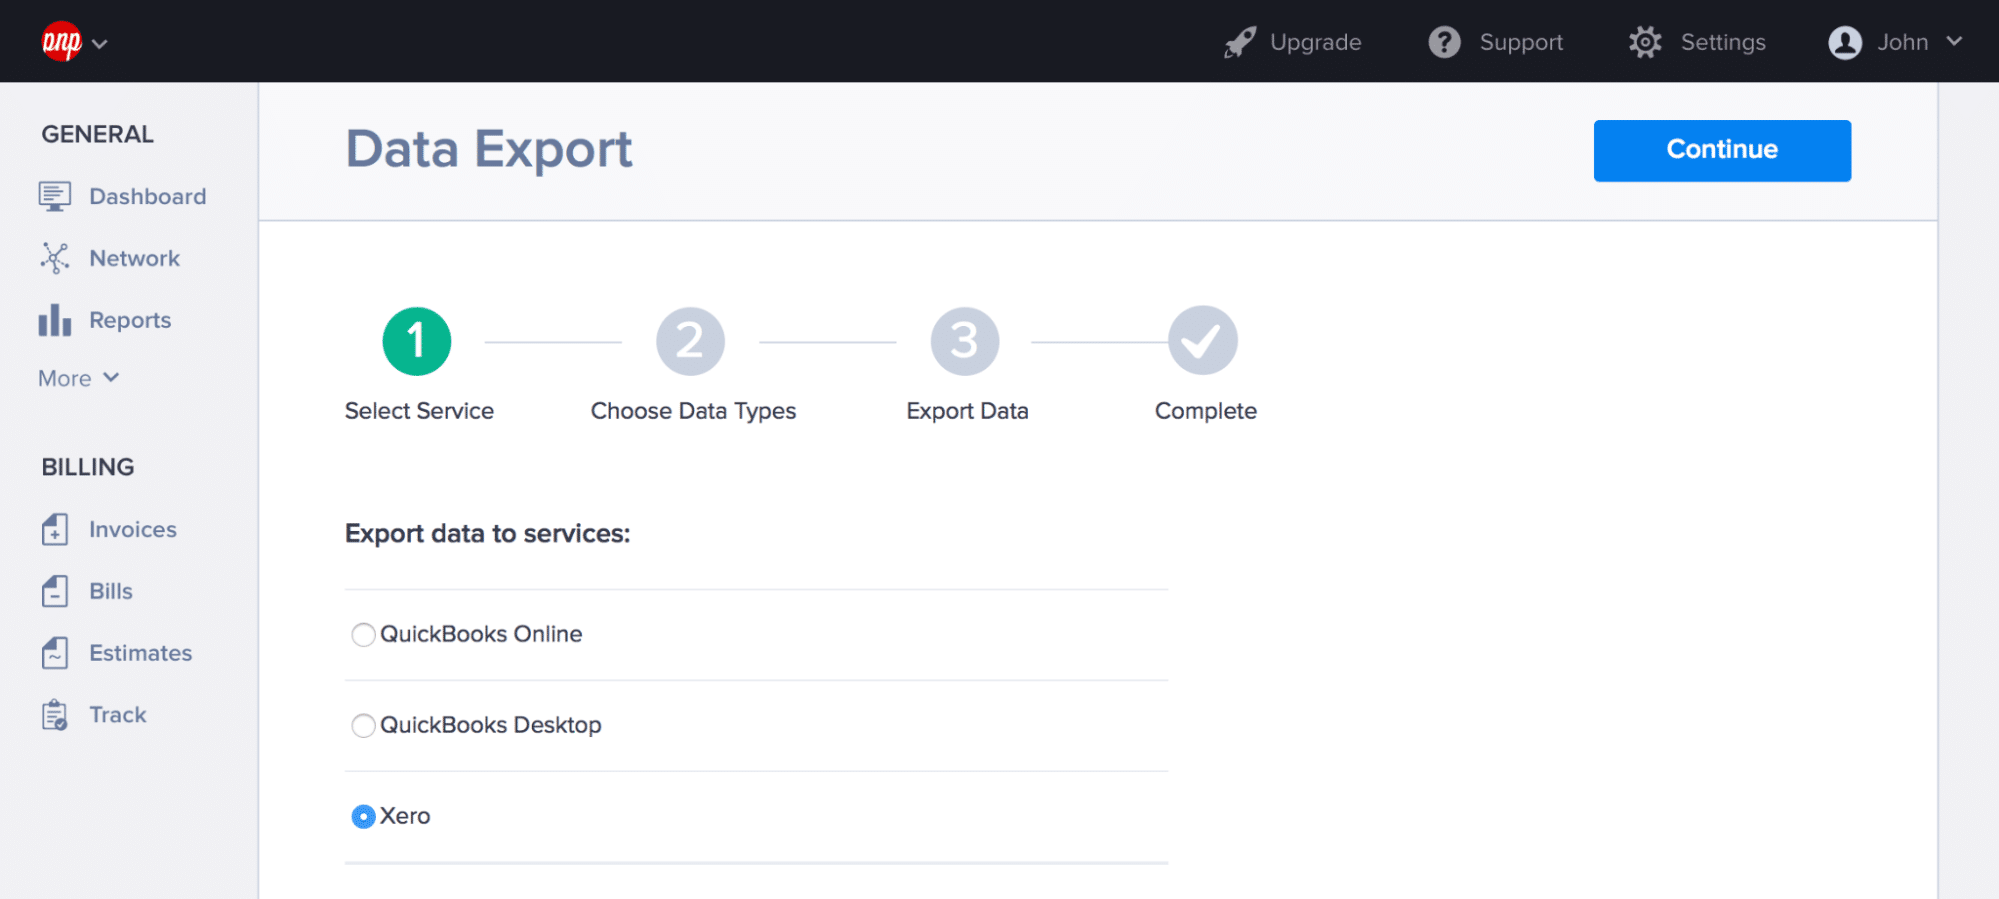
Manually exporting each account

Xero provides a native export function for each account. While it requires manual effort for multiple accounts, it’s straightforward and doesn’t require additional tools.

Step-by-step guide:

Step 1: Prepare Your Accounts

  1. Ensure you have access to each Xero account you want to export data from.
  2. List the accounts you need to access and the specific data you need from each (e.g., invoices, bills, transactions).

Step 2: Log in to Each Xero Account

  1. Log in to the first Xero account through the Xero login page.
  2. Navigate to the required section (e.g., invoices, reports) where the data is located.

Step 3: Export Data from Each Account

For each Xero account, repeat the following steps:

Exporting Invoices

  1. Go to ‘Business’ > ‘Invoices’.
  2. Apply any necessary filters to view the data you need.
  3. Click the ‘Export’ button and select ‘Excel’ or ‘CSV’ to download the invoice data.

Exporting Bills

  1. Go to ‘Business’ > ‘Bills to Pay’.
  2. Filter the bills if needed.
  3. Click the ‘Export’ button and choose ‘Excel’ or ‘CSV’.

Exporting Transactions

  1. Go to ‘Accounting’ > ‘Reports’.
  2. Select the ‘Account Transactions’ report.
  3. Customize the report by setting the appropriate date range and filters.
  4. Click the ‘Export’ button and choose ‘Excel’ or ‘CSV’.

Step 4: Consolidate Data

  1. Open each exported file in Excel or a similar spreadsheet program.
  2. Combine the data into a single master file. You can do this by copying and pasting the data or using Excel’s ‘Power Query’ feature to merge the files.

Pros:

  • No additional tools required
  • Straightforward process
  • Provides granular control over exported data

Cons:

  • Time-consuming for multiple accounts
  • Requires manual consolidation of data
  • Limited to predefined export formats

Method 3. Leveraging the Xero API

Leveraging Xero API

Coders can export data from multiple Xero accounts via the Xero API. This method can be automated and is suitable for handling large volumes of data.

Prerequisites

  1. API Access: Ensure you have API access for each Xero account. You will need the necessary OAuth2 credentials (client ID and client secret) for authentication.
  2. Programming Knowledge: Basic understanding of programming languages like Python, Node.js, or any language that supports HTTP requests.

Steps to use the Xero API:

Step 1: Set Up Your Environment

Install Required Libraries:For Python, you might use libraries such as requests and xero-python.
pip install requests xero-python

Step 2: Authenticate with the Xero API

Obtain OAuth2 Tokens: Follow Xero’s OAuth2 guide to obtain access tokens for each Xero account.

Step 3: Write the Script to Export Data

Example in Python

Set Up OAuth2 Authentication:
from xero_python.accounting import AccountingApi

from xero_python.api_client import ApiClient

from xero_python.api_client.configuration import Configuration

from xero_python.identity import IdentityApi

from xero_python.api_client.oauth2 import OAuth2Token

# Configuration

client_id = ‘YOUR_CLIENT_ID’

client_secret = ‘YOUR_CLIENT_SECRET’

redirect_uri = ‘YOUR_REDIRECT_URI’

# OAuth2 Token

token = OAuth2Token(client_id, client_secret)

# API Client

config = Configuration(oauth2_token=token)

api_client = ApiClient(config)

identity_api = IdentityApi(api_client)

accounting_api = AccountingApi(api_client)

# Set access token

token.set_access_token(‘YOUR_ACCESS_TOKEN’)

Function to Fetch Data:

def fetch_invoices(tenant_id):

    api_client.set_tenant_id(tenant_id)

    invoices = accounting_api.get_invoices()

    return invoices

def fetch_bills(tenant_id):

    api_client.set_tenant_id(tenant_id)

    bills = accounting_api.get_bills()

    return bills

def fetch_transactions(tenant_id):

    api_client.set_tenant_id(tenant_id)

    transactions = accounting_api.get_bank_transactions()

    return transactions

Main Script to Export Data:
import csv

tenant_ids = [‘TENANT_ID_1’, ‘TENANT_ID_2’]  # List of Xero tenant IDs

for tenant_id in tenant_ids:

    invoices = fetch_invoices(tenant_id)

    bills = fetch_bills(tenant_id)

    transactions = fetch_transactions(tenant_id)

    # Export invoices to CSV

    with open(f’invoices_{tenant_id}.csv’, mode=’w’) as file:

        writer = csv.writer(file)

        writer.writerow([‘InvoiceID’, ‘Date’, ‘DueDate’, ‘Total’])  # Header

        for invoice in invoices.invoices:

            writer.writerow([invoice.invoice_id, invoice.date, invoice.due_date, invoice.total])

    # Export bills to CSV

    with open(f’bills_{tenant_id}.csv’, mode=’w’) as file:

        writer = csv.writer(file)

        writer.writerow([‘BillID’, ‘Date’, ‘DueDate’, ‘Total’])  # Header

        for bill in bills.bills:

            writer.writerow([bill.bill_id, bill.date, bill.due_date, bill.total])

    # Export transactions to CSV

    with open(f’transactions_{tenant_id}.csv’, mode=’w’) as file:

        writer = csv.writer(file)

        writer.writerow([‘TransactionID’, ‘Date’, ‘Amount’])  # Header

        for transaction in transactions.bank_transactions:

            writer.writerow([transaction.transaction_id, transaction.date, transaction.amount])

Step 4: Run the Script

Execute the script to fetch and export data from all specified Xero accounts.

Pros:

  • Highly customizable
  • Can be automated for regular exports
  • Allows real-time data access

Cons:

  • Requires programming skills
  • Initial setup can be complex
  • Requires ongoing maintenance

Exporting Xero Data? Do it the Easy Way with Coefficiient

Exporting data from multiple Xero accounts doesn’t have to be a headache. Whether you choose Xero’s native export function, leverage the API, or use a powerful tool like Coefficient, you now have the knowledge to streamline your financial reporting process.

By following the methods and best practices outlined in this guide, you’ll be able to consolidate your Xero data efficiently, giving you clearer insights into your overall financial picture. This not only saves time but also empowers you to make more informed business decisions.

Ready to revolutionize how you handle your Xero data?

Get started with Coefficient today and experience the ease of exporting data from multiple Xero accounts firsthand.

Top 4 Xero Reports and Dashboards in 2024

Searching for the most effective Xero reports? This guide presents four essential dashboards that offer clear insights into your financial data, empowering you to make informed decisions and drive business growth in 2024.

#1 Xero Inventory Excel Template

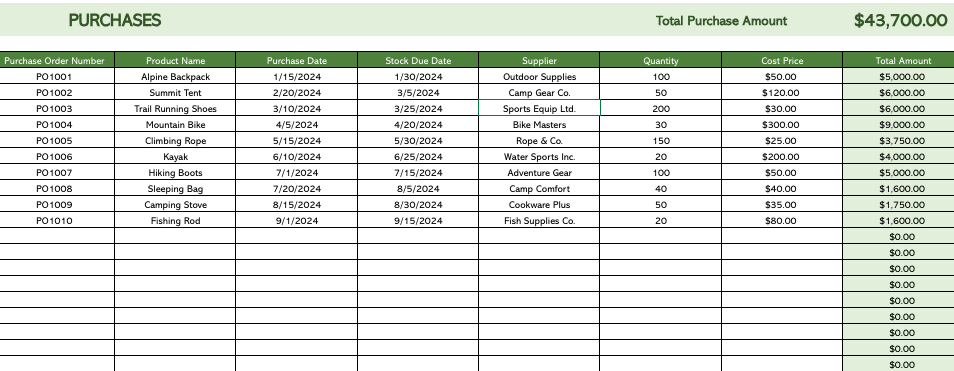
The Xero Inventory Excel Template streamlines your inventory management process. By integrating directly with your Xero account, this template provides real-time visibility into your stock levels, product performance, and inventory trends, all within Excel.

Use Case: Inventory Management and Optimization

This template helps businesses:

  • Monitor current inventory across all products
  • Identify top-selling items and slow-moving stock
  • Set up alerts for when stock reaches reorder levels
  • Manage and track purchase orders efficiently

Metrics Tracked

  • SKU, Size, Colour
  • Original Stock Level
  • Reorder Point
  • Cost Price and Markup
  • Retail Price
  • Total Orders
  • Orders Waiting to be Fulfilled
  • Stock Waiting to be Received
  • Stock on Hand

Get the Xero Inventory Excel Template

#2 Xero 3-Year Finance Projections Template

The Xero Finance Projections Template is crucial for businesses aiming to forecast their financial future. This template connects directly to your Xero account, pulling in real-time financial data to create accurate and dynamic financial projections.

Use Case: Financial Forecasting and Planning

This template enables businesses to:

  • Generate detailed financial projections based on historical data
  • Develop multiple financial scenarios to prepare for different outcomes
  • Use projections to inform budget decisions and resource allocation
  • Create professional financial forecasts for stakeholders and potential investors

Metrics Tracked

  • Net Income
  • Changes in Working Capital
  • Depreciation and Amortization
  • Accounts Receivable
  • Accounts Payable
  • Deferred Taxes
  • Cash From Sale Of Capital Assets
  • Cash Paid for Purchase Of Capital Assets
  • Increases in All Other Long-Term Assets

Access the Xero Finance Projections Template

#3 Xero Consolidated Reporting Dashboard

The Xero Consolidated Reporting Dashboard is essential for businesses managing multiple entities or subsidiaries. This dashboard automates the process of consolidating financial data from various Xero organizations, providing a comprehensive view of your overall business performance.

Use Case: Multi-entity Financial Consolidation

This template helps businesses:

  • Automate the process of combining financial data from multiple Xero entities
  • Gain a holistic view of your organization’s financial performance across all entities
  • Reduce errors associated with manual consolidation processes
  • Easily prepare consolidated financial statements for regulatory requirements

Metrics Tracked

  • Gross profit (cash)
  • Open invoices by customer
  • Open invoices amount by customer
  • Overdue invoices by customer
  • Overdue invoices amount by customer
  • Total expenses (cash) by category
  • Paid invoices amount
  • Paid invoices
  • Income (cash) by category

Get Started with the Xero Consolidated Reporting Template

#4 Xero Finance Dashboard

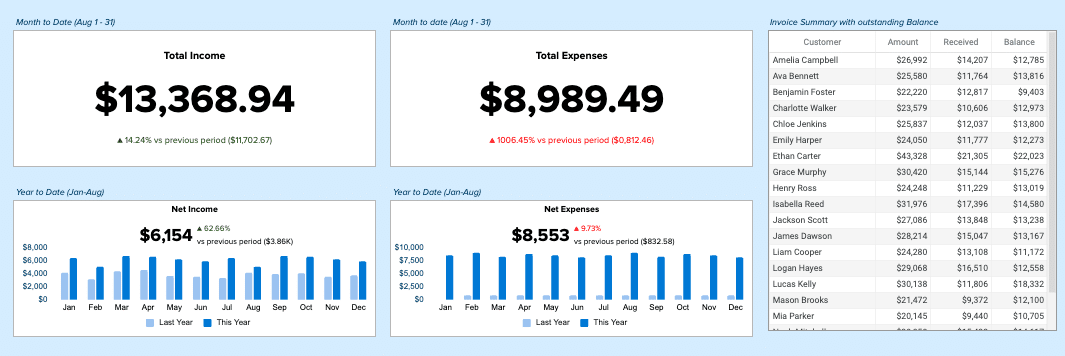
The Xero Finance Dashboard offers a comprehensive visual representation of your business’s financial health. By pulling real-time data directly from Xero, this dashboard provides an at-a-glance overview of key financial metrics, enabling quick and informed decision-making.

Use Case: Financial Performance Monitoring

This dashboard allows businesses to:

  • Track critical financial KPIs in real-time
  • Identify financial trends and patterns through intuitive charts and graphs
  • Easily share financial insights with stakeholders and team members
  • Make data-driven decisions based on up-to-date financial information

Metrics Tracked

  • Income Overview (Total Income, Income by period)
  • Expense Overview (Total Expenses, Expenses by period)
  • Bank Summary (Account balances and received amounts)
  • Profitability (Income, Gross Profit, Net Profit, Other Income, Profit/Loss)
  • Cash Summary (Cash Received, Cash Spent, Cash Surplus/Deficit, Closing Bank Balance)
  • Performance (Gross Profit Margin, Net Profit Margin, Return on Investment)
  • Balance Sheet (Debtors, Creditors, Net Assets)

Explore the Xero Finance Dashboard

Conclusion

These four Xero reports offer valuable insights into various aspects of your business’s financial health, from inventory management to consolidated reporting and financial projections. By using these dashboards, you’ll be better equipped to make data-driven decisions and keep your business on the path to financial success in 2024 and beyond. Start using these Xero reports today to transform your financial reporting and decision-making processes.

Explore All Xero Connector Dashboards

Additional Resources: