


Table of Contents
![]()
- 1. Xero Data Integration Tools That Fix the Finance & Data Workflows
- 2. 7 Best Xero Integrations in 2026: Boost Your Productivity
- 3. How to Connect Xero to Salesforce
- 4. How to Connect Xero to Snowflake
- 5. How to Connect Xero to HubSpot? Top Methods and Tutorials
- 6. NetSuite vs Xero: Quick Guide for 2025

In today’s data-driven business landscape, integrating financial data from Xero with a powerful data warehousing solution like Snowflake can unlock valuable insights and streamline reporting. This guide will walk you through the advantages of connecting Xero to Snowflake and provide step-by-step instructions for three methods to achieve this integration.
Advantages of Connecting Xero to Snowflake
Integrating Xero with Snowflake offers several key benefits:
- Real-Time Cash Flow Visibility: Sync invoice statuses and payment data from Xero to Salesforce, allowing sales reps to see real-time cash flow impacts of their deals. This empowers them to prioritize collections or adjust payment terms for at-risk accounts, improving overall financial health.
- Automated Quote-to-Cash Process: By connecting Salesforce opportunities to Xero invoices, you can automate the entire quote-to-cash cycle. This reduces processing time, minimizes errors, and accelerates revenue recognition, particularly beneficial for businesses with complex pricing or high transaction volumes.
- Data-Driven Sales Forecasting: Combine historical sales data from Salesforce with actual financial performance from Xero to create more accurate sales forecasts. This integration allows you to factor in seasonality, payment patterns, and customer profitability, leading to more realistic projections and better resource allocation.
Connecting Xero and Snowflake: 3 Methods
There are several methods to connect Xero and Snowflake, each with their own advantages and use cases. Here’s a high-level comparison:
| Solution | Best For |
| Coefficient | Small to medium-sized businesses with limited IT resources but a strong need for data analysis. Ideal for finance teams or sales operations who frequently work in spreadsheets and need to combine Xero financial data with Salesforce CRM data for custom reporting. |
| Zapier | Marketing and sales teams in organizations with diverse software ecosystems beyond just Xero and Salesforce. Best for companies that need to create multi-step workflows involving additional apps (e.g., triggering a Slack notification when a high-value invoice is paid in Xero and updating the corresponding Salesforce opportunity). |
| Dataloader.io | Enterprise-level organizations or those dealing with high data volumes and complex data structures. Optimal for IT teams or data administrators who need granular control over large-scale data migrations or regular bulk updates between Xero and Salesforce. |
Let’s dive into each method in more detail, including step-by-step setup guides.
Method 1: Coefficient – No-Code, User-Friendly
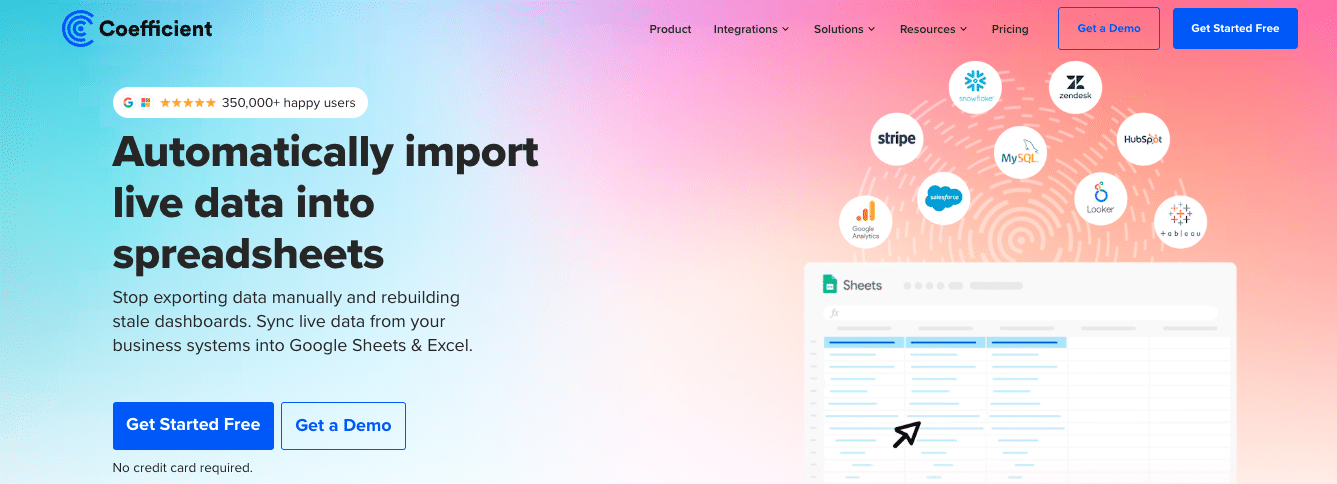
Coefficient is an analytics and automation platform that allows you to easily connect data sources like Xero to destinations like Snowflake without any coding required. It’s an excellent choice for quick integration setup.
Features:
- Intuitive, no-code interface: Simplifies the setup process for users without technical expertise.
- Automated data syncs in real-time: Keeps your Snowflake data up-to-date with the latest from Xero.
- Ability to define custom data workflows: Allows for flexible data management tailored to your needs.
- Affordable pricing plans for businesses of all sizes: Makes it accessible to small and medium-sized businesses.
Pros:
- Simple setup process with no technical skills needed: Enables quick and easy integration.
- Real-time data sync keeps Snowflake always up-to-date: Ensures you have the latest data for analysis.
- Customizable automation fits your unique data needs: Offers flexibility in data management.
Cons:
- Less flexibility compared to code-based solutions: Limited customization for complex data transformations.
- Some advanced features limited to higher-tier plans: Full functionality requires a premium subscription.
How to Connect Xero to Snowflake with Coefficient
Step 1: Install the Coefficient
For Google Sheets
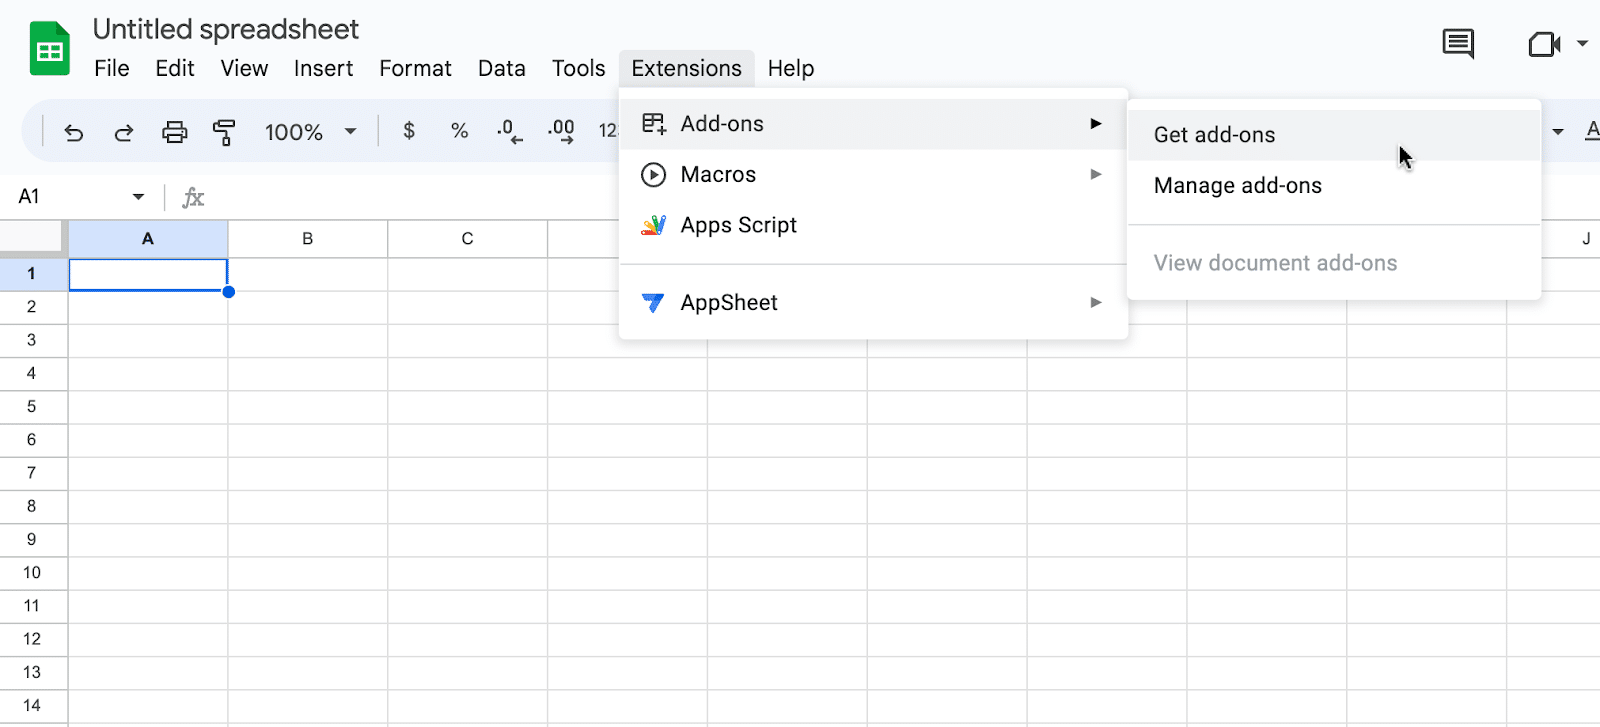
Open a new or existing Google Sheet, navigate to the Extensions tab, and select Add-ons > Get add-ons.
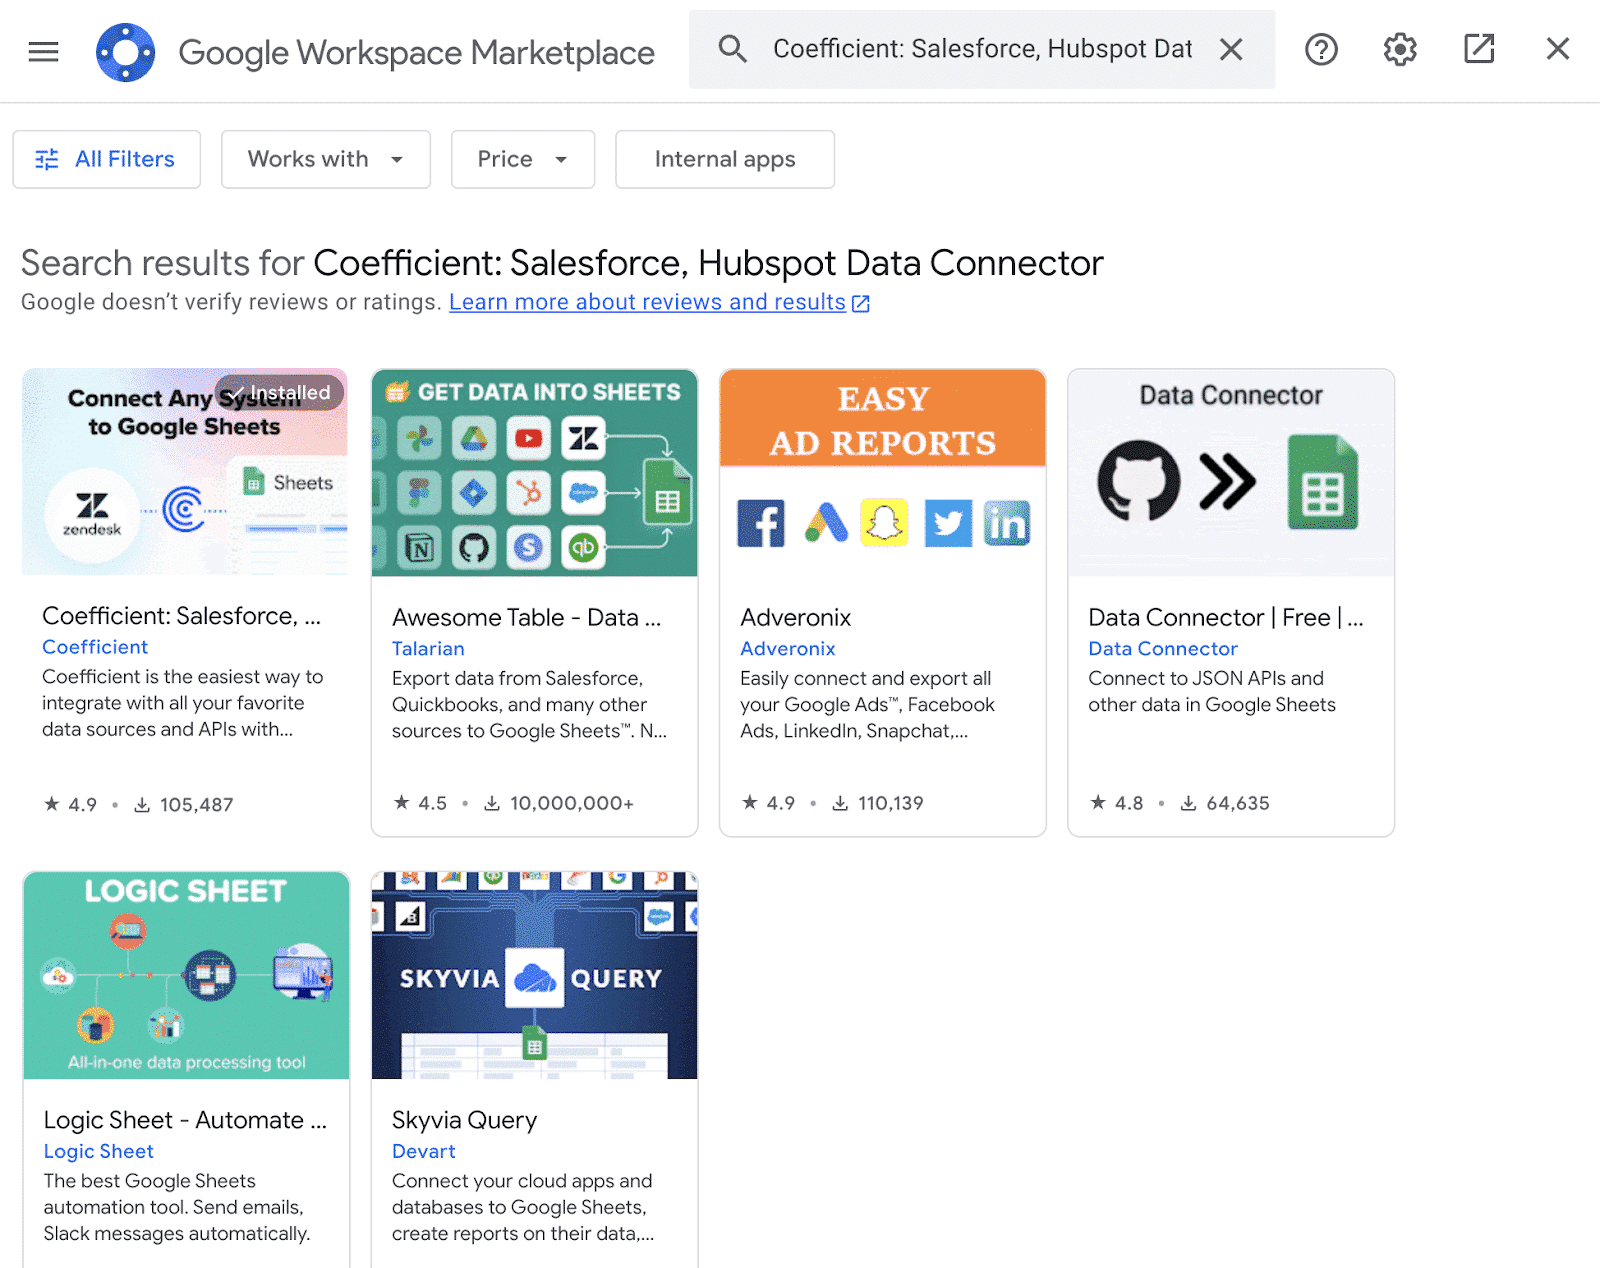
In the Google Workspace Marketplace, search for “Coefficient.”
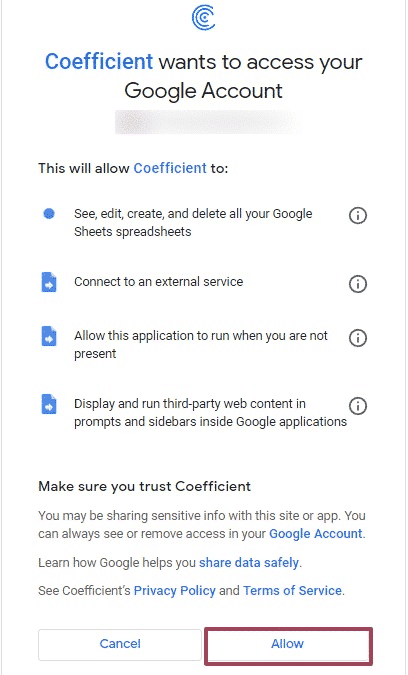
Follow the prompts to grant necessary permissions.
Launch Coefficient from Extensions > Coefficient > Launch.
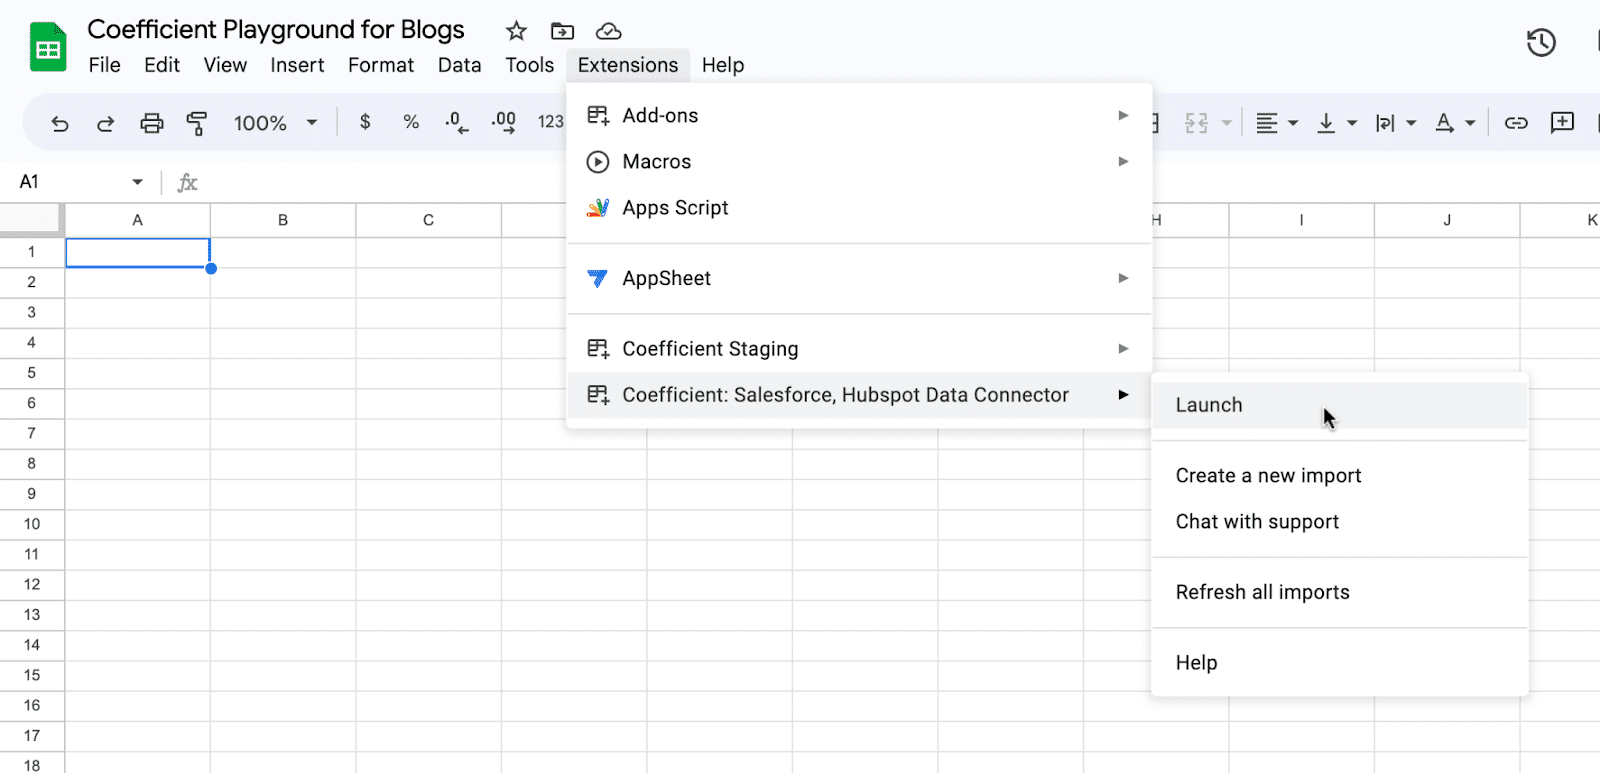
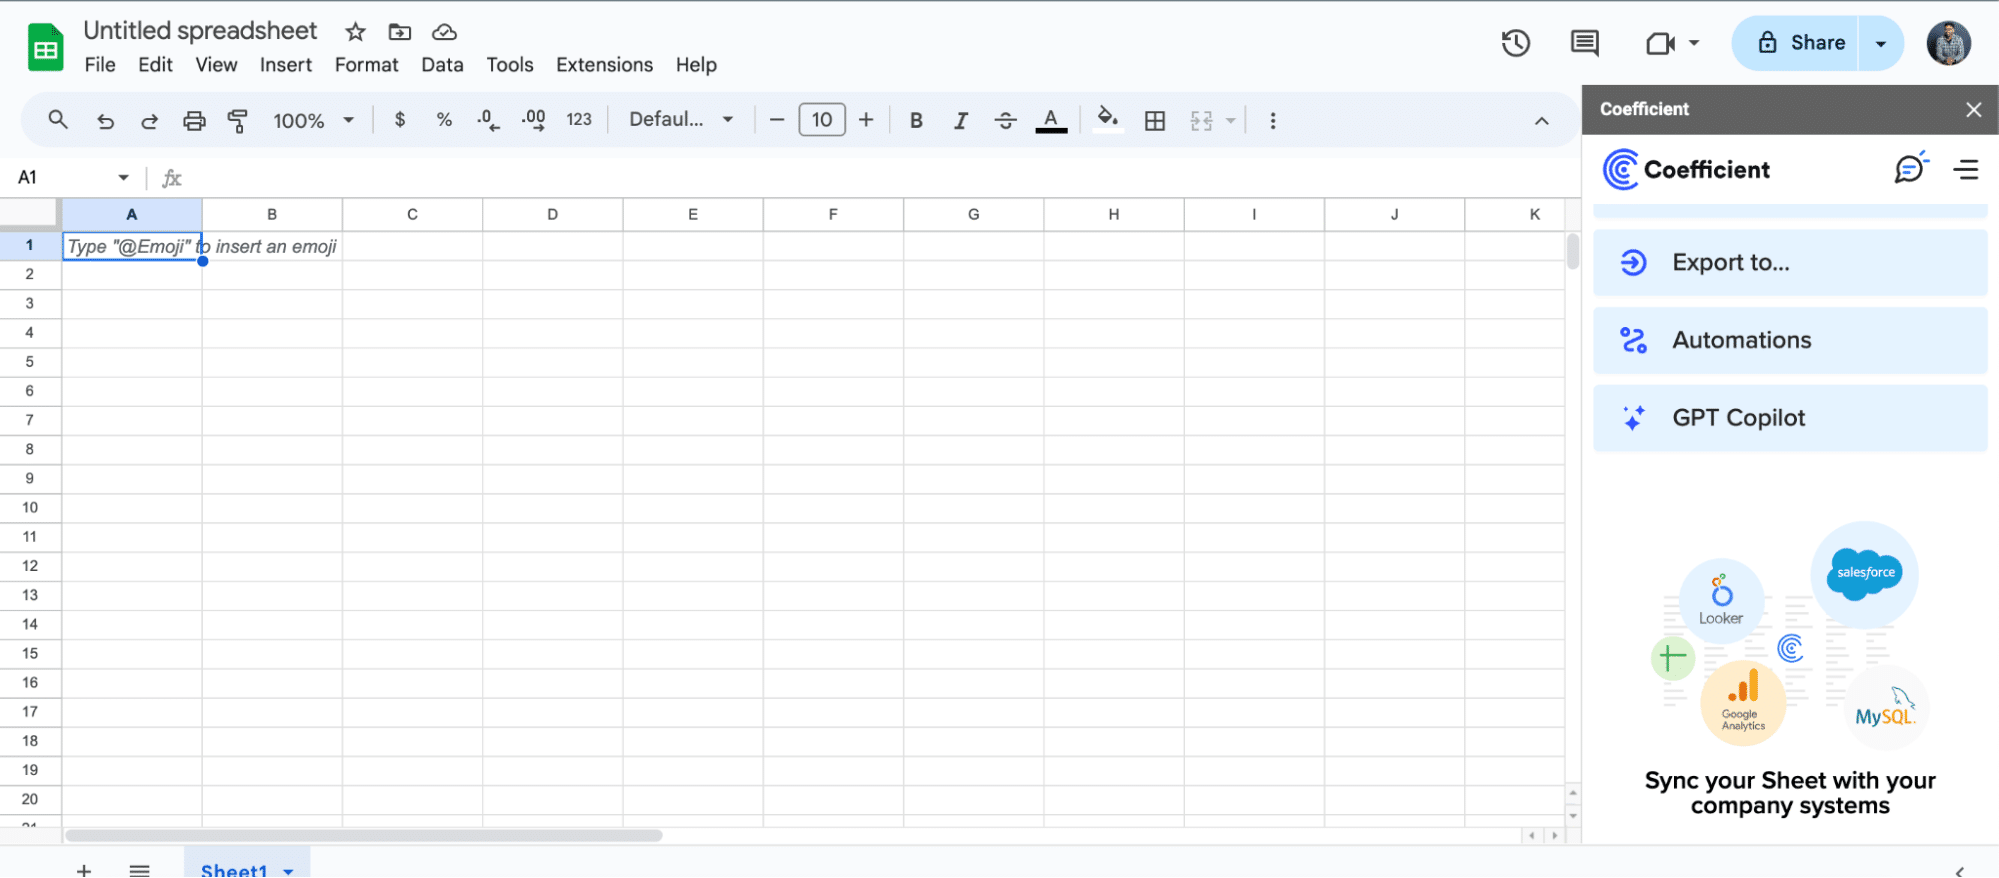
Coefficient will open on the right-hand side of your spreadsheet.
For Microsoft Excel
Open Excel from your desktop or in Office Online. Click ‘File’ > ‘Get Add-ins’ > ‘More Add-Ins.’
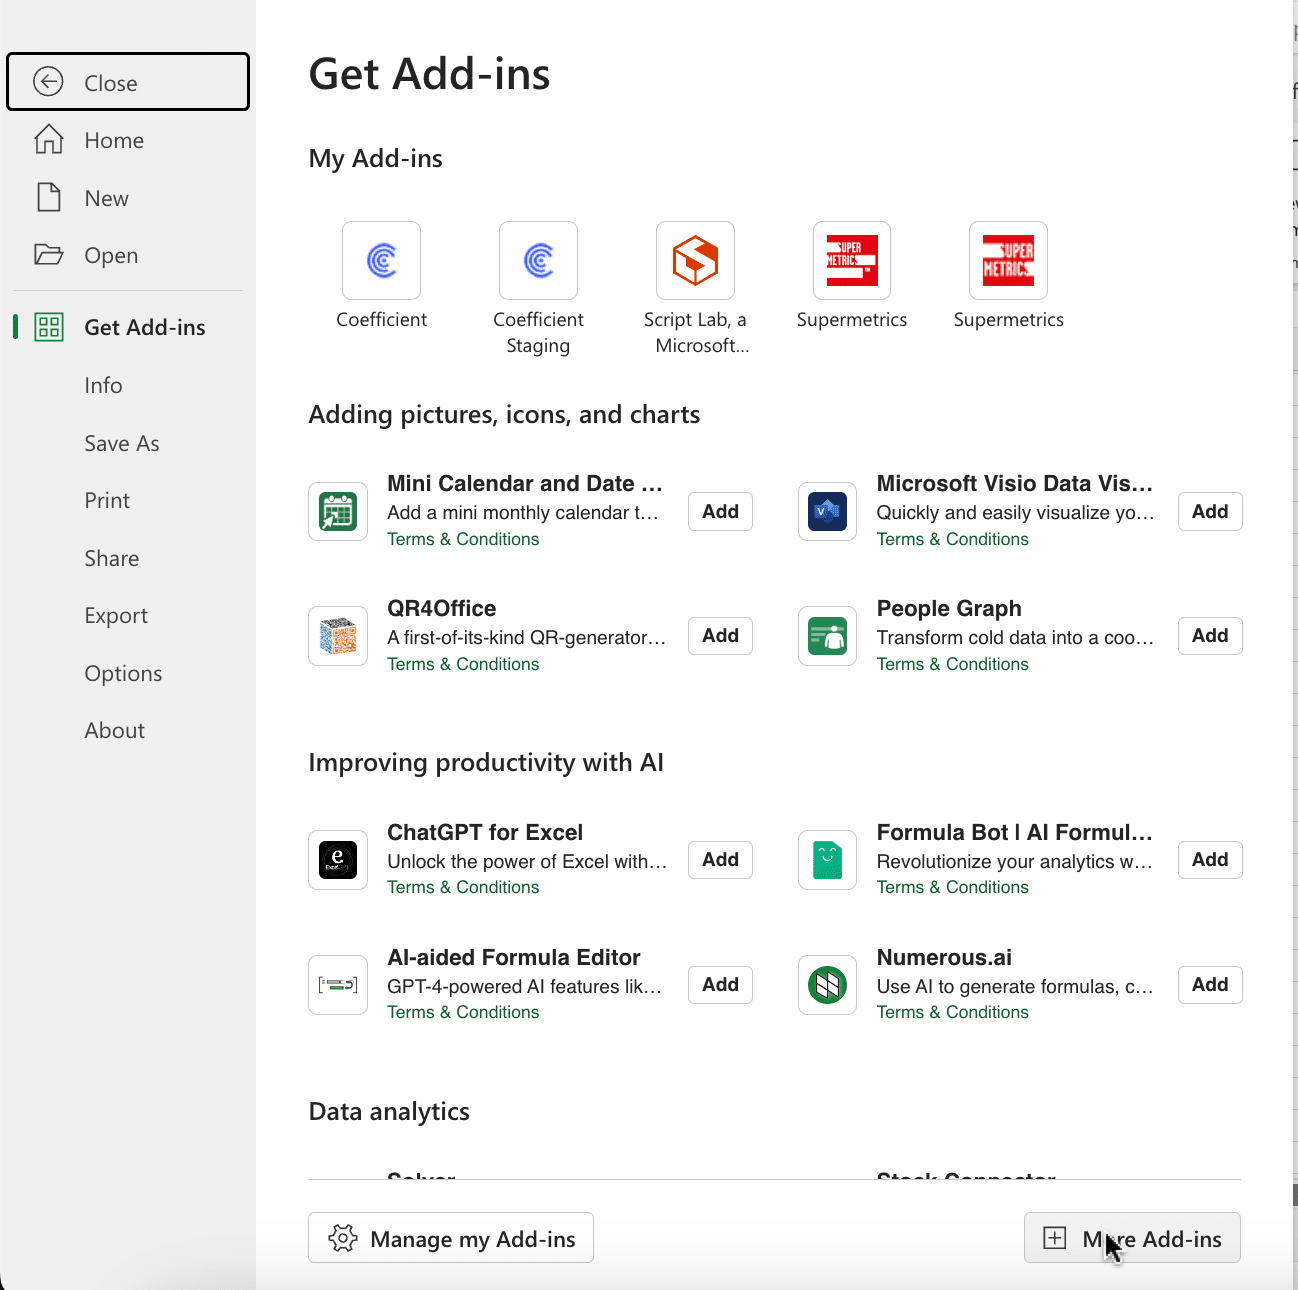
Type “Coefficient” in the search bar and click ‘Add.’
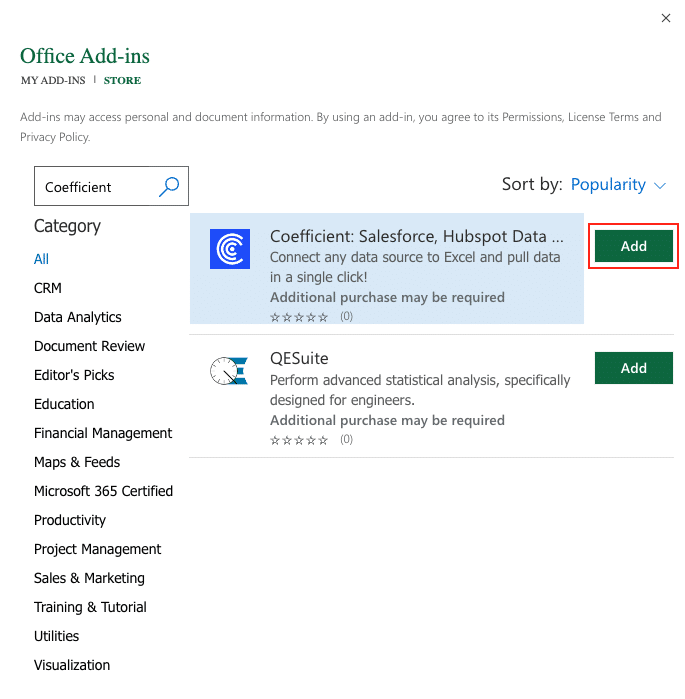
Follow the prompts in the pop-up to complete the installation.
Once finished, you will see a “Coefficient” tab in the top navigation bar. Click ‘Open Sidebar’ to launch Coefficient.
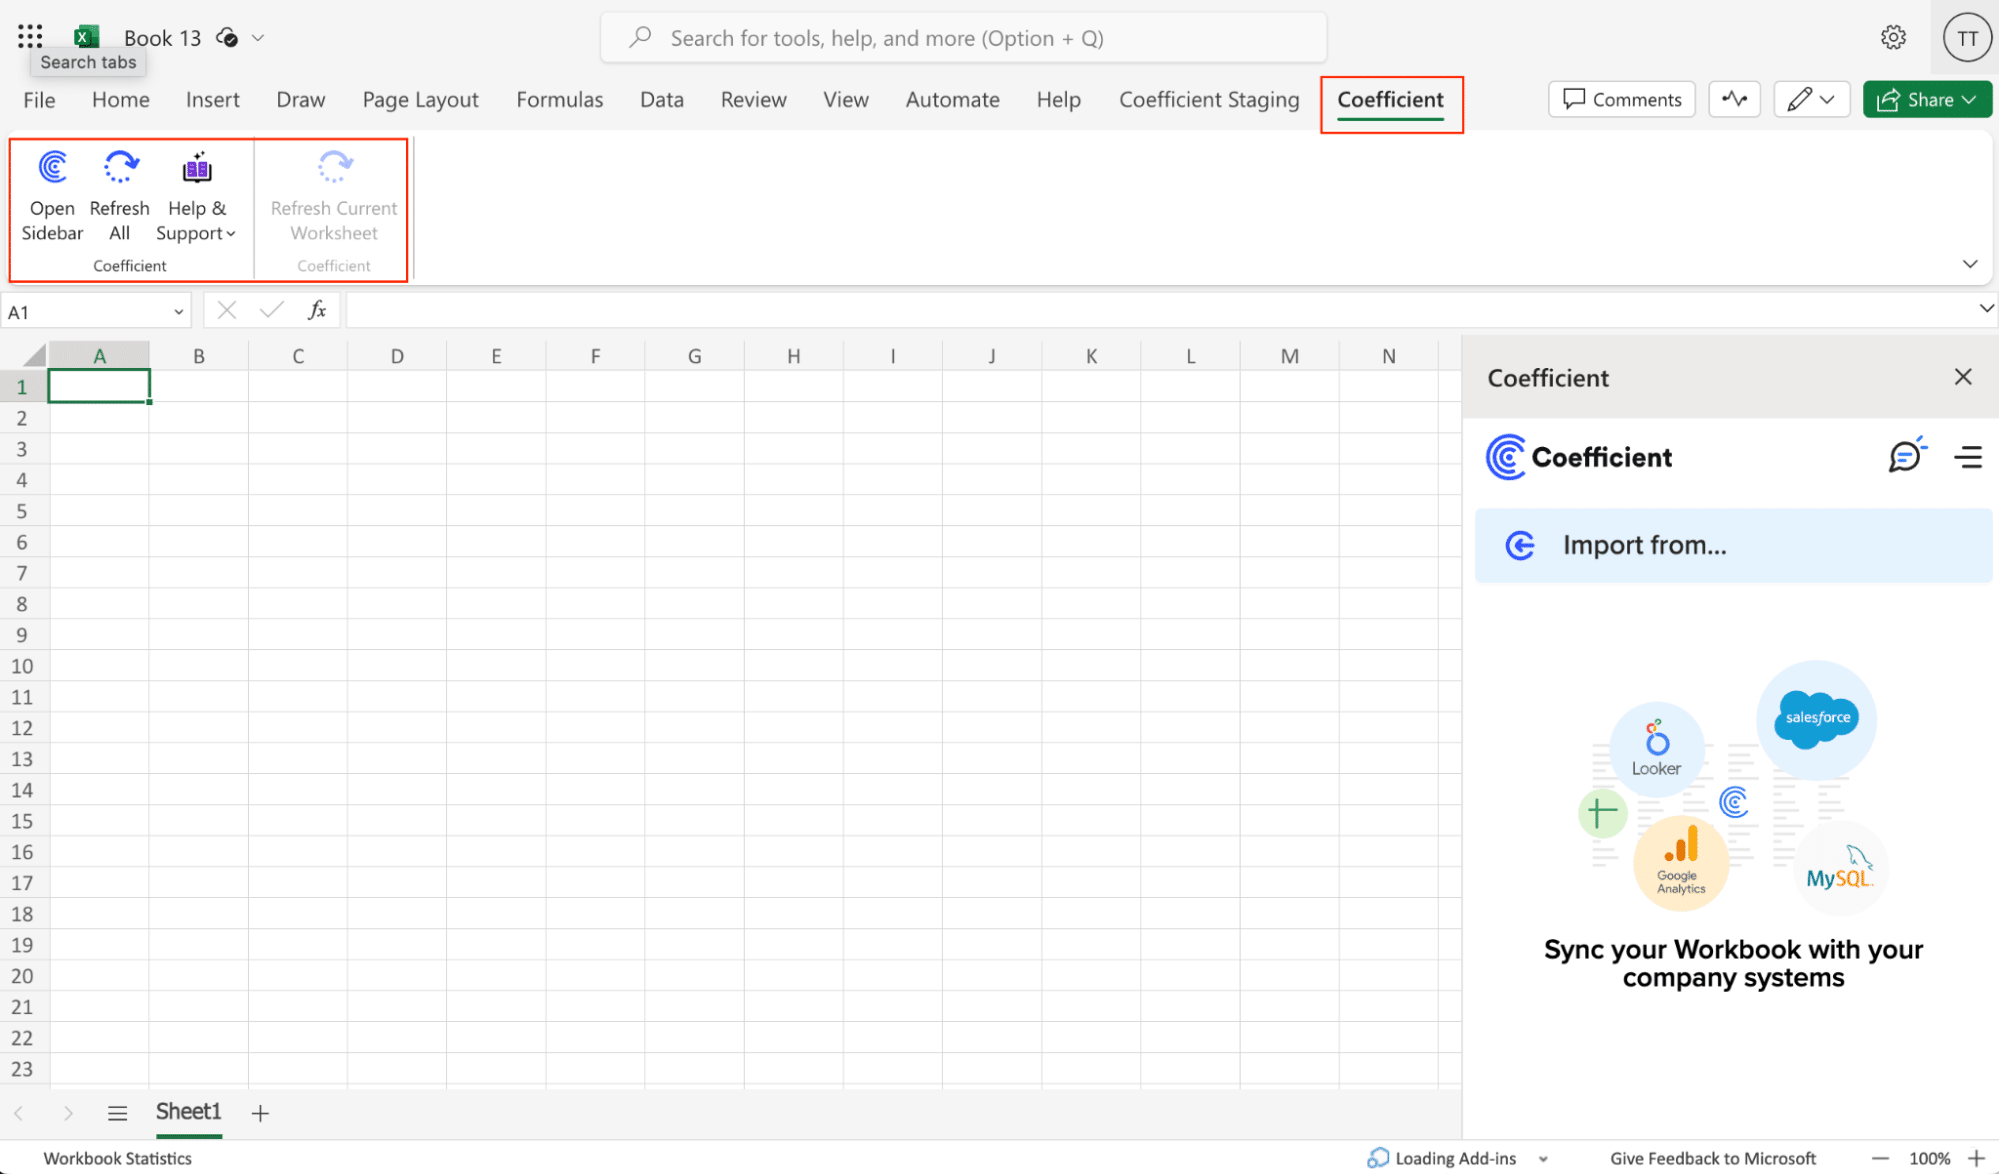
Step 2. Import Xero Data into Your Spreadsheet
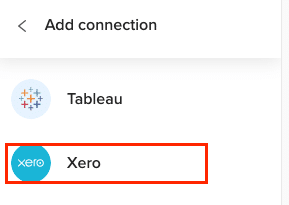
In the Coefficient sidebar, click ‘Import From.’
Select “Xero” from the list of available data sources.
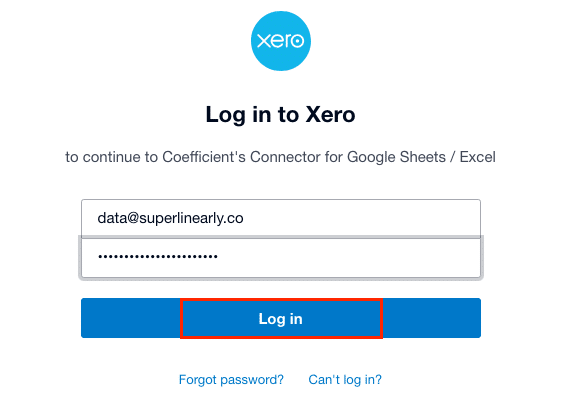
Enter your Xero demo credentials and click ‘Login.’
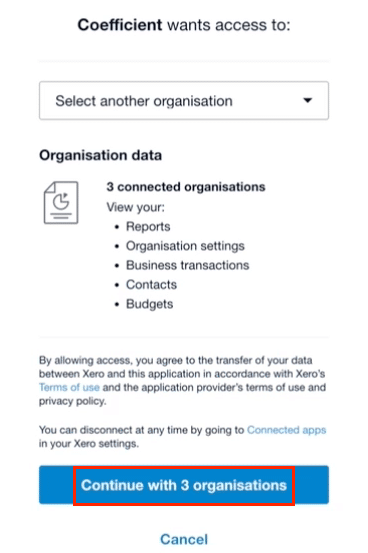
Select one or more of the available organizations to connect to Coefficient.
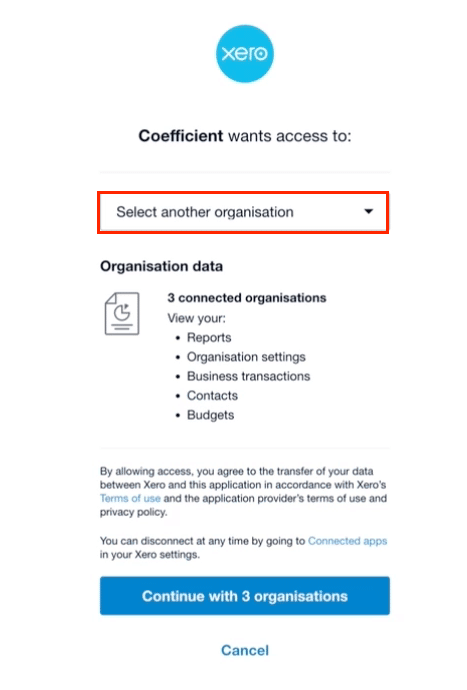
Click “Continue” to proceed with the selected organization(s).
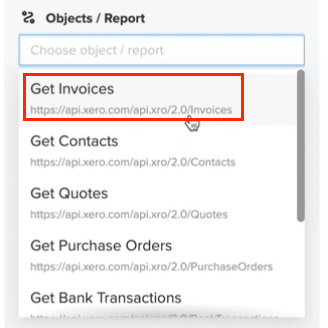
Choose an endpoint from the available options, such as Invoices, Contacts, or Users.
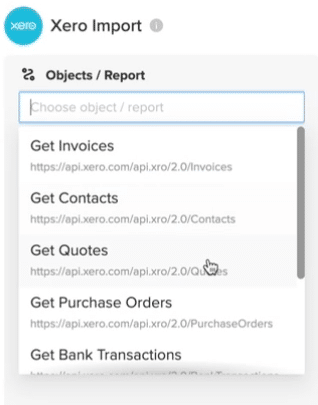
For this example, select “Get Invoices” to fetch invoice data from Xero.
Enter the Tenant ID (organization ID) for the selected Xero organization.
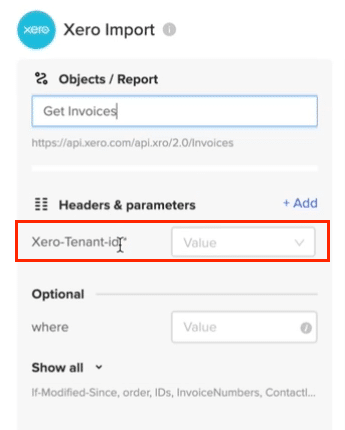
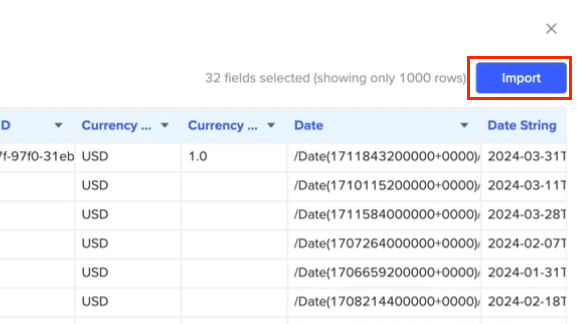
Optionally, select additional fields to include in the data import.

Click “Import” to fetch the invoice data into your spreadsheet.
Step 3. Export Data Snowflake
Before starting, make sure you’ve connected to Snowflake.
https://www.youtube.com/watch?v=Zjym92WHgLM
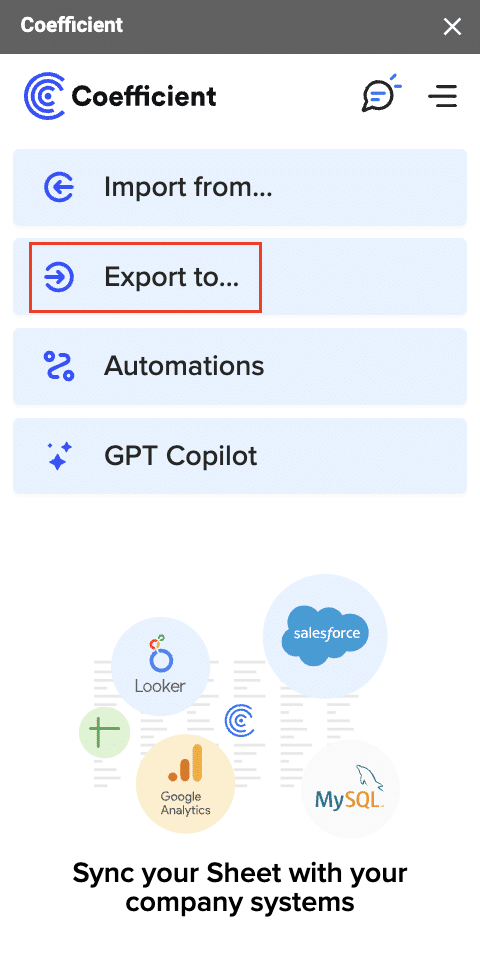
Then, navigate to Coefficient’s menu. Click “Export to…”
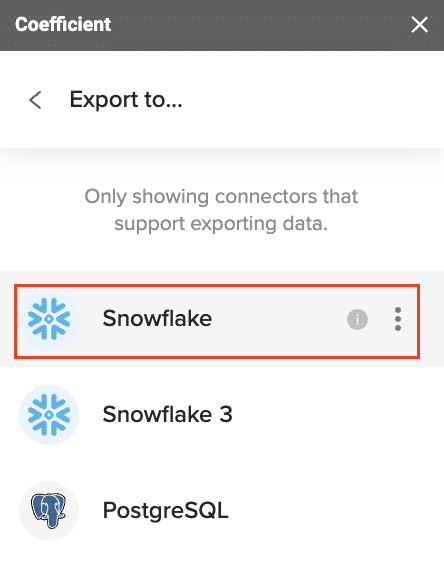
Choose Snowflake from the list of available data sources.
Select the tab and header rows in your spreadsheet that contains the data you want to export.
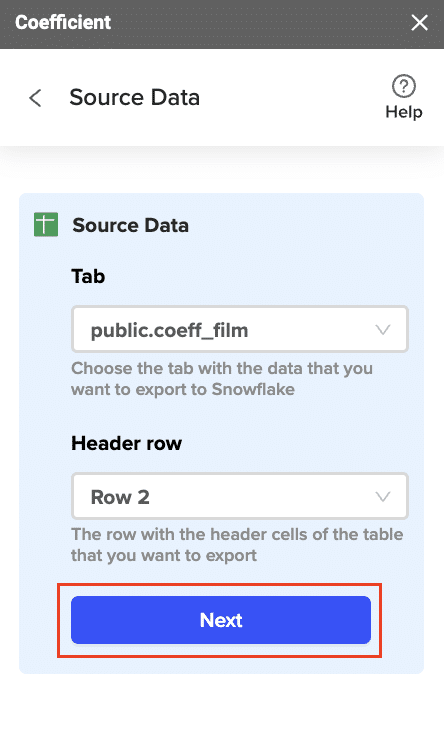
Click “Next” to continue.
Select the table in your Snowflake database that you want to update. Then, select the type of action you want to perform—Update, Insert, Upsert, or Delete.
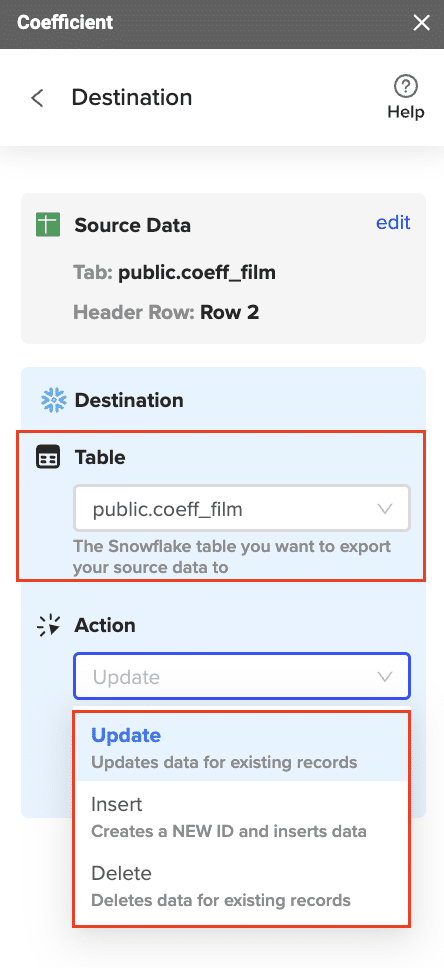
Map the fields from your spreadsheet to the corresponding Snowflake fields.
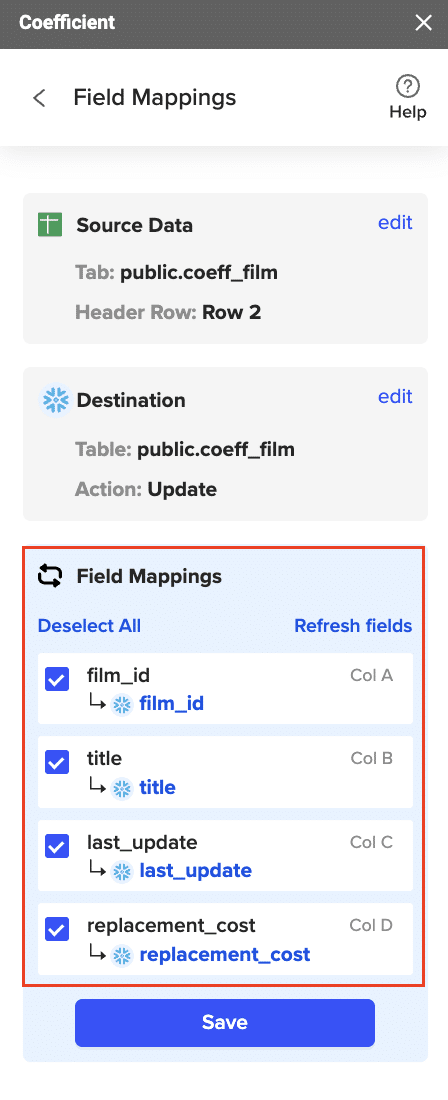
Note: Primary Keys (ID fields) are required for Update and Delete actions. For Insert actions, the Primary Key field can be set to auto populate if it’s configured in Snowflake.
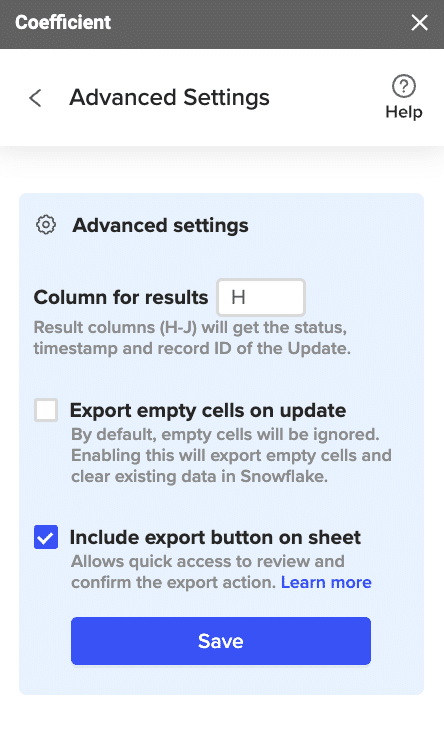
Specify additional settings such as batch size, whether to export empty cells on an update, and the column for results.
Confirm your settings.
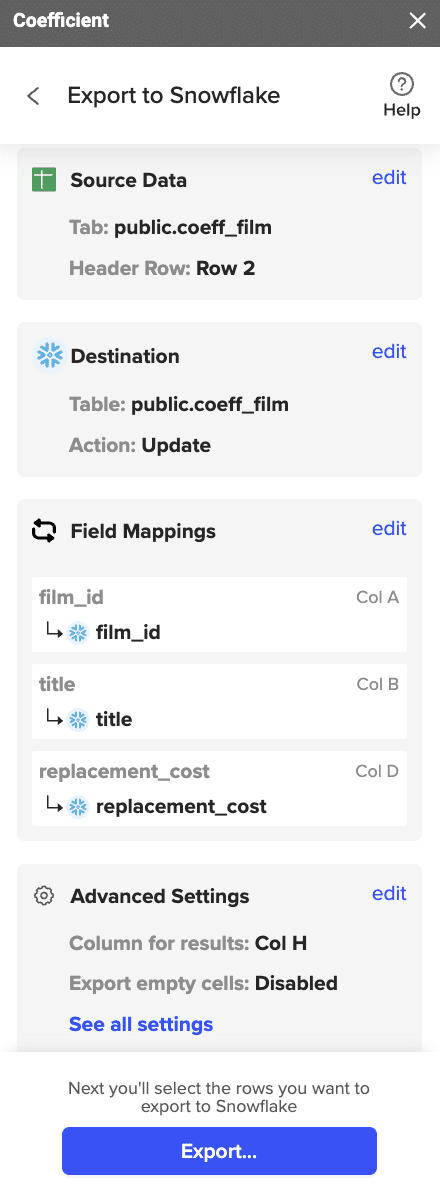
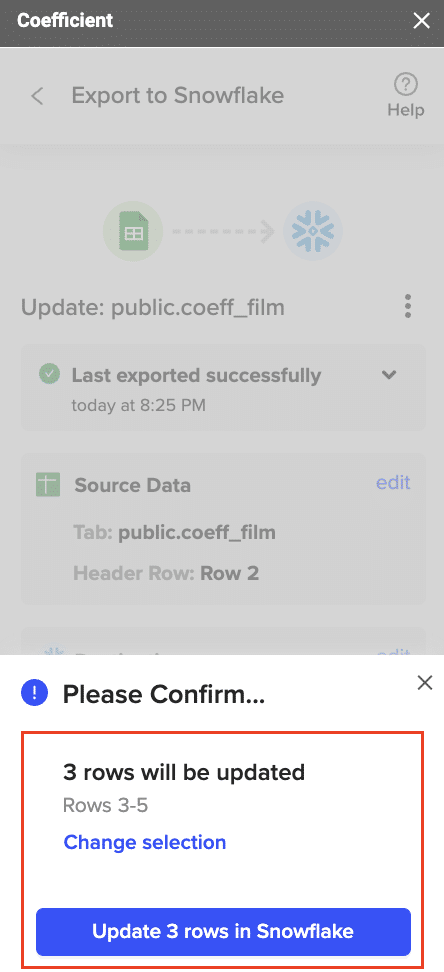
Then, highlight the rows you want to update or export. You can choose to export all rows or specific rows.
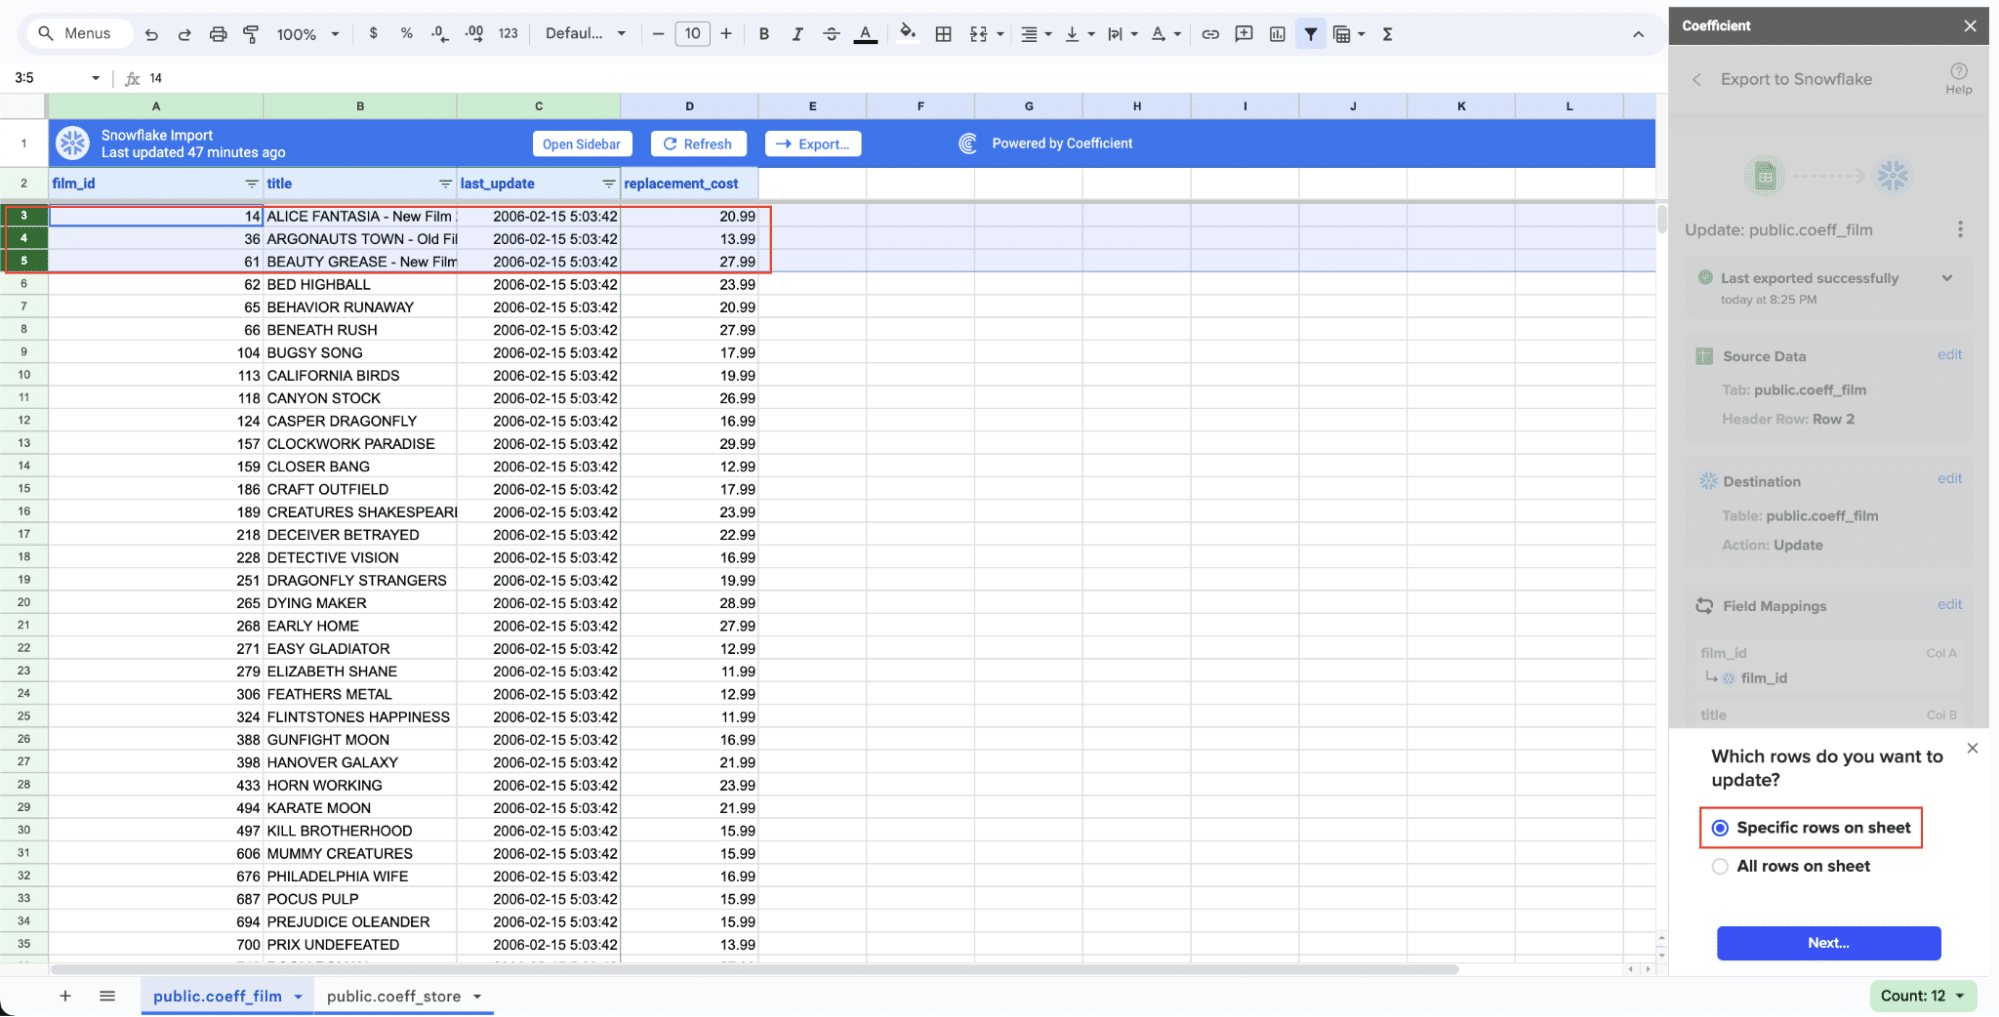
After you’re finished, review your settings and click “Export.”
Follow the prompts to confirm your changes.
In a few seconds, data from your spreadsheet will push to Salesforce.
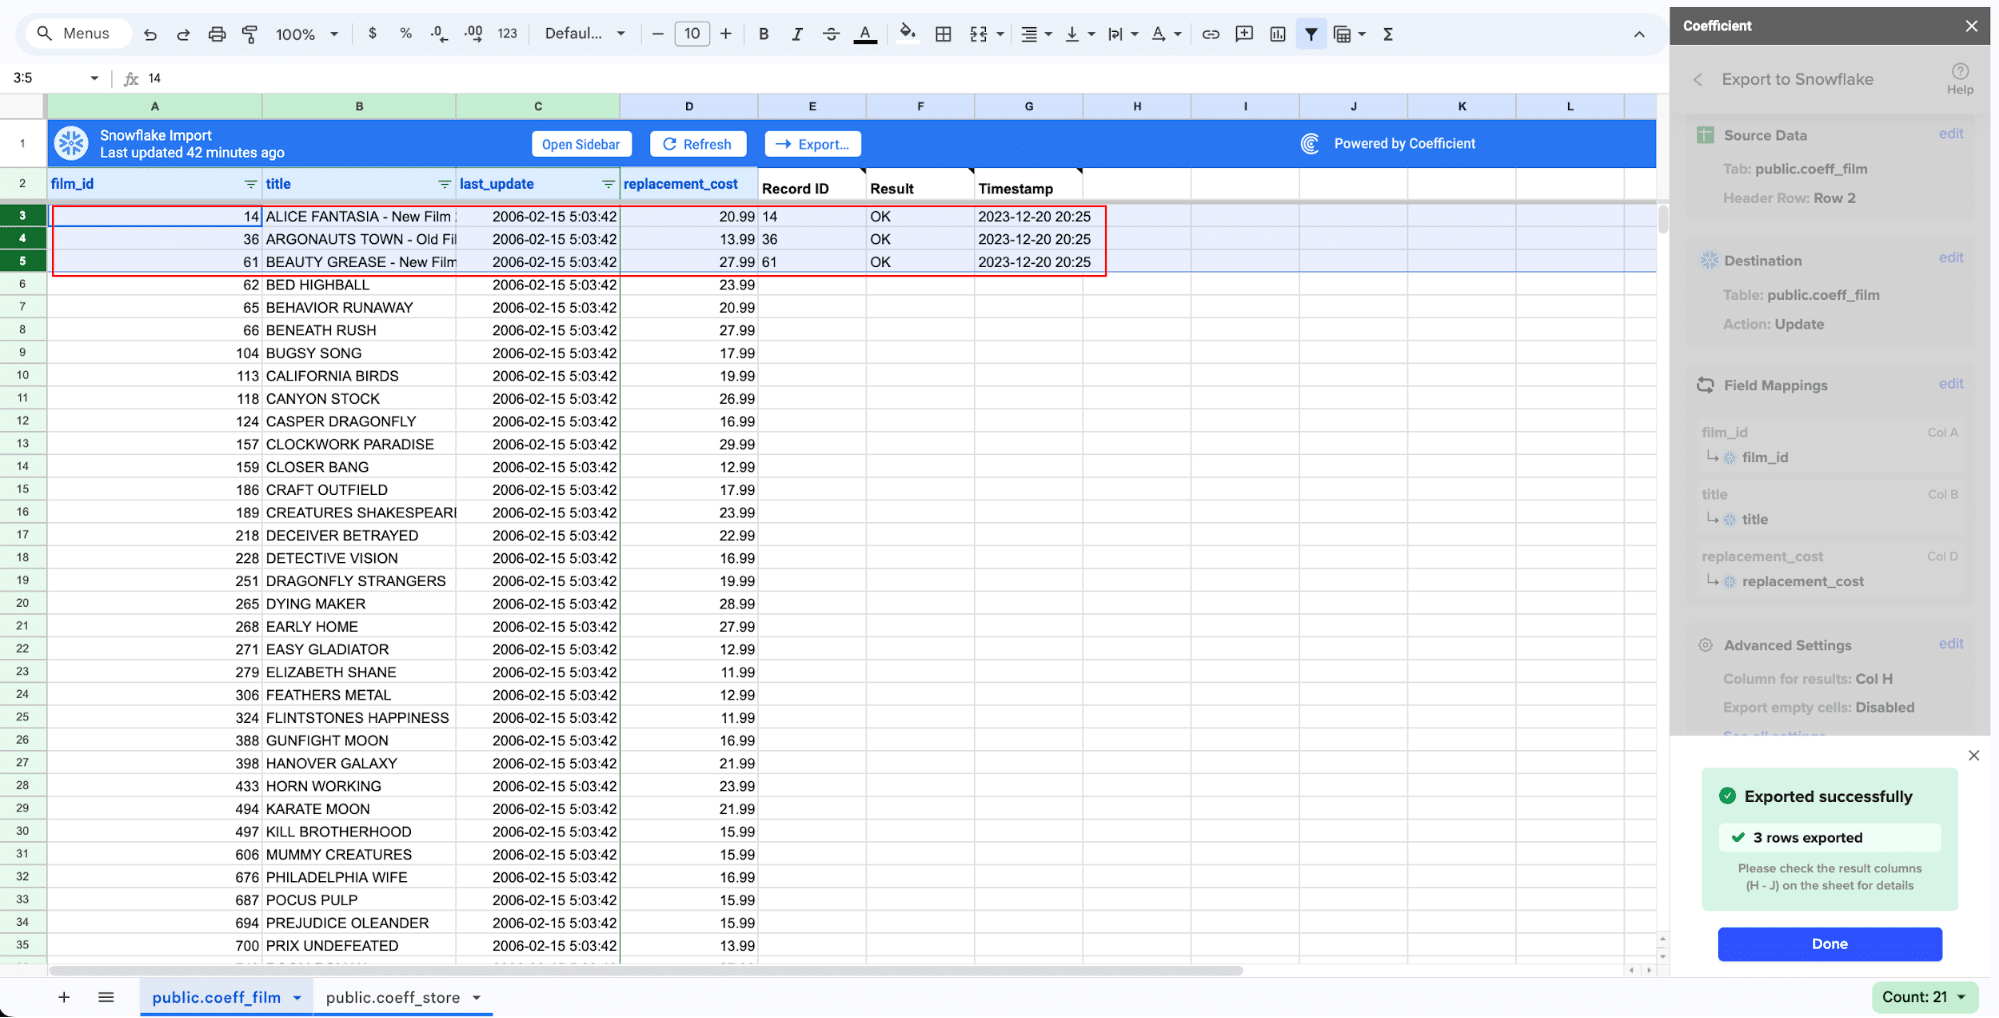
Review your settings and click “Export” to push your data from the spreadsheet to Snowflake.
Coefficient will then update the records in Snowflake, displaying the status, record ID, and timestamp of the updates in your spreadsheet.
Method 2: Hevo Data
Hevo Data is a fully managed, no-code data pipeline platform. It enables automated, real-time data replication from 150+ sources including Xero to destinations like Snowflake, without the need for any coding.
Features:
- Fully automated, codeless data pipelines: Eliminates the need for manual data handling and maintenance.
- Real-time data replication from source to destination: Ensures your data is always current.
- Pre-built integrations with 150+ data sources: Provides extensive connectivity options.
- Automatic schema mapping and evolution: Handles changes in data structure seamlessly.
- Secure and compliant with enterprise-grade security: Ensures data integrity and compliance with regulations.
Pros:
- Completely automated pipeline, no coding or maintenance needed: Simplifies the data integration process.
- Supports a wide variety of data sources out-of-the-box: Offers flexibility and connectivity.
- Handles schema changes seamlessly: Adapts to changes in data structure without manual intervention.
- Robust security and compliance features: Ensures data protection and regulatory compliance.
Cons:
- Higher pricing compared to some alternatives: May be a consideration for small businesses.
- Initial setup and data mapping can take some time: Requires careful configuration to ensure accuracy.
How to Connect Xero to Snowflake with Hevo
Step 1. Create a Hevo Account:
- Go to the Hevo website and sign up for an account.
- Log in to the Hevo dashboard.
Step 2. Add Xero as a Data Source:
- Click on “Add Pipeline” and select Xero as the data source.
- Provide your Xero account credentials and grant Hevo access.
Step 3. Configure Data Ingestion Settings:
- Select the Xero objects and fields to replicate.
- Configure the data ingestion settings according to your needs.
Step 4. Add Snowflake as a Data Destination:
- Select Snowflake as the data destination and enter your account details.
- Provide the necessary Snowflake account information, including the account URL, username, password, and the database and schema where you want to load the data.
Step 5. Map Fields and Configure Replication:
- Map the Xero fields to the desired Snowflake table and columns.
- Choose your replication frequency and other relevant settings.
Step 6. Save and Run the Pipeline:
- Click “Save and Run” to create the data pipeline.
- Hevo will automatically begin replicating data from Xero to Snowflake in real-time.
Method 3: Fivetran
Fivetran is a fully-managed, enterprise-grade ETL solution. It provides reliable, secure data pipelines to replicate data from Xero and 150+ other sources into destinations like Snowflake.
Features:
- Fully-managed, zero-maintenance data pipelines: Simplifies data integration without the need for manual intervention.
- Pre-built, analyst-ready data schemas: Provides ready-to-use data structures for analysis.
- Automated in-warehouse transformations: Supports data transformations directly within Snowflake using DBT integration.
- Advanced security and compliance certifications: Ensures data protection and regulatory compliance.
- Extensive performance monitoring and logging: Offers comprehensive insights into data pipeline performance.
Pros:
- Fully managed service, no pipeline maintenance required: Simplifies data management.
- Highly scalable to handle large data volumes: Suitable for enterprises with extensive data needs.
- Automated in-warehouse transformations via DBT integration: Enhances data processing capabilities.
- Enterprise-grade security and compliance: Ensures data integrity and regulatory compliance.
Cons:
- More expensive than other solutions: Higher cost may be a consideration for smaller businesses.
- Initial setup can be complex for non-technical users: Requires careful configuration and setup.
How to Connect Xero to Snowflake with Fivetran
Step 1. Sign Up for Fivetran:
- Go to the Fivetran website and sign up for an account.
- Complete the onboarding process and log into your dashboard.
Step 2. Add Xero as a Connector:
- Click “Add Connector” and select Xero from the list of sources.
- Authenticate with Xero and grant Fivetran access to your data.
Step 3. Configure Sync Settings:
- Choose the Xero objects and fields to replicate.
- Configure your sync settings, including the replication frequency and other relevant options.
Step 4. Add Snowflake as a Destination:
- Add Snowflake as your destination and provide your account details.
- Enter the necessary Snowflake account information, including the account URL, username, password, and the database and schema where you want to load the data.
Step 5. Map Fields and Save Configuration:
- Map the Xero data to the appropriate Snowflake tables and columns.
- Review your configuration to ensure all settings are correct.
- Click “Save & Run” to initiate the data pipeline.
Step 6. Monitor and Manage Data Pipeline:
- Fivetran will initiate a historical data sync and then continuously replicate new data from Xero to Snowflake.
- Monitor the status of your data pipeline from the Fivetran dashboard.
- Verify that data is being synced correctly by checking the tables in your Snowflake database.
- Address any errors or issues by following Fivetran’s troubleshooting guides.
- Set up email alerts for pipeline issues to stay informed of any problems.
Connect Xero to Snowflake Without a Line of Code
Connecting Xero to Snowflake empowers businesses to centralize their financial data, enabling richer insights and streamlined reporting. The three methods outlined in this guide – Coefficient, Hevo Data, and Fivetran – provide flexible options for replicating Xero data into Snowflake, catering to different business needs and technical capabilities.
Ready to get started? Coefficient offers a user-friendly, no-code platform for quickly connecting Xero to Snowflake. Sign up today to begin syncing your financial data and unlocking valuable insights.