Ingesting data into Snowflake is a critical process that enables businesses to access and analyze their data. There are several methods for loading data into Snowflake, each with its own benefits and use cases.
In this comprehensive guide, we’ll explore the various methods and best practices for loading data into Snowflake, ensuring a seamless and efficient data pipeline.
Ingest Data into Snowflake: Key Concepts
Data ingestion is the process of loading data from various sources into a target system, such as Snowflake, for storage, processing, and analysis. Efficient data ingestion is crucial because it allows businesses to access and utilize their data quickly, driving timely insights and decision-making.
Before diving into specific techniques, let’s review the key concepts related to data ingestion in Snowflake:
Batch Loading involves loading large volumes of data at scheduled intervals, such as daily or weekly. Batch loading is ideal for handling historical data or making regular updates. It allows for comprehensive data processing and minimizes the impact on system performance during peak hours.
Continuous Pipeline involves loading data in near real-time, where data is continuously ingested as it becomes available. This approach ensures your Snowflake instance is consistently up-to-date, making it suitable for applications that require timely data updates without the delay of batch processing.
Real-Time Ingestion focuses on immediately loading data into Snowflake as it’s generated, ensuring access to the most current information for analysis. Real-time ingestion is essential for use cases that demand instant data availability, such as monitoring systems, live analytics, and immediate response scenarios.
How to Ingest Data into Snowflake: 3 Methods
Method 1: COPY INTO Command
The COPY INTO command is ideal for loading large volumes of data, such as historical records or daily updates. It offers parallel loading and automatic compression, making it efficient and performant. Here’s how to use it effectively:
To use the COPY INTO command:
Stage your data: Upload your data files to a Snowflake stage or an external cloud storage location (e.g., Amazon S3, Azure Blob Storage). Ensure the files are in a supported format, such as CSV, JSON, or Avro.
Prepare your target table: Create a table in Snowflake with a schema that matches your data files. Consider using a transient or temporary table for staging the loaded data before merging it into your main table.
Execute the COPY INTO command: Specify the source location, file format, and target table to load the data. Use the VALIDATION_MODE parameter to enforce data integrity checks during loading.
Tips for optimizing COPY INTO:
Compress your data files (e.g., gzip) to reduce transfer time and storage costs. Snowflake supports automatic decompression for most formats.
Combine multiple small files into larger ones for better performance. Aim for files between 100-250 MB in size.
Use the ON_ERROR option to specify how to handle errors during loading, such as skipping bad records or aborting the entire load.
Example of using COPY INTO with validation:
COPY INTO mytable
FROM @mystage/data/
FILES = (‘data1.csv’, ‘data2.csv’)
FILE_FORMAT = (TYPE = CSV)
VALIDATION_MODE = RETURN_ERRORS;
Method 2: Snowpipe Auto-Ingest Feature
Snowpipe is a continuous data ingestion service that automatically loads data into Snowflake tables as soon as new files are added to a designated stage. This makes it ideal for streaming data or frequent micro-batch updates. Setting up Snowpipe involves:
Configure a Snowpipe: Define the source location, file format, and target table for your data pipeline. Specify the integration method, such as using a REST API endpoint or cloud storage event notifications.
Trigger data loading: As new data files are added to the source location, Snowpipe automatically detects and loads them into Snowflake. Files are loaded in the order they are received.
Monitor and manage: Use Snowflake’s monitoring tools, such as the SYSTEM$PIPE_STATUS function, to track the progress and status of your Snowpipe ingestion. Set up alerts for failures or delays.
Best practices for Snowpipe:
Use a separate Snowflake stage for each Snowpipe to avoid contention and simplify management.
Implement error handling and data validation checks in your Snowpipe definition to maintain data integrity.
Regularly monitor Snowpipe performance metrics, such as file processing time and queued file count, to identify potential bottlenecks.
Example of creating a Snowpipe that automatically ingests JSON data from an S3 bucket:
CREATE PIPE mypipe
AUTO_INGEST = TRUE
AS
COPY INTO mytable
FROM @mystage
FILE_FORMAT = (TYPE = JSON);
Method 3: Ingesting Data with Third-Party Tools
In addition to Snowflake’s native ingestion methods, you can also leverage third-party ETL (Extract, Transform, Load) tools to load data into Snowflake. These tools often provide pre-built connectors, data transformation capabilities, and scheduling features. Some popular options include:
Fivetran: Offers automated data pipelines from various sources into Snowflake. Handles incremental updates and schema changes.
Talend: Provides a graphical interface for designing and managing ETL workflows. Supports complex data transformations and data quality checks.
Matillion: A cloud-native ETL solution that integrates closely with Snowflake. Offers a wide range of connectors and pre-built templates.
Ingesting Data into Snowflake from Your Spreadsheet
Coefficient is a data connector that enables bidirectional syncing between Snowflake and spreadsheets. While not a traditional data ingestion solution, it allows users to export data from spreadsheets into Snowflake tables, complementing other ingestion methods.
Here’s how to use Coefficient to ingest data into Snowflake:
Step 1. Install Coefficeint
Before getting started, install Coefficient for your spreadsheet. The installation process is quick and only needs to be done once.
Step 2: Connect to Snowflake
Open the Coefficient Sidebar. Click on the menu icon and select “Connected Sources.”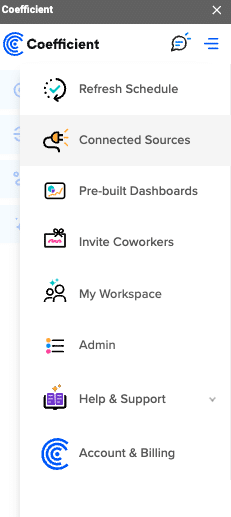
Search for Snowflake and click “Connect”.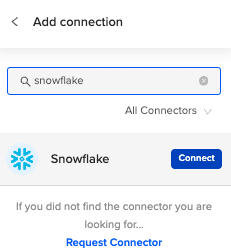
Enter your account credentials to continue.
Step 3: Prepare Your Data
Ensure your spreadsheet is organized with a header row that matches the Snowflake table fields and is ready for export.
Step 4: Start the Export Process
In the Coefficient sidebar, click on “Export to” and select “Snowflake.”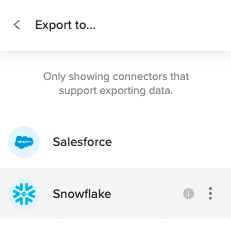
In the Coefficient sidebar, click on “Export to” and choose “Snowflake.” Select the tab and header row containing the Snowflake field headers.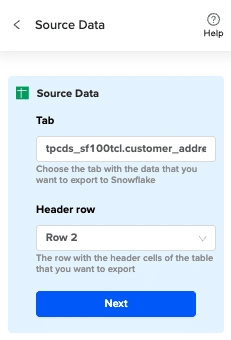
Select the table in your database that you want to update.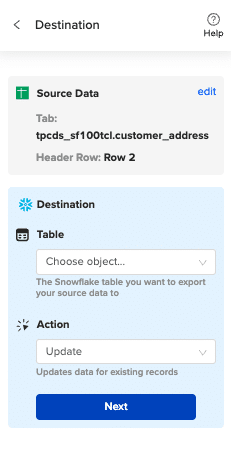
Then select “Insert” from the drop-down.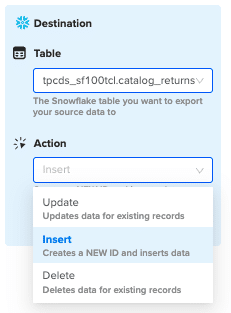
Step 5: Map Fields
Map the sheet columns to Snowflake table fields and click “Save”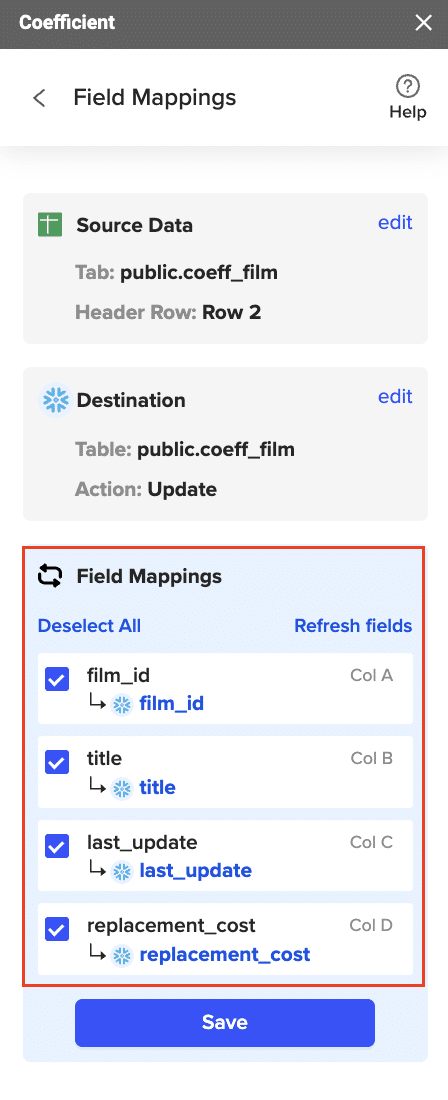
Review and confirm your settings. Click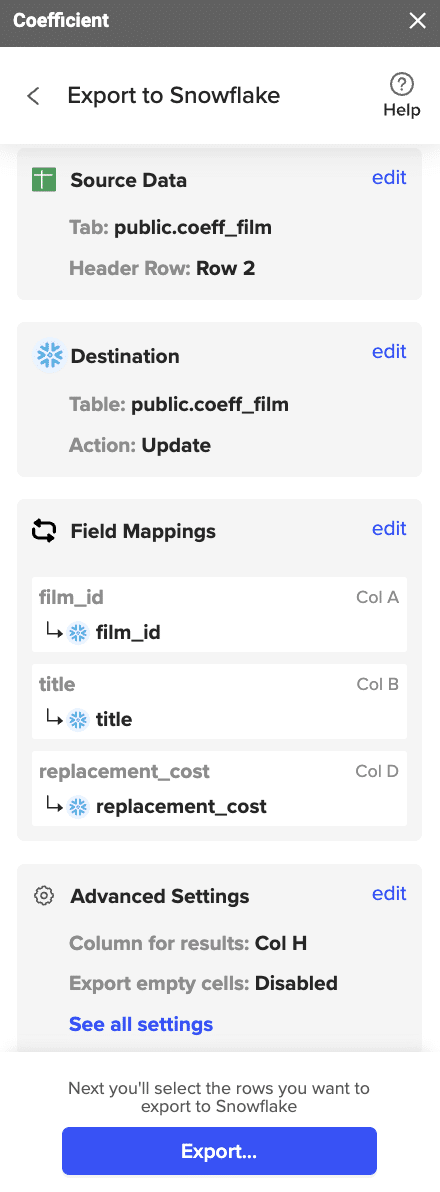
Step 6: Select and Export Rows
Highlight the rows in your sheet that you need to export.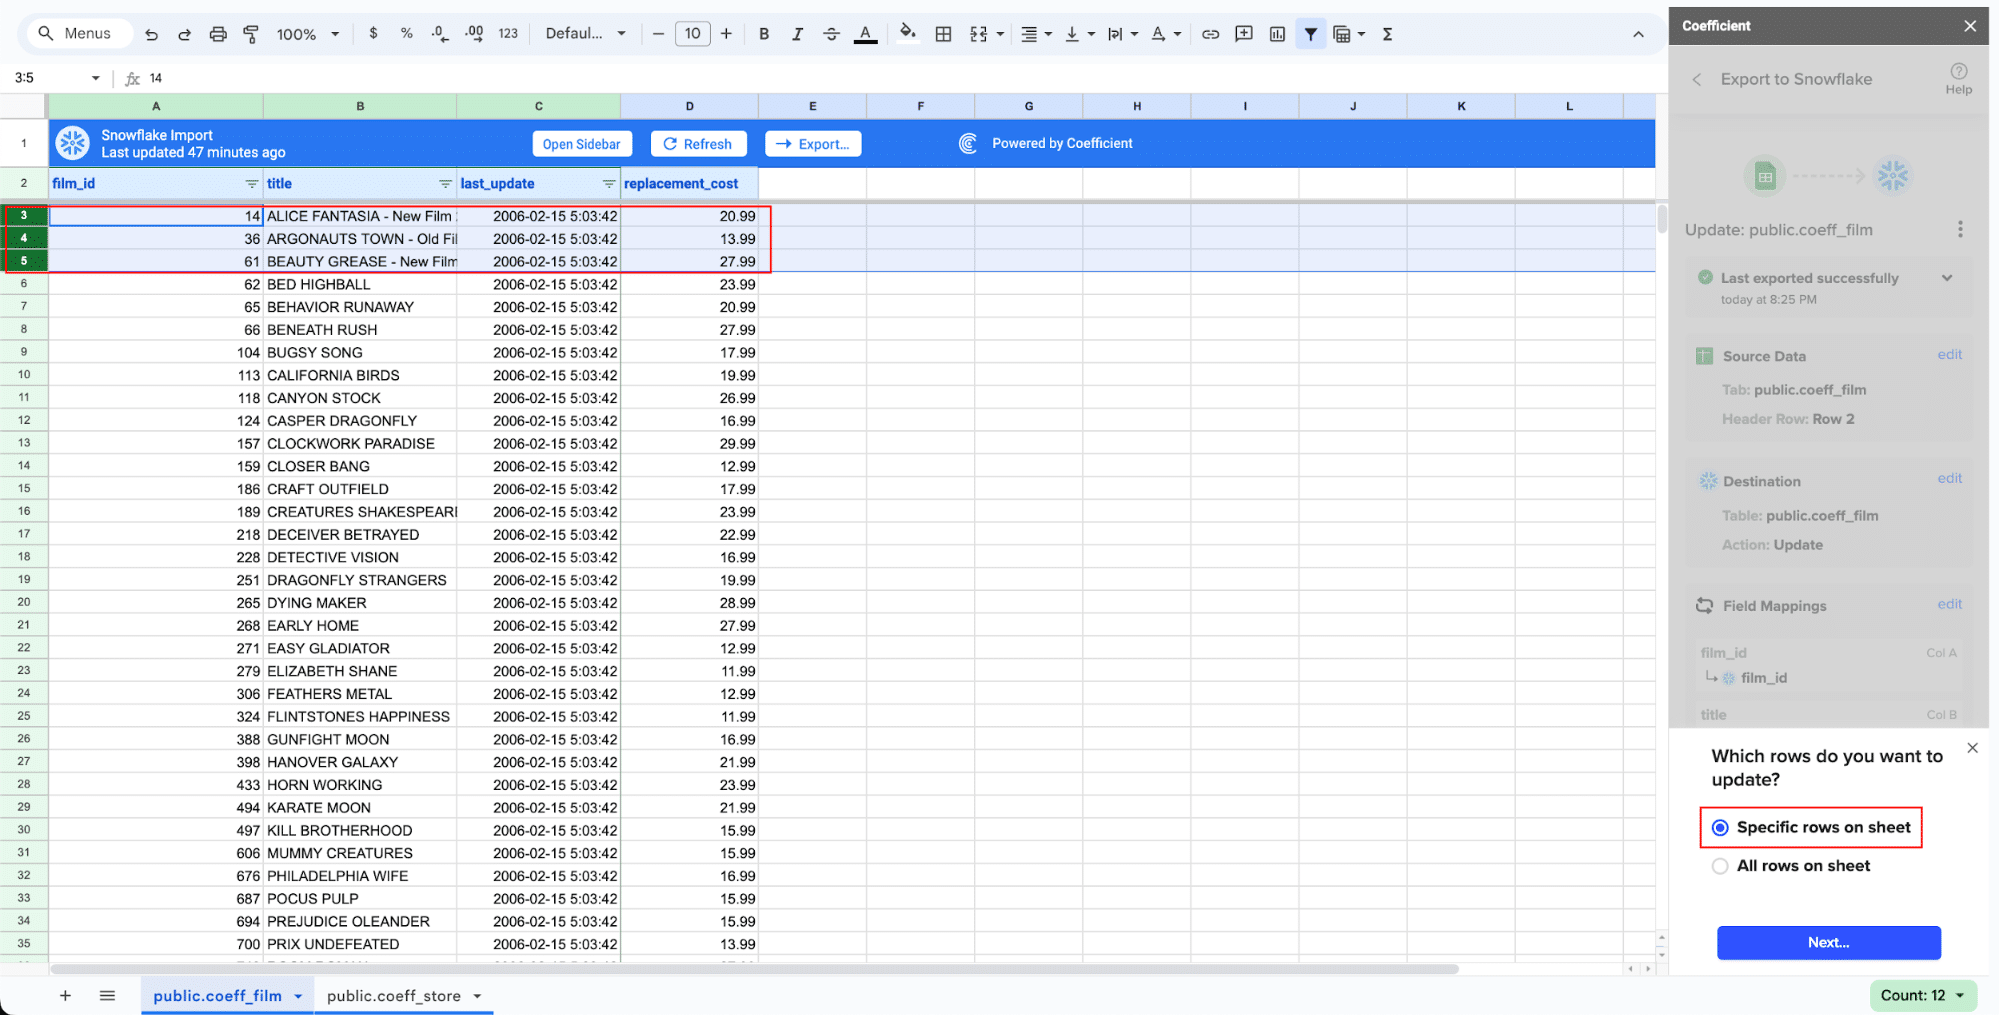
Confirm the rows to update and commit the changes. Note that these actions cannot be undone.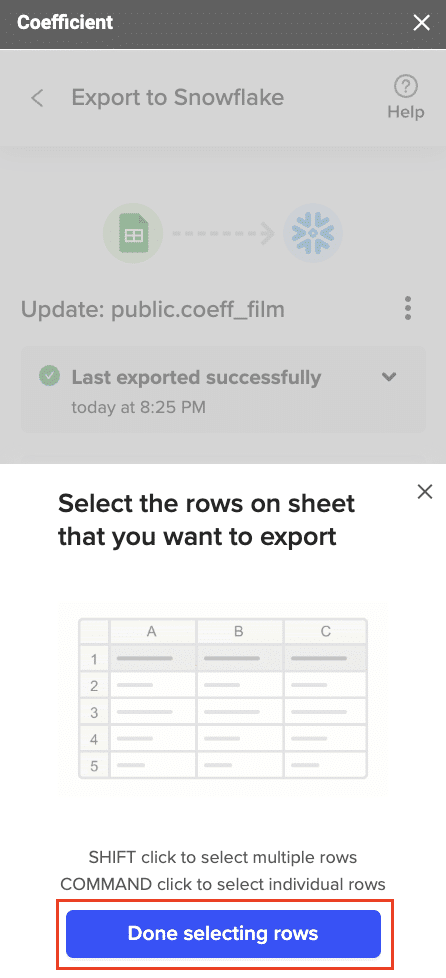
Records that have been updated will have the export status and the date/time stamp of the update in your Sheet.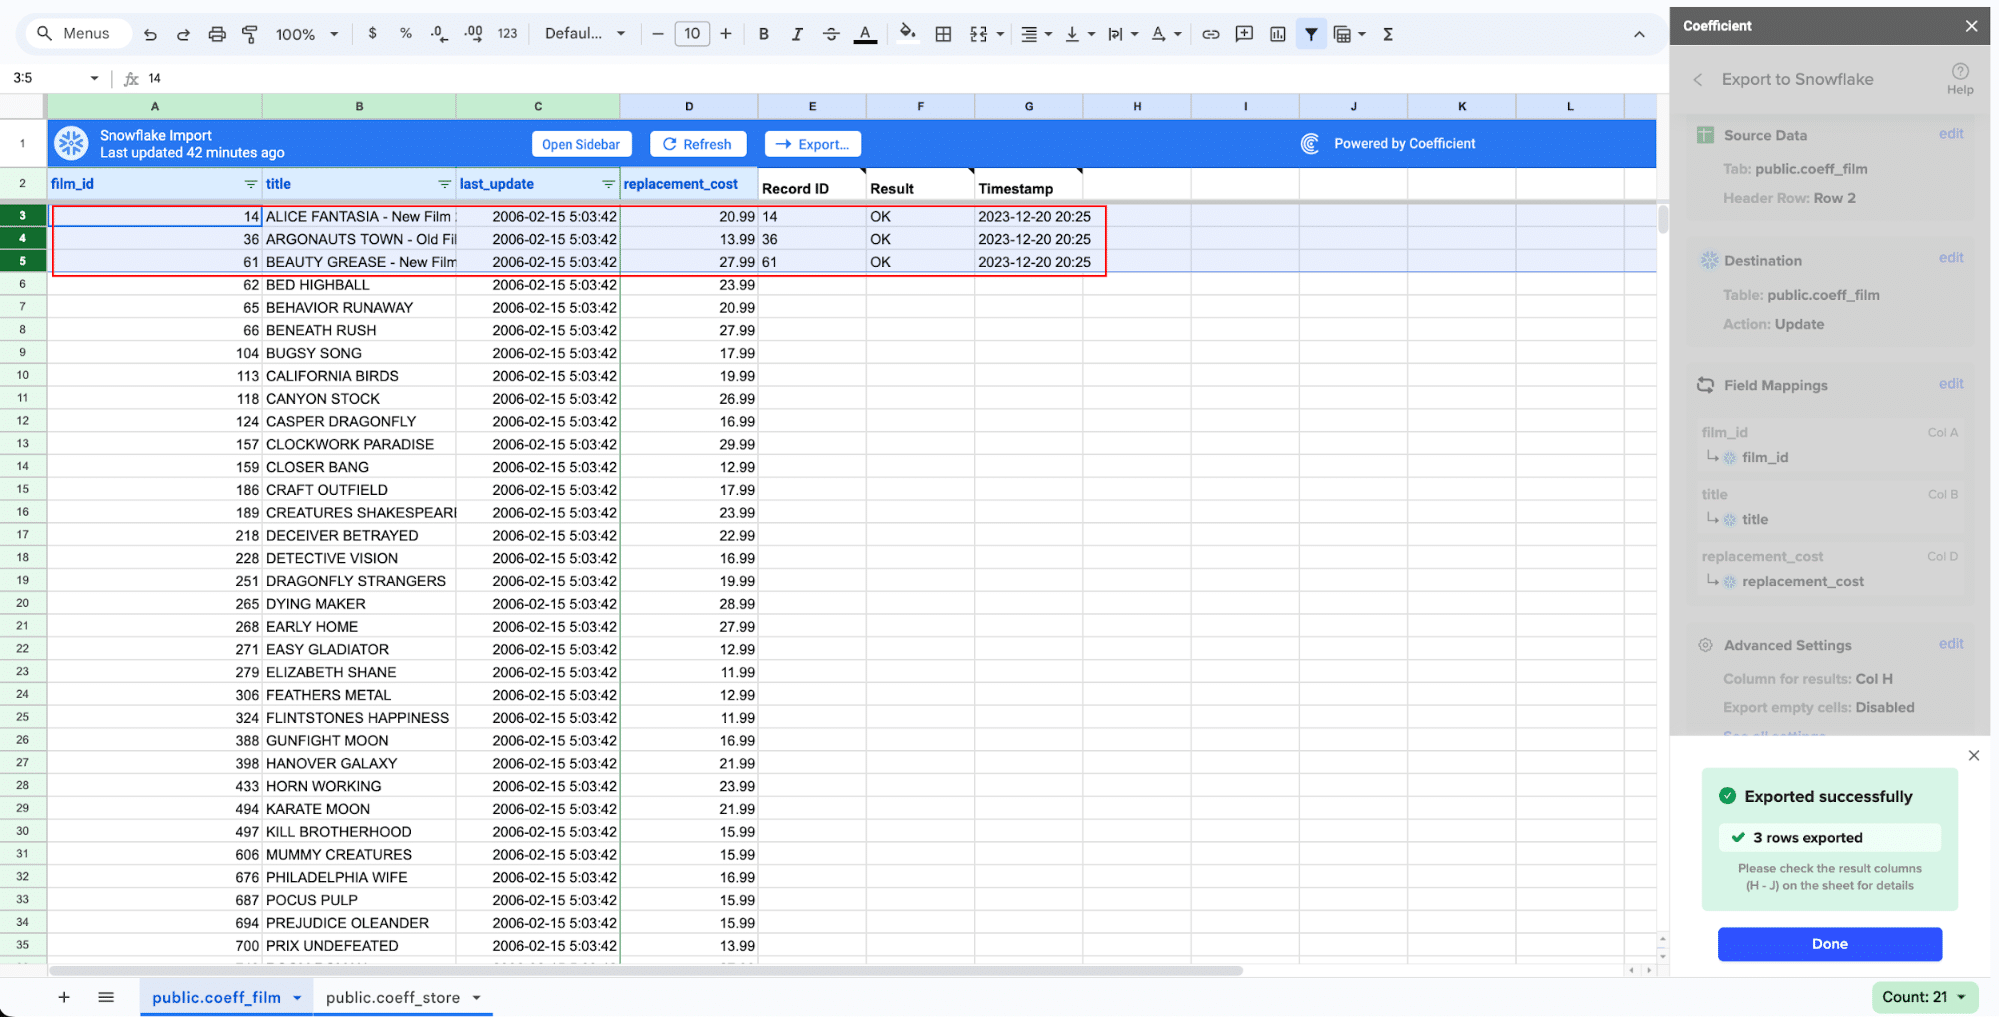
Tips and Best Practices
To ensure your data ingestion processes are optimized and dependable, follow these best practices:
Implement data validation checks: Verify the accuracy and completeness of your data during ingestion. Use Snowflake’s VALIDATION_MODE options or apply data quality checks in your ETL workflows.
Optimize file formats and sizes: Use efficient file formats like Parquet or ORC for faster loading and querying. Aim for larger file sizes to reduce the number of files and improve performance.
Leverage parallel loading: Take advantage of Snowflake’s parallel processing capabilities by splitting large data sets into multiple files and loading them concurrently.
Monitor and alert on failures: Set up monitoring and alerting for your data ingestion pipelines to quickly identify and resolve any issues. Use Snowflake’s built-in monitoring tools or integrate with external monitoring solutions.
Incrementally load data: For large data sets or frequently updated sources, use incremental loading techniques to avoid reprocessing unchanged data. Snowflake’s Change Data Capture (CDC) feature can help identify and load only new or modified records.
Secure your data: Implement proper access controls and data encryption during ingestion. Use Snowflake’s role-based access control (RBAC) and secure data sharing features to protect sensitive information.
Unlocking the Power of Data with Snowflake
Efficient data ingestion is crucial for organizations looking to harness the full potential of their data. By leveraging Snowflake’s powerful data ingestion capabilities and following best practices, you can streamline your data loading processes, ensure data quality, and enable faster insights and decision-making.
Ready to experience the benefits of seamless data ingestion in Snowflake? Get started today and unlock the power of your data with Coefficient, your trusted partner in data management and analytics.
How to Ingest Data into Snowflake
Published: December 13, 2024

Frank Ferris
Sr. Manager, Product Specialists


