If you want to learn how to connect MySQL to Google Sheets, then you’re in the right place.
Whether you want to import your MySQL data to Google Sheets to simplify handling data for your teams or to consolidate information from multiple data sources into one spreadsheet, streamlining the data linking and syncing process is critical for efficient reporting and analysis. Orgs like Move.com use pre-built connectors to automate this process.
In this guide, we’ll closely examine the importance of connecting your MySQL database to Google spreadsheets and several step-by-step methods to link your data.
Video Tutorial: How to Connect MySQL to Google Sheets
Can you connect Google Sheets to MySQL?
There are many ways to connect MySQL to Google Sheets — through apps scripts, automated solutions, and other third-party data connector apps (among others).
While the best method of connecting depends on your unique business needs and processes, you’re better off choosing a method that simplifies and automates the entire process.
Doing so saves you from the tedious, time-consuming aspects of linking MySQL to Google Sheets. This allows you and everyone in your company to have more time and resources on more critical tasks.
Why connect Google Sheets to your MySQL database?
Establishing a MySQL Google Sheets connection is excellent for creating sales pipeline dashboards and reports, mass data updating and editing, and visualizing your data.
If your data isn’t linked, you’d need to copy and paste your MySQL datasets to Google Sheets or perform manual exports and updates. This takes too much time if you’re handling volumes of data. What’s more, the manual process leaves plenty of room for human errors.
Connecting your MySQL to Google Sheets also makes your data more accessible to users who are more comfortable and familiar with using spreadsheets than business intelligence tools and SQL.
Top 3 ways to connect MySQL to Google Sheets
- Coefficient Data Connector – Easy and out of the box solution
- Zapier – High setup effort, cost and maintenance
- Google Apps Script – Complex setup and requires coding
Lets take a look at them in detail.
1. Coefficient Data Connector –
While using Google Apps Script involves quite a bit of coding, and Zapier needs you to create several individual workflows to connect your MySQL database to Google Sheets, the Coefficient app doesn’t require any of these.
Using Coefficient is the simple and easiest option when linking your MySQL data with Google Sheets (or Excel) because the app can simplify and automate the whole process.
Pros of using Coefficient to import MySQL data into Google Sheets –
- Create custom reports – Coefficient lets you create custom imports, allowing you to specify the data you want from MySQL to pull into your spreadsheets. This means you won’t have to manually pick out and remove rows and columns of data after importing them.
- No coding needed – Importing MySQL data into Google Sheets can be done via point and click, requiring no coding at all to connect Google Sheets with MySQL. However, Coefficient does offer a custom SQL query importing option for more complex querie and the ability to use GPT to help write your queries. These simple import options will save you and your team countless hours of repetitive, laborious tasks, allowing everyone to work more efficiently.
- Automate Data Sync – You can also set an auto-refresh schedule of your linked data so you won’t need to import or export your tables and files again to update them.
- 2-Way Sync – Not only can you use Coefficient to pull data from MySQL into Google Sheets, but you can also write back data from Google Sheets to MySQL when you need.
- Powerful Reporting capabilities – Set up your MySQL to Google Sheets connection, apply data import filters, configure a refresh schedule, and Coefficient automates the process from there. This supercharges your reporting and data analysis, such as tracking your lead to opportunity conversion rate in Google Sheets.
Steps to connect MySQL database to Google Sheets –
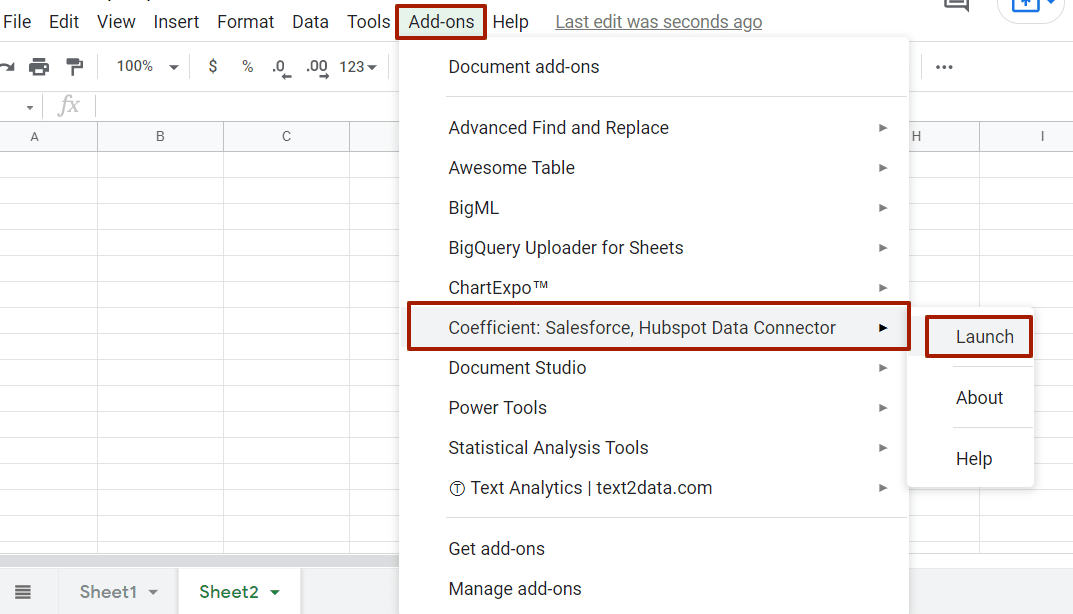
Step 1: Launch Coefficient
You can access Coefficient for free by signing up here. Once you’ve installed the add-on, launch Coefficient from Add-ons on the Google Sheets menu.
Step 2: Set your data source
Select Import data on the Coefficient sidebar.

Choose MySQL as the data source and select whether to import via point and click from tables directly or use a custom SQL query.

Input your connection details (such as your host, database name, and username) to connect to MySQL.
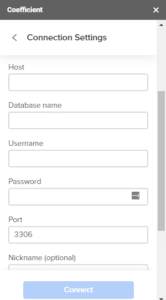
You might also need to whitelist several IP addresses if your database is behind a private network or firewall.
If you’re using a custom SQL query to pull data from MySQL to Google Sheets, input the code in the space provided.

Step 3: Customize your imports
Specify the fields you want to include and use the Coefficient filters to customize your MySQL import data, so you only get the relevant data you need.

This way, you won’t need to filter or remove columns and rows manually when your datasets are already in your spreadsheet.
Click Import when you’re done, and your import data should populate your active Google spreadsheet almost instantly.
You can also consolidate information from other data sources (besides MySQL) into one Google spreadsheet, making it easy to create comprehensive reports for your sales operations reporting.
Step 4: Configure auto-refresh schedules
Coefficient also keeps your data live by allowing you to configure regular, automated syncing.
You can set a weekly, daily, or hourly auto-refresh schedule so you won’t need to repeat importing your Google spreadsheet datasets every time you update your MySQL database.

Automated updates streamline your efforts to generate data insights, making Coefficient one of the best Google Sheets add-ons to supercharge your data analysis and reporting.
Step 5: Set alerts
Using Coefficient ensures you and your team won’t miss any critical changes or updates to your connected MySQL and Google Sheets data.
You can set automated alerts that trigger an email or slack message every time your Google Sheets data gets updated.
Configure the alert type, such as when your data changes or when a row gets added.
Get daily or weekly screenshots of a specific spreadsheet or range to quickly view changes, set the notification frequency, and add the alert recipients.

With Coefficient, linking your MySQL database to Google Sheets is seamless, quick, and even automated. The app removes the manual, time-consuming, and sometimes resource-draining aspects of importing and syncing data. This allows you and your team to direct your time and energy to more critical work while streamlining your data analysis and reporting processes.
2. Zapier
Zapier offers one of the most popular ways to send information between MySQL and Google Sheets automatically without writing a single line of code.
There are several ways to connect your MySQL data with Google Sheets, such as creating Google Sheets rows from new MySQL rows. Start by following these steps.
Step 1: Connect your MySQL account
Log in to Zapier and connect your MySQL account and Google Sheets (if you haven’t yet).

Allow Zapier to access your MySQL account by providing your IP address or the hostname of where your database is stored, the port, the database, the username, and other details.
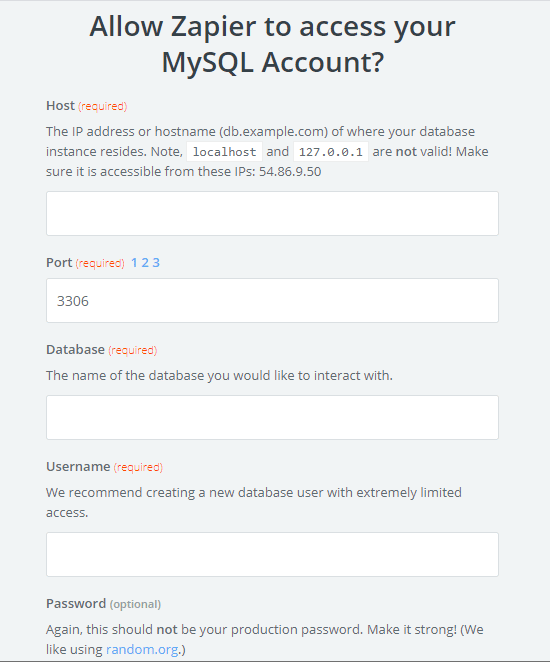
Then, connect Zapier to Google Sheets following a similar process.
Step 2: Customize your workflows
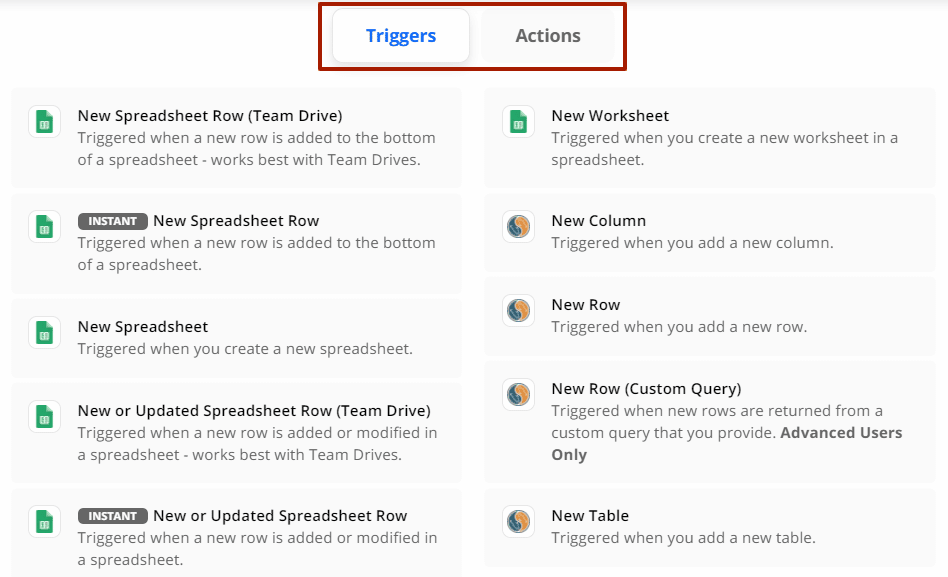
After connecting your MySQL database and Google spreadsheet to Zapier, create customized workflows by selecting triggers and actions.
For example, you can select a MySQL New Row as a trigger and Create Spreadsheet Row as the action.
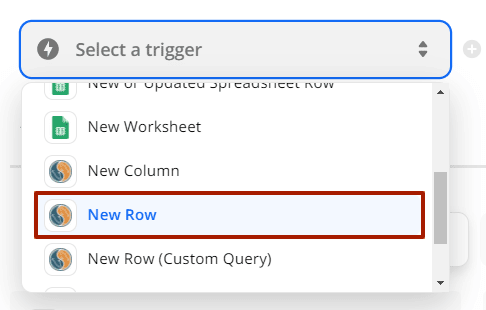
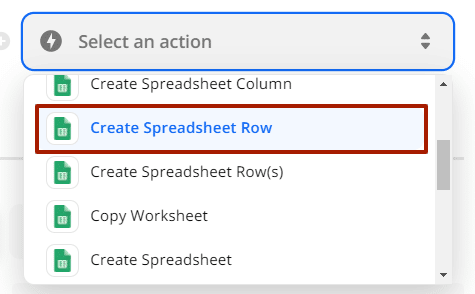
The workflow (or zap) automatically creates spreadsheet rows when you add new rows to your MySQL database. This helps keep your data live and eliminates the hassles of manually setting up your MySQL data to push it to Google Sheets.
You can create individual zaps to keep Google Sheets cells up-to-date every time you refresh your MySQL data and other workflow triggers and actions.
Step 3: Test your workflows
Test your zaps or workflows before running them to see how well they work and if they could deliver your expected results.
While Zapier is an excellent no-code tool, creating individual workflows to link your MySQL data to Google Sheets can be cumbersome. This is a massive, time-draining, and laborious task if you’re handling volumes of data.
It’s good to use Zapier to create new records in Google Sheets when you add new data to your MySQL database, but updating it is often a long and painful process. You might also need to write some SQL codes to ensure it works properly.
Also, it can get expensive the bigger the data volume you need to link for your zaps.
Limitations of Zapier –
- Tedious setup and maintenance – Zapier requires users to set up bespoke workflows, known as “Zaps”. Users must build and configure the Zaps on their own. In this sense, none of Zapier’s integrations are pre-built.
- Not cost-effective – Creating and managing Zap workflows can quickly become expensive. Multiple integrations can create multilayered boondoggles that rack up costs in a prohibitive fashion.
- User experience – Zapier takes you out of Google Sheets, creating a more fractured and disconnected experience. Coefficient allows you to stay in Google Sheets, allowing for more efficiencies in the processes of your team.
These are key considerations you should consider before leveraging Zapier.
3. Google Apps Script
Google Sheets includes a built-in app development platform called Apps Script that is based on JavasScript.
It covers a lot of tasks for Visual Basic for Applications (VBA) in Excel and comes with a Java Database Connectivity (JDBC) service that allows you to connect to Microsoft SQL, Oracle, and MySQL databases.

Stop exporting data manually. Sync data from your business systems into Google Sheets or Excel with Coefficient and set it on a refresh schedule.

Follow the steps below to connect your MySQL database to Google Sheets.
Step 1: Open the Script editor
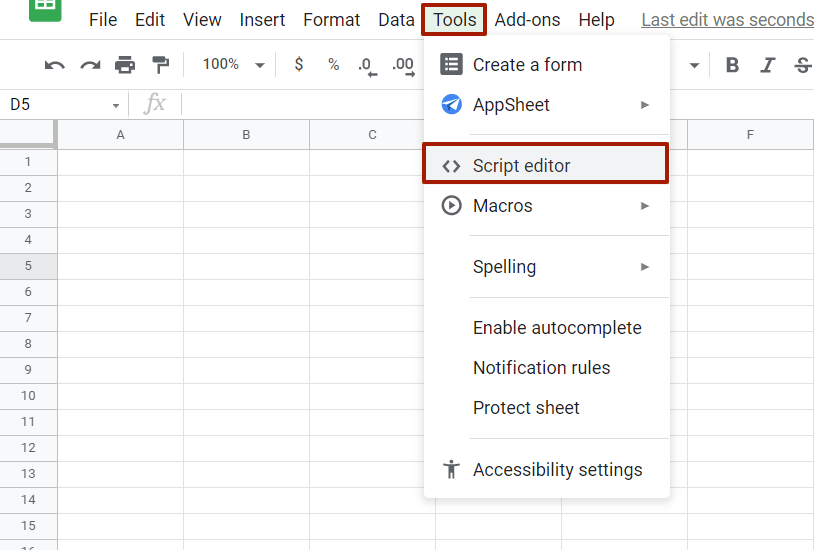
On a new Google Sheets spreadsheet, navigate to Tools on the menu and click Script editor from the dropdown.
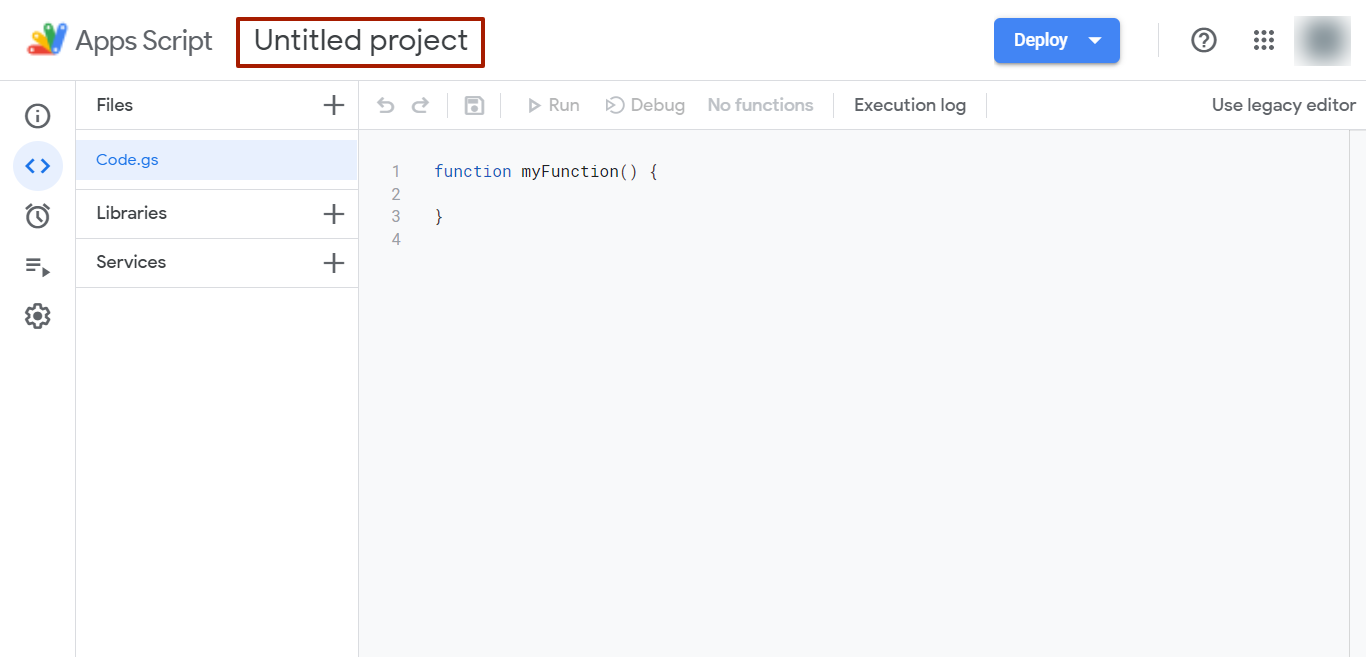
Name your project on the Google Apps Script interface.
Step 2: Whitelist specific IP addresses
To use JDBC to update an external database, your script must open a connection to said database, then apply changes by delivering SQL statements.
To do all this, you’ll need to whitelist several IP ranges within your database settings to allow Apps Script access.
Below are the IP addresses and beside each one shows how to whitelist them.
- 216.239.32.0 – 216.239.63.255
- 209.85.128.0 – 209.85.255.255
- 207.126.144.0 – 207.126.159.255
- 173.194.0.0 – 173.194.255.255
- 74.125.0.0 – 74.125.255.255
- 72.14.192.0 – 72.14.255.255
- 66.249.80.0 – 66.249.95.255
- 66.102.0.0 – 66.102.15.255
- 64.233.160.0 – 64.233.191.255
- 64.18.0.0 – 64.18.15.255
Step 3: Input the code
Remove the existing code in the code area.
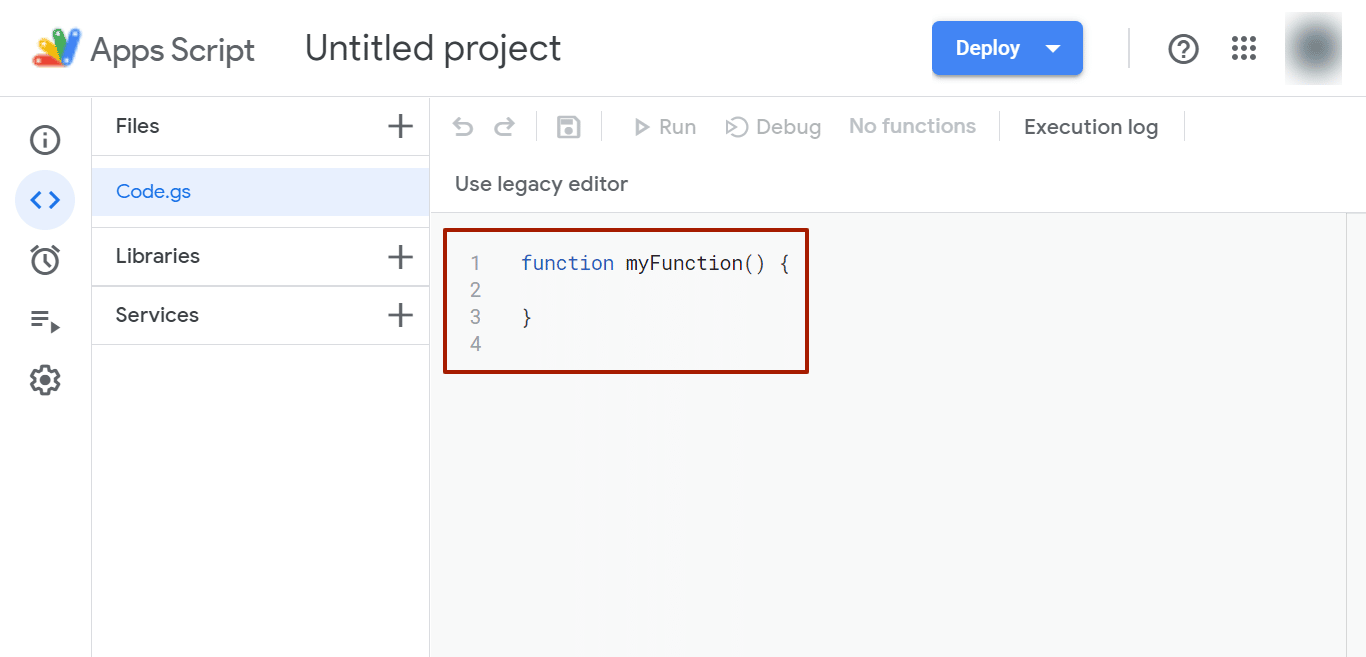
Copy and paste the code below.
var server = ‘11.11.11.11’;
var port = 3306;
var dbName = ‘dummy’;
var username = ‘username’;
var password = ‘password’;
var url = ‘jdbc:mysql://’+server+’:’+port+’/’+dbName;
function readData() {
 var conn = Jdbc.getConnection(url, username, password);
 var stmt = conn.createStatement();
 var results = stmt.executeQuery(‘SELECT * FROM dashboard_dummy’);
 var metaData=results.getMetaData();
 var numCols = metaData.getColumnCount();
 var spreadsheet = SpreadsheetApp.getActive();
 var sheet = spreadsheet.getSheetByName(‘Sheet1’);
 sheet.clearContents();
var arr=[];
 for (var col = 0; col < numCols; col++) {
   arr.push(metaData.getColumnName(col + 1));
 }
 sheet.appendRow(arr);
while (results.next()) {
 arr=[];
 for (var col = 0; col < numCols; col++) {
   arr.push(results.getString(col + 1));
 }
 sheet.appendRow(arr);
}
results.close();
stmt.close();
sheet.autoResizeColumns(1, numCols+1);
}
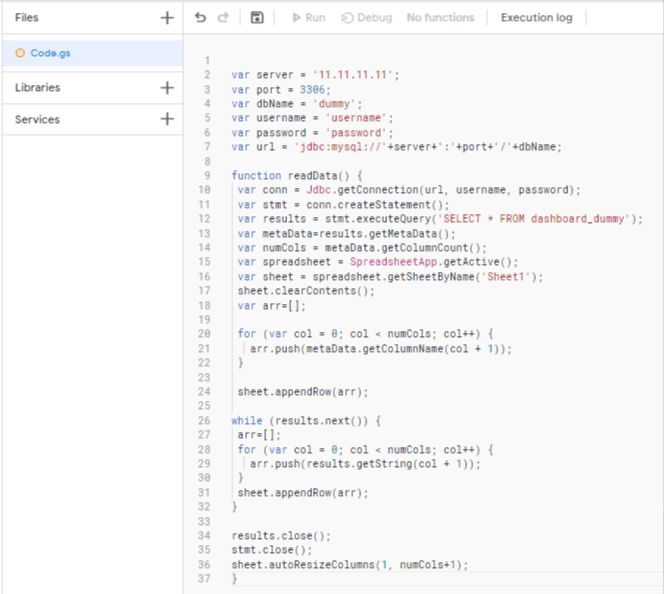
Step 4: Replace with your code
Input your code to replace the information below.
var server = '11.11.11.11'; // Replace 11.11.11.11 with your IP address
var port = 3306; // Replace 3306 with your port number. If you use a MySQL database, chances are that it’s the same, since port 3306 is the default port for the MySQL Protocol (port), which is used by the mysql client and MySQL Connectors.
var dbName = 'dummy'; // Replace dummy with your database name
var username = 'username'; // Replace username with your user name
var password = 'password'; // Replace password with your password
var results = stmt.executeQuery('SELECT * FROM dashboard_dummy'); // Replace dashboard_dummy with your table name
var sheet = spreadsheet.getSheetByName("Sheet1");// Replace Sheet1 with your Google Sheets tab name
Step5: Run your script
Click the Run button to execute your code.
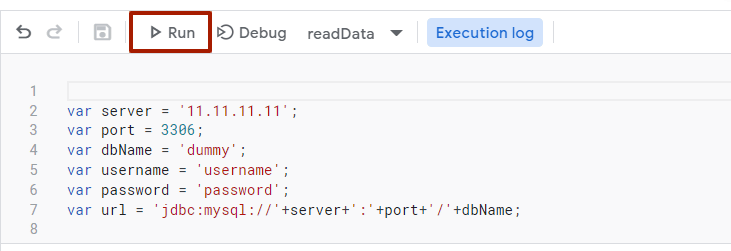
Step 6: Authorize access
Allow access by selecting Review Permissions on the Authorization required prompt.
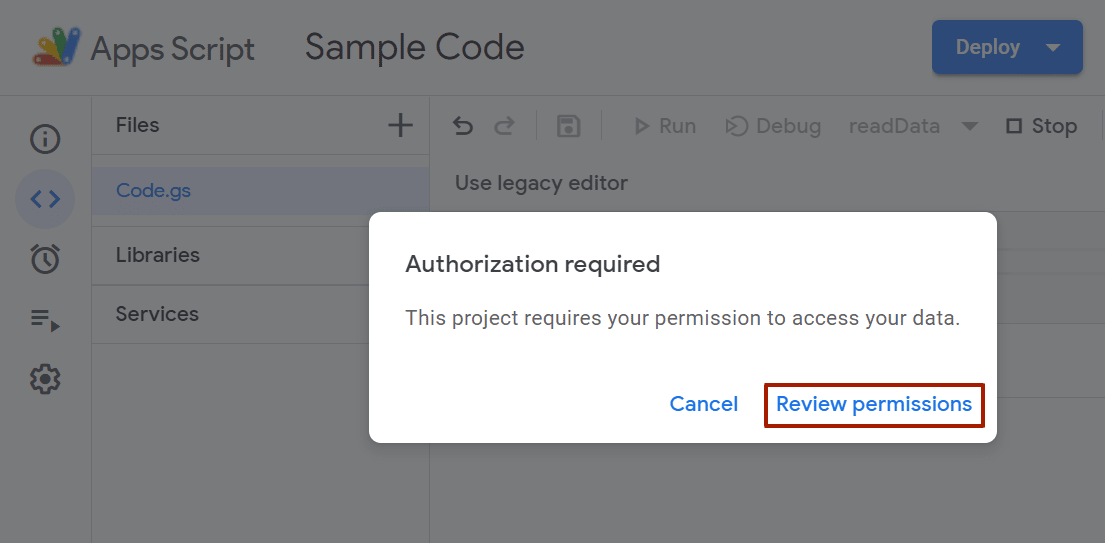
Choose the Google account you want to use to run your script, then click Allow.
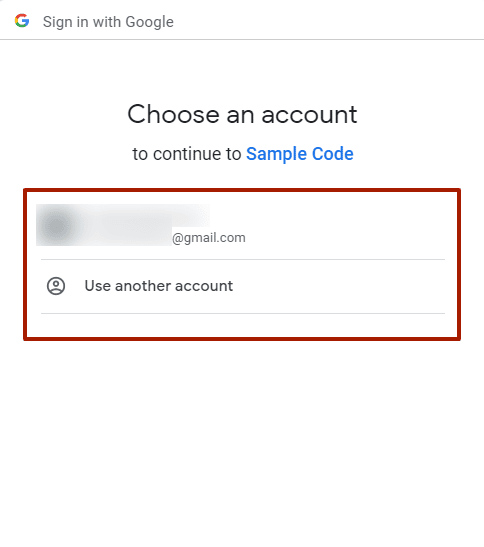
A message saying Running function readData should appear at the top of the interface. Once the message disappears, go back to Google Sheets and you should see your MySQL data on your spreadsheet.
Step 7: Automatically fetch and refresh your MySQL data
You can add a code to pull and refresh your MySQL data on Google Sheets every minute. This automatically clears the existing data in your chosen sheet and replaces it with your MySQL database data while maintaining the Google Sheets format you set.
Add this piece of code at the bottom of your current one.
ScriptApp.newTrigger('readData')
.timeBased()
.everyMinutes(1)
.create();
Click the Run button, allow access, and you should be good to go.
Pros
The process is pretty straightforward as long as you know the code to use and assuming you don’t encounter any errors when you run it.
Cons
The method has a few limitations since sharing the script with your team and applying it to many spreadsheets can be a pain. It can also make it challenging to link data between multiple Google sheets seamlessly.
You’ll also need to save your password in plain text within the Code.gs file, which isn’t very secure.
You would need multiple queries to go into various spreadsheets, making it cumbersome to schedule and automate refreshing your data.
Additionally, while using Google Apps Script commonly involves lightweight coding, it requires deploying engineering resources to understand MySQL and Google Apps Script. This means you’ll need in-depth knowledge and skills to use this approach, and it can take up tons of time and energy to do.
Connect MySQL to Google Sheets now
Automate the process of pulling data from your MySQL to Google Sheets. With an automated procedure, you save your team countless hours and headaches, let alone avoid needless human errors from happening.
Try Coefficient for free today!
With Coefficient, linking your MySQL database to Google Sheets is seamless, quick, and even automated. The app removes the manual, time-consuming, and sometimes resource-draining aspects of importing and syncing data. This allows you and your team to direct your time and energy to more critical work while streamlining your data analysis and reporting processes.
