Looking to consolidate financial data from multiple Xero accounts? You’re not alone.
Many face this challenge – and unfortunately, Xero doesn’t allow users to copy all of an organization’s data at once.
But don’t worry – we’ve got you covered. This guide will walk you through the process of exporting data from multiple Xero accounts, helping you streamline your financial reporting and analysis.
Export Xero Data from Multiple Accounts: Top 3 Methods
| Solution | Best For |
| Coefficient | Organizations managing multiple Xero accounts that need consolidated reporting, real-time data access, and automated updates in spreadsheets. |
| Manually Exporting Each Account | Small businesses with a few Xero accounts who need infrequent exports and prefer direct interaction with Xero’s interface. |
| Leveraging the Xero API | Large enterprises or accounting firms handling numerous Xero accounts, requiring automated, scalable solutions for bulk data extraction and processing. |
Method 1. Exporting Xero Data with Coefficient
Coefficient syncs live data from various business systems, like Xero, directly into Excel and Google Sheets. For Xero users, this means you can build real-time financial reports, automate data updates, and streamline your accounting workflows without leaving your spreadsheet.
Key features of Coefficient:
- Live Data Export: Pull real-time data directly into Excel or Google Sheets.
- Automated Reporting: Set up scheduled data refreshes for up-to-date reports.
- Data Accuracy: Ensure precision with direct connections to Xero.
Step-by-Step-Guide
Step 1. Install Coefficient
For Google Sheets
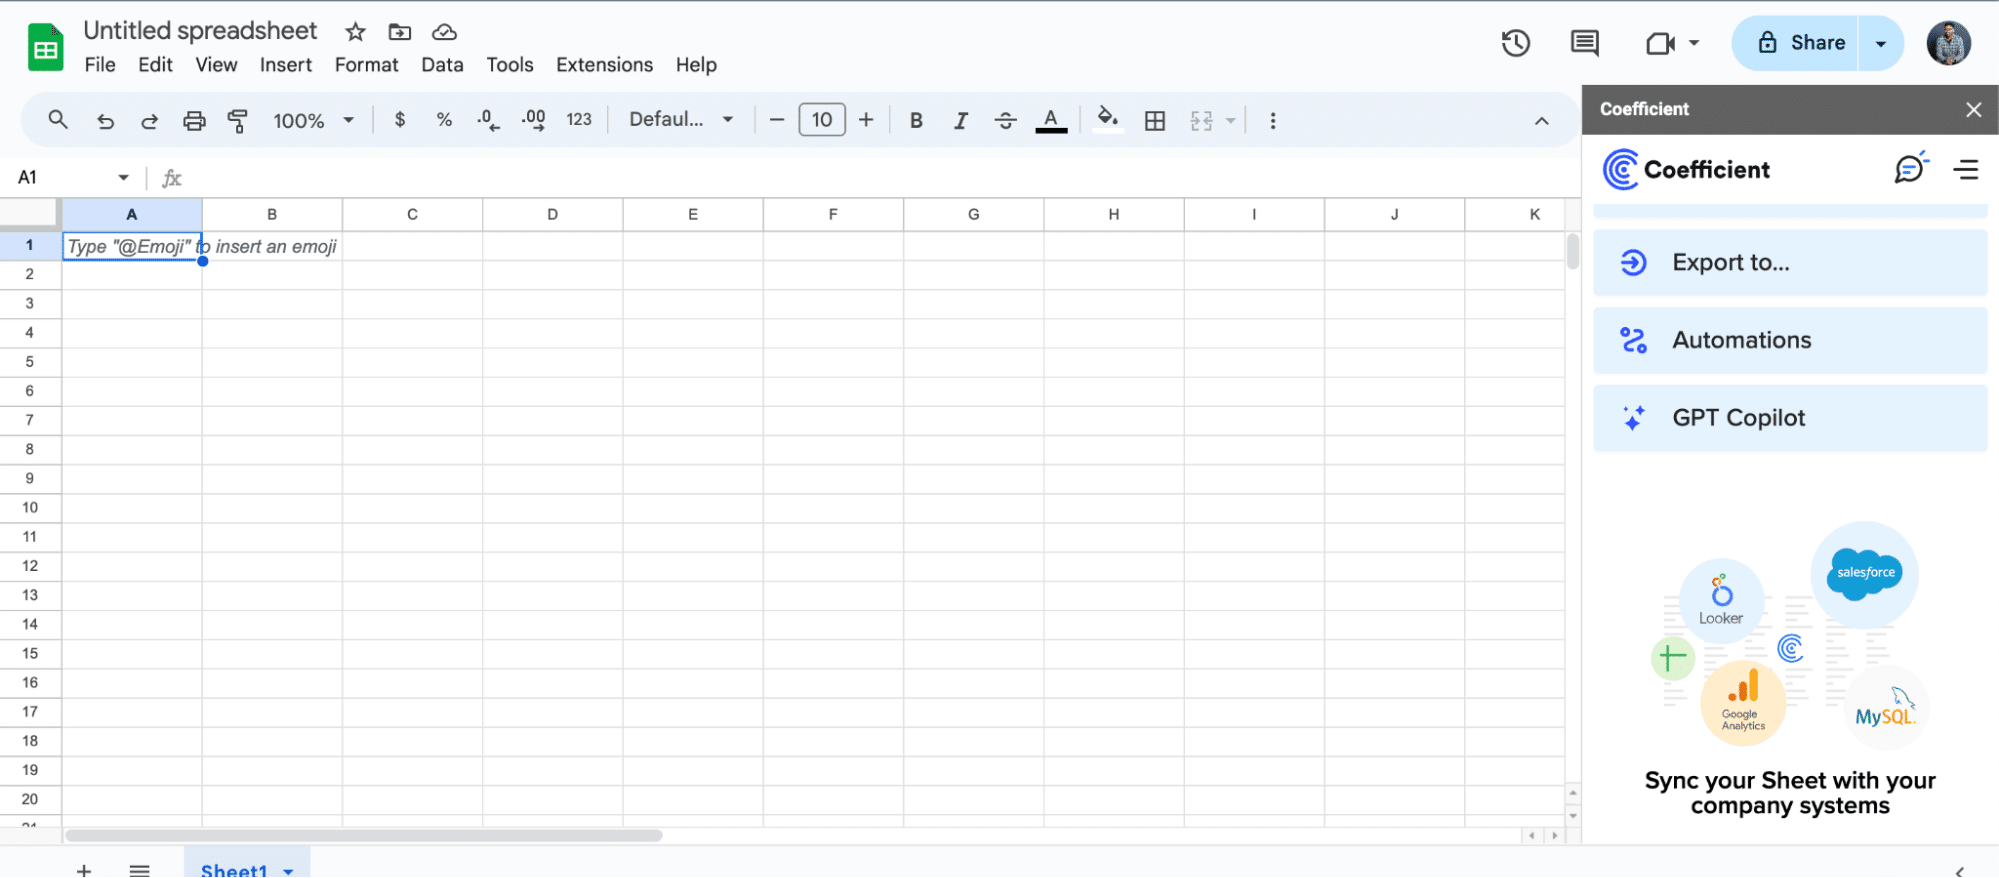
- Open a new or existing Google Sheet, navigate to the Extensions tab, and select Add-ons > Get add-ons.
- In the Google Workspace Marketplace, search for “Coefficient.”
- Follow the prompts to grant necessary permissions.
- Launch Coefficient from Extensions > Coefficient > Launch.
- Coefficient will open on the right-hand side of your spreadsheet.
For Microsoft Excel
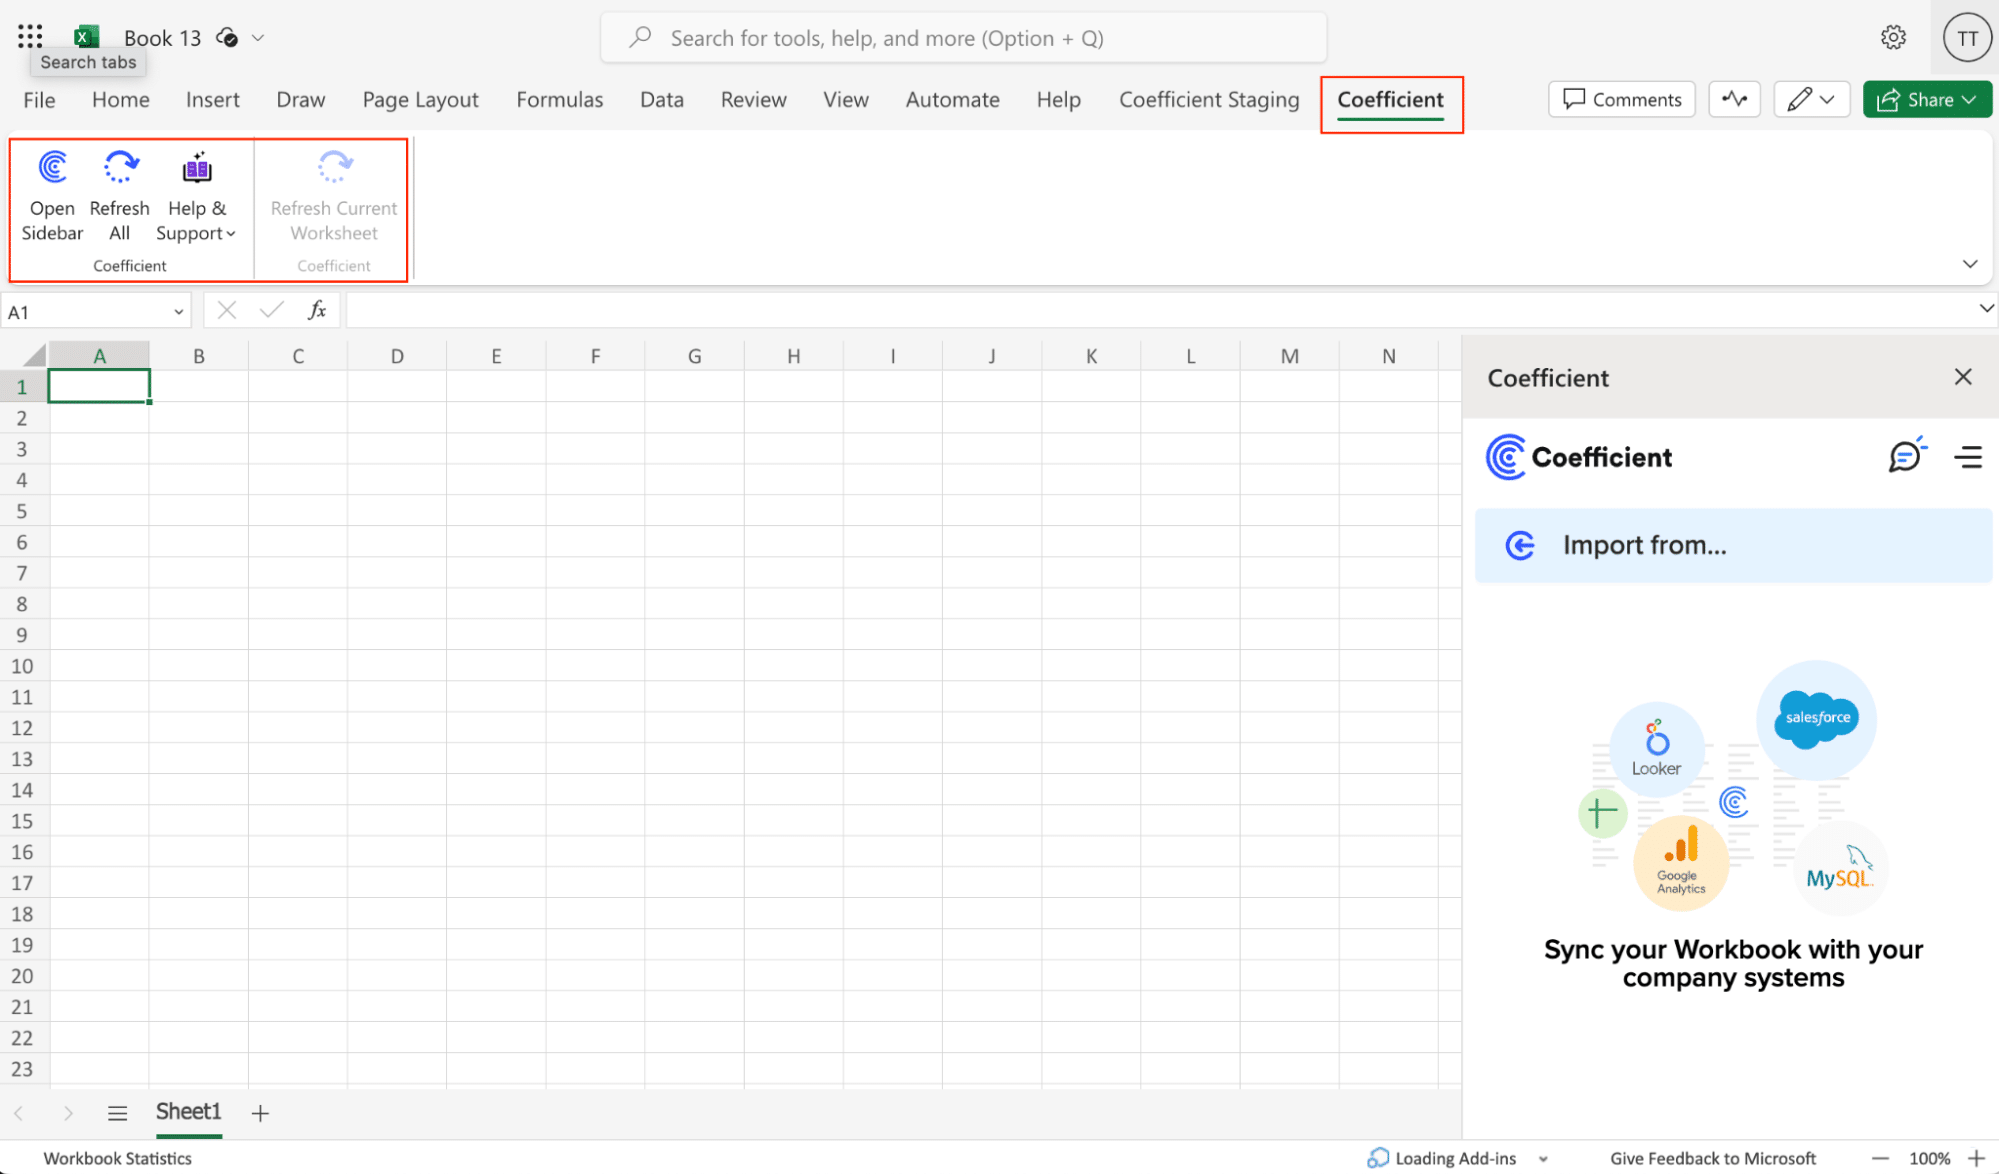
- Open Excel from your desktop or in Office Online. Click ‘File’ > ‘Get Add-ins’ > ‘More Add-Ins.’
- Type “Coefficient” in the search bar and click ‘Add.’
- Follow the prompts in the pop-up to complete the installation.
- Once finished, you will see a “Coefficient” tab in the top navigation bar. Click ‘Open Sidebar’ to launch Coefficient.
Step 2: Connect to Xero
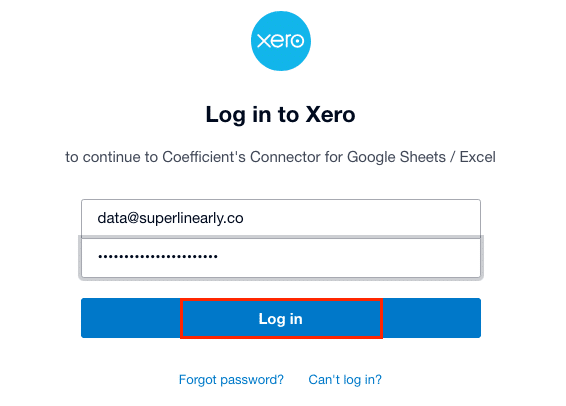
Enter your Xero demo credentials and click “Login.”
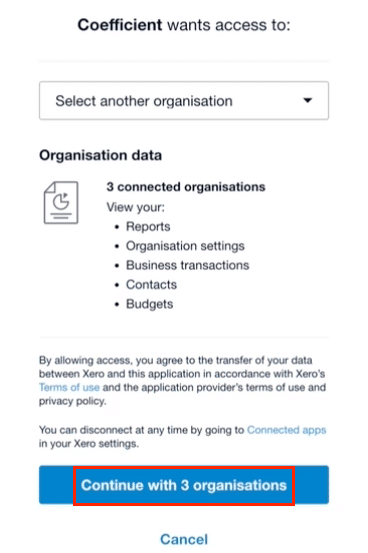
Select one or more of the available organizations to connect to Coefficient.
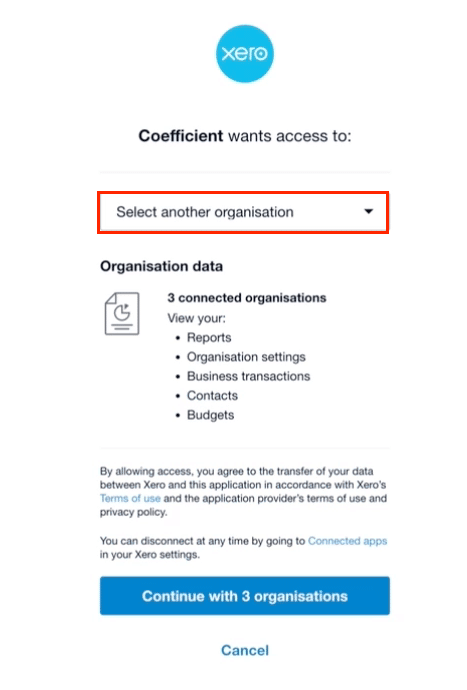
Click “Continue” to proceed with the selected organization(s).
Step 3: Export Your Data
Choose an endpoint from the available options, such as Invoices, Contacts, or Users.
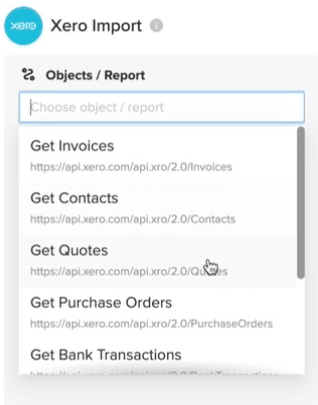
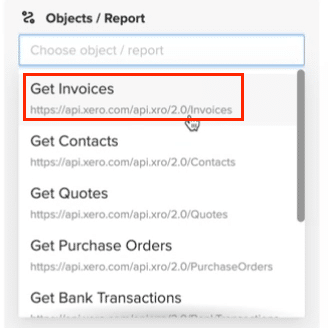
For this example, select “Get Invoices” to fetch invoice data from Xero.
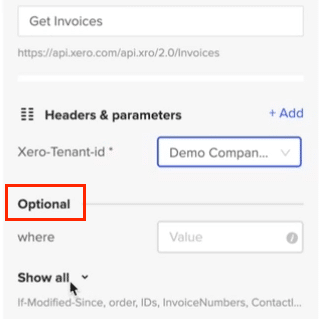
Enter the Tenant ID (organization ID) for your organization.

Optionally, select additional fields to include in the data import.
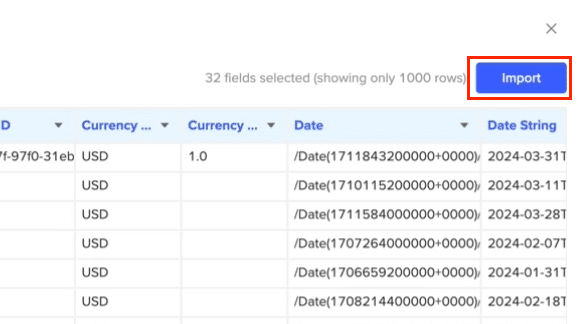
Click “Import” to fetch the invoice data into Google Sheets spreadsheet.
From here, follow these steps to consolidate your data:
- Set up data imports for the P&L data from each account
- Combine your datasets together
- Create a summary sheet that pulls data from each account’s import
- Set up automatic refreshes to keep the consolidated report up-to-date
Pro tip: Coefficient also offers pre-built reports templates to sync your live Xero data into, including a Xero Finance Dashboard, a consolidated cashflow report, and Xero finance projections template.
Method 2. Manually Exporting Each Account
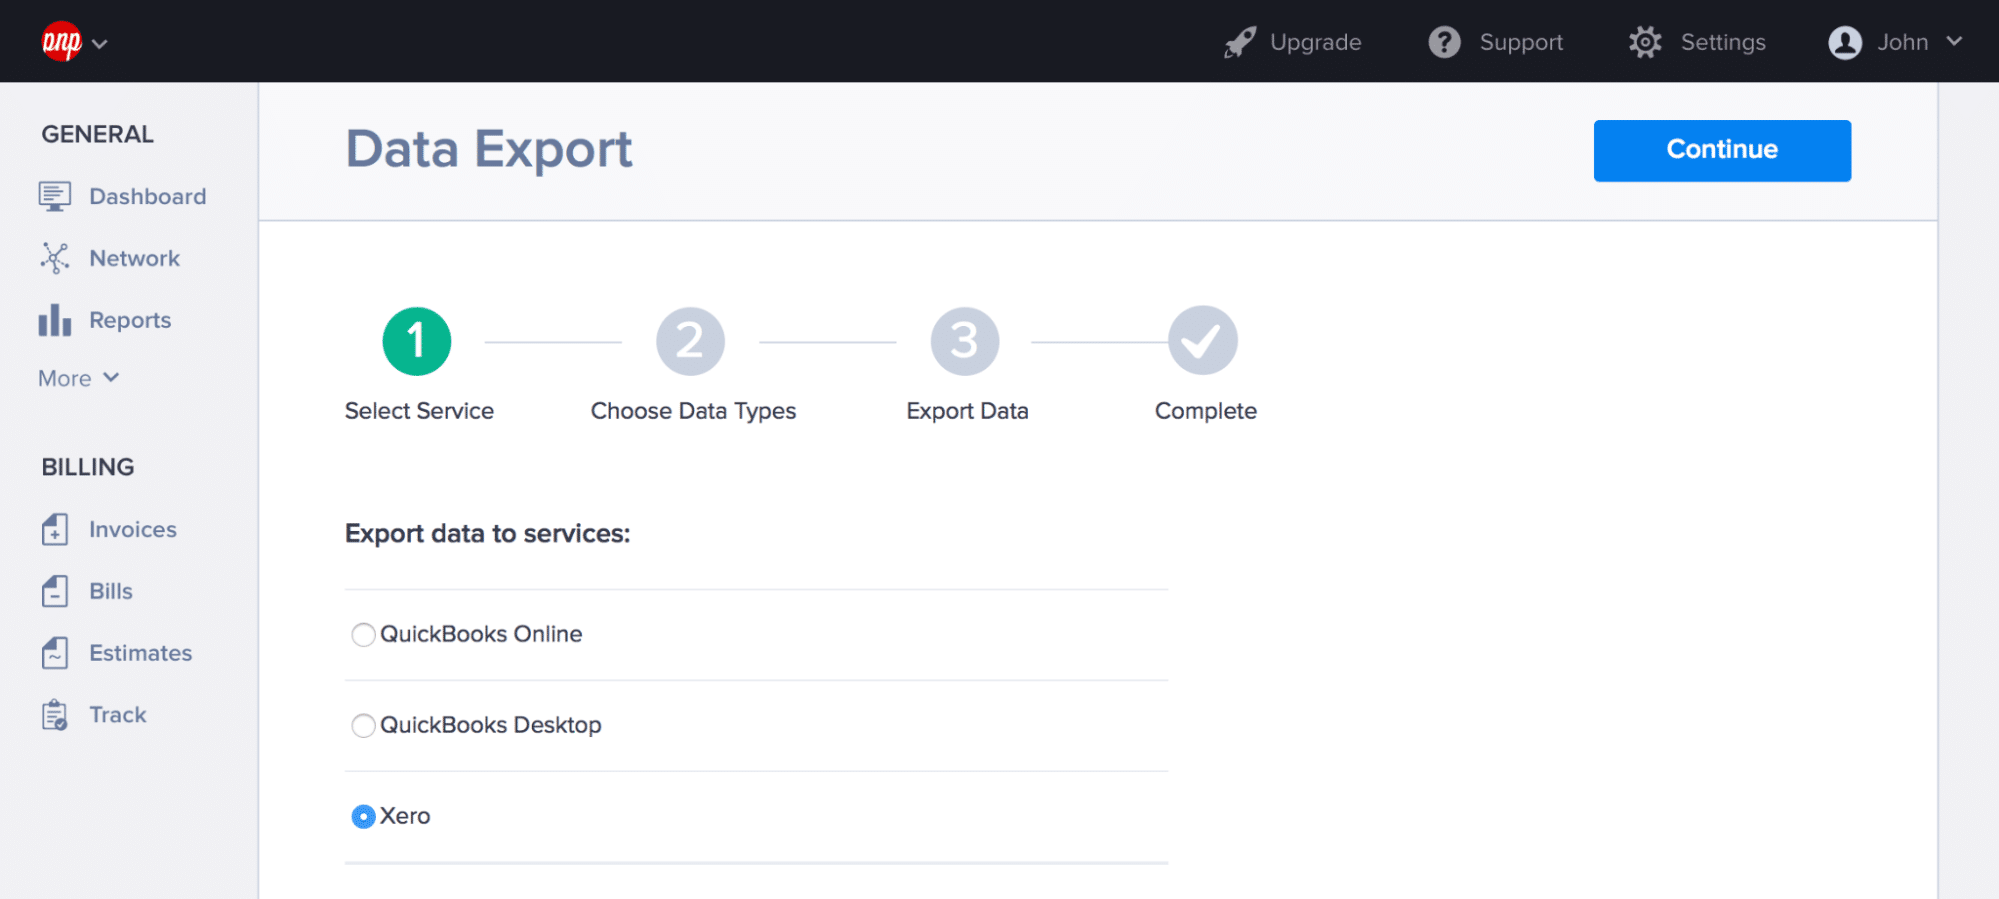
Xero provides a native export function for each account. While it requires manual effort for multiple accounts, it’s straightforward and doesn’t require additional tools.
Step-by-step guide:
Step 1: Prepare Your Accounts
- Ensure you have access to each Xero account you want to export data from.
- List the accounts you need to access and the specific data you need from each (e.g., invoices, bills, transactions).
Step 2: Log in to Each Xero Account
- Log in to the first Xero account through the Xero login page.
- Navigate to the required section (e.g., invoices, reports) where the data is located.
Step 3: Export Data from Each Account
For each Xero account, repeat the following steps:
Exporting Invoices
- Go to ‘Business’ > ‘Invoices’.
- Apply any necessary filters to view the data you need.
- Click the ‘Export’ button and select ‘Excel’ or ‘CSV’ to download the invoice data.
Exporting Bills
- Go to ‘Business’ > ‘Bills to Pay’.
- Filter the bills if needed.
- Click the ‘Export’ button and choose ‘Excel’ or ‘CSV’.
Exporting Transactions
- Go to ‘Accounting’ > ‘Reports’.
- Select the ‘Account Transactions’ report.
- Customize the report by setting the appropriate date range and filters.
- Click the ‘Export’ button and choose ‘Excel’ or ‘CSV’.
Step 4: Consolidate Data
- Open each exported file in Excel or a similar spreadsheet program.
- Combine the data into a single master file. You can do this by copying and pasting the data or using Excel’s ‘Power Query’ feature to merge the files.
Pros:
- No additional tools required
- Straightforward process
- Provides granular control over exported data
Cons:
- Time-consuming for multiple accounts
- Requires manual consolidation of data
- Limited to predefined export formats
Method 3. Leveraging the Xero API
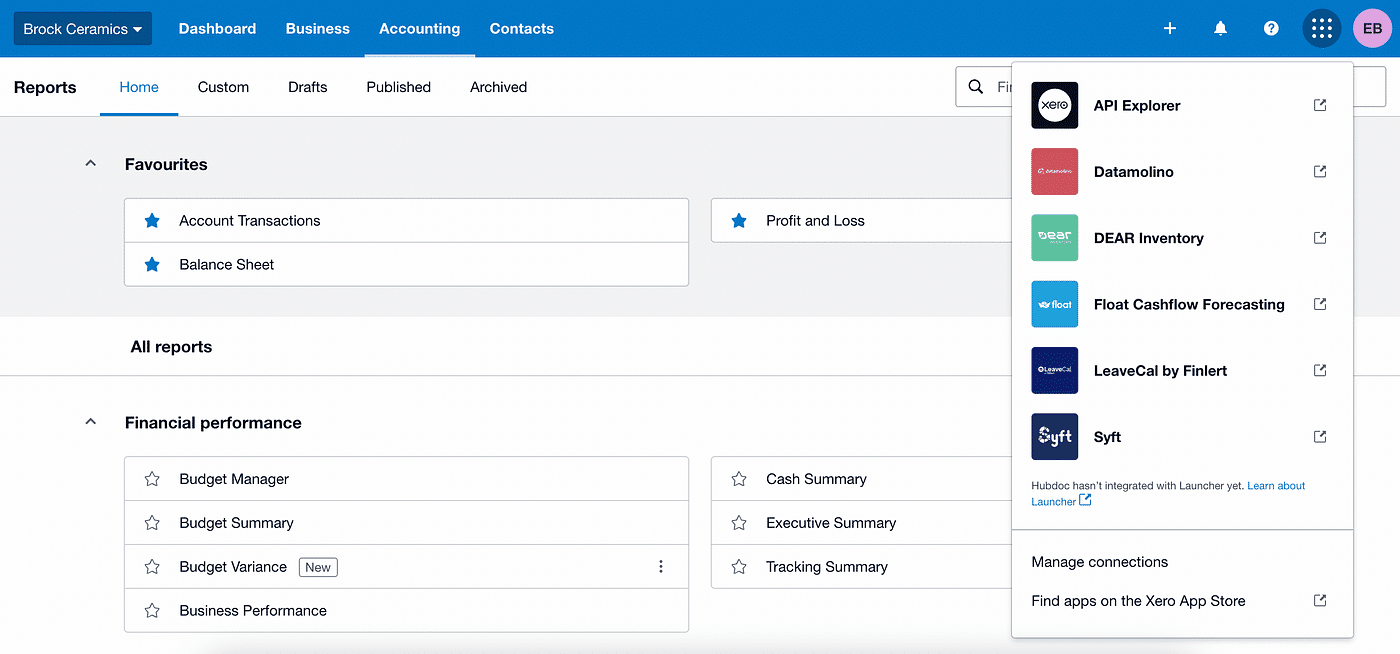
Coders can export data from multiple Xero accounts via the Xero API. This method can be automated and is suitable for handling large volumes of data.
Prerequisites
- API Access: Ensure you have API access for each Xero account. You will need the necessary OAuth2 credentials (client ID and client secret) for authentication.
- Programming Knowledge: Basic understanding of programming languages like Python, Node.js, or any language that supports HTTP requests.
Steps to use the Xero API:
Step 1: Set Up Your Environment
Install Required Libraries:For Python, you might use libraries such as requests and xero-python.
pip install requests xero-python
Step 2: Authenticate with the Xero API
Obtain OAuth2 Tokens: Follow Xero’s OAuth2 guide to obtain access tokens for each Xero account.
Step 3: Write the Script to Export Data
Example in Python
Set Up OAuth2 Authentication:
from xero_python.accounting import AccountingApi
from xero_python.api_client import ApiClient
from xero_python.api_client.configuration import Configuration
from xero_python.identity import IdentityApi
from xero_python.api_client.oauth2 import OAuth2Token
# Configuration
client_id = ‘YOUR_CLIENT_ID’
client_secret = ‘YOUR_CLIENT_SECRET’
redirect_uri = ‘YOUR_REDIRECT_URI’
# OAuth2 Token
token = OAuth2Token(client_id, client_secret)
# API Client
config = Configuration(oauth2_token=token)
api_client = ApiClient(config)
identity_api = IdentityApi(api_client)
accounting_api = AccountingApi(api_client)
# Set access token
token.set_access_token(‘YOUR_ACCESS_TOKEN’)
Function to Fetch Data:
def fetch_invoices(tenant_id):
api_client.set_tenant_id(tenant_id)
invoices = accounting_api.get_invoices()
return invoices
def fetch_bills(tenant_id):
api_client.set_tenant_id(tenant_id)
bills = accounting_api.get_bills()
return bills
def fetch_transactions(tenant_id):
api_client.set_tenant_id(tenant_id)
transactions = accounting_api.get_bank_transactions()
return transactions
Main Script to Export Data:
import csv
tenant_ids = [‘TENANT_ID_1’, ‘TENANT_ID_2’] # List of Xero tenant IDs
for tenant_id in tenant_ids:
invoices = fetch_invoices(tenant_id)
bills = fetch_bills(tenant_id)
transactions = fetch_transactions(tenant_id)
# Export invoices to CSV
with open(f’invoices_{tenant_id}.csv’, mode=’w’) as file:
writer = csv.writer(file)
writer.writerow([‘InvoiceID’, ‘Date’, ‘DueDate’, ‘Total’]) # Header
for invoice in invoices.invoices:
writer.writerow([invoice.invoice_id, invoice.date, invoice.due_date, invoice.total])
# Export bills to CSV
with open(f’bills_{tenant_id}.csv’, mode=’w’) as file:
writer = csv.writer(file)
writer.writerow([‘BillID’, ‘Date’, ‘DueDate’, ‘Total’]) # Header
for bill in bills.bills:
writer.writerow([bill.bill_id, bill.date, bill.due_date, bill.total])
# Export transactions to CSV
with open(f’transactions_{tenant_id}.csv’, mode=’w’) as file:
writer = csv.writer(file)
writer.writerow([‘TransactionID’, ‘Date’, ‘Amount’]) # Header
for transaction in transactions.bank_transactions:
writer.writerow([transaction.transaction_id, transaction.date, transaction.amount])
Step 4: Run the Script
Execute the script to fetch and export data from all specified Xero accounts.
Pros:
- Highly customizable
- Can be automated for regular exports
- Allows real-time data access
Cons:
- Requires programming skills
- Initial setup can be complex
- Requires ongoing maintenance
Exporting Xero Data? Do it the Easy Way with Coefficiient
Exporting data from multiple Xero accounts doesn’t have to be a headache. Whether you choose Xero’s native export function, leverage the API, or use a powerful tool like Coefficient, you now have the knowledge to streamline your financial reporting process.
By following the methods and best practices outlined in this guide, you’ll be able to consolidate your Xero data efficiently, giving you clearer insights into your overall financial picture. This not only saves time but also empowers you to make more informed business decisions.
Ready to revolutionize how you handle your Xero data?
Get started with Coefficient today and experience the ease of exporting data from multiple Xero accounts firsthand.


