Connecting Notion to Salesforce can dramatically streamline your workflow, enhance your team’s efficiency, and optimize your data management processes. This blog will walk you through the benefits of making this integration and the best methods to achieve it.
Advantages of Connecting Notion to Salesforce
- Centralize customer information: Combine customer notes and project details from Notion with Salesforce records for a more complete view of your customers.
- Streamline project management: Automatically update Salesforce records with project status and deliverables from Notion, reducing manual data entry.
- Improve team collaboration: Enable sales, marketing, and project teams to work together more effectively by sharing data between Notion and Salesforce.
.
Method Recommendations by Use Cases
Here’s a guide mapping the best methods to connect Notion to Salesforce based on the target personas of Revenue Operations, Marketing, Finance, and Data Teams:
|
Persona |
Key Use Case |
Recommended Method |
|
Revenue Operations |
Automated data updates |
Coefficient |
|
Marketing |
Campaign performance tracking |
Zapier |
|
Finance |
Real-time budget vs actuals reporting |
Bardeen.ai |
|
Data Teams |
Custom analytics and reporting |
Coefficient |
How to Connect Notion to Salesforce
Method 1: Coefficient – No-Code, User-Friendly
Coefficient connects your spreadsheet to all your business data without a single line of code.
Pros:
- Simple, no-code setup
- Automatic data updates
- Affordable pricing plans
Cons:
- Scheduled automations are not free in all pricing plans, but overall costs remain reasonable
Step-by-Step Setup Guide
Step 1. Install Coefficient
For Google Sheets
Open a new or existing Google Sheet, navigate to the Extensions tab, and select Add-ons > Get add-ons.

In the Google Workspace Marketplace, search for “Coefficient.”

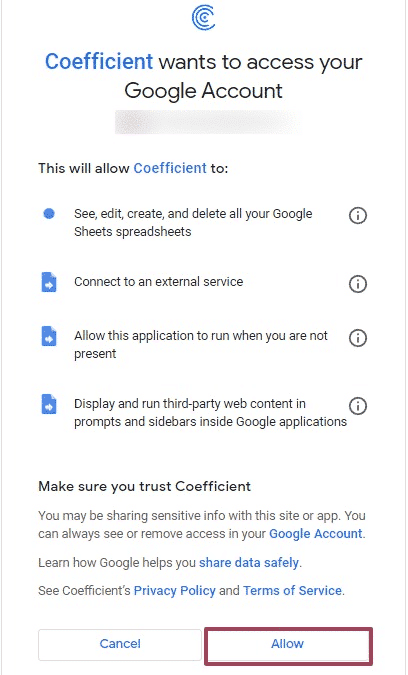
Follow the prompts to grant necessary permissions.
Launch Coefficient from Extensions > Coefficient > Launch.

Coefficient will open on the right-hand side of your spreadsheet.

For Microsoft Excel
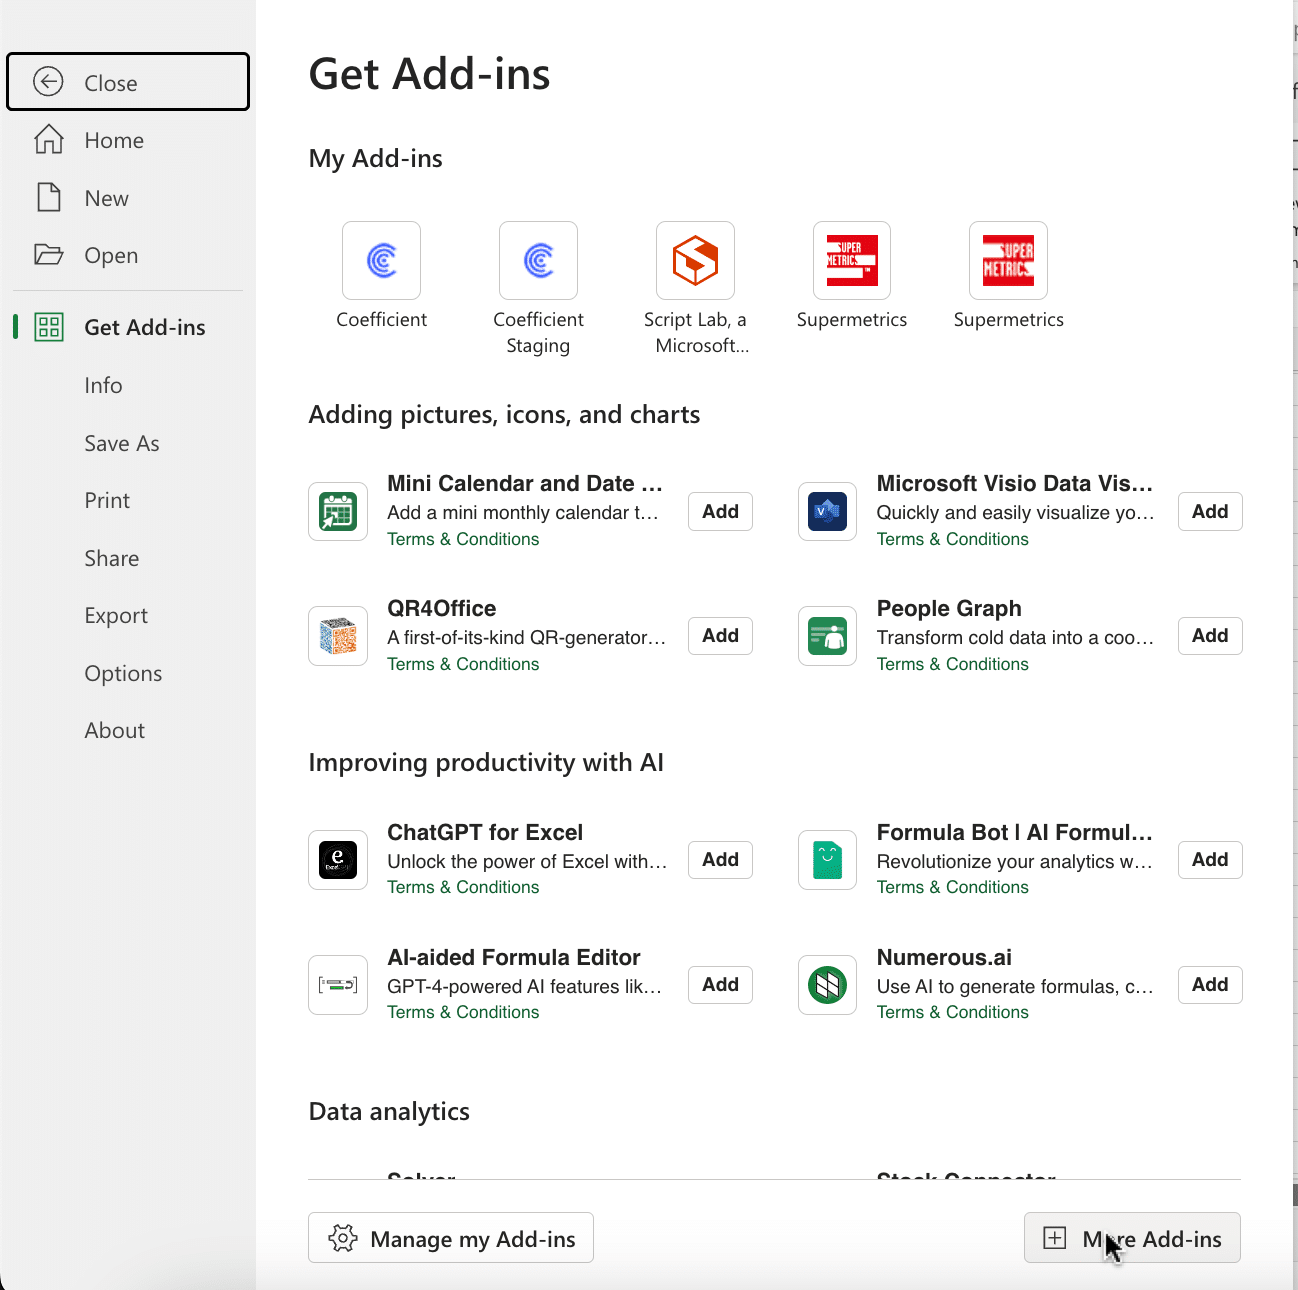
Open Excel from your desktop or in Office Online. Click ‘File’ > ‘Get Add-ins’ > ‘More Add-Ins.’
Type “Coefficient” in the search bar and click ‘Add.’
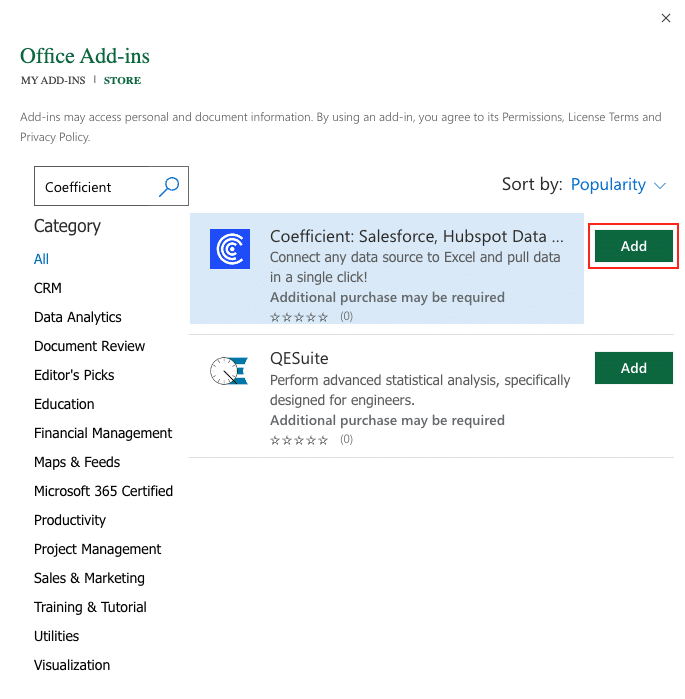
Follow the prompts in the pop-up to complete the installation.
Once finished, you will see a “Coefficient” tab in the top navigation bar. Click ‘Open Sidebar’ to launch Coefficient.

- Importing Data from Notion into Google Sheets with Coefficient:
- Open Google Sheets and click on Coefficient in the plugin menu.
- Choose “Import New Data” and select Notion as your source.
- Authenticate your Notion account and select the data you want to import.
- Click “Import” to pull the data into your Google Sheet.
Step 3. Export Data from Your Spreadsheet to Salesforce
Before starting, make sure you’ve connected to Salesforce.
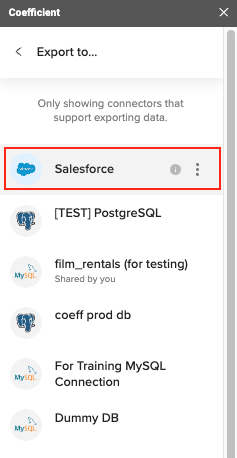
Then, navigate to Coefficient’s menu. Click “Export to…”

Choose Salesforce from the list of available data sources.
Select the tab and header rows in your spreadsheet that contain the data you want to export.

Stop exporting data manually. Sync data from your business systems into Google Sheets or Excel with Coefficient and set it on a refresh schedule.

Define your tab and header row.

Note: Coefficient will automatically map the fields for you if the data in the sheet came from an import from Salesforce using Coefficient.
Next, select the Salesforce Object you want to export data to, e.g., “Opportunity”, “Contacts”, etc.

Then, select the type of action you want to perform—Update, Insert, Upsert, or Delete.
Step 5: Map Fields
Map the fields from your spreadsheet to the corresponding Salesforce fields.
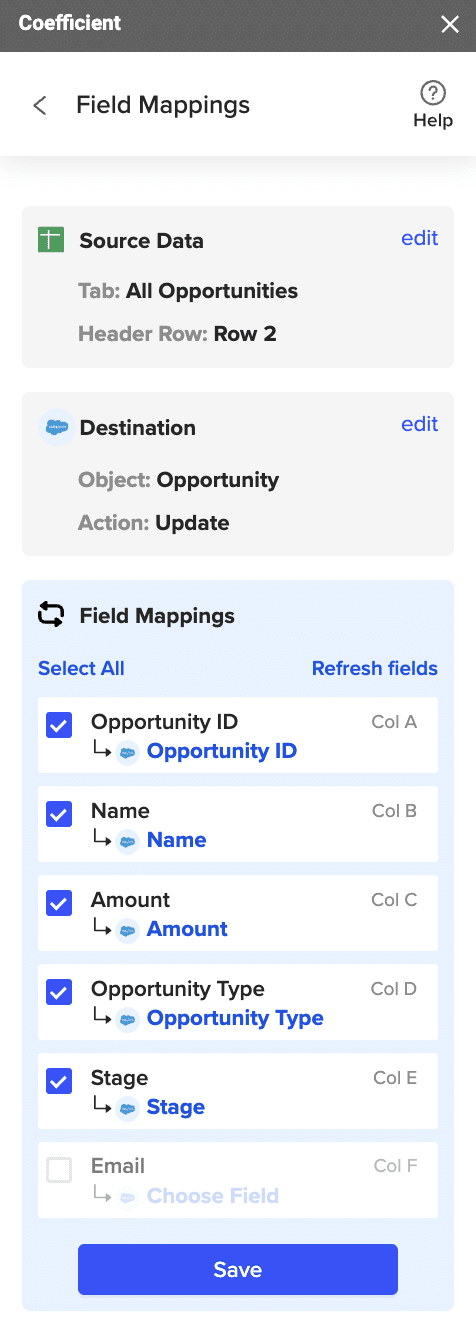
Note: If you imported data from Salesforce into your spreadsheet previously, Coefficient will auto-detect and map these fields.
(Optional) Specify additional settings such as batch size, whether to export empty cells on an update, and the column for results.
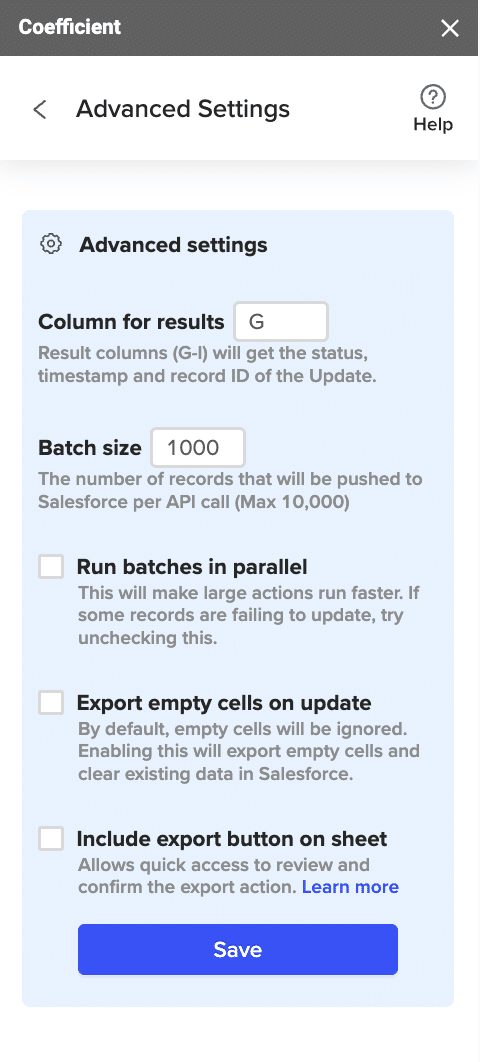
Note: Batch size is capped at 10,000 rows due to Salesforce API limitations.
Step 7: Select Rows to Export
Confirm your settings and click “Export”.
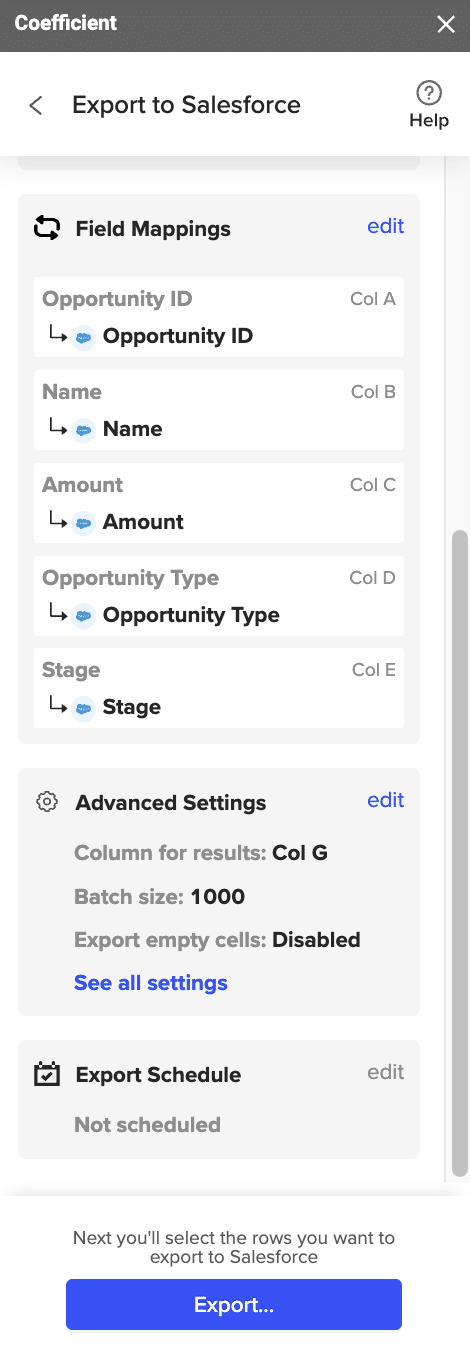
Then, highlight the rows you want to update or export. You can choose to export all rows or specific rows.

After you’re finished, review your settings and click “Export.”
Follow the prompts to confirm your changes.
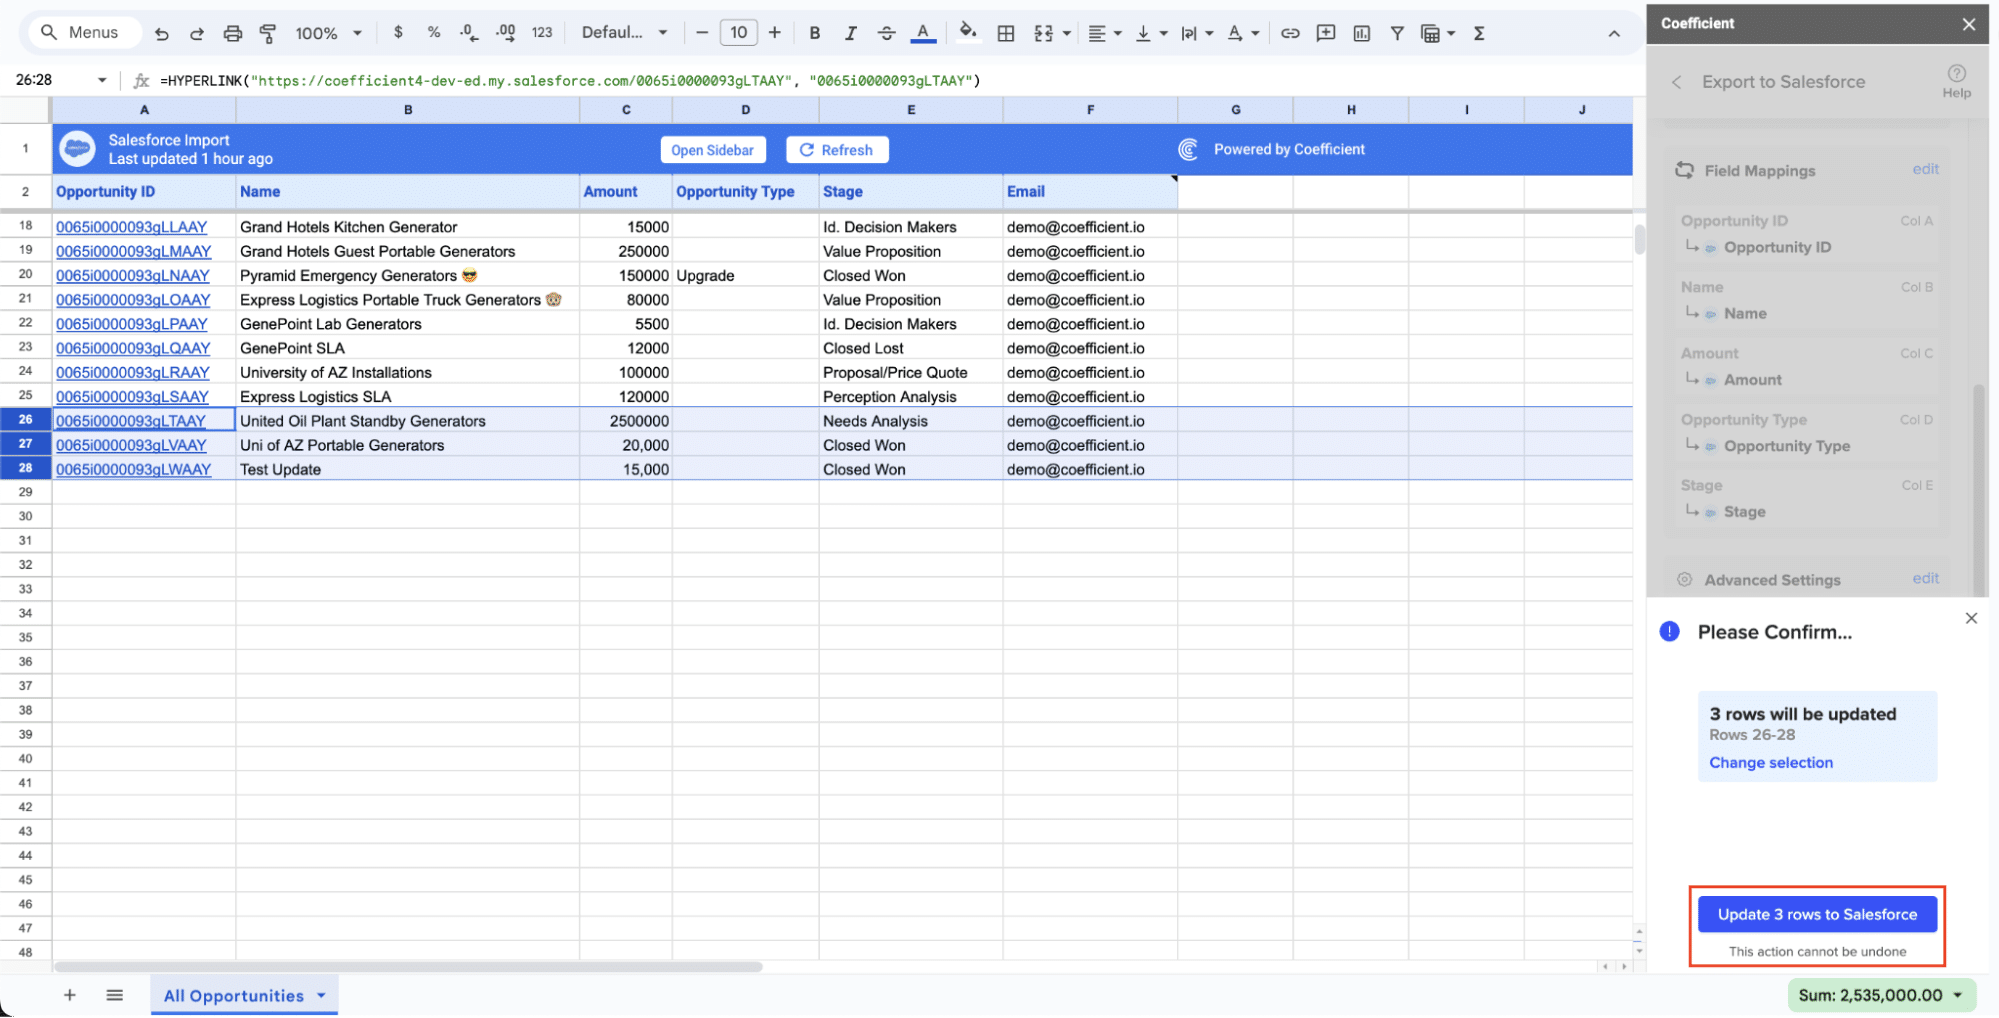
In a few seconds, data from your spreadsheet will push to Salesforce.
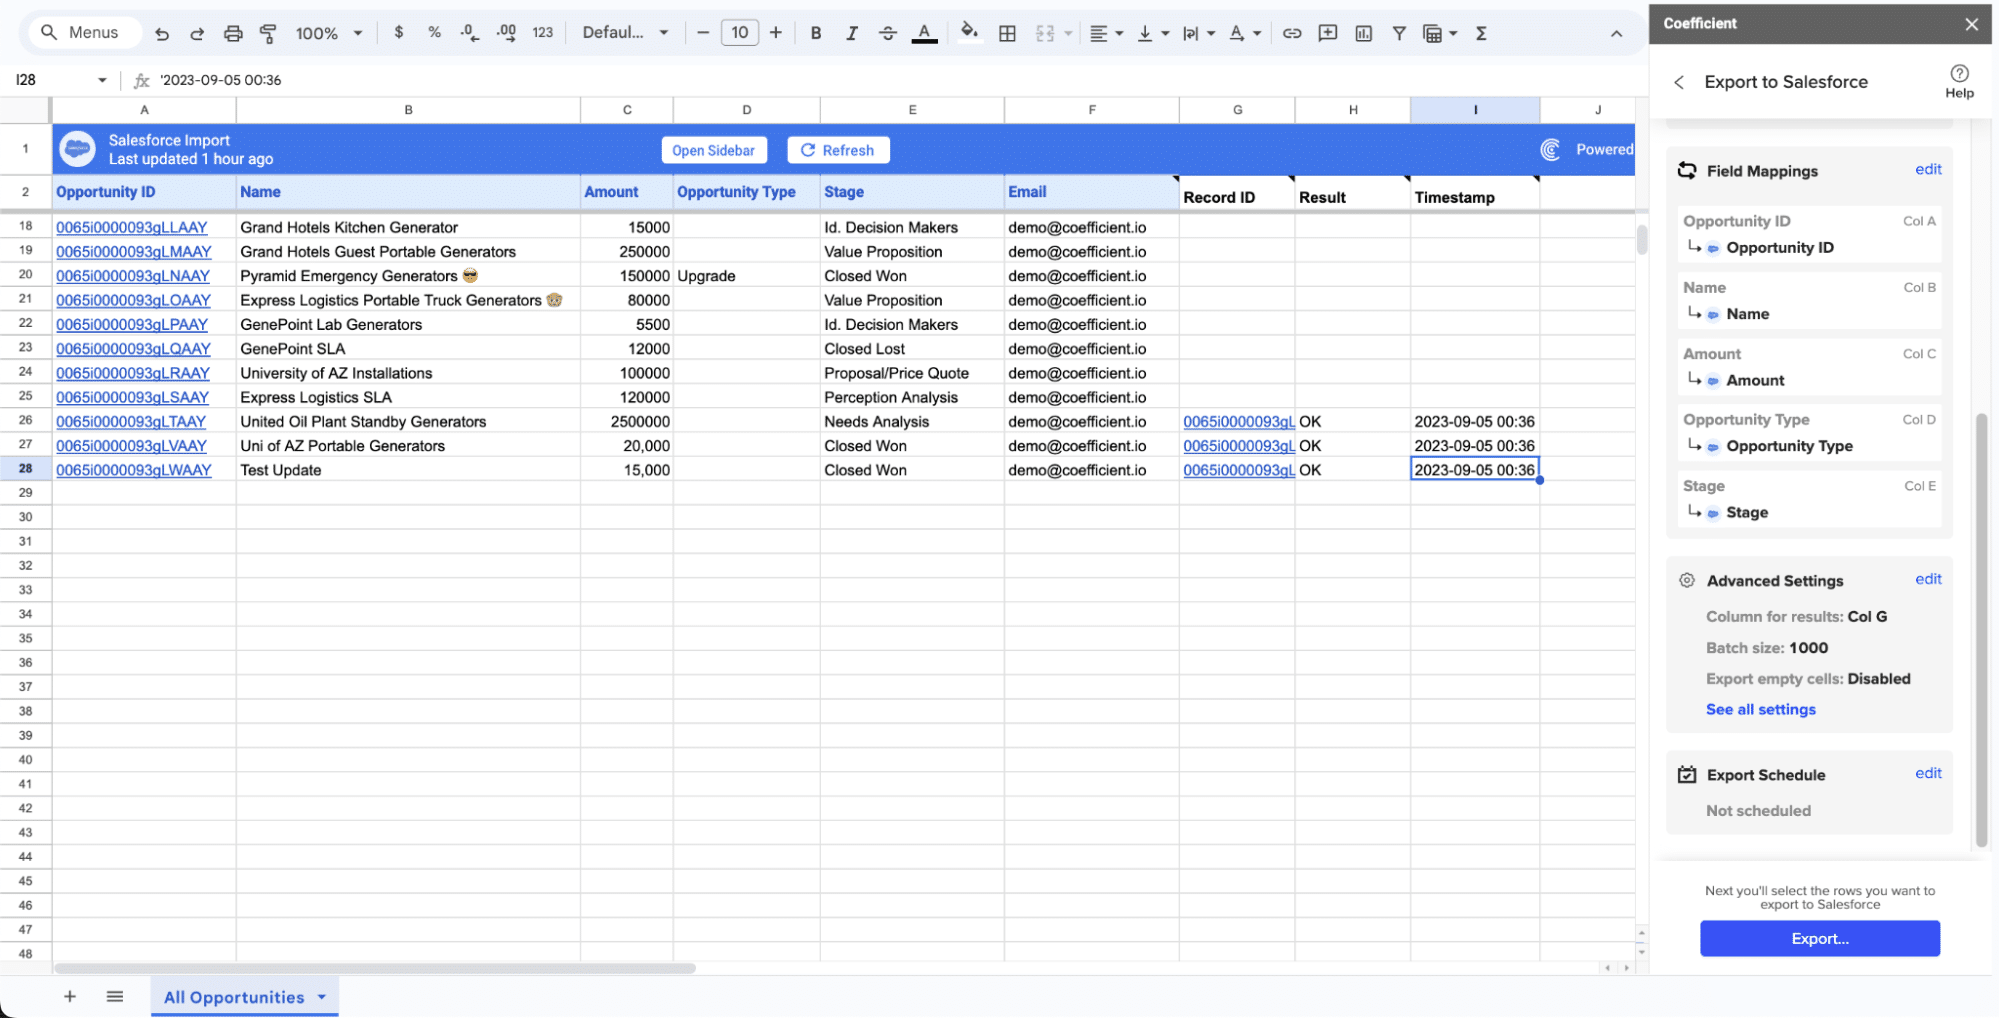
Your spreadsheet will display updated records, along with their export status and the date/time stamp of the update.
Method 2: Zapier

Zapier acts as a workflow automation tool that connects various apps and services, including Notion and Salesforce. Zapier is known for its wide range of integrations and reliability in automating routine tasks.
Pros:
- No-code setup
- Wide range of integrations
- Reliable and well-documented
Cons:
- Limited free plan
- Can become costly with premium features
Step-by-Step Setup Guide
- Setting up Zapier:
- Log into your Zapier account.
- Create a new Zap (workflow).
- Connecting Notion to Zapier:
- Set Notion as the trigger app.
- Choose a trigger event, such as “New Database Item”.
- Authenticate your Notion account and select the Notion workspace and database.
- Connecting Salesforce to Zapier:
- Set Salesforce as the action app.
- Choose an action event such as “Create Record” or “Update Record”.
- Authenticate your Salesforce account and select the Salesforce object where the data needs to be pushed.
- Map the fields correctly between Notion and Salesforce.
- Test the Zap and if successful, turn it on.
Method 3: Bardeen

Bardeen.ai offers AI-powered automation that can connect various tools, including Notion and Salesforce. It is particularly useful for creating customizable workflows and handling repetitive tasks efficiently.
Pros:
- AI-powered automation
- Customizable workflows
- Efficient for repetitive tasks
Cons:
- Requires initial setup
- Some advanced features may need a learning curve
Step-by-Step Setup Guide
- Setting up Bardeen.ai:
- Sign up on the Bardeen.ai platform.
- Follow the setup steps to install the Bardeen browser extension.
- Connecting Notion to Bardeen.ai:
- Open the Bardeen extension and navigate to the “Playbooks” section.
- Create a new playbook and set Notion as the source app.
- Select the trigger event within Notion (e.g., Updated Database Item).
- Authenticate your Notion account and save the settings.
- Connecting Salesforce to Bardeen.ai:
- In the same playbook, set Salesforce as the action app.
- Choose the action event (e.g., Create or Update Salesforce Record).
- Authenticate your Salesforce account.
- Map the Notion fields to Salesforce fields.
- Save and activate the playbook.
Conclusion
Connecting Notion to Salesforce can significantly enhance your business processes by streamlining data management, improving lead and campaign tracking, enhancing team collaboration, and automating workflows. Among the methods discussed, Coefficient stands out as a user-friendly, no-code solution perfect for various business personas. Get started today by visiting Coefficient’s website.
By following the steps and methods provided in this blog, you’ll be well on your way to improving your team’s efficiency and making the most out of the capabilities offered by both Notion and Salesforce.
