Are you looking to connect Snowflake to SQL Server? You’re not alone. Many organizations need to integrate their cloud data warehouse with on-premises databases. This guide will walk you through three proven methods to establish this connection, complete with step-by-step instructions for each approach.
Why Connect Snowflake to SQL Server?
Before we dive into the how-to, let’s quickly cover the why. Connecting Snowflake to SQL Server offers several key advantages:
- Real-time data synchronization: Keep your cloud and on-premises systems in sync for unified reporting and analytics.
- Improved ETL processes: Move and transform data more effectively across platforms.
- Better data accessibility: Perform cross-platform analysis for more informed decision-making.
Top 3 Methods to Connect Snowflake to SQL Server
There are several ways to connect Snowflake to SQL Server, each suited to different needs and technical expertise levels. Here’s a quick overview of the top three methods:
| Solution | Best For |
| Coefficient | Business users who need a no-code solution to sync Snowflake data to SQL Server through spreadsheets, with automated refreshes and real-time updates |
| SQL Server Linked Server | Technical users who require direct database-to-database connectivity and prefer native SQL Server tools |
| Airbyte | Organizations needing an open-source solution for batch data transfers with customizable configurations |
Let’s explore each method in detail.
#1 Coefficient: The No-Code Solution
Coefficient provides a user-friendly interface to connect Snowflake and SQL Server through spreadsheets. This method is ideal for non-technical users who want to manage data flows without coding.
Step-by-Step Guide:
Step 1. Install Coefficient
For Google Sheets
- Open a new or existing Google Sheet, navigate to the Extensions tab, and select Add-ons > Get add-ons.
- In the Google Workspace Marketplace, search for “Coefficient.”
- Follow the prompts to grant necessary permissions.
- Launch Coefficient from Extensions > Coefficient > Launch.
- Coefficient will open on the right-hand side of your spreadsheet.

For Microsoft Excel
- Open Excel from your desktop or in Office Online. Click ‘File’ > ‘Get Add-ins’ > ‘More Add-Ins.’
- Type “Coefficient” in the search bar and click ‘Add.’
- Follow the prompts in the pop-up to complete the installation.
- Once finished, you will see a “Coefficient” tab in the top navigation bar. Click ‘Open Sidebar’ to launch Coefficient.

Step 2: Connect and Import Data from Snowflake
- Open Coefficient Sidebar: In Google Sheets, go to Extensions > Coefficient > Launch.
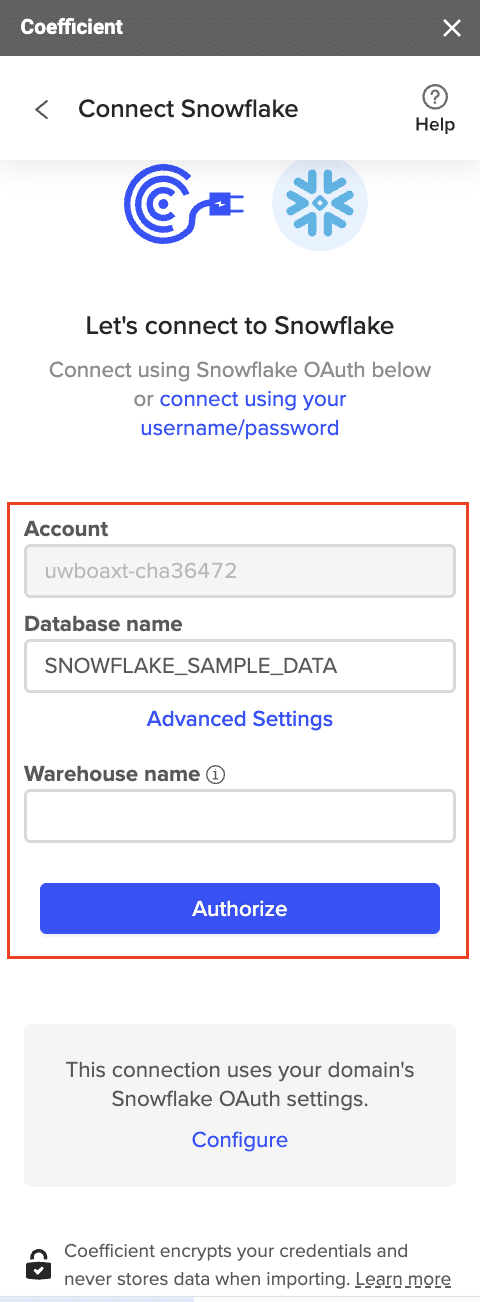
- Connect Snowflake: Click Import from… and select Snowflake.
- Authenticate: Enter Snowflake credentials (Account Name, Database Name, Username, Password, Warehouse Name).
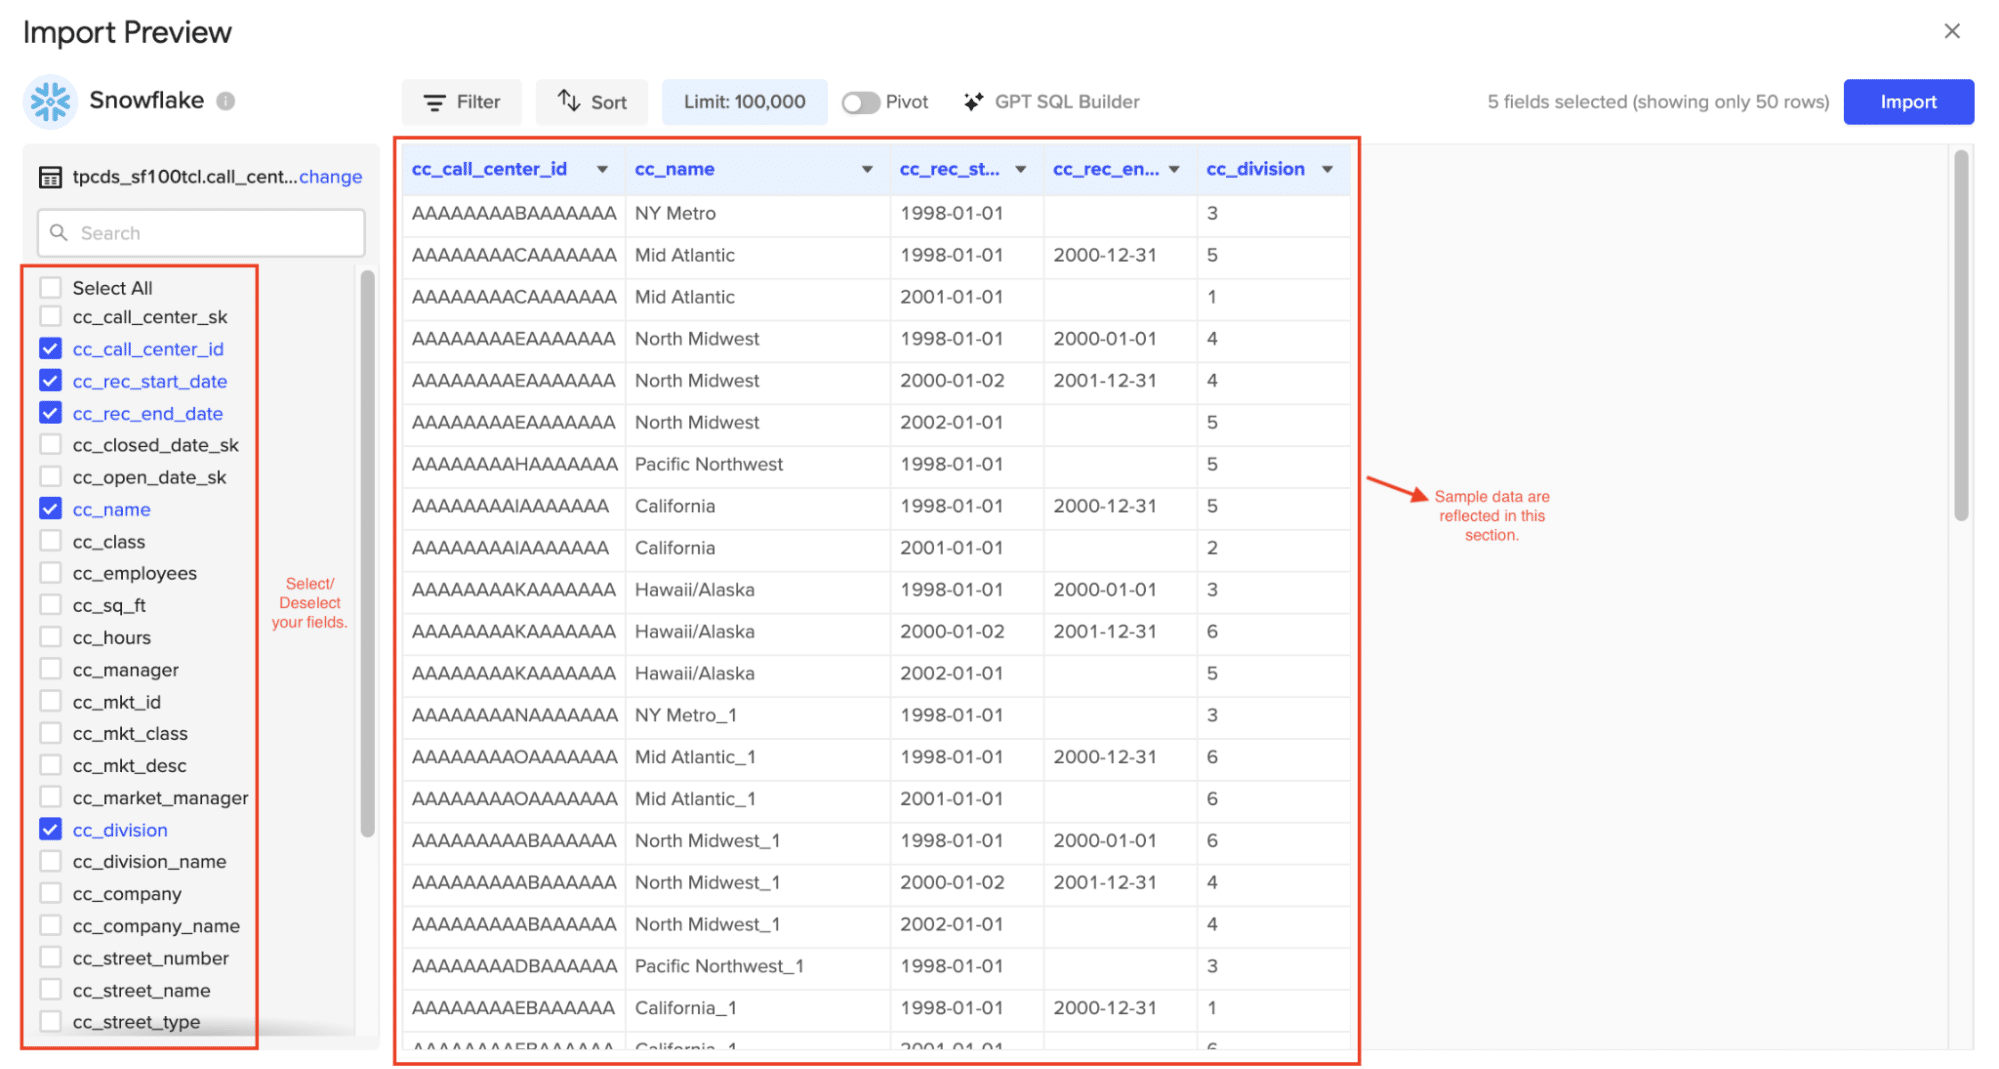
- Select Data: Choose tables/columns or run a custom SQL query, then click Import.
Step 3. Export Data from Your Spreadsheet to MS SQL
Before starting, make sure you’ve connected to MS SQL.
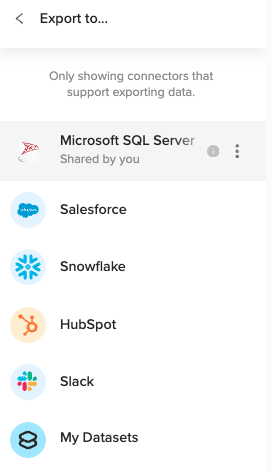
Then, navigate to Coefficient’s menu >Click “Export to…”

Select MS SQL.
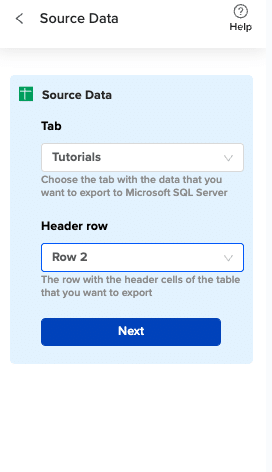
Choose the tab in your workbook that contains the data you want to export and specify the header row that contains the database field headers.
Specify the table in your database where you want to insert the data and choose the appropriate action (Insert, Update, Delete).

Complete the field mappings for the export. Then, confirm your settings and click “Export” to proceed.

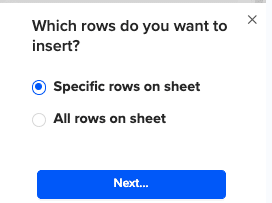
Then, highlight the specific rows in your sheet that you want to export, or choose to export all rows.
Review your settings and follow the prompts to push your data back to MS SQL.
Pros:
- No coding required
- User-friendly interface
- Automated scheduling
- Real-time updates
- Spreadsheet-based transformations
Cons:
- Requires spreadsheet intermediary
- Limited to spreadsheet row limits
- May not suit very large datasets
For more information on connecting SQL Server to spreadsheets, check out these resources:
#2 SQL Server Linked Server: The Native Approach
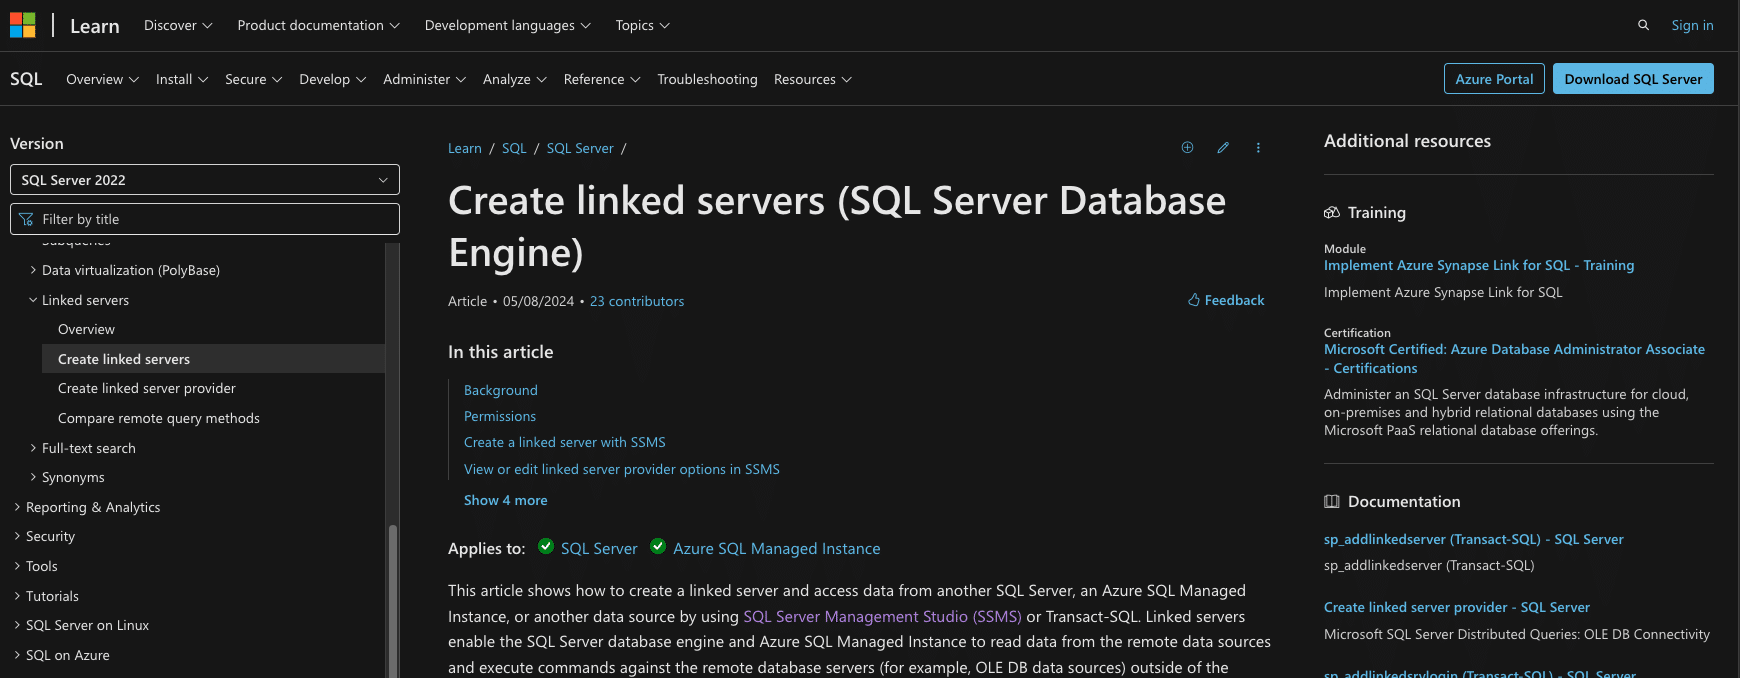
SQL Server’s native linked server functionality allows direct connection to Snowflake using ODBC drivers. This method provides seamless data access between platforms.
Step-by-Step Guide:
Step 1: Install Snowflake ODBC Driver
Installation Requirements:
Driver Version: Snowflake ODBC 2.25.4 or later
Architecture: 64-bit
Prerequisites:
Microsoft Visual C++ Redistributable
.NET Framework 4.7.2
System Requirements:
Operating System: Windows Server 2019/2022
Memory: 8GB minimum
Disk Space: 200MB for driver installation
Step 2: Configure System DSN
[ODBC Data Sources]
SnowflakeDSN=SnowflakeDSIIDriver
[SnowflakeDSN]
Description=Snowflake Data Source
Driver=C:Program FilesSnowflake ODBC Driverlibsnowflakeodbc.dll
Server=your_account.snowflakecomputing.com
Database=YOUR_DATABASE
Warehouse=YOUR_WAREHOUSE
Schema=YOUR_SCHEMA
Port=443
SSL=on
Step 3: Create Linked Server in SSMS
— Create the linked server
EXEC sp_addlinkedserver
@server = ‘SNOWFLAKE_LINK’,
@srvproduct = ‘Snowflake’,
@provider = ‘MSDASQL’,
@datasrc = ‘SnowflakeDSN’;
— Configure server options
EXEC sp_serveroption
@server = ‘SNOWFLAKE_LINK’,
@optname = ‘rpc out’,
@optvalue = ‘true’;
EXEC sp_serveroption
@server = ‘SNOWFLAKE_LINK’,
@optname = ‘data access’,
@optvalue = ‘true’;
Step 4: Set Up Security Credentials
— Create login for Snowflake access
CREATE LOGIN snowflake_user
WITH PASSWORD = ‘StrongPassword123!’;
— Configure linked server login
EXEC sp_addlinkedsrvlogin
@rmtsrvname = ‘SNOWFLAKE_LINK’,
@useself = ‘FALSE’,
@locallogin = ‘snowflake_user’,
@rmtuser = ‘your_snowflake_username’,
@rmtpassword = ‘your_snowflake_password’;
— Grant necessary permissions
GRANT EXECUTE ON master.dbo.sp_serveroption TO snowflake_user;
Step 5: Test Connection
— Create test procedure
CREATE PROCEDURE dbo.TestSnowflakeConnection
AS
BEGIN
BEGIN TRY
— Test basic connectivity
SELECT TOP 1 *
FROM OPENQUERY(
SNOWFLAKE_LINK,
‘SELECT CURRENT_TIMESTAMP()’
);
— Test data access
SELECT TOP 10 *
FROM OPENQUERY(
SNOWFLAKE_LINK,
‘SELECT * FROM SAMPLE_TABLE LIMIT 10’
);
PRINT ‘Connection test successful’;
END TRY
BEGIN CATCH
PRINT ‘Connection test failed: ‘ + ERROR_MESSAGE();
THROW;
END CATCH;
END;
Step 6: Query Snowflake Data
— Create wrapper stored procedure for data access
CREATE PROCEDURE dbo.GetSnowflakeData
@TableName NVARCHAR(128),
@Filter NVARCHAR(MAX) = NULL
AS
BEGIN
DECLARE @SqlQuery NVARCHAR(MAX);
SET @SqlQuery = CONCAT(
‘SELECT * FROM OPENQUERY(SNOWFLAKE_LINK, ”’,
‘SELECT * FROM ‘, @TableName,
CASE WHEN @Filter IS NOT NULL
THEN ‘ WHERE ‘ + @Filter
ELSE ” END,
”’)’
);
EXEC sp_executesql @SqlQuery;
END;
Pros:
- Native integration
- Direct database access
- Familiar SQL Server interface
- No third-party tools required
Cons:
- Requires technical expertise
- Complex setup process
- Limited automation options
- Performance considerations
#3 Airbyte: The Open-Source Alternative

Airbyte offers an open-source solution for connecting Snowflake to SQL Server, with customizable connectors and scheduling options.
Step-by-Step Guide:
Step 1: Install Airbyte
# Docker installation commands
mkdir airbyte && cd airbyte
wget https://raw.githubusercontent.com/airbytehq/airbyte/master/docker-compose.yaml
docker-compose up -d
Step 2: Configure Snowflake Source
{
“sourceDefinitionId”: “snowflake”,
“connectionConfiguration”: {
“host”: “your_account.snowflakecomputing.com”,
“role”: “ACCOUNTADMIN”,
“warehouse”: “COMPUTE_WH”,
“database”: “YOUR_DATABASE”,
“schema”: “PUBLIC”,
“credentials”: {
“auth_type”: “username/password”,
“username”: “your_username”,
“password”: “your_password”
}

Stop exporting data manually. Sync data from your business systems into Google Sheets or Excel with Coefficient and set it on a refresh schedule.
Get Started
}
}
Step 3: Set Up SQL Server Destination
— Create staging schema and tables
CREATE SCHEMA staging;
GO
CREATE TABLE staging.snowflake_sync_log (
sync_id UNIQUEIDENTIFIER DEFAULT NEWID(),
start_time DATETIME2 DEFAULT GETDATE(),
end_time DATETIME2,
status VARCHAR(50),
records_processed INT,
error_message NVARCHAR(MAX)
);
Step 4: Define Sync Rules
Sync Configuration:
Mode: Incremental
Cursor Field: last_modified
Primary Key: id
Batch Size: 10000
Schema Mapping:
source_table: destination_table
timestamp_ntz: datetime2
variant: nvarchar(max)
object: nvarchar(max)
Step 5: Schedule Data Transfers
{
“schedule”: {
“timeUnit”: “HOURS”,
“units”: 6
},
“syncCatalog”: {
“streams”: [
{
“stream”: {
“name”: “CUSTOMERS”,
“jsonSchema”: {
“type”: “object”,
“properties”: {
“ID”: {“type”: “string”},
“NAME”: {“type”: “string”},
“CREATED_AT”: {“type”: “string”}
}
}
},
“config”: {
“syncMode”: “incremental”,
“cursorField”: [“CREATED_AT”],
“destinationSyncMode”: “append_dedup”
}
}
]
}
}
Step 6: Monitor Synchronization
— Create monitoring view
CREATE VIEW dbo.vw_sync_status
AS
SELECT
sync_id,
DATEDIFF(SECOND, start_time, COALESCE(end_time, GETDATE())) as duration_seconds,
status,
records_processed,
error_message
FROM staging.snowflake_sync_log
WHERE start_time >= DATEADD(DAY, -7, GETDATE());
— Create alert procedure
CREATE PROCEDURE dbo.AlertFailedSync
AS
BEGIN
DECLARE @EmailBody NVARCHAR(MAX);
SELECT @EmailBody = STRING_AGG(error_message, CHAR(10))
FROM staging.snowflake_sync_log
WHERE status = ‘FAILED’
AND start_time >= DATEADD(HOUR, -1, GETDATE());
IF @EmailBody IS NOT NULL
EXEC msdb.dbo.sp_send_dbmail
@profile_name = ‘Notifications’,
@recipients = ‘[email protected]’,
@subject = ‘Snowflake Sync Failed’,
@body = @EmailBody;
END;
Pros:
- Open-source platform
- Customizable connectors
- Comprehensive documentation
- Community support
Cons:
- Requires deployment management
- Technical setup needed
- Limited enterprise support
- Learning curve for new users
Start Connecting Snowflake to SQL Server Today
Whether you’re looking for a no-code solution like Coefficient, a native approach with SQL Server Linked Server, or an open-source alternative with Airbyte, there’s a method that fits your needs. For the easiest way to get started, try Coefficient’s user-friendly platform to seamlessly connect your Snowflake and SQL Server databases today.
Frequently Asked Questions
How do I transfer data from Snowflake to SQL Server?
While there are multiple methods, Coefficient offers the simplest solution with its no-code platform, allowing you to transfer data through spreadsheets with automated scheduling and real-time updates.
Can SQL Server connect to Snowflake?
Yes, SQL Server can connect to Snowflake through various methods, including Coefficient’s user-friendly platform, native linked server setup, or third-party tools like Airbyte.
What is the difference between Snowflake and SQL Server?
Snowflake is a cloud-based data warehouse, while SQL Server is primarily an on-premises database system. Coefficient bridges these platforms, enabling seamless data integration between them.


