Are you looking to connect Smartsheet to SQL Server? Whether you need to sync project data, automate reporting, or consolidate information across platforms, this guide covers three proven methods to establish a reliable connection between Smartsheet and SQL Server.
Why Connect Smartsheet to SQL Server?
Before we dive into the methods, let’s explore the advantages of connecting these two powerful platforms:
- Real-time Project Data Synchronization: Keep project timelines, resource allocation, and task status synchronized between Smartsheet’s collaborative workspace and SQL Server’s robust database system.
- Automated Reporting: Eliminate manual data entry by automatically pushing Smartsheet updates to SQL Server for enterprise-wide reporting.
- Centralized Data Management: Consolidate multiple Smartsheet tables into a single SQL Server database for improved data governance and analytics.
Top 3 Methods to Connect Smartsheet to SQL Server
Here’s a quick overview of the three methods we’ll cover:
| Solution | Best For |
| Coefficient | Business users who need a no-code solution to sync Smartsheet data with SQL Server using spreadsheets as an intermediate platform for data transformation |
| Smartsheet Live Data Connector | Organizations already invested in Smartsheet’s enterprise features requiring direct ODBC connectivity |
| Zapier | Teams seeking simple automation for basic data transfer between Smartsheet and SQL Server |
Let’s explore each method in detail.
1. Coefficient: No-Code Smartsheet to SQL Server Integration
Coefficient provides a user-friendly solution that enables seamless data synchronization between Smartsheet and SQL Server through Google Sheets or Excel. This method requires no coding knowledge and supports automated refresh schedules.
Step-by-step guide:
Step 1. Install Coefficient
For Google Sheets
- Open a new or existing Google Sheet, navigate to the Extensions tab, and select Add-ons > Get add-ons.
- In the Google Workspace Marketplace, search for “Coefficient.”
- Follow the prompts to grant necessary permissions.
- Launch Coefficient from Extensions > Coefficient > Launch.
- Coefficient will open on the right-hand side of your spreadsheet.

For Microsoft Excel
- Open Excel from your desktop or in Office Online. Click ‘File’ > ‘Get Add-ins’ > ‘More Add-Ins.’
- Type “Coefficient” in the search bar and click ‘Add.’
- Follow the prompts in the pop-up to complete the installation.
- Once finished, you will see a “Coefficient” tab in the top navigation bar. Click ‘Open Sidebar’ to launch Coefficient.

Step 2. Connect and Import Data from Smartsheet
Click ‘Import from…’ from the Coefficient menu.

Navigate down the menu to find Smartsheet. Click ‘Connect.’

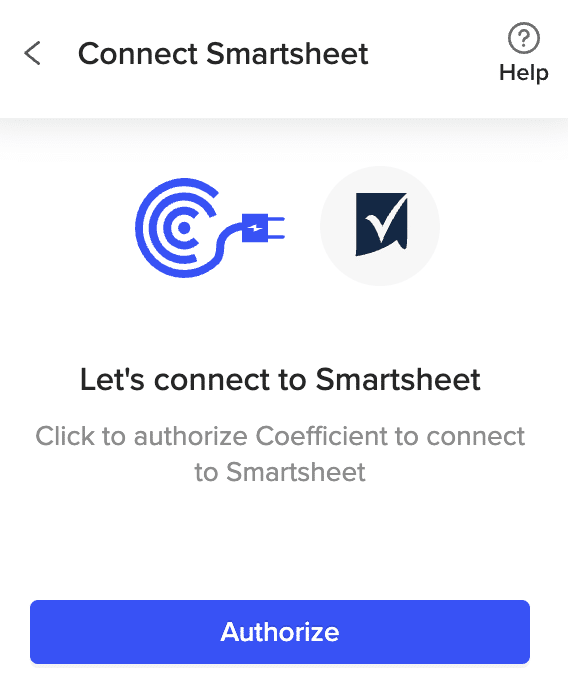
Click ‘Authorize’ to grant Coefficient access to Smartsheet.
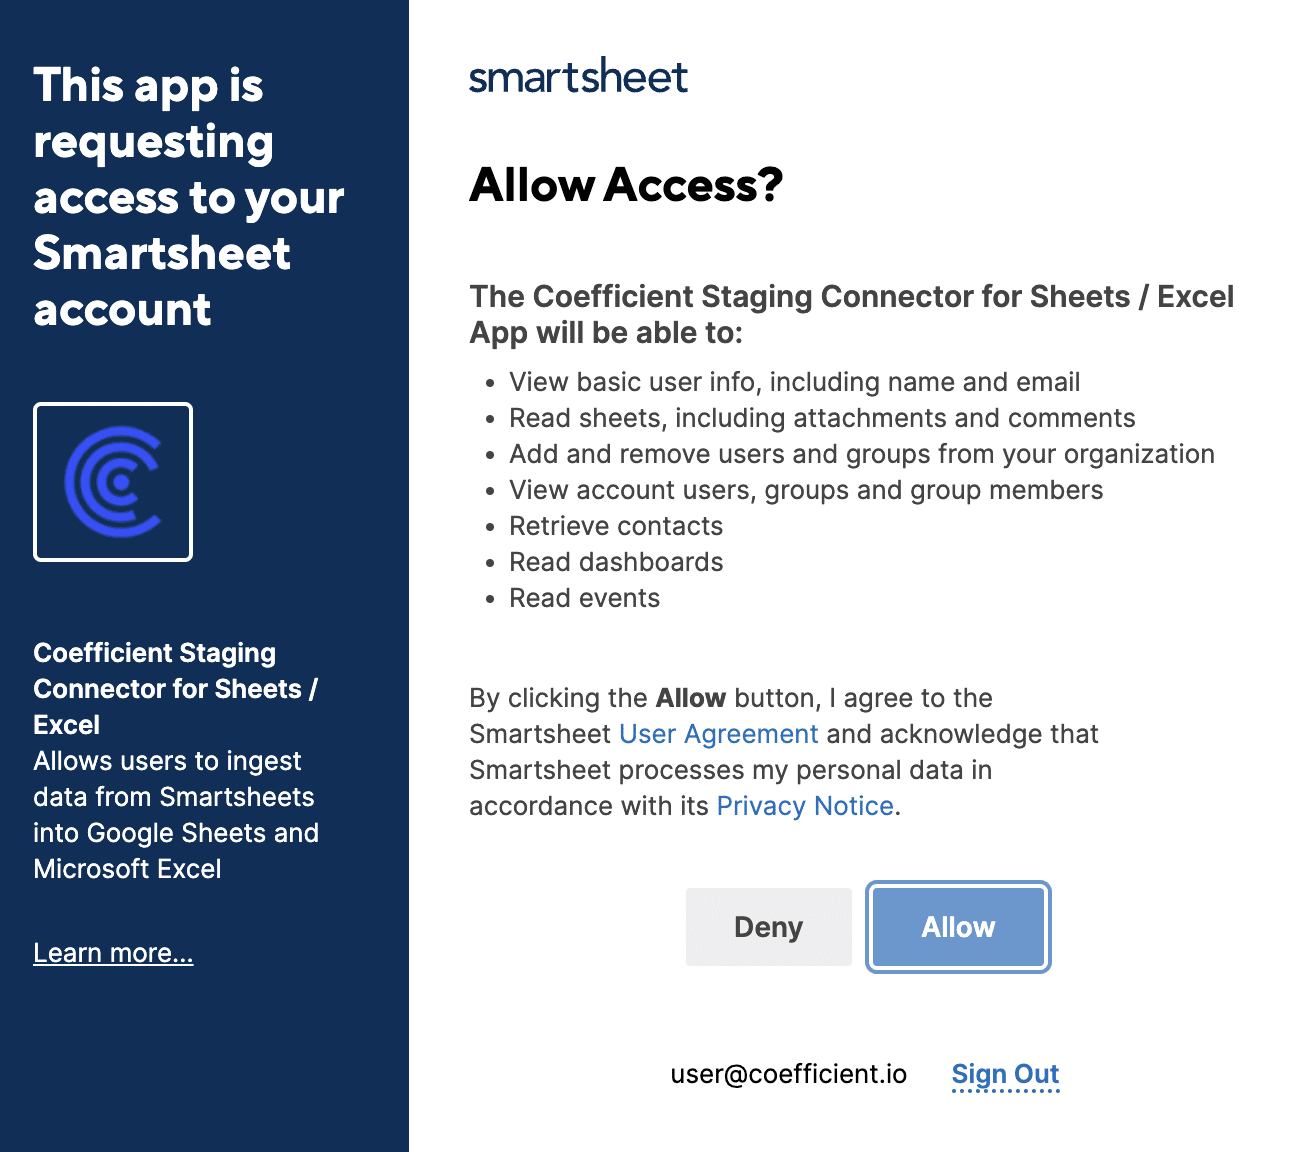
Select ‘Allow’ and log in to your Smartsheet account when prompted.
Select ‘Start from Scratch’ after connecting Coefficient to Smartsheet.

Review the list of available objects you can import into Coefficient in the Preview menu.

To Import Data from a Sheet:
Select ‘Import a Sheet.’
Note: You’ll need the Sheet ID of the sheet you wish to import to continue.
Navigate to the desired sheet in Smartsheet. Go to ‘File’ > ‘Properties.’

Copy the Sheet ID.

Paste the copied Sheet ID into the required field in Coefficient.
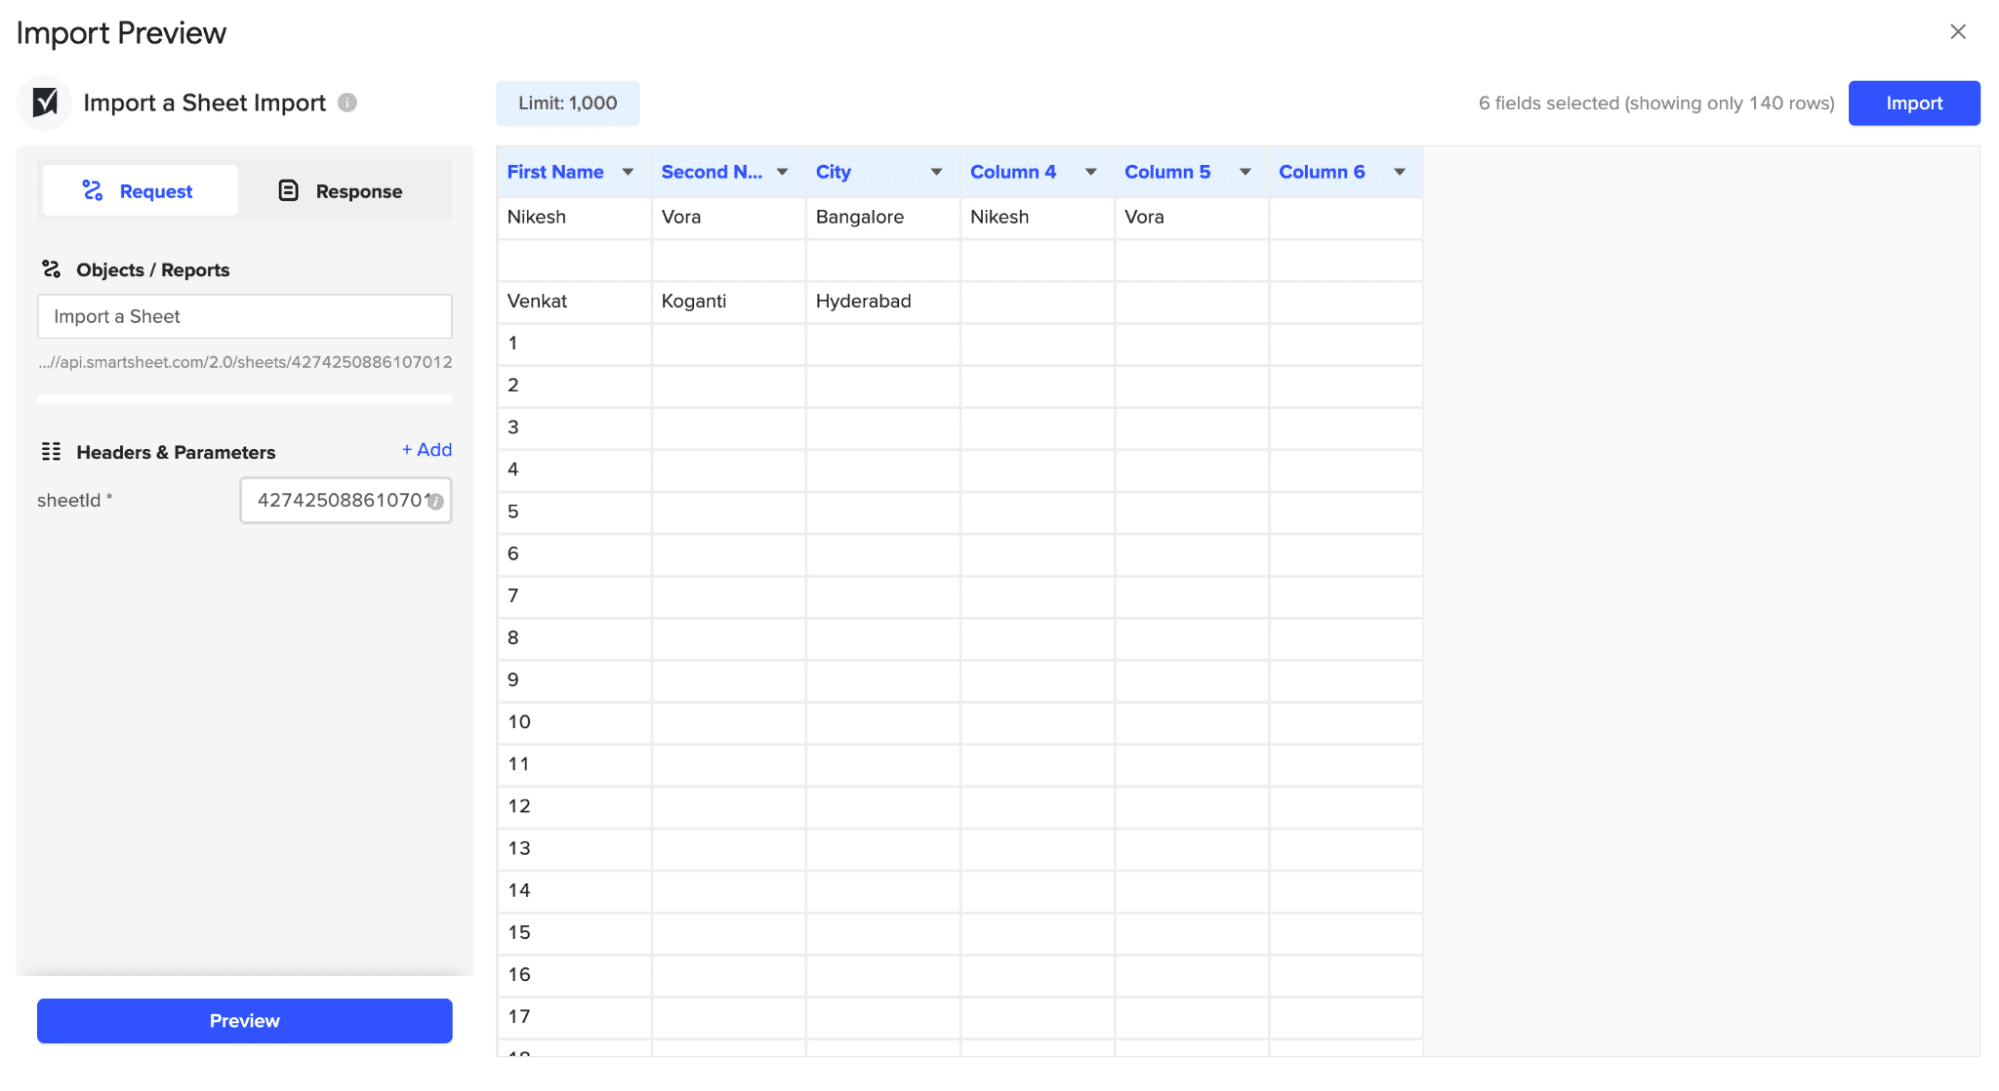
Click ‘Import’ to fetch the Smartsheet data into your Excel workbook.
Step 3. Export Data from Your Spreadsheet to MS SQL
Before starting, make sure you’ve connected to MS SQL.
Then, navigate to Coefficient’s menu >Click “Export to…”
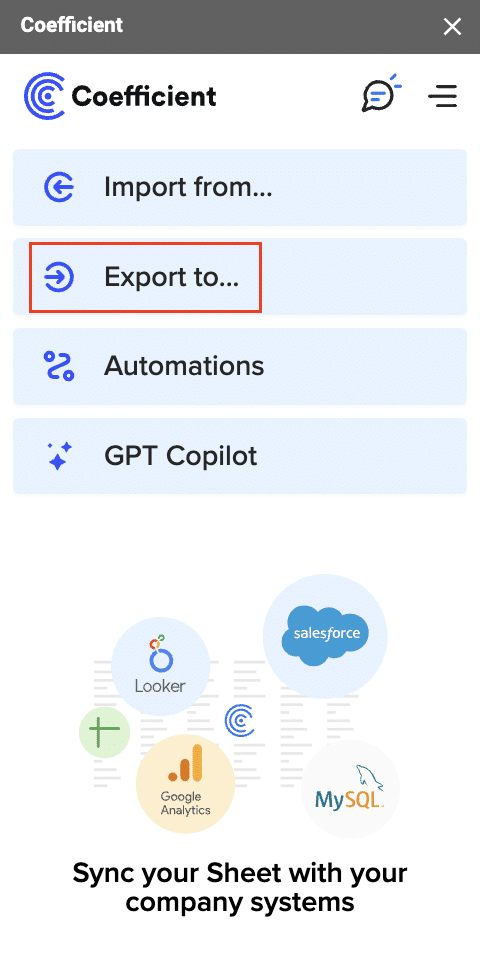
Select MS SQL.

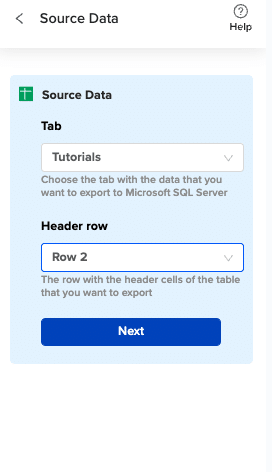
Choose the tab in your workbook that contains the data you want to export and specify the header row that contains the database field headers.
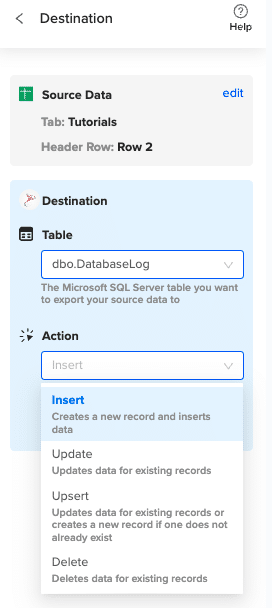
Specify the table in your database where you want to insert the data and choose the appropriate action (Insert, Update, Delete).
Complete the field mappings for the export. Then, confirm your settings and click “Export” to proceed.
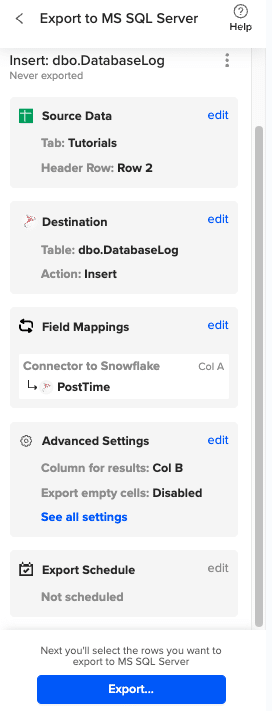
Then, highlight the specific rows in your sheet that you want to export, or choose to export all rows.

Review your settings and follow the prompts to push your data back to MS SQL.
Pros:
- No coding required
- Real-time data synchronization
- Automated refresh schedules
- Flexible data transformation options
- User-friendly interface
Cons:
- Requires spreadsheet as intermediate step
- Premium features require paid subscription
For more information on connecting SQL Server to Google Sheets, visit Coefficient’s SQL Server to Google Sheets guide.
If you prefer using Excel, check out Coefficient’s Excel to SQL Server connection guide.
2. Smartsheet Live Data Connector: Native ODBC Integration

Smartsheet’s native solution for connecting to external databases uses ODBC drivers. This enterprise-level tool enables direct database connections for data import and export.
Step-by-step guide:
Let’s examine each step in comprehensive detail:
- Install Smartsheet Live Data Connector
- Download the latest Live Data Connector (LDC) version 2.3.1 from Smartsheet Enterprise Portal
- Run the installer as administrator to avoid permission issues
- Install required dependencies:
- Microsoft Visual C++ Redistributable
- .NET Framework 4.8 or higher
- Verify installation by checking Windows Services for “Smartsheet Live Data Connector”
- Configure ODBC Connection to SQL Server
Create a system DSN with these settings:
# Basic Connection Settings
Server Name: your_server_name.database.windows.net
Database Name: your_database_name
Authentication Mode: SQL Server Authentication
# Connection String
Driver={SQL Server Native Client 11.0}
Server=your_server_name
Database=your_database
Uid=your_username
Pwd=your_password
Encrypt=yes
TrustServerCertificate=no
Connection Timeout=30
- Set up Data Mapping
Launch Smartsheet Live Data Connector Manager and configure:
# Source Configuration
DSN_NAME=Your_DSN_Name
TABLE_SCHEMA=dbo
TABLE_NAME=your_table
REFRESH_INTERVAL=300
# Column Mapping
PRIMARY_KEY=Id
TIMESTAMP_COLUMN=LastModified
# Data Type Mappings
TEXT -> STRING
DECIMAL(18,2) -> NUMBER
DATETIME -> DATETIME
BOOLEAN -> CHECKBOX
- Initialize Connection
Configure service account settings:
# Authentication Settings

Stop exporting data manually. Sync data from your business systems into Google Sheets or Excel with Coefficient and set it on a refresh schedule.
Get Started
CLIENT_ID=your_client_id
CLIENT_SECRET=your_client_secret
WORKSPACE_ID=your_workspace_id
ACCESS_TOKEN=your_access_token
# Connection Validation Steps
– Network connectivity check
– Firewall settings verification
– Database permissions test
– OAuth token validation
- Schedule Updates
Set up synchronization configuration:
# Sync Settings
SYNC_INTERVAL=300 # 5 minutes
MAX_ROWS_PER_SYNC=10000
ERROR_RETRY_COUNT=3
ERROR_RETRY_INTERVAL=60
# Monitoring Configuration
LOG_LEVEL=INFO
NOTIFICATION_EMAIL=admin@company.com
ALERT_ON_FAILURE=true
MAX_CONCURRENT_CONNECTIONS=5
Pros:
- Native Smartsheet integration
- Direct database connection
- Enterprise-grade security
Cons:
- Requires technical setup
- Enterprise license required
- Limited transformation capabilities
3. Zapier: Automation Platform for Simple Data Transfer
Zapier is a no-code automation platform that connects Smartsheet and SQL Server through pre-built integrations and custom workflows.
Step-by-step guide:
Step 1. Sign up for a Zapier account
Visit Zapier’s website and create an account if you don’t already have one.
Step 2. Create a new Zap (automated workflow)
In your Zapier dashboard, click on ” + Create” > “New Zap” to start setting up your automation workflow.

Step 3. Choose Smartsheet as the trigger app
Search for “Smartsheet” in the app selection and choose it as your trigger app.
Step 4. Select the specific Smartsheet trigger event
Choose the event that will initiate your workflow

Step 5. Connect your Smartsheet account to Zapier
Follow the prompts to authenticate your Smartsheet account with Zapier.
Step 6. Choose SQL Server as the action app
In the action step, search for and select “SQL Server” as your action app.
Step 7. Select the action to perform in SQL Server
Choose the specific action you want to perform, such as “New Row” or “Update Row.”
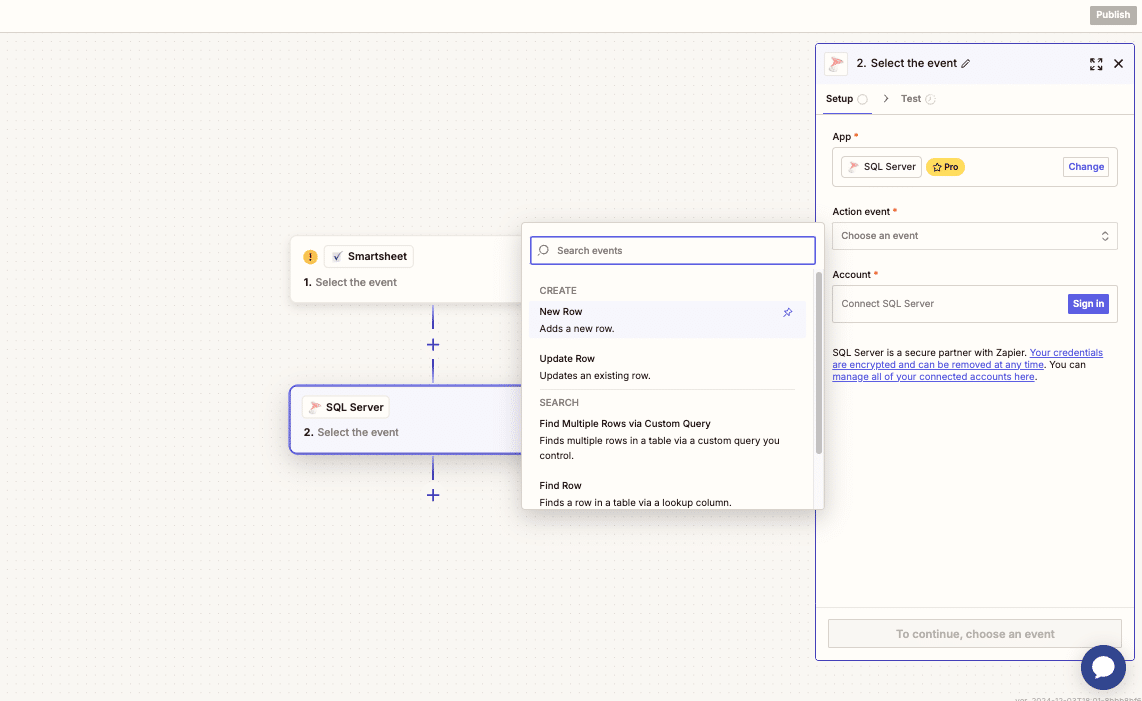
Step 8. Map the data fields to the corresponding SQL Server table columns
Use Zapier’s field mapping interface to match the Smartsheet data with the appropriate columns in your SQL Server table.
Step 9. Test and activate your Zap
Run a test to ensure your Zap is working correctly, then activate it to start the automated workflow.
Pros:
- No-code solution
- Quick setup
- Multiple trigger options
Cons:
- Limited data volume
- Basic transformation options
- May require premium plan for advanced features
Start Syncing Your Smartsheet Data with SQL Server Today
Whether you’re looking for a no-code solution like Coefficient, native integration through Smartsheet Live Data Connector, or automation with Zapier, connecting Smartsheet to SQL Server can streamline your data workflows. For the most user-friendly experience with powerful transformation capabilities, get started with Coefficient today.
Frequently Asked Questions
Can Smartsheet connect to a database?
Yes, Smartsheet can connect to databases through multiple methods. While Smartsheet offers native ODBC connectivity through their Live Data Connector, Coefficient provides a more user-friendly approach with additional features for data transformation and automation.
Can you use SQL in Smartsheet?
A: While Smartsheet doesn’t support direct SQL queries, Coefficient enables you to work with SQL Server data in familiar spreadsheet interfaces, providing an intuitive alternative to writing SQL queries.
How to load data into SQL Server?
With Coefficient, you can easily load data into SQL Server through a simple point-and-click interface, eliminating the need for complex SQL Server Management Studio operations or technical database knowledge.

