
Salesforce is a cornerstone in Customer Relationship Management (CRM), pivotal in helping businesses manage customer interactions.
And one of the key features that enhances user experience within Salesforce is the ‘List View.’
In this blog, we’ll delve into the significance of List View in Salesforce and provide a comprehensive guide on how to create a contact list in Salesforce Lightning, save it as list view, and manage it.
Let’s start!
Understanding List Views in Salesforce
List View in Salesforce serves as a dynamic, customizable display of data records, allowing users to filter, sort, and organize information according to their preferences.
Significantly, List Views simplify data navigation, providing a more efficient way to handle records within various objects, such as leads, accounts, and opportunities.
Salesforce Lightning, the modern user interface, takes List Views further. Lightning List Views offer a more visually appealing and user-friendly experience, with improved navigation and functionality.
Users can seamlessly switch between different List Views, enhancing productivity and decision-making.
Step-by-Step Guide: Creating a List View in Salesforce Lightning
Before diving into how to create a List View in Salesforce, ensure you have the necessary permissions and access rights within Salesforce. Additionally, identify the specific object you want to create a List View: accounts, contacts, or any other data entity.
This step-by-step guide will cover creating List Views by showing how to create a contact list in Salesforce Lightning. The same steps can be applied to any other category:
Step 1: Navigate to the List View in Salesforce Lightning
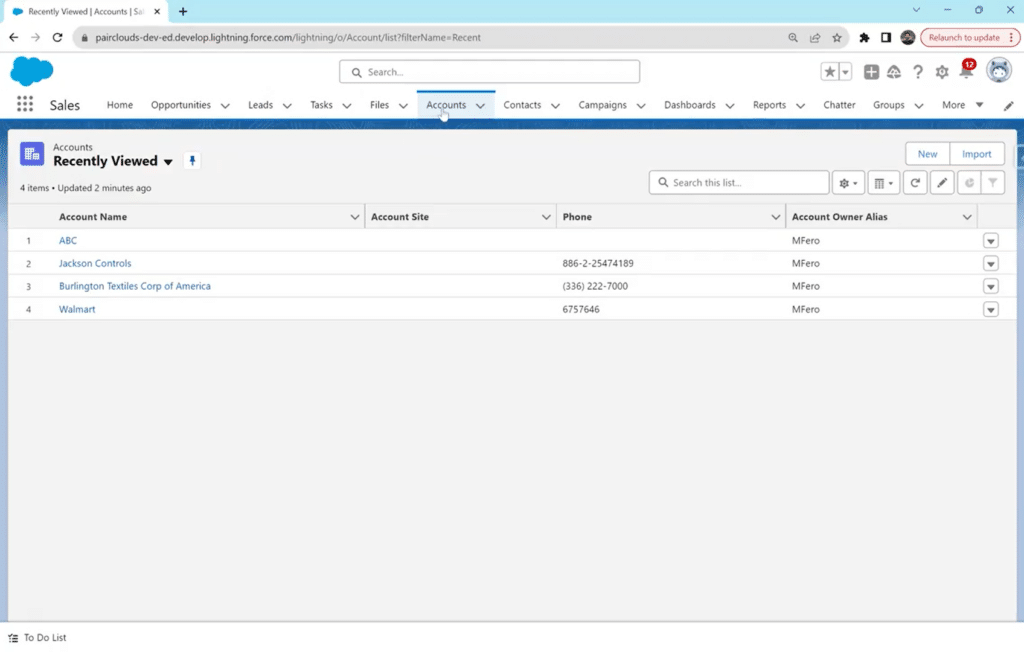
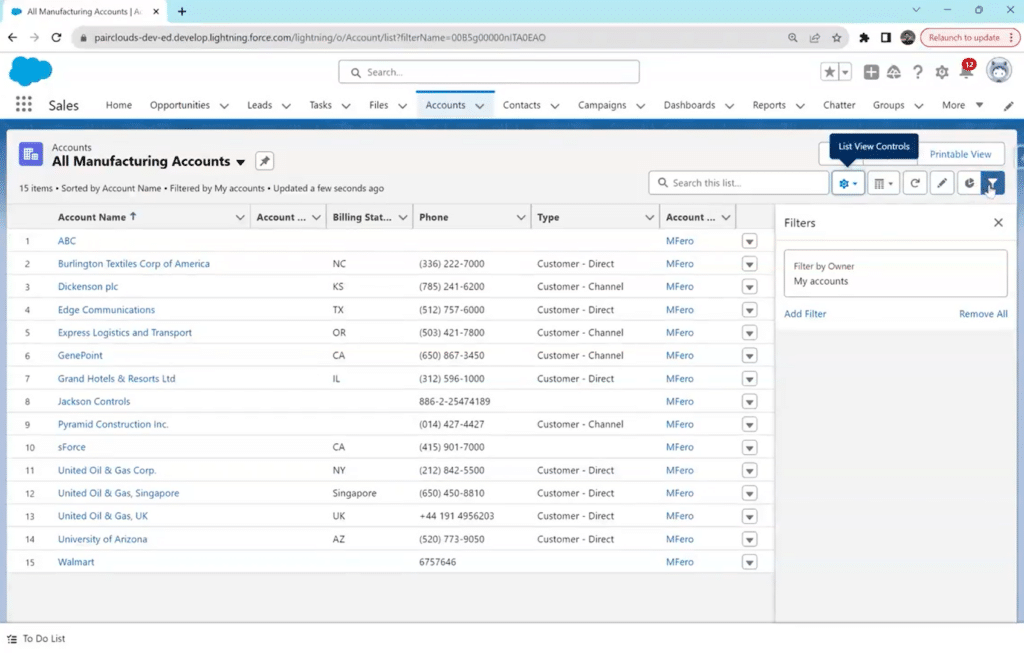
In Salesforce Lightning, finding the List View is the initial step. Navigate to the desired object’s tab e.g. ‘Accounts’ and locate the ‘List View’ dropdown. You can find all List Views for this object on its main screen.
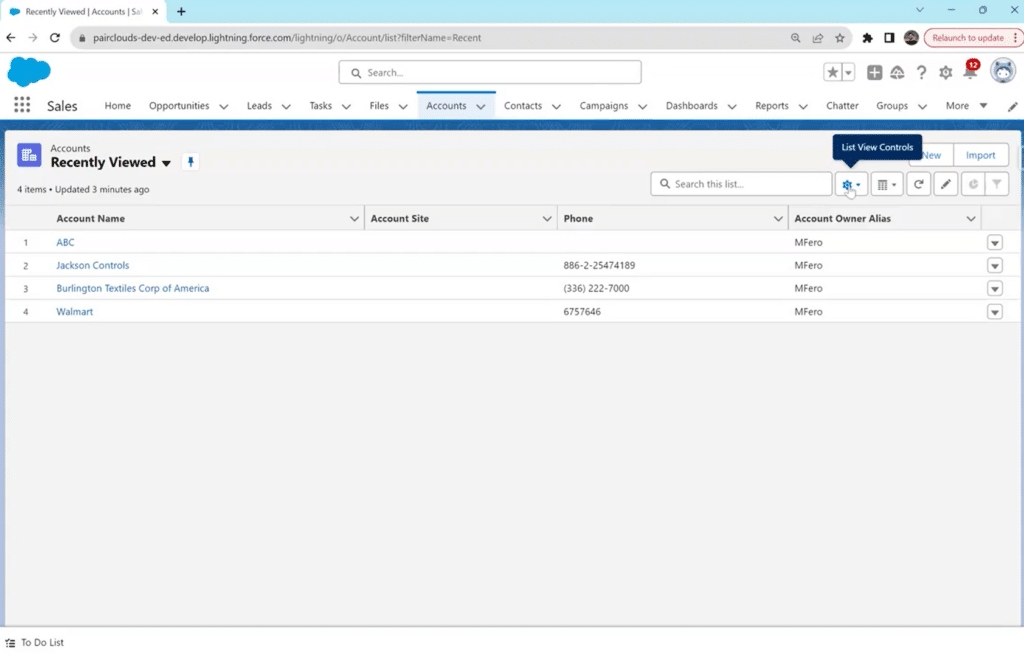
You can find this dropdown by navigating to the Gear Icon beside the ‘search this list’ bar. This menu holds existing list views and is the starting point for creating a new one.
Step 2: Creating a New List View
Click ‘Create New View’ to initiate the List View creation process.
Provide a name for your view and set the visibility options based on your preferences. You can make the List View visible to only yourself, your entire team, or specific user groups.
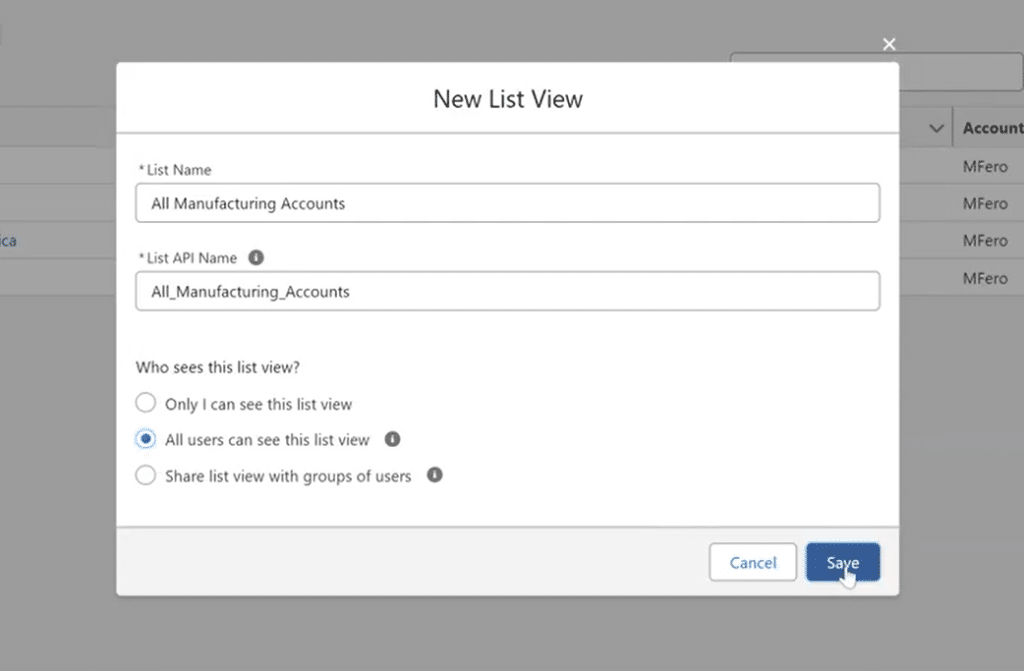
Once you’ve named and managed access to your list click on ‘Save.’ A list will be generated based on general criteria.
Step 3: Customizing Columns and Filters
Tailor your List View by selecting the columns you want to display.
Salesforce allows you to choose from fields relevant to the object, ensuring that your view presents the most pertinent information. Further, apply filters to refine the records displayed, focusing on specific criteria crucial to your workflow.
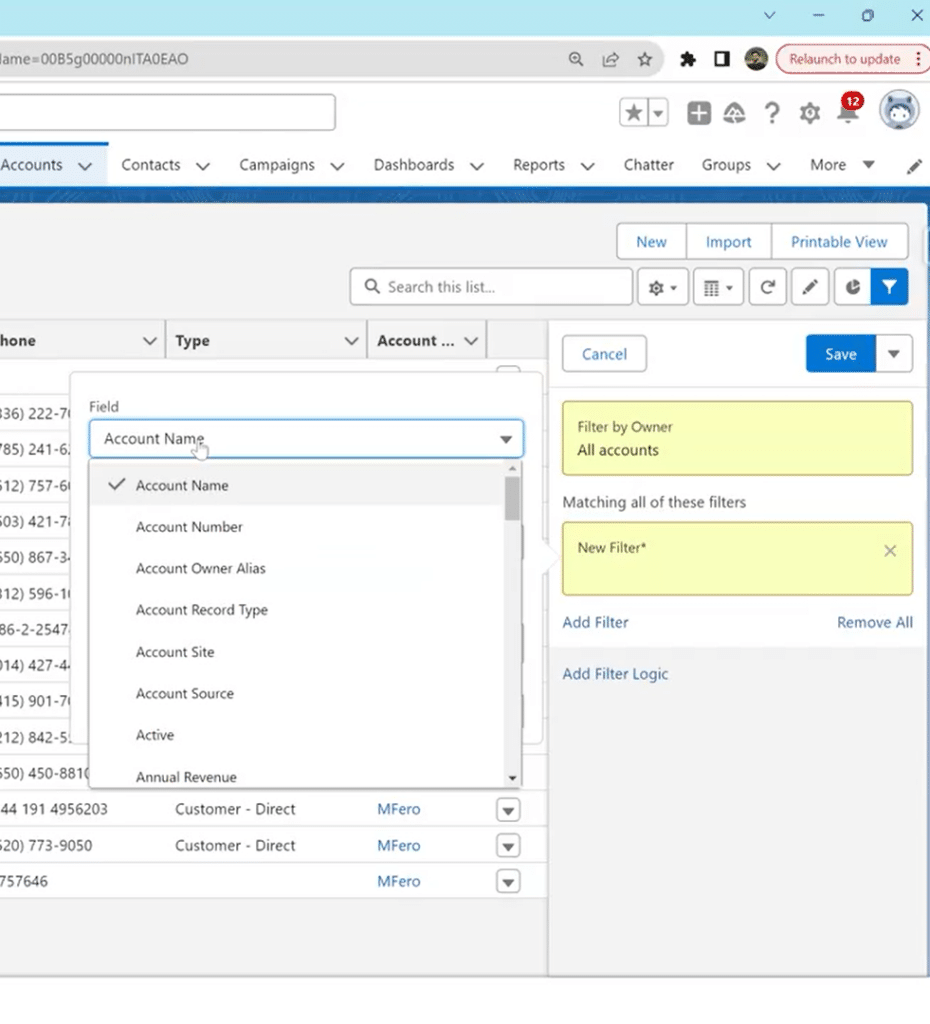
To add filters:
Navigate to the Filter Icon and click on it.
You can add a general filter based on the types of accounts and their owners or creators. For further customization, click on ‘Add Filter.’
In the ‘New Filter’ field, you can add different ranges to sort your filters based on specific criteria. For example, You can select ‘Industry’ from the standard options or one of your customized options.
Then, choose a category within that range, like ‘Manufacturing,’ to make your List Views precise.
Step 4: Saving and Refining the List View
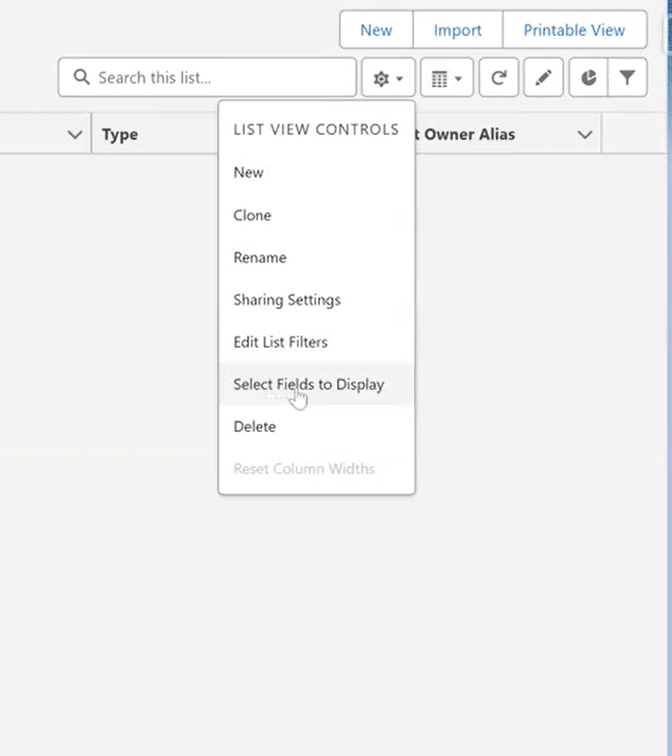
If your List View on Salesforce looks too cluttered, you can remove some extra fields by navigating to the Gear Icon and selecting the option ‘Select Fields to Display’ from the drop-down menu.

You can remove or add any standard or custom fields based on your needs. Remove the fields you don’t wish to see from the ‘Visible Fields’ section.
You can add new fields from the ‘Available Fields’ section.
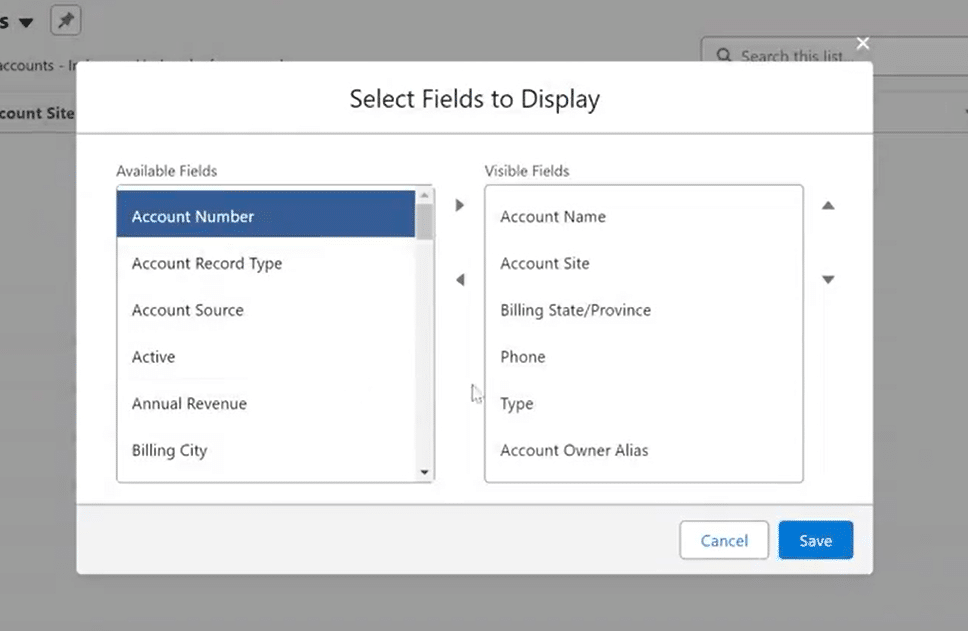
When you’re done tailoring your List Views, click ‘Save’ and you’re done!
Saving your List View makes it readily accessible whenever you return to the object’s tab, as you can see in the first image of Step 1.

Explore 8 cutting-edge techniques that are revolutionizing how Salesforce admins manage their daily tasks. Contribute more significantly to business outcomes and become a key driver of efficiency and innovation.
See the Techniques
Check out this video tutorial on creating a Salesforce List View for a more in-depth visual tutorial!
Tips for Managing List View in Salesforce
Creating List Views in Salesforce is one thing, but managing them is a struggle. But we have some tips to save you the hassle!
By implementing these tips, you’ll not only optimize your List Views for personal use but also contribute to a more organized and collaborative environment within your organization’s Salesforce environment:
- Regularly Review and Clean Up
Periodically assess your existing List Views to identify those that are no longer relevant or necessary. Remove outdated views to declutter your workspace and streamline your navigation. This practice ensures you work with the most current and pertinent data.
- Group Related List Views into Folders
As your Salesforce instance grows, organizing List Views into folders is beneficial based on their relevance or purpose. Grouping similar views simplifies navigation, making it easier for you and your team to find the right view quickly. This organizational structure enhances overall efficiency and user experience.
- Utilize Filters Effectively
Leverage filters strategically to refine the information displayed in your List Views. Understand the specific criteria crucial to your workflow and apply filters accordingly. This targeted approach ensures that your List Views provide meaningful insights, allowing you to focus on the most relevant data for your tasks.
- Understand Sharing Options
Familiarize yourself with Salesforce’s sharing options for List Views. You can share views with specific users and your entire team or even publicize them. Choose the sharing setting that aligns with your collaboration needs while ensuring that sensitive information is appropriately restricted.
- Regularly Evaluate Team Needs
As team dynamics and projects evolve, regularly evaluate whether the shared List Views meet the team’s needs. Be open to feedback and adjustments, and update sharing settings accordingly. This ongoing evaluation ensures that shared List Views remain valuable to the team’s collaborative efforts.
Making the Most of List View Advanced Features
Salesforce offers a range of advanced features that can significantly enhance your List View experience, providing additional tools for efficient data management.
Here’s a brief overview of some key advanced features:
- Inline Editing – Salesforce allows users to edit records directly from the List View using inline editing. This feature streamlines data updates, eliminating the need to navigate to individual records. Simply click on a field within the List View, make the necessary changes, and save, accelerating data management processes.
- Mass Actions – Streamline repetitive tasks by leveraging mass actions. With List Views, you can select multiple records and perform actions such as updating fields, assigning tasks, or sending emails in bulk. This feature is particularly valuable for handling large datasets efficiently.
- Exporting Data – Exporting data from List Views enables you to analyze information outside of Salesforce or share it with stakeholders. Salesforce provides export options in various formats, such as CSV or Excel. Exporting from List Views simplifies the process if you need to perform detailed analysis or share data with external teams.
- Custom Buttons and Links – Tailor your List Views further by adding custom buttons and links. These can be configured to perform specific actions or direct users to external resources. Custom buttons and links provide a personalized touch to your List Views, enabling quick access to relevant tools or external systems.
By exploring and integrating these advanced features into your List View management strategy, you can elevate your Salesforce experience.
These tools save time, enhance productivity, and provide a more tailored and powerful approach to working with your data. Experiment with these features to discover how they can be customized to suit your unique business needs.
Final Takeaways
Some key points to remember before we wrap this up:
- List Views are dynamic displays of data records in Salesforce, providing a customizable and efficient way to navigate information.
- Salesforce Lightning enhances List Views with a modern interface, improving user experience and productivity.
- Creating a List View involves navigating to the List View, creating a new view, customizing columns and filters, and saving the view with a descriptive name.
Empower yourself and your team by incorporating List Views into your daily Salesforce routine. Regularly review and update your views, embracing best practices to maintain an organized workspace. The efficiency gained will contribute to more informed decision-making and improved overall performance.
Want to know how you can implement the tips and manage your List View in Salesforce efficiently?
Start with increasing your data export options and expanding beyond the interface of Salesforce into all types of spreadsheets and other popular CRMs to collaborate with your teams and keep your data safe in different places!
Integrate Your Lists Beyond Salesforce with Coefficient!


