Table of Contents
![]()

Salesforce dashboards are more than individual tools; they’re a gateway to team collaboration and data-driven decisions.
This guide walks Salesforce admins and report builders like you through sharing your Salesforce dashboards, ensuring every team member stays informed and aligned.
There are often there are stakeholders that need visibility that may not have a Salesforce license. So, we’ll introduce Coefficient as an option to share Salesforce reports with your native Google Sheets or Excel share and permissions settings for anyone you require to view, edit, and collaborate seamlessly.
Teams like Miro have used Coefficient for years to give visibility and analytical capabilities to cross-functional stakeholders who don’t have Salesforce, Snowflake, or Looker licenses.
Understanding Salesforce Dashboard Sharing
Dashboard sharing in Salesforce is vital for teamwork, offering benefits like unified data views, quick decision-making, and streamlined communication.
But how do you share a dashboard effectively? Let’s dive in.
Pre-Requisites for Sharing Dashboards
You require some Salesforce permissions and roles to activate the user-sharing dashboard. Here are the essential prerequisites for sharing dashboards on Salesforce:
- User Permissions and Roles: Ensure your Salesforce setup has the necessary user permissions and roles for sharing. Key permissions include “View Dashboards in Public Folders” and “Create and Customize Dashboards.”
- Roles and Hierarchies: In Salesforce, there’s a system that uses roles to control who can see what. Every user has a role. When you share a dashboard, think about the roles of the users you’re sharing it with. You can set up the dashboard so that different roles see different parts of the information. This way, the right people see what they need based on where they are in the organization.
- Dashboard Visibility Settings: Salesforce dashboards have settings to decide who can see them. There are three main settings to know.
- Private dashboards are only for the person who made them. If you want to share, the creator has to allow access to others.
- Public read-only lets others view but not change the dashboard. It’s good when you want to show information without letting anyone make changes.
- Public read/write lets others both view and make changes. This is handy for teamwork when many people need to add or change things on the dashboard.
To bypass these prerequisites within Salesforce, you can sync your Salesforce reports into Google Sheets or Excel with Coefficient, set them on a refresh schedule, and lean on your native spreadsheet share settings to share your report amongst your team.
Step-by-Step Guide to Sharing a Salesforce Dashboard Natively
Sharing your Salesforce dashboard is crucial for effective collaboration and ensuring that key insights are accessible to the right stakeholders. Follow this detailed walkthrough to seamlessly share your dashboard with the necessary users within Salesforce.
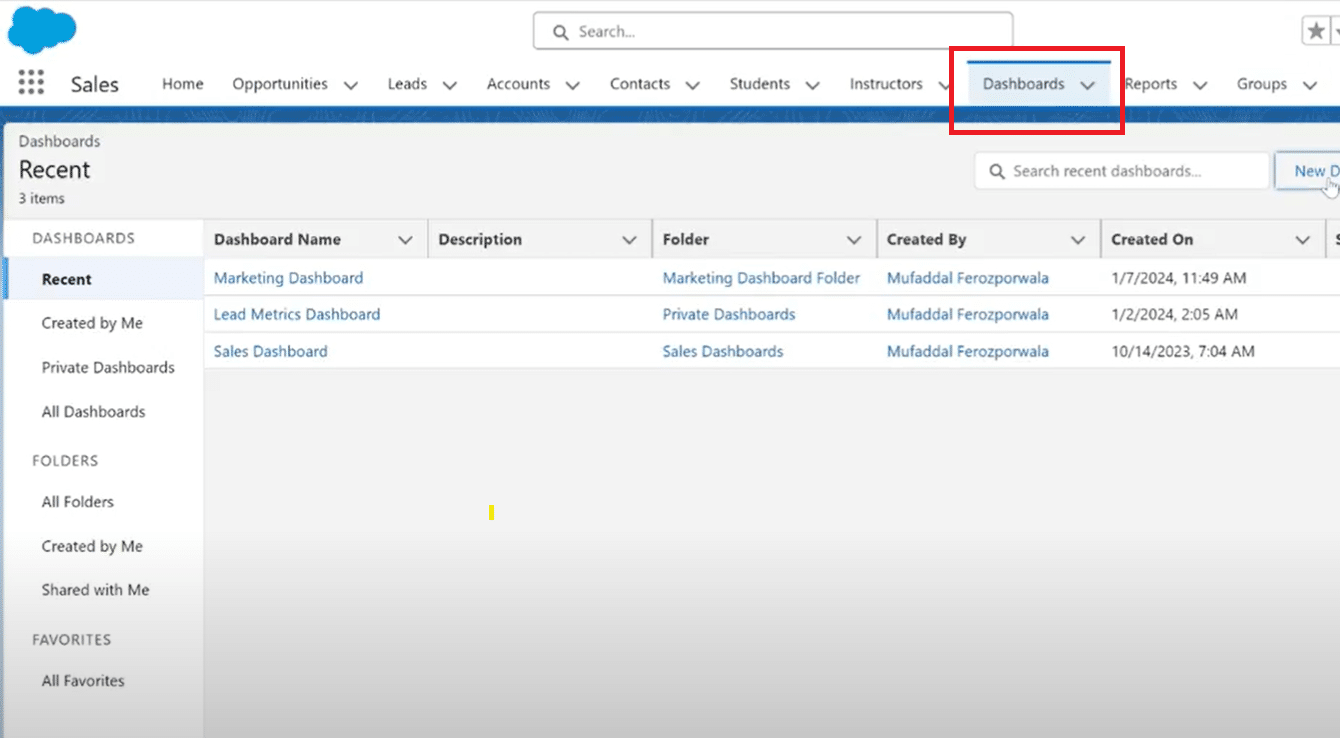
Step 1: Open Your Salesforce Dashboard
- Navigate to the Salesforce homepage and log in to your account.
- Once logged in, locate and open the dashboard you want to share.
- Click on the dashboard name to enter the dashboard view.
Step 2: Click on the “Share” Button
- In the upper-right corner of the dashboard, you’ll find the “Share” button.
- Click on it to access the sharing settings for the dashboard.
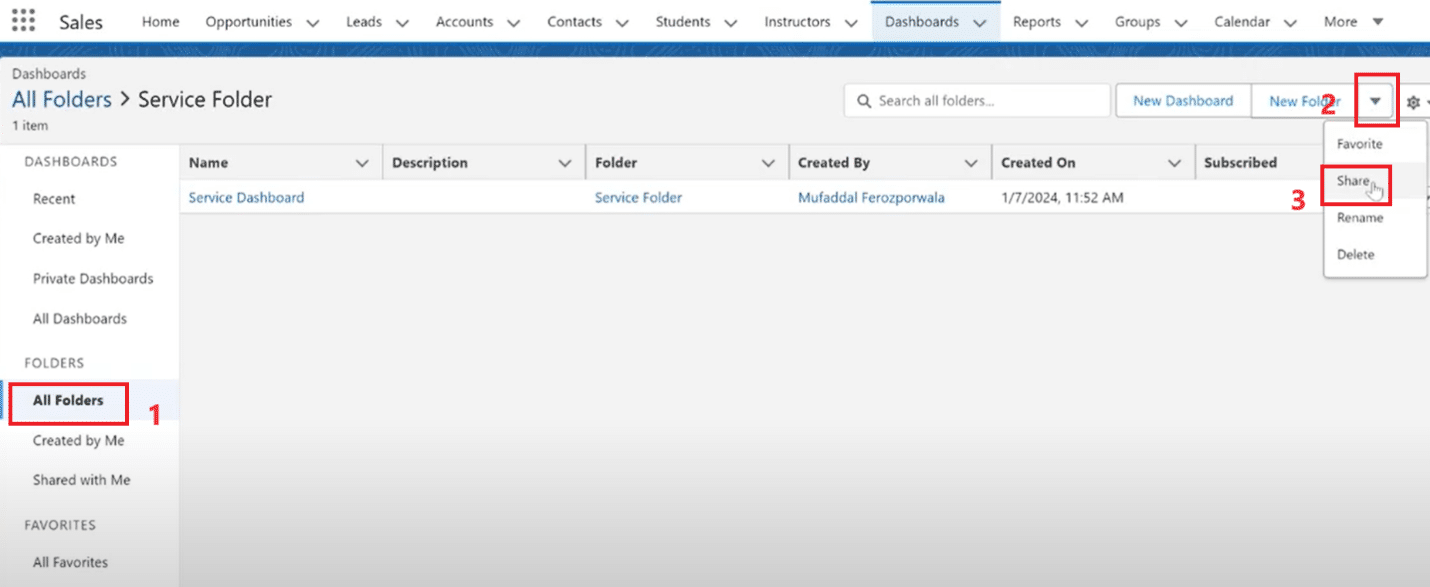
Step 3: Choose Sharing Settings
A new window will appear, allowing you to define the sharing settings.
- Select “Share Dashboard” and choose the type of access you want to grant: Public Link, Specific Users, or Groups.
- Adjust the settings according to your collaboration needs.

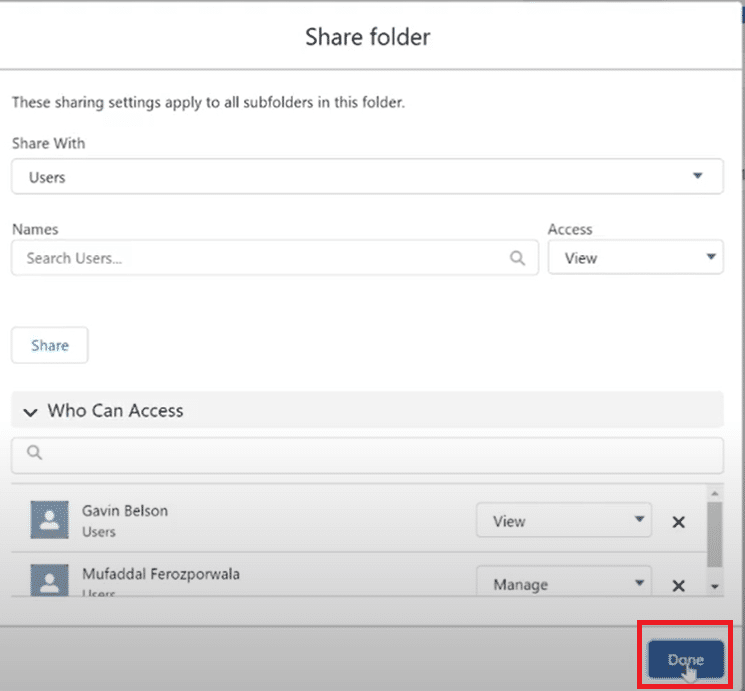
Step 4: Add Specific Users or Groups
- If you selected “Specific Users” or “Groups,” you can now add the Salesforce users or groups you want to share the dashboard with.
- Start typing their names, and Salesforce will provide suggestions.
- Click on the correct suggestion to add them.
Don’t see your stakeholder on the list? Coefficient facilitates seamless sharing with external stakeholders who don’t have Salesforce licenses.
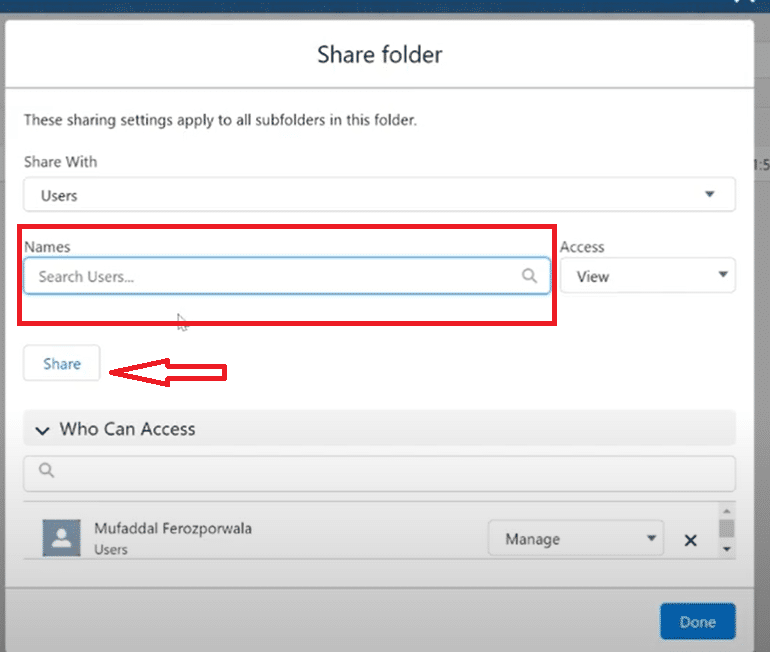
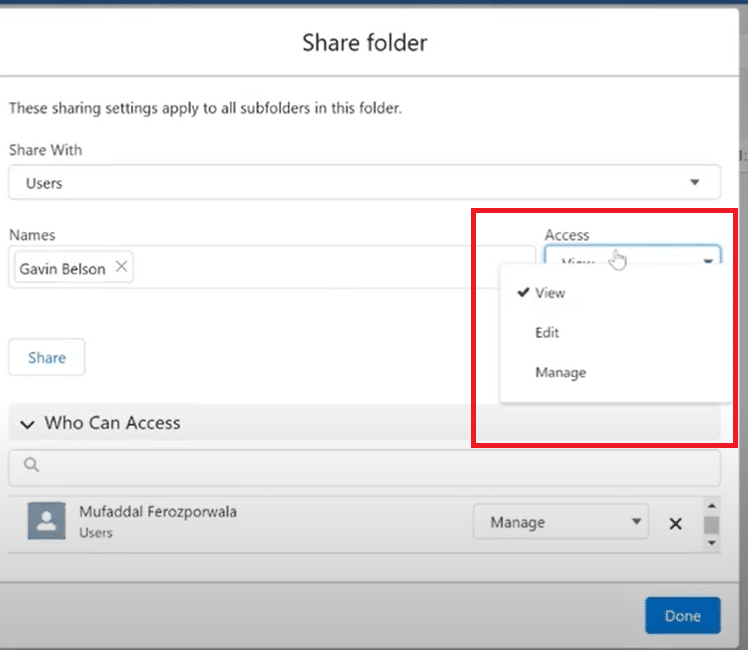
Step 5: Define Access Levels
- For each user or group added, define their access level—Read-Only or Read/Write.
- This controls whether they can only view the dashboard or also make changes.
- Click “Add More” if you need to include additional users or groups.
Step 6: Save Changes
- Once you’ve added all the users or groups and defined their access levels, click “Done” to apply the sharing settings.
- Your dashboard is now shared with the selected users or groups based on the specified access levels.
How to Share a Salesforce Dashboard with Non-License Stakeholders
In this quick video, you’ll see how simple it is to leverage Coefficient from the AppExchange to share the reports you build with any stakeholder, whether they have a Salesforce License or not.
Benefits of Leveraging Coefficient
Besides the incredible cost-savings, the benefits of leveraging Coefficient to share your Salesforce reports are pretty massive.
- Universal Access Without Buying Extra Licenses: With Coefficient, you can share live Salesforce data in Google Sheets or Excel, giving non-licensed stakeholders instant access to reports without a Salesforce login. This eliminates the need for costly “view-only” licenses for executives, board members, and cross-functional teams.
- Always-Current Data: Reports auto-refresh on a set schedule or whenever you need them, ensuring everyone always sees the most up-to-date Salesforce data without manual exports. This removes version control headaches and eliminates the confusion of wondering which spreadsheet is the latest.
- Customizable Views for Each Audience: You can filter, combine, and format reports in the spreadsheet so each stakeholder sees only the data that matters to them. Salesforce data can also be blended with any other data source leveraging Coefficient, including finance, marketing, and operations data in the same sheet, creating a richer, more complete view.
- Better Collaboration: Stakeholders can leave comments, add context, and model scenarios directly in the spreadsheet without altering the original Salesforce report. This makes it easier for cross-functional teams to analyze data collaboratively in a tool they already know and use.
- Time Savings for RevOps & Sales Ops: With Coefficient, there’s no need for repeated exporting or reformatting—reports are pulled once and kept automatically updated. This reduces manual work for ops teams, allowing them to focus more on strategy and less on administrative tasks.
Troubleshooting Common Issues when Sharing Dashboards Natively
Here are the common problems you might encounter while sharing your dashboard on Salesforce and the best solution to troubleshoot them:
Access Denied Issues
- Issue: Users might encounter “Access Denied” messages when trying to view a shared dashboard.
- Solution: Confirm that the dashboard’s sharing settings are configured correctly. Check the user’s profile and ensure they have the necessary permissions to access and view dashboards. Alternatively, sync your Salesforce reports into your spreadsheet for free with Coefficient. You can now share with anyone, even those without Salesforce licenses.
Missing User or Group in Sharing Settings
- Issue: Shared users or groups might not be able to view the dashboard.
- Solution: Revisit the dashboard’s sharing settings and verify that all intended users or groups are added. Ensure correct spelling and user/group selection. Save changes if modifications are needed.
Incorrect Access Levels
- Issue: Users may have unintended access levels (Read-Only vs. Read/Write).
- Solution: Double-check the access levels assigned to each user or group in the sharing settings. Adjust as needed, and remind users to refresh their browsers to apply the changes.
Public Link Issues
- Issue: Users may experience difficulties accessing the dashboard through a public link.
- Solution: Confirm that the public link is generated and accessible. If issues persist, regenerate the link and share it again. Ensure that the sharing settings allow for public link access.
Changes Not Reflecting
- Issue: Shared users may not see the latest changes made to the dashboard.
- Solution: Instruct users to refresh their browsers to ensure they are viewing the most recent version of the shared dashboard. Additionally, verify that the dashboard’s running user has the necessary data access for shared users to see updates.
Sharing with Large User Groups
- Issue: Sharing with a large user group might be inefficient or lead to performance issues.
- Solution: Consider sharing with smaller user groups or using public links for broader access. Evaluate the impact on performance and adjust sharing methods accordingly.
Conclusion
Sharing Salesforce dashboards effectively enhances team collaboration and data-driven decision-making.
As you implement these steps and tips, consider simplifying your Salesforce report sharing experience with Coefficient.
Ready to transform your Salesforce capabilities? Get started with Coefficient today and unlock a new realm of efficiency and insight for your organization.