Importing data into Salesforce often involves the cumbersome and manual task of mapping spreadsheet columns to Salesforce fields. This process can quickly become a bottleneck, especially with large sets of data.
Fortunately, Salesforce’s auto-mapping feature automatically detects and aligns your spreadsheet columns with the corresponding Salesforce fields.
This guide aims to show how it works.
Why Understanding API Names is Crucial
API names serve as the backbone for data identification within Salesforce. These unique identifiers are what Salesforce uses to distinguish between fields during an import.
Prior knowledge of API names for both standard and custom fields sets the stage for a smoother auto-mapping process.
Tools at Your Disposal for Auto-Mapping
Salesforce offers two primary tools for data import – the Data Import Wizard and the Salesforce Data Loader.
For a more integrated approach, Coefficient’s two-way Salesforce connector offers a seamless bridge between Salesforce and Google Sheets or Excel.
Step-by-Step Guide: Auto-Mapping Import Fields with API Name
1. Preparing Your Data for Import
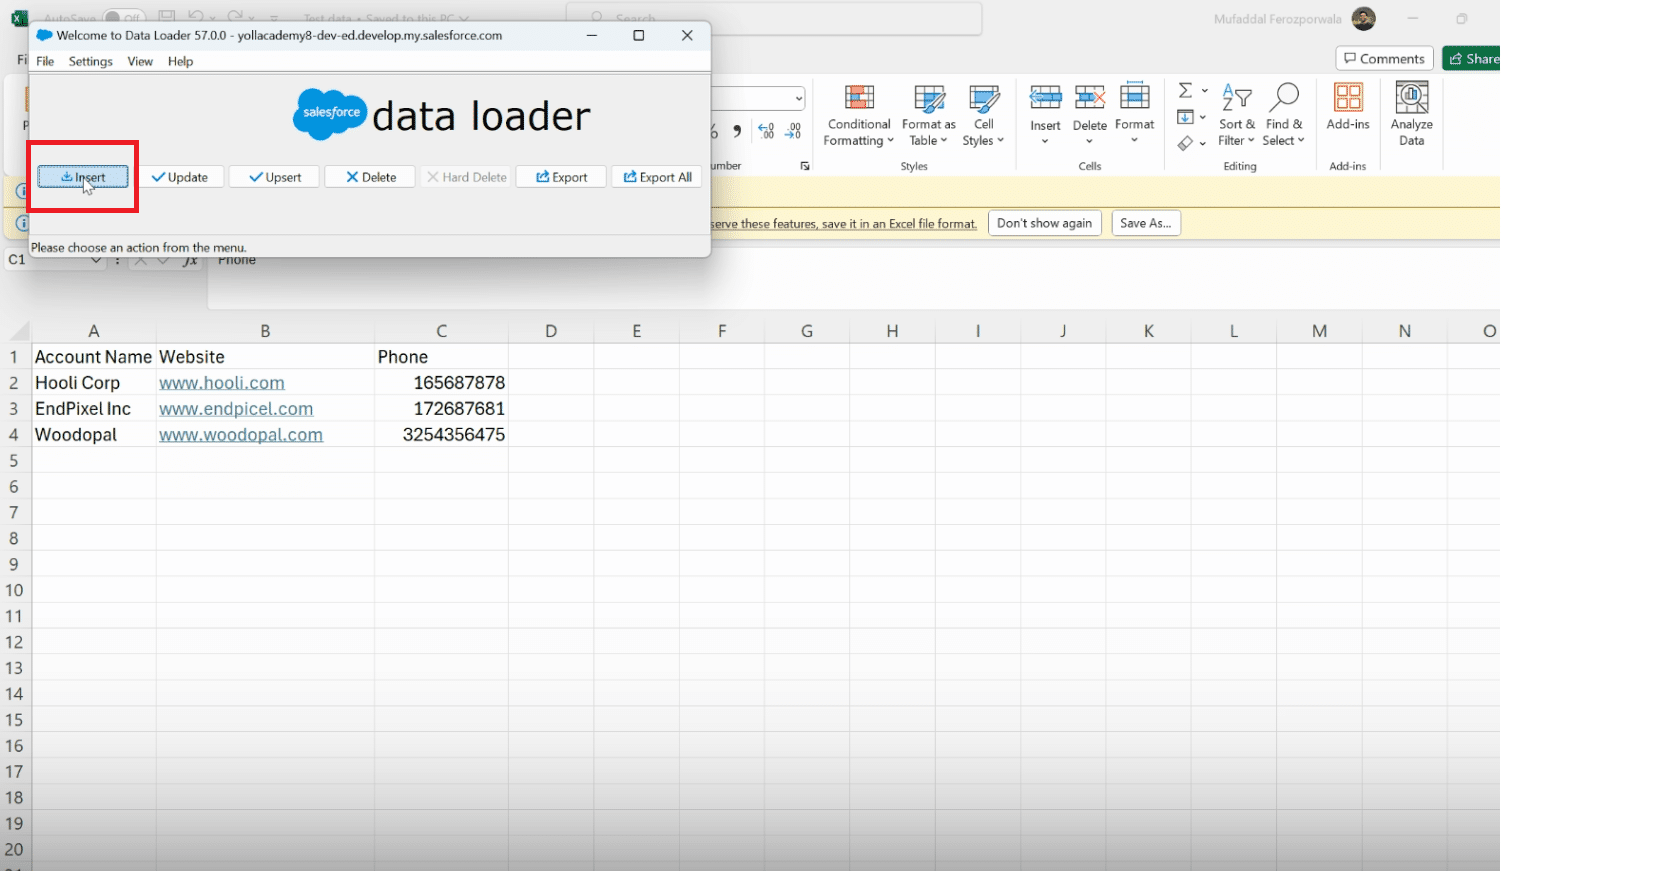
Begin with an Excel sheet organized with data columns like Account Name, Website, and Phone Number.
Ensure these column headers closely resemble your Salesforce field labels for efficient auto-mapping.
a
2. Leveraging the Data Loader
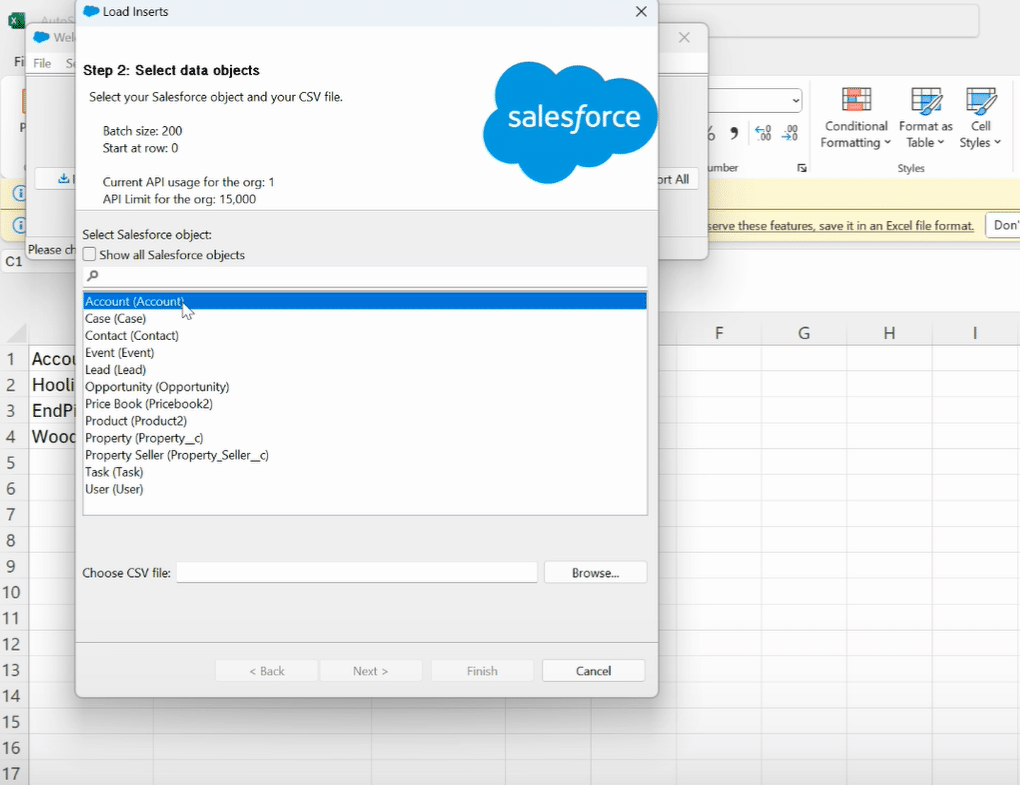
Launch the Salesforce Data Loader and navigate to the “Insert” option for importing data into the “Account” object.

Select your file and choose ‘Create or Edit Map’.

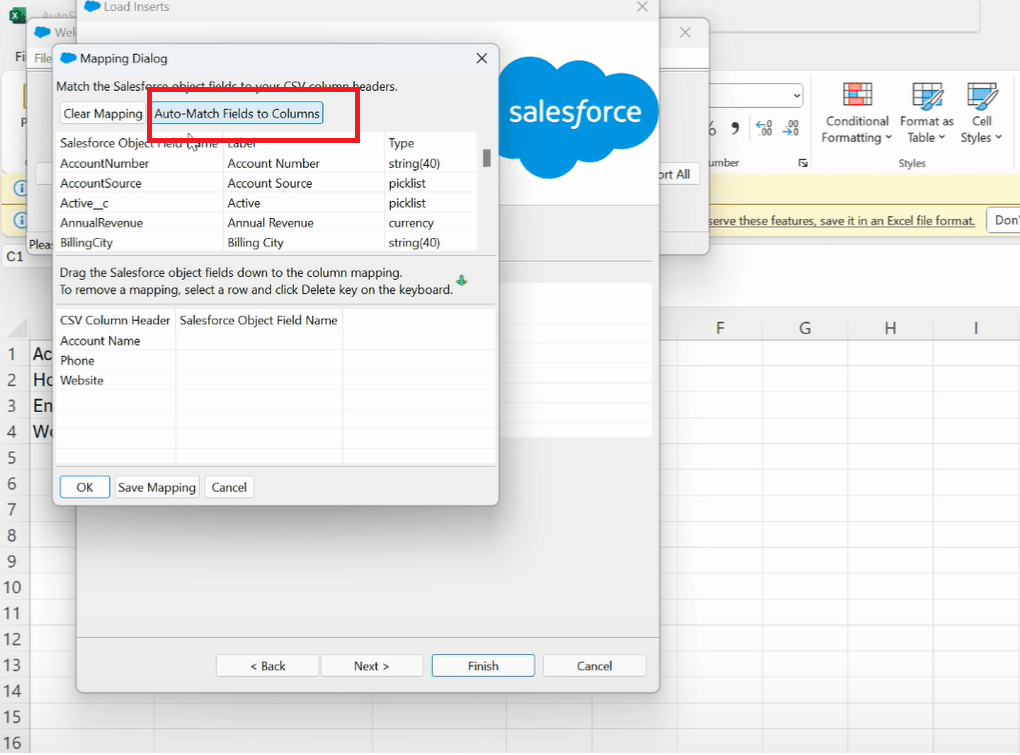
Here you’ll see the ‘Auto Match Fields to Columns’ button, an indispensable feature that automates the mapping process.

3. Executing Auto-Mapping
After selecting ‘Auto Match Fields to Columns’, Salesforce scrutinizes column headers in your Excel sheet against Salesforce fields for potential matches.

This automated endeavor might take a few seconds, post which, it reveals the auto-mapped fields. It’s imperative to meticulously review this mapping to ensure accuracy before proceeding.
4. Integration with Coefficient for Enhanced Data Management
By leveraging Coefficient (hyperlink to Google Sheets or Excel), automate and refine your data import process. It not only simplifies imports but also offers real-time Salesforce data updates directly from your spreadsheets.
Troubleshooting
While Salesforce’s auto-mapping feature dramatically simplifies the data import process, navigating this convenience without caution could lead to discrepancies that may disrupt your data integrity. Below are some common pitfalls encountered during the auto-mapping process and strategies to effectively avoid them.

Stop exporting data manually. Sync data from your business systems into Google Sheets or Excel with Coefficient and set it on a refresh schedule.
Get Started
1. Incorrect Auto-Mapping of Fields
One of the most frequent issues users face is Salesforce auto-mapping fields incorrectly due to similar column and field names. This might result in data being populated in the wrong fields, leading to inaccuracies and confusion.
Avoidance Strategy: Always conduct a thorough review of the auto-mapped fields before proceeding with the import. Pay special attention to fields that have similar names but contain different data, such as “Phone” vs. “Phone Number” or any custom fields that might closely resemble standard fields.
2. Ignoring Data Format Compatibility
It’s crucial to ensure that the format of the data in your Excel sheet matches what Salesforce expects. For instance, dates might be formatted differently between your document and Salesforce, leading to incorrect or failed data imports.
Avoidance Strategy: Double-check the data format for each field in Salesforce and adjust your Excel sheet accordingly. Salesforce documentation provides comprehensive details on acceptable formats for various field types.
3. Overlooking Required Fields
Salesforce objects often have fields set as required. Ignoring these fields during the import process will result in errors and incomplete records.
Avoidance Strategy: Prior to import, identify all required fields for the Salesforce object you are importing data into. Ensure that these required fields are populated in your Excel sheet to avoid any import failures.
4. Misinterpreting Relationship Fields
Salesforce’s powerful relational data model allows records to be interconnected via relationship fields. Misunderstanding or incorrectly mapping these fields can disrupt record associations, leading to data integrity issues.
Avoidance Strategy: Gain a solid understanding of the object relationships within your Salesforce instance. Use Salesforce’s relationship field names accurately in your document columns and verify these mappings carefully during the auto-mapping process.
5. Not Accounting for Custom Fields and Objects
Companies often customize Salesforce with custom fields and objects tailored to their specific business processes. These custom components might not be as straightforward to map due to unique naming conventions or data requirements.
Avoidance Strategy: Familiarize yourself with the API names and data formats of custom fields and objects in your Salesforce environment. Ensure these are accurately represented in your Excel document for seamless auto-mapping.
Conclusion
The journey from daunting manual data imports to streamlined auto-mapping is a transformative one. Harnessing the power of Salesforce’s Data Loader and embracing integrated solutions like
Coefficient can radically elevate your Salesforce experience. Dive into the world of effortless data management and start with Coefficient today.
Meta Description: “Learn how to effortlessly auto-map import fields with API names in Salesforce, enhancing your data management and efficiency. Our guide walks you through each step, ensuring a seamless process


