How to sync NetSuite financial data to Google Sheets without Apps Script coding

You can sync NetSuite financial data to Google Sheets without writing a single line of Apps Script code using a point-and-click connector that handles all the technical complexity for you.

Here’s how to set up automated financial data sync that refreshes on your schedule and requires zero coding knowledge.

Skip Apps Script entirely with Coefficient

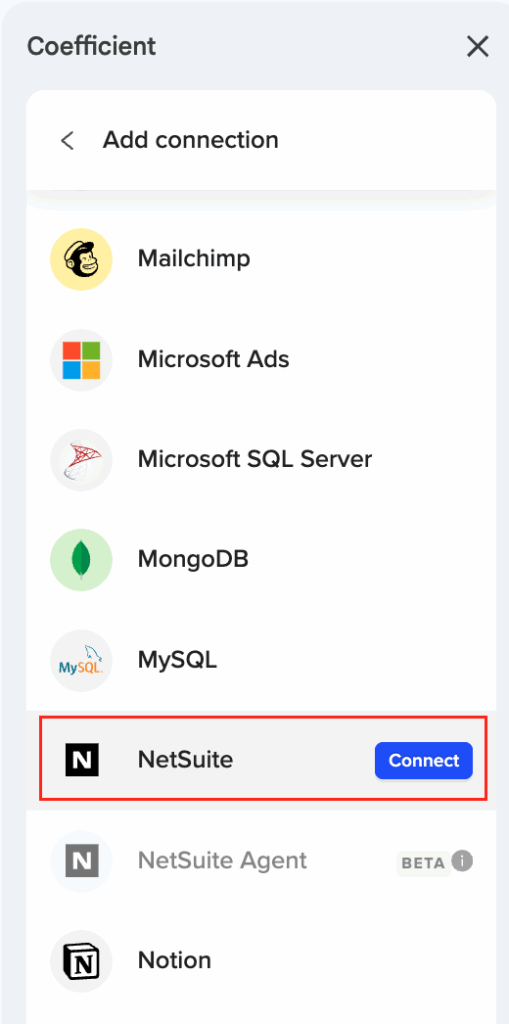
Coefficient provides a no-code NetSuite connector that eliminates the need for custom Apps Script development. Unlike NetSuite’s native capabilities that require complex scripting or expensive middleware, you get direct access to live financial data through a visual interface.

How to make it work

Step 1. Set up OAuth authentication.

Your NetSuite admin deploys Coefficient’s RESTlet script and configures OAuth 2.0 authentication. This is a one-time setup that requires no custom coding from your end.

Step 2. Import your financial reports.

Access standard NetSuite reports like Income Statement, Trial Balance, and General Ledger directly through Coefficient’s Reports import method. You can also pull custom financial data using Records & Lists for Account records and Transaction data with field-level selection.

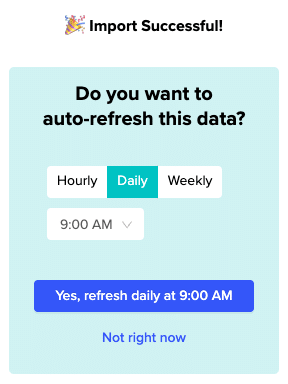
Step 3. Schedule automated refreshes.

Set up hourly, daily, or weekly data refreshes to keep your Google Sheets synchronized with live NetSuite data. The system handles authentication management and automatic token refresh every 7 days.

Step 4. Preview and customize your data.

Use the real-time preview feature to see your data before import. Apply complex filtering with AND/OR logic and select only the fields you need for your financial analysis.

Start syncing your financial data today

This approach gives you enterprise-grade reliability for financial data automation without the technical headaches of Apps Script development. Get started with automated NetSuite financial reporting in minutes, not weeks.

How to sync NetSuite data to Tableau without exceeding API rate limits

Direct NetSuite-Tableau connections quickly exhaust your 15 base RESTlet API calls, making automated data sync nearly impossible for most business intelligence needs.

Here’s how to create a reliable data pipeline that consolidates API usage while maintaining the automated refresh cycles your dashboards need.

Sync NetSuite data efficiently using Coefficient

Coefficient acts as an optimized middleware layer between NetSuite and NetSuite Tableau. Instead of Tableau making hundreds of individual API requests, Coefficient batches data retrieval through consolidated calls, then feeds that data to Tableau through live spreadsheet connections.

How to make it work

Step 1. Set up your NetSuite OAuth connection in Coefficient.

Your NetSuite admin will need to configure the OAuth connection and deploy Coefficient’s RESTlet scripts. This one-time setup enables secure API access without ongoing authentication issues.

Step 2. Create optimized data imports using SuiteQL queries.

Write custom SuiteQL queries that pull exactly the data Tableau needs in single API calls. For example: SELECT customer.companyname, transaction.trandate, transactionline.amount FROM transaction JOIN customer ON transaction.entity = customer.id. This retrieves comprehensive data sets up to 100K rows per query.

Step 3. Schedule automated hourly refreshes.

Configure Coefficient to pull fresh NetSuite data every hour using its built-in scheduling engine. This reduces your API calls from potentially hundreds per Tableau refresh to just a few consolidated Coefficient requests.

Step 4. Connect Tableau to your Coefficient-managed spreadsheet.

Set up Tableau to use the Coefficient spreadsheet as a live data source. Configure Tableau’s refresh schedule to align with Coefficient’s NetSuite sync timing for seamless automation.

Keep your dashboards fresh without API headaches

This approach transforms resource-intensive direct connections into efficient automated pipelines. Your Tableau dashboards stay current while respecting NetSuite’s API constraints. Start building your optimized data pipeline today.

How to sync NetSuite financial data to external dashboard tools for better user experience

Syncing NetSuite financial data to external dashboard tools requires a reliable data bridge that maintains accuracy while enabling superior visualization capabilities. Direct API integrations are complex and manual exports are time-consuming.

You’ll learn how to create automated financial data synchronization that works with any external dashboard platform while maintaining data integrity and security.

Automate financial data synchronization using Coefficient

Coefficient provides comprehensive financial data synchronization more effectively than direct API integrations. You can import standard financial reports from NetSuite with configurable periods and export synchronized data to business intelligence platforms like Tableau, Power BI, or Looker from NetSuite.

How to make it work

Step 1. Install Coefficient and connect your NetSuite account.

Open your spreadsheet application and install the Coefficient add-in. For Excel, go to Insert > Get Add-ins and search for Coefficient. For Google Sheets, visit the Google Workspace Marketplace. Once installed, launch Coefficient and complete the NetSuite OAuth connection with your admin’s help to deploy the RESTlet script.

Step 2. Import NetSuite financial data to your spreadsheet.

Select your import method based on data needs. Use the Reports method for Income Statement, Trial Balance, and General Ledger with configurable periods. Choose Records & Lists for account records and transaction data. Use SuiteQL queries for complex financial calculations like variance analysis and trend calculations.

Step 3. Set up automatic refresh schedules.

Configure hourly, daily, or weekly refresh schedules that align with your financial reporting cycles. Set timezone-based updates for global operations. Coefficient handles NetSuite’s 7-day token refresh automatically to maintain continuous data sync without manual intervention.

Step 4. Connect your spreadsheet to external BI tools.

Link your auto-refreshing spreadsheet as a data source in your BI platform. Tableau, Power BI, Looker, and similar tools can connect directly to Google Sheets or Excel files. Your BI dashboards will pull fresh NetSuite data from the spreadsheet after each scheduled refresh.

Step 5. Monitor and maintain your data pipeline.

Review refresh logs in Coefficient to confirm successful data updates. Set up Slack or email alerts for refresh failures or data changes. Apply role-based access controls to your spreadsheet to ensure only authorized users access financial data before it flows to BI tools.

Create reliable financial data pipelines

External dashboard tools provide better visualization than NetSuite’s native reports, but they need reliable data feeds. Automated synchronization ensures your financial dashboards stay current while maintaining enterprise-grade security and compliance. Build your financial data pipeline today.

How to sync NetSuite financial data to Notion databases without API development

Moving financial data from NetSuite to Notion databases typically requires complex API development work that most teams can’t handle. But there’s a simpler way to get your accounts, transactions, and financial reports into Notion without writing a single line of code.

Here’s how to set up automated financial data sync that keeps your Notion databases current with NetSuite changes.

Extract NetSuite financial data automatically using Coefficient

Coefficient acts as a bridge between NetSuite and Notion by pulling your financial data into spreadsheets first, then exporting it for Notion import. This eliminates the technical complexity of NetSuite’s API while giving you automated refresh capabilities.

How to make it work

Step 1. Connect Coefficient to NetSuite with OAuth authentication.

Your NetSuite admin needs to set this up once by deploying a RESTlet script and configuring external URL access. After that, you’ll have secure access to all your financial records without ongoing technical maintenance.

Step 2. Import your financial data using Records & Lists.

Select the financial records you need like accounts, transactions, or subsidiary information. Use the drag-and-drop interface to choose specific fields and apply filters by date range, department, or subsidiary. You’ll see a preview of the first 50 rows before importing.

Step 3. Pull standard financial reports with configurable periods.

Import Income Statements, Trial Balances, or General Ledger reports directly. Choose your reporting period, accounting book, and subsidiary settings. The data comes in formatted and ready for analysis.

Step 4. Set up automated refresh scheduling.

Configure hourly, daily, or weekly refresh cycles to keep your data current. The system maintains your OAuth connection automatically, refreshing tokens every 7 days without manual intervention.

Step 5. Export to Notion databases.

Once your financial data refreshes in the spreadsheet, export it as CSV for direct import into Notion database tables. You can also copy-paste data directly for immediate updates.

Keep your financial data flowing automatically

This approach transforms complex API integration into a simple workflow that finance teams can manage themselves. Start syncing your NetSuite financial data to Notion today.

How to sync NetSuite financial data with HubSpot deal records automatically

Syncing NetSuite financial data with HubSpot deal records automatically ensures your sales team works with actual revenue numbers instead of estimated values. This connection between financial reality and sales forecasting improves deal accuracy and revenue reporting.

Here’s how to set up automated financial data synchronization that keeps HubSpot deals current with NetSuite transaction reality.

Automate financial data sync for accurate deal tracking using Coefficient

Coefficient enables automated NetSuite financial data synchronization with HubSpot deal records by providing comprehensive access to transaction and financial data. This ensures deal values reflect actual recognized revenue rather than estimated amounts.

How to make it work

Step 1. Import NetSuite transaction records with complete financial details.

Access NetSuite sales orders, invoices, payments, and estimates using the Records & Lists import method. Import transaction amounts, dates, customer information, and payment status to maintain comprehensive financial data for deal updates.

Step 2. Set up revenue recognition tracking for deal value updates.

Import NetSuite invoice and payment data to update HubSpot deal values with actual recognized revenue. Use date filters to capture recent transactions and apply customer matching to connect financial data with corresponding HubSpot deals.

Step 3. Sync transaction status for automated deal stage progression.

Import NetSuite transaction status fields (pending, fulfilled, paid) to automatically advance HubSpot deal stages. When NetSuite shows a payment received, the corresponding HubSpot deal can be marked as “Closed Won” with actual revenue amounts.

Step 4. Create custom financial queries for comprehensive deal analysis.

Use SuiteQL to create complex financial data queries that join customer, transaction, and accounting data. Import customer lifetime value, payment terms, and collection status for comprehensive deal performance tracking.

Step 5. Schedule daily imports for current financial performance.

Set up automated daily imports of transaction data to maintain current deal values in HubSpot. Apply filters for specific date ranges or customer segments to focus on deals requiring financial updates, ensuring sales forecasts reflect actual NetSuite financial performance.

Align your sales forecasts with financial reality

This approach ensures HubSpot deal records reflect actual NetSuite financial performance rather than estimated values, improving sales forecasting accuracy and revenue reporting. Start syncing your financial data with deal records today.

How to sync NetSuite inventory turns data for working capital forecasting

Working capital forecasting requires detailed inventory movement data and turn rate calculations that NetSuite’s standard inventory reports don’t provide in the format needed for sophisticated cash flow modeling and optimization.

Here’s how to synchronize comprehensive inventory turns data that enables accurate working capital forecasting and cash flow optimization across your operations.

Sync inventory turns data using Coefficient

Coefficient enables comprehensive inventory turns data synchronization that provides granular information needed for working capital analysis. You can track inventory movement, calculate turn rates, and maintain rolling historical data that keeps working capital models current with NetSuite inventory positions in NetSuite .

How to make it work

Step 1. Track detailed inventory movement and values.

Import Item records combined with Inventory Detail records to track inventory quantities, values, and movement patterns. This data is essential for turn rate calculations and working capital forecasting that requires precise inventory flow analysis.

Step 2. Integrate COGS data for precise turn calculations.

Extract transaction-level COGS data through Records & Lists imports, enabling precise inventory turn calculations by item, category, or location. This integration provides the cost basis needed for accurate working capital modeling and inventory optimization.

Step 3. Analyze inventory across multiple locations and entities.

Import inventory data with location and subsidiary dimensions, supporting working capital forecasting for complex distribution networks and multi-entity operations. This multi-dimensional view enables location-specific working capital optimization.

Step 4. Maintain rolling historical data for trend analysis.

Use automated refresh scheduling to maintain rolling historical inventory data, enabling trend analysis and seasonal adjustment calculations for working capital planning. This historical context improves forecast accuracy for seasonal businesses.

Step 5. Include custom inventory classifications for quality metrics.

Import custom fields related to inventory classification like fast/slow moving, seasonal, or obsolete inventory. This enhances working capital forecasting accuracy with inventory quality metrics that affect cash conversion cycles.

Step 6. Integrate vendor and purchase data for procurement timing.

Extract vendor and purchase order data to model inventory procurement timing and payment terms impact on working capital requirements. This integration enables comprehensive working capital scenario modeling.

Step 7. Build advanced inventory metrics with SuiteQL.

Write custom queries to calculate complex inventory metrics like days sales outstanding, inventory aging, and turn rate variations. These advanced calculations support sophisticated working capital scenario modeling and optimization strategies.

Optimize working capital with inventory insights

This automated inventory data synchronization provides the granular information needed for accurate working capital forecasting and cash flow optimization. Start building sophisticated working capital models with comprehensive inventory turns data.

How to sync NetSuite invoice data with Salesforce opportunities in real-time

Real-time syncing between NetSuite invoice data and Salesforce opportunities eliminates manual data exports and provides live visibility into your pipeline-to-cash process without constant system switching.

Here’s how to set up automated synchronization that keeps your revenue tracking current and accurate.

Connect both systems through live data imports using Coefficient

Coefficient enables real-time integration by importing live invoice data from NetSuite and NetSuite into spreadsheets, where it combines with Salesforce opportunity data using dual-connector capabilities. This approach eliminates manual export bottlenecks while providing automated refresh scheduling that keeps your data synchronized.

How to make it work

Step 1. Set up OAuth configuration for both systems.

Configure authentication for NetSuite using the RESTlet script deployment and set up Salesforce connector access. This one-time setup enables secure API connections to both platforms without ongoing credential management.

Step 2. Import NetSuite invoice data using Records & Lists.

Select transaction records and choose relevant fields like transaction ID, customer, amount, date, and custom fields that link to Salesforce opportunity IDs. Apply filters to focus on recent invoices or specific customer segments.

Step 3. Import Salesforce opportunity data in parallel.

Pull opportunity records with stage, amount, close date, and matching customer identifiers. Import this data into a separate sheet or range within the same workbook for easy cross-referencing.

Step 4. Create automated matching logic.

Use spreadsheet functions like XLOOKUP or INDEX/MATCH to connect invoice records with opportunities based on customer IDs, deal reference numbers, or custom linking fields. This eliminates VLOOKUP errors common in manual processes.

Step 5. Configure automated refresh scheduling.

Set up hourly, daily, or weekly refresh cycles based on your reporting needs. Both imports refresh on the same schedule, maintaining data consistency and providing real-time synchronization without manual intervention.

Start tracking your pipeline to cash automatically

This automated approach transforms static reporting into live revenue tracking that updates continuously. Get started with Coefficient to eliminate manual data exports and gain real-time visibility into your sales-to-cash process.

How to sync NetSuite multi-location customer data to marketing platforms for geo-targeted campaigns

You can sync NetSuite multi-location customer data to marketing platforms by importing comprehensive geographic information and creating location-based segments that enable precise geo-targeted campaigns with relevant messaging.

This approach improves campaign relevance and conversion rates by ensuring customers receive location-appropriate messaging and offers based on their actual geographic data from NetSuite.

Create precise geo-targeted campaigns using Coefficient

Coefficient provides comprehensive geographic data integration through customer and location import capabilities. You can import customer records with complete address data from NetSuite and handle complex multi-location scenarios including customers with multiple addresses and location hierarchies.

How to make it work

Step 1. Import customer records with complete location data.

Use Coefficient’s Records & Lists method to import customer records including shipping and billing addresses, subsidiary assignments, and location-based custom fields. Select fields that capture both primary addresses and any secondary location information stored in NetSuite .

Step 2. Import location and subsidiary records for hierarchy mapping.

Pull location and subsidiary records to create geographic hierarchy mapping. This handles complex organizational structures where customers may be associated with multiple locations or regional subsidiaries.

Step 3. Create geographic segments using location filters.

Use Coefficient’s filtering system to create geographic segments by state, region, country, or custom territories. Build targeted groups that reflect your marketing territories and campaign geographic strategies.

Step 4. Analyze location-based purchase patterns.

Combine location data with transaction history to identify geographic preferences and buying patterns. Create insights about which products or services perform best in different regions for targeted campaign messaging.

Step 5. Set up automated weekly location data refreshes.

Configure Coefficient to refresh customer location data weekly to capture address changes and new customer locations. Export location-based segments to marketing platforms with geo-specific messaging and offers for each region.

Deliver location-relevant campaigns that convert

This geographic targeting approach ensures customers receive campaigns with location-appropriate messaging and offers, improving campaign relevance and conversion rates through precise segmentation. Start building geo-targeted campaigns today.

How to sync NetSuite opportunity data to Mailchimp for sales pipeline email campaigns

NetSuite opportunity data provides powerful insights for sales-focused email marketing that can significantly improve conversion rates and sales cycle efficiency through targeted pipeline campaigns.

Here’s how to import and analyze opportunity data to create sophisticated sales pipeline automation that delivers the right message at the right stage.

Build sales pipeline email automation using NetSuite opportunity data with Coefficient

Coefficient provides comprehensive opportunity record access from NetSuite with relationship mapping capabilities that enable sophisticated sales pipeline automation in NetSuite Mailchimp.

How to make it work

Step 1. Import comprehensive opportunity data.

Use Coefficient’s Records & Lists method to import Opportunity records with complete field selection including stage, probability, close date, amount, and custom opportunity fields. Import opportunities with customer/contact references to create comprehensive sales pipeline profiles.

Step 2. Create pipeline-based audience segments.

Build audience segments based on opportunity stages using filtering logic. Create segments for Prospecting, Qualification, Proposal, and Negotiation stages. Use formulas like =IF(OpportunityStage=”Proposal”,”Proposal Stage”,”Other”) to categorize prospects for targeted messaging.

Step 3. Implement value-based and timing segmentation.

Segment by opportunity value ranges for targeted messaging using formulas like =IF(OpportunityAmount>50000,”High Value”,IF(OpportunityAmount>10000,”Medium Value”,”Standard”)). Use close date proximity for urgency-based campaigns and track opportunity age for nurturing sequence timing.

Step 4. Calculate advanced opportunity analytics.

Create win probability scores using imported probability and historical data. Track sales cycle length using date calculations like =TODAY()-OpportunityCreatedDate for timing optimization. Monitor opportunity progression velocity to identify stalled deals needing intervention campaigns.

Step 5. Use SuiteQL for complex pipeline analysis.

For advanced opportunity analysis, use Coefficient’s SuiteQL Query method to join opportunities with customers, items, and sales rep data. This enables comprehensive pipeline insights including product interest patterns and competitive analysis for enhanced personalization.

Transform opportunity data into sales acceleration

Sales pipeline automation using NetSuite opportunity data creates highly targeted campaigns that move prospects through your sales process more effectively. Start building your opportunity-driven email campaigns today.

How to sync NetSuite purchase request data to Google Sheets automatically

You can automatically sync NetSuite purchase request data to Google Sheets using automated refresh schedules that update your spreadsheet hourly, daily, or weekly without any manual work.

This eliminates the tedious process of exporting CSV files from NetSuite and ensures your Google Sheets always shows current purchase request status and approval data.

Set up automated NetSuite purchase request sync using Coefficient

Coefficient connects directly to NetSuite and pulls purchase request data into Google Sheets with automatic refresh capabilities. You can access all purchase request fields like request ID, requester, status, amount, and approval stage without needing to export files manually.

How to make it work

Step 1. Connect to NetSuite and select purchase request records.

Use Coefficient’s Records & Lists feature to access NetSuite purchase request data. Choose specific fields you need like request ID, requester name, status, amount, approval stage, and submission dates. You can reorder columns using drag-and-drop functionality to create the exact view you want.

Step 2. Apply filters to focus on relevant requests.

Use Coefficient’s filtering capabilities with AND/OR logic to narrow down your data. For example, filter for pending approvals, requests above certain dollar amounts, or specific departments. This keeps your Google Sheets focused on the purchase requests that matter most.

Step 3. Schedule automatic refresh updates.

Set up automated refresh schedules to keep your data current. Choose hourly updates for high-priority requests, daily for standard operations, or weekly for historical tracking. The system will automatically pull fresh data from NetSuite without any manual intervention.

Step 4. Share with stakeholders who need visibility.

Share your Google Sheets with team members who need purchase request visibility but don’t have NetSuite access. They’ll always see current data without needing to log into NetSuite or wait for email updates.

Keep your purchase request data always current

Automated NetSuite purchase request sync eliminates manual data exports and gives your team real-time visibility into approval status and request details. Start syncing your purchase request data automatically today.