🔥 Now available: AI Dashboards. Learn More ➡️

How to export Financial Reports Row Layout Assignment data when NetSuite Saved Search doesn’t show the dataset

NetSuite saved searches often fail to display Financial Reports Row Layout Assignment data because this configuration information lives in system tables that aren’t exposed through standard search functionality.

Here’s how to access this critical data using direct table queries and automated export methods that bypass NetSuite’s built-in limitations.

Access row layout data directly using Coefficient

Coefficient provides direct access to NetSuite system tables through SuiteQL queries, eliminating the need for complex workarounds or custom development. Instead of struggling with saved search limitations, you can query the actual tables where row layout assignments are stored.

How to make it work

Step 1. Connect Coefficient to your NetSuite instance.

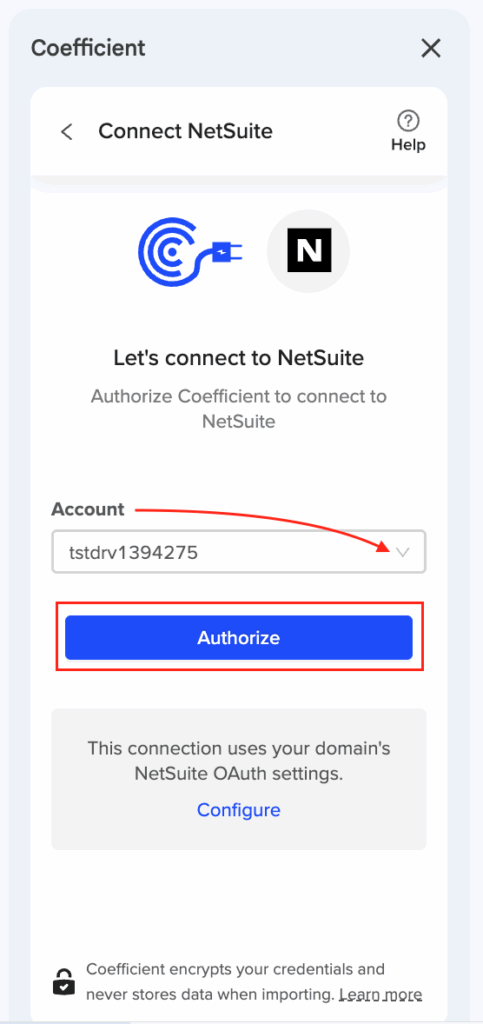
Install the Coefficient add-on in Excel or Google Sheets. Your NetSuite admin will need to configure OAuth 2.0 authentication and deploy the RESTlet script for secure API access.

Step 2. Select SuiteQL Query as your import method.

Open Coefficient and choose “SuiteQL Query” from the import options. This method allows you to write custom SQL-like queries that access NetSuite’s underlying database tables directly.

Step 3. Write your row layout extraction query.

Use this query to extract comprehensive row layout data:

Step 4. Preview and import your data.

Click “Preview” to see the first 50 rows of results. Once you verify the data looks correct, import it directly into your spreadsheet. You can process up to 100,000 rows per query.

Step 5. Set up automated refreshes.

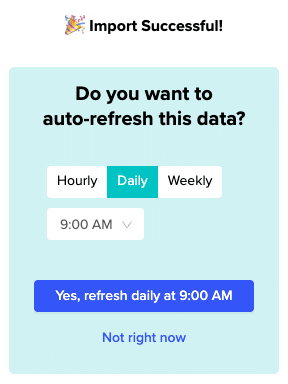
Schedule daily or weekly refreshes to keep your row layout data current. Coefficient will automatically re-authenticate and pull fresh data according to your schedule.

Get complete financial report configuration data

This approach gives you access to all row layout fields including formulas, hierarchies, and print orders that saved searches simply can’t reach. Start extracting your NetSuite row layout data today.
How to export invoice line items with product details to Excel weekly

You can export detailed invoice line items from NetSuite to Excel weekly with automated scheduling that captures individual product details, not just summary totals.

This guide shows you how to set up weekly exports that pull granular transaction data including SKUs, quantities, rates, and amounts for each line item.

Get detailed invoice line items automatically using Coefficient

Coefficient connects directly to NetSuite to access Transaction Line records, which contain individual invoice line items rather than summary invoice data. Unlike NetSuite’s native export functionality that typically provides only invoice totals, this approach captures each product line as separate rows with complete details.

How to make it work

Step 1. Connect to NetSuite and select Transaction Line records.

Use the Records & Lists import method to access Transaction Line records. This gives you granular access to individual invoice line items instead of summary-level invoice data that NetSuite typically exports.

Step 2. Choose your specific fields for product details.

Select fields like Item Name, SKU, Quantity, Rate, Amount, Invoice Number, Customer, and Date. You can also include custom fields from both invoice headers and line items for complete product information.

Step 3. Apply filters to focus on relevant invoices.

Use date range filters to capture invoices from specific periods. You can also filter by customers or other criteria using AND/OR logic to narrow down your data set.

Step 4. Set up weekly automated scheduling.

Configure automatic data refresh on a weekly schedule through the scheduling feature. Choose your preferred day and time, and the system will handle timezone-based scheduling automatically.

Step 5. Review your structured output.

Each product line appears as individual Excel rows with complete product details. The data stays current with automatic refresh capabilities, eliminating manual export requirements.

Start automating your weekly invoice exports

Weekly invoice line item exports give you consistent access to detailed product data without manual intervention. Get started with automated NetSuite exports today.

How to export multiple entities’ open invoices from NetSuite in bulk to Excel

NetSuite’s standard exports require individual entity selection or complex saved searches, making bulk invoice exports for multiple customers time-consuming and inefficient.

Here’s how to export open invoices for multiple entities simultaneously with flexible filtering and automated refresh capabilities.

Export multiple entities in bulk using Coefficient

Coefficient excels at bulk invoice exports for multiple entities from NetSuite , eliminating the need for individual entity exports while providing flexible filtering and unified formatting.

How to make it work

Step 1. Set up your NetSuite connection in Excel.

Install Coefficient and complete the OAuth authentication process. Your NetSuite admin will deploy the RESTlet script for bulk data access.

Step 2. Configure bulk entity filtering.

Use Records & Lists with OR logic to include multiple specific entities. Apply filters for “Entity IN (Customer1, Customer2, Customer3)” and “Status = Open” to capture all open invoices across selected customers.

Step 3. Use SuiteQL for advanced multi-entity queries.

Create queries like: SELECT c.companyname as customer_name, t.tranid as invoice_number, t.amount, t.amountremaining, t.duedate FROM transaction t JOIN customer c ON t.entity = c.id WHERE t.type = ‘Invoice’ AND t.status = ‘Open’ AND c.companyname IN (‘Customer A’, ‘Customer B’, ‘Customer C’)

Step 4. Apply category and territory filtering.

Filter by customer categories, territories, sales rep, or subsidiary instead of individual entities. Combine entity filters with date criteria for more targeted bulk exports.

Step 5. Set up automated bulk processing.

Configure daily or weekly updates to capture new invoices across all entities automatically. The 100,000 row limit handles large multi-entity datasets efficiently while maintaining consistent formatting.

Streamline multi-entity invoice management

This eliminates multiple individual entity exports while providing comprehensive invoice data across your entire customer base with automated refresh capabilities. Perfect for collections teams and territory management. Start bulk exporting today.

How to export NetSuite Balance Sheet to Google Sheets automatically

You can automatically export your NetSuite Balance Sheet to Google Sheets with scheduled refreshes that eliminate manual exports and maintain consistent formatting.

This guide shows you how to set up automated Balance Sheet exports that update daily, weekly, or hourly without logging into NetSuite.

Set up automated Balance Sheet exports using Coefficient

Coefficient provides direct access to NetSuite’s standard financial reports without requiring Saved Searches. Unlike manual exports or limited tools, you get seamless integration with scheduled refreshes that keep your data current.

How to make it work

Step 1. Connect Coefficient to your NetSuite account.

Install the Coefficient add-on in Google Sheets and complete the OAuth 2.0 authentication. Your NetSuite admin will need to handle the initial configuration, but this is a one-time setup.

Step 2. Configure your Balance Sheet import.

Select “Import from NetSuite” → “Reports” → “Balance Sheet” from the Coefficient sidebar. Configure your parameters including reporting period (current period, specific dates, or custom ranges), accounting book selection, and subsidiary filtering if using OneWorld.

Step 3. Set up automation scheduling.

Click “Schedule” after creating your import. Choose your refresh frequency: hourly for real-time monitoring, daily for standard reporting needs, or weekly for period-end processes. Set the specific time for daily updates based on your timezone.

Step 4. Enable auto-refresh for continuous updates.

Toggle on auto-refresh to maintain live data connection. This preserves historical data with each scheduled update and supports multiple subsidiary consolidation automatically.

Keep your financial data current without manual work

Automated Balance Sheet exports save time and reduce errors while maintaining the formatting your team expects. Start your free trial to eliminate daily manual exports from NetSuite.

How to export NetSuite saved search with custom formulas to Google Sheets automatically

Coefficient supports automatic export of NetSuite saved searches containing custom formulas to Google Sheets. Formula results import as values, though complex field types have some limitations to consider.

Here’s how to handle formula exports and strategies for working with complex calculations in your automated workflows.

NetSuite custom formula export using Coefficient

Coefficient automatically includes formula columns when importing saved searches. Standard formula fields like text, numeric, date, and conditional formulas export successfully, with results appearing as static values in Google Sheets.

How to make it work

Step 1. Ensure your saved search includes formula columns.

Verify that your NetSuite saved search contains the custom formula fields you need. Text formulas (CONCAT, SUBSTR), numeric formulas (mathematical operations), and date formulas all export successfully through Coefficient.

Step 2. Import the saved search with formulas included.

In Coefficient, select “Saved Searches” import and choose your saved search containing formulas. The formula results automatically include in the import without additional configuration needed.

Step 3. Schedule automatic updates for formula results.

Set up hourly, daily, or weekly refresh schedules to keep formula calculations current. The automated refresh updates both raw data and calculated formula results simultaneously.

Step 4. Handle complex formulas with hybrid approaches.

For complex CASE statements or nested formulas, import both raw data fields and formula results. Create corresponding Google Sheets formulas to validate NetSuite calculations:

Step 5. Document and enhance formula logic.

Add sheet comments documenting NetSuite formulas since only results transfer, not logic. Use named ranges for formula consistency and create additional calculations using imported formula results as inputs.

Automate your NetSuite formula exports

Custom formula exports work seamlessly with scheduled automation, keeping calculated fields current without manual intervention. Combine NetSuite formula results with Google Sheets capabilities for enhanced analysis. Start exporting your NetSuite formulas automatically today.

How to extract partially paid invoices from NetSuite to Excel with remaining balance

NetSuite’s native reports often don’t clearly show remaining balances for partially paid invoices, requiring manual calculations or complex saved searches to get accurate payment tracking.

Here’s how to extract partially paid invoices with automatic remaining balance calculations that update as new payments are received.

Track partial payments with automated balance calculations using Coefficient

Coefficient excels at extracting partially paid invoices from NetSuite with accurate remaining balance calculations, eliminating the need for manual balance tracking or complex saved searches.

How to make it work

Step 1. Connect NetSuite to your Excel workbook.

Install Coefficient and complete the OAuth authentication process. Your NetSuite admin will deploy the RESTlet script for secure data access.

Step 2. Use SuiteQL Query for precise partial payment tracking.

Create a query to identify partially paid invoices: SELECT t.entity, t.tranid, t.amount, t.amountremaining, (t.amount – t.amountremaining) as amount_paid, t.duedate, t.status FROM transaction t WHERE t.type = ‘Invoice’ AND t.amountremaining > 0 AND t.amountremaining < t.amount

Step 3. Include payment history and aging details.

Add fields for payment terms, customer notes, and collection information. You can also calculate aging based on the original due date rather than payment dates for more accurate collections tracking.

Step 4. Set up automated balance updates.

Configure daily or weekly refreshes so remaining balances automatically update as new payments are received. This eliminates manual recalculation and ensures current payment status.

Step 5. Create Excel formulas for enhanced analysis.

Use the remaining balance data with Excel formulas for aging calculations, payment percentage analysis, and collection priority scoring. The live data integrates seamlessly with your existing Excel calculations.

Eliminate manual balance calculations

This approach provides current partial payment status without manual intervention while integrating with Excel formulas for comprehensive collections management. Start tracking partial payments automatically today.

How to fix NetSuite exporting Excel files as .XLS instead of .XLSX format

NetSuite exports files with a .XLS extension, but they’re actually XML Spreadsheet 2003 format, not true Excel files. This creates compatibility issues with modern Excel versions and triggers security warnings.

Here’s how to get your NetSuite data in proper .XLSX format without dealing with file conversions or compatibility errors.

Skip NetSuite exports entirely using Coefficient

Coefficient eliminates the export problem by connecting directly to your NetSuite instance and importing data straight into Excel or NetSuite in native format. No more file downloads, no more format mismatches, and no more security warnings.

How to make it work

Step 1. Install Coefficient and connect to NetSuite.

Add Coefficient to Excel from the Office Add-ins store or to Google Sheets from the workspace marketplace. Your NetSuite admin will need to configure the OAuth connection once – this involves deploying a RESTlet script and setting up external URL configuration.

Step 2. Choose your import method.

Select from Records & Lists for direct access to any NetSuite data, Saved Searches to import existing searches, Reports for financial statements, or SuiteQL Query for custom data pulls. Each method delivers data directly to your spreadsheet in proper format.

Step 3. Set up automated refreshes.

Configure hourly, daily, or weekly refresh schedules to keep your data current. The data updates automatically in your spreadsheet without any manual exports or file handling.

Get clean NetSuite data without the export headaches

Stop wrestling with file format issues and security warnings. Coefficient gives you live NetSuite data in proper Excel format, ready for analysis and sharing. Try Coefficient and eliminate export problems for good.

How to handle date format conversion when preparing CSV files for NetSuite import

Date format mismatches cause frequent NetSuite import failures and data corruption. You can eliminate manual date conversion by using automated import processes that handle format standardization automatically.

Here’s how to avoid date format headaches and ensure consistent date handling across all your NetSuite imports.

Automate date format conversion with intelligent imports using Coefficient

Coefficient eliminates date format conversion problems by automatically handling date standardization in its import process. Instead of manually preparing CSV files with proper date formatting, the platform recognizes various date formats and converts them to NetSuite -compatible formats without manual intervention.

The system handles automatic date format recognition from source systems, correctly interpreting MM/DD/YYYY, DD/MM/YYYY, ISO 8601, and other common formats. Date/Time fields are imported as Date only, ensuring compatibility with NetSuite ‘s expectations.

How to make it work

Step 1. Connect your data source with date fields.

Import your data using Coefficient’s Records & Lists method or other import options. The platform automatically detects date fields and begins format recognition without requiring manual specification of date formats.

Step 2. Review date formatting in the preview.

Use the preview feature to verify that date fields appear correctly formatted. The first 50 rows show how NetSuite will interpret your dates, allowing you to catch format issues before completing the import.

Step 3. Set up timezone consistency for scheduled imports.

Configure scheduled imports knowing that the timezone is based on the user who created the schedule. This ensures consistent date calculations across all automated refreshes without timezone confusion.

Step 4. Import directly without manual conversion.

Complete your import knowing that date fields maintain their integrity through the process. The platform prevents common issues like dates being interpreted as text strings or month/day confusion in international formats.

Eliminate date format guesswork

Automated date handling prevents the trial-and-error typically associated with CSV date conversions. You get reliable imports without format mismatches, timezone confusion, or Excel’s automatic date conversions that corrupt data. Start importing with confidence today.

How to handle multi-subsidiary journal entries in automated NetSuite imports

Multi-subsidiary journal entries require precise control over entity assignments, intercompany relationships, and validation across different subsidiaries. Automated imports can handle these complex scenarios with proper filtering and subsidiary management configuration.

This guide shows you how to set up automated imports that handle multi-entity journal entries while maintaining audit trails and proper subsidiary assignments.

Automate multi-subsidiary journal entries using Coefficient

Coefficient provides robust support for multi-subsidiary journal entry imports through advanced filtering and subsidiary management features. During OAuth setup, the system can be configured to access multiple subsidiaries, with permissions inherited from the authenticating user’s NetSuite role.

You can filter imports by specific subsidiaries using AND/OR logic, map subsidiary fields directly from your Excel data, and handle elimination entries between subsidiaries. The platform also supports filtering by departments and classes for precise control over multi-entity transactions.

How to make it work

Step 1. Configure multi-subsidiary access during OAuth setup.

Work with your NetSuite admin to ensure the OAuth connection has permissions across all relevant subsidiaries. The system inherits access rights from the authenticating user’s role, so proper role configuration is essential for multi-entity imports.

Step 2. Structure your Excel template with subsidiary identifiers.

Create columns for primary subsidiary, intercompany subsidiary (if applicable), account, debit, credit, and memo. Use clear subsidiary identifiers that match your NetSuite subsidiary setup for accurate mapping.

Step 3. Set up filtering logic for each subsidiary.

Use Coefficient’s AND/OR filtering capabilities to separate entries by subsidiary and route transactions to correct entities. You can create separate import configurations for each subsidiary or use dynamic filtering based on your Excel data.

Step 4. Validate entries across subsidiaries before import.

Use the preview feature to validate journal entries across different subsidiaries before committing the import. This ensures balanced entries, proper subsidiary assignments, and correct intercompany account relationships.

Step 5. Schedule autoamted imports for intercompany transactions.

For intercompany journal entries, set up separate import configurations for each subsidiary and use Coefficient’s scheduling feature to coordinate imports across entities. This maintains transaction timing consistency and proper elimination entry handling.

Streamline complex multi-entity accounting

Multi-subsidiary journal entries become manageable with proper filtering, validation, and scheduling. Maintain audit trails and control while automating complex multi-entity transactions. Set up your multi-subsidiary import workflow today.

How to handle NetSuite API rate limits when automating frequent data pulls to Excel

Coefficient provides built-in mechanisms to work within NetSuite ‘s API rate limits while enabling frequent automated data pulls to Excel. The key is intelligent scheduling and query optimization to avoid hitting the 15 simultaneous API call limit.

Understanding these constraints and implementing smart strategies ensures reliable data automation without throttling or failed refreshes.

Manage NetSuite API rate limits for Excel automation using Coefficient

NetSuite limits you to 15 simultaneous RESTlet API calls (plus 10 more per SuiteCloud Plus license) and 100,000 rows per SuiteQL query. Coefficient handles these constraints through intelligent scheduling and NetSuite query optimization.

How to make it work

Step 1. Stagger refresh schedules to avoid simultaneous API calls.

Set different refresh times for your imports instead of running them all at once. For example, schedule financial summaries at 6 AM, sales transactions hourly, customer data weekly, and inventory levels every 4 hours to distribute API load.

Step 2. Use optimized import methods for better API efficiency.

Choose Saved Searches for pre-filtered data to reduce API processing time, leverage Datasets for commonly accessed information, and apply filters to Records & Lists imports to minimize data volume and API calls.

Step 3. Break large data requests into smaller, targeted imports.

Instead of one massive import, create multiple smaller imports with date range filters or subsidiary segmentation. Use incremental-style updates by filtering for only new or modified records since the last refresh.

Step 4. Optimize query structure and data selection.

Select only necessary fields to reduce payload size, use date range filters to import only recent transactions, and leverage SuiteQL for complex queries that would otherwise require multiple API calls.

Step 5. Monitor and adjust based on performance patterns.

Track import execution times in Coefficient and adjust schedules based on data volume patterns. Use off-peak hours for large data pulls and implement error handling with automatic retries for failed requests.

Build reliable NetSuite automation within API constraints

Working within NetSuite’s API limits doesn’t mean sacrificing automation quality. Smart scheduling and query optimization ensure consistent data flow while preventing throttling issues. Start optimizing your NetSuite to Excel automation today.