Are you looking to connect Jira to SQL Server? You’re in the right place. This guide will walk you through three proven methods to establish this connection, helping you choose the best approach for your specific needs.
Why Connect Jira to SQL Server?
Before we dive into the how-to, let’s quickly explore why you might want to connect these two systems:
- Enhanced Data Analysis: By exporting Jira issue data to SQL Server, you gain access to advanced querying and custom reporting capabilities that go beyond Jira’s native features.
- Automated Updates: Syncing project updates between systems helps maintain data consistency and reduces manual data entry.
- Comprehensive Data Integration: Combining Jira project data with other business systems stored in SQL Server allows for more comprehensive business intelligence.
Now, let’s explore the top three methods to connect Jira to SQL Server.
Top 3 Methods to Connect Jira to SQL Server
| Solution | Best For |
| Coefficient | Non-technical teams needing real-time Jira data in spreadsheets before pushing to SQL Server, with minimal setup and maintenance |
| Native Jira Database Connection | Organizations requiring direct database connection during initial Jira setup or for existing instances |
| SQL Connector for Jira | Enterprise teams needing dedicated Jira-to-SQL integration with advanced export capabilities |
#1 Coefficient: No-Code Solution for Jira to SQL Server Connection
Coefficient provides a user-friendly solution to connect Jira with SQL Server using spreadsheets as an intermediate layer. This method allows for data transformation and validation before pushing to SQL Server, making it ideal for teams without extensive technical expertise.
Steps to Connect Jira to SQL Server Using Coefficient:
Step 1. Install Coefficient
For Google Sheets
- Open a new or existing Google Sheet, navigate to the Extensions tab, and select Add-ons > Get add-ons.
- In the Google Workspace Marketplace, search for “Coefficient.”
- Follow the prompts to grant necessary permissions.
- Launch Coefficient from Extensions > Coefficient > Launch.
- Coefficient will open on the right-hand side of your spreadsheet.

For Microsoft Excel
- Open Excel from your desktop or in Office Online. Click ‘File’ > ‘Get Add-ins’ > ‘More Add-Ins.’
- Type “Coefficient” in the search bar and click ‘Add.’
- Follow the prompts in the pop-up to complete the installation.
- Once finished, you will see a “Coefficient” tab in the top navigation bar. Click ‘Open Sidebar’ to launch Coefficient.
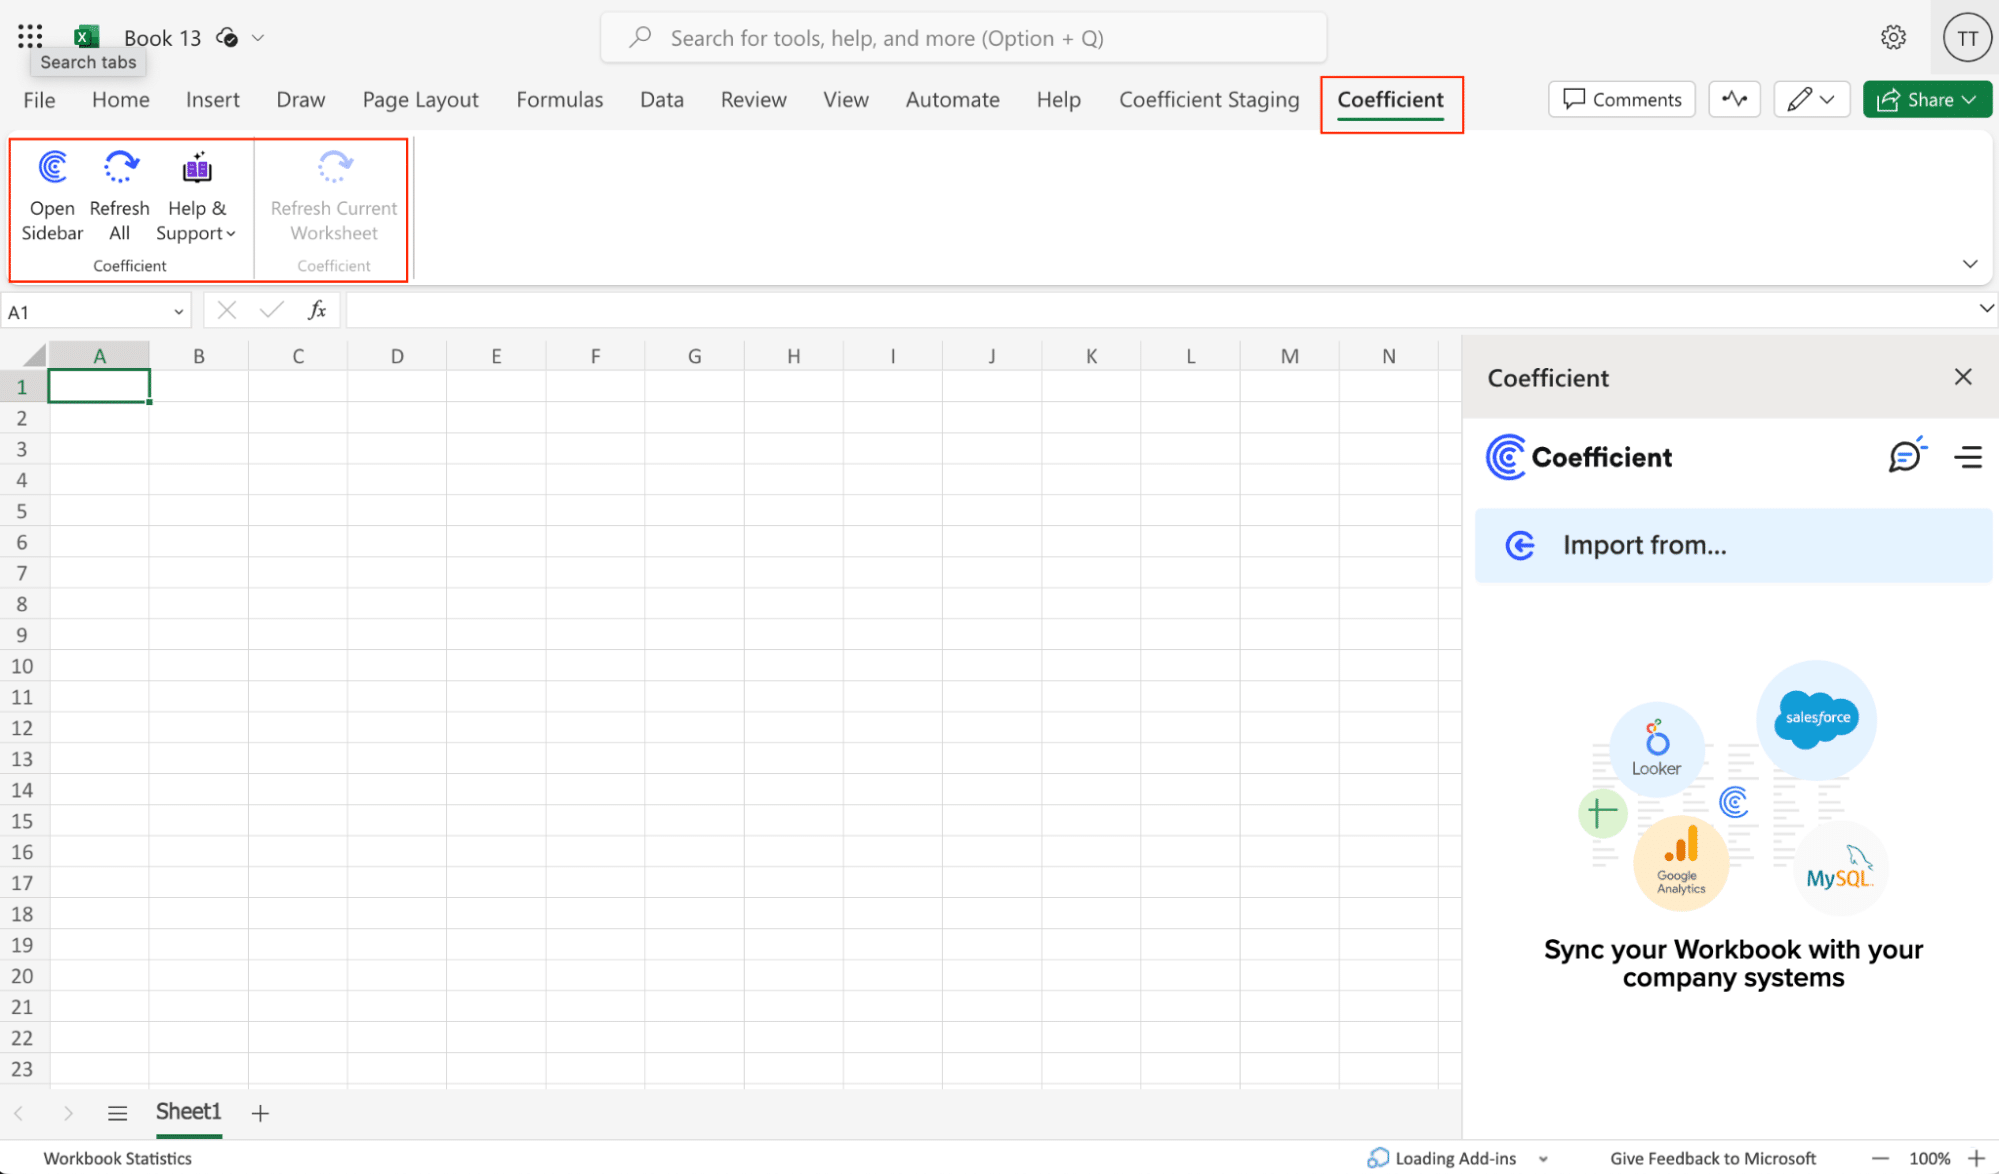
Step 2. Connect and Import Data from Jira’
Open Coefficient Sidebar and Click on the Menu icon.
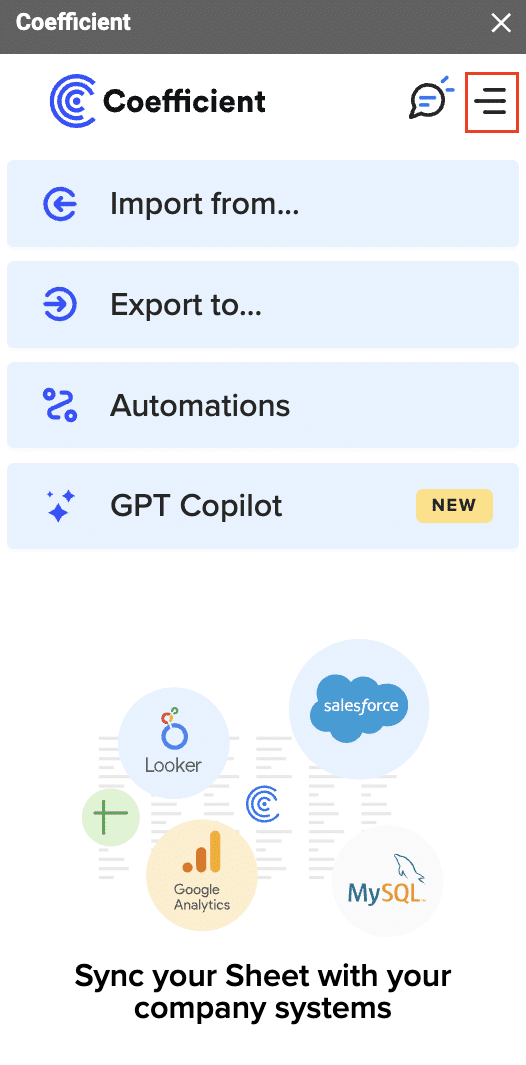
In the menu, Select “Import From…” and Select “Connected Sources.”

Select “Add Connection” at the bottom of the “Connected Sources” list and Select Jira.

Click on Connect and you will be redirected to Authorize. You will be asked to log in to your Jira account and follow the prompts to authorize access successfully.

To start data import, go back to the Coefficient Menu and click “Import From…”
This time, you will see Jira on the options list. Select Jira and Select ‘Start from Scratch’ to start importing a new file for the first time.

In your ‘New Import’ window, Select a Project.
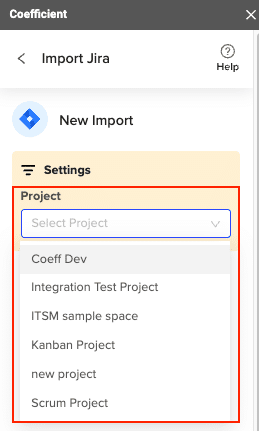
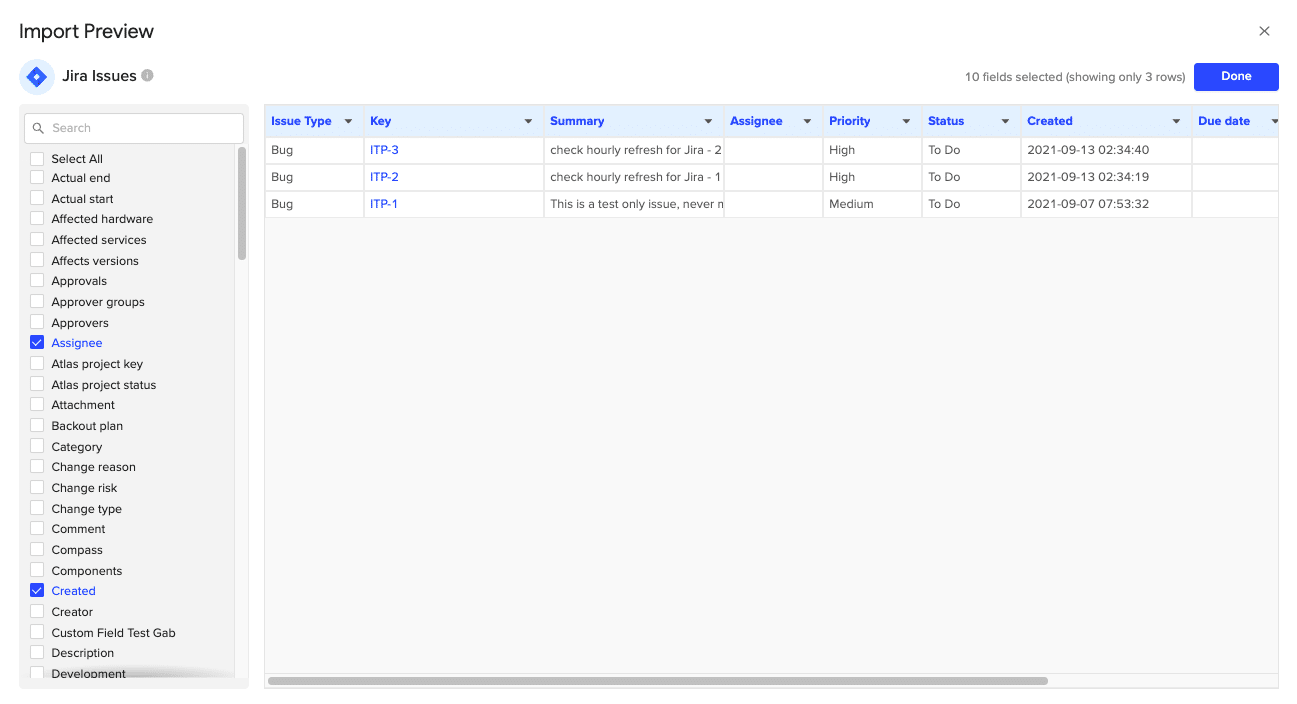
A new window will direct you to make edits necessary for the setup, such as the status of your data, priorities, resolutions, issue types, and dates. Once you’ve done this, Click on “Select Fields,” and you will be redirected to the Import Preview Window, where you can select fields you wish to include from Jira Issues.
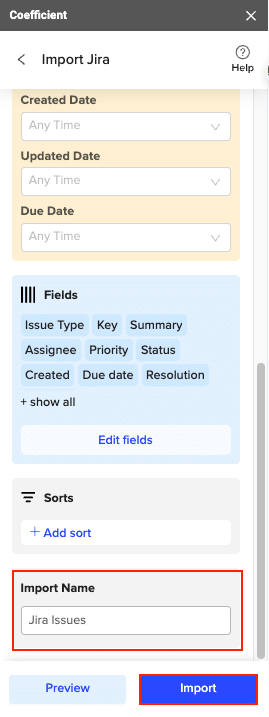
Add an Import Name and Click on Import.
Step 3. Export Data from Your Spreadsheet to MS SQL
Before starting, make sure you’ve connected to MS SQL.
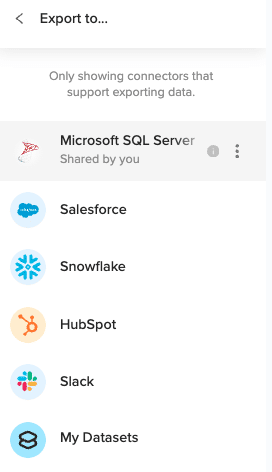
Then, navigate to Coefficient’s menu >Click “Export to…”

Select MS SQL.
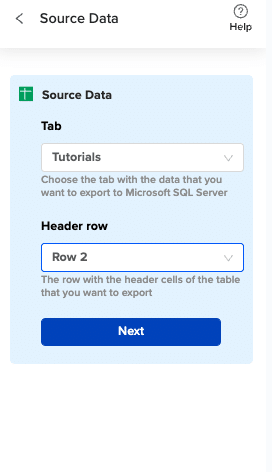
Choose the tab in your workbook that contains the data you want to export and specify the header row that contains the database field headers.
Specify the table in your database where you want to insert the data and choose the appropriate action (Insert, Update, Delete).

Complete the field mappings for the export. Then, confirm your settings and click “Export” to proceed.
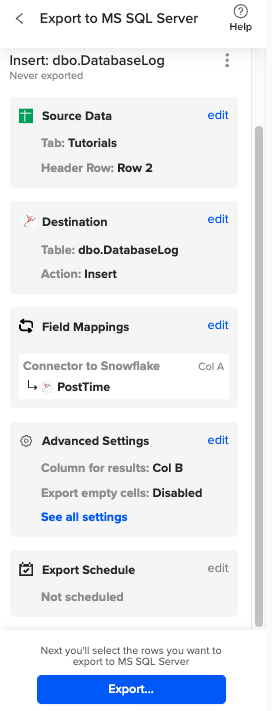
Then, highlight the specific rows in your sheet that you want to export, or choose to export all rows.

Review your settings and follow the prompts to push your data back to MS SQL.
Pros:
- No coding required
- Real-time data synchronization
- Flexible data transformation options
- Automated scheduling capabilities
Cons:
- Requires spreadsheet as intermediate step
- Limited to spreadsheet row limits
For more information on connecting SQL Server to spreadsheets, check out these resources:
#2 Native Jira Database Connection: Direct Integration
Jira’s built-in database configuration allows direct connection to SQL Server during installation or through the configuration tool for existing instances.
Steps for Native Jira Database Connection:
Le’s walk through establishing a direct connection between Jira and SQL Server:
- Create SQL Server Database First, we’ll set up a proper database environment for Jira:
— Create the database with appropriate collation
CREATE DATABASE JiraDB
COLLATE SQL_Latin1_General_CP1_CS_AS;
— Configure database settings for optimal Jira performance
ALTER DATABASE JiraDB SET READ_COMMITTED_SNAPSHOT ON;
ALTER DATABASE JiraDB SET ALLOW_SNAPSHOT_ISOLATION ON;
ALTER DATABASE JiraDB SET RECOVERY FULL;
— Create necessary filegroups for better performance
ALTER DATABASE JiraDB
ADD FILEGROUP JiraData;
ALTER DATABASE JiraDB
ADD FILE (
NAME = JiraData1,
FILENAME = ‘C:SQLDataJiraData1.ndf’,
SIZE = 5GB,
FILEGROWTH = 1GB
) TO FILEGROUP JiraData;
- Configure Database User Permissions Set up secure access for Jira:
— Create dedicated login for Jira
CREATE LOGIN jira_user
WITH PASSWORD = ‘YourStrongPassword123!’;
USE JiraDB;
— Create database user
CREATE USER jira_user FOR LOGIN jira_user;
— Grant necessary permissions
GRANT CREATE TABLE TO jira_user;
GRANT ALTER ON SCHEMA::dbo TO jira_user;
GRANT SELECT, INSERT, UPDATE, DELETE ON SCHEMA::dbo TO jira_user;
GRANT EXECUTE ON SCHEMA::dbo TO jira_user;
— Configure specific permissions for Jira operations
EXEC sp_addrolemember ‘db_ddladmin’, ‘jira_user’;
- Update Jira’s dbconfig.xml Navigate to your Jira installation directory and modify the database configuration:
<?xml version=”1.0″ encoding=”UTF-8″?>
<jira-database-config>
<jdbc-datasource>
<url>jdbc:sqlserver://your-server.database.windows.net:1433;databaseName=JiraDB;encrypt=true;trustServerCertificate=false;hostNameInCertificate=*.database.windows.net</url>
<driver-class>com.microsoft.sqlserver.jdbc.SQLServerDriver</driver-class>
<username>jira_user</username>
<password>YourStrongPassword123!</password>
<pool-min-size>20</pool-min-size>
<pool-max-size>100</pool-max-size>
<pool-max-wait>30000</pool-max-wait>
<!– Performance optimization settings –>
<validation-query>select 1</validation-query>
<min-evictable-idle-time-millis>60000</min-evictable-idle-time-millis>
<time-between-eviction-runs-millis>300000</time-between-eviction-runs-millis>
<pool-remove-abandoned>true</pool-remove-abandoned>
<pool-remove-abandoned-timeout>300</pool-remove-abandoned-timeout>
<pool-test-while-idle>true</pool-test-while-idle>
</jdbc-datasource>
</jira-database-config>
- Test Connection Create a validation script to ensure everything works:
#!/bin/bash
# Stop Jira service
sudo service jira stop
# Test database connection
java -jar “${JIRA_INSTALL}/bin/postgresql-42.2.5.jar”
-cp “${JIRA_INSTALL}/lib/*”
com.atlassian.jira.db.SqlServerDatabaseValidator
“jdbc:sqlserver://your-server.database.windows.net:1433;databaseName=JiraDB”
“jira_user”
“YourStrongPassword123!”
# If successful, start Jira service
if [ $? -eq 0 ]; then
sudo service jira start
echo “Connection test successful, Jira service started”
else
echo “Connection test failed, please check configuration”
fi
- Complete Setup Wizard Follow these final configuration steps:
- Access Jira setup wizard at http://your-jira-server:8080
- Choose “I’ll set up myself”
In database configuration:
Database Type: Microsoft SQL Server
Hostname: your-server.database.windows.net
Port: 1433
Database: JiraDB
Username: jira_user
Password: YourStrongPassword123!
- Schema: dbo
- Verify database connection
- Complete the remaining setup steps for your Jira instance
Pros:
- No additional tools required
- Direct database connection
- Official Atlassian support
Cons:
- Requires technical expertise
- Limited to basic database operations
- Complex configuration process
#3 SQL Connector for Jira: Enterprise-Grade Solution
SQL Connector for Jira is an enterprise-grade application from the Atlassian Marketplace that enables direct data export to SQL Server.
Steps to Use SQL Connector for Jira:
Let’s set up the SQL Connector for comprehensive data integration:
- Install SQL Connector from Marketplace Begin with a proper installation:
- Log in to your Jira instance as an administrator
- Navigate to Settings → Manage apps
- Search for “SQL Connector for Jira”
- Click “Install”
- Accept the license agreement
Verify installation:
Installation Path: /var/atlassian/application-data/jira/plugins/
Plugin Status: Active
Version: Latest (currently 5.x)
- License: Valid
- Configure SQL Server Connection Details Set up your database connection:
Connection Configuration:
Connection Name: JiraSQL_Production
Server Type: Microsoft SQL Server
Connection String: jdbc:sqlserver://your-server.database.windows.net:1433;databaseName=JiraDB
Authentication:
Method: SQL Server Authentication
Username: jira_export_user
Password: YourStrongPassword123!
Advanced Settings:
Connection Pool Size: 10
Query Timeout: 300 seconds
Batch Size: 1000
Use SSL: Yes
- Set up Data Mapping Configure your data synchronization:
— Create target tables
CREATE TABLE dbo.jira_issues (
issue_key VARCHAR(20) PRIMARY KEY,
project_key VARCHAR(10),

Stop exporting data manually. Sync data from your business systems into Google Sheets or Excel with Coefficient and set it on a refresh schedule.
Get Started
summary NVARCHAR(255),
description NVARCHAR(MAX),
status VARCHAR(50),
priority VARCHAR(20),
assignee VARCHAR(100),
created_date DATETIME2,
updated_date DATETIME2,
resolution VARCHAR(50)
);
CREATE TABLE dbo.jira_worklogs (
worklog_id INT PRIMARY KEY,
issue_key VARCHAR(20),
author VARCHAR(100),
time_spent_seconds INT,
work_date DATETIME2,
FOREIGN KEY (issue_key) REFERENCES dbo.jira_issues(issue_key)
);
- Configure Export Schedules Set up automated synchronization:
Schedule Configuration:
Issues Sync:
Frequency: Every 15 minutes
JQL Filter: project in (PROJ1, PROJ2) AND updated >= -24h
Fields:
– Key
– Project
– Summary
– Description
– Status
– Priority
– Assignee
– Created
– Updated
– Resolution
Worklogs Sync:
Frequency: Hourly
JQL Filter: worklogDate >= -24h
Fields:
– ID
– Issue Key
– Author
– TimeSpent
– Started
- Monitor Data Flow Implement monitoring and alerting:
— Create monitoring view
CREATE VIEW dbo.vw_jira_sync_status
AS
SELECT
‘Issues’ as SyncType,
COUNT(*) as RecordCount,
MAX(updated_date) as LastUpdateTime,
DATEDIFF(MINUTE, MAX(updated_date), GETDATE()) as MinutesSinceLastUpdate
FROM dbo.jira_issues
UNION ALL
SELECT
‘Worklogs’ as SyncType,
COUNT(*) as RecordCount,
MAX(work_date) as LastUpdateTime,
DATEDIFF(MINUTE, MAX(work_date), GETDATE()) as MinutesSinceLastUpdate
FROM dbo.jira_worklogs;
— Create alert procedure
CREATE PROCEDURE dbo.sp_alert_jira_sync_delay
AS
BEGIN
IF EXISTS (
SELECT 1
FROM dbo.vw_jira_sync_status
WHERE MinutesSinceLastUpdate > 120
)
BEGIN
DECLARE @msg NVARCHAR(MAX) = ‘Jira sync delay detected’;
EXEC msdb.dbo.sp_send_dbmail
@profile_name = ‘Notifications’,
@recipients = ‘[email protected]’,
@subject = ‘Jira Sync Alert’,
@body = @msg;
END
END;
Pros:
- Purpose-built for Jira-SQL integration
- Advanced export options
- Regular updates and support
Cons:
- Additional licensing costs
- Limited to export operations
- Requires Jira admin access
Connect Jira to SQL Server with Coefficient
Connecting Jira to SQL Server can significantly enhance your project management and reporting capabilities. Whether you opt for the user-friendly Coefficient solution, the native Jira database connection, or the enterprise-grade SQL Connector for Jira, you’re now equipped with the knowledge to make an informed decision.
Remember, the best solution depends on your specific needs, technical expertise, and resources. Take the time to evaluate each option carefully, and don’t hesitate to test different approaches to find the one that works best for your team.
Ready to transform how you manage your Jira data in SQL Server? Get started with Coefficient today and experience the power of seamless data integration.
Frequently Asked Questions
Can I use SQL in Jira?
Yes, you can interact with SQL databases through various methods, including Coefficient’s no-code solution for easy data export and import operations.
How do I connect Jira to SQL?
There are multiple methods available, including using Coefficient for a no-code solution, native Jira database connection, or SQL Connector for Jira.
Can I use Jira as a database?
While Jira isn’t a database itself, you can use tools like Coefficient to sync Jira data with SQL Server for advanced database functionality.

